Credit: James Paterson
1. Where to start
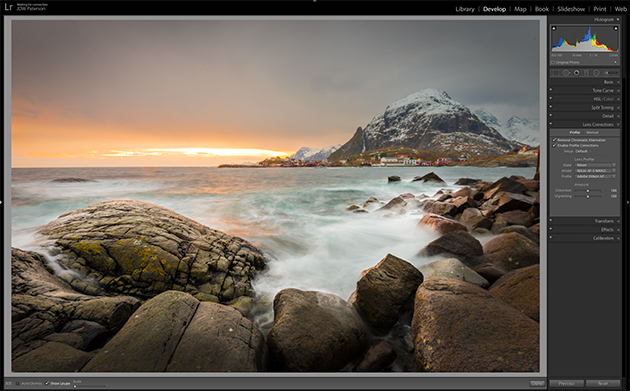
The Lens Correction Panel in Lightroom’s Develop Module is the place to apply automatic and manual fixes for inherent problems present, to some extent, in every lens. By contrast, to fix perspective problems like keystoning, use the Transform Panel.
2. Make use of lens profiles
Found in the Lens Correction Panel, this simple checkbox is one of the most important tools for lens fixes. It automatically detects the lens used to take the photo and applies a lens profile to fix any barrel distortion and vignetting that is characteristic of that particular model.
3. Create your own lens profiles
If you’re not satisfied with the lens profiles Lightroom uses, or if your lens isn’t listed, one option is to create your own custom profiles. Adobe offers free profile creation software (go to helpx.adobe.com and search for ‘lens profile creator’). The process is fairly involved, but you’ll find help and support on the Adobe site.
Credit: James Paterson
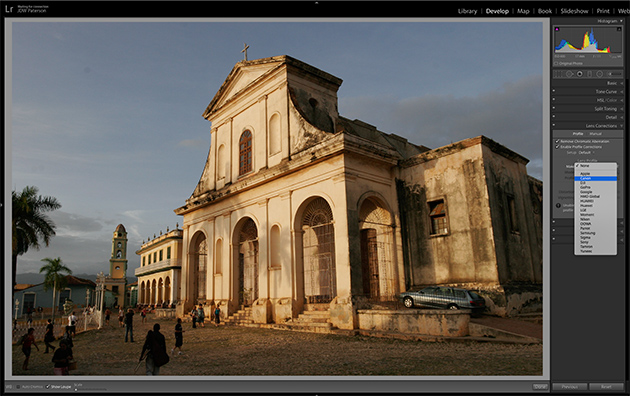
4. Manually fix distortion
If the lens you used is not automatically detected, then you may be able to find it manually in the long list of brands and models in the Lens Profile settings. The newer your lens, the more likely it will be recognised. However, if it’s not listed at all then you can go to the Manual tab and adjust the Distortion and Vignetting controls there to get perfect results.
5. Corrections and JPEGs
Lens corrections are best applied to raws as the metadata is used to determine the best fix. As for JPEGs, you can manually choose a lens profile but be aware that Lightroom won’t be able to account for any previous crops or processing applied to the JPEG, so the fix may not be accurate.
Credit: James Paterson
6. Use plug-ins
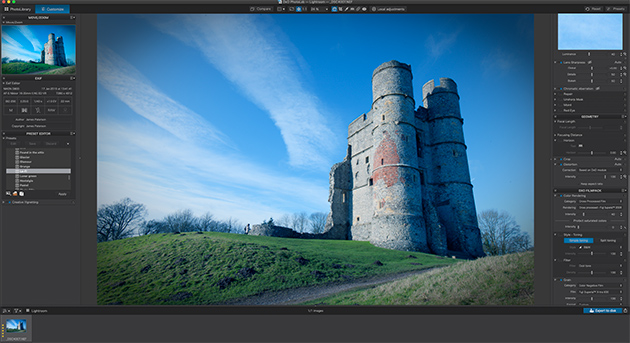
There are plenty of excellent options for lens correction outside Lightroom. DxO PhotoLab 2 is superb – it applies automatic fixes to every image based on DxO’s unparalleled database of lens issues. You can round-trip raws between Lightroom and PhotoLab 2 using File>Plug-in extras.
7. Turn on and size the grid
When manually correcting a lens, a grid can be helpful. Press Cmd/Ctrl+Alt+O to view the grid. Then hold Cmd/Ctrl to alter the size and opacity. You can tailor it to the natural lines in your image then use the manual lens correction sliders to fix.
8. Remove colour fringing
Colour fringing can occur when pixels become misaligned. It’s more prone to happen along high-contrast edges and with wideangle lenses, especially wideangle zooms. To fix fringing issues automatically, check ‘Remove Chromatic Aberration’.
Credit: James Paterson
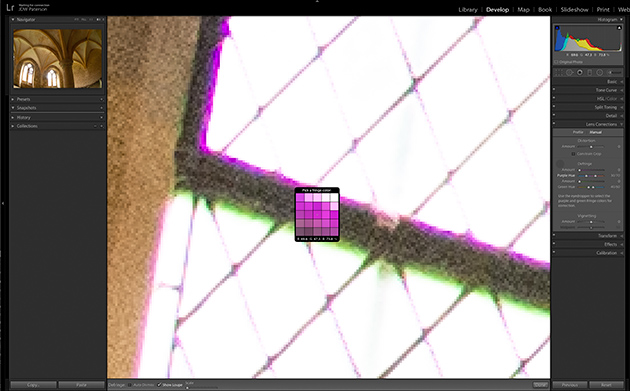
9. Use the Defringe sampler
If fringing is still present after checking ‘Remove Chromatic Aberration’ then click the Manual tab in the Lens Correction panel. Either use the Defringe sliders, or grab the eyedropper tool alongside then zoom in and click on a fringe colour to remove it.
10. Apply corrections by default
Some photographers prefer to apply lens fixes automatically to every image that is imported into Lightroom. This is easy to set up. Simply, check ‘Enable Profile Corrections’ and ‘Remove Chromatic Aberration’ then go to Develop>Set Default Settings>Update to Current Settings (note this also changes the defaults in Adobe Camera Raw).
Credit: James Paterson
11. The Upright controls
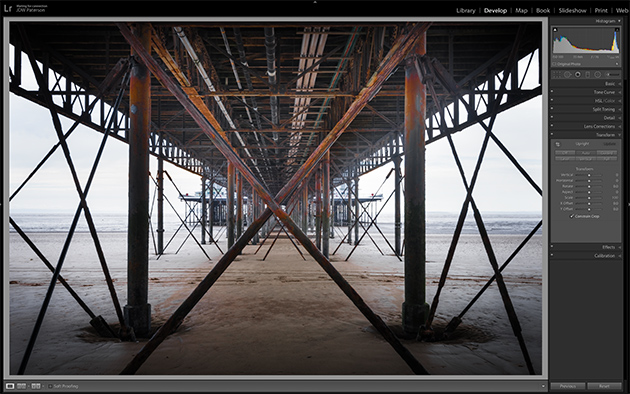
This powerful command automatically corrects for unwanted perspective problems – most notably distracting converging verticals, keystoning and wonky horizons. Simply go to the Transform panel in the Lightroom Develop Module and click through the buttons to apply the right automatic fix for your photograph.
12. Which Upright button?
There are four automatic Upright fixes to choose from in the Transform panel. ‘Auto’ applies level, aspect ratio and perspective correction. Level weighs corrections towards horizontal details, and Vertical puts the bias on vertical details. Full combines all the other three into one.
13. Apply fixes first
The Upright controls are best applied to raw files, as Lightroom uses the extra metadata – such as the focal length – to aid it in fixing the perspective. Before applying any Upright fix it’s best to ‘Enable Profile Corrections’ and ‘Remove Chromatic Aberration’ first in the Lens Correction panel (if you forget and do this afterwards, hit ‘Update’ in the Upright settings).
14. Adjust the Aspect Ratio
The Full option applies a full 3D correction to your photo, snapping all lines in the image to vertical or horizontal. This can lead to extreme distortion with your image looking squashed or stretched. If this happens, try fine-tuning the Aspect slider in the Transform panel until things look more natural.
Credit: James Paterson
15. Batch-apply Upright settings
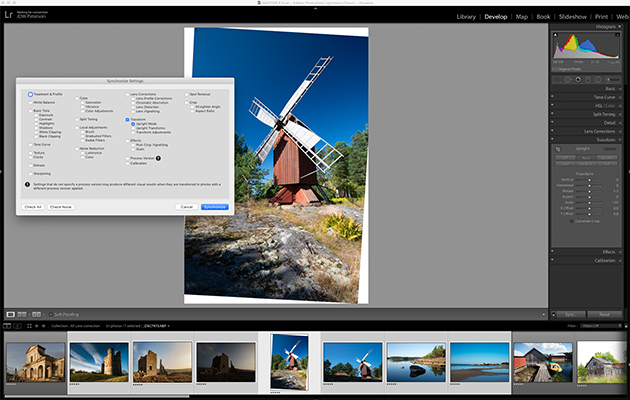
There are two ways to apply Upright to an entire set. To begin, correct one image then select the others and hit the Sync button. You’ll see two options ‘Upright Mode’ and ‘Upright Transforms’. Mode analyses and fixes each image as an individual, and Transforms applies the exact adjustment to all – this is the better option for batch-processing photos that need identical tweaks, like a timelapse.
16. Preserve your settings
When you apply any automatic Upright correction like Auto, Level or Full the command will by default cancel any previous manual-perspective corrections you’ve made. However, if you want to preserve the settings then hold Alt as you press the Upright buttons.
17. Guided Upright controls
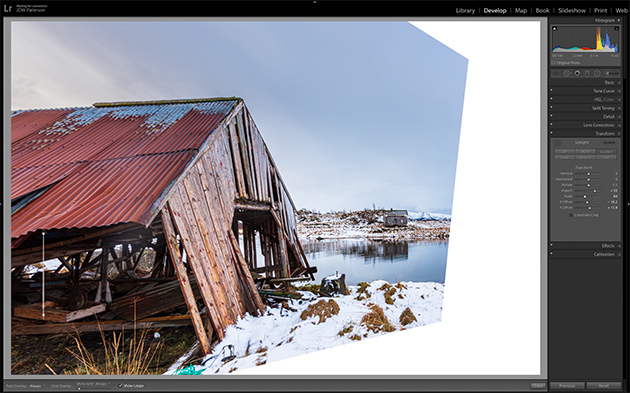
This gives you a degree of manual control over perspective corrections, and it’s helpful when the auto Upright buttons fail. We simply grab the Guided Upright tool from the Transform panel then drag guide lines through the image to correct horizontals and verticals.
Credit: James Paterson
18. Drag to reposition
The Guided Upright controls can lop off important parts of the photo, leaving you with an unwanted crop. The X/Y Offset sliders in the Transform panel change the position of the image in the window, but don’t bother with them – simply hold Cmd/Ctrl+Alt then drag the image to change the position.
19. Drawing guide lines
When dragging guide lines with the Guided Upright command, follow natural lines that you know should be horizontal or vertical. We can make between two and four guide lines. Ideally make at least one horizontal and one vertical line.
20. Use the Loupe
The more accurate your guided upright lines, the better. The Loupe can be very helpful when plotting guide lines. The O key toggles the loupe on or off. If you hold Alt while dragging you’ll also turn on a precision cursor that lets you drag more slowly for greater accuracy.


