The sixth part of our video series Amateur Photographer, in association with London Camera Exchange, continues our in-depth ‘How-to Guide to Shooting Video’. In this series we will arm you with all the information and knowledge you’ll ever need to become a competent and confident video shooter. Along with explaining camera settings, recommending equipment and demystifying all the videography jargon, we’ll walk you through all the steps to get you recording your first movie… Below, we show you how to inject motion and energy into your video footage and banish boring static scenes.
In part 1 of this series we looked at How to set up your camera to shoot video. In part 2 we revealed our Essential gear guide and in part 3 we examined 9 Common Video Problems and How to Fix Them, the fourth part we showed you How to get outstanding audio in your videos. Our fifth guide we shared the best lenses for video in 2022.
Adding motion to video
One common mistake newcomers to videography make is to lock the camera off on a tripod and film a scene. Now, there are times and places when this is suitable, but follow this course all the time and you’ll be left with static, boring footage that is low in production value and will struggle to engage with viewers. So, what’s the alternative?
Well, adding motion into your footage has multiple benefits. First up, it can help you show more of a location, and secondly it can help add a sense of energy to the video. More importantly, it can really ramp up the feel and production value of your content and, if you plan on sharing or even selling your video work, this should be a high priority.
There’s a number of ways to start introducing movement into your movies and these routes give completely different results. Some techniques will require you to add some extra equipment to your set-up but you may be surprised to hear that other routes require no kit at all and can be done completely in post production when you have finished your filming and are back at the PC.
Grab a tripod
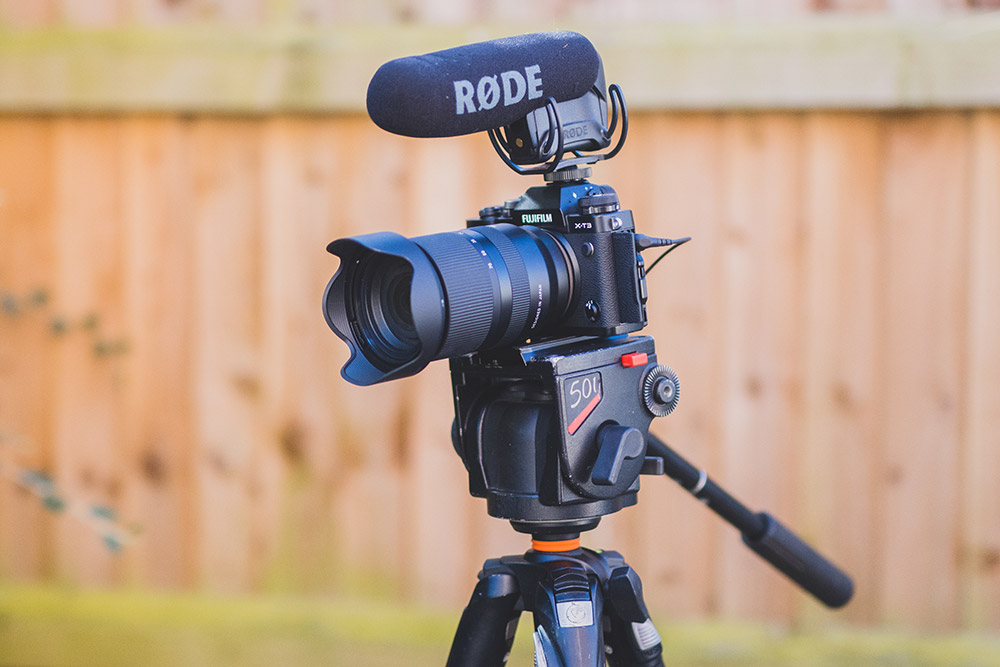
Investing in a video-centric tripod with a fluid head will ensure you are able to capture smooth pans that will look great in your movies. Image: Matty Graham
The simplest and most cost-effective way to introduce steady movement into your footage is to first lock your camera off on a tripod. When shooting at regular speed, handholding the camera is a poor choice as you’re likely to be greeted with shaky footage that will probably be unusable.
However, by placing the camera on a tripod with a three-way head that will allow you to pan left and right or up and down, you can creatively move the camera around to inject movement and show more of your location. The responsibility is on the videographer to work on their technique so they move the tripod pan handle smoothly as jerky movements will look poor but this comes with time and practise.
One issue to be aware of when panning the camera from side to side is a phenomenon called rolling shutter, where the shutter mechanism can’t keep up with the movement of the camera and this results in distortion in your video footage. Again, with time and practise you’ll get to know the limits of your specific camera and as you may well own a tripod for your stills photography, you may be able to get creative with your video without needing to invest an extra penny.
Go slow
We’ve already mentioned that handholding a camera and shooting video at regular speed will result in poor results. However, what if you shoot in slow motion? Most cameras now offer a slow motion mode that can capture video at 120p or even 240p and this enables users to capture epic slow motion sequences that can show scenes in a whole new light.
Slow motion filming is very forgiving to movement so small bumps or jerks when moving the camera are quite literally smoothed out and this is when you can banish the tripod and capture steady footage while on the move. Adding slow motion footage to your movies has the added benefit of breaking up and varying the pace of a film and works even better when you set this slow motion to music.
Invest in a gimbal
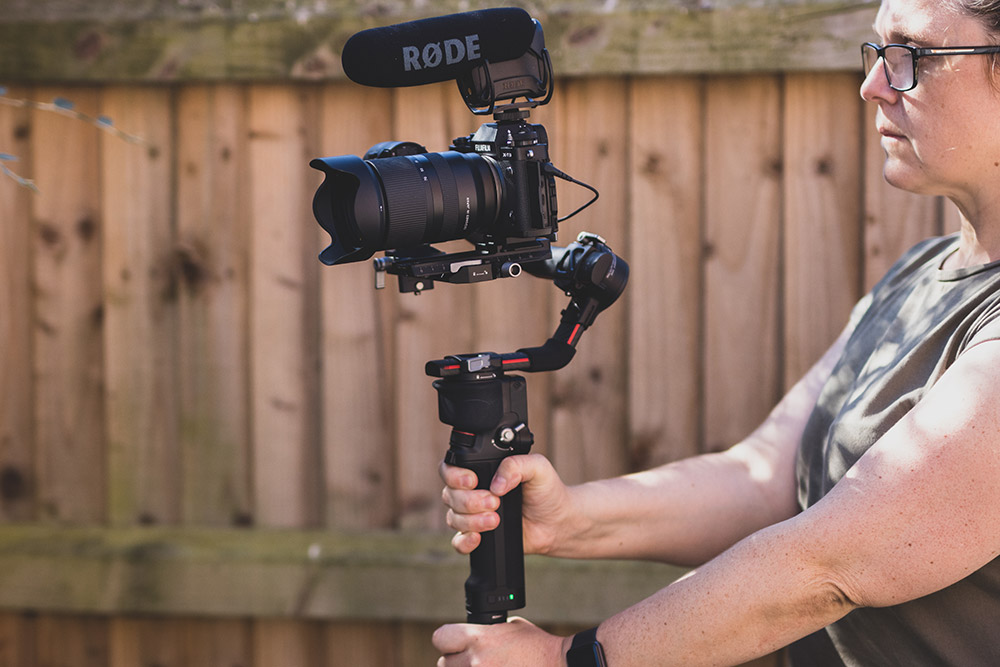
Gimbals allow you to follow your subject around with no limit on where you can go. Ensure you buy a gimbal that is capable of holding the weight of your total set-up (camera, lens and mic etc). Image: Matty Graham
A gimbal is a video accessory that helps keep the camera steady when you’re moving around. Essentially, gyro motors work together to suppress any movement and keep the camera still and level as you move around. Gimbals used to be the preserve of Hollywood and cost mega big bucks but in recent years they’ve become both far more accessible and far more affordable.
One factor that does affect the price of gimbals is how much payload they can hold – if you want to use a heavy camera and a bulky lens then you’re going to need a pro-level gimbal. If you use a more compact mirrorless camera and lens set-up then the chances are you can bag a gimbal for less than £500. Brands to look out for when it comes to gimbals are Zhiyun, DJI and Feiyu Tech – all of which offer a range of products to support different size cameras: from smartphone cameras right up to DSLRs. Some brands even sell gimbals with built-in cameras; the DJI Osmo is an all-in-one system that features a stabilised camera that can shoot 4K footage in a compact package that tips the scales at just 201g.
You’ll find these gimbals have a huge amount of features, modes and tech to help you capture smooth footage in different styles and they are highly customisable so you can set up the gimbal to suit your own personal preference. Gimbals also typically have impressively long battery capacities, so it’s not unusual for a battery to last between six and nine hours (sometimes even more). To get the best from a gimbal, it’s worth taking your time to properly balance and set up the kit, which can take time, but most larger gimbals now also offer quick-release systems so this can save time, which is important if you are moving from location to location.
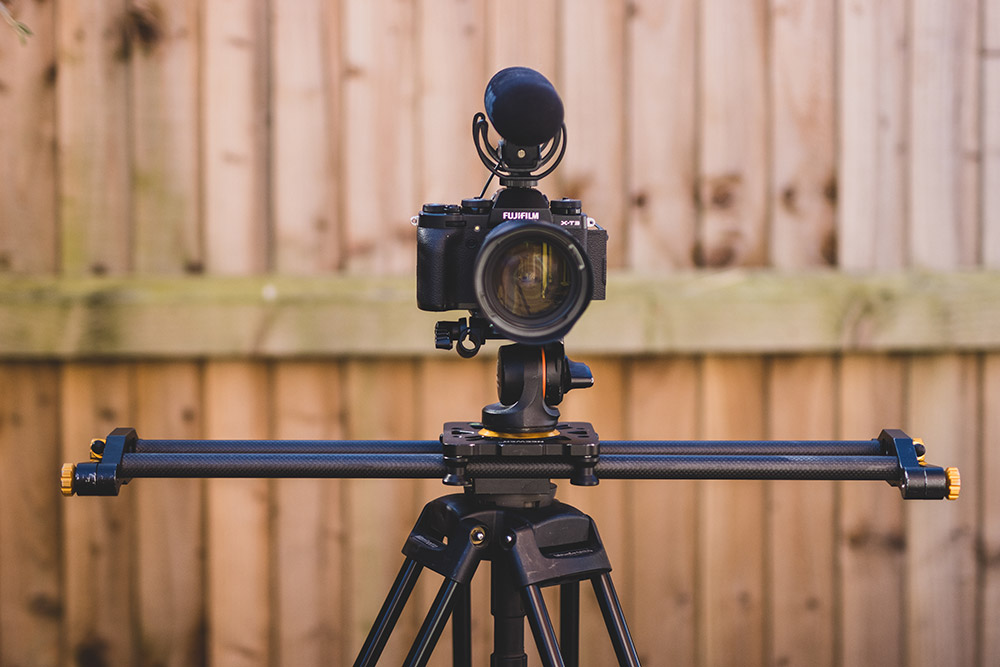
Slider rails can add dynamic movement to your footage, but remember it’s best to shoot at a wide angle to make the most of the effect, and to keep any movement along the rails smooth and consistent. Image: Matty Graham
Sort out a slider
Slider rails are another excellent accessory that can help add motion to your footage. As the name suggests, the camera sits upon a rail that can slide from side to side, delivering smooth motion into your videos. The more affordable slider rails are manually powered with the users gently pushing the camera sideways, but more expensive sliders do offer a mechanism that moves the camera electronically for an even smoother motion. You can also buy sliders in different lengths from 30cm to two metres long.
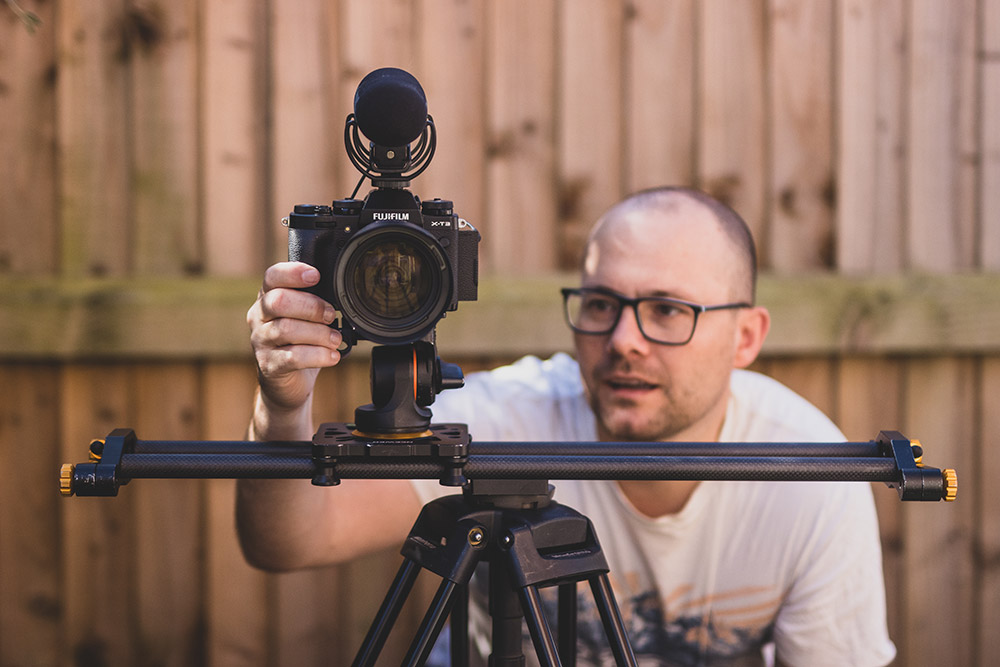
Slider in motion. Image: Matty Graham
Add motion in post
So far we’ve talked about methods of adding motion to your footage while actually filming the video using either slow motion or accessories like a gimbal or tripod. However, there is another route and this involves adding motion via post production. There’s a number of options here and this will all depend on how much experience you have in editing video, but at its very simplest, you can add motion with the use of keypoints.
To break this down, you essentially place key points throughout a clip and this allows you to increase/decrease the magnification of the footage to replicate the look of a videographer zooming in/out with the lens. Or, alternatively, if you shoot in 4K, you can use the extra pixels to set key points and move the visible area of your footage from left to right, replicating the look of the camera panning from side to side. Learning to make these edits in post production can take a little time, but it’s well worth doing as it increases the production value of your movies and is perfect for vloggers who are working by themselves and don’t have anybody to move the camera for them.
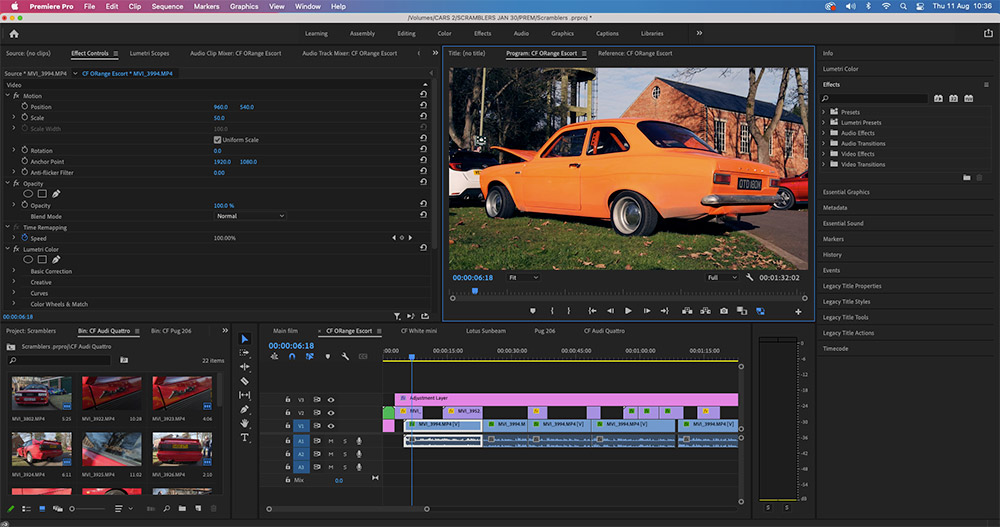
You can replicate the effect of movement from a slider, tripod or gimbal in post-production by using keypoints to change the position and scale of your footage
Related articles:
How to set up your camera to shoot video
The essential gear guide for video
9 Common Video Problems and How to Fix Them
How to get outstanding audio in your videos
Find the best cameras for video, vlogging and YouTube