Credit: James Paterson
1. What are Profiles?
Designed to be applied at the beginning of your editing workflow, Profiles are useful starting points for editing your photos. The range of Profiles on offer give your image a specific ‘look’ by processing the data from your camera in different ways. Each Profile results in a particular mix of contrast and colour.
2. Adobe Color Profile
Adobe Color is the default Profile applied to raw photos upon importing them into Lightroom. Previously the default profile was Adobe Standard (still accessible from the Profiles list). The Adobe Color Profile is designed to be a good all-round starting point. It’s slightly punchier, and warmer in the reds, yellows and oranges than the old Adobe Standard profile.
Credit: James Paterson
3. How to apply a Profile
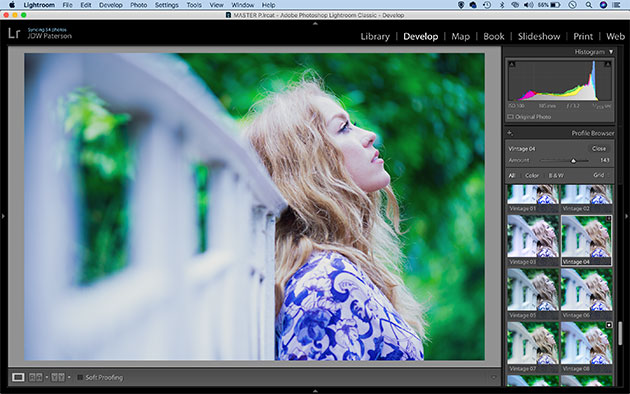
The Profile Browser is found within the Develop Module’s Basic Panel (and also in Photoshop’s Camera Raw Basic Panel). Expand the browser by clicking the grid icon, then hover over the presets to see a preview of the effect. Once you decide on the one you want, a double-click will simultaneously select the preset and close the browser. The browser can be viewed as either a grid, a large grid or a list by clicking ‘Grid’ at the top.
4. Old vs new Profiles
In older versions of Lightroom and Camera Raw, a basic list of Profiles could be found within the Camera Calibration Panel. These included a few simple treatments like Adobe Standard and Vivid, as well as those that matched your camera’s picture styles. Now this tucked-away feature has been expanded and improved to form the foundation of raw-image editing.
5. Profiles and Presets
Profiles are similar to Presets in that they give you a range of one-click treatments. But unlike Presets, Profiles work independently of all the other settings. It means that you can apply a Profile after inputting other settings and they won’t be overwritten.
Credit: James Paterson
6. Why do some Profiles only work with raws?
Raws contain greater colour data and dynamic range than JPEGs, which is why some Profiles, including the Adobe and Camera matching sets, can only be applied to raws. These profiles are designed to interpret the raw data for optimum image quality. By contrast, the range of creative profiles such as the Modern and Artistic sets act more like one-click effects, and can be applied to raws, JPEGs and TIFFs.
7. Adobe Landscape Profile
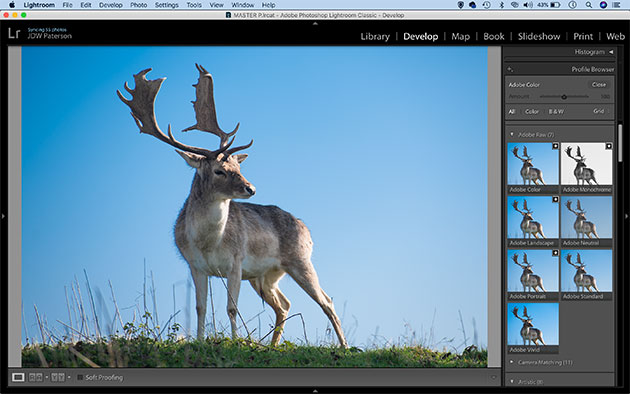
This is a hugely useful profile found within the Adobe Raw set. Adobe Landscape adds saturation to all the colours, particularly enhancing the blues and greens. It also pulls slight detail out of the shadows/highlights. It’s designed to make skies look punchier, reveal textured details and lift foliage.
8. Adobe Portrait Profile
This profile is all about improving skin tones, especially in studio portraits. It renders them naturally, resulting in a better starting point for further editing, with greater headroom for contrast and colour boosts. Many portrait photographers will apply this profile by default to all the portraits they import into Lightroom.
Credit: James Paterson
9. Monochrome Profile
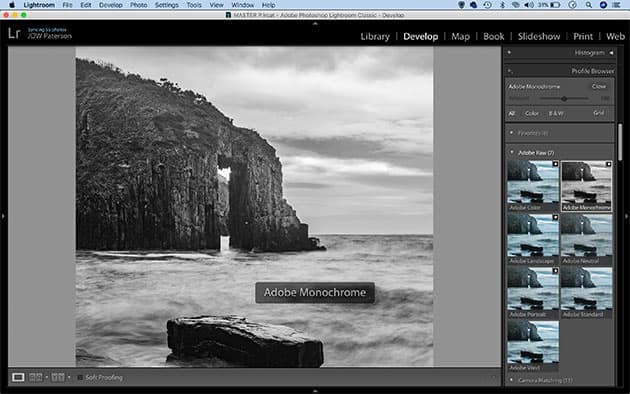
This is the standard black & white profile (others can be found in the BW profile set). Designed to provide a foundation for converting your image to black & white, it brightens up the warmer colours and darkens down the cooler ones, which results in slightly punchier skies and lighter skin tones.
10. Neutral, Vivid and Standard Profiles
The Adobe Neutral Profile reduces saturation and contrast for at result, which gives you plenty of headroom for tonal editing. Vivid is a cross between Adobe Landscape and Adobe Portrait – it boosts saturation and enhances detail. Standard is the old default Adobe profile that used to be applied to all images; it offers a good blend of contrast and saturation, but it’s been usurped by the Adobe Color profile.
Credit: James Paterson
11. Creative Profile sets
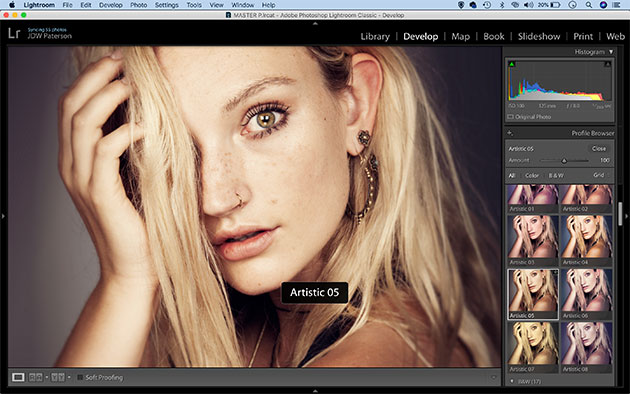
The wide array of Creative Profiles are grouped into categories named Modern, Vintage and Artistic. These act like one-click colour treatments and retro-toning effects designed to change the feel of an image by altering the colours or washing out the shadows.
12. Camera Matching set
This list of Profiles will match the picture style options you have on your camera. When your camera is set to raw quality these picture styles won’t carry across to Lightroom, so if you want to replicate a specific picture style applied in-camera, you can select it here.
Credit: James Paterson
13. Black and White Profile set
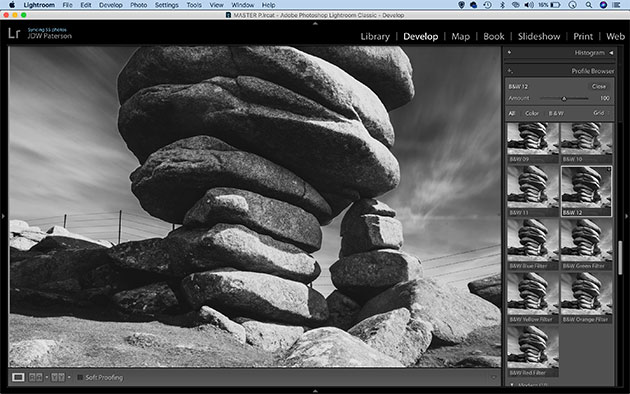
The Black and White Profiles each give you a different monochrome mix, some with changes in contrast, others mimicking lens-mounted colour filters by lifting certain colours. The great thing about these profiles is that once applied, you can still go on to adjust the brightness of different colour ranges using the B&W Mix controls.
14. Control the strength
Unlike the raw-only profiles in the Adobe Raw and Camera Matching sets, the Creative Profiles (including Artistic, Modern, Vintage and your own user Profiles) give you access to a useful Strength slider that lets you control the intensity of the effect. So you can either keep the Profile subtle or push it to the limit.
Credit: James Paterson
15. Making your own Profiles
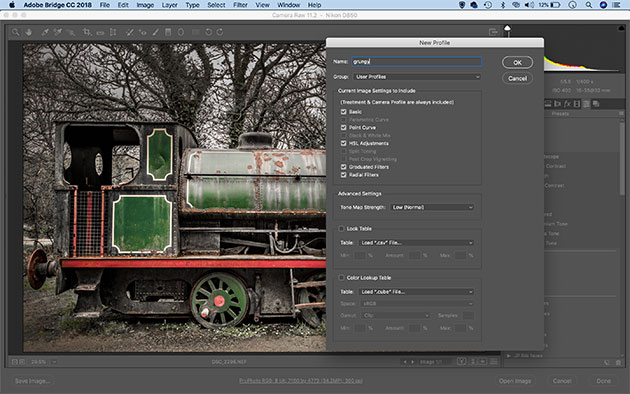
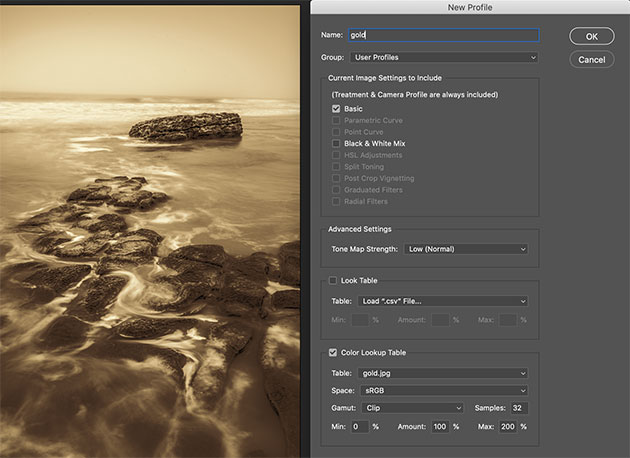
Custom Profiles can be made in Adobe Camera Raw. Open an image, choose an existing profile then go on to make any other changes you like, or simply use an existing preset. Next go to the Preset Panel and Alt-click the New Preset icon to open the ‘New Profile’ dialog, where you can save the treatment as a new Profile. It will appear in Lightroom the next time you open it.
16. Create Color LUTs for Profiles
Color Lookup Tables (LUTs) are like maps for colours; they can be incorporated into your custom profiles. To make a LUT, open an image into Photoshop and make tonal changes using Adjustment Layers, then go to File>Export>Color Lookup Table. Give the table a name and save it. You can load the LUT into a custom profile using the New Profile dialog.
Credit: James Paterson
17. Choose your favourites
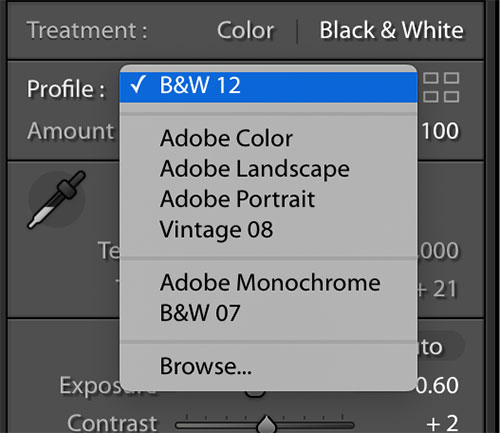
The Profiles dropdown list gives you access to your favourite Profiles without the need to enter the Profile Browser. By default you’ll see the Adobe Raw set as well as your currently selected Profile. You can add or remove Profiles from this dropdown list by clicking the thumbnail star of each within the Profile Browser view.
18. Profiles vs Presets
Profiles outperform Presets in every way. They’re slicker, they don’t mess with existing settings, and they have a Strength slider. What’s more, with the inclusion of Color Lookup Tables, the range of possible tonal treatments goes beyond what can be achieved with Develop tools alone. If you’re a Preset-lover then start converting your favourites to Profiles; you won’t regret it.
19. Set Profiles as default
A Profile can be set as the default for all your images. Simply choose a Profile (and leave all other settings untouched); then hold Alt and the ‘Reset’ button at the bottom right will change to ‘Set Default’. Click this, and the chosen Profile will be applied as standard to every image you edit.
Credit: James Paterson
20. New Profile Dialog
Alt-clicking the New Preset icon in Camera Raw opens the New Profile dialog. Here you can create your own custom profiles and load in Color Lookup Tables. You can also set a maximum and minimum strength for your custom profile, which dictates the range of intensity when using the Profile strength slider.


