
The winter months see millions of starlings migrate to the UK, which results in their highly photogenic gatherings, or murmurations. Two skilled pros with different creative approaches to starling murmurations share their tips
Photographing Starling Murmurations – Find your flock
Starlings winter in the UK between October and March and the greater proportion can be found in southern England away from cooler uplands. There are some places where they congregate more than others. The Somerset Levels are a good bet, as are parts of north Shropshire, south Cheshire, Cambridgeshire, Suffolk and the east.
If you want something less rural, you’ll also find them at piers such as Aberystwyth and Brighton. The RSPB is a great resource and members get a useful magazine and other benefits.
Of course, the starlings have minds of their own, and vary their position daily within broad areas. In murmuration season, there’s plenty of advice on Facebook, so rely on connections to guide you, and make sure you give the birds time to do their thing. As the dusk comes in, they gather and activity builds to its best, so don’t give up early. And go often: I went three nights in a row for some of my most recent images, which helped me to know what was possible in the location, too.
Finally, be respectful of your surroundings. Starling murmurations are enticing, but taking place over private farmland or nature reserves, make sure you’re not causing annoyance, blocking access, or damaging the environment. Sadly a few landowners see starling murmurations as an annoying mess, though this is one of the wonders of the natural world.
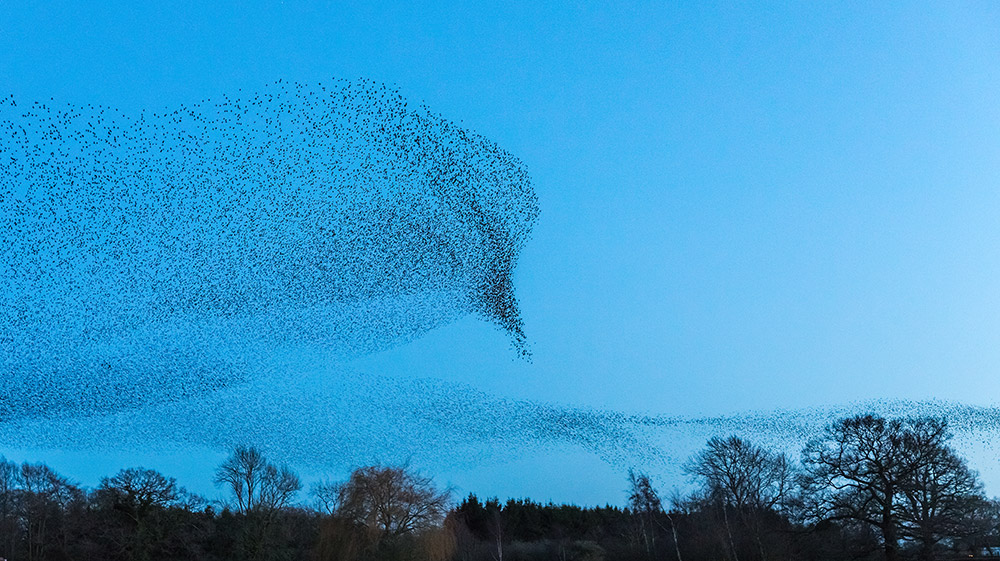
Image credit: Andrew Fusek Peters
Discover a sense of place
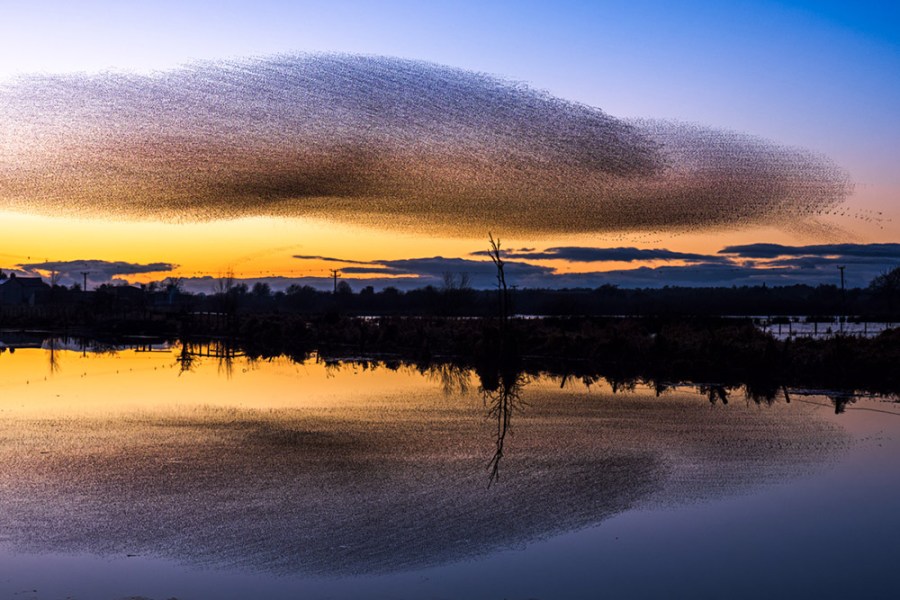
I much prefer to see starling murmurations in context. That’s why I see the foreground as immensely important. As with the moon, the real challenge is setting murmurations in context with a landscape or building. As they are part of nature, I want the birds connected to it, rather than abstracted in the sky. A beautiful murmuration and a beautiful landscape is the perfect combination. In that way, it’s important to make sure you shoot as level as possible, so rely on the digital spirit level in your viewfinder if you have one.
One of the best ways I’ve found to add context is with reflections. You need to be in the right environment for that, with perfect weather, and be lucky enough to have the birds displaying in a direction that works. Again, that’s why patience and persistence really pays off. These images were taken on the third night of three, and it was only on that last night that it all came together.
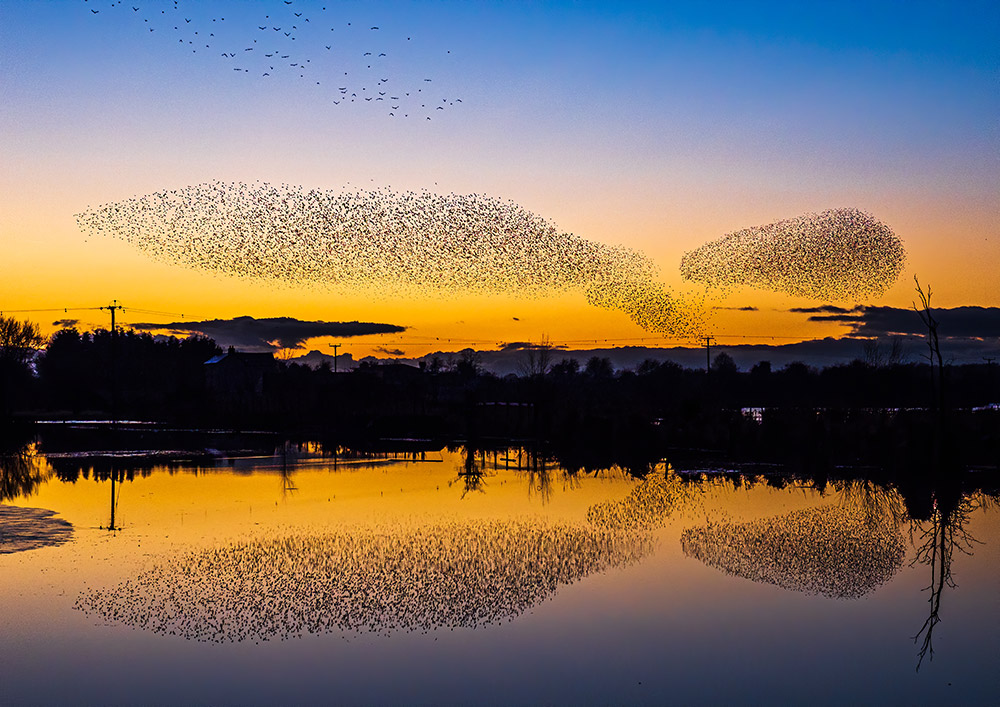
Image credit: Andrew Fusek Peters
Do something different
If you know exactly where the birds are going to be, you can get a bit more creative in your approach, too. Something I like is to create multiple exposures that form trails of birds as they swoop around in the flock, and it lets you get these extremely interesting shapes like a timelapse in a single photo. Sometimes the trails form into extraordinary shapes, like whales in the sky.
For images like this you need to be locked off, of course, or all the scenery will move, too, which will give you something that’s a lot more impressionistic. I put my camera on a tripod, focus on the distance on where the flock is going to be, and then set a burst mode of about 10fps. The aim on location is to get sequences of shots – in this case about 100 were taken – that can later be made into interesting shapes. Back home, I combine shots into a layered Photoshop document and change the Blending Mode to Darken.
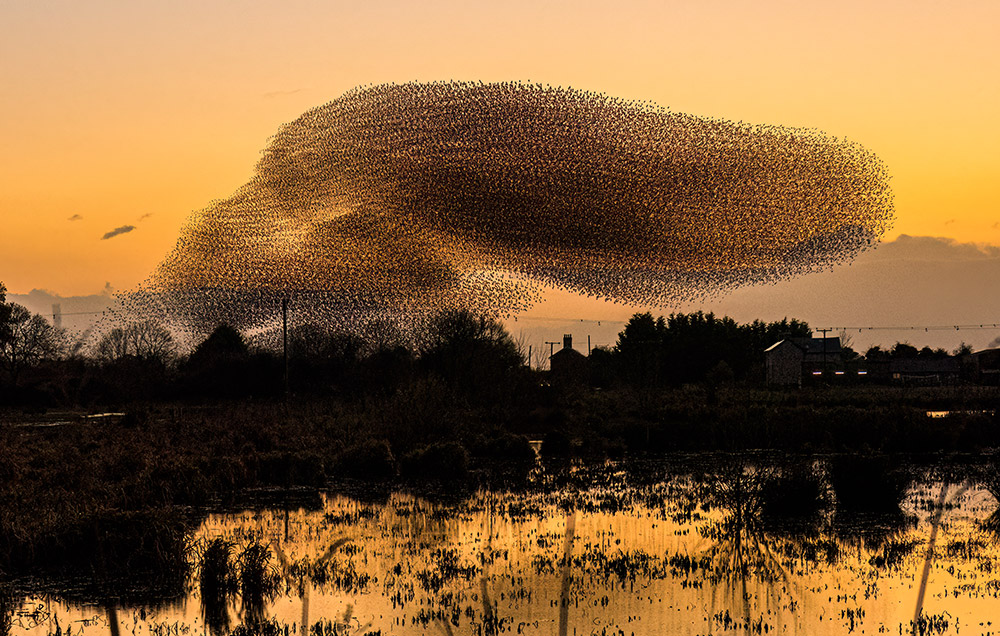
Image credit: Andrew Fusek Peters
Get into shape
You can get some beautiful shapes, most often with birds in ribbons, but it’s the stranger patterns that can be more striking. With luck and the right settings you can capture some stunning shapes; one of my favourites is where the flock has formed into a giant ‘bird’ of its own.
Images like this are fraction-of-a-second moments, so shoot in burst mode. Or use a camera with a pre-shot feature.
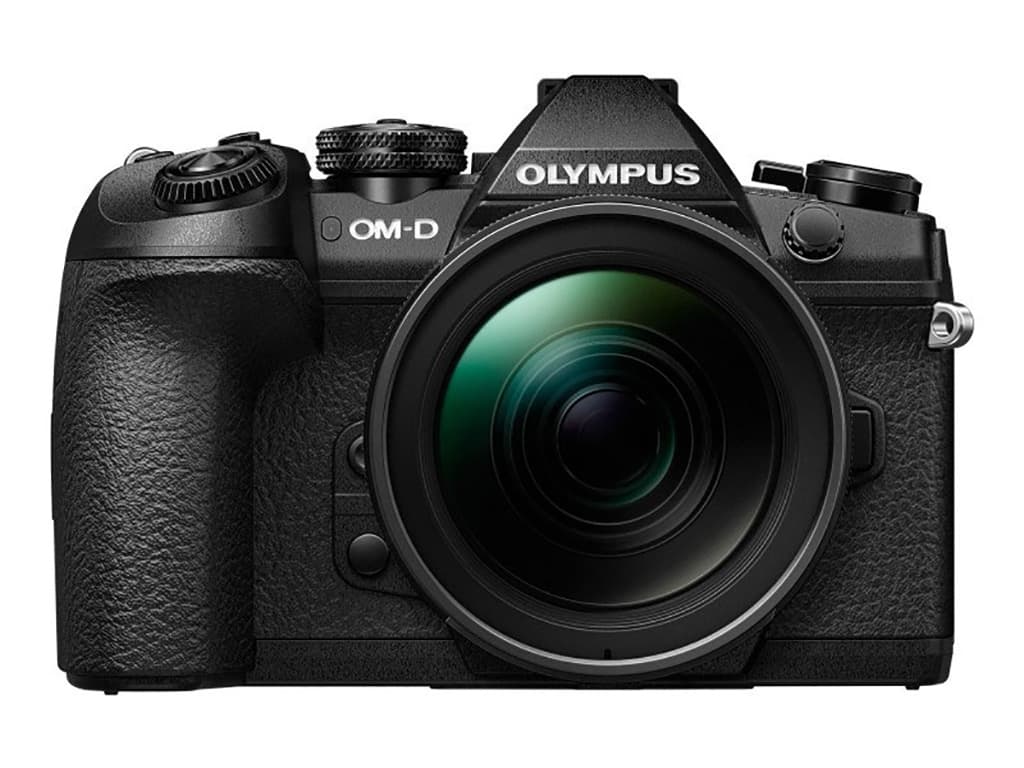
My Olympus OM-D E-M1 Mark II has a Pro Capture mode which is immensely useful. It’s 60fps with fixed focus, and begins recording as soon as the shutter is half-pressed. This means you get the benefit of a second or so’s frames before you shoot, and are less likely to miss something. You don’t need a very fast shutter to get images like this either. A starling murmuration is big, too. You can go down to speeds between 1/125sec and 1/250sec with ease. And this also means you’re not restricted by low light, as that’s when the best activity happens. Just expose for the highlights, as you want the birds to be silhouetted.
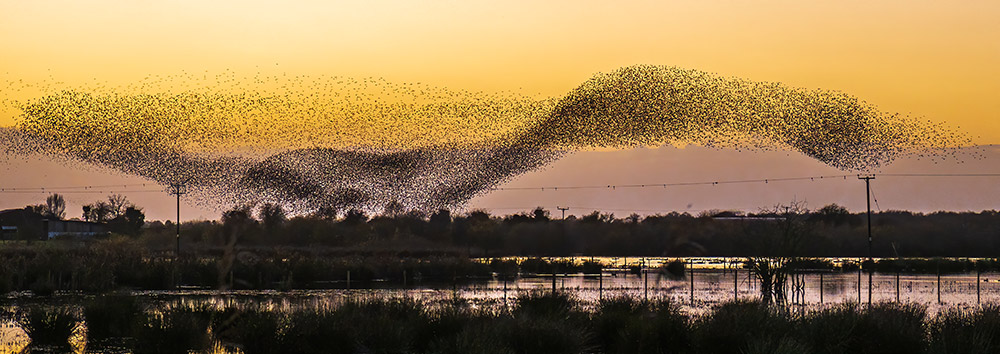
Image credit: Andrew Fusek Peters
Pick the right gear – what camera kit do I use?
As I like to shoot a mix of spontaneous handheld and locked-off shots, I tend to bring two cameras to a starling murmuration. Lens choice is also important. You probably won’t need the sort of super-telephotos that you’d normally associate with bird photography, though lenses like my ED 300mm f/4 IS PRO or ED 150-400mm f/4.5 TC 1.25x IS PRO can let me get some regular shots before the main event.
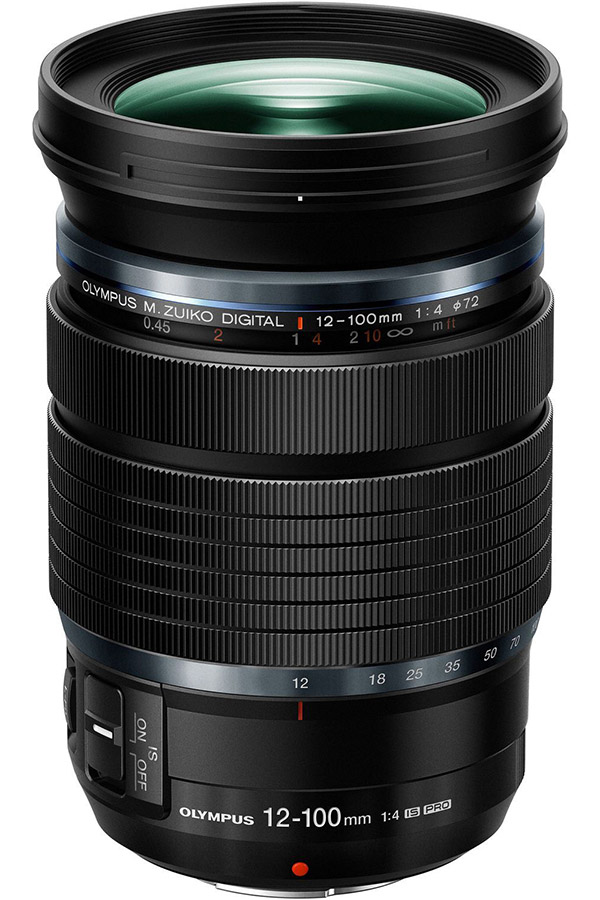
For starling murmurations I prefer a standard or all-in-one zoom like the ED 12-100mm F4 IS Pro. It’s stabilised, so great for dusk shots and though it’s not an f/2.8, the ISO performance on modern bodies easily makes up for a stop of light.
Andrew Fusek Peters
Andrew is a professional wildlife and landscape photographer as well as an OM System ambassador. He mainly works in Shropshire and is on commission to the National Trust on the Long Mynd and Stiperstones, while his photos regularly appear in the national press. His book, Butterfly Safari, will be published in spring 2023 by Graffeg. Visit fusekphotos.com
Photographing murmurations – Tell a story in the sky
Keep asking yourself: what’s the story? For me, this is what ultimately determines composition and it works for starling murmurations just as well as for anything else. If you’re looking at a flock of starlings some distance away, and they’re swooping and moving in unison with great precision, then the story might be one of simple, ethereal beauty. And you might choose a long lens and a fast shutter speed to tell it. Framing is vital in telling that story.
You could choose to feature the entire flock in frame, or only a very tiny part of it, which might well also imply a huge gathering. If, on the other hand, you’re directly beneath 30,000 starlings as they land literally on top of you, around you, and beyond you, the story might be one of visceral chaos. When shooting, pay attention to all of your senses, not just visual: the noise of these creatures as they come in to land can be quite something, and spark off all sorts of imaginative leaps. I’ve found that longer shutter speeds and wideangle shots are particularly useful here, implying mess and sheer volume.
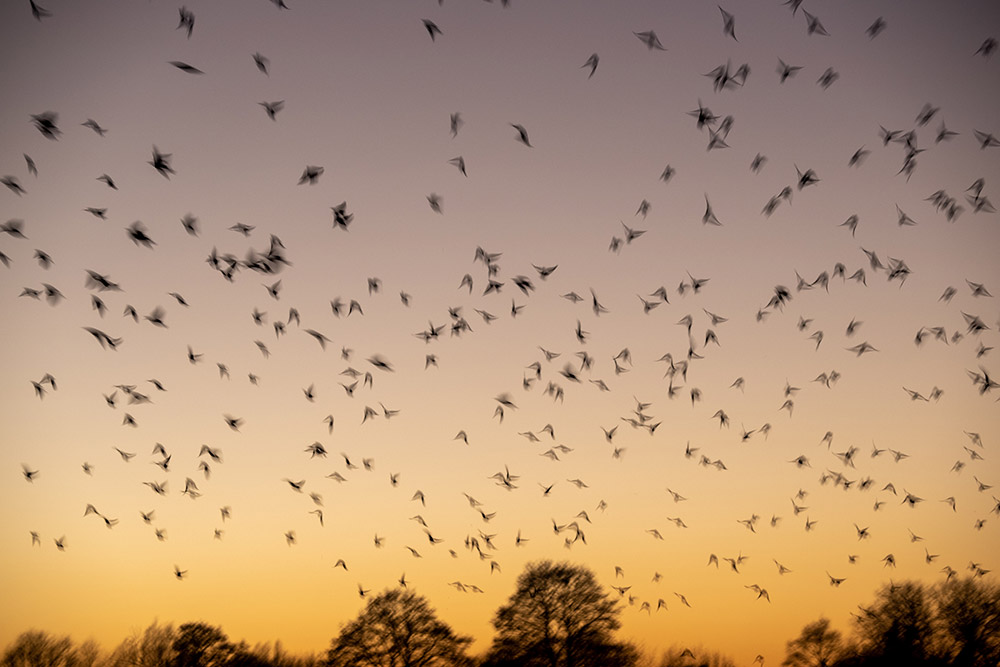
Image credit: Bill Ward
Move with Mother Nature
Often, I find ICM (Intentional Camera Movement) images can be far more emotionally accurate than conventional techniques, and that’s just as true with starling murmurations. When shooting starlings, I like the idea of applying movement on movement. It’s chaos upon chaos. Instead of denying the movement of these beautiful creatures, as you would with a traditional high shutter speed that freezes them in flight, ICM will accentuate and honour it. It tells the story of their movement, speed and volume in an abstract way that can evoke of the thrill of being there when land.
From a technical point of view, this means generating shutter speeds around 1/50sec and below. How much blur you’re after is entirely up to you, and informed by the story you’re looking to tell. Longer shutter speeds tend to generate more abstract shapes; shorter shutter speeds more obviously bird-like forms.
Image credit: Bill Ward
Go with the flow
Work with whatever Mother Nature happens to throw your way, whether that’s weather, location, or starling numbers. You simply have to react and improvise. Taking your imagination with you, I find, is more important than any camera or lens, even though I will make sure to have lens options that let me respond quickly and precisely to whatever my mind suggests, or whatever the starlings may be doing.
I like to turn up and see what happens, and in that way, I’m never disappointed. If it helps you as a photographer, by all means go with an idea in mind. But be prepared for anything that might happen, and embrace it when it does. I much prefer to keep it as simple as possible with a single body and a couple of lenses. Remember, starlings are wild creatures and are absolutely within their rights to do what they like, when they like.
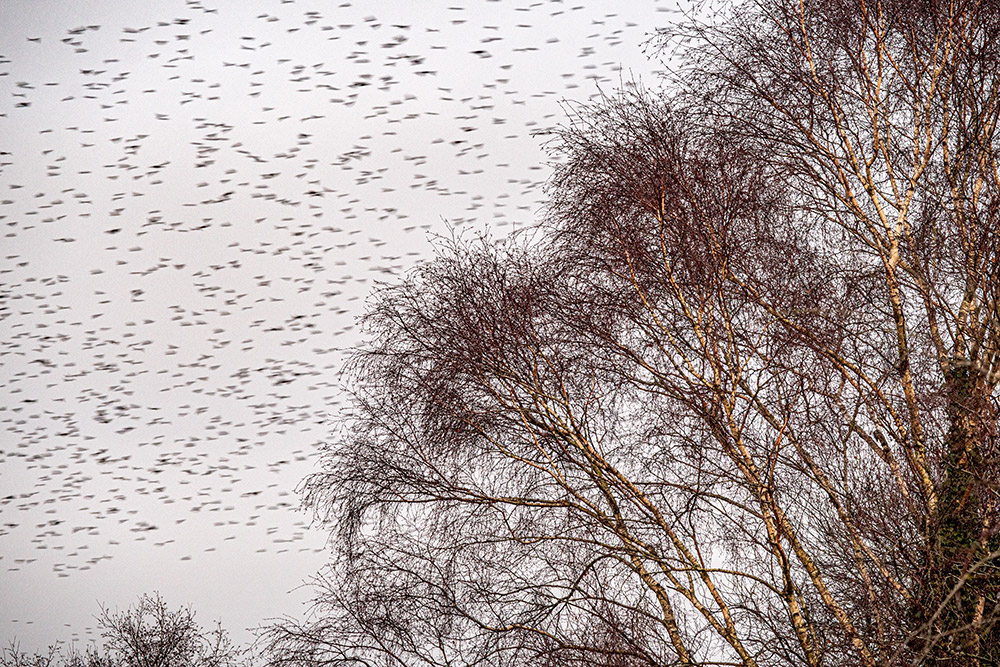
Image credit: Bill Ward
Get creative on the fly
As with ICM, I’ve been using multiple exposures for many years in my photography. For me, there is an energy, a rawness, a dynamism that’s inherent in this, rather than using Photoshop. I like to improvise and almost always shoot handheld, trying out ideas and seeing what happens in the moment, then adjusting to whatever emerges on the screen as I go. That can be the perfect springboard to another idea, like a voyage to an unknown destination.
My Pentax cameras have a brilliant multiple exposure engine, which can layer up to 1,999 frames, although in practice it’s rare that I’ll go above 20 or 30, and I’m often around three to five. Most cameras these days allow up to ten frames to be layered onto one image. Of the various blending modes offered, most often I use Average, which keeps exposure consistent, and Bright which can also be called lighten, which prioritises the brighter pixels in a frame. I also combine multiple exposures with ICM in the same frame.
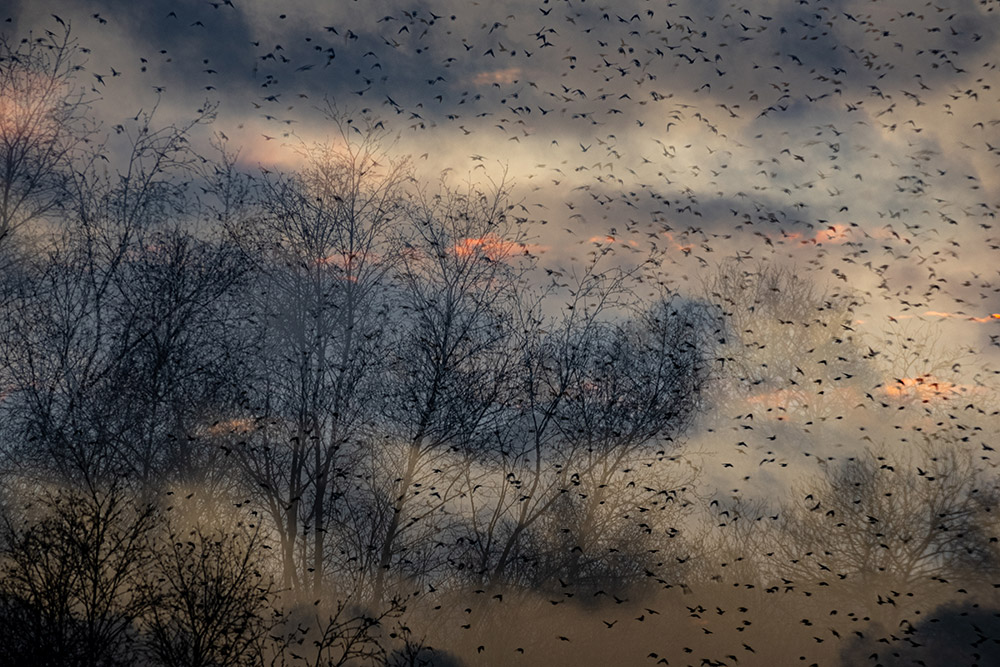
Image credit: Bill Ward
Gear up for starling murmurations – What camera kit do I need?
I shoot with the Pentax K-1 Mark II and K-3 Mark III, both of which have a great multiple exposure mode, capable of combining as many frames as I want in camera. As for lenses, I use a D FA 24-70mm F2.8 ED SDM WR on the former, which is very good in low light – great as the starlings tend to come in as the sun sets and with wide to short telephoto storytelling options. For more reach I use the DA 55-300mm F4-5.8 ED WR, and again one that gives lots of options in framing.
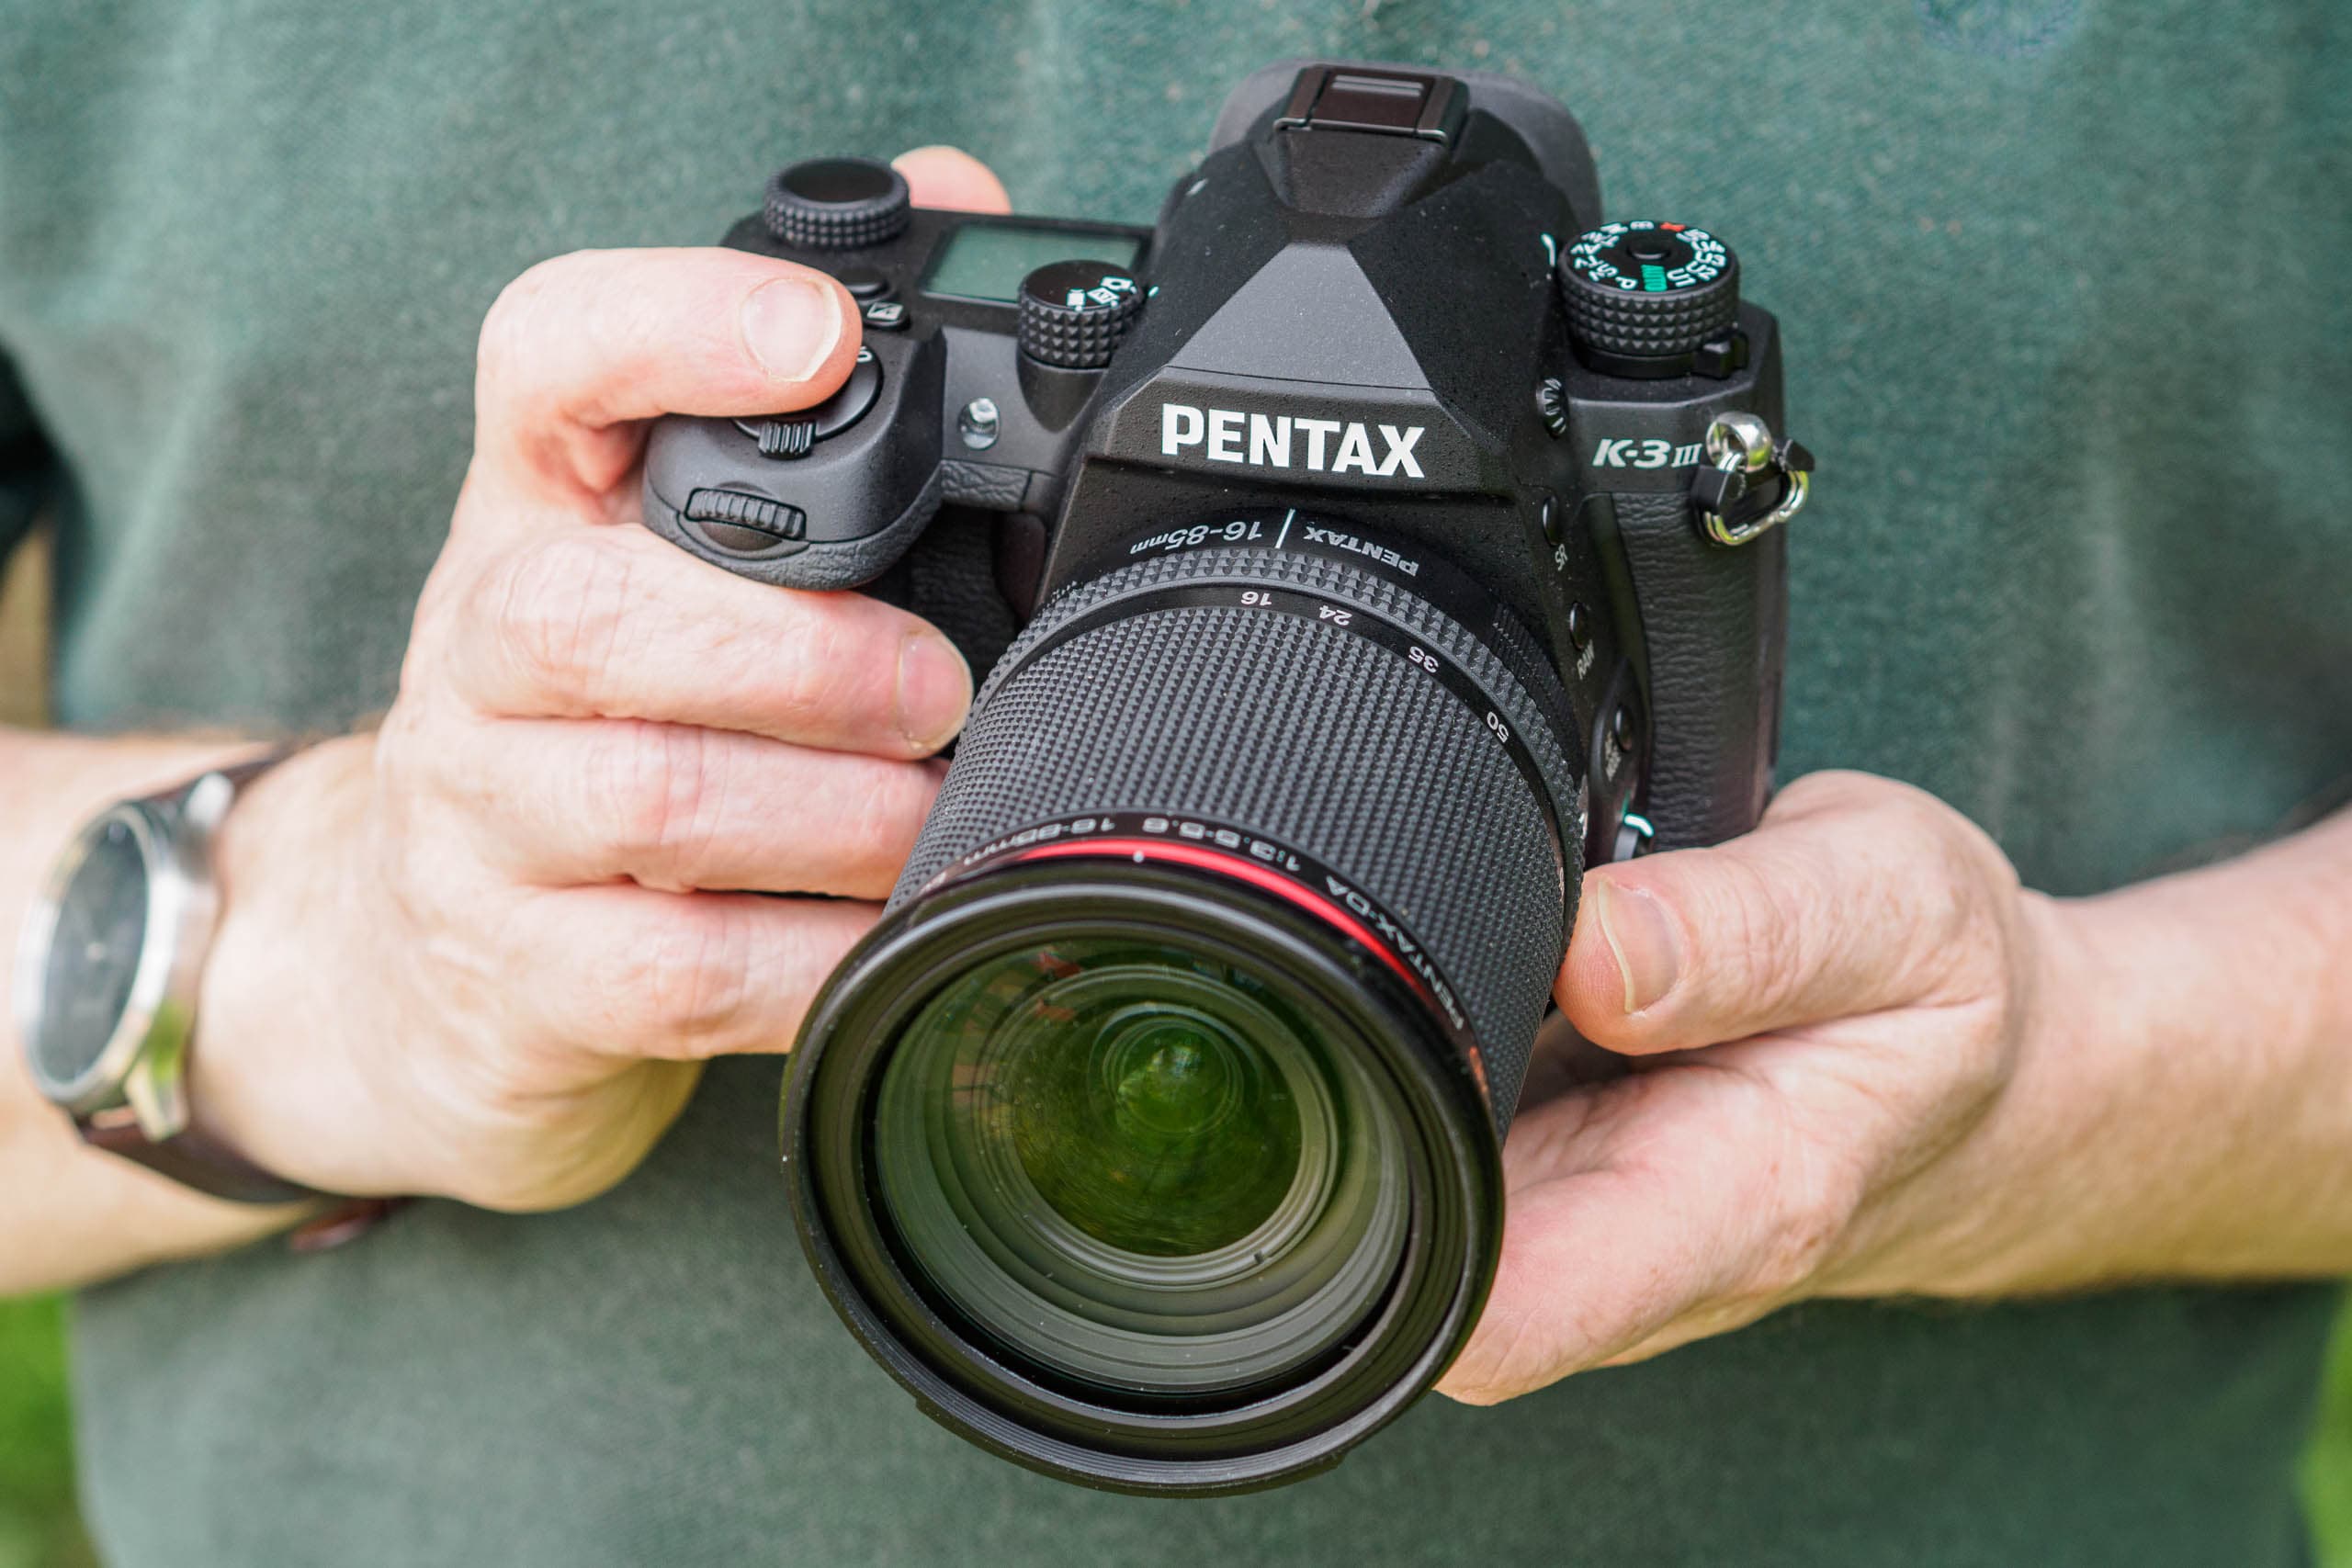
Image credit: Andy Westlake
Bill Ward
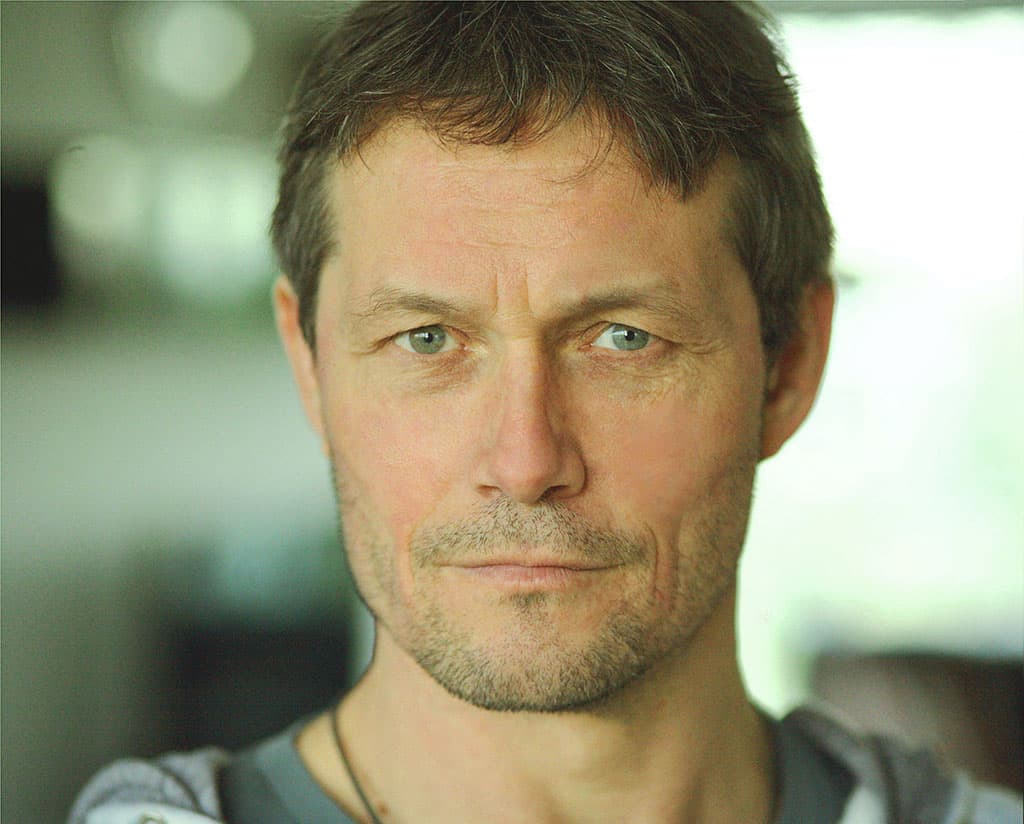
Bill is a self-taught creative landscape photographer with a string of awards and commendations. A brand ambassador for Pentax and Ricoh Imaging since 2014, he gives talks at camera clubs and photographic societies across Europe and the USA, and is proud to be a tour/workshop leader for Light and Land, as well as a judge at UK Landscape Photographer of the Year 2022. Visit Billwardphotography.co.uk
Looking for further guidance or inspiration around bird photography?
Best cameras for bird photography
How to capture fast-moving birds (and animals)
Bird Photographer of the Year 2022 winners announced!
How to capture garden birds in flight
Interested in learning how to photograph different birds? We are running a series of photography holidays around the UK and Abroad. Check these out:
Birds of the Shetland Islands with Tom Dyring and Brydon Thomason – June 26 – July 2 2023
Red Grouse with Ben Hall – 24 – 27 August 2023
Birds of India with David Tipling – 12 – 18 November 2023
Follow AP on Facebook, Twitter, Instagram, and YouTube.


