Wildlife photographer Ben Hall shows you how to capture one of Britain’s most exciting and fierce autumn wildlife spectacles, the Red Deer rut.
Your guide: Ben Hall
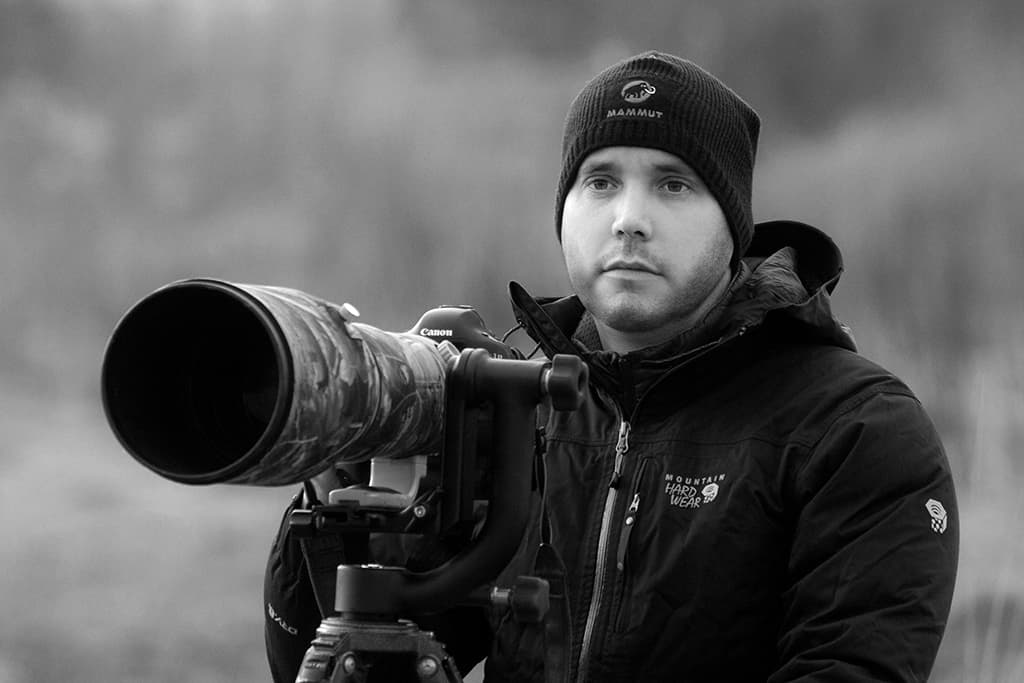
Ben Hall is one of the UK’s leading wildlife photographers with many international awards to his name. His images are widely published throughout the world, he has co-authored two books and runs photo workshops in the UK and overseas.
Visit www.benhallphotography.com.
Each autumn during rutting season, red deer stags will battle rival males in a bid to win a harem of hinds. The red deer rut is one of Britain’s most exciting wildlife spectacles, and throughout October, can provide endless dramatic photo opportunities. Witnessing a stand-off between two fully grown stags is an unforgettable experience but keep an eye out for other interesting behaviour, too.
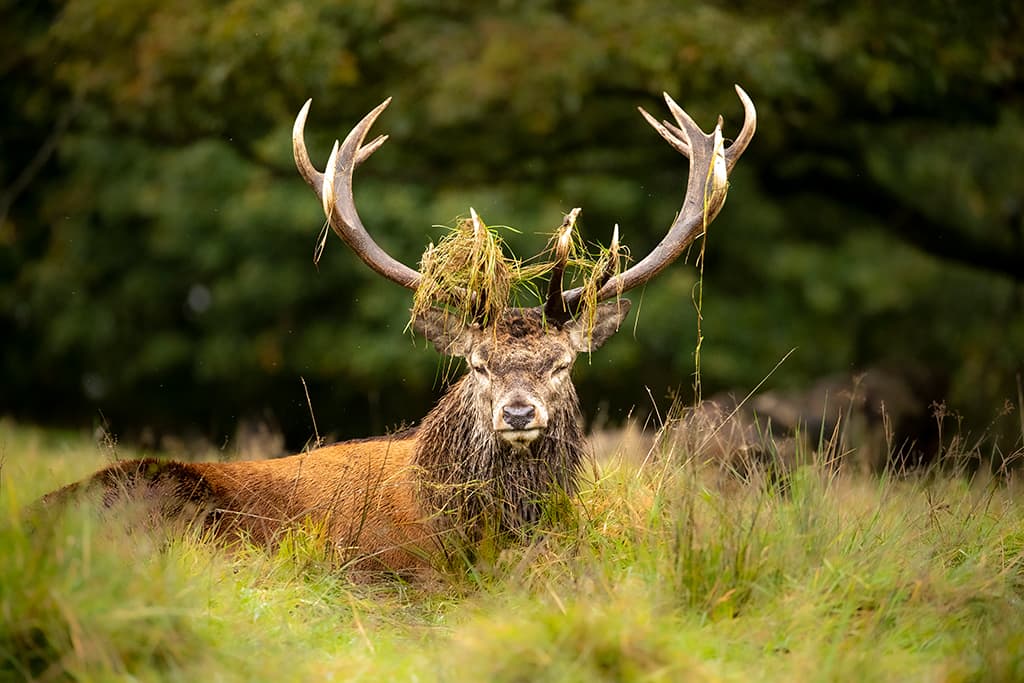
Stags will often dig at the ground with their antlers, sometimes ending up with interesting headgear made up of grass or bracken! They will be strutting their stuff, expending energy herding the females together, and bellowing out vocal threats to rivals. This is an action-packed photographic opportunity not to be missed.
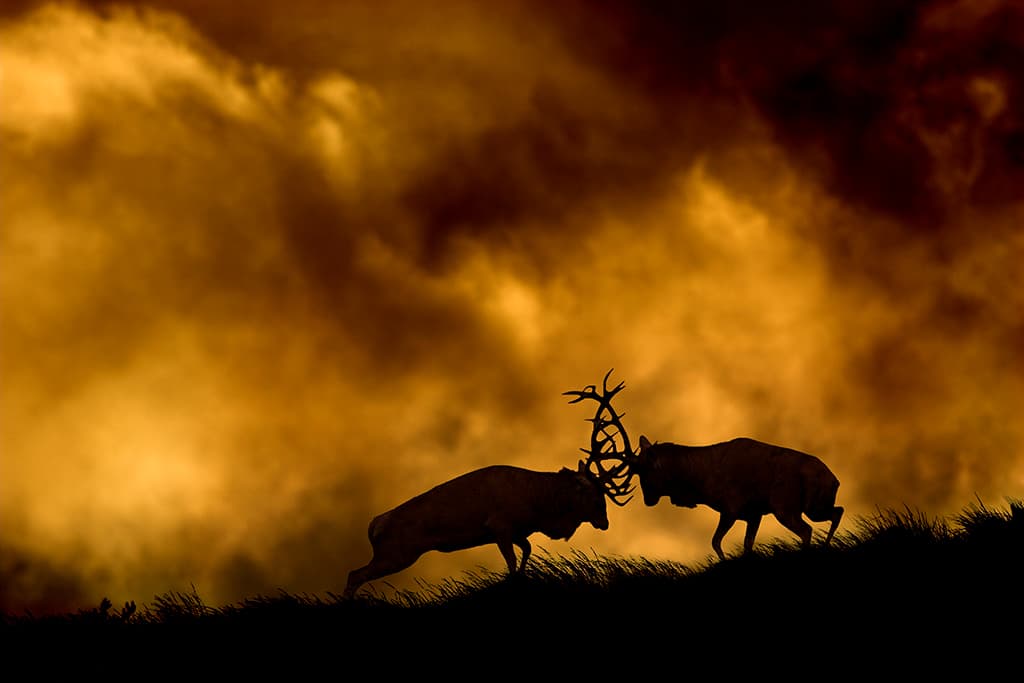
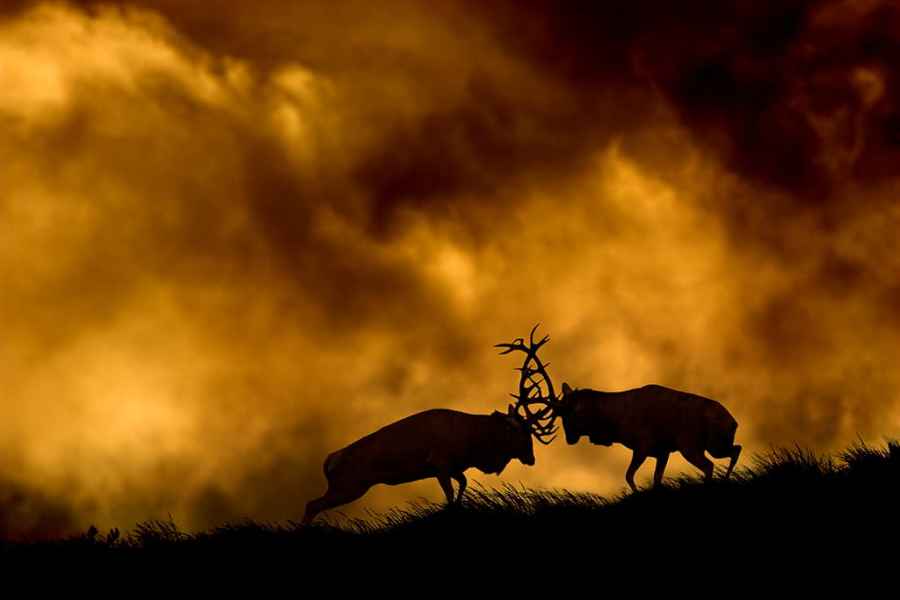
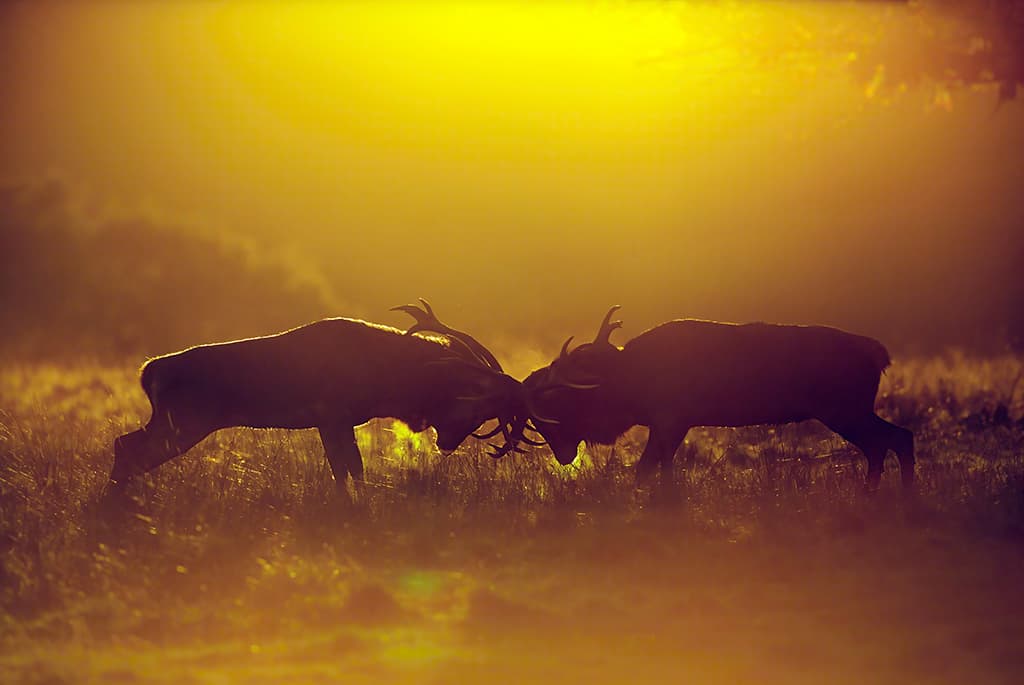
The combination of the setting sun and stormy clouds produced some dramatic lighting. The fighting stags were placed on the horizon and metered from the sky to create this stunning silhouette. Canon EOS-1D Mark II, 500mm, 1/1250sec at f/5.6, ISO 50
Know your location
As with any type of wildlife photography, it is important to familiarise yourself with your location and build up an understanding of the place, as well as your intended subjects. Pick a site that is local enough to allow you to visit several times, as the more time you spend there, the more you will learn about your subject’s movements and behavioural patterns.
You should also pay close attention to the light and how it affects the surroundings. Is it possible to shoot against a background cloaked in shadow for a dramatic effect, for instance? Try to visualise the type of images that you would like to take, and note down any patterns you observe, so you are better armed for your next visit.
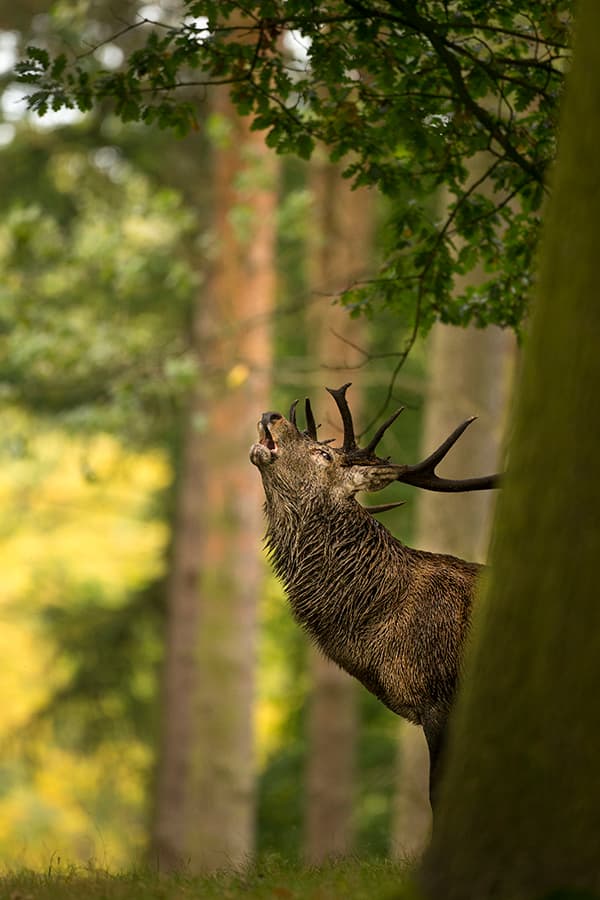
As soon as you see a stag’s head lift to let out an almighty roar, fire off a burst of shots to maximise your chances of capturing a pin-sharp shot/ Canon EOS-1D X, 500mm, 1/200sec at f/4, ISO 1600
Fieldcraft
Most deer, even in parklands, remain wary of people so you will need to think carefully about your approach. Deer possess very acute senses: their eyesight, smell and hearing far exceed ours. When tackling completely wild deer, you will need to stalk them carefully, always keeping low and ensuring your outline does not break the horizon.
Always be sure to stay downwind and pause if the deer look alert, continuing only when they appear relaxed. Deer that inhabit parklands up and down the country tend to be more accustomed to people, and as such are more tolerant and a little bit easier to approach.
All deer have a fear circle, however, and you will still need to keep a close eye on their behaviour and watch for any signs of unease. The key is to avoid surprising the deer with your presence. Patience, as always, is a virtue. Walk slowly, stopping and waiting at regular intervals until the deer begin to gain your trust and appear to be relaxed in your company.
The golden hour
Most activity will occur during the first and last two hours of sunlight, so it pays to arrive at your location early. During the golden hour, the wavelengths of light are much longer, creating a warmth and richness in the light that is completely absent at any other time. This is your opportunity to capture some atmospheric images.
Take time to search out the most aesthetic backgrounds and avoid any that are too obtrusive and distracting. Use the warmth of the light to your advantage and seek out autumnal colours in the surroundings to enhance the rich hues.
Backlighting
Due to the intensity of sunlight, backlighting your subject is best done at dawn or dusk when the sun is very low in the sky. One byproduct of contre-jour photography is rim lighting. This is where a halo of light will appear around the outline of your subject, and it can be an effective way of accentuating a subject’s shape and form. For such images, exposure can be critical.
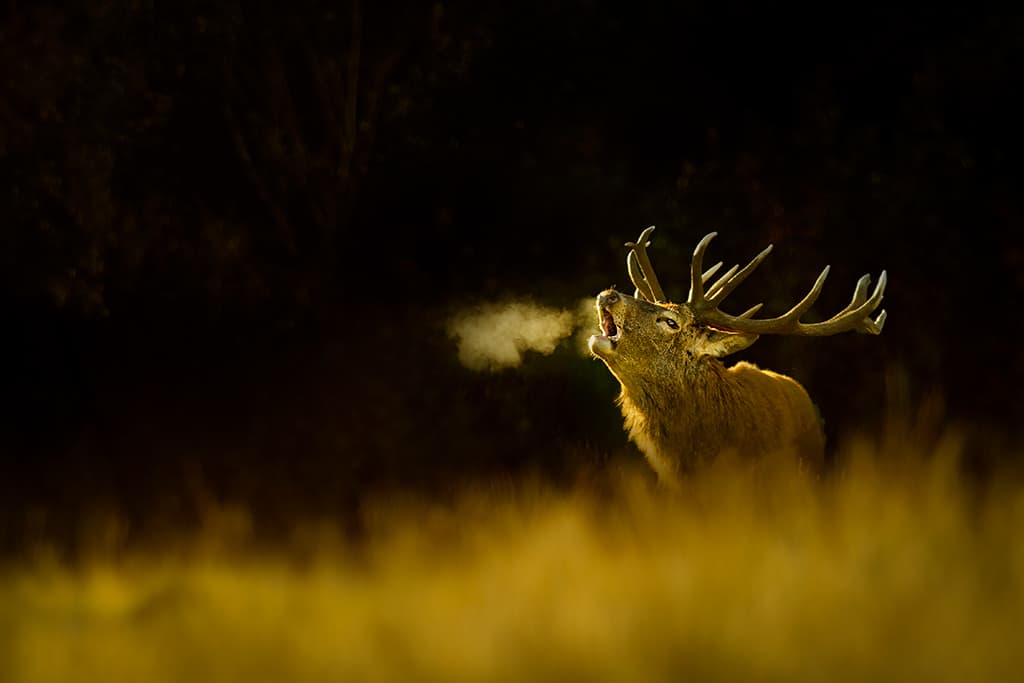
Make a habit of checking the histogram regularly to ensure that you are not losing important highlight detail and compensate for this accordingly. Experimenting with exposure, especially under backlit conditions, can be a great way of capturing drama. By searching out a shadowy background and purposely underexposing by up to 3 stops, you will find only the rim lighting is visible, with the rest of the image falling to black. Images such as these add an air of mystery and a strong graphic element.
Misty mornings are perfect for backlighting, too. Hanging mist creates an ethereal atmosphere, whilst the mist diffuses the light allowing you to shoot towards the sun for longer. Watch the forecast closely, as mist at dawn usually occurs following a cold but clear night. On particularly cold mornings, look for a dark background to shoot towards – the strong backlighting will help to highlight the deer’s breath, adding a wonderful, evocative atmosphere.
Capture the action
During the rut, action can be fast-paced so you will need to set up your camera in advance. Switch to high-speed drive mode to enable you to fire a sequence of images; this is especially important for fighting and bellowing stags. A minimum shutter speed of 1/800sec will be necessary to freeze the movement of a roaring stag, so keep a careful eye on your settings and raise the ISO if you need to.
As a stag bellows, it will lift its head back and let out a gut-wrenching roar, so your best chance of a sharp image is to capture it at its peak, when the head is back all the way and no longer moving. As soon as you see the head start to lift, fire a burst of images to capture a sequence – this is your best chance of securing a pin-sharp image.
Battles between rival stags are one of the most exciting parts of the rut. Often, two stags will commence in a parallel walk to size each other up before suddenly turning and clashing antlers – this is your sign to get ready to fire. Keep your angle low for a more intimate view, and this will also help your background to become more distant and diffused. Use a small focusing area, either single point, or a small group, and focus on the eyes, moving your focus point if necessary.
Ben’s Top Tips for capturing the deer rut
Include the foreground
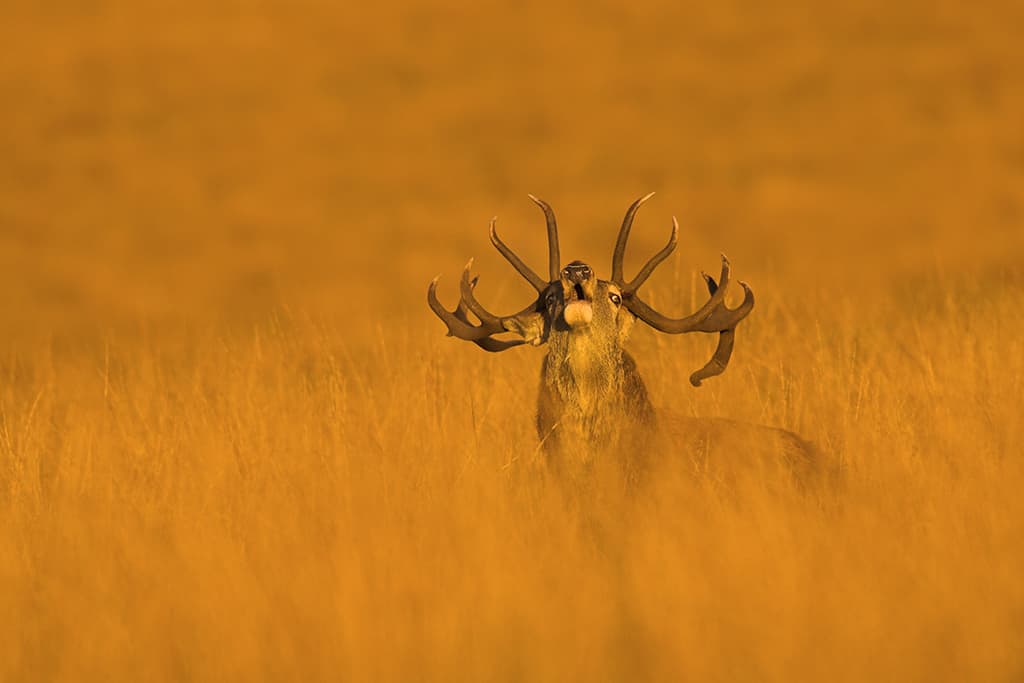
Use the foreground to add depth to your composition and lead the eye through the frame to your subject. Select a wide aperture to create a shallow depth of field, as this will help to blow the foreground out of focus and eliminate any distracting elements.
Eyes are key
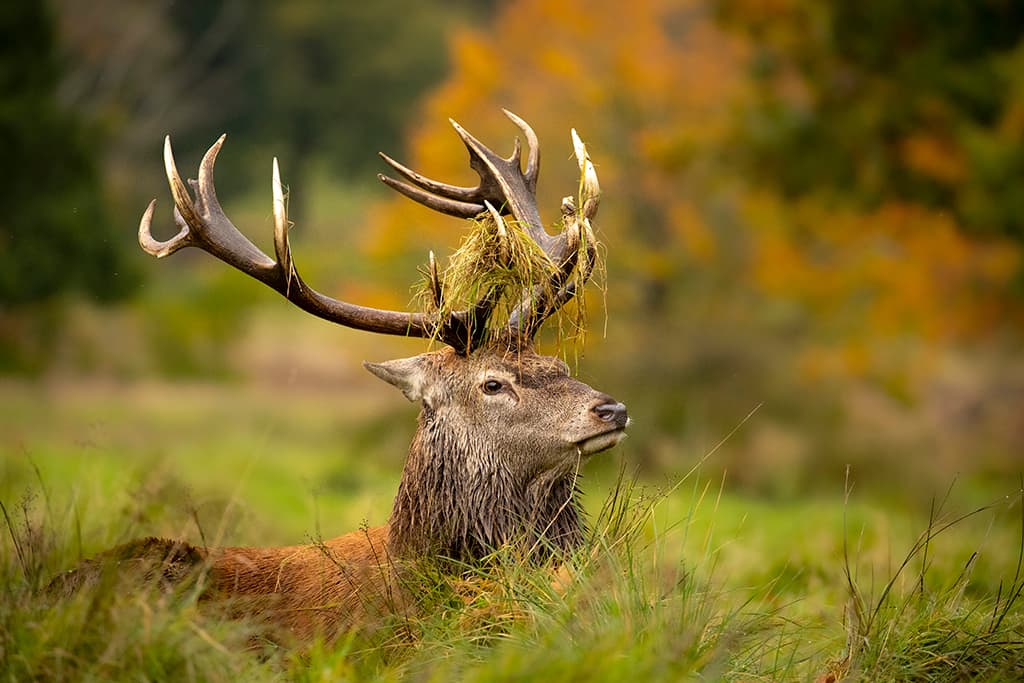
Always focus on the eye. Choose single-focus point and move the point around the frame so that it is always on the eye of your subject when you fire the shutter. If your camera has face detection or even better, Eye AF mode, the hard work is done for you.
Experiment with panning
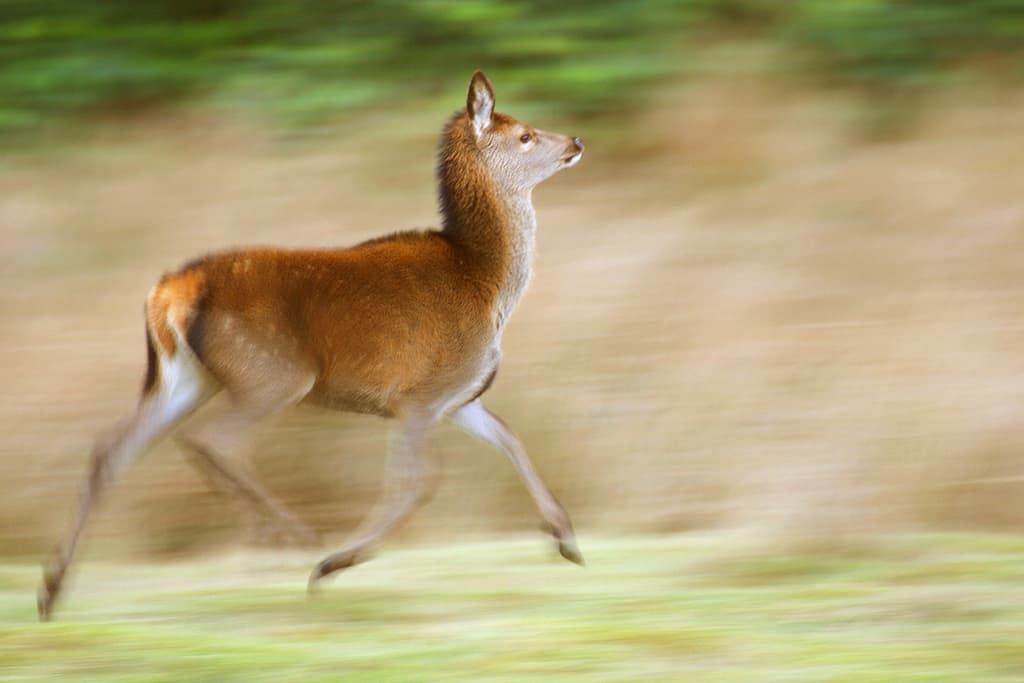
During the rut, stags are often chasing hinds, so why not experiment with movement by selecting a slow shutter speed and panning? Set your camera to shutter priority and try out a variety of speeds. Somewhere between 1/30 and 1/60sec is a good place to start.
Go wide
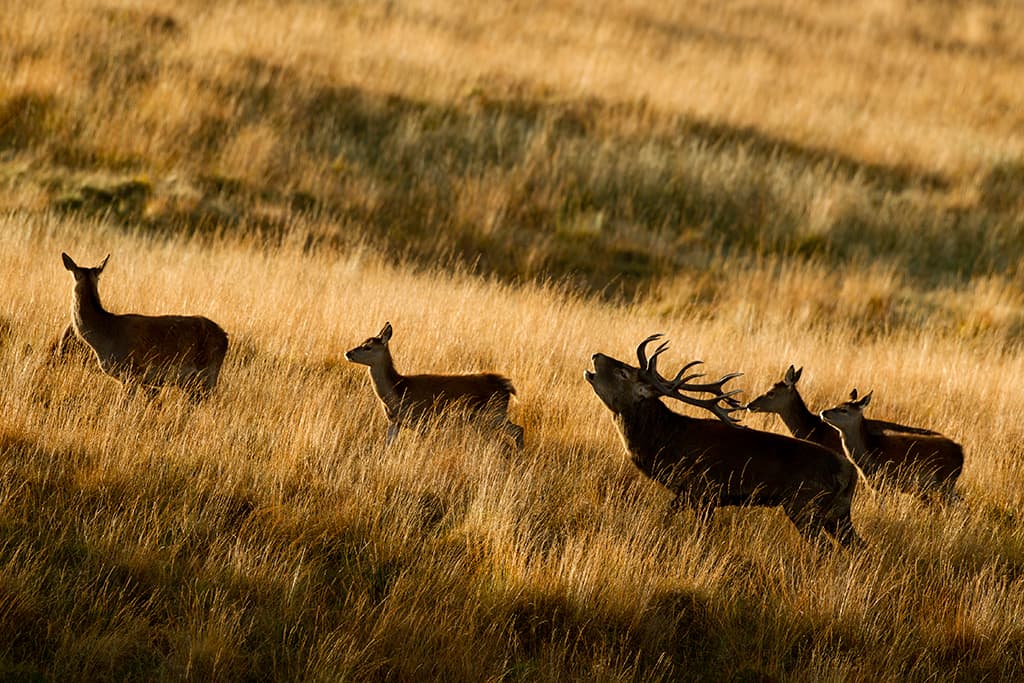
Instead of always focusing on individual portraits, try composing wider shots and including a whole harem and their surrounding environment. Capturing a wide array of images will help you to build up an in-depth coverage of red deer rut behaviour.
Extreme weather
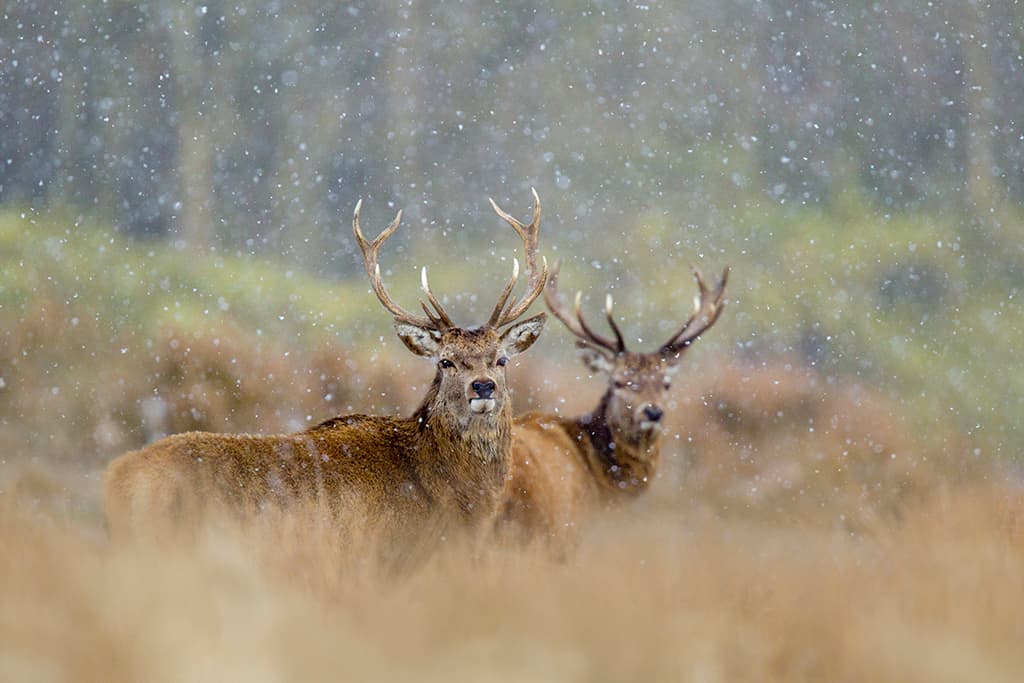
Capture an element of weather by venturing out when it is raining, stormy, or if you are very lucky, snowing! Photographing in adverse weather can be an effective way of capturing atmosphere and revealing a sense of place. It will add an extra element to your images.
Why it works
Although this image doesn’t depict any dramatic behaviour, it is always worth watching out for opportunities to capture arresting portraits. When first coming across this lone stag, I was immediately struck by the subtle but beautiful light. Dusk was fast approaching, and the wooded background was in deep shadow.
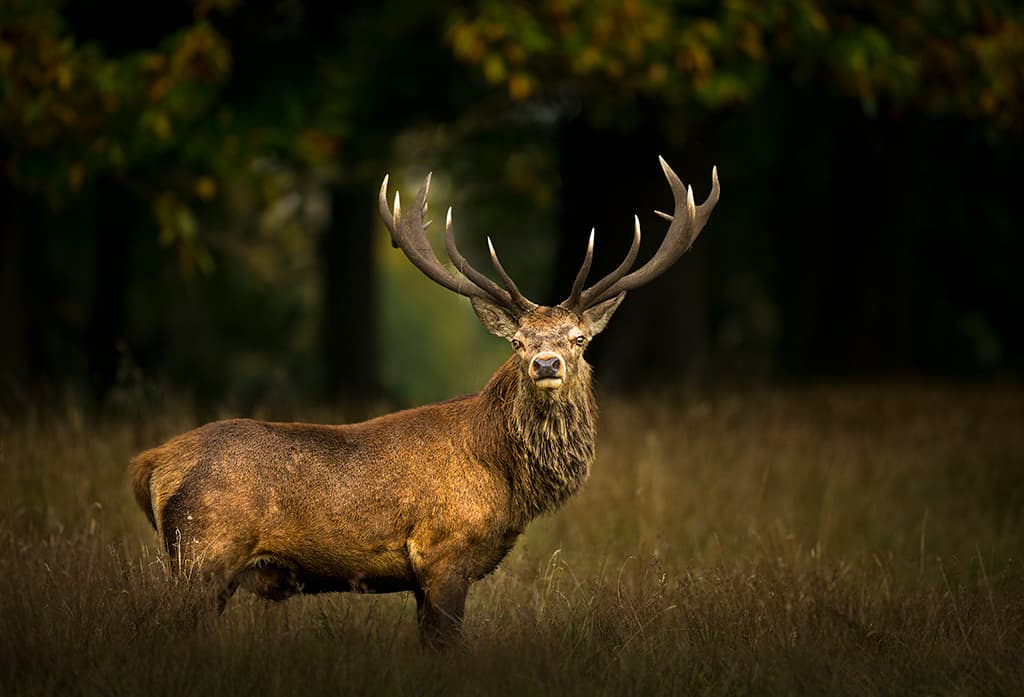
The deer stood in a patch of warm light, isolated wonderfully against the darker surroundings. I used a 500mm lens and a wide aperture to blow the background out of focus. The leaves and tree trunks are still obvious, however, which hints at the deer’s habitat.
I used single-point focus and moved the point onto the eye, letting the shallow depth of field gently blur the foreground grasses. The deer looked directly down the lens for just a few seconds, making that all-important connection.
Ben’s simple steps for shooting silhouettes
1. Seek out a suitable location and think about your shooting position. Look for an area that will allow you to shoot upwards towards the sky.
2. Watch the weather closely and pick a day when there is some interest and colour in the sky. I prefer a sky with at least some clouds as they add interest and can be used to convey mood and atmosphere.
3. I usually opt for a slightly shorter lens than usual when photographing silhouettes because I like plenty of space around my subject. A tele-zoom in the range of 100-400mm is ideal.
4. Use single-point autofocus and move the focus point towards the bottom of the frame. I often place the subject on one of the bottom intersecting thirds, leaving at least two-thirds sky for an effective composition.
5. Switch to spot metering mode and aim the metering point at a bright area of the sky. This way the sky will be correctly exposed, and the subject will naturally fall into silhouette.
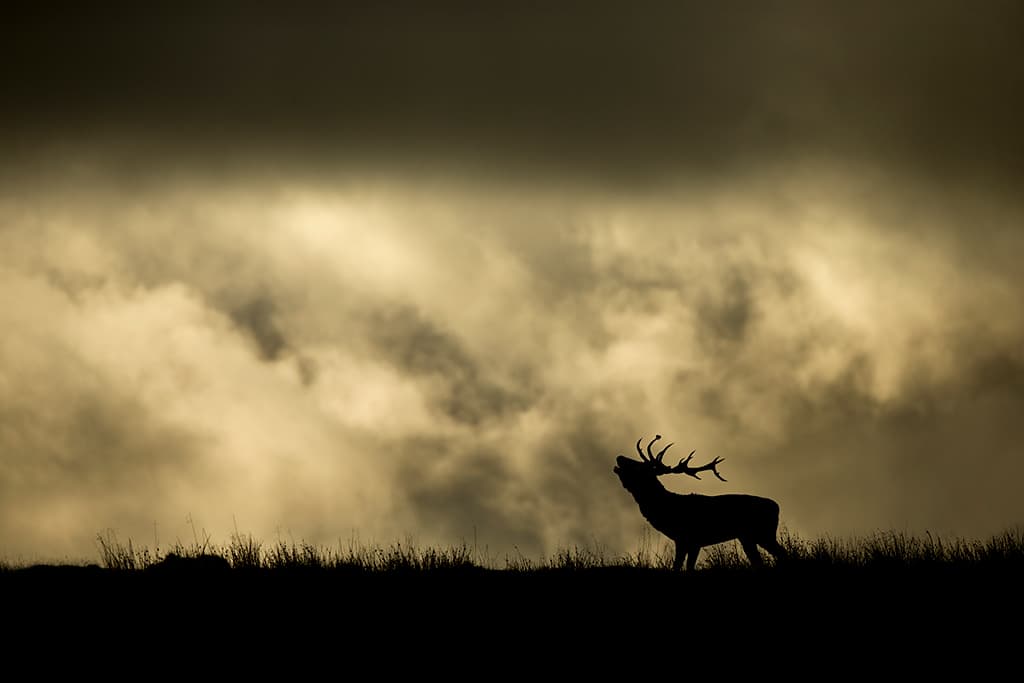
The most successful silhouette shots are taken when there’s some interest in the sky. Make sure you’re positioned down low so you can shoot up towards the sky. Canon EOS-1D X, 500mm, 1/5000sec at f/5.6, ISO 250
6. When metering for the sky, you may find you need to add a small amount of positive exposure, so check the histogram and make sure that the graph is nudging towards the right-hand side.
7. Opting for cloudy white balance will further warm up and enhance the colours of a nice sunrise or sunset.
8. A stag roaring in silhouette can look particularly dramatic so be ready to fire at all times and keep your camera set to high-speed drive to capture the peak of the action.
9. If you are using a tripod, turn off image stabilisation. On a completely solid platform, the image stabiliser can cause movement.
10. If you decide to show a small amount of detail in your subject, rather than a solid silhouette, lift the shadows in your post-processing software. This can often add a little bit of depth to an otherwise flat image.
Before and after
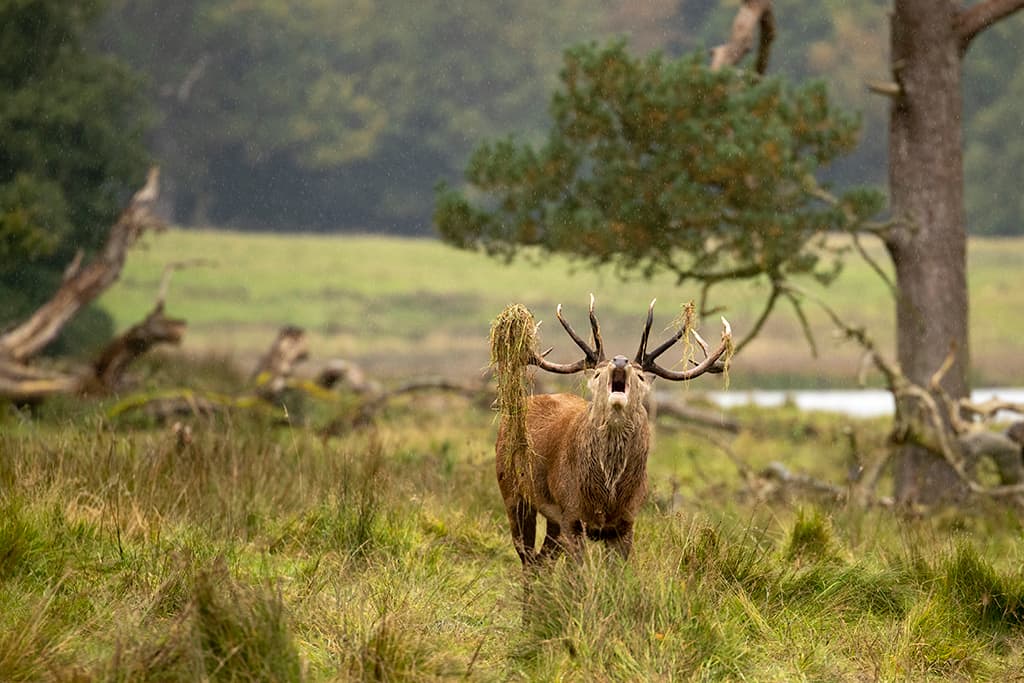
Before
This image is too cluttered. Even though I was using a wide aperture, I was not close enough to the deer to sufficiently blow the surroundings out of focus. The logs behind the deer pull the eye away from the subject, and the grass in the foreground is too detailed, giving the image an overall lack of depth.
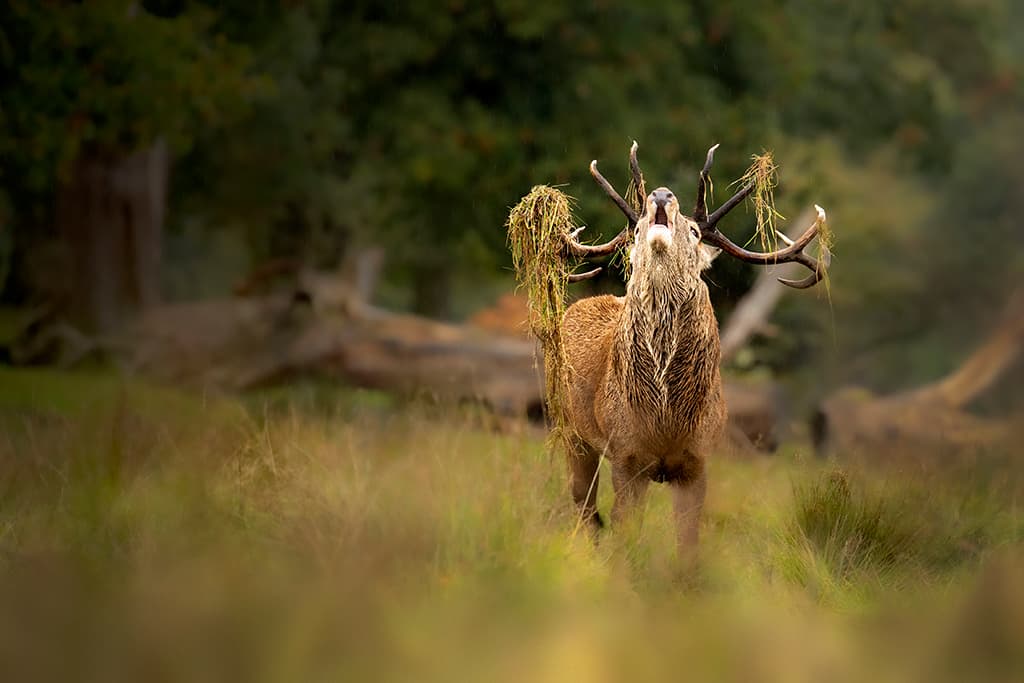
After
By slowly managing to creep closer to the deer, I have managed to reduce the depth of field significantly, even though this was shot using the same lens at the same aperture. The foreground grass is now blown out of focus, appearing as a diffused foreground, and the logs in the background no longer distract the eye from the roaring stag.
Kit list
Telephoto lenses
Even for park deer, a long focal length will be necessary for frame-filling shots, as well as achieving soft backgrounds. A tele-zoom will offer more versatility when it comes to framing options.
Tripod or monopod
For lenses of 500mm upwards, a tripod will be required, but for shorter lenses in the range of 100mm to 400mm, a monopod is my preferred choice of support.
Waterproof walking boots
When photographing the red deer rut you may find yourself covering long distances on foot, often over uneven and wet ground. It’s important that you remain comfortable at all times, so sturdy, waterproof footwear is essential.
Gimbal head
When shooting on a tripod with a long lens, a gimbal head will allow quick movements to be made, whilst remaining completely solid. This is especially useful when following moving subjects such as hinds or stags running.
Further reading
Get great autumn wildlife shots

