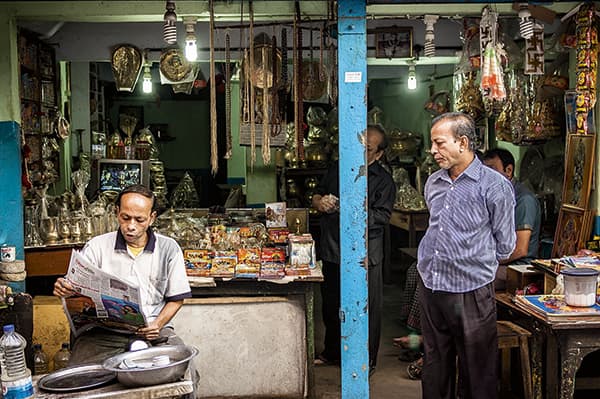
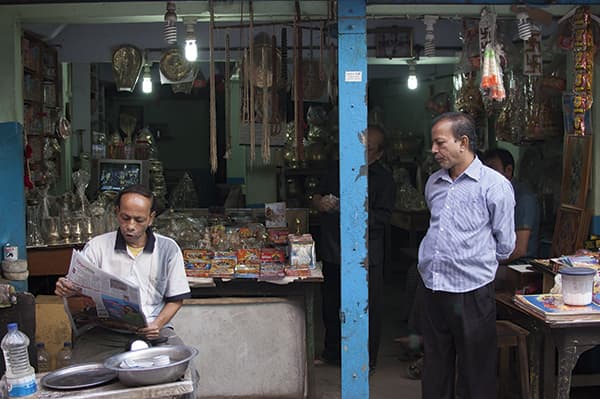
There is a lot of fantastic detail in this photograph from Asheque Ahsan, although the dark exposure setting does mean that some of this is somewhat lost in the shadows. It also doesn’t help that there is some mixed lighting to contend with because there are fluorescent electric light bulbs illuminating the interior mixed with the daylight.
The approach I used here was to use Camera Raw to lighten the image and bring out more detail in the interior. I then introduced a darkening vignette to concentrate the eye more on the centre of the scene and give the photograph depth. It also helped to adjust the white balance so that the final version had more warmth.
1. Basic panel adjustments
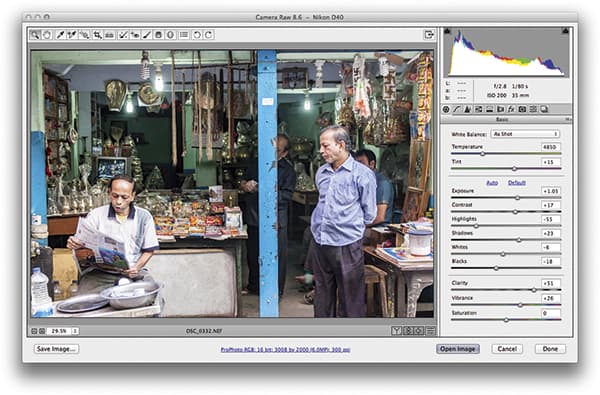 I began by opening the raw NEF file via Camera
Raw and applied some Basic panel tone and colour adjustments. The photograph needed to be lightened a lot, so I set the Exposure slider to +1.05. I then reduced the Highlights slider to preserve the delicate highlight detail and raised the Shadows to bring out more shadow information. I also increased the Contrast slightly.
2. Tone Curve adjustment
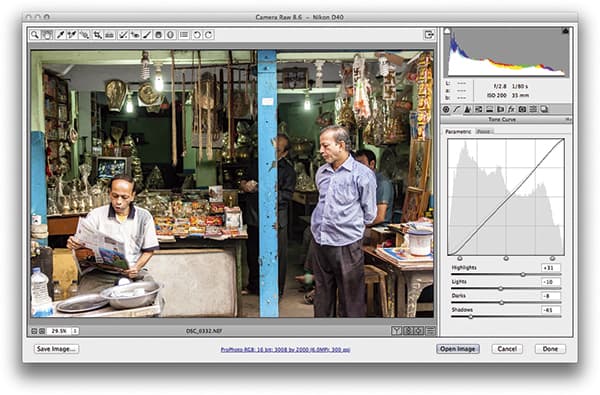 The default white balance setting looked rather cold, so I went to the white balance menu in the Basic panel and selected Daylight. I next went to the Tone Curve panel and applied the parametric settings shown here for a boost in contrast. I adjusted the
tone range sliders to accentuate the contrast at the extreme highlight and shadow ends of the curve.
3. Add a darkening vignette
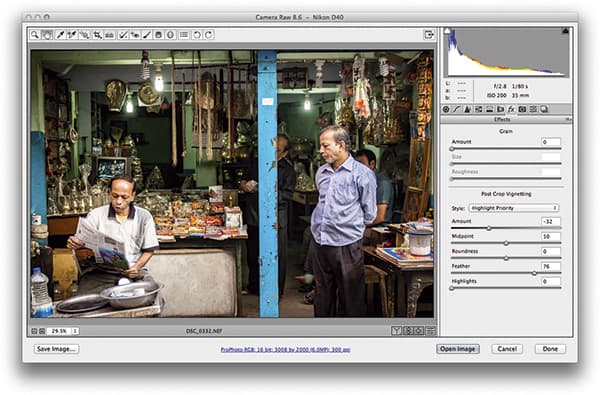 Finally, I went to the Effects panel and added a darkening vignette. More specifically, I selected the Highlight Priority from the Style menu, where I set the Amount to -32 and increased the Feather amount to +76. This combination of settings produced a nice soft-edged vignette, which helps focus the viewer’s eye towards the centre of the frame.

