Many of us are hamstrung by chaotic image libraries. Maybe you started with a sloppy folder structure years ago and now you’re too far down the rabbit hole to change things, perhaps you’ve given yourself a free pass with the flimsy excuse that ‘creative types are naturally disorganised’, or maybe your fledgling photo library has reached the tipping point where a bloated ‘Pictures’ folder won’t cut it any more. Whatever the reason, there are huge benefits to getting organised, and now might be the perfect time to do so. An organised library means you can find images with ease, collate your photos in all kinds of ways and even rediscover great photos you’d forgotten about. It may not be the most glamorous side of photography, but a little time spent on image organisation can go a long way.
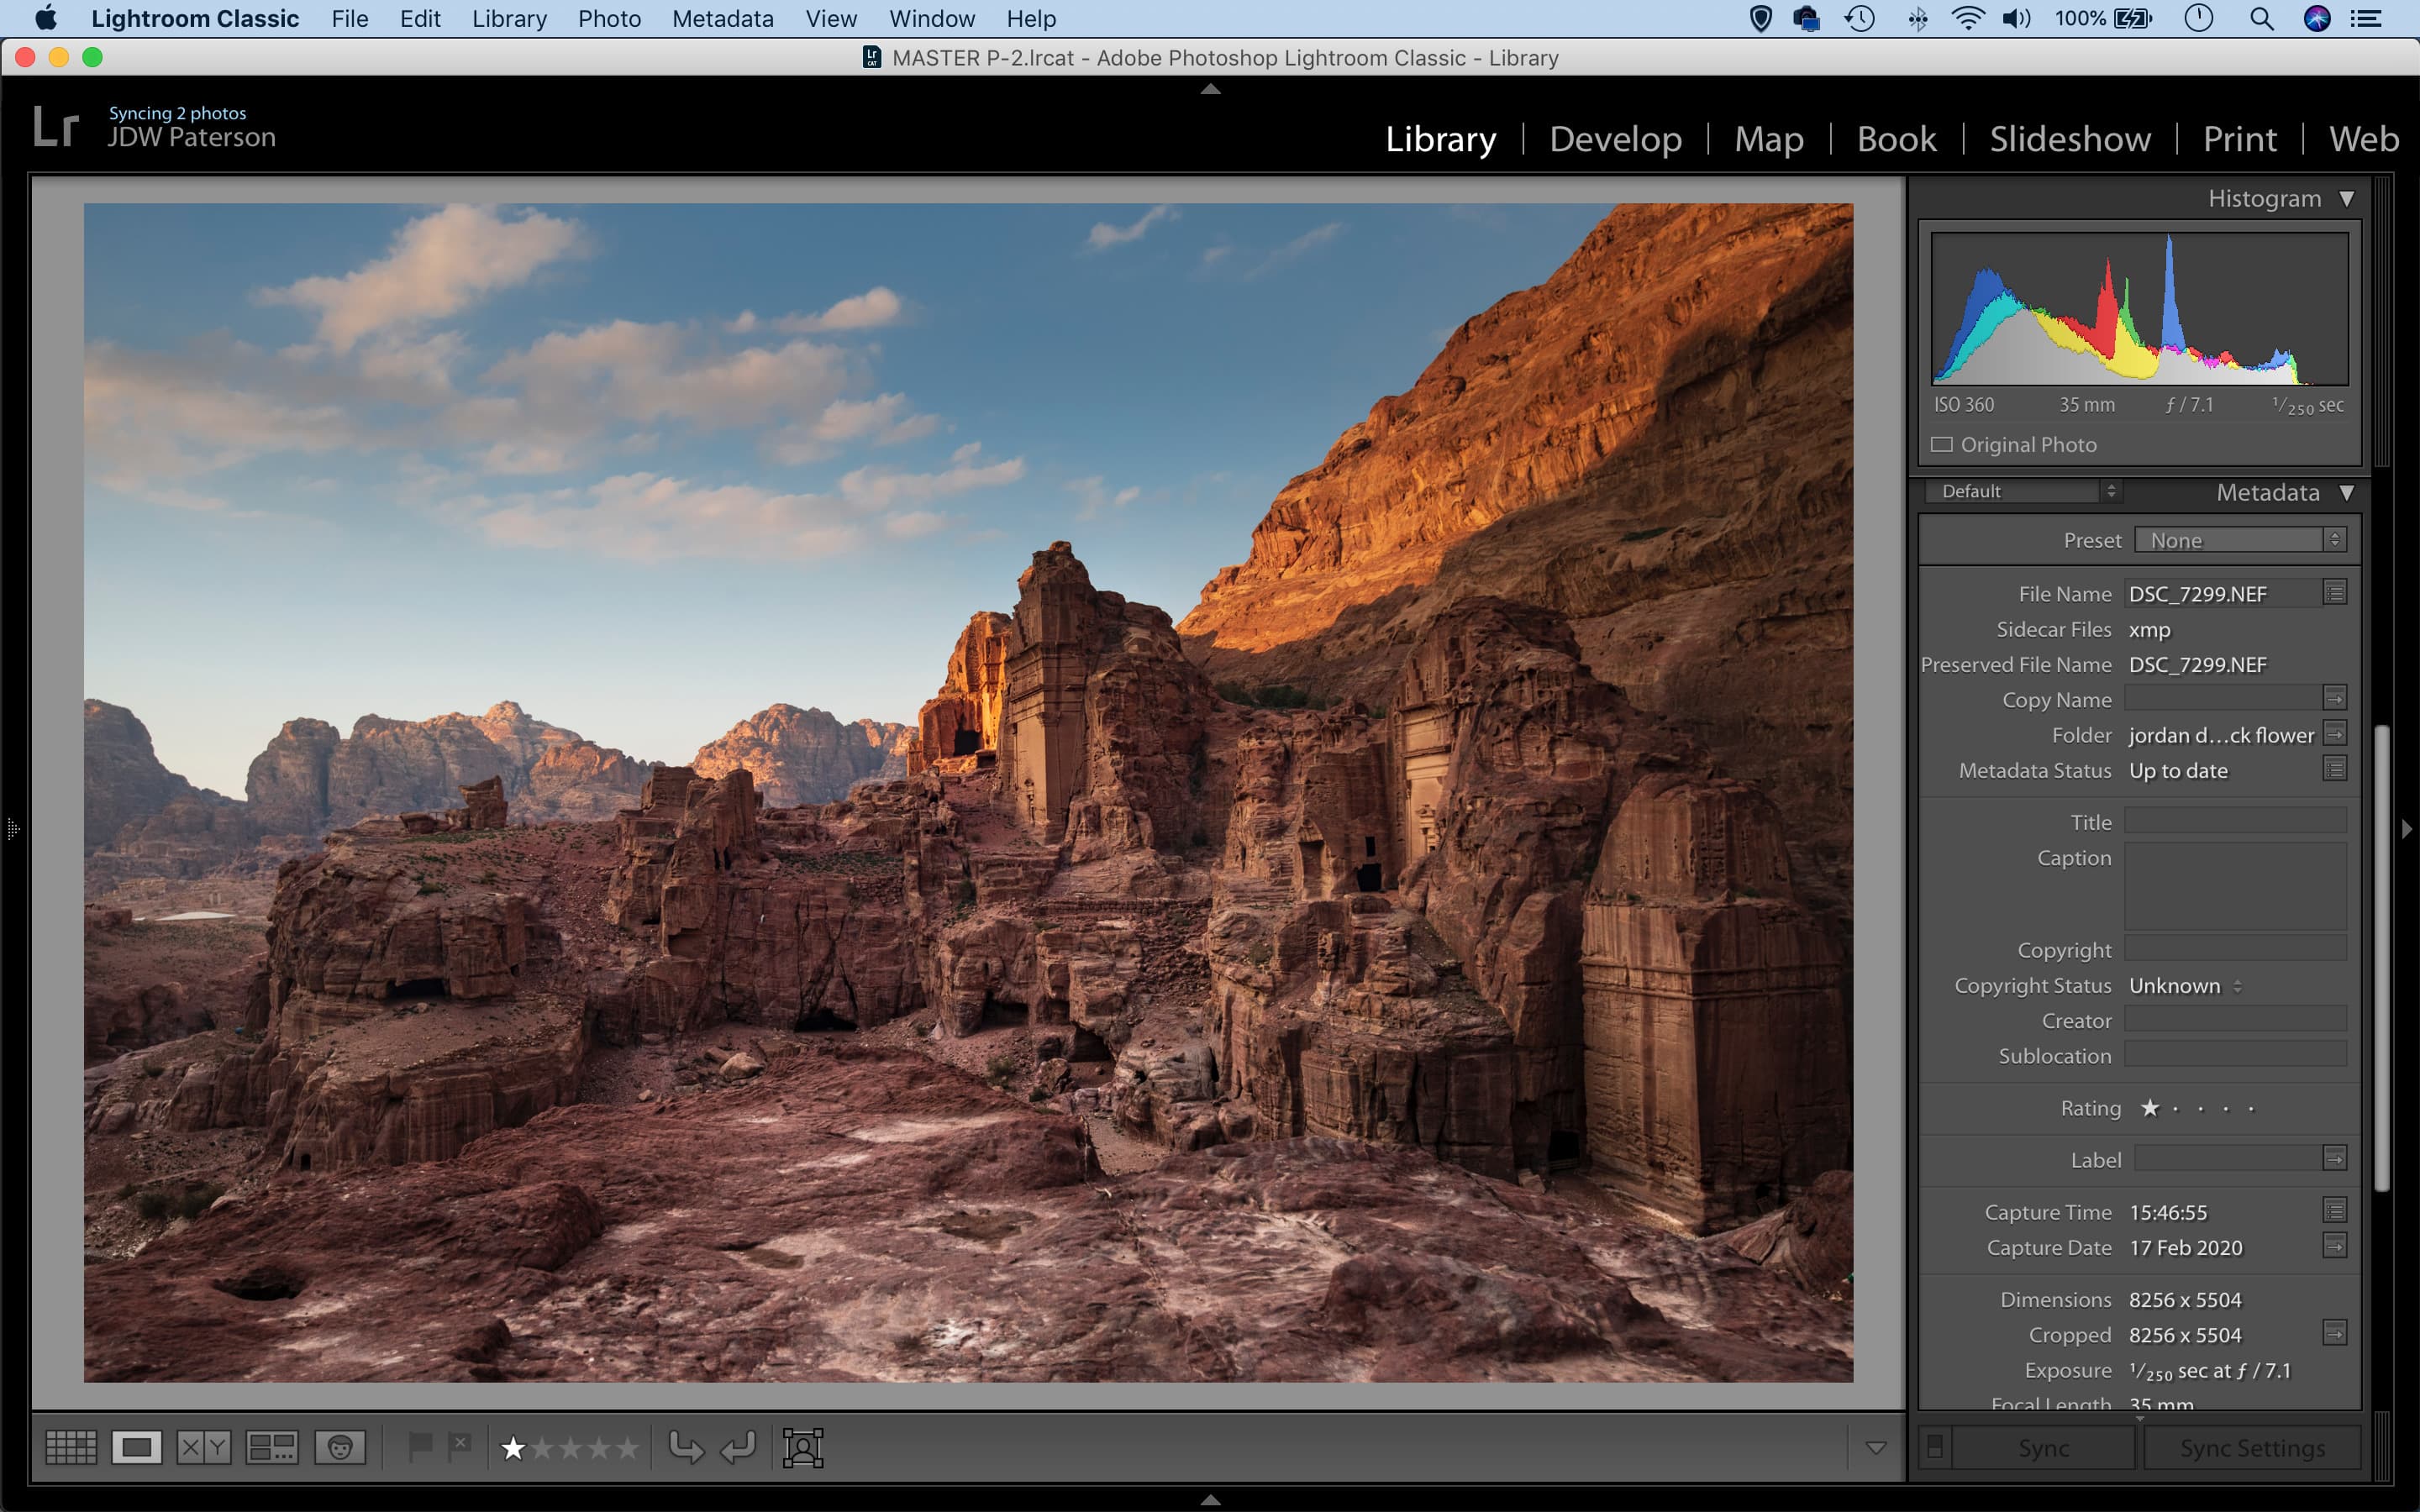
Now is the perfect time to organise your image library so you can search photos with ease
What is metadata?
Photographers often talk about the metadata embedded in their images, but what exactly is it? In a broader sense metadata is simply data about data. It’s purpose is to make data easier to organise and manage. An archeological object, for example, becomes more valuable to academics when data is logged about where, when and how it was discovered. Applied to photography, the image is the primary data, and the Exif info is the data about the data – when it was taken, which camera and lens was used, the exposure settings and colour space. Most cameras will store Exif data automatically and if we like we can use this Exif metadata to categorize our photos by, for example, singling out all files taken with a certain ISO or lens (Lightroom offers filtering options for this in the Library Module). But perhaps more usefully, we can also add extra metadata that will help us to organise our photo library, like keywords and ratings. So we can include a brief description, perhaps name the person or location in the photo, specify the genre of photography, or include any other information we think might aid us in seeking out the image at a later point.
The Lightroom Catalog
In Lightroom, metadata about your images is accessed and edited through the Catalog. It records keywords, ratings and collections, which are three essential tools for organising our image library. The Catalog also logs all the edits and changes you make to each image. All you need do is tell Lightroom the location of your image on your hard drive (which is done when you import the file). From this point, you can organise the images using Lightroom tools without ever having to touch the file location again. In theory, this means you could simply dump all of your images into a single folder on your drive and do all your organising in Lightroom. In practice, it’s a good idea to use a basic folder structure when storing your photos, perhaps by organising them into separate years, locations or genres.
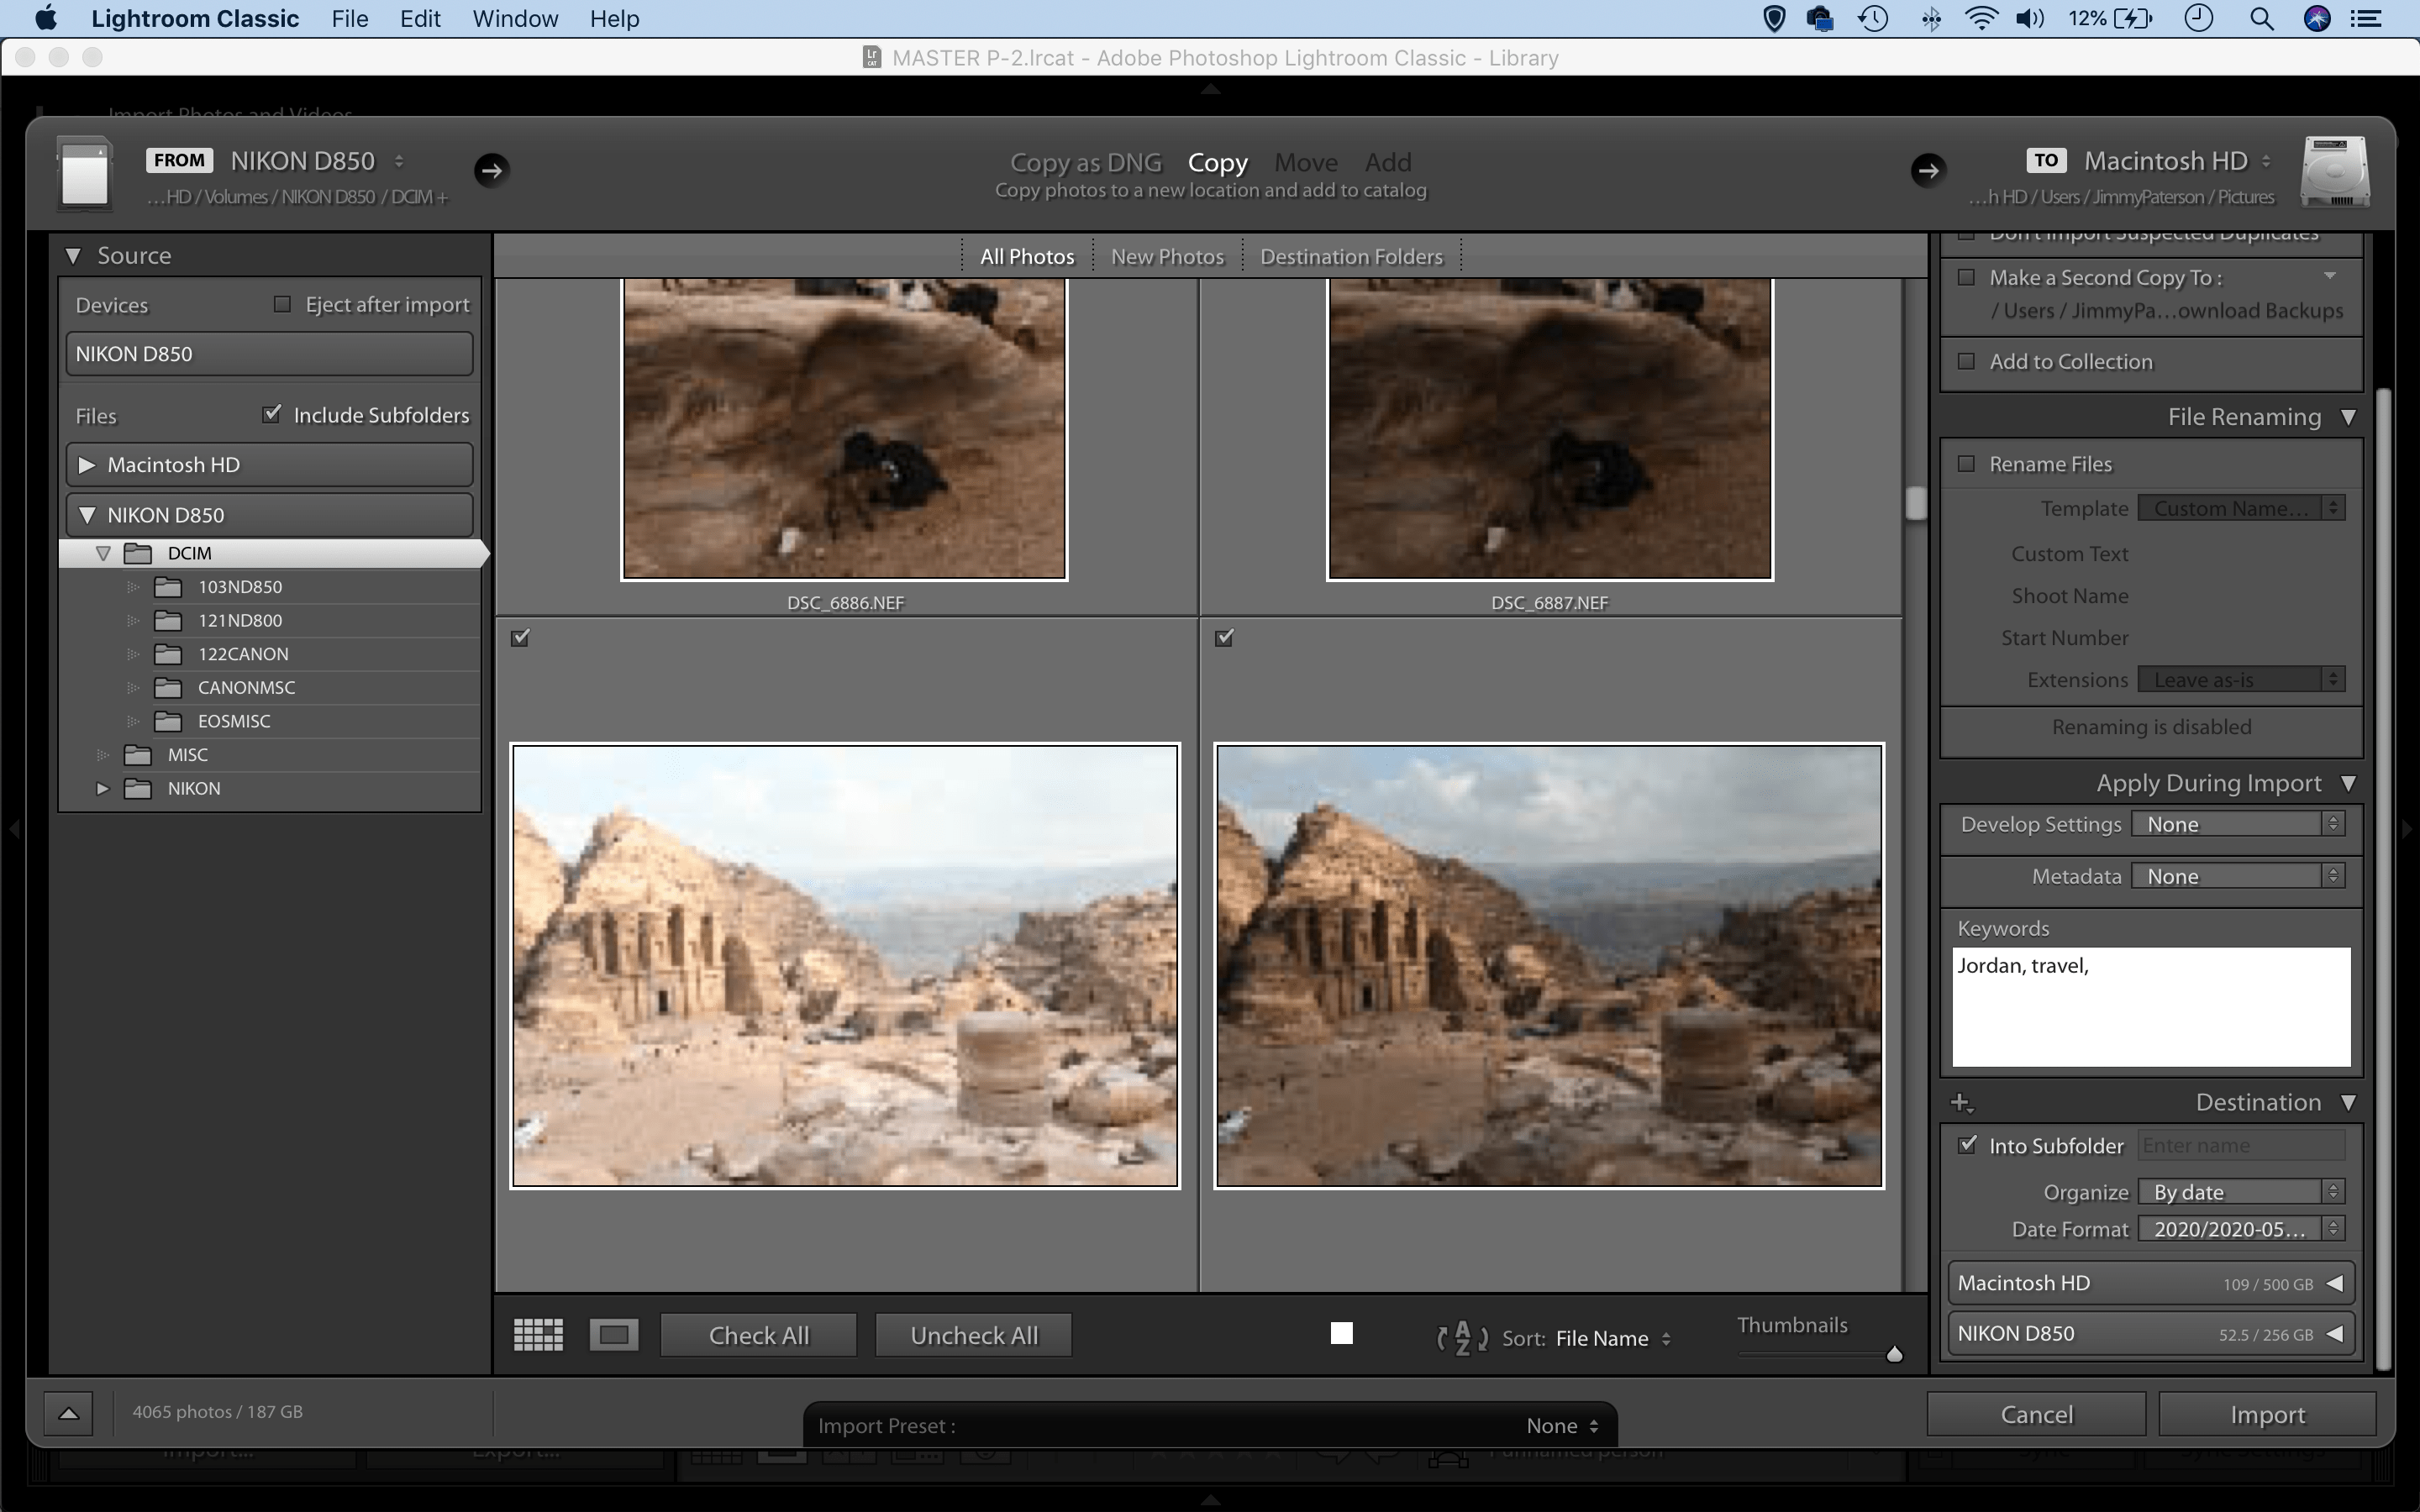
Get into the habit of entering keywords at the start of the process, ideally when you import your photos
Keywording on import
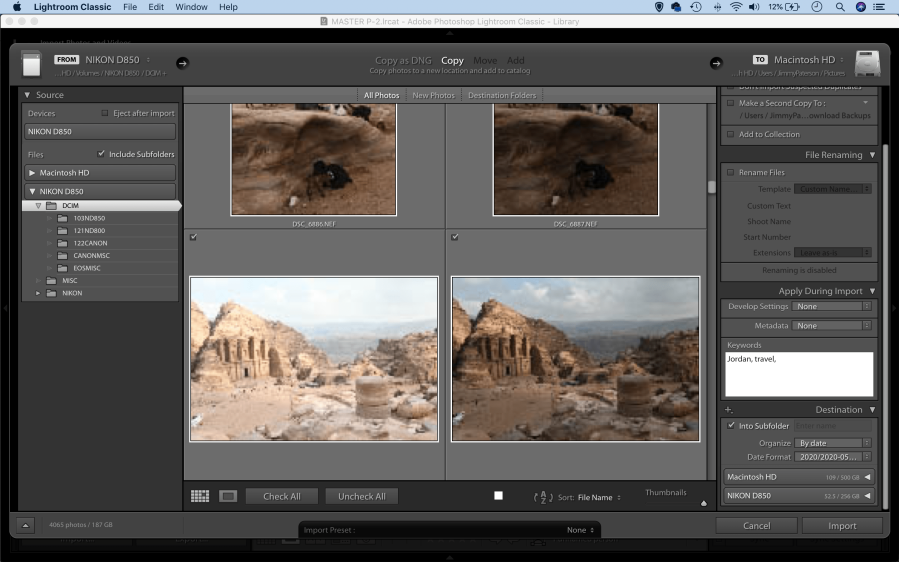
If you’ve always found it hard to muster the willpower to organise your images properly then here’s a tip – do it right at the start, before you even look through a fresh set of photos. At this moment we are all eager to start working up our photos. So this is the time to be disciplined, defer the gratification and spend a few moments organising the files. It needn’t be too involved, but if we can add a few keywords it will serve us well in the long run. Lightroom’s Import dialog lets you add keywords and create collections for your fresh image files while you import them, so this is an ideal place to spend a few moments on image organisation. You can also use the import dialog to download cards to your drive.
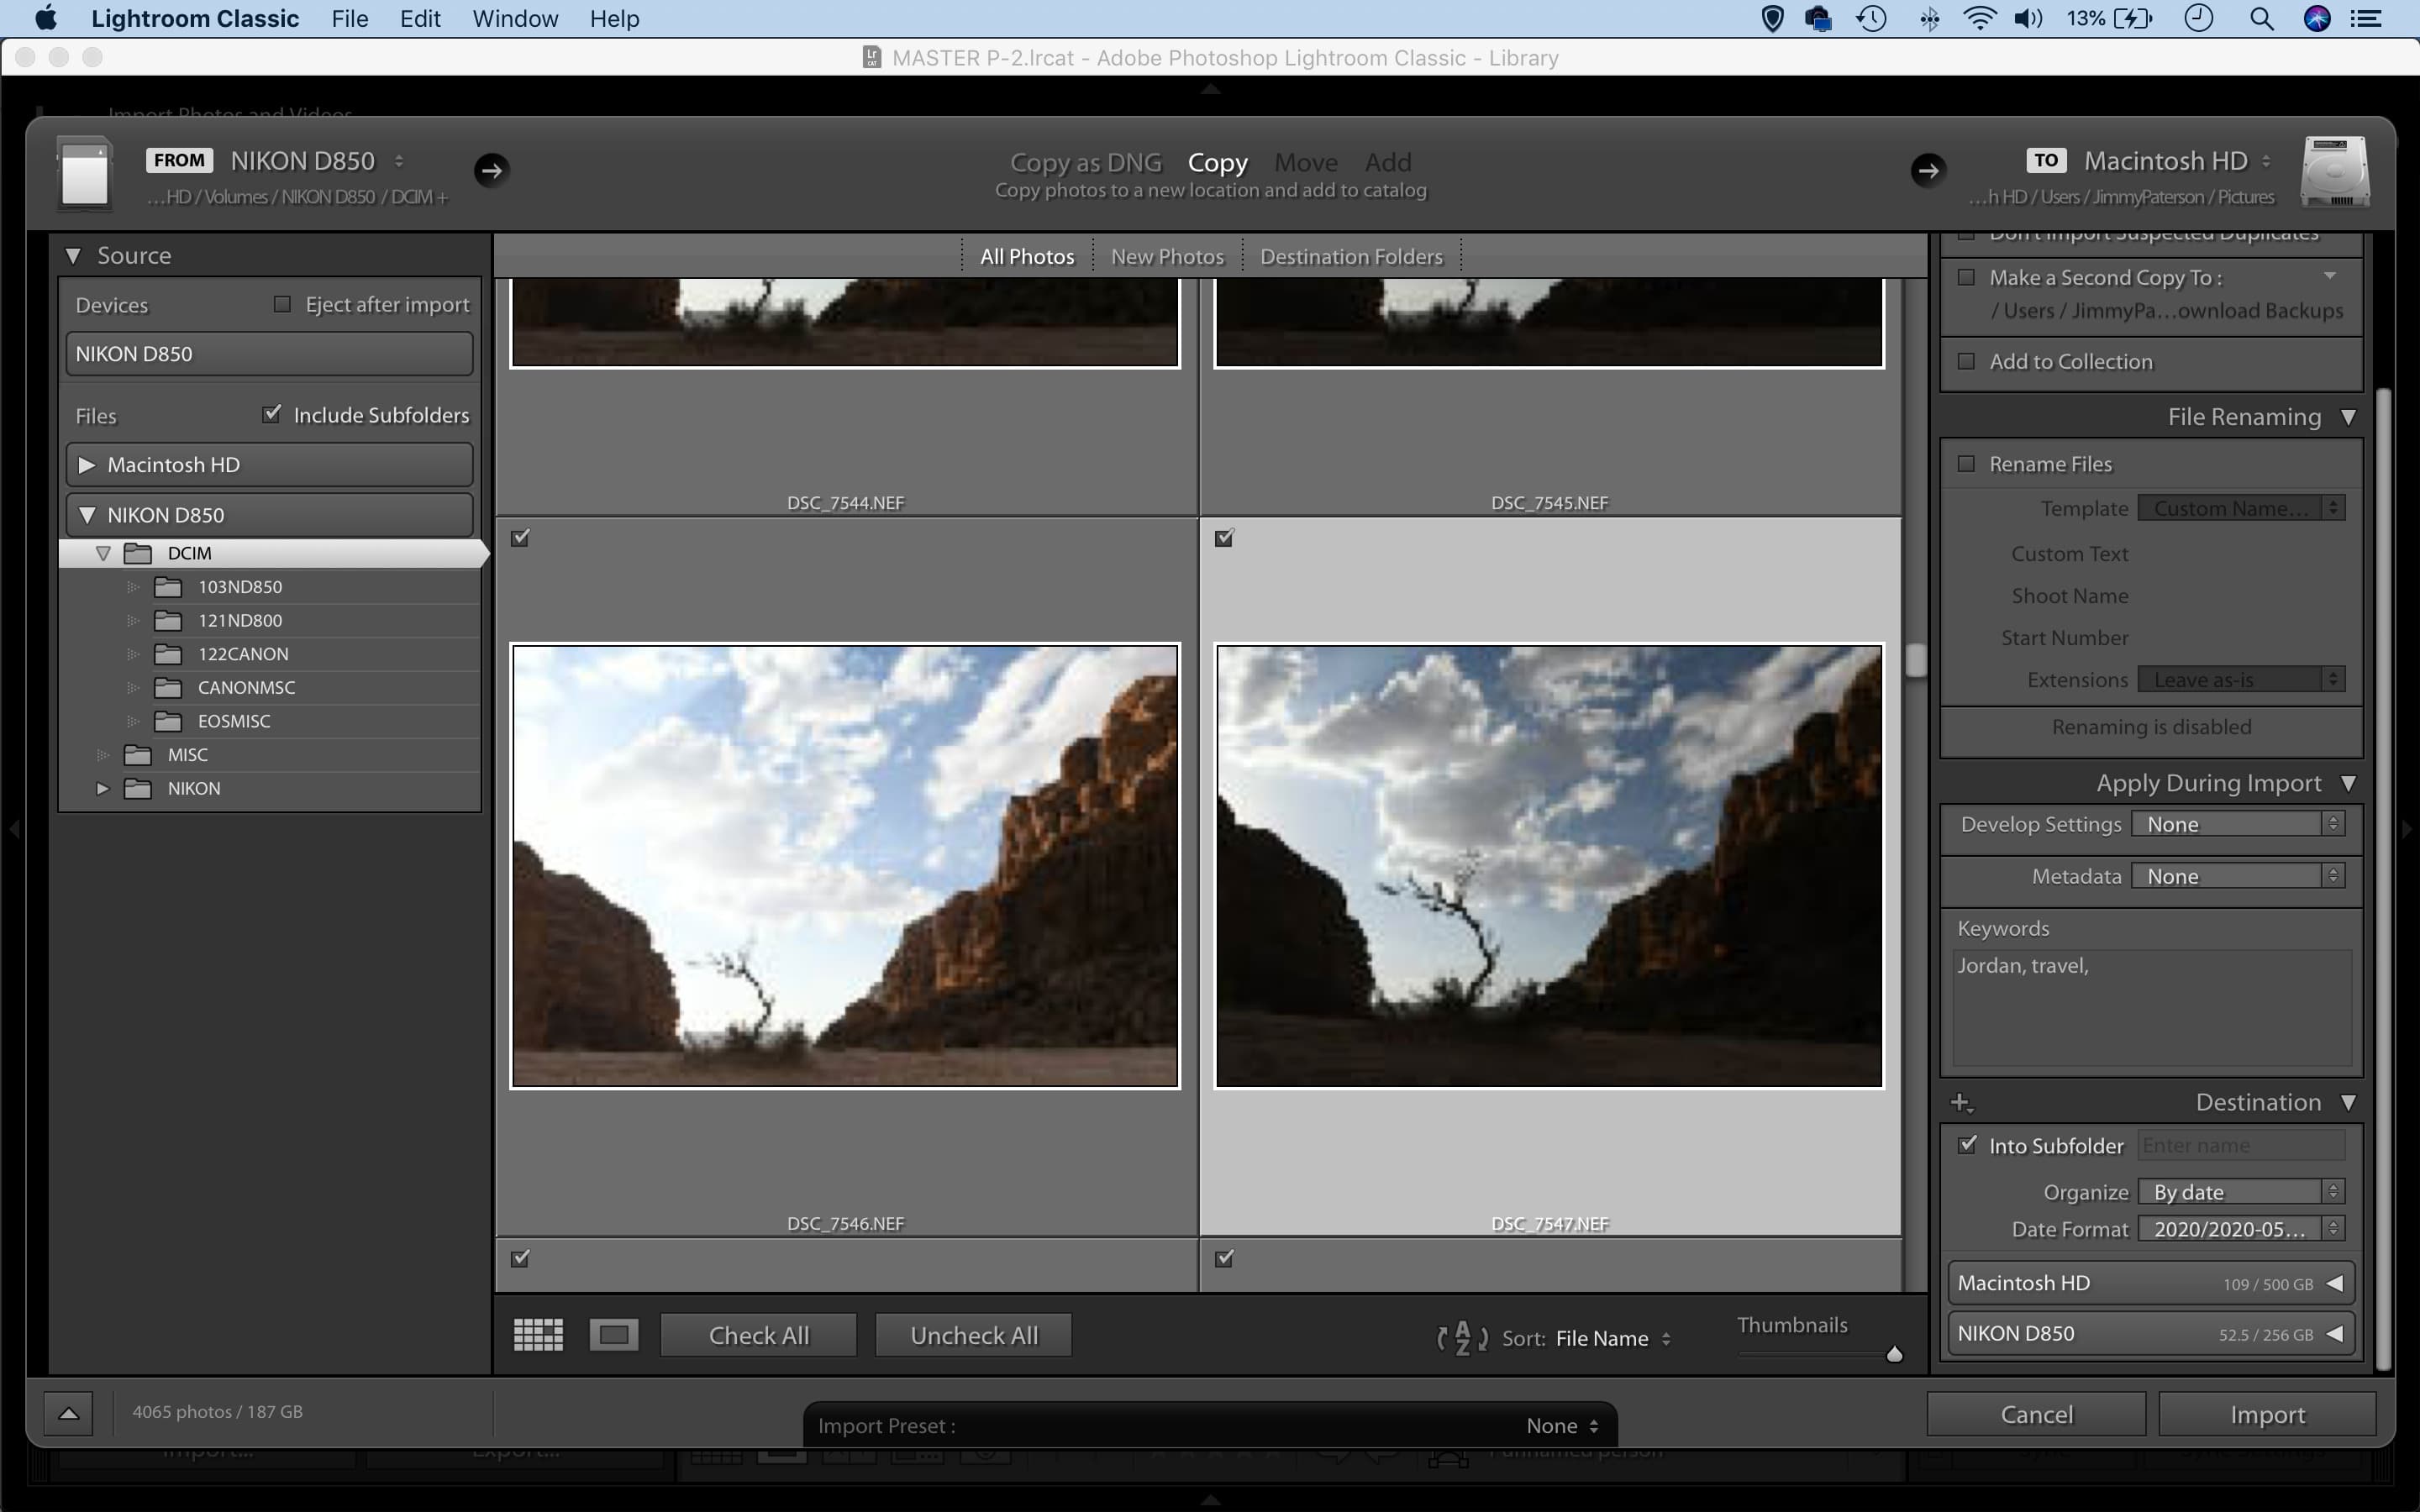
Lightroom’s Import dialog lets you add keywords and create collections while you import new images
This is good practice, as you can set up a folder on your drive and create a backup too if you like. When it comes to choosing a folder structure, a simple method is to organise by date. So choose ‘Copy’ at the top of the Lightroom Import dialog, select a destination then copy all the files from your card into a folder named with the date in the format YYYY-MM-DD and perhaps a brief description, for example ‘2020-03-12-garden-birds’. Then simply add a couple of keywords and import the files.
A simple Lightroom workflow
Open Lightroom Import
Take your memory card of fresh photos out of your camera and plug into your computer. You can set Lightroom up so that the Import dialog opens automatically when you insert a memory card – go to Preferences > General and check ‘Show Import Dialog when a memory card is detected’.
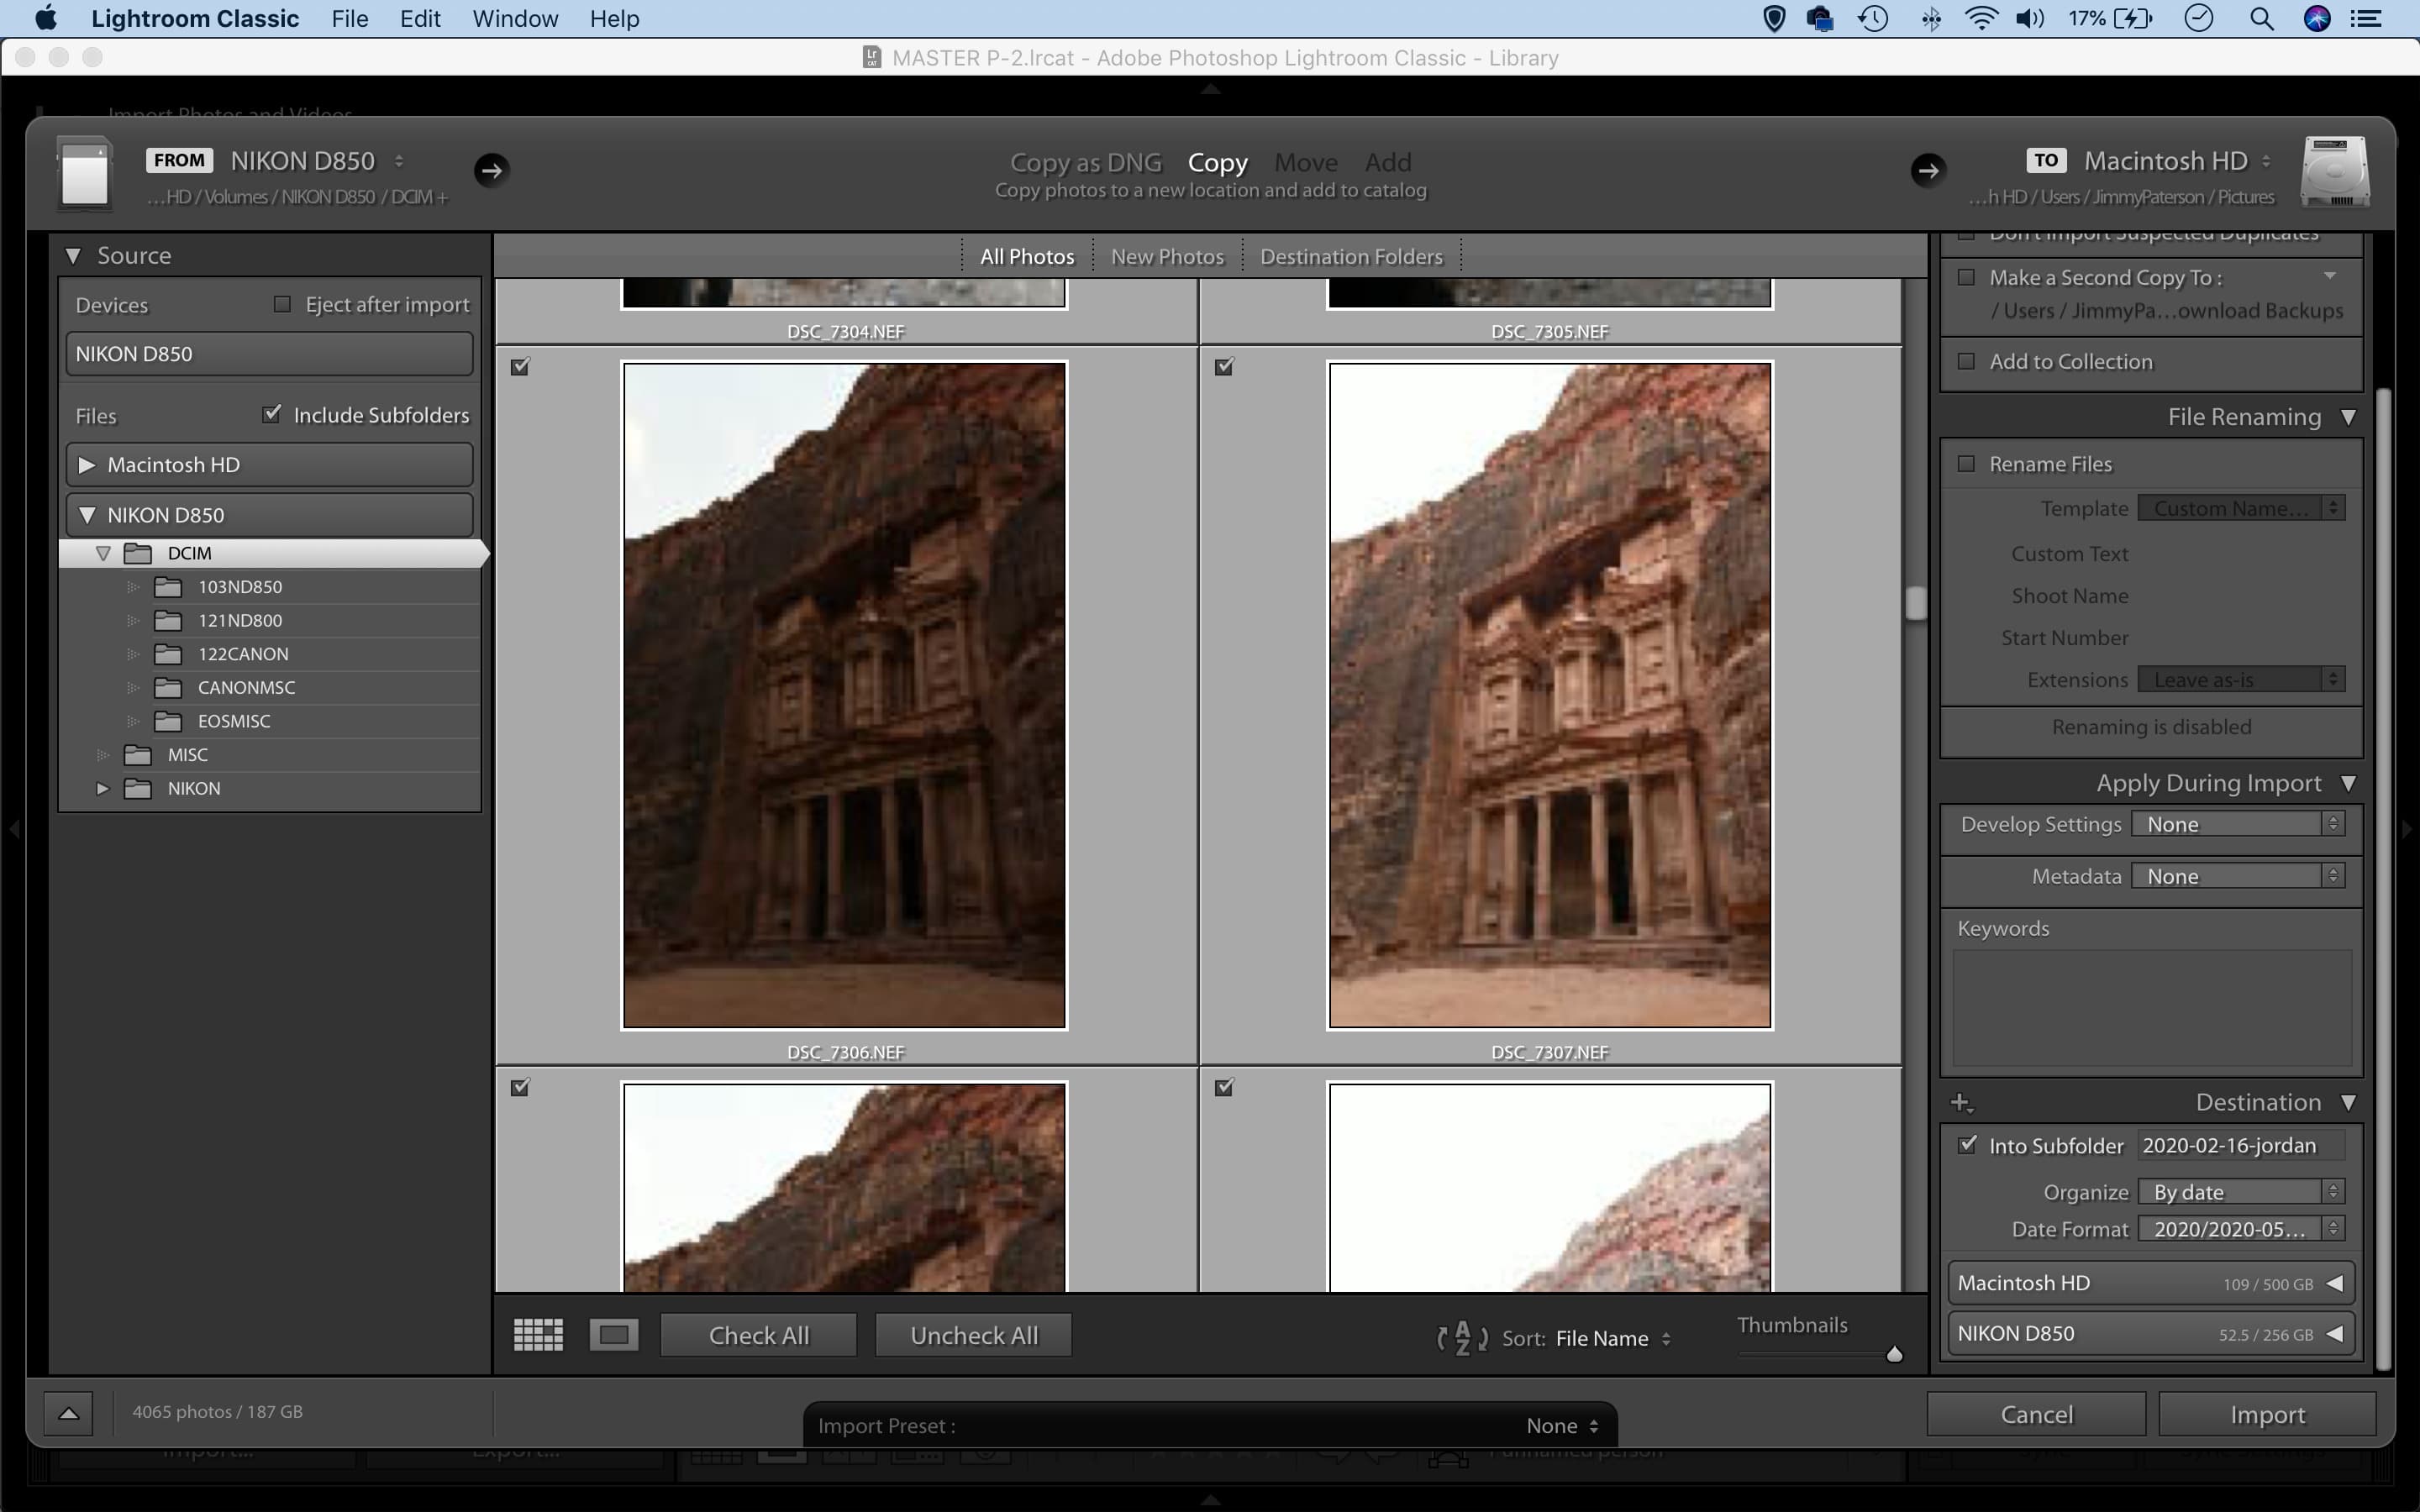
Create a folder
Choose ‘Copy’ in the options at the top then create a folder in the ‘Destination’ on the right. Check ‘Into Subfolder and give it a suitable name. A simple folder structure could be to organise photos into separate years, then locations. If you like you can use ‘Make a second copy to’ in the File Handling options to simultaneously back up to another drive.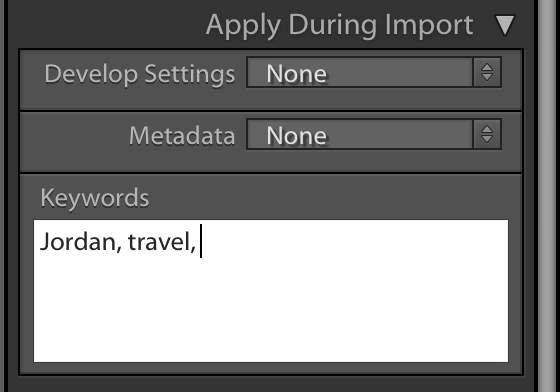
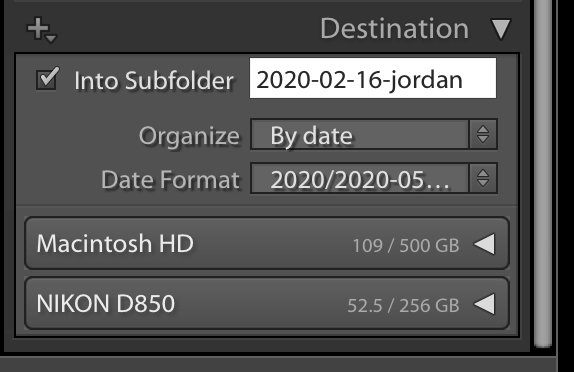
Add keywords
Select your images with Cmd/Ctrl+A. Add keywords to your set of images using the Apply During Import panel within the Import dialog. Start typing a word a Lightroom will autofill the rest, which helps to speed things up. Add any keywords that might be relevant. You can always supplement with more keywords later in the Library module.
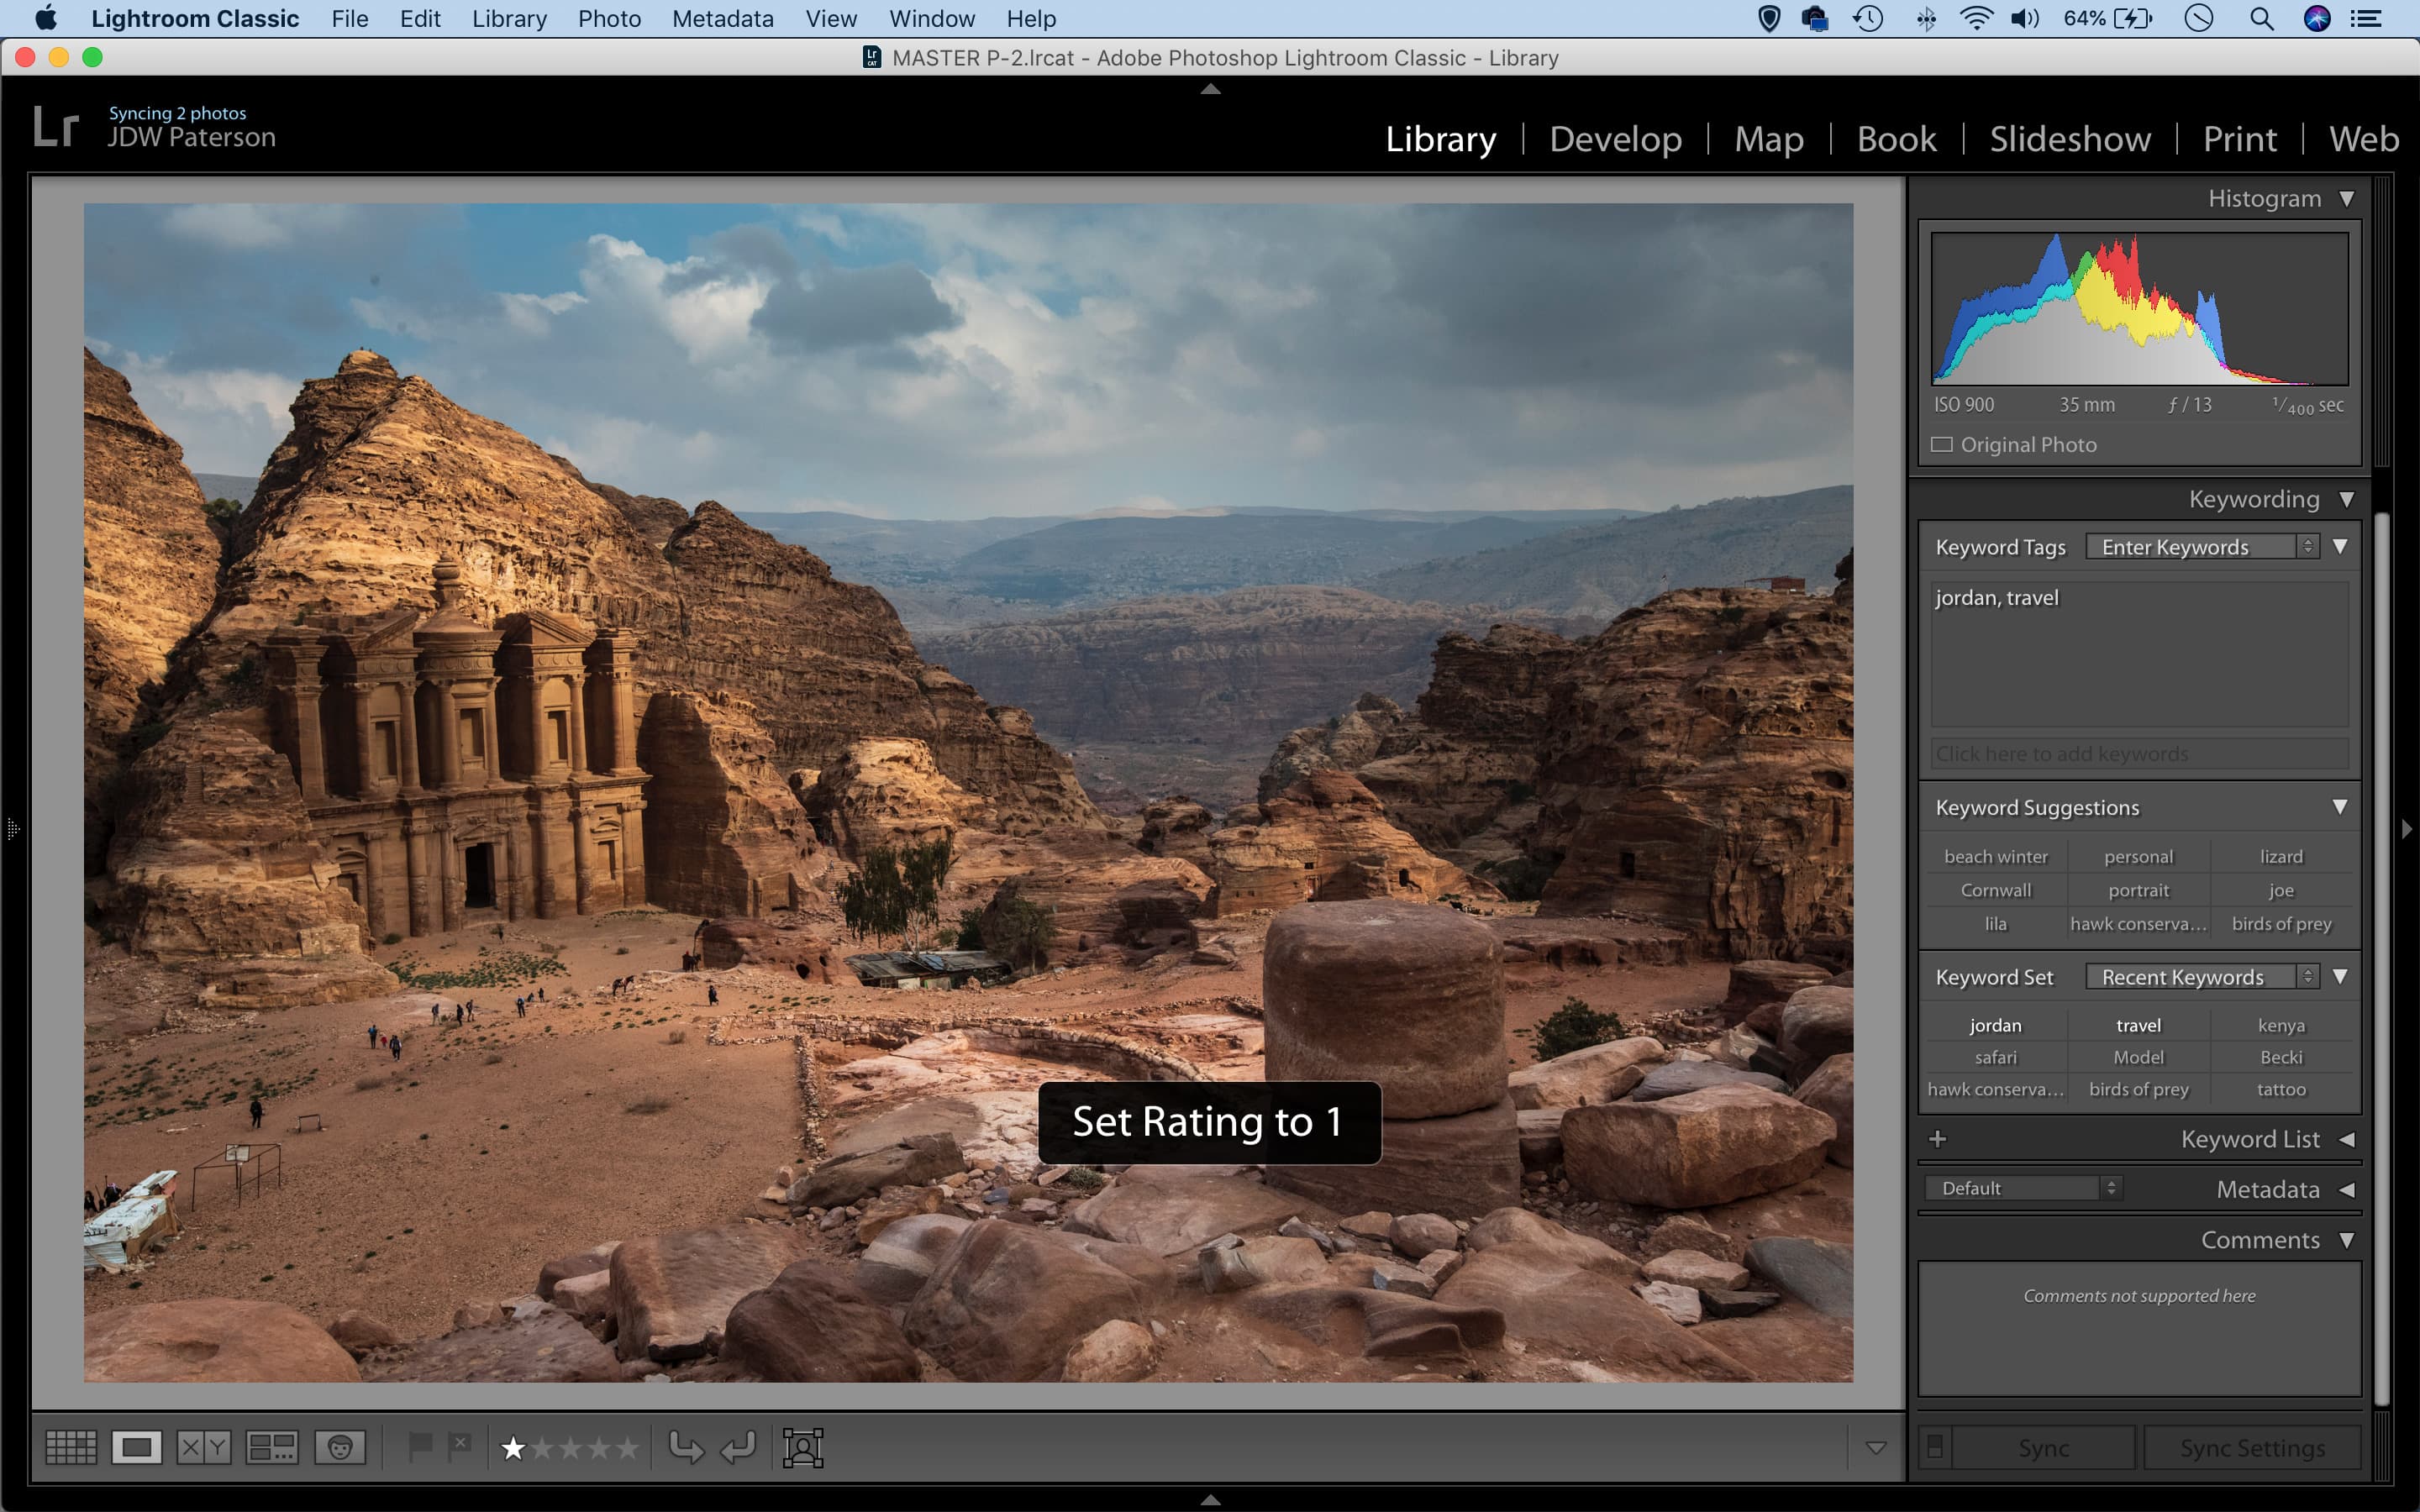
Rate and filter
Once imported the next step is to look through your set of photos and choose your favourites. In the Lightroom Library, use G for a grid view and E for Loupe view, and cycle through images with the arrow keys. Add a star rating (1-5) or Pick (P) then, once done, click Attribute in the Library Filter bar at the top (in grid view) to filter out the favourites.
Create a collection
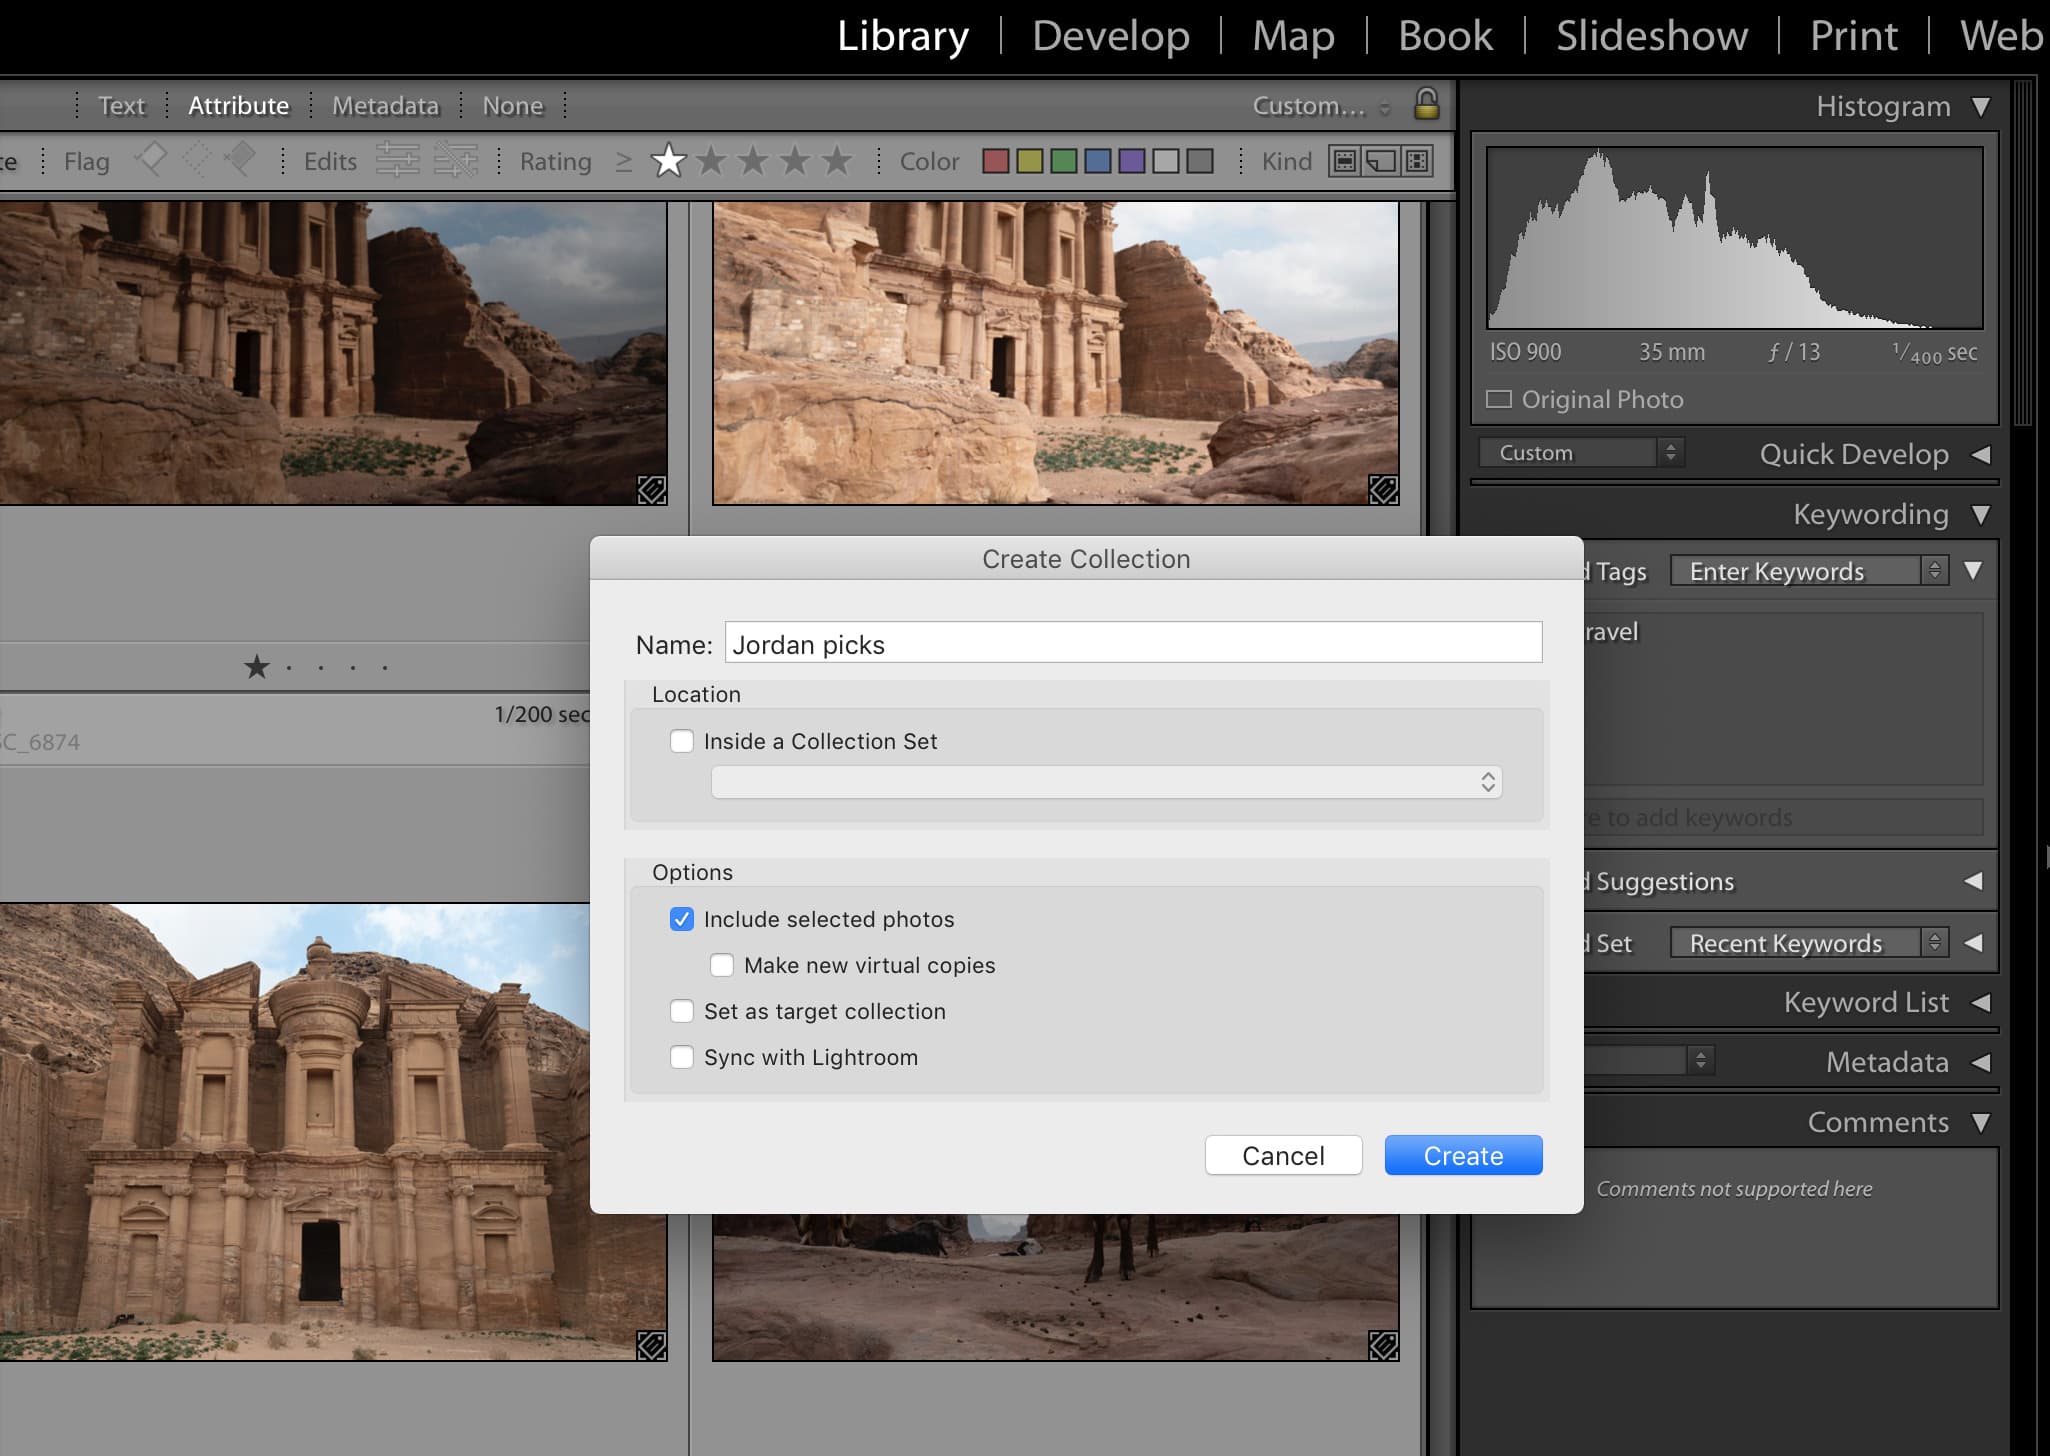
Press Cmd/Ctrl+A to select all images then go to the Collections Panel and click the plus icon to make a Collection. Choose a suitable name and a collection set to house it in, then ensure ‘include selected photos’ is checked and create the collection. You can add photos to other collections by dragging them across. A photo can be housed in multiple collections ar once.
Edit and enhance
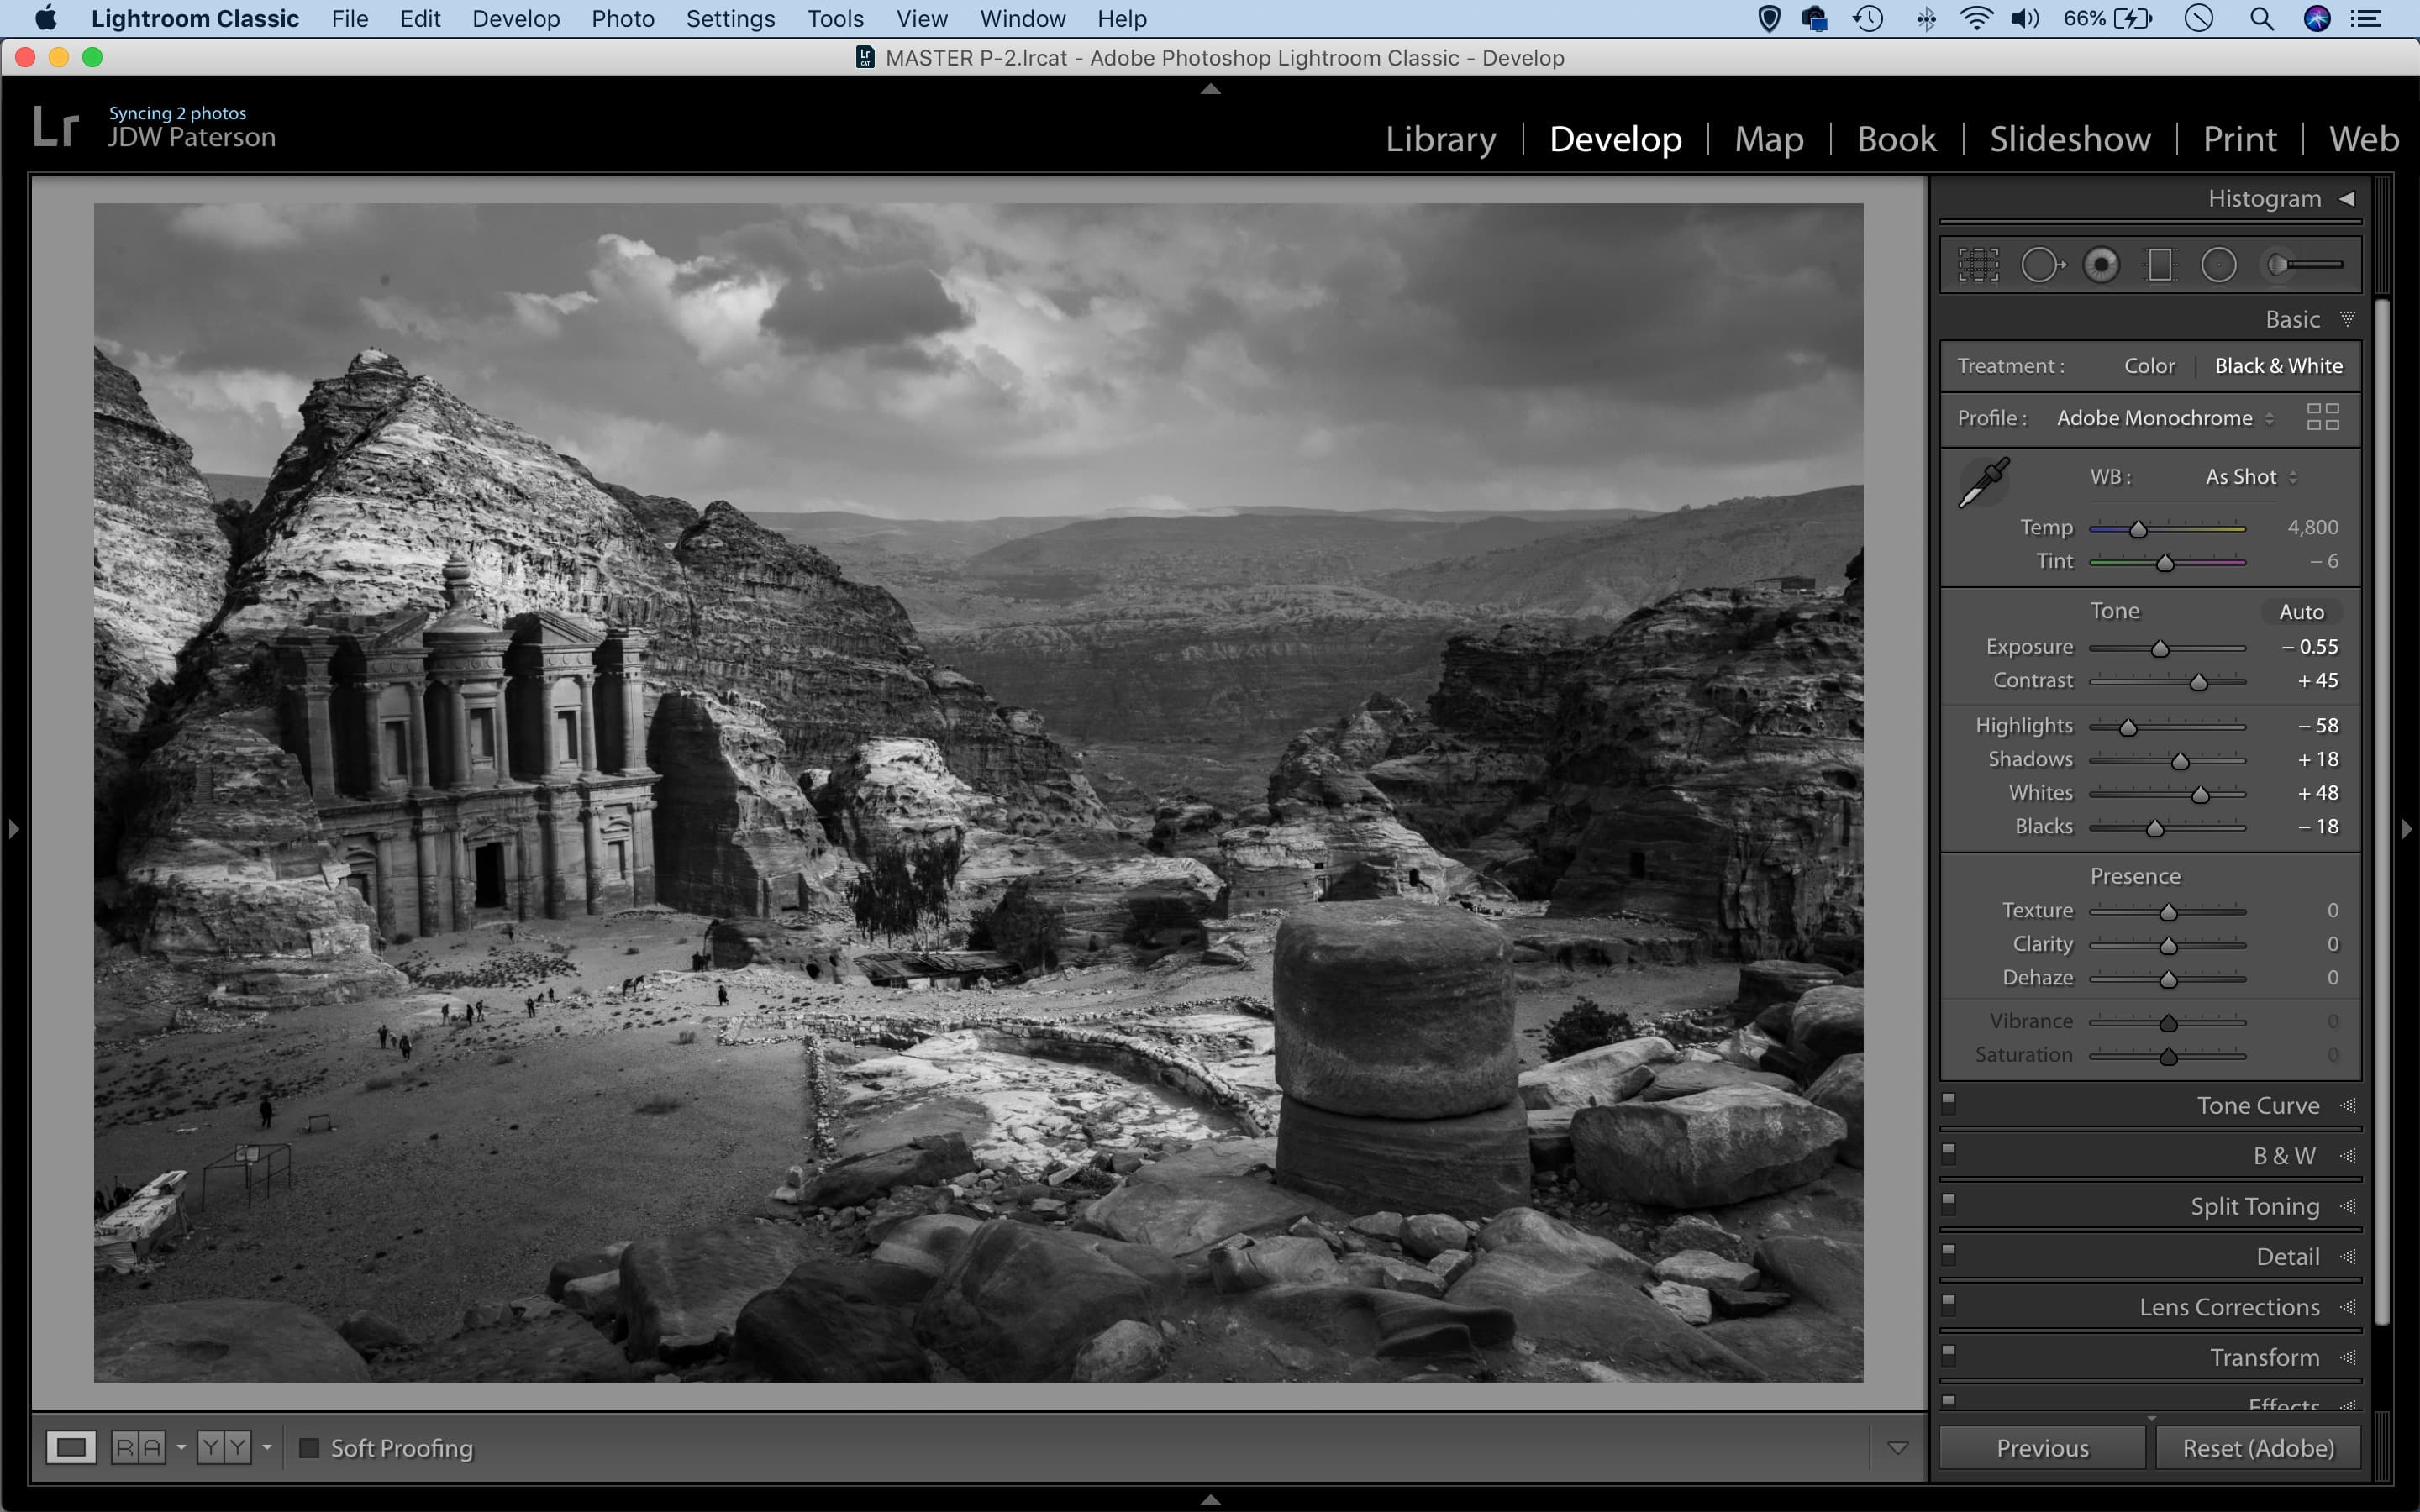
Now you have a collection for your favourite images from the shoot, you may never need to go back to the original folder. Instead, use the Collection to take your images through Lightroom’s other modules (the Collections panel can be found in them all). Start with the Develop Module and begin enhancing your photos.
Taking collections further
A Smart Collection lets you automatically filter and bring together your photos based on specific attributes or metadata. So you can, for example, use a Smart Collection to gather all of your photos with a five star rating, or all photos with the keyword Landscape that were shot in 2019. You can also direct Smart Collections to work only on specific folders, so you can quickly filter out photos from a larger set based on all kinds of metadata. To make a smart collection, click the plus in the Collections Panel, then simply use the options to add one parameter after another. Another helpful feature is target collections. Either enable the target feature when creating the collection, or by right-clicking an existing collection. Once done, you can then quickly add images to the target collection simply by hitting B.
My library is a mess. Should I start over?
If you’ve been struggling for years with a garbled mess of old hard drives, incomprehensible folder names, and crippling copies upon copies, then the task of organising your shambolic photo library can seem overwhelming. But one of the greatest strengths of Lightroom is how you can structure your photo library independently of your operating system. Instead of reorganising your messy folders you can import your maelstrom of photos into Lightroom then restructure them using Collection Sets and Collections. These are similar to a folder structure but aren’t tied down to specific drive locations. Like a sort of ghost operating system, Collections and Collection Sets can be used to organise your photos independently of your traditional folder structure. As such, it gives you a chance at a fresh start without having to completely start over.
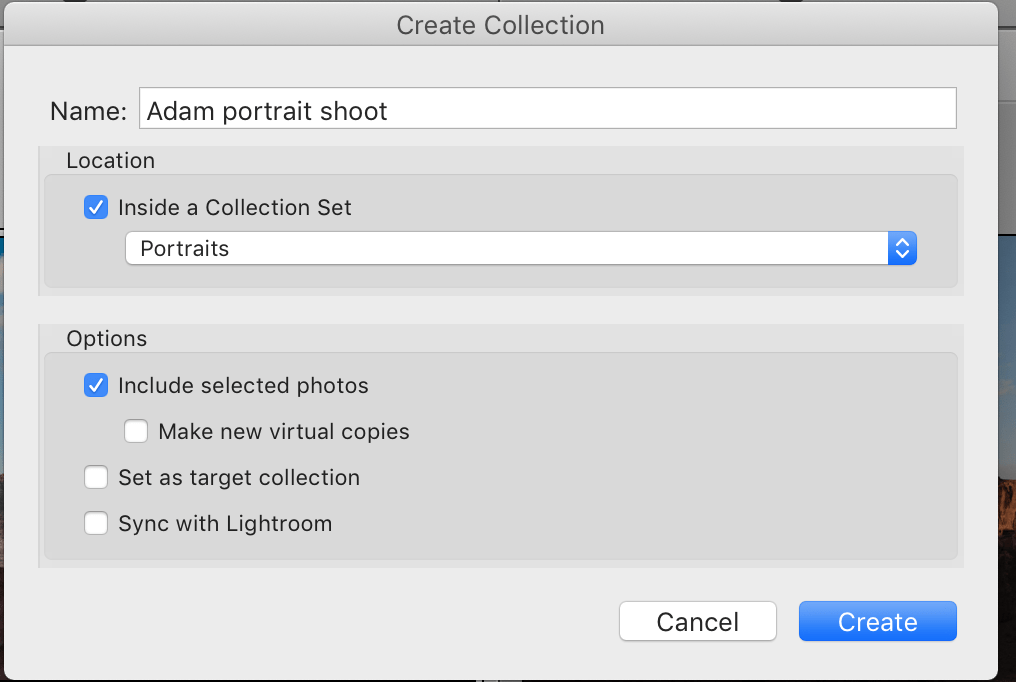
Simply import your images one folder at a time, keywording them on import as you go. Then create Collection Sets in the Library Panel to split your photos into categories – for example Travel, Portraits, Landscapes and so on. Next create Collections within these sets for certain locations or people, drag images to the collections and you’ll have the beginnings of an organised photo library without the hassle of copying and pasting vast amounts of files from one folder to another. What’s more, if you choose to rearrange the images differently later on, you can set up a new structure with relative ease.
Filtering your favourites
After importing a fresh folder of photos we get to one of the most gratifying stages in image-editing – the process of picking our favourite shots. We can single out our favourites with a simple rating system in the Library Module. There are a couple of different rating options. Either add a star rating from 1-5 using the number keys on your keyboard, or flag (P) and unflag (U) images. If you like you can use colour ratings too (6 = red, 7 = yellow, 8 = green, 9 = blue). Whichever method of rating you choose, the important thing is to have a system that works for you. For example, you could give 1 star to any image with potential, 2 to panoramas and HDR sets, 3 to those that you want to work up, 4 to your favourites, 5 to your absolute best work.
Once done, you can filter out your favourites using the Library filter that runs along the top of the grid view. Keep in mind that ratings can also be used in combination with Smart Collections. So you could perhaps set up a Smart Collection named ‘Portrait Portfolio’ to automatically collate all your images that have the keyword ‘portraits’ along with a five star rating.
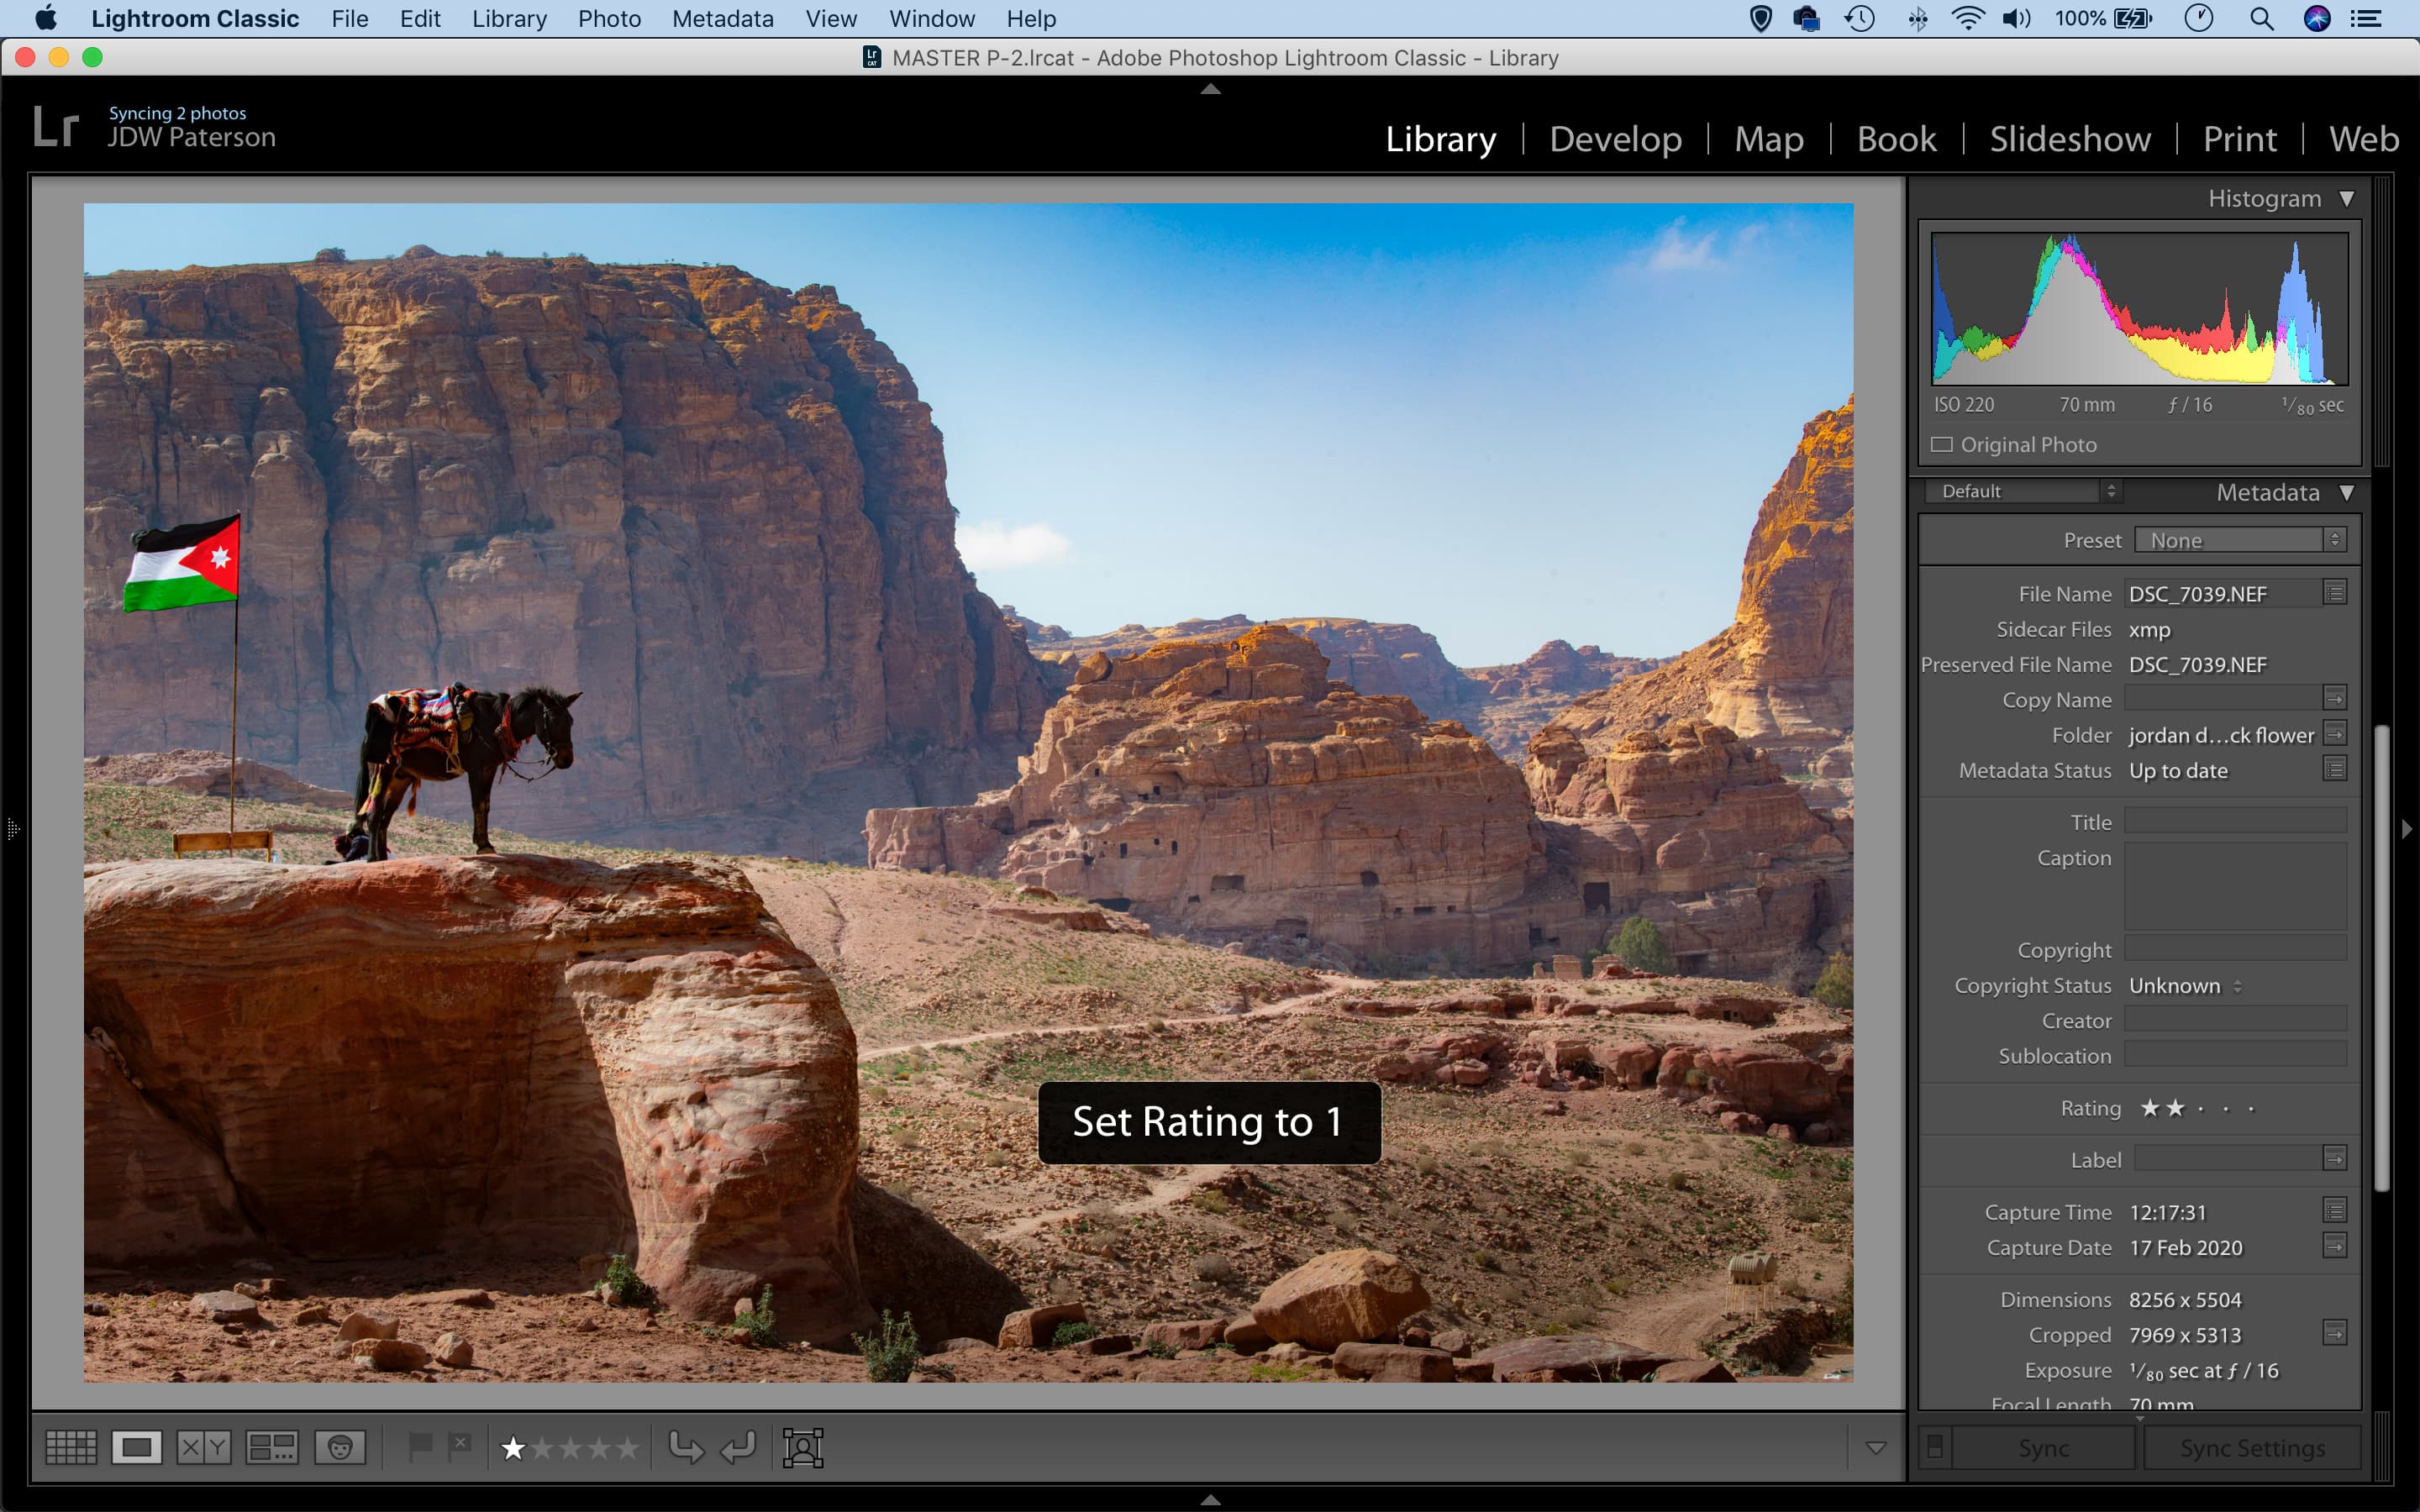
Implement a rating system that works for you, there are several rating options to choose from
Folders vs Collections
If you’re used to a traditional file-and-folder-based structure for your images then library organisation with Lightroom requires a slight shift in mindset. Lightroom is capable of sorting and organising folders and files just like your operating system, but with Collections it also offers an alternative that, on the face of it, looks similar to a folder structure. But Collections offer an advantage. Think of collections like music playlists for your photos. They let you collect any group of images together without affecting file and folder locations on your drive. What’s more, unlike a normal folder an image can exist in multiple collections at once without creating several storage-hogging copies of the file. As such, after rating and filtering your favourite shots from a folder it’s a good idea to create a collection for them. From this point, you’ll only need to go back to the original folder if you ever want to look through your lesser shots, which rarely happens. So with a collection you can single out and sort the pictures that matter most then forget about the rest. In combination with keywords and ratings, collections let you reshape your image library into any structure you like, or several different structures at once.
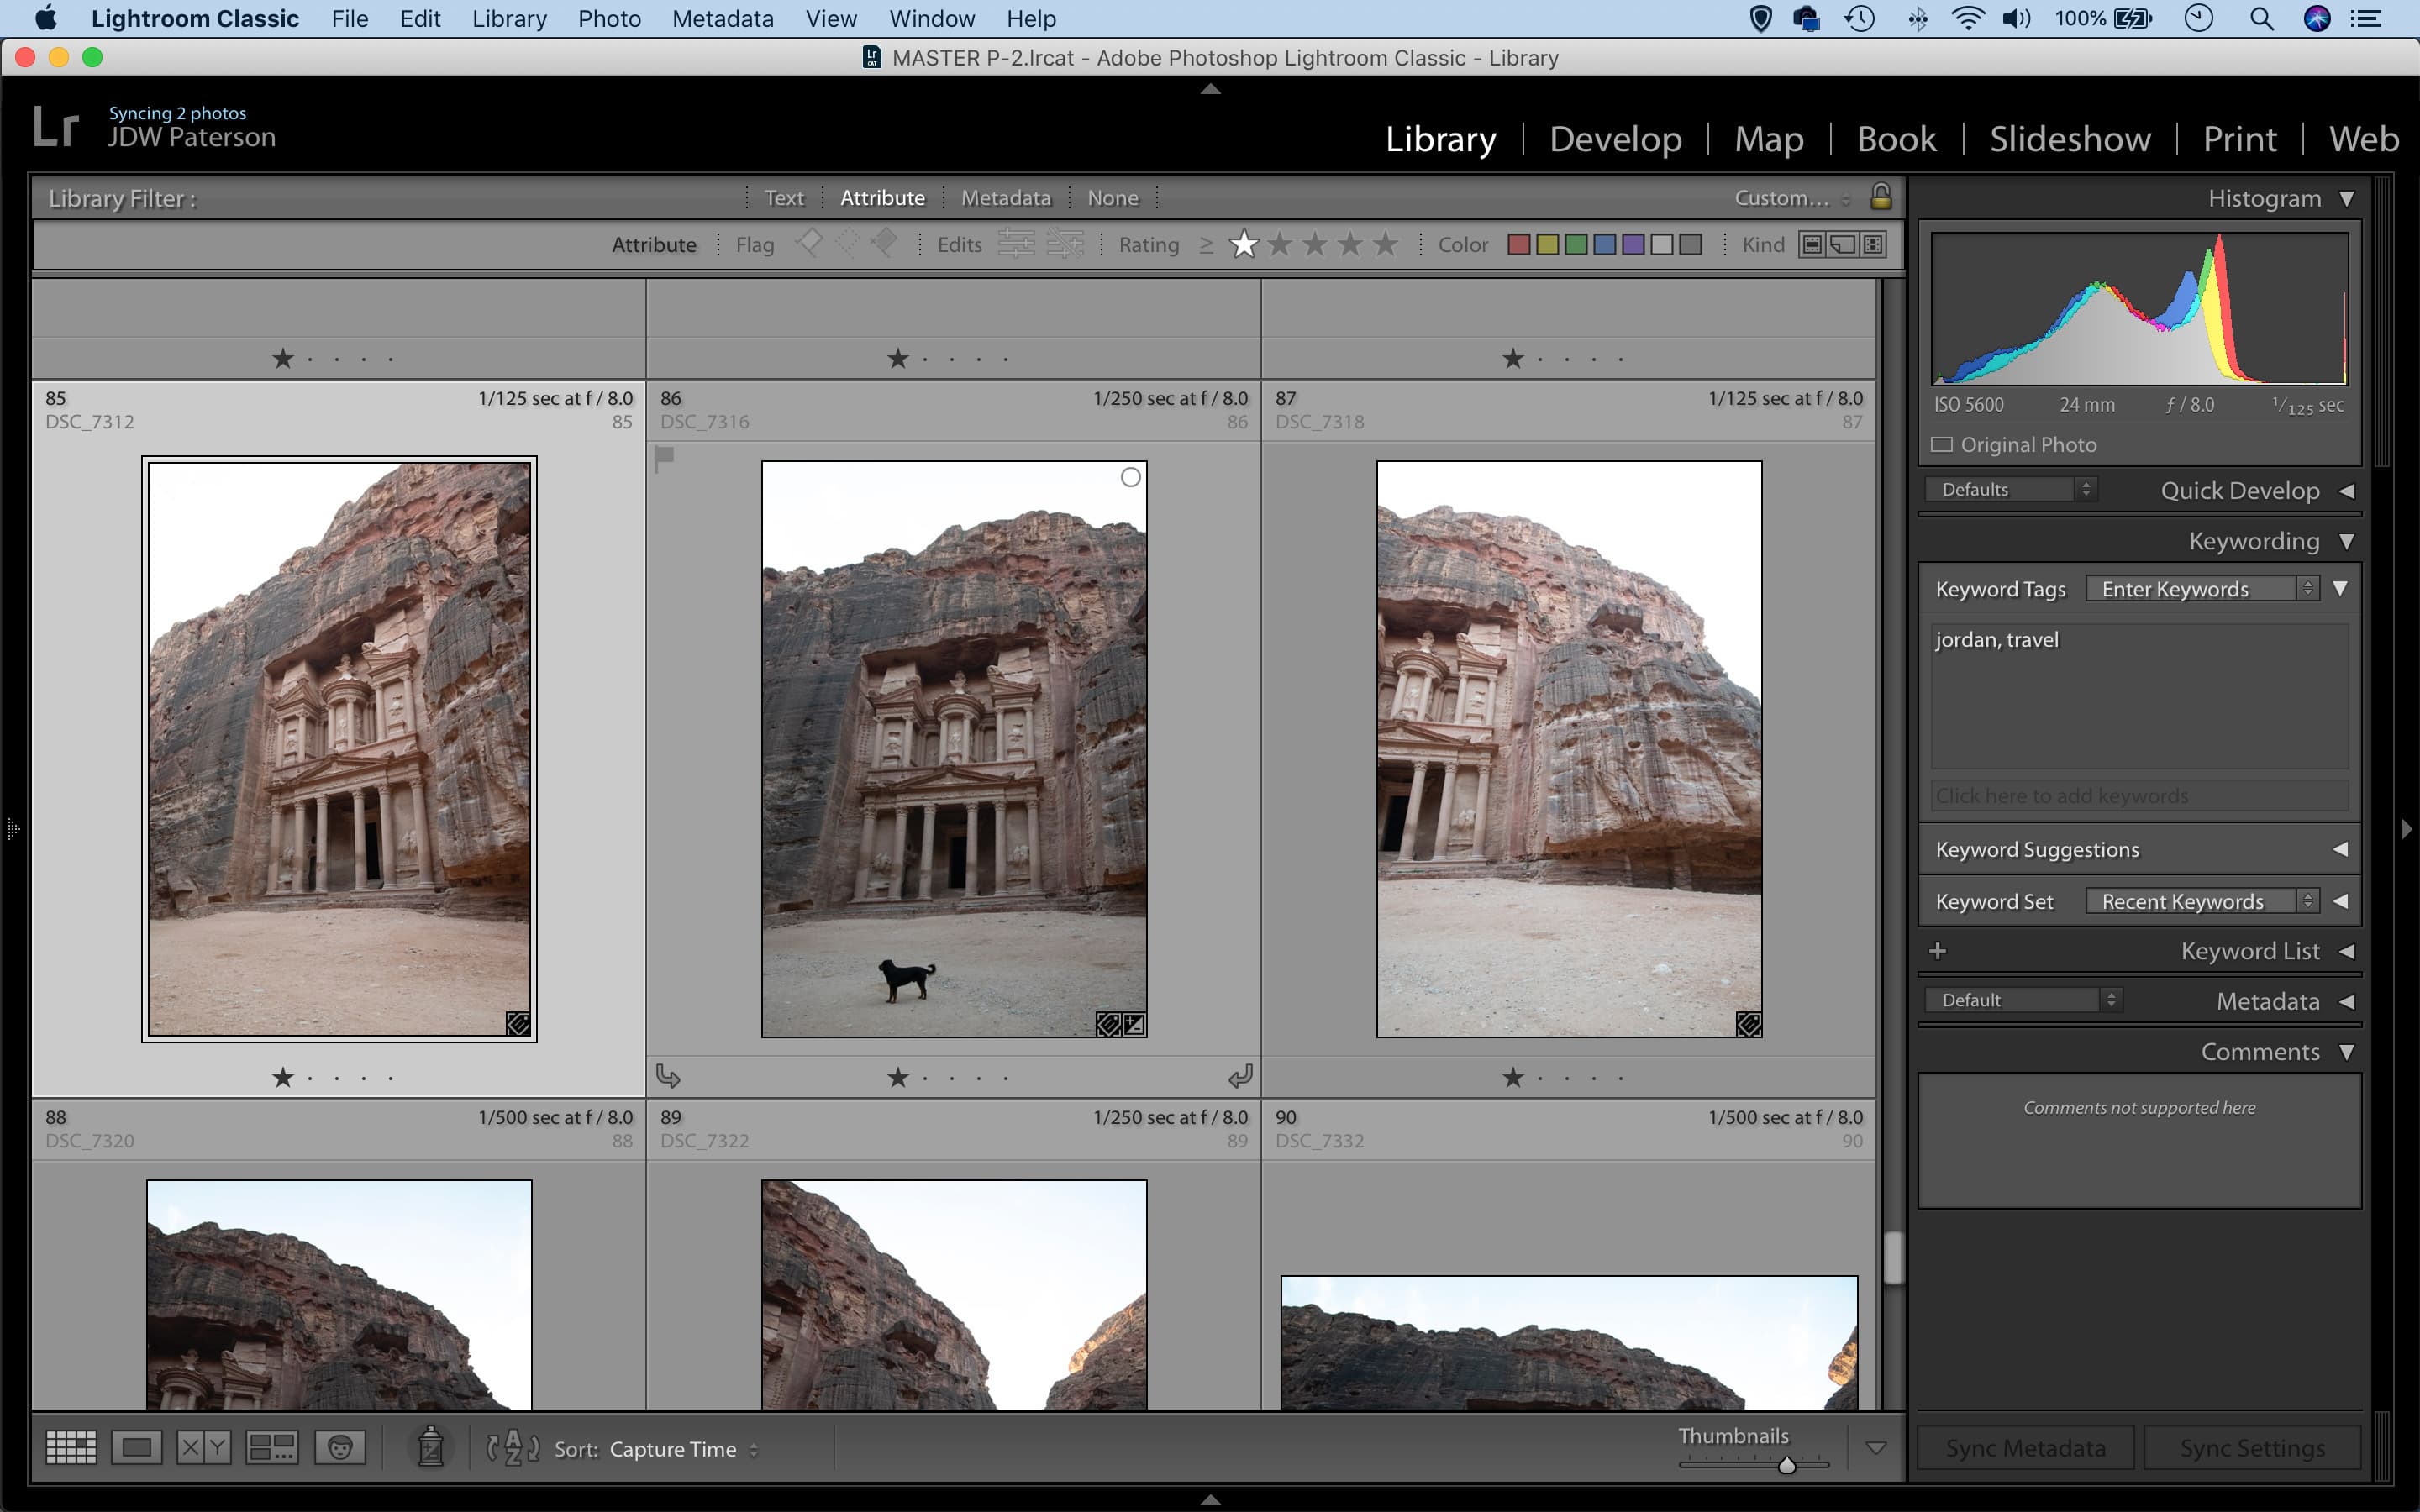
Ratings can also be used in combination with Smart Collections, so you can collate types of images
Backing up and backups
Storage can be a pain in the bum, but it is an essential part of photography. At some point your computer will inevitably fill up, and you’ll need to copy your images elsewhere. Thankfully, external hard drives are getting larger and cheaper these days. But sometimes hard drives fail so it’s important to devise a storage workflow, then stick to it. We should back up our images in at least two and ideally three places so nothing is ever lost. A simple method is to buy two hard drives, then regularly back up one to the other. This can get cumbersome, so you might want to invest in a DAS (Direct Attached Storage) or NAS (Network Attached Storage) system. These can hold a mighty amount of data spread over several inexpensive drives. The drives can be mirrored so that if one fails your photos will be safe on another.
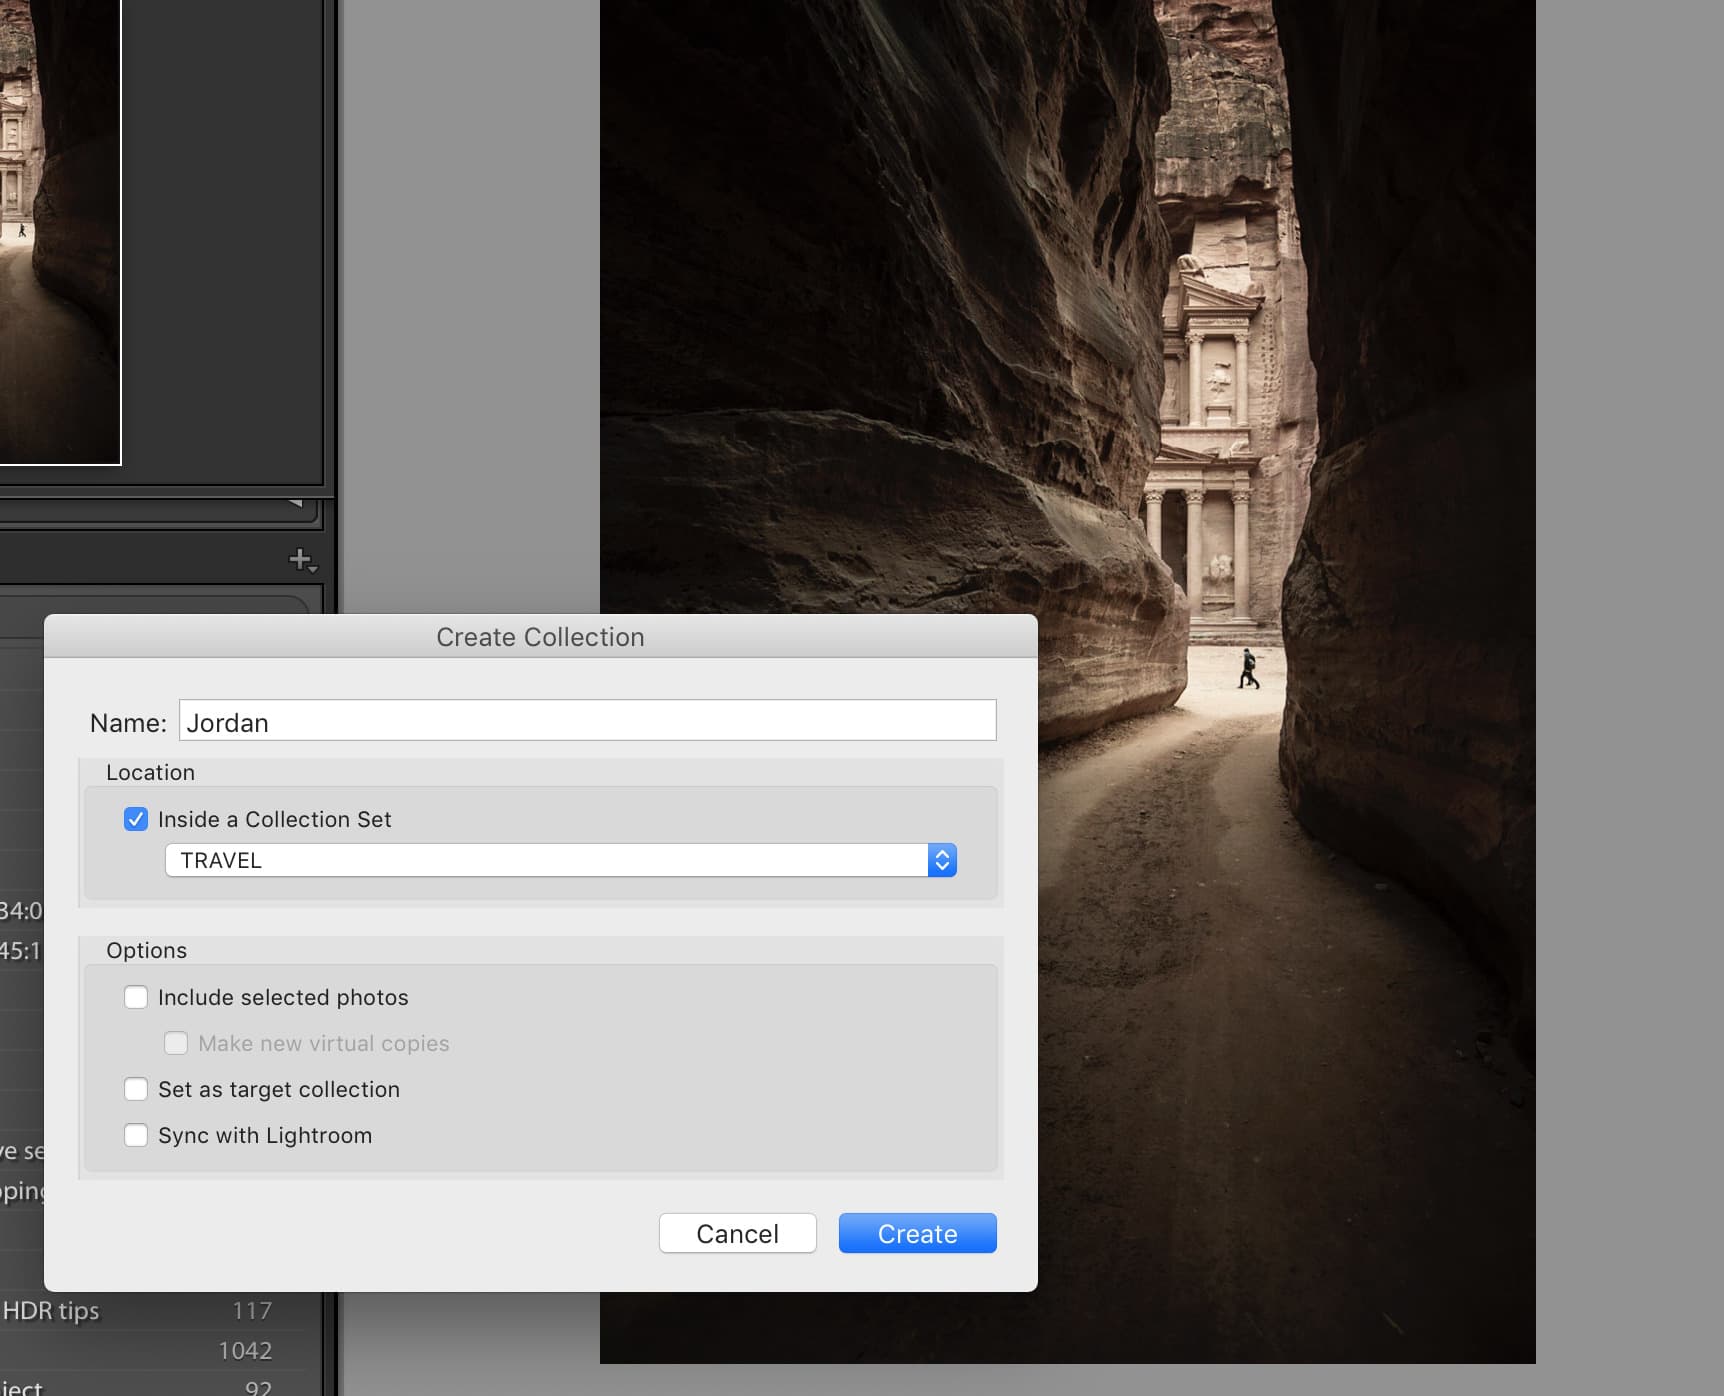
After rating and filtering your shots, it’s worth creating a collection for them to start building a clear folder structure
It’s also good practice to keep a set of your data in a separate location in case of fire, theft or the like. This could be another external hard drive kept off-site, or alternatively you could upload your images to an online cloud service. Options like Backblaze and Crashplan offer vast storage for a monthly fee. It’s worth exploring but it does mean you’ll be uploading large amounts of data so you certainly need a fast connection.
Ten quick Library tips
- Enable Lightroom’s Face Detection tool at the bottom of the Library Module and it will automatically detect and group all photos of an individual for you to tag.
- When first looking through and rating images, tap L to turn out the lights and Tab to collapse panels for a cleaner view that minimises screen clutter.
- If you need to move images around your drive then do so using the Folders panel so that Lightroom keeps track of your files.
- If Library organisation gets too dull, set up a collection called Temporary, then drop unsorted photos into it to be tackled later when you can muster the willpower.
- Some people love using star ratings, but with a choice of 1-5 it can make things overly complicated. The Pick (P) and unpick (U) rating method keeps things simpler.
- When importing your images into Lightroom you can add a copyright metadata preset using the ‘Apply During Import’ panel. Choose Metadata > Edit Presets to set it up.
- If you use Lightroom CC (the cloud-based editor) then you can search your photo library using clever AI that recognises image content – it’s as if Lightroom keywords your images for you.
- You can right-click on any folder or image in Lightroom and choose Show in Finder (Mac) or Show in Explorer (Windows) to view the photos in your operating system folders.
- Free up space by deleting dud photos – hit X to reject the files while sorting and rating, then use Photo > Delete rejected photos or hit Cmd/Ctrl+Backspace.
- To speed up your ratings workflow turn on Photo > Auto-Advance and Lightroom will automatically jump to the next image when you add a rating.
Need more storage? Have a look at our guide to the best drives for backing up your data on the go!
If you’re looking for a Lightroom alternative, you’ll find free photo editing software options here.

