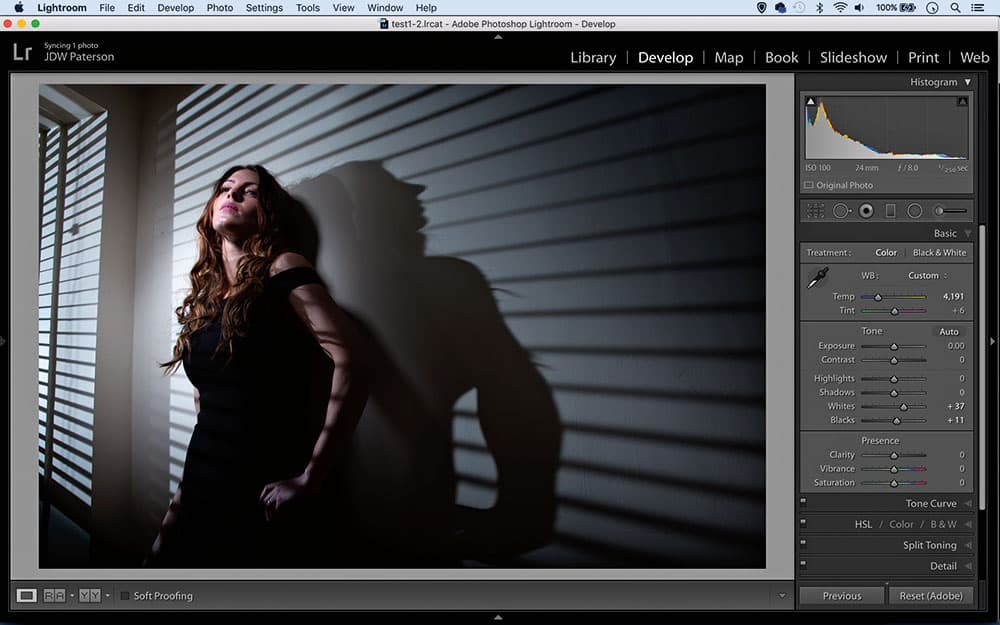
1 Auto-fix whites and blacks
Shift-clicking any tonal setting’s name within the Develop Module’s Basic Panel will apply an auto- correction for that specific setting. So, for example, you can auto- correct Temperature and Tint independently of one another, or auto-set the whites and blacks to ensure a tonally rich image.
2 Speed up sorting
This little-known gem is found under Photo>Auto-Advance. When sorting images in the Library Module, upon setting a rating – using pick (P), unpick (U) or rate (1-5) – Lightroom will advance to the next image, rather than waiting for you to use the arrow keys to move on. Caps-Lock also enables/disables the feature.
3 Lose the lag
Image lag can be a problem. If you find that Lightroom takes a few seconds to bring up a full-screen image the issue might be with your display, as it takes extra processing power to draw to a high-resolution screen. Try reducing the window size, or set your view to 1:2 or 1:3 instead.
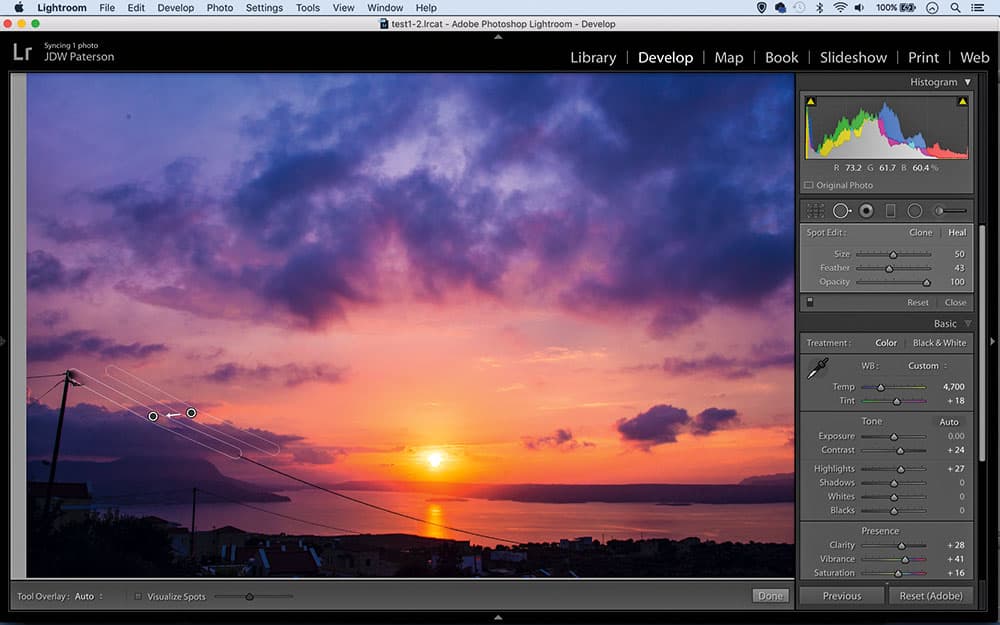
You can paint with the Spot Removal tool to remove overhead wires
4 Straight-line healing
The Spot Removal tool lets you remove marks and spots, and you can also paint with it to clear up scratches or lines. If you click on one end of a line, hold Shift and click on the other end, you can heal the whole line in one go – great for removing overhead wires in landscapes. The same technique works with the Adjustment Brush too.
5 Increase your cache size
If you notice a fall off in running speed, it might be because Lightroom’s cache size is too small. The cache stores data that can speed up initial image processing. To increase the size of the cache go to Preferences>File Handling and set it to 20GB or more – but make sure you have the disk space.
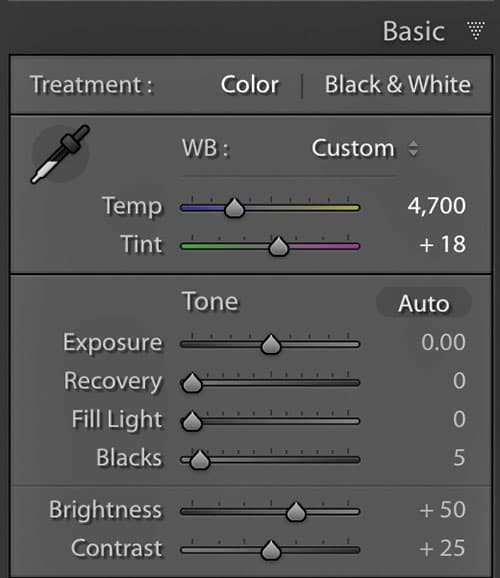
6 Use older sliders
The Process Version setting within the Develop Module’s Camera Calibration panel lets you revert back to older Lightroom controls. If you set it to ‘2010’ the Basic Panel changes to the older ‘Fill Light’ and ‘Recovery’ sliders which are far more potent than the Shadows and Highlights sliders that replaced them.
7 Get smart
Underused and highly useful, you can create Smart Collections by clicking the Collection Panel’s plus icon. They let you search and group photos based on the metadata held within. For example, you could collect together all photos taken within a date range, or with a high ISO, or rated five stars.
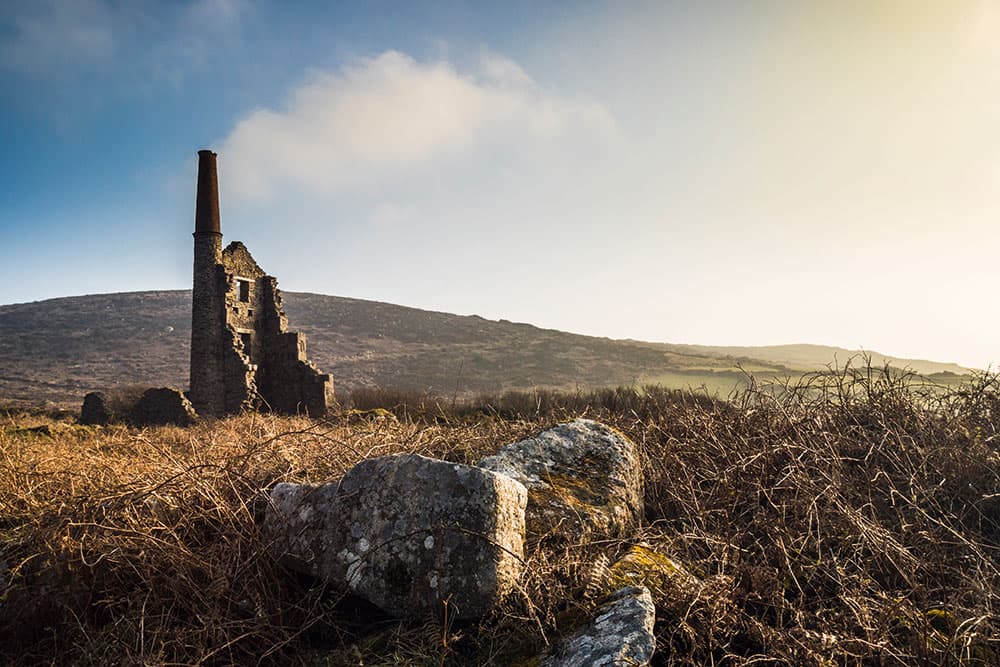
Increase Shadows in the Graduated Filter tool
8 Clever grads
When loaded with negative exposure, the Graduated Filter tool can work wonders over a sky. However, any objects that jut into the sky will also be darkened. To fix this simply increase Shadows in the tools tonal settings. This will counteract the darkening effect over the land but leave the sky (mainly highlights) unaffected.
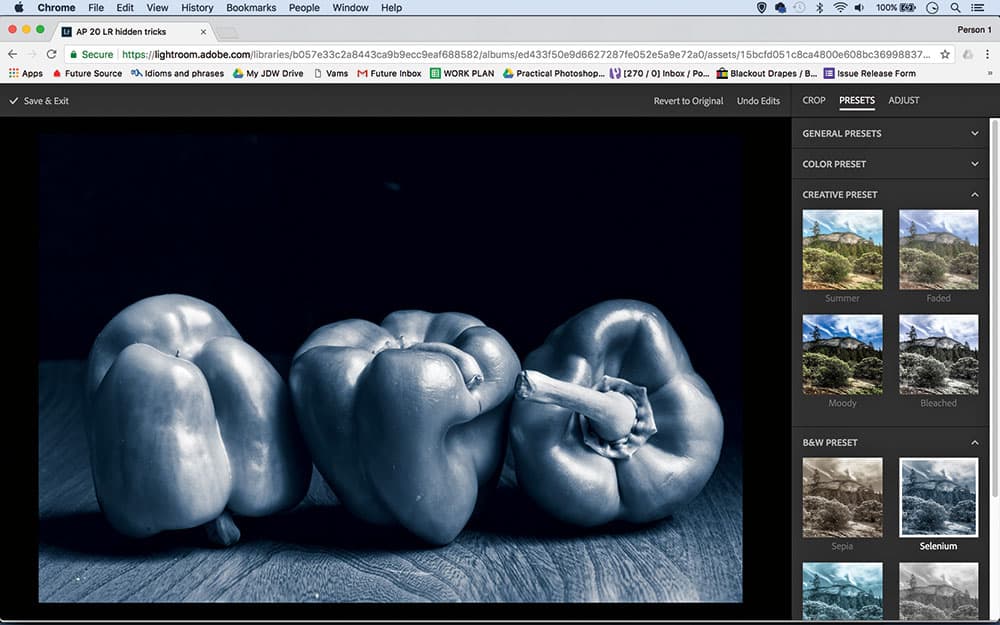
Lightroom CC users can edit online by signing in to their account
9 Edit on the web
Lightroom CC users can edit photos from any computer with an internet connection. First, you need to sync the photos in with your usual Lightroom desktop (check the sync box next to any Collection to do so). Then go to lightroom.adobe.com and sign in to your CC account to start editing.
10 Tone your videos
The Develop Module doesn’t support video, but here’s a workaround. Import your video, go to the Library Module and use the Capture Frame button below the video clip. Take this frame into the Develop Module and tone it, then save a preset. Then use the Quick Develop panel in the Library Module to apply the same preset to the video.

The Radial Filter is better for vignettes than the Post Crop vignette tool
11 Better vignettes
The Radial Filter is better for vignettes than the ‘Post Crop vignette’ tool, as it gives you more control over the darkening of corners. Rather than trying to position the circular area by hand, simply hold Cmd/Ctrl and double-click over the image to snap the circle to the edges of the frame.
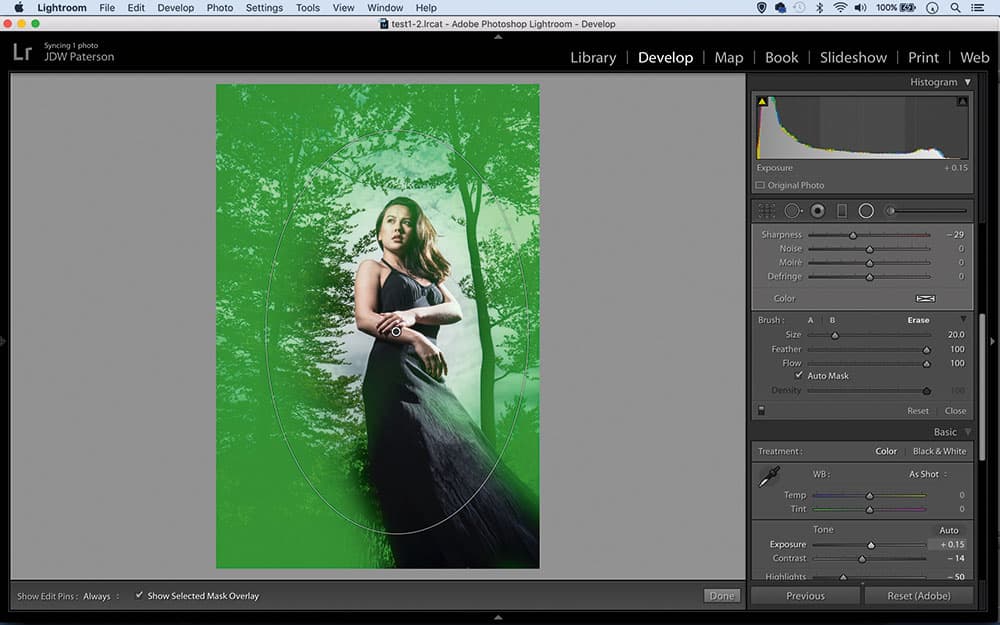
12 Brush your grads
One of the great strengths of the Graduated and Radial Filter tools is the brush option found in the settings to the right, which lets you add or subtract to the effect created by either filter. Enable the brush and hit O to toggle a mask overlay on so you can see where to paint.
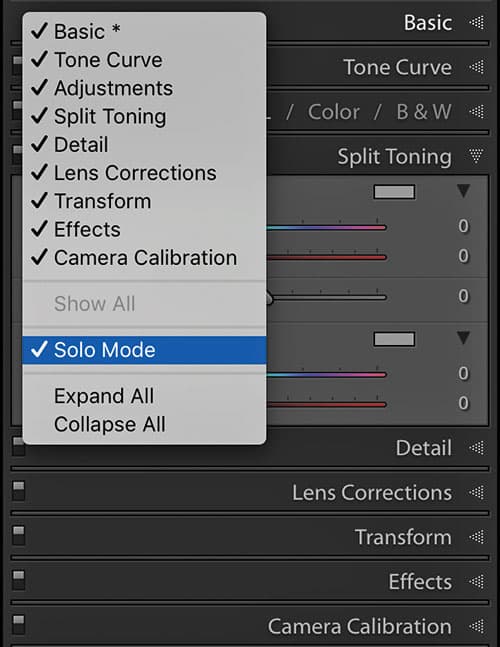
13 Super Solo Mode
This is a huge timesaver – scrolling down the panels to the right of the Develop Module takes valuable seconds, so instead enable Solo Mode by right-clicking over any panel name. Once turned on, each panel will automatically collapse once another is opened, keeping the interface tidy and accessible.
14 Hide the Modules
The list of modules at the top of the Lightroom interface takes up valuable screen space. You can minimise it by clicking the arrow, then use keyboard shortcuts to switch between modules – use G for Library grid view, E for Library Loupe view and D for Develop Module.
15 Order of edits
Adobe lists a ‘correct’ order for edits that will optimise performance: first carry out spot healing, then do any lens corrections that are necessary. Next, perform global tonal adjustments such as exposure and contrast (this can also be done at the start if you like). Finally, apply sharpening and noise reductions.
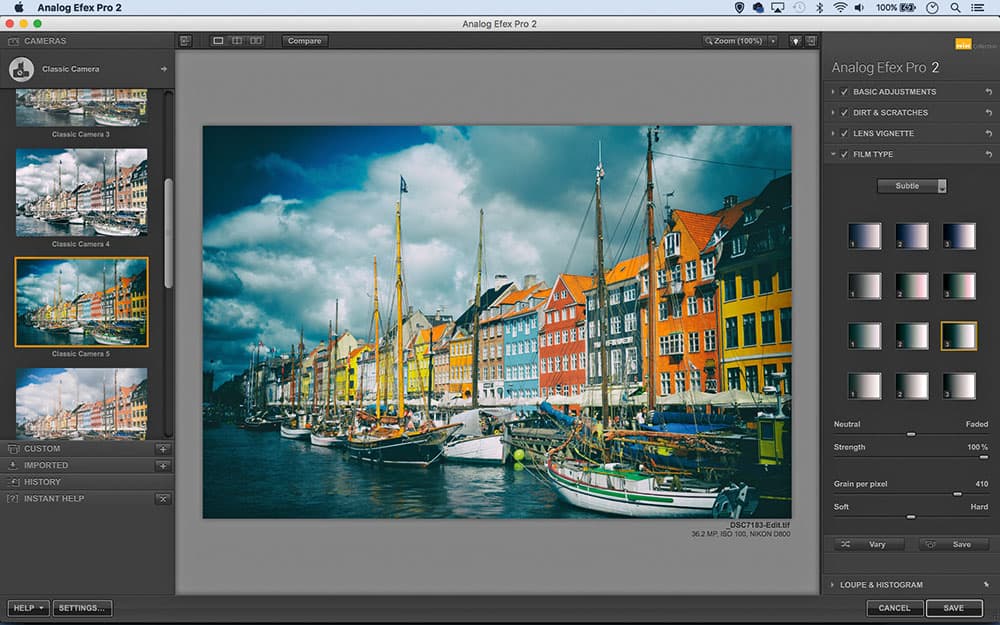
16 Useful plug-ins
Why not try Lightroom plug-ins? One of our favourite free plug-ins is the Google Nik collection (available online from www.google.com/nikcollection) that includes Analog Efex Pro and Silver Efex Pro. Another gem is LRtimelapse, which lets you create gradual tonal adjustments to an all-raw sequence of photos – essential when making day-to-night or night-to-day timelapses.
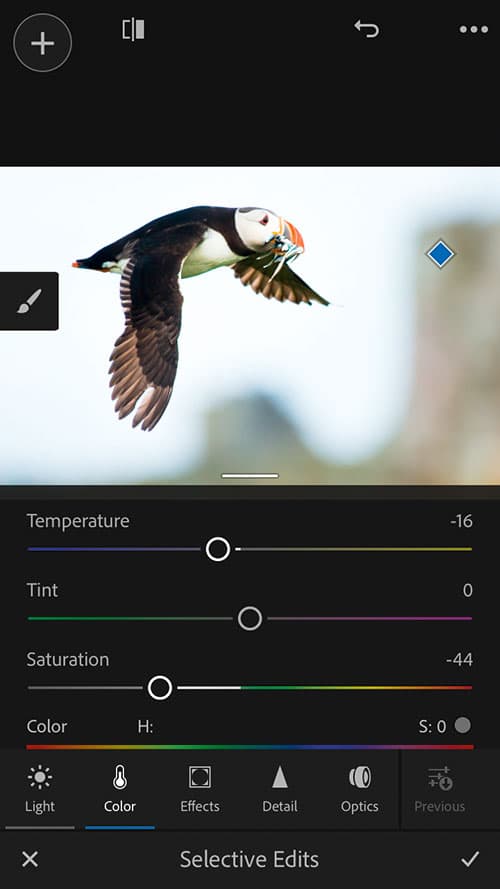
Lightroom Mobile is a game-changer
17 Improved Mobile tools
If you’ve not used Lightroom Mobile before, then now is the time to give it a go. The latest updates include a new Selective Brush that lets you paint tonal changes in a similar way to the Adjustment Brush in Lightroom Desktop. Along with updates to the sharpening tools, it’s a real game-changer.
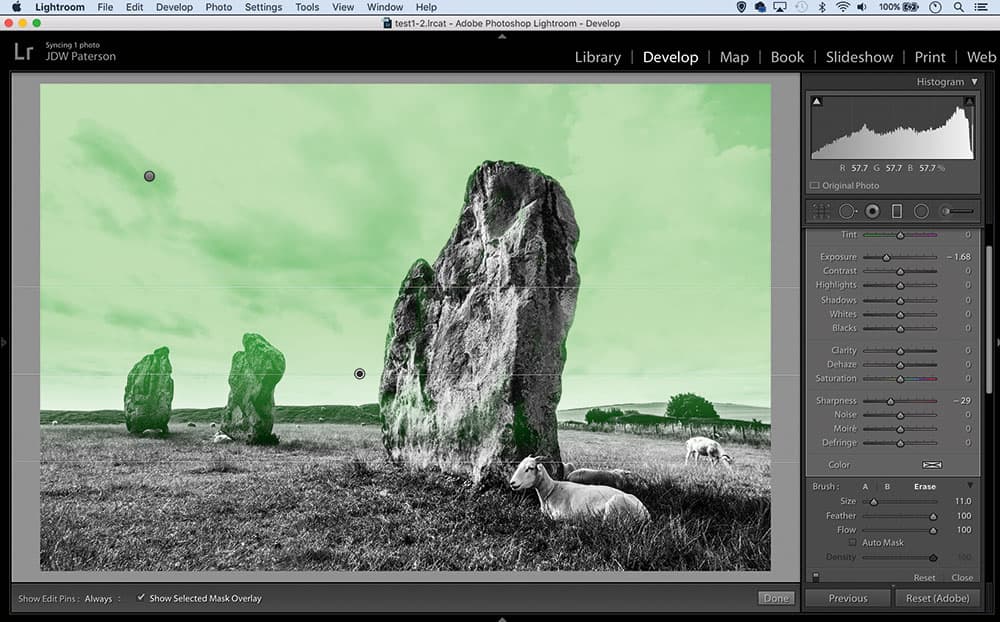
Turn your Adjustment brush into a precise tool
18 Precision painting
This underused setting transforms your Adjustment Brush into a powerful, precise selective tool by seeking out edge details as you paint. Turn it on and off in the Brush settings, or with A. Auto-mask is also available in the Graduated Filter and Radial Filter’s Brush options, so you can erase part of an adjustment with precision.
19 Spray-paint keywords
The little-used but highly useful spray-can tool is available in the Library Module’s grid view (G). It lets you ‘spray’ settings, presets or keywords over a grid of photos. The tool sits below the grid. Simply grab it, use the settings beside to choose metadata, then start spraying.
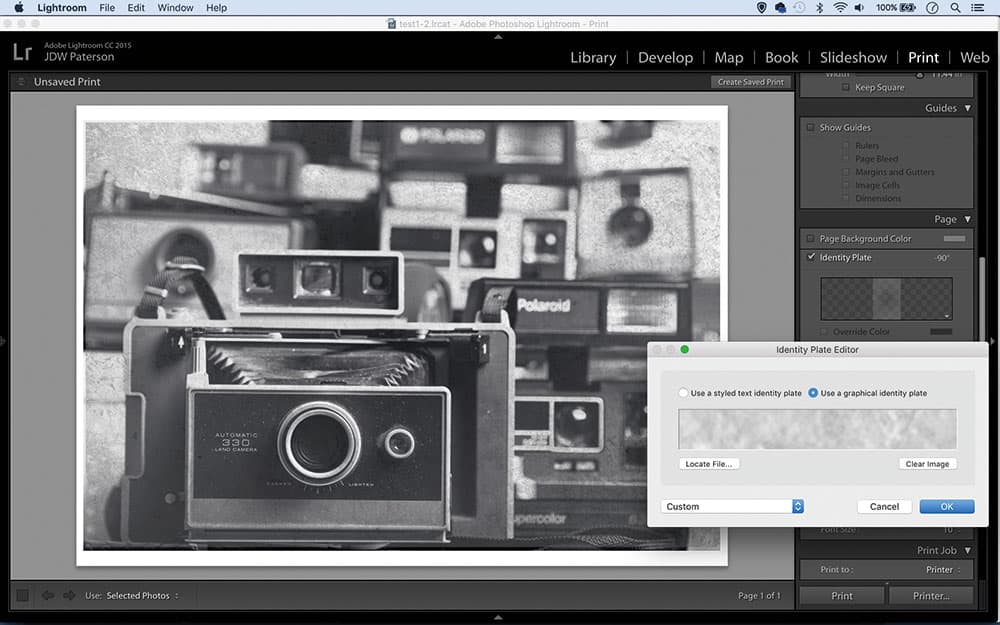
20 Add textures
The Print Module lets you place an ‘Identity Plate’ over an image. It’s primarily designed to let you add a brand name or logo, but you can drop any PNG (a file type that allows transparency) on top of your image, so you can add textures and borders as if layering them in Photoshop.
James Paterson
James is as skilled a photo editor as he is a photographer. His work has appeared in countless magazines and books, and in 2014 he was appointed editor of Practical Photoshop magazine. His subjects range from portraits to landscapes, architecture and underwater scenes. For James, Photoshop is more than just a work tool.


