
Editing images from digital photography can be both rewarding and painstaking. Even simple tasks in Photoshop are onerous when you’ve a lot of them to do. Thankfully, Photoshop Actions help automate the process, as Emma Davenport explains
Many of us have agonised over an editing process before perfecting it; and promptly forgotten how we achieved it when we do the next batch. Enter Photoshop Actions which records your editing steps for future use; saving precious time.
What are Photoshop Actions and what do they do?
Actions are essentially a series of recorded tasks or user commands. Creating an Action is a matter of carrying out those tasks manually, accurately, from start to finish. Just the once. Every step is captured as a process that can be recalled and applied to other images later by re-playing it: executing the steps automatically.
There’s no limit to what can be achieved with Photoshop Actions. On one hand, it can be something as simple as a ‘Save As’ command; or it could be a highly complicated edit, complete with many layers, masks, and adjustments.
The time-saving quality of this cannot be over-stated – provided the actions are planned and methodical so as not to throw up errors when applied to different images.
How to use Photoshop Actions
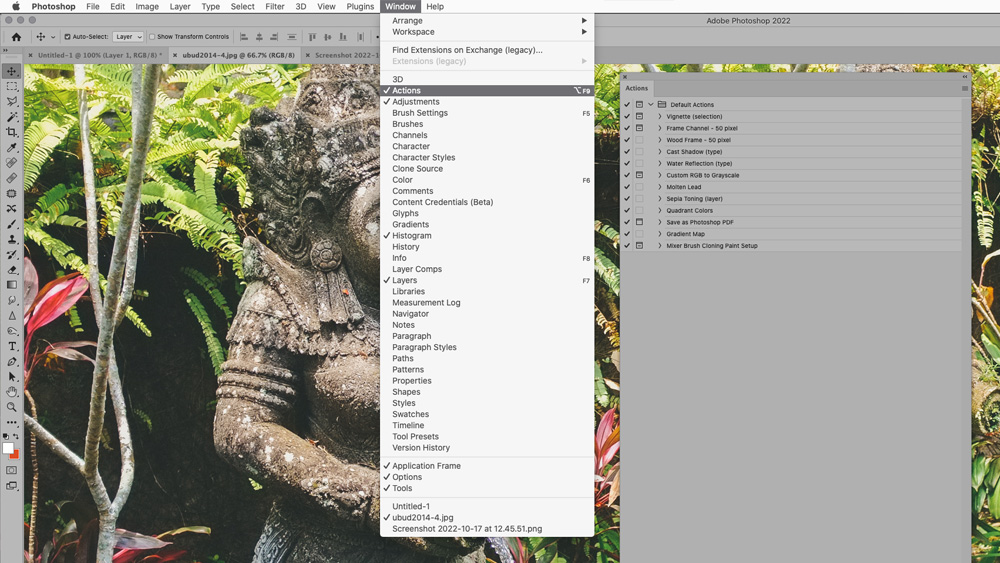
Photoshop comes loaded with a basic set of default Actions. Some of these are of questionable value, but in the first place it’s worth expanding the list and looking through them to see how they’re constructed. Photoshop Actions are located at Window>Actions.
There are two different views within this Actions panel; ‘List Mode’, which you can expand to show the step of each Action. In this mode we organise, play, and record. The other is a more simplified, one-press ‘Button Mode’.
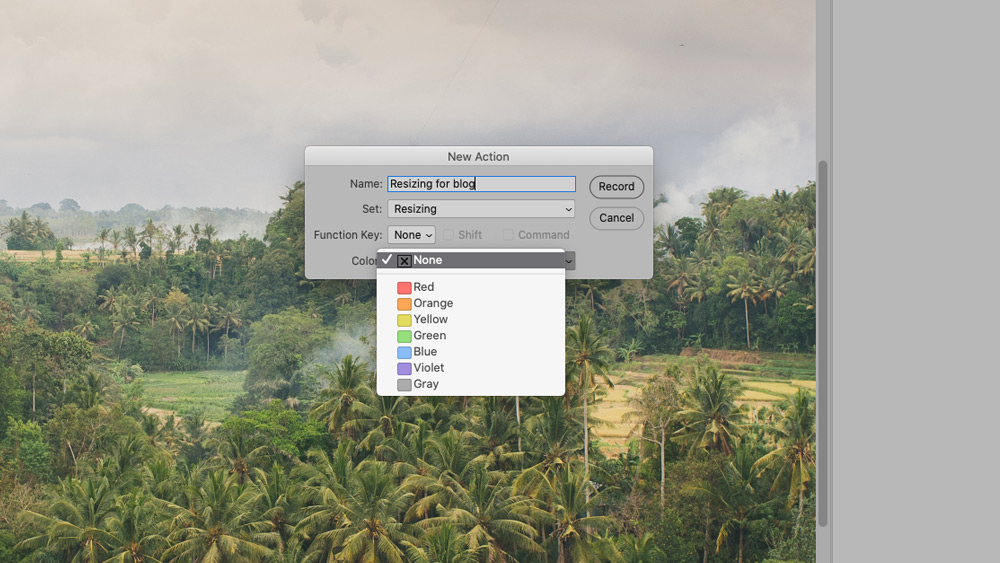
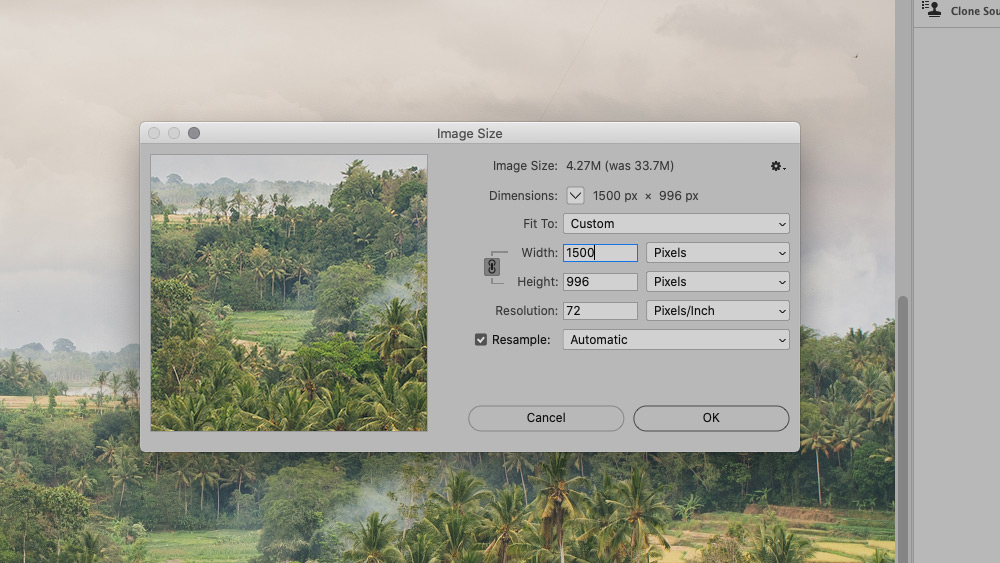
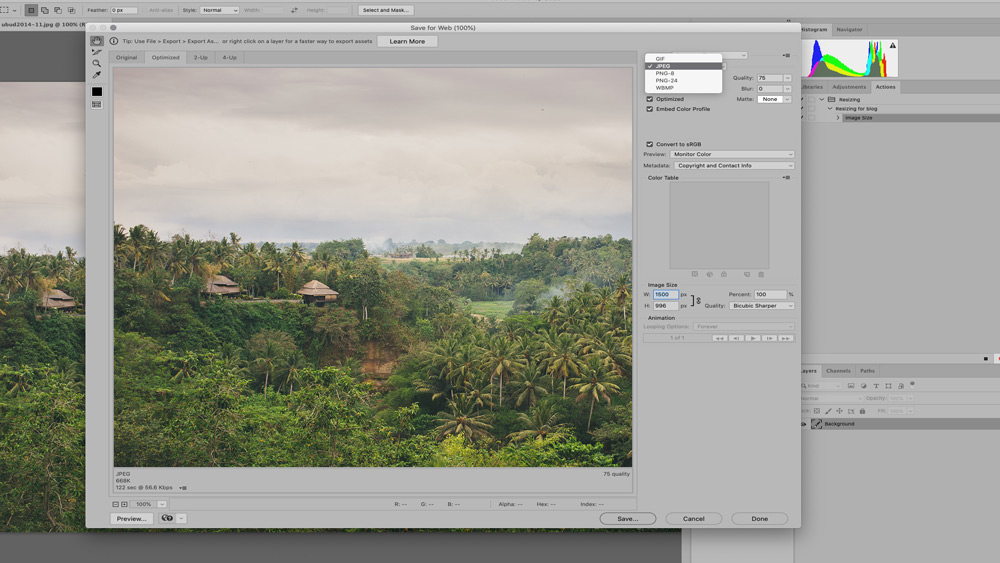
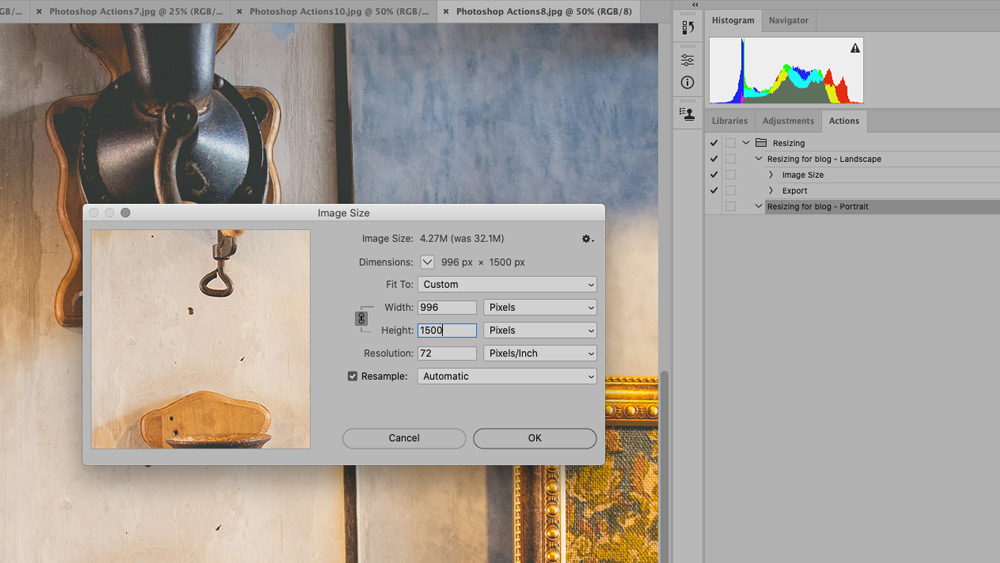
Let’s start by creating a basic ‘Save for Web’ Action. We shall simply resize our image and save it in a designated folder ready to upload to a blog post. To show the images off at their best and keep our file sizes down we want all images to be 1500 pixels wide, at 75% JPEG quality.
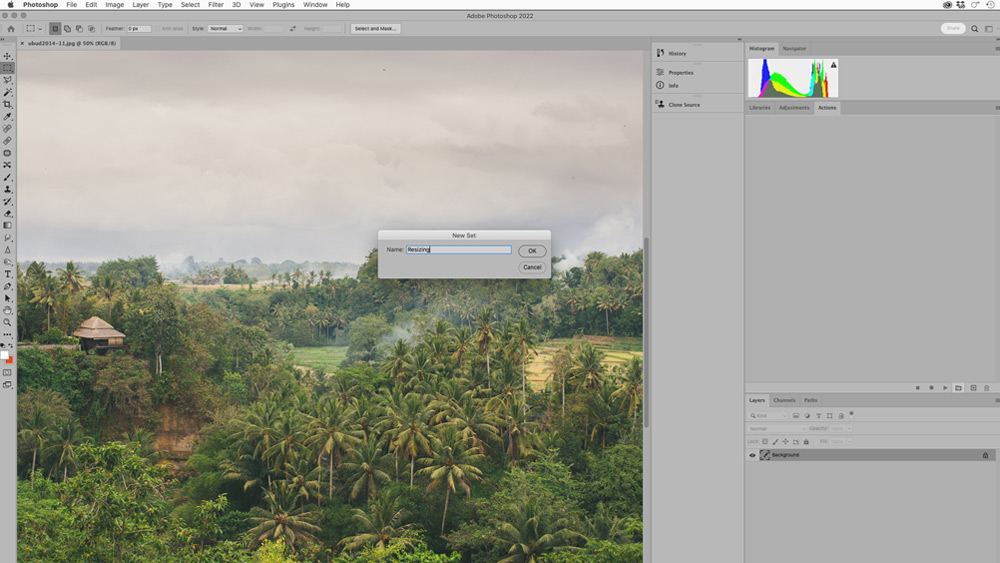
- The keys to useful Actions are organisation and order. Looking at Actions in List View can challenge this as they can look confusing. At the bottom of the Actions Panel is a small folder icon called ‘New Set’. We’ll create a Set called ‘Resizing’.
Saving a Photoshop Actions as a Droplet
The Action we’ve created is a handy time-saver for working through a small run of images. But what if you have 300 of them to adjust?
While an “Action” like this will undoubtedly save time, opening 300 images in turn to hit the Play button will not feel like an automated task for long! [Your Action could include a save and close step, by the way]. There are two extra features that work alongside Photoshop Actions that wave a wand over that pile.
A Droplet is a shortcut for running an Action. It’s a very handy drag-and-drop widget. You can simply drop an image, a series of images or a whole folder onto a Droplet. It can save you a lot of time as it means you don’t have to open your images into Photoshop first.
Droplets can be stored anywhere. You might find it handy to have a Droplet on your Desktop or a designated folder. If you’re working on a Mac, you can even add a Droplet to your Dock.
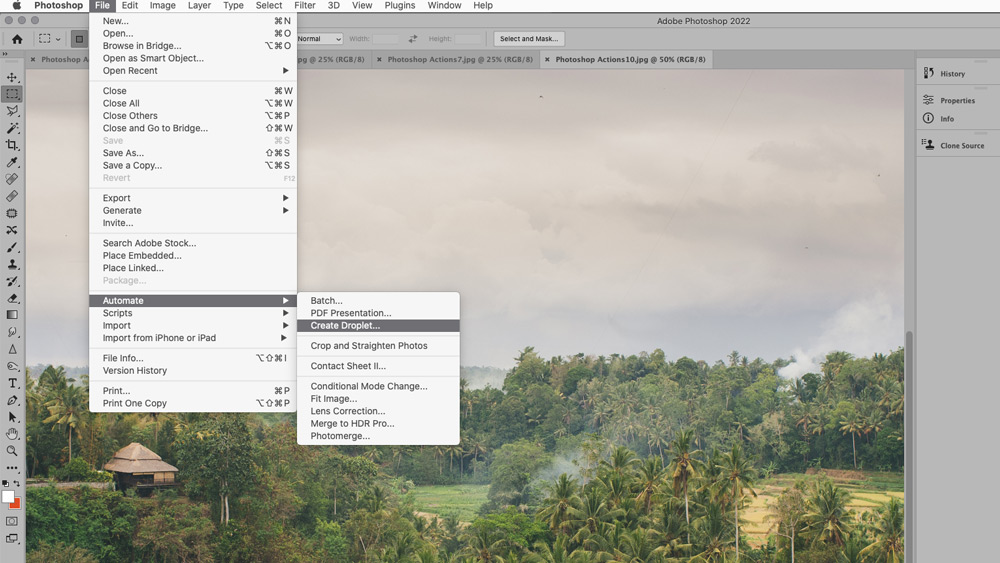
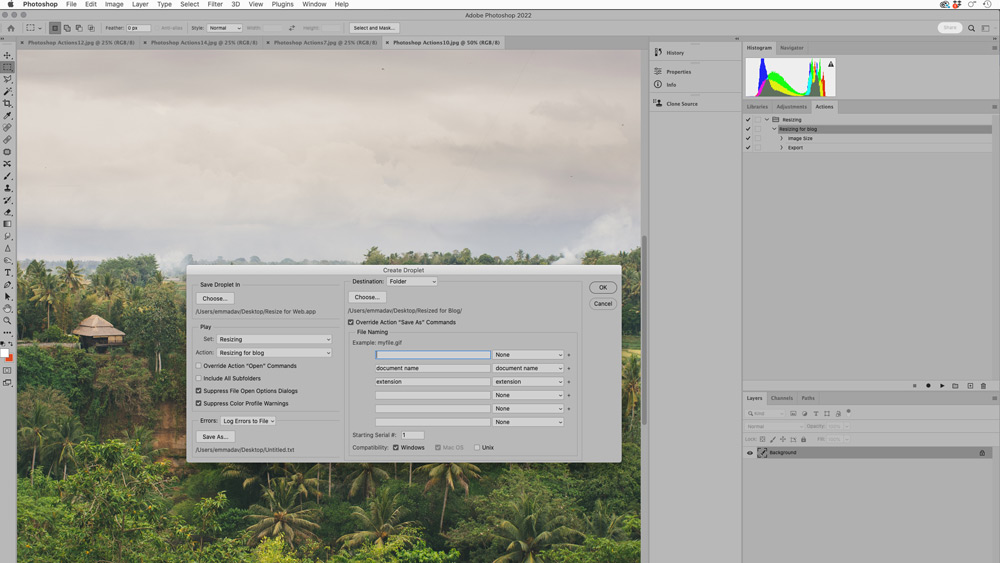
Making a Droplet from an action is very simple:
- Choose File>Automate>Create Droplet.
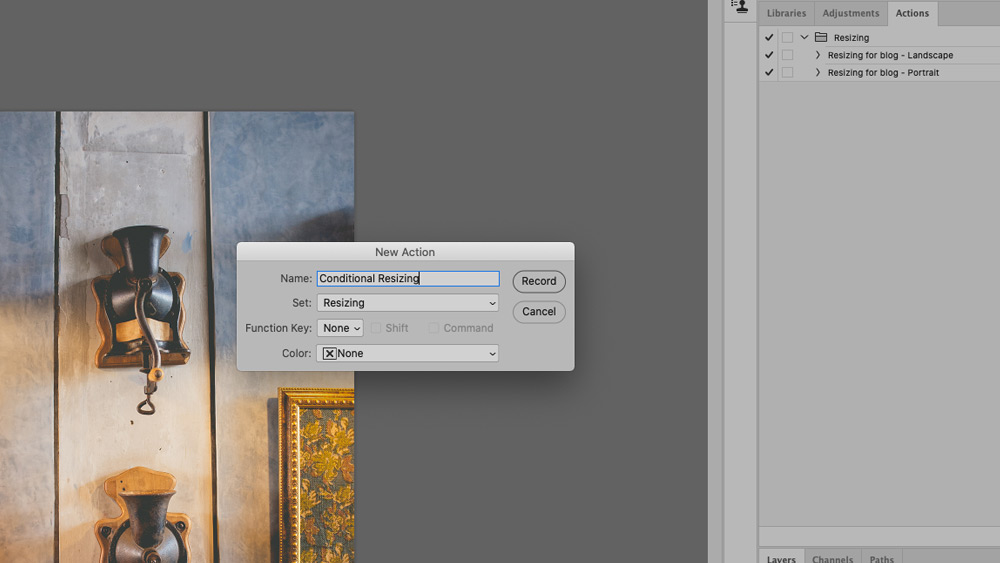
Creating conditional Photoshop Actions
Exporting images for a blog and resizing them can be more laborious if you have a mix of landscape and portrait-orientated images. Say you need each image in your blog to be 1500px wide to look their best. If you create an Action as above, it will only work if the orientation is the same as the image you used to Record your Action. Here’s where the “Insert Conditional…” command comes in handy.
- When we created the ‘Resizing for blog’ Action we used a landscape image. Select this Action, double-click and add a suffix of ‘- Landscape’ to the name.
- Create a new Action called ‘Resizing for blog – Portrait’. You can follow the same steps, but this time use a Portrait-orientated image whilst recording.
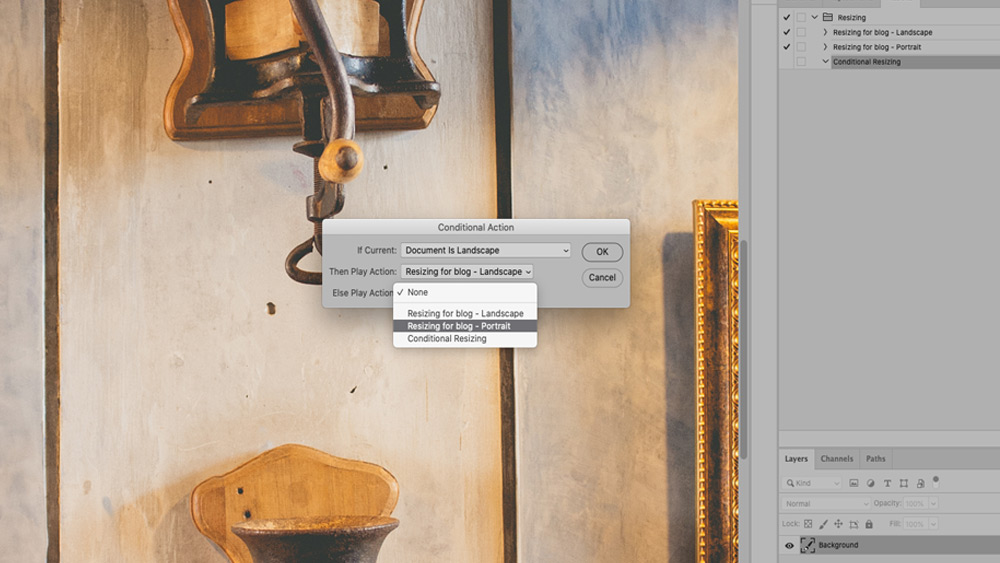
With this set up you can now create a Droplet from this ‘Conditional Resizing’ Action. Now you can drag a portrait or a landscape-orientated image onto this Droplet! The Conditional Resizing will run the appropriate Action and sift the images for you. All your images should now be 1500px wide.
Batch Processing in Photoshop
An alternative to making Droplets is to Batch-process files. The controls here are essentially the same as in the Droplets panel but it has the flexibility of working with Actions on the spur of the moment. In this Dialog box you’ll need to remember to select the Source for your images. Again, whole folders can be selected, which speeds things up.
You can find this by choosing File>Automate>Batch…
Sharing Actions
It’s possible to save Actions for use on another computer or to share with friends. They are saved as a .atn file. Check for compatible versions of Photoshop for Photoshop Actions! Provided that all the features of an action exist in the version of Photoshop that is to receive them, you should have no problems with this.
To save an Action file click on your Action Set folder, selected the fly-out menu and choose ‘Save Actions…’ You will be able to share this file with others. You can also Load in other Actions in the same way.
Where to find Photoshop Actions
There’s plenty of scope to buy Photoshop Actions. Sites such as Creative Market, Etsy or Luxe Lens are a good place to start. You can also keep your eye on the Creative Cloud site at https://creativecloud.adobe.com/discover/free-assets/.
The internet is awash with so many creative Actions, including ways to transform your images into illustrations, light leaks and frames.
That said, you’ll probably get the best use in Actions for more practical purposes. Now you know how to create a basic Action here are some other ideas for everyday tasks you might want to automate.
- Adding a border to images
- Creating Double Exposures
- Converting colour images to black and white
- Adding image info i.e Copyright information not created in-camera
- Adding Watermarks to images (try using Conditional Actions as we did above to change the watermark position according to your image orientation)
Featured image credit: Szabo Viktor via Unsplash.
Further reading
Best software for black and white editing
How to edit photos – beginners’s guide to Photoshop Elements
Best subscription-free photo editing software
Follow AP on Facebook, Twitter, Instagram, YouTube and TikTok.


