
The use of artificial intelligence (AI) in photo editing may be a contentious issue, but it’s safe to say that it’s here to stay. While most ethical questions surrounding the use of AI in photography centre around the creation of entire images, most of the AI-powered tools available in the best photo editing software are pretty much benign when it comes to the question of ethics and authenticity.
At this point, you may be wondering where we’re heading because surely any use of AI goes against the veracity of photography, but there’s an extremely simple argument here. Not to mention, one that includes the use of Photoshop’s Generative Fill feature in a specific way. I don’t want to get bogged down in the AI debate so we can cast that aside, and some of this was covered in an interview in the Christmas issue of AP with the Italian photographer Andrea Pizzini who creates incredible images of Sony cameras using AI.
The majority of AI-powered tools in editing software are designed to save time and typically make complex tasks easier to achieve. They’re not there to trick, cheat or anything else, they’re both practical and powerful in equal measure. Photoshop has been gradually growing in this area with many tools now at the disposal of photographers, ranging from intelligent selection refinement to special effects to cloning and much more. Most, if not all of the results of these tools can be achieved in more manual time-consuming ways, so I would argue that taking advantage of them is most often a wise decision.
Photoshop is an AI powerhouse
This is far from a definitive list of Photoshop’s AI-powered features, but some that you can take advantage of include Neural Filters, Generative Fill, Generative Expand, Sky Replacement.
Subject selection, Sky selection, Intelligent Refine Edge and the Remove Tool. Of course, Generative Fill and Generative Expand are by far the most contentious options available, but even these can be used in ways that don’t detract from a photo’s authenticity when used outside of a news or reportage context.
Our focus here is going to be using Photoshop’s AI-powered features for cloning in different situations as well as expending a simple background to change a photo from portrait to landscape format. Everything can be achieved manually, and these changes are frequently made to images for personal, editorial and advertising use, but what’s most important is that the essence of the image ultimately isn’t changed.


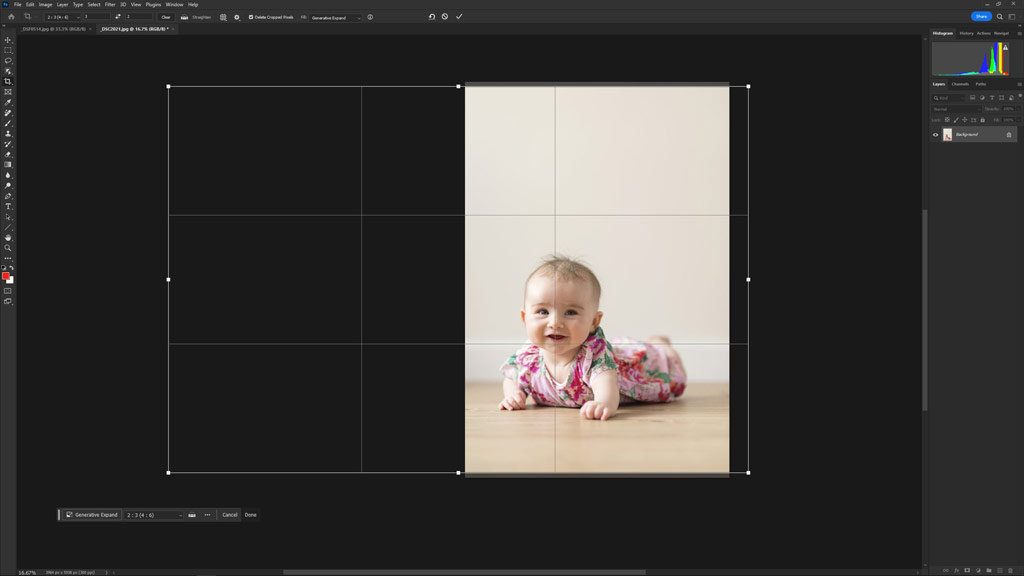
How to extend the background on an image using Generative Expand
1. Set the crop
Select the Crop Tool and set the Ratio to the desired setting and make sure that Fill is set to Generative Expand. Next, drag the Crop Guide over the image so it covers the area surrounding the image that needs to be increased. Here, it was set to convert the portrait format image with a simple background to landscape format.
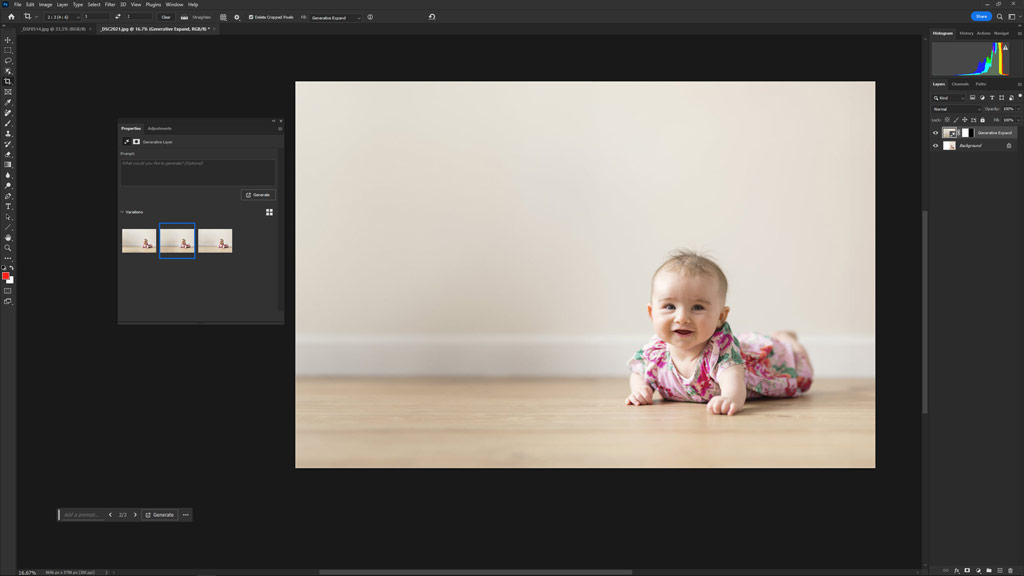
2. Generate the expansion
Hit Enter and the Generative Fill Crop will begin, and after roughly 20-30 seconds you’ll be presented with three fill options to choose from. Simply left mouse click on each to see what looks best. If you’re happy with one close the dialogue and the Fill will be applied to a New Layer, but if not move on to the next step.
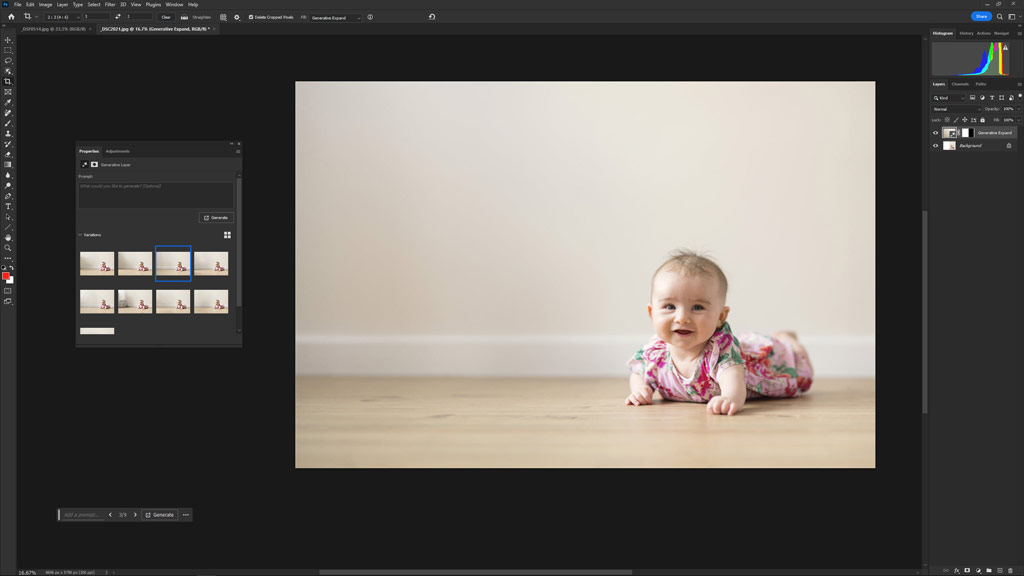
3. Create more expand options
If you’re unhappy with the Fill options presented, simply press the Generate button in the dialogue box to generate three more options. You can continue pressing the button to add more Fill options until you find an option that you’re happy with. Each option presented will have subtle or significant differences to offer choice.
How to use AI for seamless cloning
Remove complex elements in seconds using the Remove Tool and Generative fill
Cloning and Healing can be laborious tasks; they’re rarely enjoyable, always a chore, but they can admittedly be rewarding when you finish. One of the great things about some of Photoshop’s AI-powered tools is that they can make light work of more complex cloning work, saving huge amounts of time and sometimes even frustration. You just have to know what to use and when to use it.
Minor jobs like spotting and removing simple elements are still best worked on with tools such as the Healing Brush. But depending on the task at hand, the Remove Tool and in certain cases, Generative Fill can make light work of what needs to be done to produce a seamless result in seconds rather than minutes. What’s more, if you don’t have the skills to perform these tasks manually, AI can help you get to where you want to be.


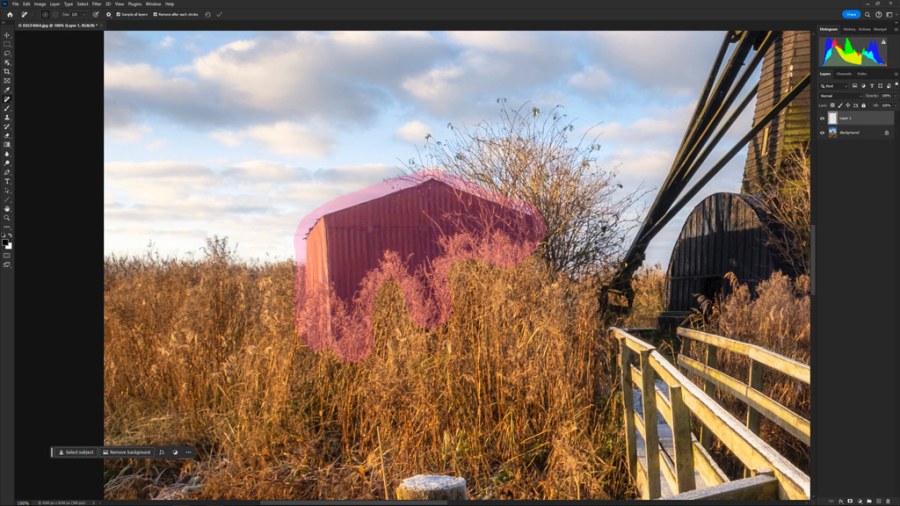
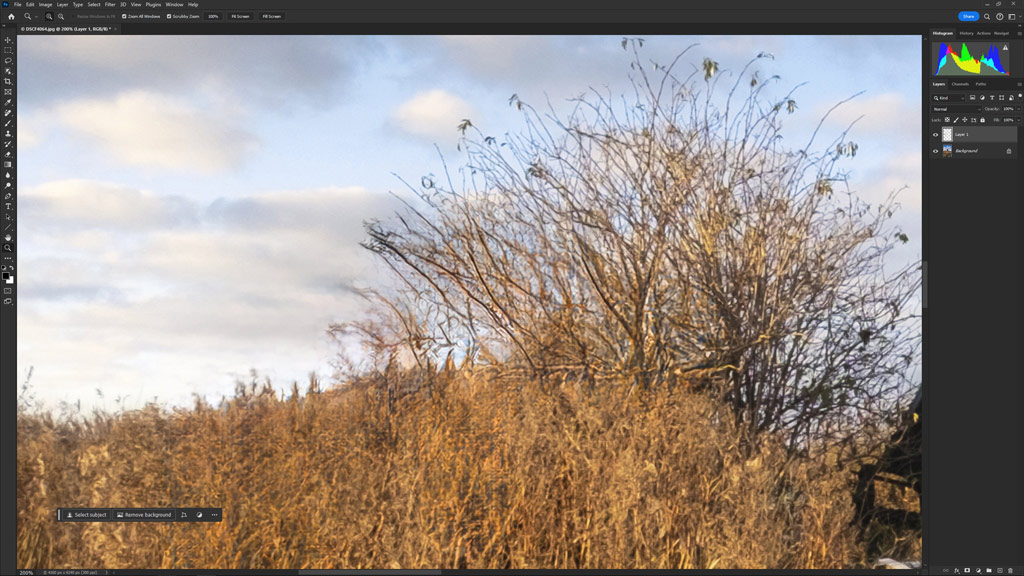
How to try the Remove Tool
1. Paint over the object
Select the Removal Tool which is within the Healing Tool menu on the Tool panel. Paint over the object to be removed, making sure you overlap the surrounding area because this will help to facilitate a more effective removal. It takes a few seconds for the object removal to render.

2. Assess the removal
Check the area where the object has been removed to make sure it looks natural. Here, you can see that the left edge of the bush and the reeds look fake, so we’ll need to run some additional passes of the Removal Tool over these areas. Areas like this take a little more work because of the fine detail.
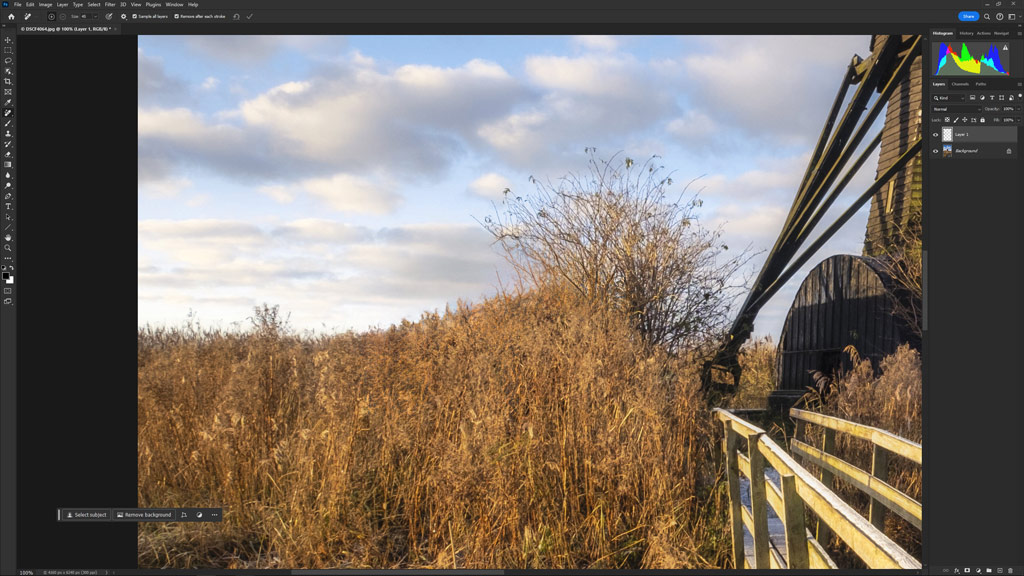
3. Run more passes
The Removal Tool can be applied to the same area as many times as you like, so you can keep painting over this until you’re happy. A good way to work is to create an empty New Layer in Step 1 and make sure Sample all layers is checked so you can delete the Layer if necessary and start again.
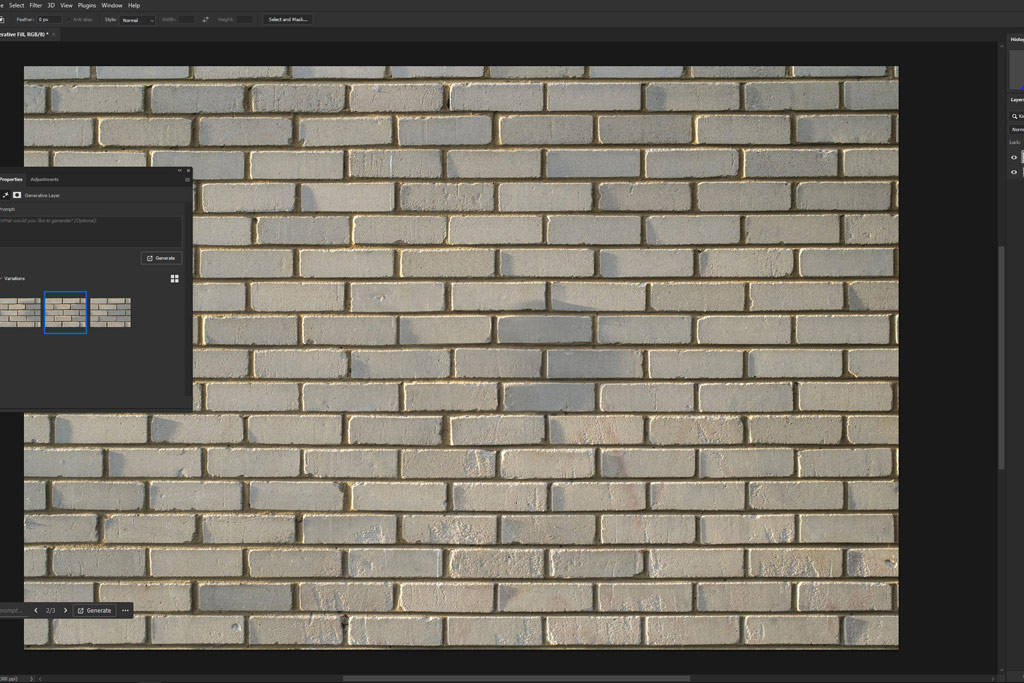
How to use Generative Fill to remove elements
Generative Fill is best known for adding elements into images, but it can also be used to remove them. To do this, simply draw a selection around the object that needs to be removed, with space around it included, and then click the Generative Fill button on the Contextual Task Bar. This press of the button opens the prompt box for typing in word prompts, but leaving this empty and then pressing the Generate button forces the tool to remove or change the selected area. For the image used here, the Remove Tool was unable to fill the uniform brickwork effectively, but Generative Fill was able to remove the sign in a matter of seconds while maintaining the texture and lighting present.


Related reading:
- Best AI-powered tools for photography
- Canon, Sony, Nikon beef-up fight against fake AI images
- Sony AI cameras – Pure fantasy can be a visual reality
- This model earns £10000 a month – but she isn’t real
Follow AP on Facebook, Twitter, Instagram, YouTube and TikTok.


