Colour photography has been possible for more than 150 years. Possible, yes; easy, no. And it didn’t help that early colour pictures were shot in black & white. Confused? Don’t be. All will be explained.
What I want to explore here principally is a camera that was among the first to simplify colour photography. It was called the Hess-Ives Hicro. But let’s start by taking a look at what led up to it.
Three-colour systems
Way back in 1666 physicist Isaac Newton used a prism to show that sunlight could be split into the seven colours of the visible spectrum: red, orange, yellow, green, blue, indigo and violet. Nearly 200 years later Scottish physicist James Clerk Maxwell proved that those seven colours could be distilled down to just three – red, green and blue – and in so doing he took the first colour photograph in 1861.
Maxwell shot three pictures of a tartan ribbon on three monochrome photographic plates, each through a red, green or blue filter. The plates were processed to make black & white positives which were then projected using three magic lanterns (an early form of projector), each one through red, green and blue filters.
When the three images were superimposed in register on a screen, the result was a full-colour picture. To make the three exposures necessary for colour photography easier, repeating backs were introduced. They contained red, green and blue filters positioned in front of the photographic plate, through which three separate monochrome images were shot in succession.
The Miethe-Bermpohl three-colour camera, was first sold in 1903
The back slid sideways between exposures when it was mounted horizontally on the camera, but a more popular method was to mount it vertically so that gravity caused the filter sections to fall and click-stop into position after each exposure. Sometimes they were connected to the shutter so that, as the exposure was made, the back automatically dropped into position for the next shot.
Another type of three-colour plate back comprised red, green and blue filters side by side through which three images could be shot on a single plate simultaneously. After development, the plate was cut into three sections, each with a different filtered monochrome image on it, and placed in a viewer called a photochromoscope.
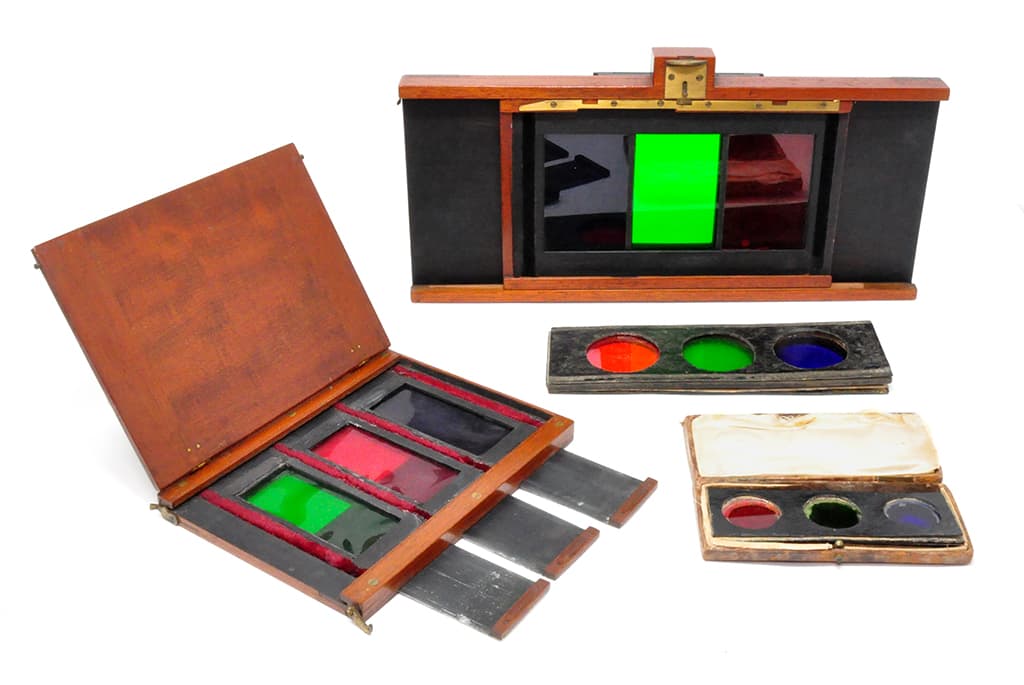
A repeating, or falling, back with its three filters for attachment to a suitable plate camera; another three-colour back suitable for shooting three stereo pairs on a single plate; and two sets of vintage tri-colour filters for use with any camera
Because using a standard size plate inevitably led to the three strips of images each being in a letterbox shape, this system was useful for stereo photography in which a pair of stereo images needed to be placed side by side. The Kromskop, designed by American inventor Frederic Ives, was specially made for viewing three-colour stereo images like these.
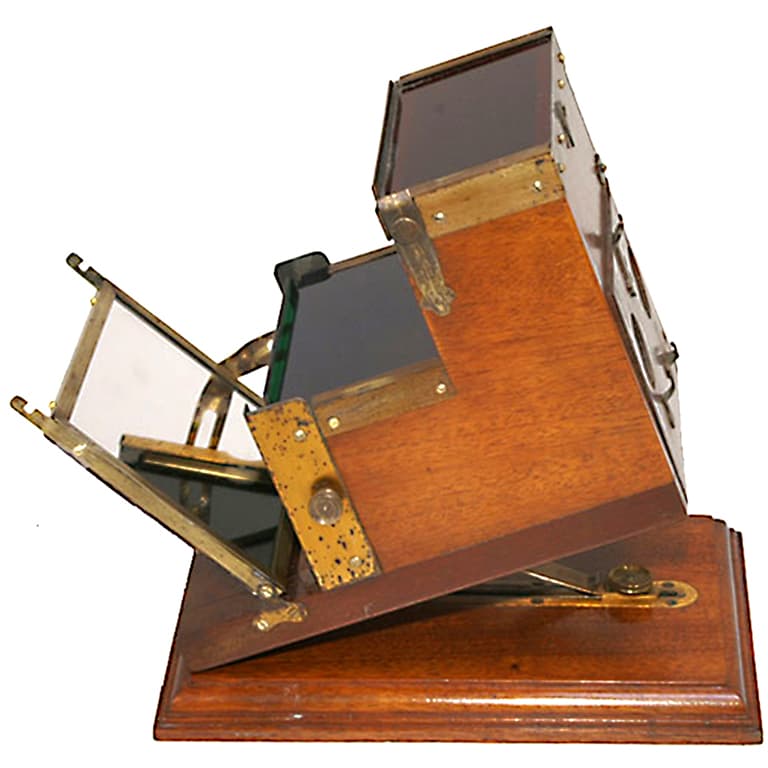
The Kromskop for viewing stereo tri-colour images
The three filtered twin images were placed in steps over red, green and blue filters. Internal mirrors superimposed and combined the three images which, when viewed though lenses at the front of the apparatus and lit by overhead light reflected through the plates by a mirror at the back, formed a stereo picture in full colour.
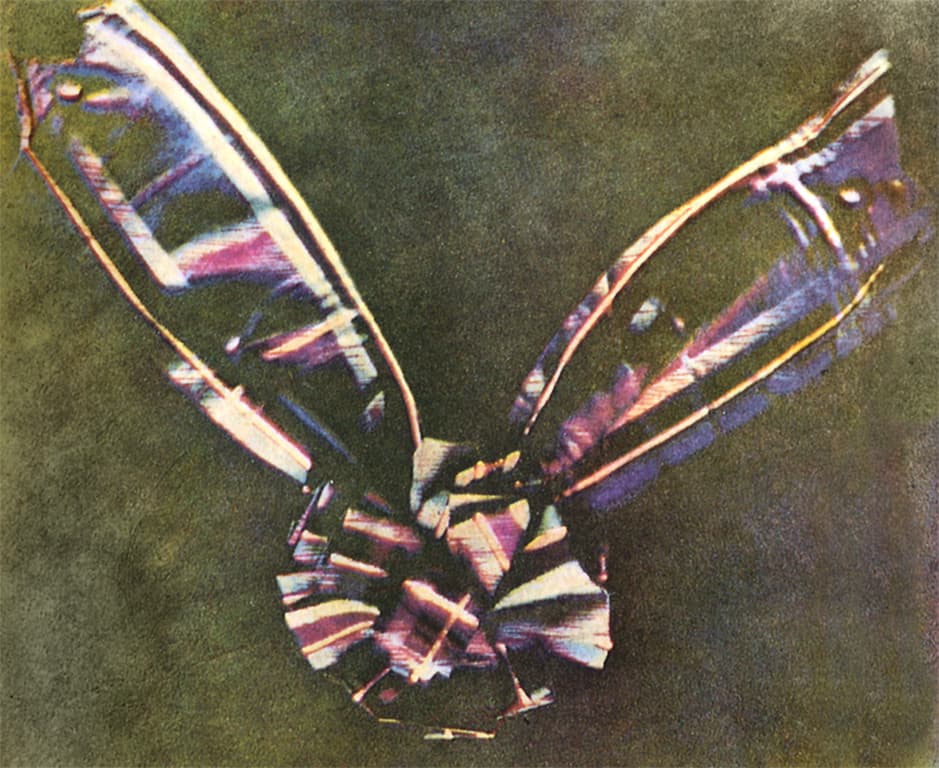
The first colour photograph, a tartan ribbon photographed by James Clerk Maxwell in 1861
One-shot systems
Parallel to the development of three-colour equipment, research was ongoing into how a colour picture might be taken in any ordinary camera. Many pioneers gave it a go, of which Gabriel Lippmann should be singled out. In the 1890s, he experimented with interference patterns – the multicoloured effect you see when oil spreads over water.
Lippmann’s process involved placing a silver chloride photographic emulsion on a plate in contact with a layer of mercury, causing interference patterns during exposure which miraculously produced an accurate rendition of colours in the subject. His success won him a Nobel prize in physics in 1908, but the length of the exposure times needed for the process proved too long for a practical method of colour photography.
One-shot colour became a reality thanks to Auguste and Louis Lumière, French photographic equipment manufacturers who, in 1907, introduced the Autochrome. The process comprised glass plates coated with minute potato starch particles dyed red-orange, green and blue-violet.
More than 600,000 particles to the square centimetre, too small to be individually seen by the naked eye, were applied at random to an adhesive spread over a glass plate. Charcoal powder filled in gaps between the grains and a layer of photographic emulsion was applied on top.
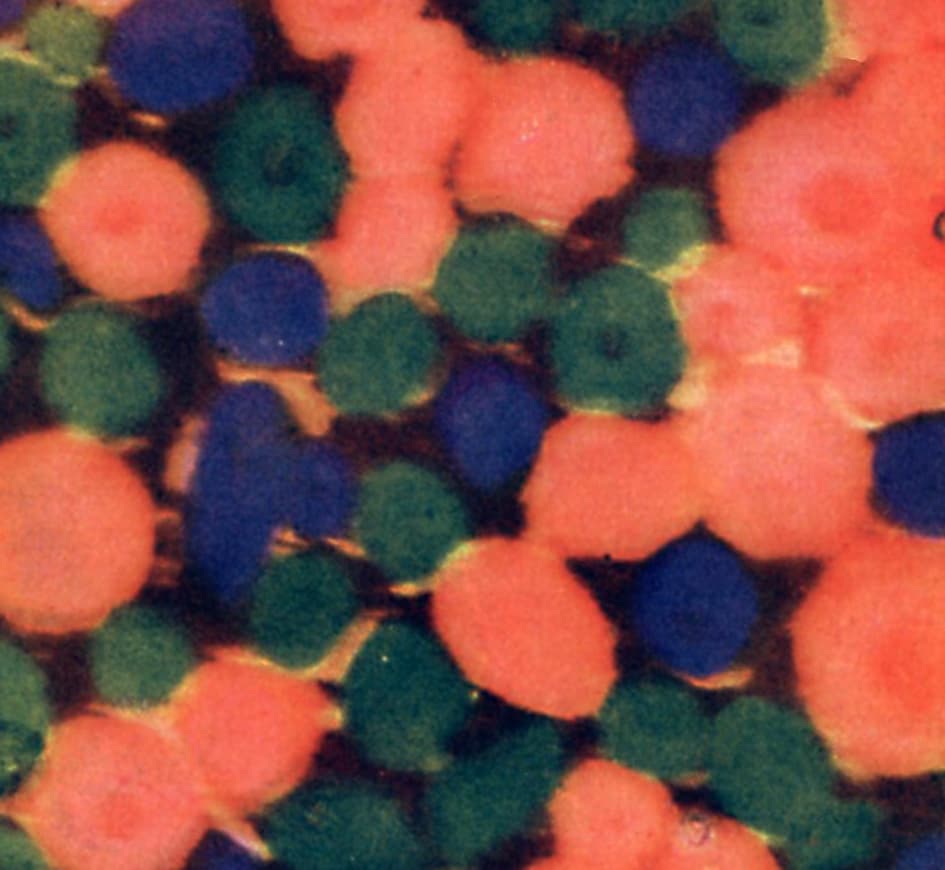
The dyed starch grains on an autochrome plate, magnified 700 diameters
Pictures were exposed through the potato starch grains which acted as microscopic filters. When the plate was developed to a positive and viewed against a light source, the same grains turned the filtered monochrome image into a coloured image. The Autochrome process required long exposure times, and it was also very costly. Nevertheless, it survived for many years.
The amateur photographer in search of a cheaper one-shot colour process might have turned instead to the Paget Colour Photography Outfit, which sold for ten shillings (50p). It worked by use of screens combined with monochrome plates. The screens contained red, green and blue squares, each measuring around 0.75mm to a side.
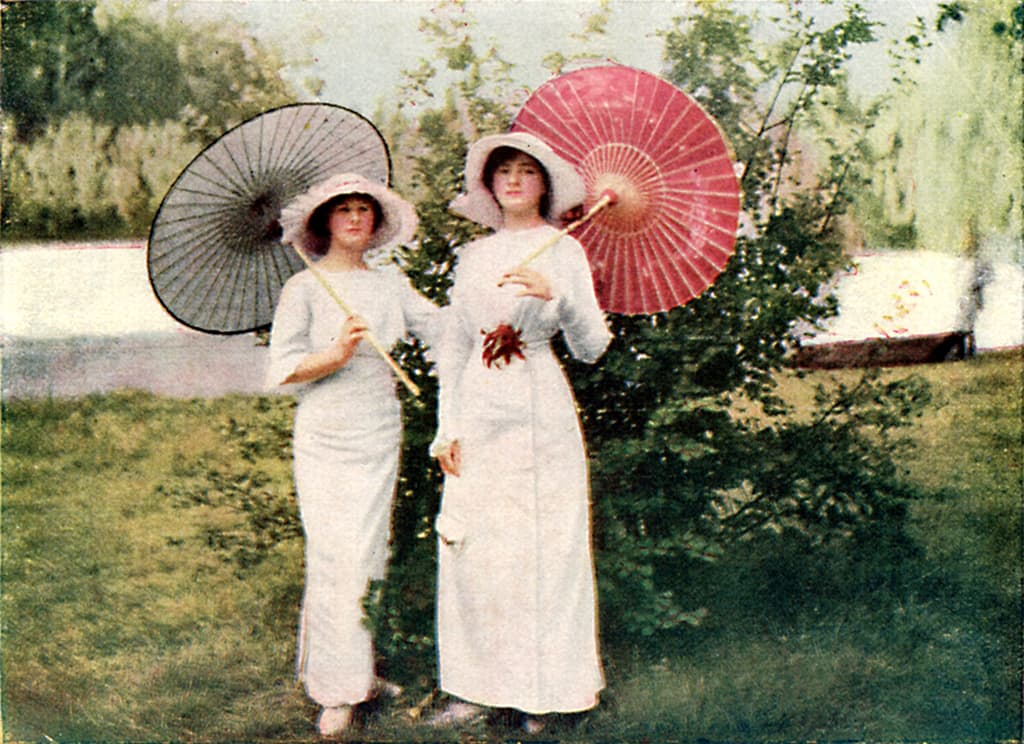
Autochrome plate by George Lindsay Johnson, shot c.1911
The kit was made up of a pack of taking screens, another pack of viewing screens, a yellow filter to compensate for too much blue in normal daylight, photographic plates, developer, safelight filter and an instruction book. In use, a normal monochrome photographic plate was exposed behind one of the taking screens, then developed and contact printed to make a positive plate, which was then viewed through one of the viewing screens to see a full colour image.
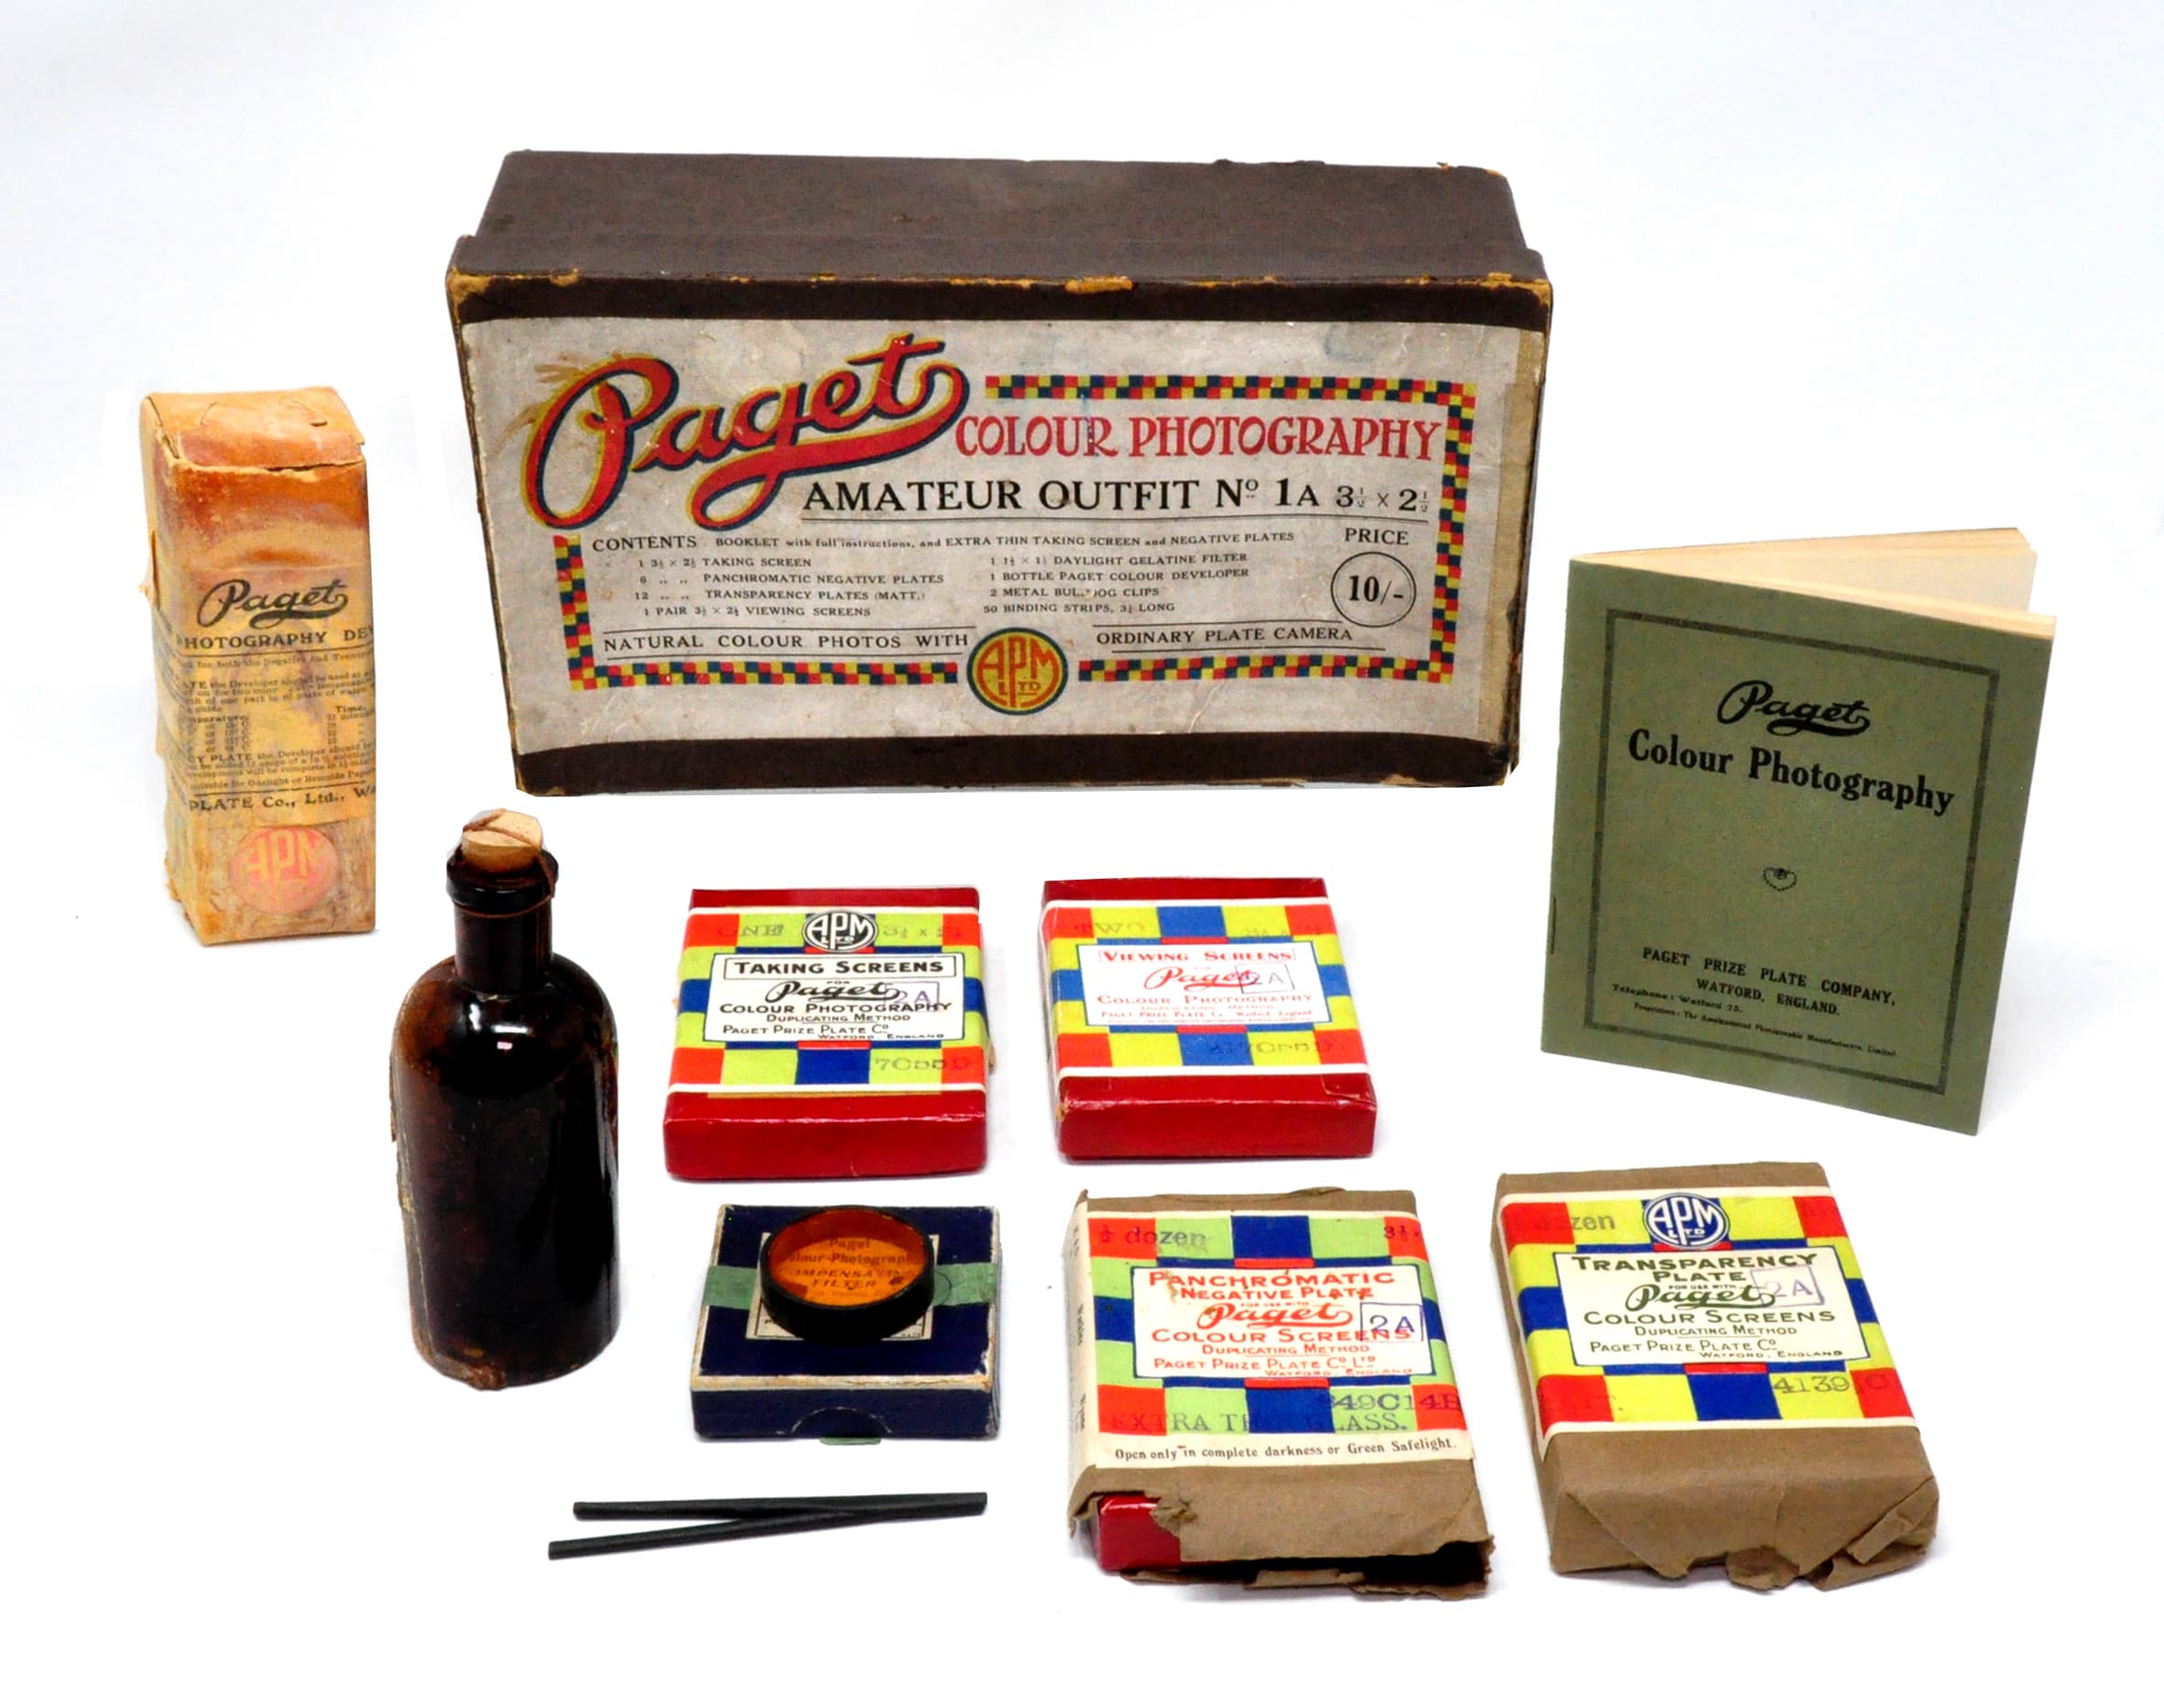
The contents of a Paget Colour Photography Amateur outfit from 1913
Despite the advent of one-shot colour systems, however, manufacturers continued to make three-colour cameras. The accent was now on a new type of camera which could take three filtered exposures with a single click of the shutter. Which brings me right back to where I started.
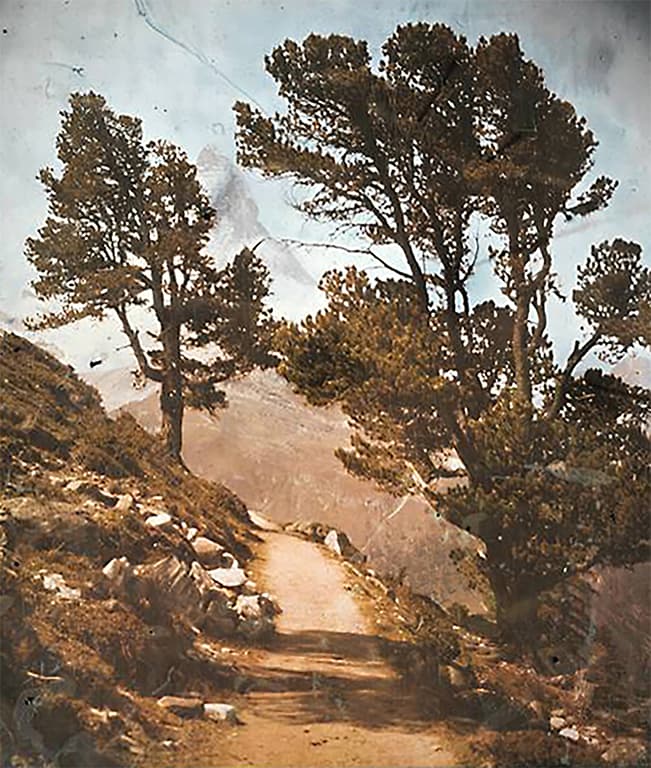
A Lippmann picture, made by the direct interference process
Hess-Ives Hicro camera
We’ve already met Frederic Ives, the man behind the Kromskop. In 1911 he teamed up with businessman Henry Hess in Philadelphia to form the Hess-Ives Corporation. In 1915 they introduced the first Hicro colour camera, which was built for them by the Hawkeye Division of Eastman Kodak.
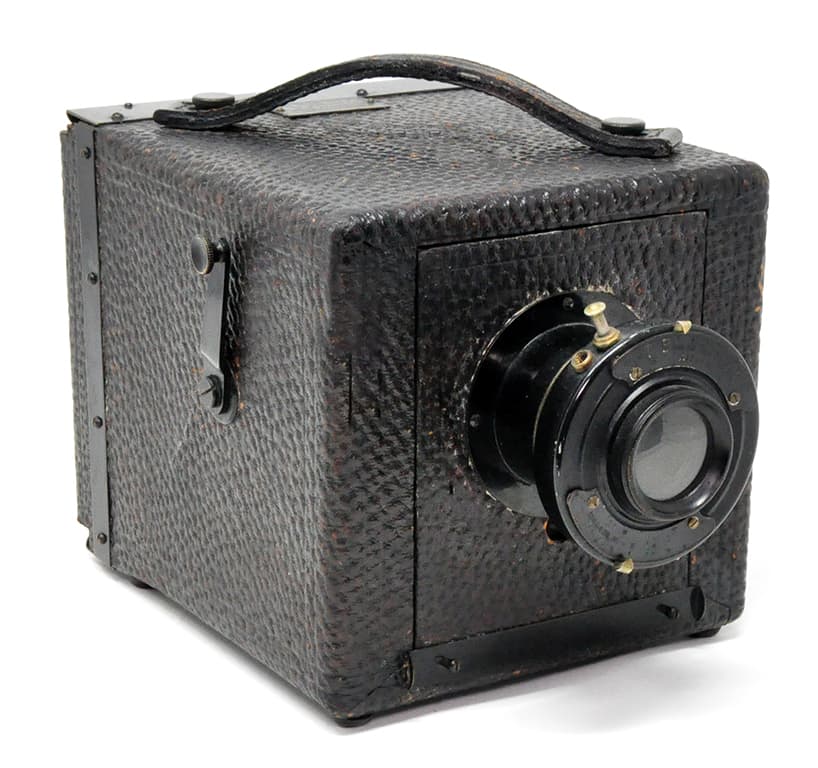
The Hess-Ives Hicro camera for one-shot tri-colour pictures
The model I’m looking at is box shaped with an f/4 lens, focused by a lever on the side and a shutter speeded 1-1/100sec, all on a short tube at the front. To make carrying the camera easier, the lens/shutter tube can be removed and reversed to rest inside the body. The camera is made of leather-covered wood, there’s a rotating handle on one side, a small lever on the other and a focusing screen at the back.
It shoots 3¼ x 4¼ inch negatives. At first sight, then, the Hicro appears fairly conventional. It’s the mechanism inside that sets it apart. Here comes a quick chemistry lesson. In early photographic emulsions, unmodified silver halide crystals were sensitive only to blue light.
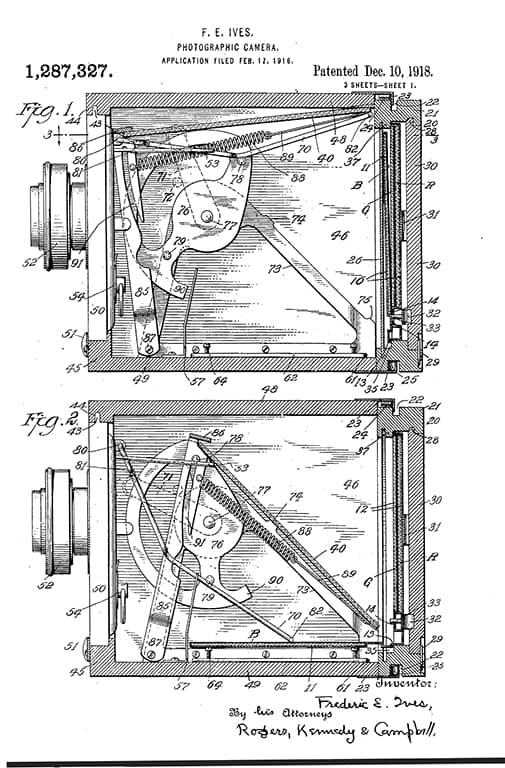
The patent drawing shows how the mirror is lowered inside the body
Later, sensitising dyes were discovered which caused the silver halide crystals to react to other colours as well. This led first to the emergence of orthochromatic emulsions, which were sensitive to green as well as blue but not red, then came panchromatic emulsions which were sensitive to red, green and blue.
Now let’s look at something called a tripack, which was used in the back of the Hicro in place of a normal photographic plate. This consisted of a holder containing two glass plates with a sheet of film and a red filter sandwiched between them. The plates were hinged at the base and a dark slide at the front protected them from light when not in the camera. Inserted into the camera back, the dark slide is removed from the tripack, causing the front plate to fall forward and rest on the floor of the body.
Turning the handle on the side of the body brings down a wire with a hook on the end to trap the plate and hold it in position. As the handle is turned further, the wire hook disengages from the mechanism which goes on to move a semi-silvered mirror that descends to rest at 45° to the lens. The back of this is coated with a yellow filter.
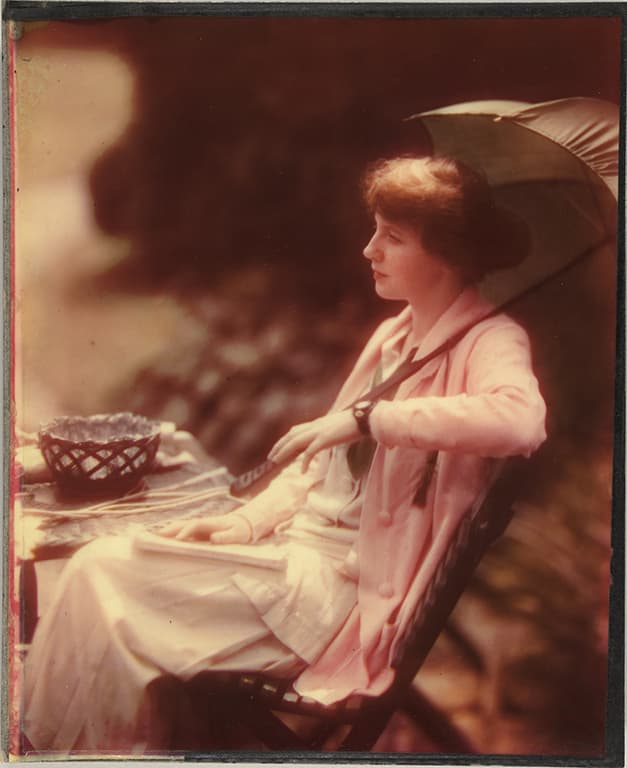
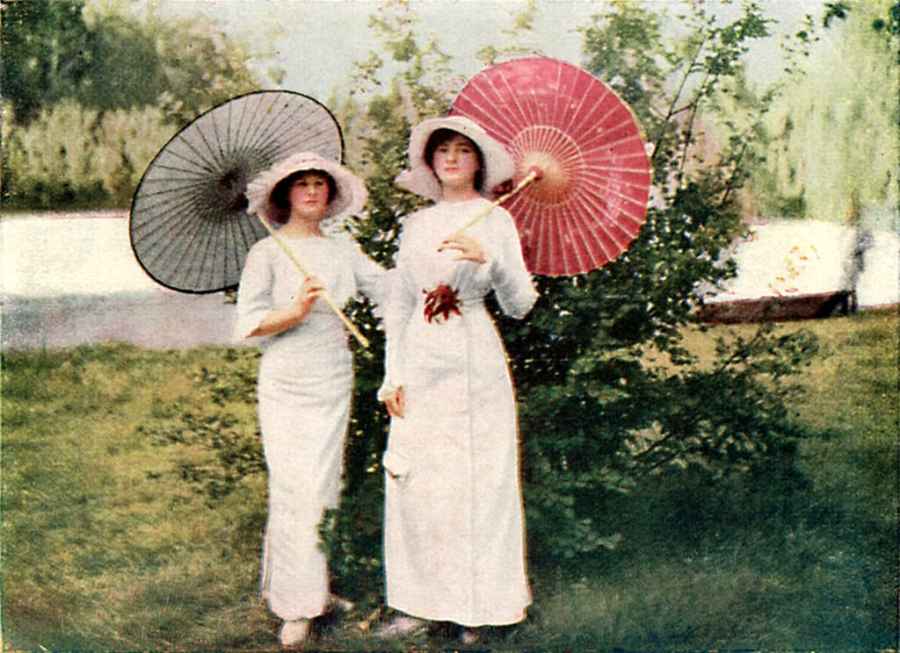
Woman with Parasol by Elias Goldensky, shot with a Hicro camera in 1916
Pause here to remind ourselves of filter theory. A coloured filter passes light of its own colour and blocks light of its complementary colour. The complementary of red is cyan, the complementary of green is magenta and the complementary of blue is yellow. Okay, back to the camera. Focus is set, aperture and shutter speed are adjusted and the exposure is made. Light (which remember is made up of red, green and blue) travels through the lens and hits the 45° mirror to be reflected down to the plate in the floor of the camera whose emulsion is sensitive only to blue light.
Since the mirror is semi-silvered, it transmits as well as reflecting light, so the light travels on through the mirror where it hits the yellow filter on the back of the mirror. This blocks the blue light so only green and red now travel on to meet the film which is orthochromatic and so insensitive to red, thus recording only the green light.
Green and red light then travel on to the second plate via the red filter, which allows through only the red light to record on the second plate because this one is panchromatic. With that done, the lever on the side of the camera is reversed to take the mirror back into the interior roof of the body and to release the hook. Then the small lever on the opposite side of the body is turned, which operates a wire inside to push the plate on the floor of the body back into the tripack.
The dark slide is replaced and the tripack removed from the camera. It now contains three monochrome images, each of which has independently recorded red, green and blue light from the subject to be viewed in colour by the same means as those from three-colour cameras.
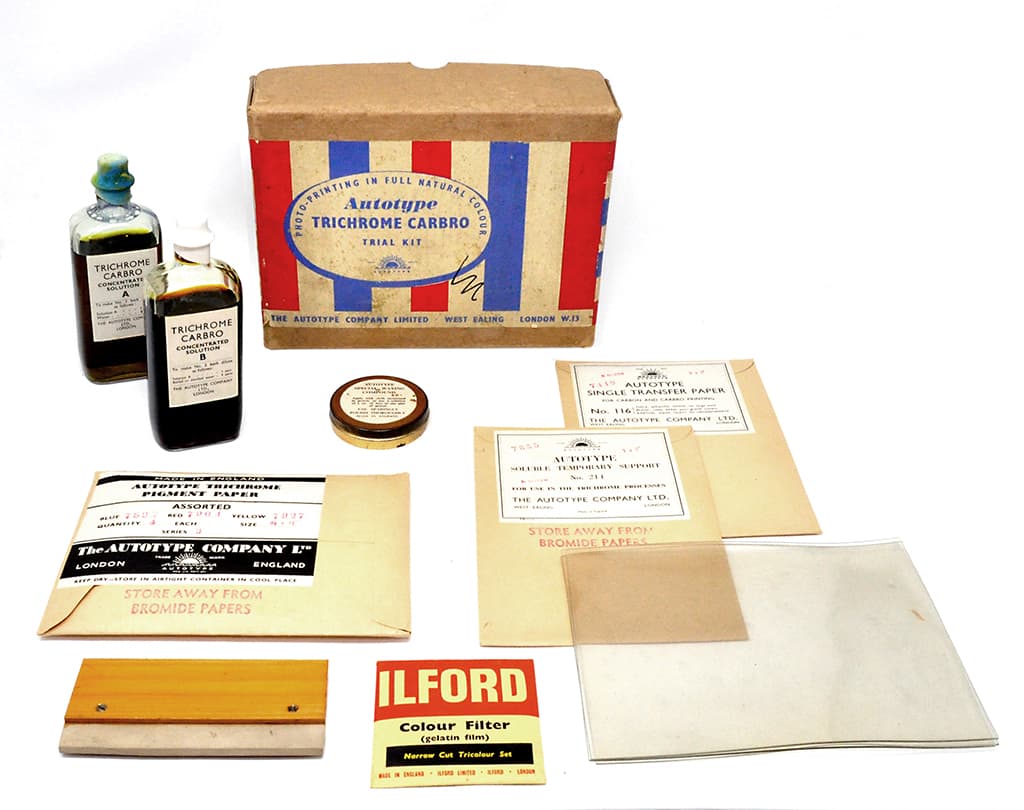
Contents of the Autotype Trichrome Carbro outfit, sold c.1925
Making colour prints
So far I’ve only looked at making colour slides for viewing in a special viewer or by a complicated system of projectors. If our colour photographer of yesteryear wanted colour prints, he might have turned to the Autotype Trichrome Carbro process, found in a kit that contained everything needed. The process, described in excruciating detail in the kit’s 48-page instruction book, was long and complicated. But, put as simply as possible, it went something like this… Using the filtered negative plates from a three-colour camera, three monochrome bromide prints were made.
The Trichrome kit contained dyed pigmented gelatine sheets attached to paper bases, one dyed magenta, one dyed cyan and one dyed yellow. These were each soaked separately in two solutions of chemicals mysteriously labelled ‘Solution A’ and ‘Solution B’. The red-filtered bromide print was placed in contact with the cyan pigment sheet, the blue-filtered print with the yellow pigment sheet and the green-filtered print with the magenta gelatine sheet. After 15 minutes, each bromide print was peeled from the pigmented gelatine to find that the bromide images had been bleached out, their image transferred to the appropriately coloured gelatine sheets.
The magenta sheet was placed on a piece of waxed celluloid and soaked in warm water. The paper base could then be peeled away leaving the gelatine behind on the celluloid to form the magenta part of the image. That process was repeated with the cyan and yellow gelatine sheets. The three images were mounted in register on a temporary support of gelatine coated paper, cyan first, then magenta, then yellow.
The celluloid sheets were removed as each application was made and the image left behind was transferred to a sheet of single transfer paper, which left the cyan part of the image, previously on the bottom of the stack, now on top. If I’ve got all that right, our extremely patient photographer of the past would now have been holding a colour print.
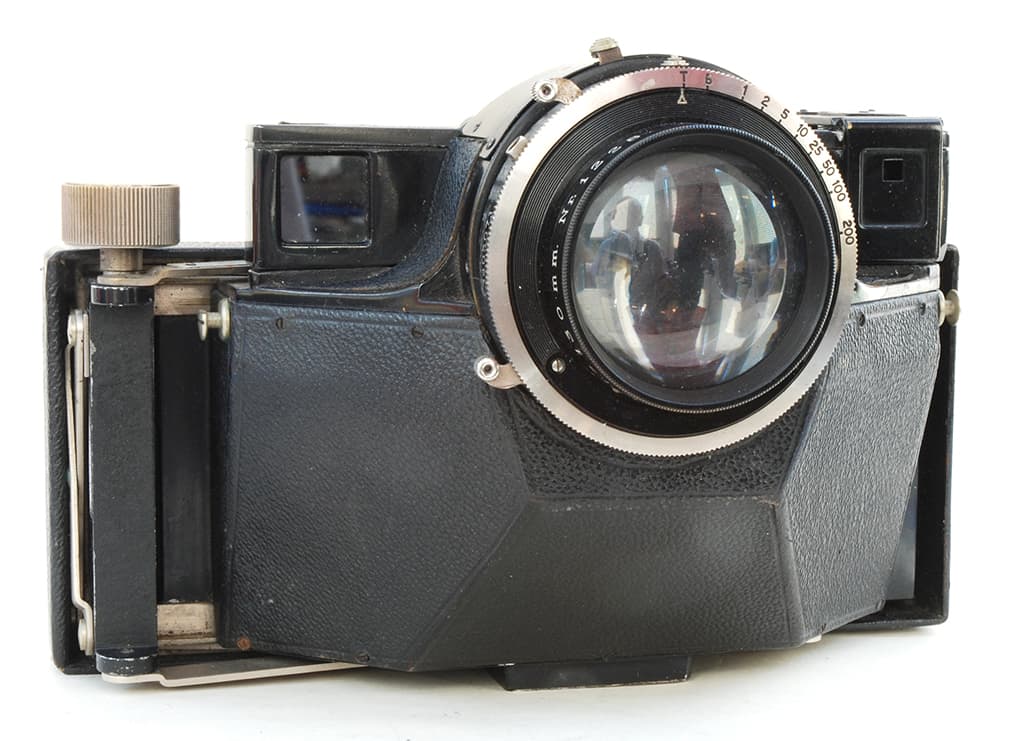
The 1936 Mikut produced three 4x4cm filtered pictures side by side on a single plate
What came next
Now came a different design of camera which made the job simpler by using mirrors and prisms to split the light through the lens so that it hit three plates at the same time, each one through a red, green or blue filter. So despite the success and relatively easy use of Autochrome, three-colour cameras were still considered the way forward. Then Dufaycolor arrived.
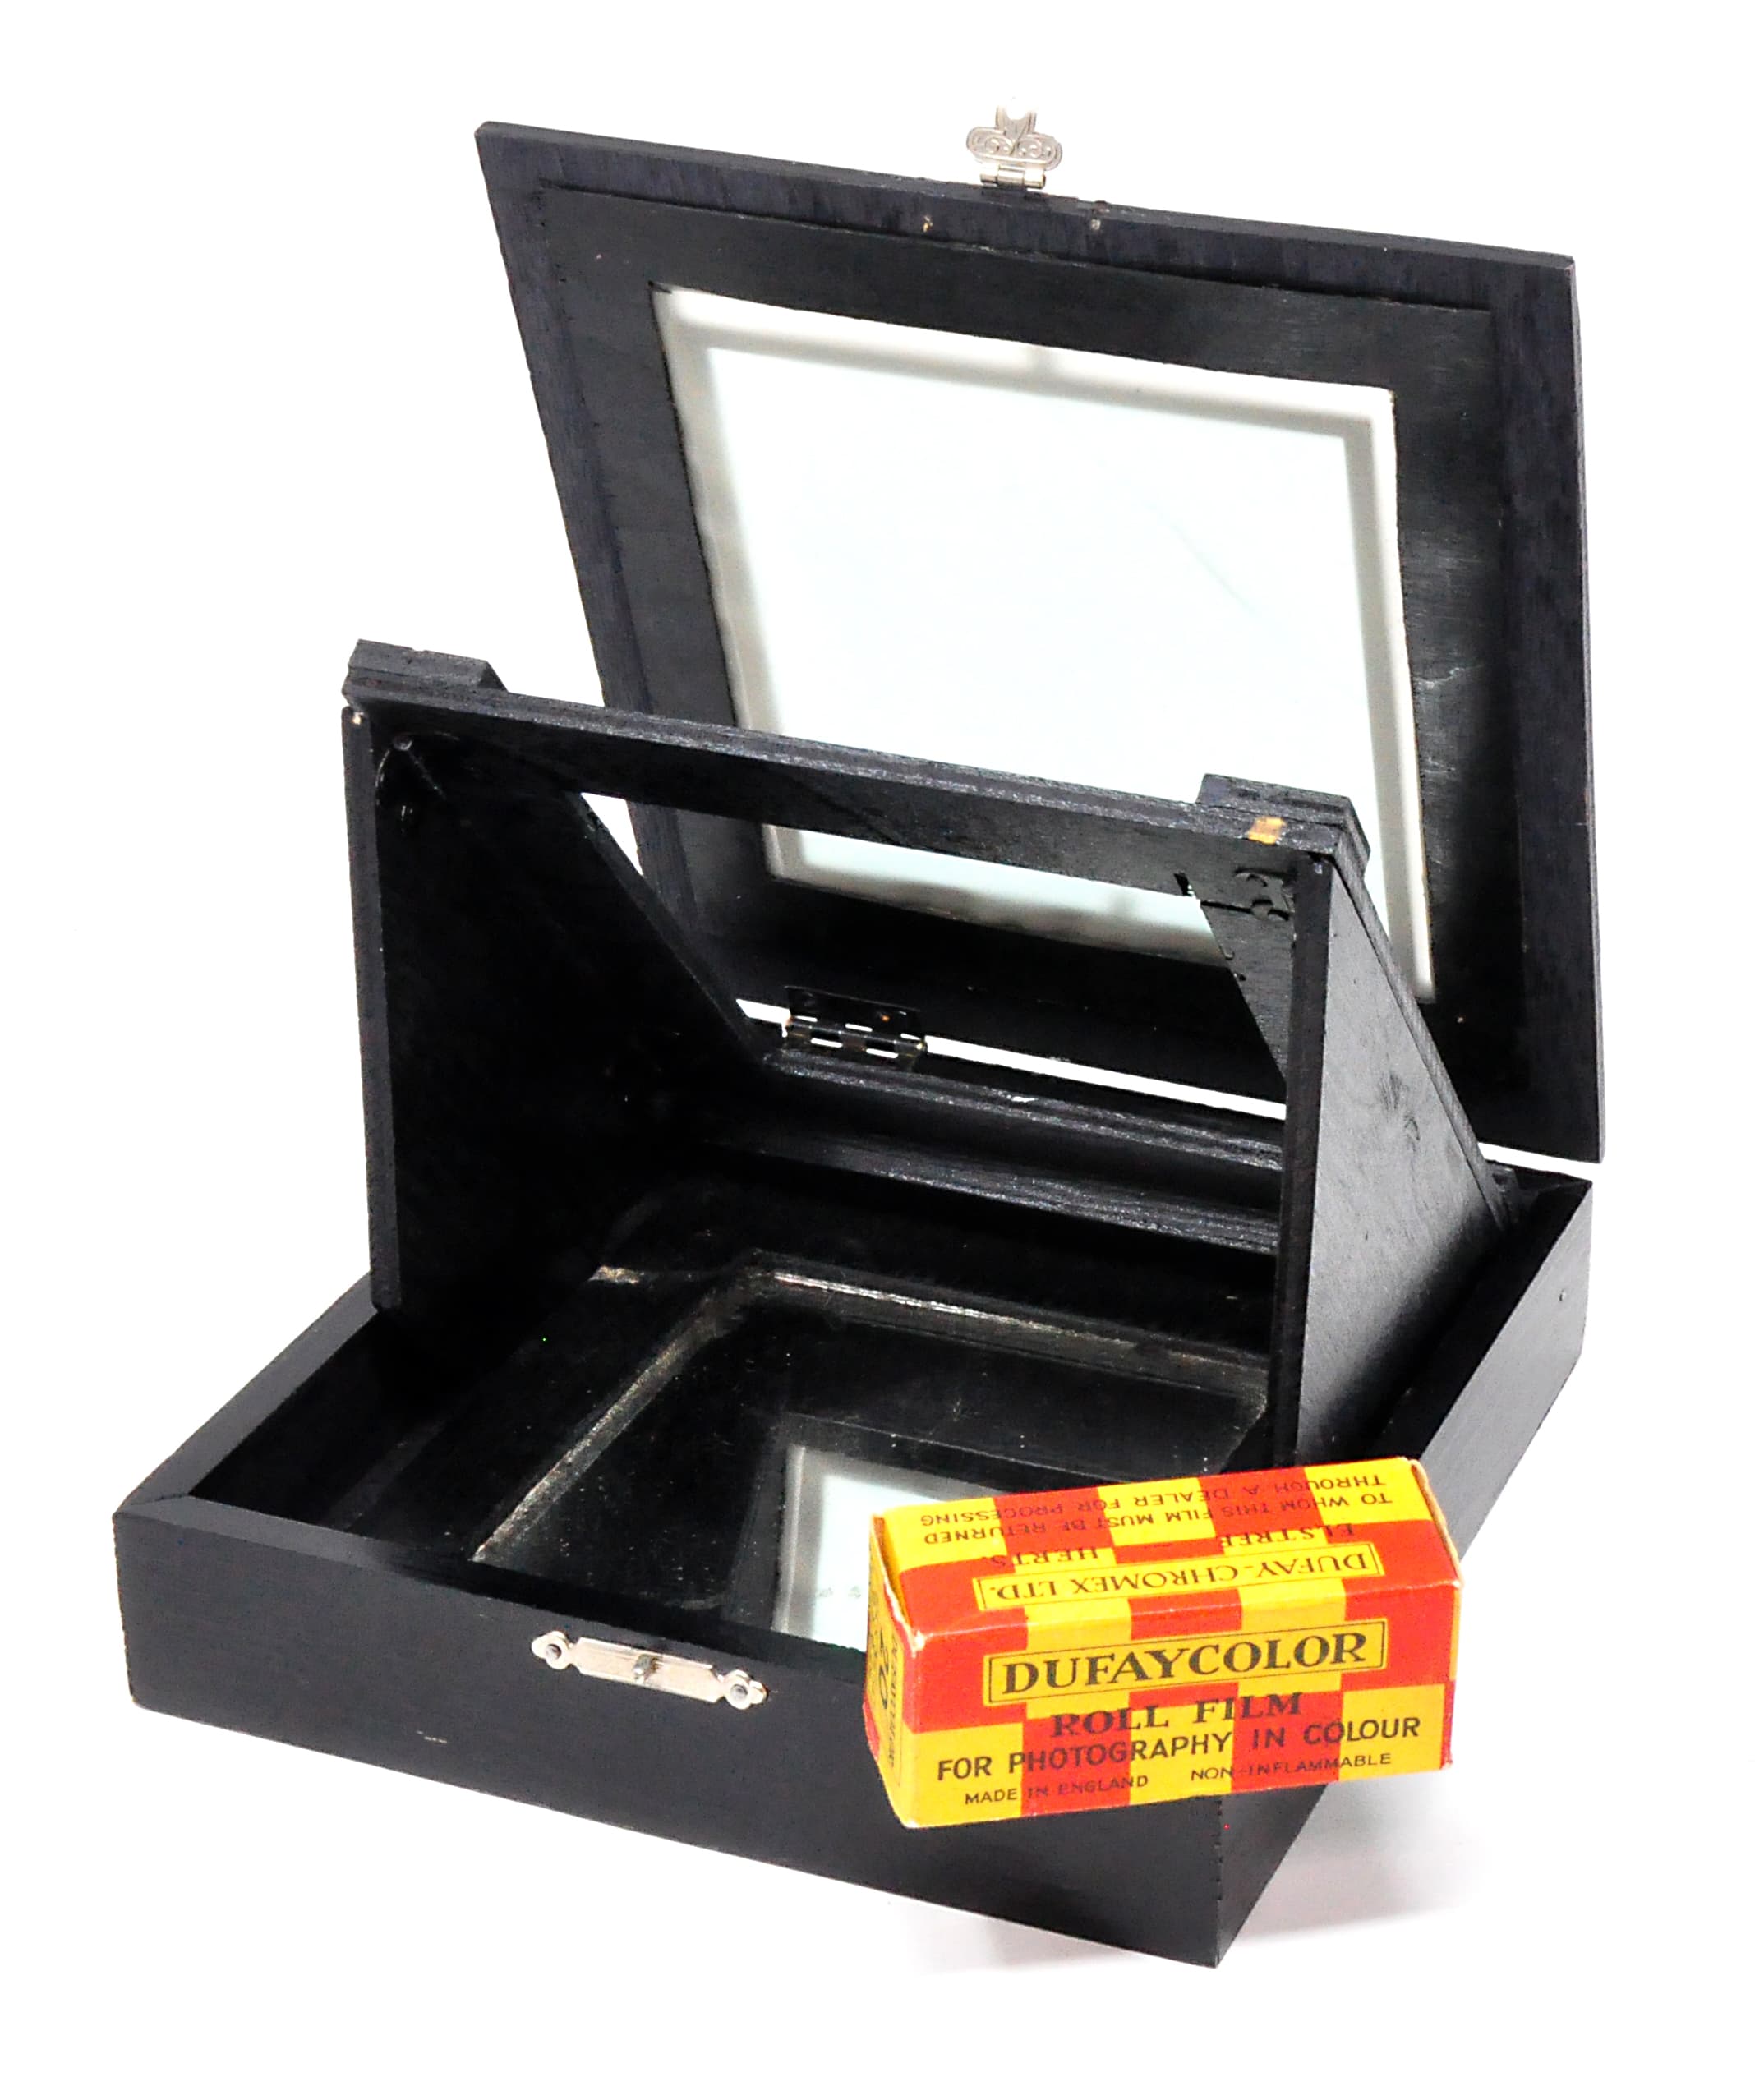
A special viewer made for Dufaycolor transparencies, with a box of 120 size Dufay colour film
This was a monochrome roll film whose base contained blue and green lines criss-crossed with red lines to form a microscopic grid of red, green and blue rectangles. Shooting through the base, then processing the film as a positive monochrome image produced a full colour, though rather dense, transparency. Dufaycolor was introduced as a cine film in 1932 and as still film in 1935.
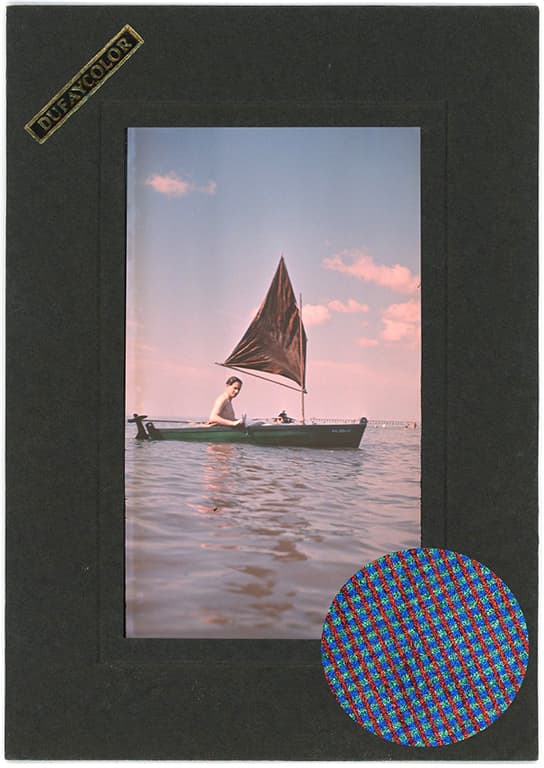
Dufaycolor transparency and, inset, the microscopic grid embedded in the film base
So colour could finally be shot on film, rather than glass plates, in virtually any camera. Could it get better than that? Yes, actually it could, and it was all down to two full-time musicians and part-time scientists called Leopold Godowsky and Leopold Mannes. Their work so intrigued Kodak that the company offered them full use of its research facilities in Rochester where they discovered a new way to make colour film.
It was launched first as a cine film, then as a film for still cameras in 1936. It was called Kodachrome. After that colour photography, and the cameras that made it possible, were never the same again.
Doing it with digital
How to recreate three-colour photography of the past with today’s digital technology
Set up a colourful subject and switch your digital camera to monochrome mode. With the camera on a tripod, take three black & white pictures through red, green and blue separation filters. (You can buy a set by searching ‘tri-colour filters’ at Wex Photo Video, but many other retailers have them too). Do not adjust the images to greyscale, keep them as RGB. You need the full version of Photoshop or similar software that allows you to work in Channels.
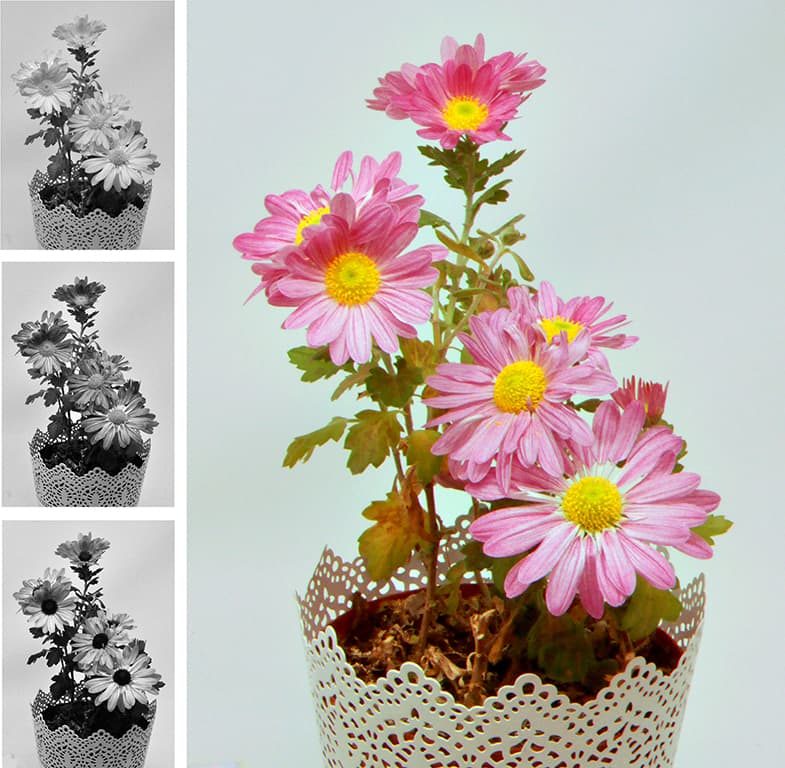
Three filtered monochrome images (Left) and the colour version
made using Photoshop’s Channels palette
-
- Open the Channels palette (Window>Channels).
This shows you the red, green and blue channels that make up a digital picture, plus an RGB channel that shows all three combined. - Open the red channel then copy and paste the red filtered monochrome image into it. Do the same with the green and blue channels.
- Click the RGB channel to see the picture in colour.
- Open the Channels palette (Window>Channels).
If your version of Photoshop or other software does not allow you to work in channels:
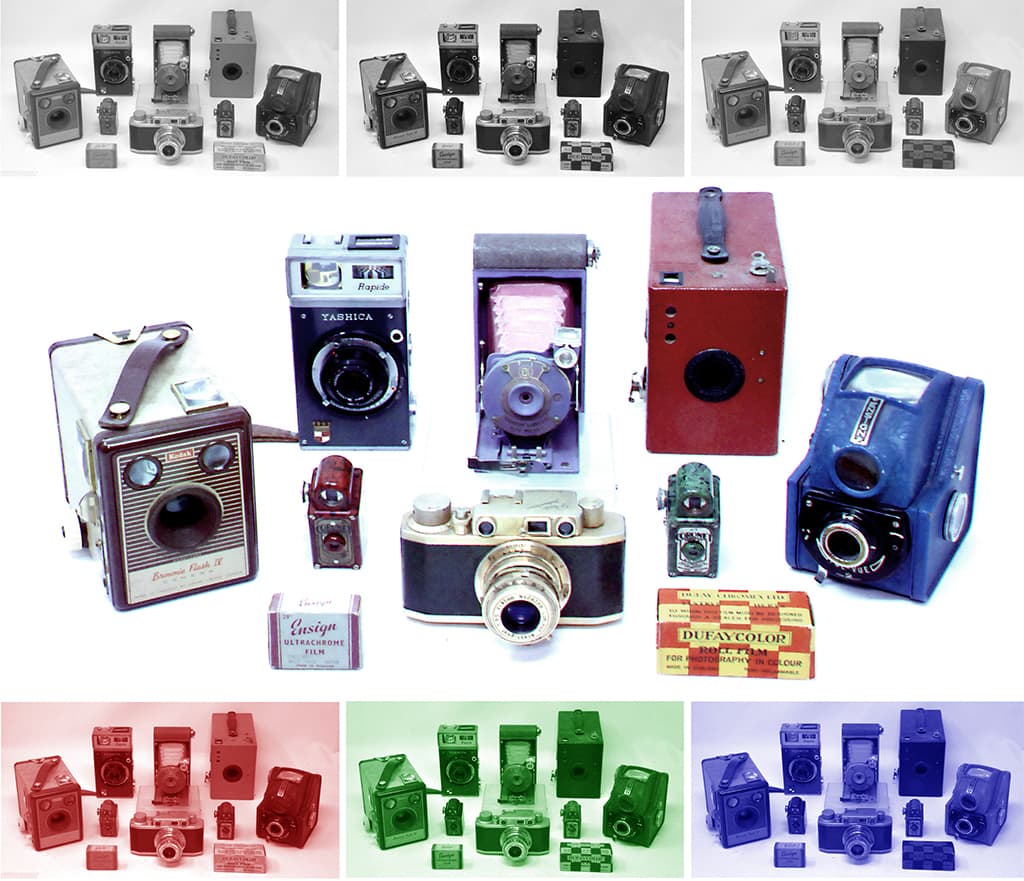
Top: Three monochrome filtered images; Bottom: Toned versions of the same monochrome images; Centre: The toned images combined to make a full-colour picture
1) Take your three monochrome images through red, green and blue filters as before.
2) Open the red filtered image and then open the colour balance tool (Image>Adjustments>Colour Balance). Shift the red pointer all the way to the right. This will tone the monochrome image red. Do the same with the green and blue filtered images.
3) Open the red image, then copy and paste it into a new page.
4) Open the green image, copy and paste it into a new layer on top of the red image. Open the layers palette (Window>Layers) and change the blending mode from ‘normal’ to ‘lighten’.
5) Do the same with the blue image.
6) Flatten the layers (Layer>Flatten Image).
7) You should now have a full colour image. Adjust the levels (Image>Adjustments>Levels) and colour saturation (Image>Adjustments>Hue/Saturation) for the best result.
Article: John Wade

