Tucked away among the plethora of Photoshop filters is Displace, which is perhaps one of the oldest filters in the programme’s arsenal. Designed to allow you to place artwork realistically on an irregular surface, it is perfectly suited for overlaying text onto a brick wall, for example, and will ensure the text follows the contours of the bricks. This displacement mapping requires two elements – the image (or text) you wish to distort and the picture you want the first image to overlay (the displacement map). It works by interpreting the brightness value of greys in the map.
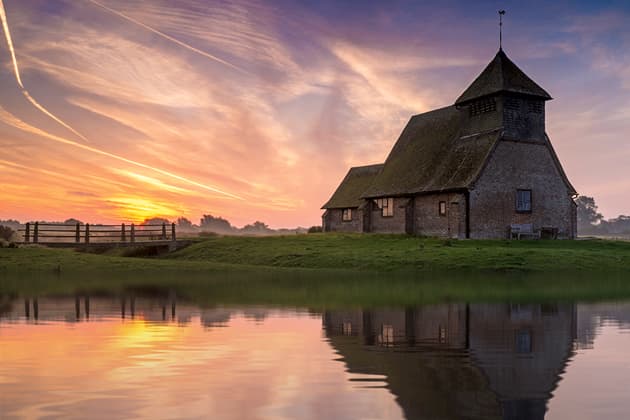
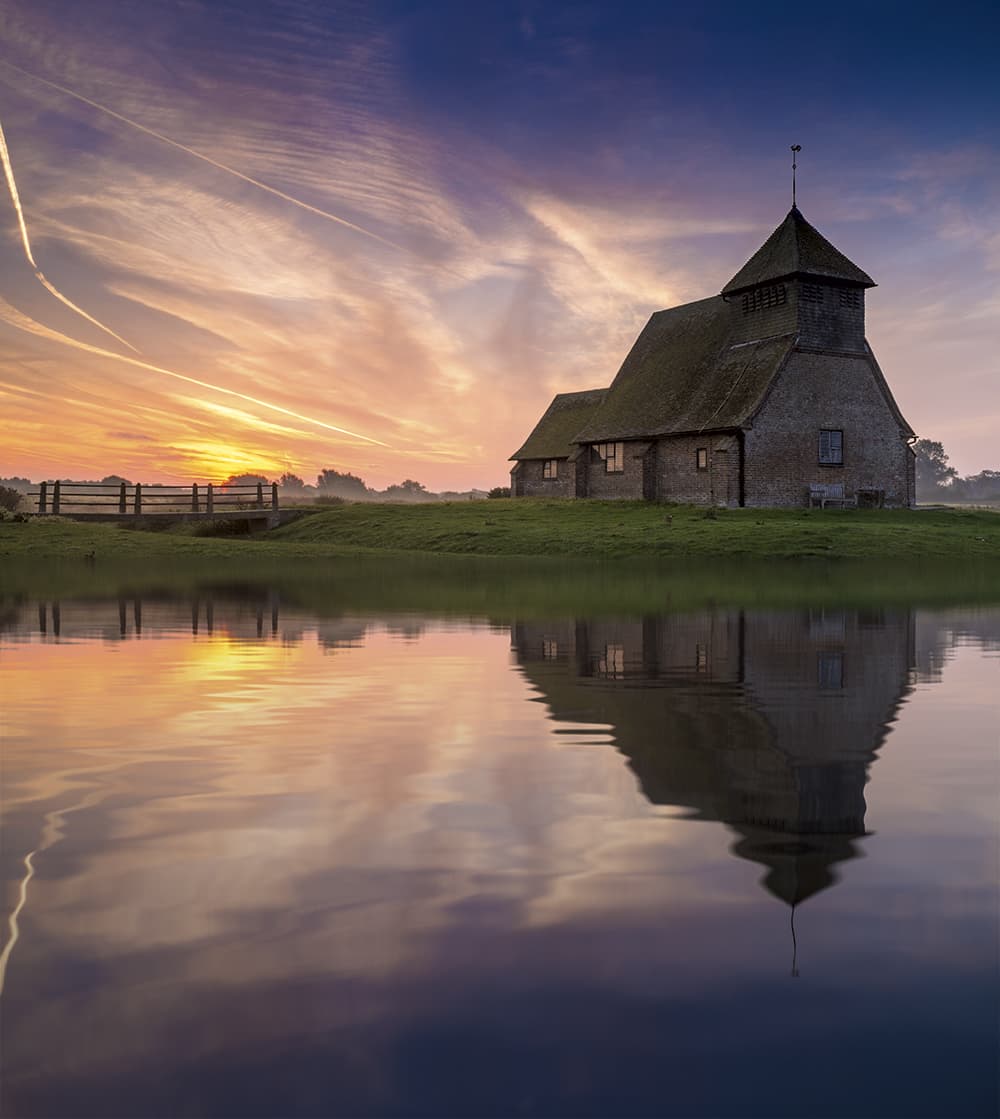
That’s one way of using the Displace filter, but it can also be used to create a lifelike water reflection. This is achieved by making your own displacement map, which can then be applied to a flipped image so it appears as a reflection.
Things to consider
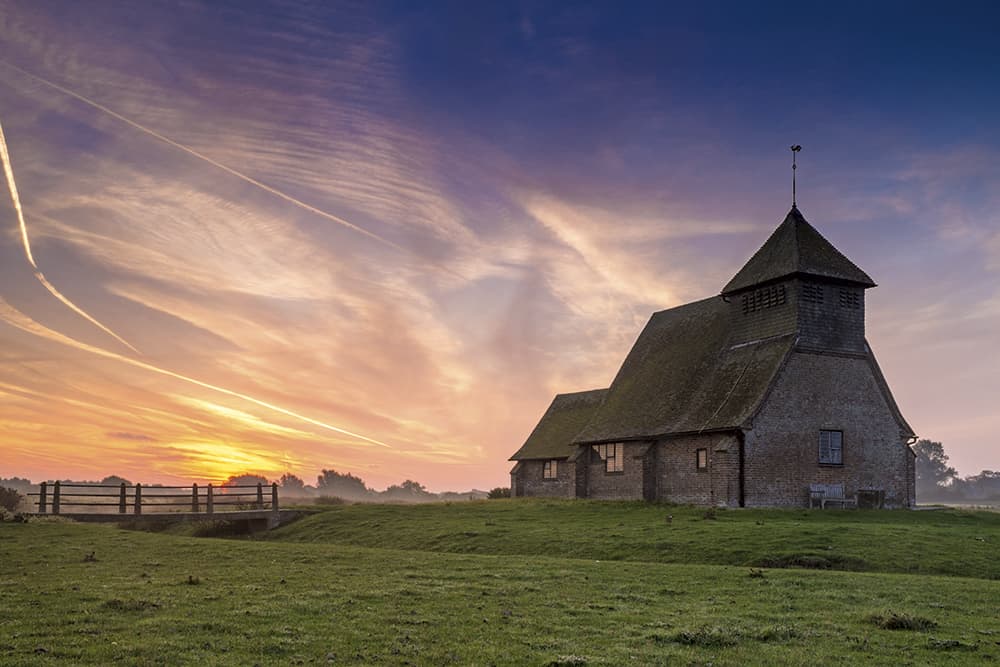
To achieve a successful result, you have to consider the image you use. Images from a higher viewpoint tend to look a little awkward, while those shot from a lower angle look more natural. As the image is going to be flipped, you need to look for a point where the two elements can be joined seamlessly so it won’t look out of place. You also need to think about the format of the image you pick – portrait format doesn’t really work, because once the image is flipped you’ll be left with a long, thin canvas.
As you can see from the shot we’ve used here, the angle is low and, thanks to the uncluttered foreground, the join between the images is quite natural. While this technique naturally lends itself to landscapes, don’t be afraid to experiment with other subjects.
Step by step
1 Displacement Map
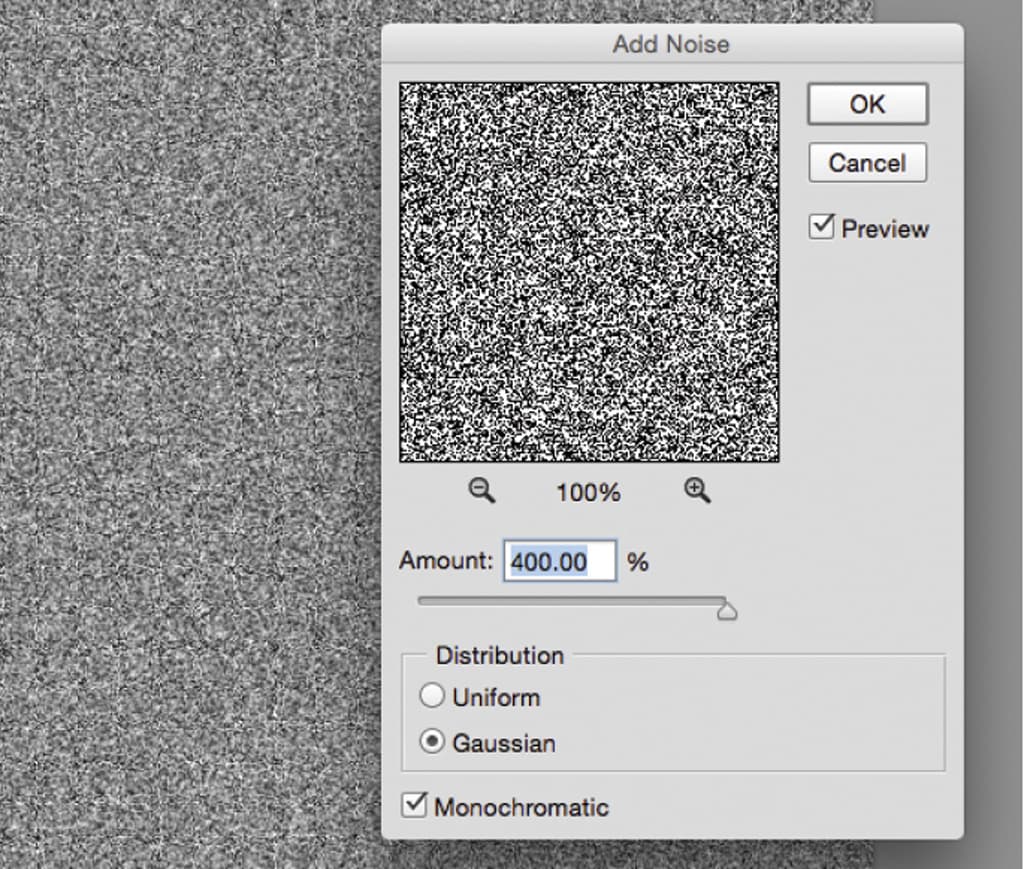
Go to File>New and create a new document at 1,000×2,000 pixels, in RGB mode with white as the fill. Once opened, go to Filter>Noise>Add Noise and in the pop-up box set the amount to 400% and Distribution as Gaussian, with Monochromatic ticked. Then go to Filter>Blur>Gaussian Blur and set the amount to 2.0px.
2 Emboss
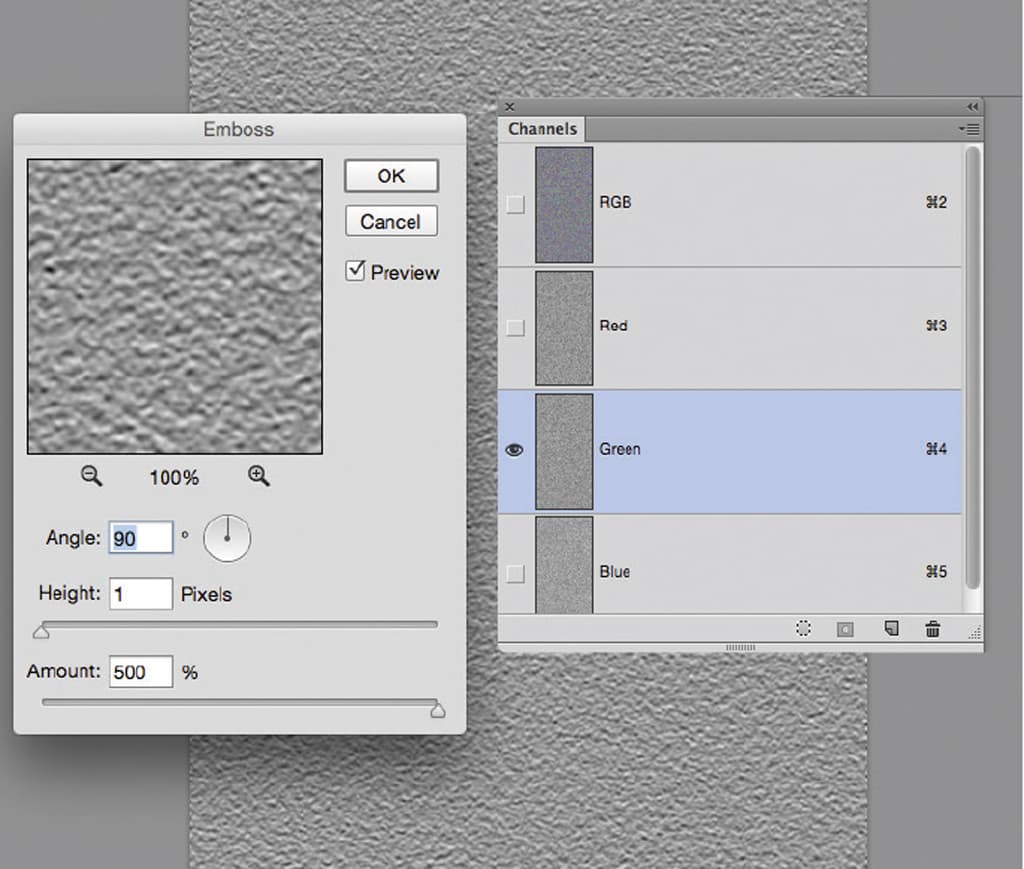
In the Channels palette, select the Red channel, then Filter>Stylize>Emboss. Set the angle to 180°, height at 1px and amount to 500%. Then select the Green channel and Emboss again. This time set it to 90°, with everything else the same as before. Select the Blue channel and go to Edit>Fill and fill with black.
3 Transform
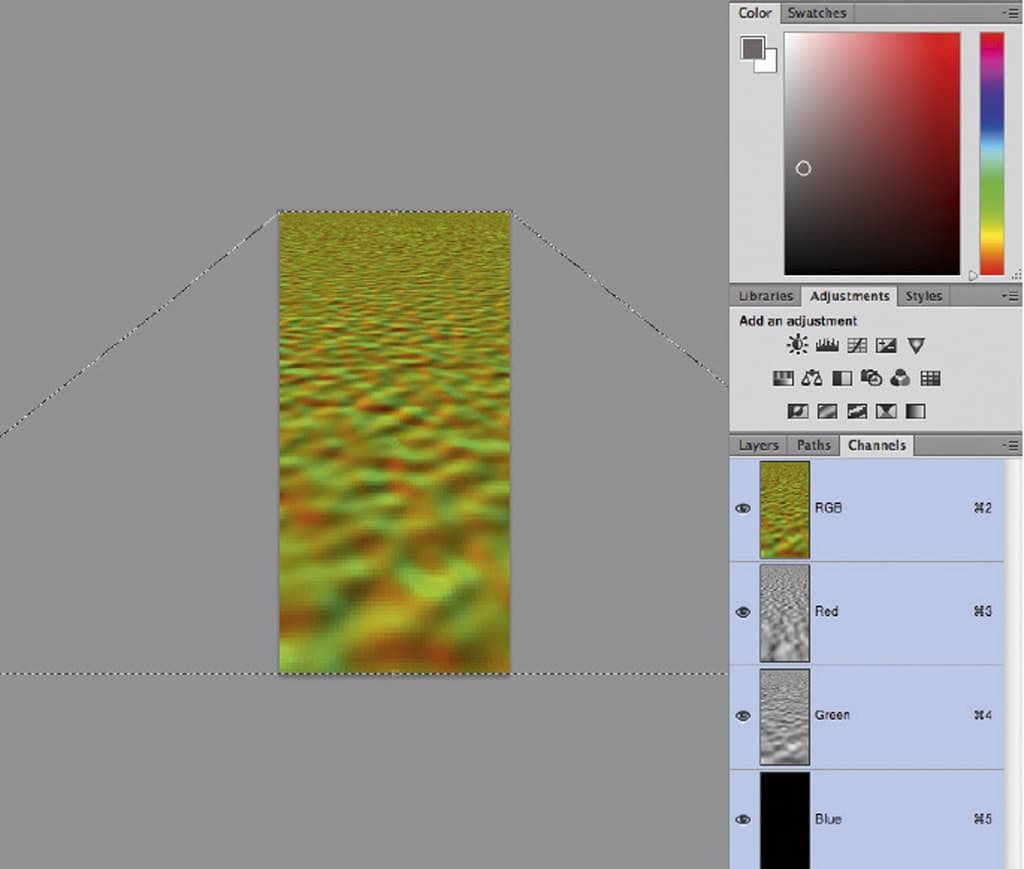
Select the RGB layer and then select the Layers palette. Go to Edit>Transform>Perspective, pulling a bottom corner outwards until the width is 600%. Hit return and repeat. Resize the image by going to Edit> Transform>Scale, setting the height to 50%, with the white space cropped to leave a 1,000px square file.
4 Add distance
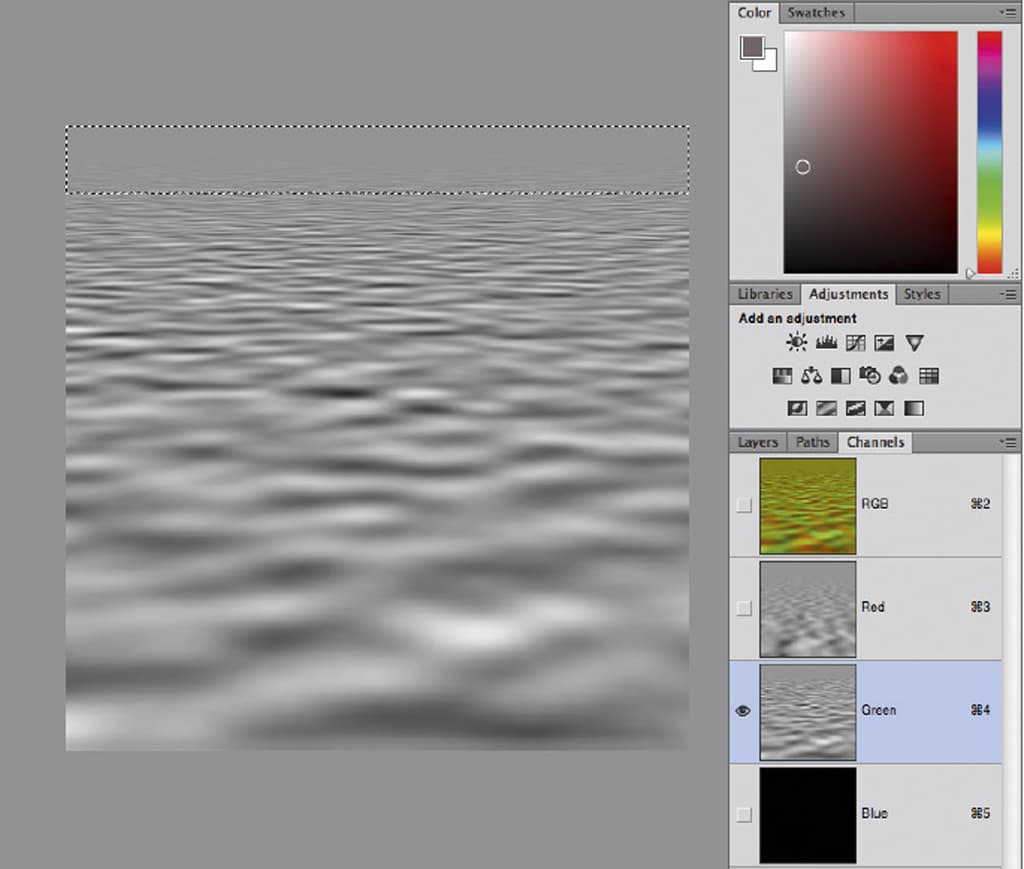
Return to the Channels panel, select Red, hit Q for Quick Mask Mode and draw a Gradient (white to black) from top to bottom before hitting Q again. Go to Edit> Fill and select 50% Grey. Select the Green channel, hit Q and draw another gradient – this time from the top down, but only by 15-20%. Hit Q and fill with 50% grey.
5 Blur and save
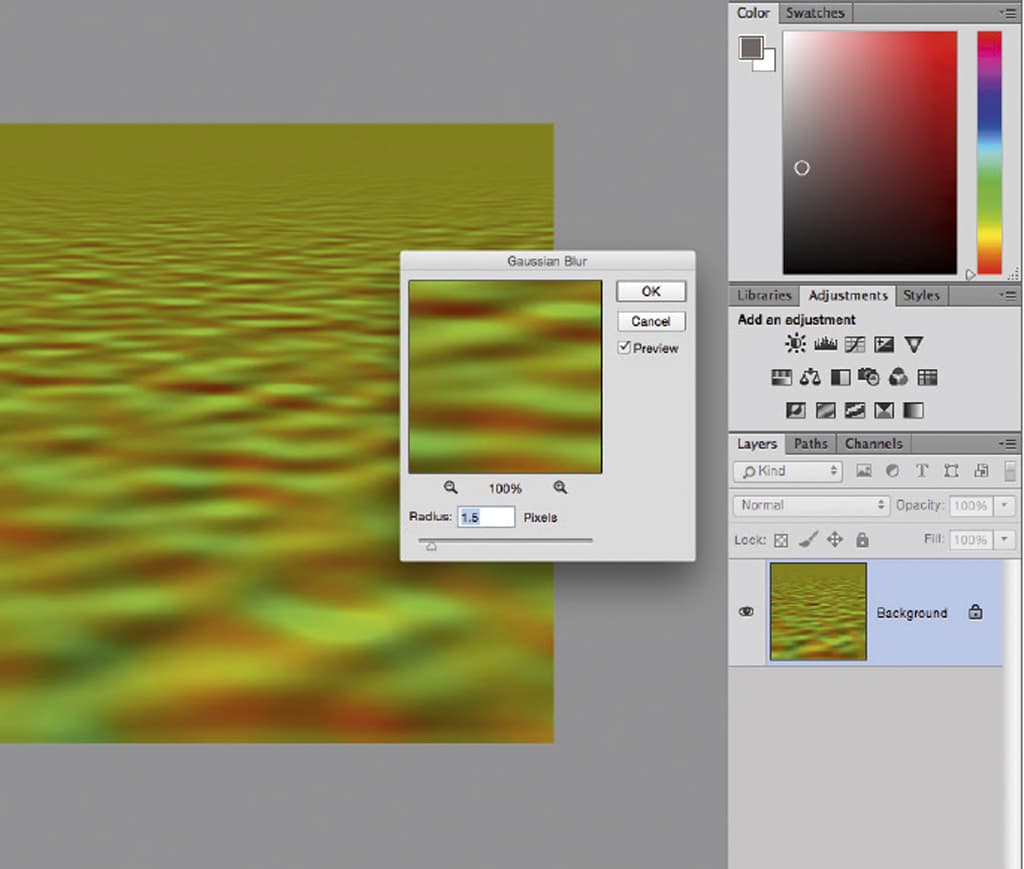
Select the Layers palette and apply a Gaussian Blur of 1.5px before saving. It’s important to save it as a Photoshop PSD file, ensuring Maximum Compatibility is applied – if you’re unsure, got to File>Preferences> File Handling. With the Displacement Map saved, we can now look at applying this to an image.
6 Select image
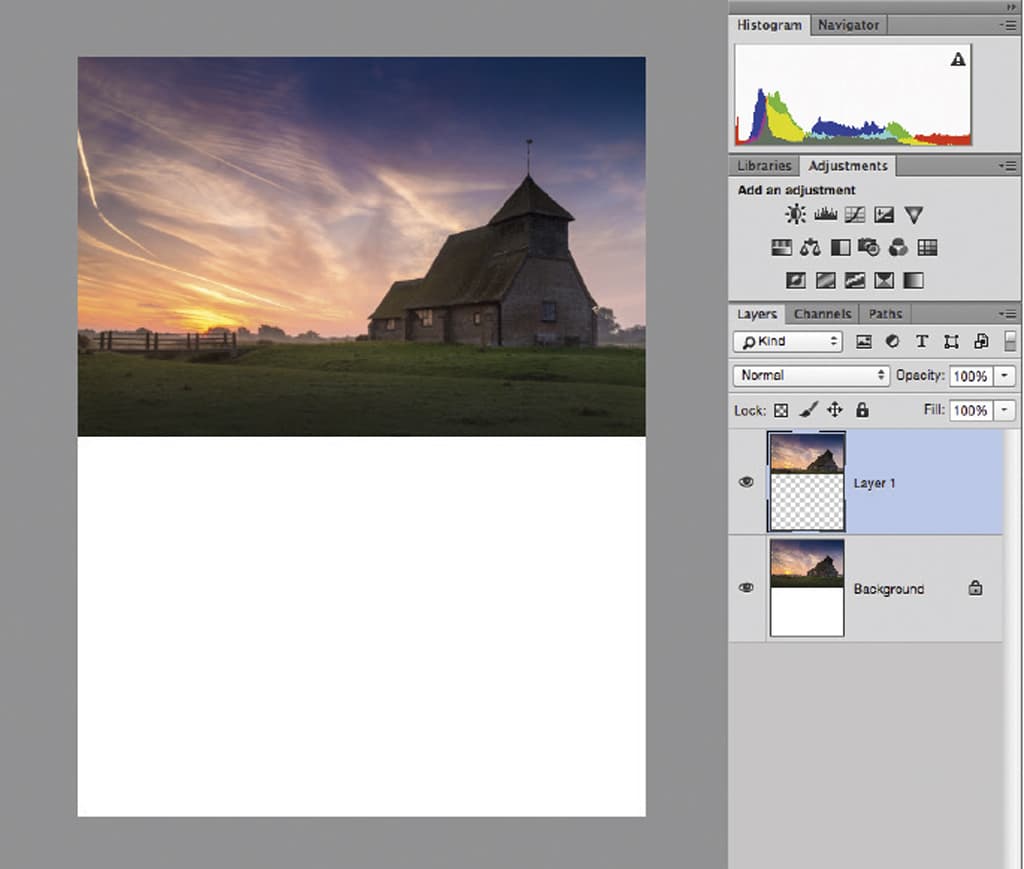
Open a suitable image to apply a reflection to and extend the Canvas (Image>Canvas and in the pop-up box, set the Anchor point in the top middle, setting the Height at 200%). Then make a selection, paying attention to the point you want the reflection to begin. Hit Ctrl+C and then Ctrl+V to paste into a new layer.
7 Flip
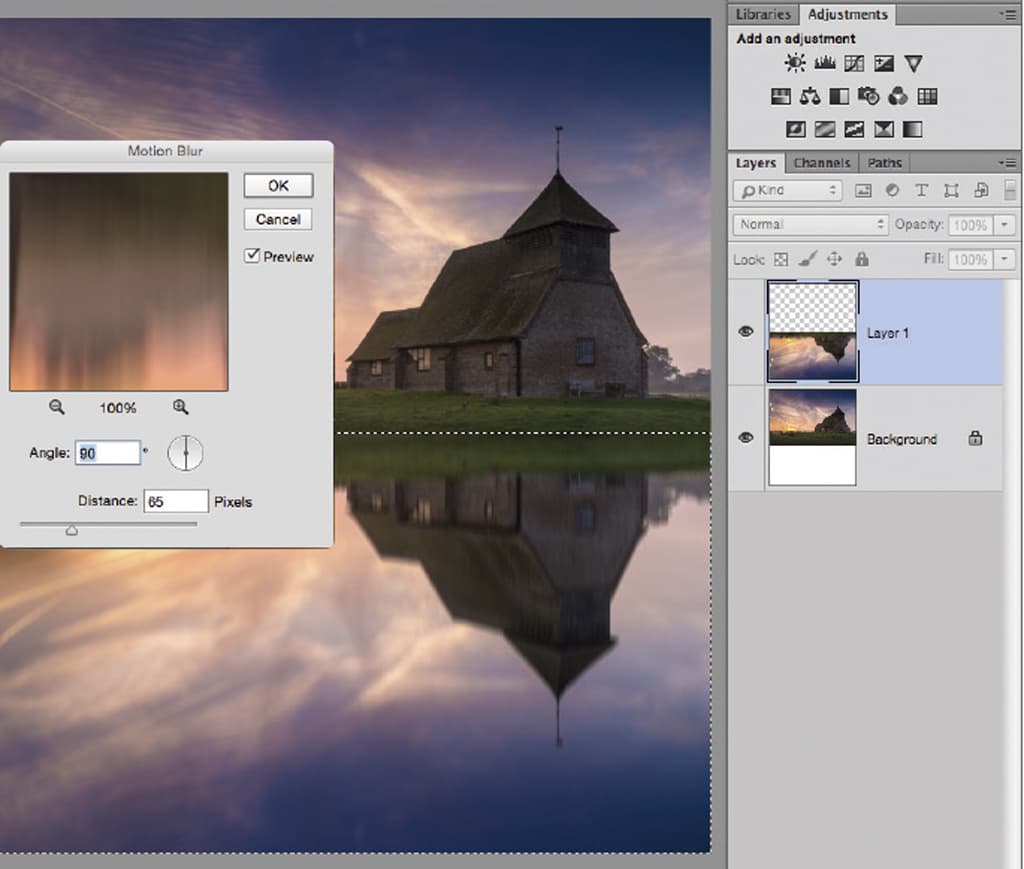
Go to Edit>Transform>Flip Vertical and then move it into position. Crop the image if necessary before holding down Ctrl and clicking on the flipped thumbnail in the Layers palette to make a selection. Go to Filter>Blur>Motion Blur and enter an angle of 90° and a Distance of 65px to soften the image.
8 Add ripples
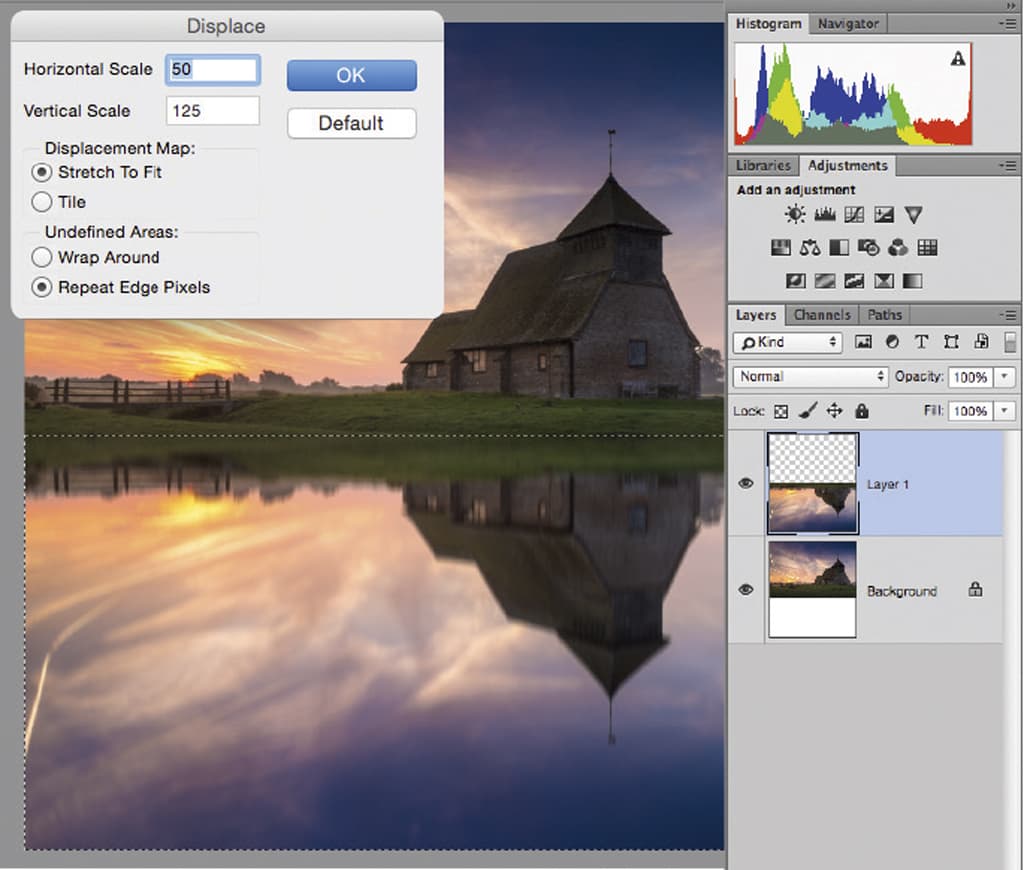
Select Layer 1, hit Ctrl and click on the thumbnail. Goto Filter>Distort Displace. In the pop-up box, set the Horizontal Scale to 50 and Vertical Scale to 125 (you may need to experiment), select Stretch To Fit and Repeat Edge Pixels, then hit OK. Find where your Displacement Map is saved and watch the magic happen.
9 Finishing touches
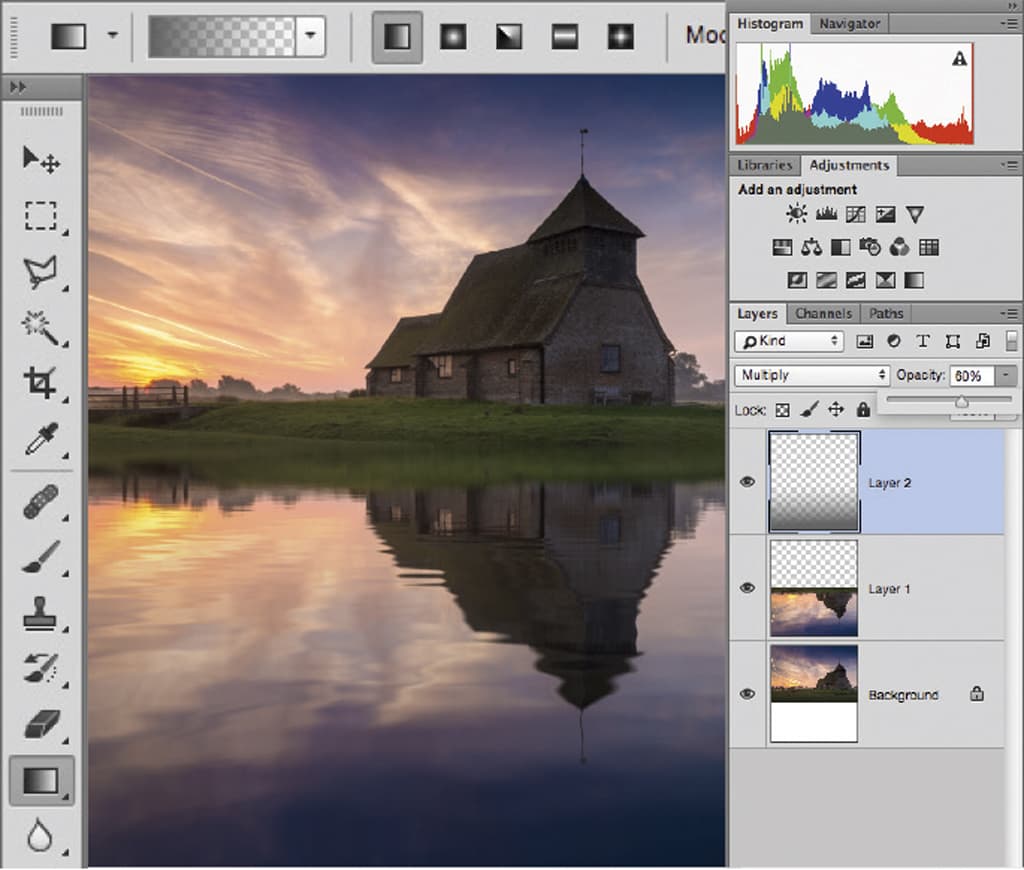
To finish, go to Layer>New Layer, then select the Gradient Tool from the Toolbox, picking ‘Foreground to Transparent’ as the Gradient. Select a dark grey as your foreground colour and then apply a gradient from the bottom to the middle of the image. Change the Blending Mode to Multiple and reduce the Opacity.

