

Angela Chalmers explores the cyanotype printing technique, and shows you how you can create your own. A super fun and easy activity
What are Cyanotypes?
The cyanotype process is an alternative, camera-less technique that involves laying negatives and/or objects such as leaves, flowers, materials on photosensitive paper and exposing in the sun or under UV light. Traditionally used for reproducing technical drawings e.g. in architecture and engineering, the reaction between UV light and the iron-based solution produces a Prussian Blue pigment (hence the term ‘blue print’). Paper can be bought pre-coated, or you can use cyanotype chemicals to coat your own. Finished prints are developed by washing with cold running water.
Cyanotype inspiration
While many photographers make decisions about which lens, aperture or shutter speed is required to capture a moment of creativity, my photographic images are made without using a camera, and use the traditional cyanotype formula that was invented in 1842 (by Sir John Herschel). British botanist Anna Atkins, who has been described as the first woman to produce a photographic book, used the process to illustrate specimens of algae in Photographs of British Algae: Cyanotype Impressions in 1843, while famous artists such as Man Ray and László Moholy-Nagy rediscovered photograms during the avant-garde movements of the early 20th century.

A technique with no boundaries
The biggest joy of working with an alternative process is the impressive results you can achieve when you experiment and break rules. There are no boundaries with making photograms. In fact it is such a liberating way to make images that even if your first attempts are not masterpieces the creative experience of producing a simple photographic image without a camera is something that I feel all photographers should try at least once in their life. I would compare the sacred act of making black & white prints in the darkroom to making cyanotype prints – a simple yet satisfying photographic process with unlimited possibilities. Indeed William Henry Fox Talbot, one of the pioneers of photography in the 1830s, continued to experiment with camera-less images for many years after he discovered how to produce photographic negatives.
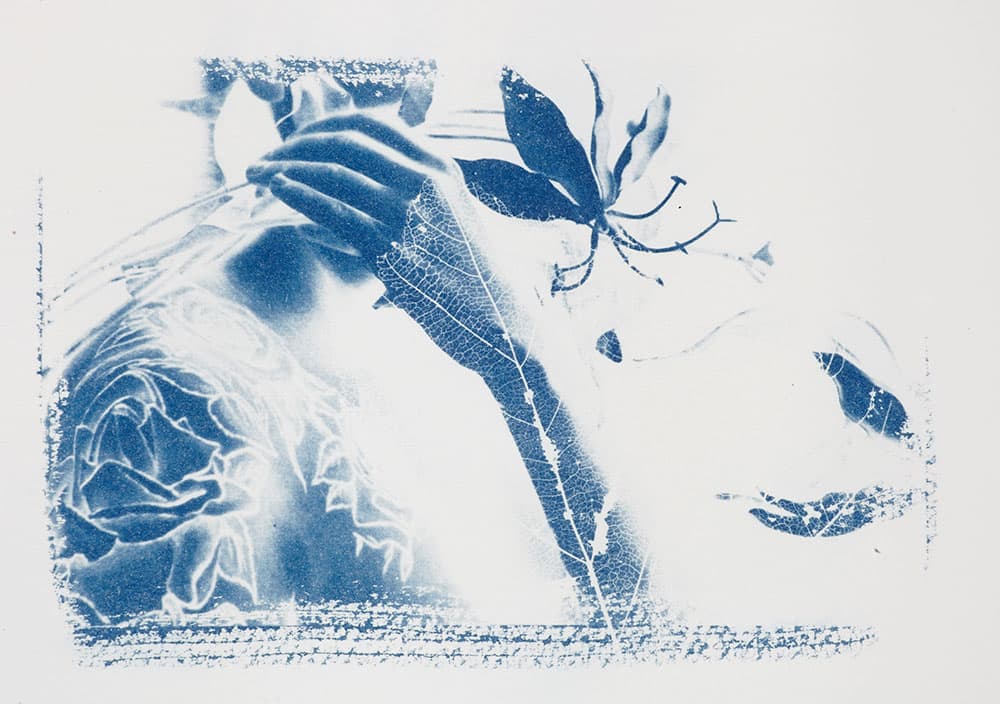
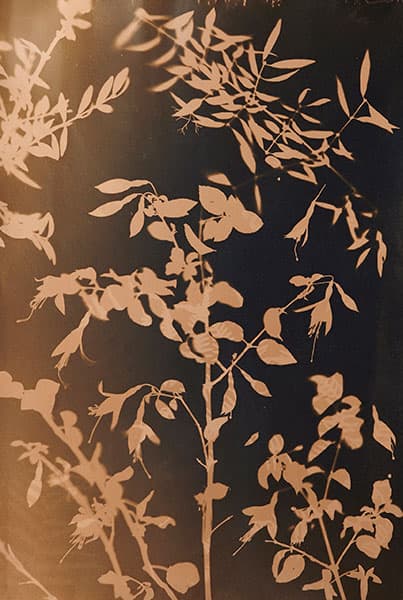
The aesthetics of a photogram are somewhat mysterious, which is what grabbed my attention when I first saw the works of surrealist artist Man Ray. Almost any object that blocks the light can be used to cast shadows on a support. I have worked with feathers and birdcages, wedding dresses and veils, and even people. There are infinite options to make unique photographic prints. Whatever the subject matter, they are quite intriguing and in some way ethereal.
What objects work best for cyanotypes?
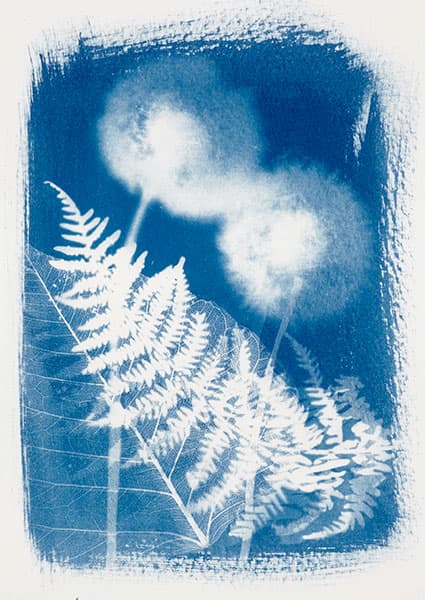
I always tell participants of my workshops that semi-transparent objects create the best effects. A solid object will block the light leaving a white silhouette, and translucent items allow the light to pass through and around. This can be interesting and creates fluctuating tones of blue. When working with nature, I prefer to choose flowers that are delicate, such as poppies, sweet pea and dandelion seed heads. The soft translucency of their petals and form create beautiful tones. Obviously, digital negatives or traditional large-format film negatives can be used to produce cyanotype prints. I am currently working with both digital negatives and 3D objects together on a series called ‘The Flower Collector’.
How to create successful cyanotype images
Observe nature
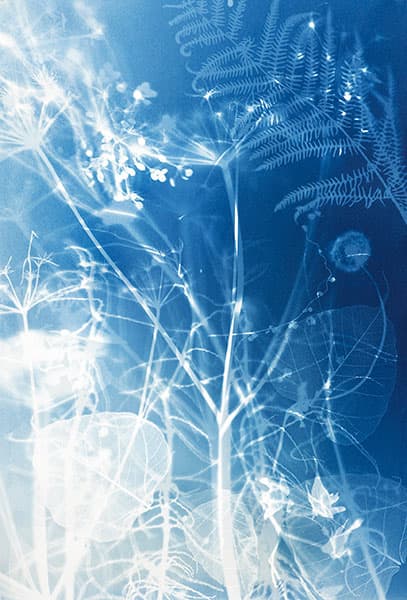
I love to walk into the landscape and work directly with nature using sunshine as my light source. Direct sunshine will yield harder shadows, and diffused sunlight creates softer edges. Regarding the best time to expose outside in the UK, the sun gives more consistent results from March to September when the sun is higher in the sky; a couple of hours each side of noon usually work the best.
When travelling, I often carry a basic kit to process my prints outdoors. These prints are mostly on smaller sheets of paper, which are easier to carry around. The experience of working on location becomes one of a physical engagement with my environment. You could call it multisensory. It is wandering, seeing, smelling, feeling, gathering and printing.
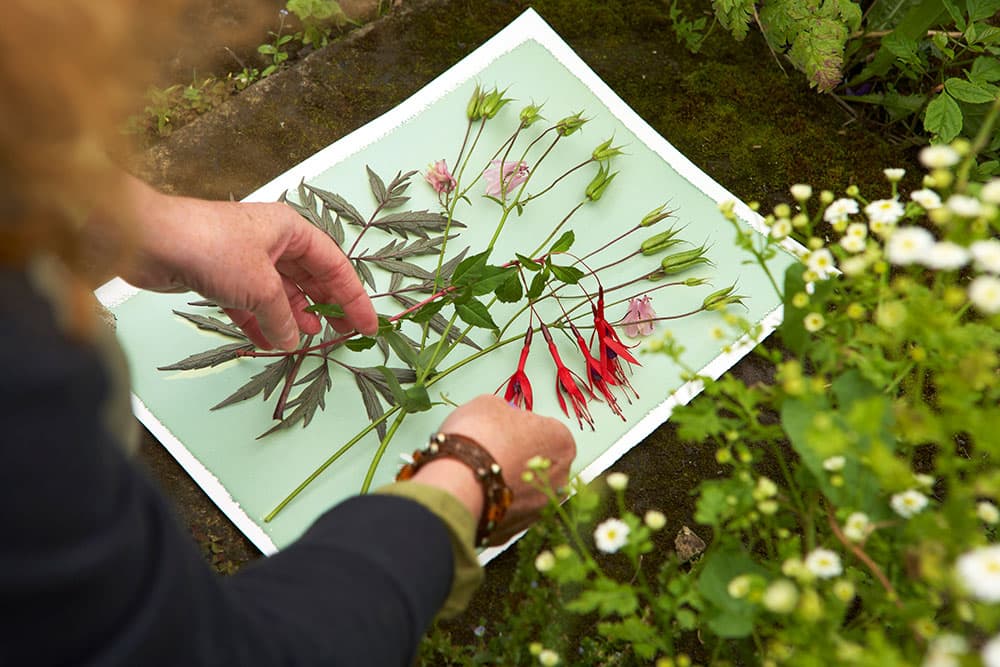
It is important to look closely at plants in their natural environment; this will be a useful practice to enhance your compositions back in the darkroom. While gathering foliage I make a mental note about the way certain flowers and grasses sit harmoniously side by side. A field and hedgerow full of bracken and hogweed is chaotic and wild; an elegantly designed parkland is much more orderly. When I am back in the studio with a collection of plant life, I create my own landscapes through considered composition. I might remove flower heads from their stalks to allow them to be placed flat on the paper.
Controlled UV
It is best to print in bright sunshine. The summer months are best for shorter exposures and stronger blues. However, working outside under the rays of the sun leaves very little time to fiddle or move anything. If you do, your image may end up blurred. You don’t have time to be indecisive when your paper is fast exposing. If a precise composition is more essential to your final print this needs to be done under a controlled light source. UV lamps are essential for all-year-round printing. Exposure units and even facial tanning lamps can be used.
My set-up is basic. I have a simple yet straightforward UV lighting system on an adjustable stand that can be moved up and down to accommodate a range of paper sizes. This gives me plenty of time to organise my composition under safe light. The downside is that exposure times are longer; large papers require 2-3 hours under my system. I use a 300W Osram lamp, which is designed to be a UV light source for amphibian cages. I made a basic lamp housing that I just plug into a 13 Amp socket. Get a qualified electrician to make this for you.
Be experimental
My favourite read is Shadow Catchers: Camera-less Photography by Martin Barnes. It’s full of experimental techniques by contemporary artists who extend the creative possibilities of making a photograph image without the use of a camera. Cyanotypes sound terribly toxic, but are quite safe if used with care. They can be printed on paper, textiles, wood, ceramics and even glass.
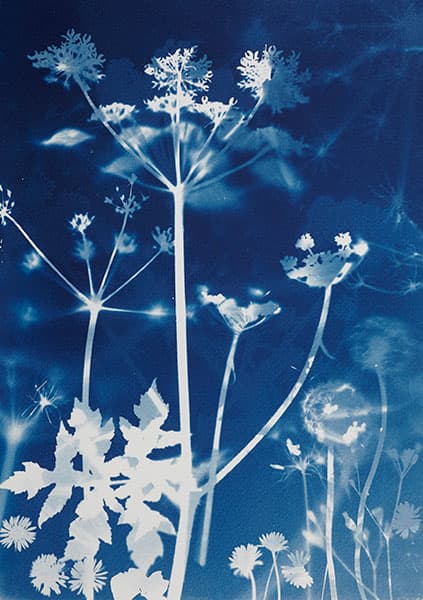
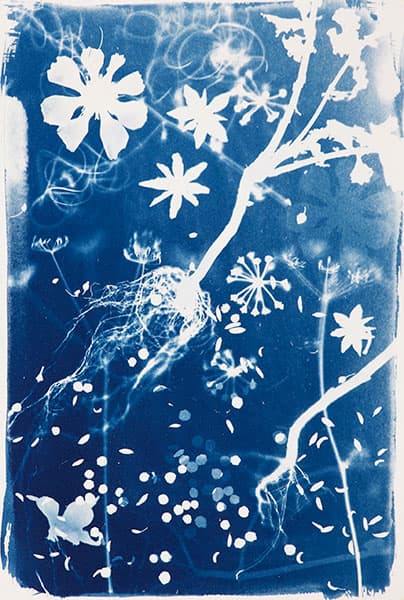
Why this image works
There are many ways of creating depth with a camera, using various apertures and focal length. Photographers can also see what their final image will look like. Using the photogram technique offers an element of surprise, and the final outcome often reveals an unusual visual element.
Why does this hogweed image work? When working with nature, it is difficult to predict how the final picture will emerge. I often let the creative process go, and allow chance to play a part in my image-making process. In this case I was pleased with the way the overlapping forms created a sense of depth in the composition. I had no preconceived plan of what to expect with this print apart from my decision to document a wild verge on the North Yorkshire moors.
The exposure time was 10 minutes on a bright sunny day. After arranging a few items of plant life on the unexposed paper, I allowed for space to make additions nearer the end of the session and added new elements throughout the exposure. This affected the density of the Prussian blue. It also helped yield delicate graduations of tone that I feel give this photogram its magic and strength.
Create a cyanotype in 10 simple steps
Step-by-step guide for creating successful cyanotypes
- My chosen cyanotype formula is: solution A – 25gm dissolved in 100ml water, solution B – 10gm and 100ml water. The two solutions are then blended together in equal parts to produce solution C.
- Remember to use safety equipment, especially when mixing chemicals. Gloves should be worn during coating and washing. Don’t forget to consider your clothes.
- Coat your paper in low-level tungsten light using a sponge or brush. My favourite tools are Japanese Hake brushes. They soak up the fluid and coat beautifully.
- Allow the papers to dry in a dark place, such as a cupboard or drawer. Keep in mind that cyanotypes are only affected by UV light.
- Place objects on the paper and if necessary hold them in place using glass. Remember that the parts that cover the surface are not exposed to light and will remain white.
- Achieving good results depends a great deal on how you compose and arrange objects. However, despite this importance I often embrace playfulness and randomness to allow for an element of chance.
- You can make a simple test strip for exposure times. A properly exposed print will turn a dark blue/green, while the shadows look slightly solarised.
- Once the print has been exposed, process your print by rinsing it in cold water for at least five minutes and until the water runs clear. This thorough washing process will remove any unexposed chemical.
- The final print can now be hung to dry. Once dry they may be prone to wrinkling due to a large amount of washing. I use heavy boards and weights to flatten the prints.
- You don’t need a hot sunny day to make cyanotypes. Even on a cloudy day there will be enough UV for an exposure. Alternatively you can use a UV lamp.
Top tips and techniques for cyanotype photography
Change the background
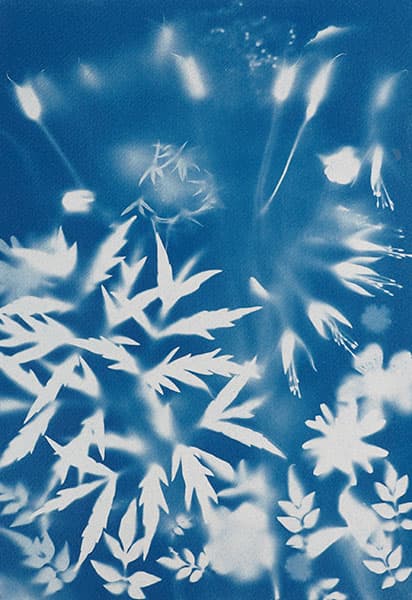
I often move objects during a long exposure. I arrange my composition knowing I will remove a flower head or perhaps add another leaf. This helps to add a sense of depth and create various tones to the final print. This can be done at any time during exposure.
Experiment
To create extra tones and textures I spray the dried unexposed paper with water before I arrange the plants. The cyanotype solution becomes diluted and dries quickly in the sun leaving interesting marks. Also try coating your paper for a second time and double expose.
Be creative
The way you coat the paper is subjective. Painterly brush strokes are very much a big part of my work. I occasionally coat the entire sheet of paper leaving no border, or use sheets of card to create a mask. This works well if you prefer clean straight edges.
Create more depth
It’s not always necessary to flatten plants under glass. Delicate flowers, such as dandelion clocks, work best when they simply sit on the paper. This technique allows for light to pass through and around the 3D object creating soft blurry edges, and encourages shadows to form.
Enhance the blues
Prints will not reach their full density until they are dry (usually overnight), because it takes time for the sensitiser to oxidise in the air. To achieve an immediate oxidation, rinse the print for 1 minute in dilute hydrogen peroxide. While not necessary, it provides ‘instant gratification’.
Tea toning
It’s possible to change the colour of cyanotypes by toning. The cyanotype must be left to oxidise first. A short immersion in tannic acid (a strong inexpensive tea), will transform the Prussian blue colour to a navy blue. The tannic acid does not affect the archival qualities.
Kit list
- Safety equipment Cyanotype chemicals must be handled with care. The most hazardous practice is mixing raw chemicals to make stock solution. For basic protection you need protective glasses, mask and gloves.
- Chemicals The cyanotype solution is made from two chemicals: Ferric ammonium citrate (green) and Potassium ferricyanide. These solutions are generally labelled A and B. Mix equal measures of A + B to make the working solution.
- Coating Handcrafted coating allows you to be free and give painterly edges, while a sponge gives a harder edge to the emulsion. Do not use a brush with a metal ferrule, as this may react with the cyanotype chemistry and corrode.
- Exposure Working outdoors you will need a board, glass and clips. I use plywood or stiff cardboard to clip the glass in position while making exposures. This is particularly useful in windy conditions as it holds everything in place.
- UV light source The summer sun works beautifully. A good south-facing window ledge can work surprisingly well. For total control an ultraviolet (UV) lamp can be used effectively. I use an Osram Ultra-vitalux 300W bulb plugged into a 13 Amp plug socket.
Angela Chalmers is a photographer and painter with a first-class honours degree in Fine Art. Her working methods range from expressive watercolours to painterly camera-less cyanotypes. Angela has exhibited internationally and her work is held in many private collections. See www.angelachalmers.com.
Further reading:
Alex Timmermans on the wet-plate process
The chilling story behind Sally Mann’s award-winning tintypes
Follow AP on Facebook, Twitter, Instagram, YouTube and TikTok.


