Drones have completely revolutionised photography and video in recent years, thanks in part to a flurry of easy-to-fly models with high-quality cameras being launched. Not only do they allow photographers to reach locations otherwise inaccessible on foot, but they also help us to capture the world from viewpoints previously only possible from a helicopter. The ability to send a drone to an altitude of up to 120m at a moment’s notice, as long as you can see the drone and it’s safe and legal to do so at the chosen location, provides myriad photographic opportunities.
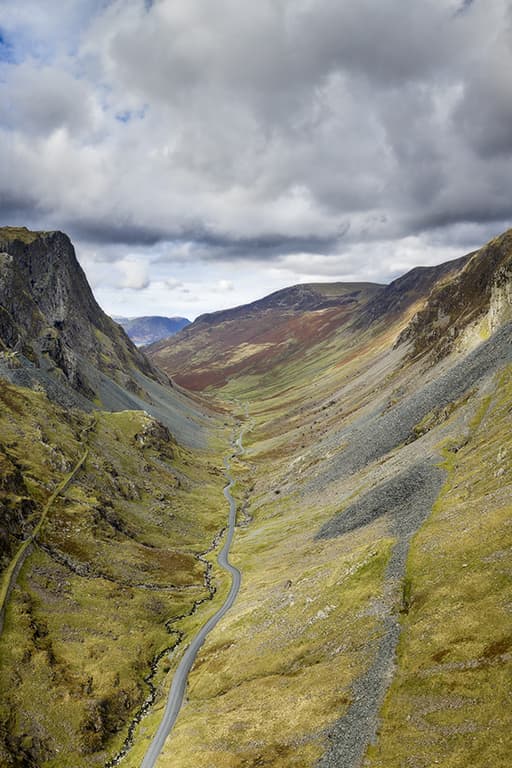
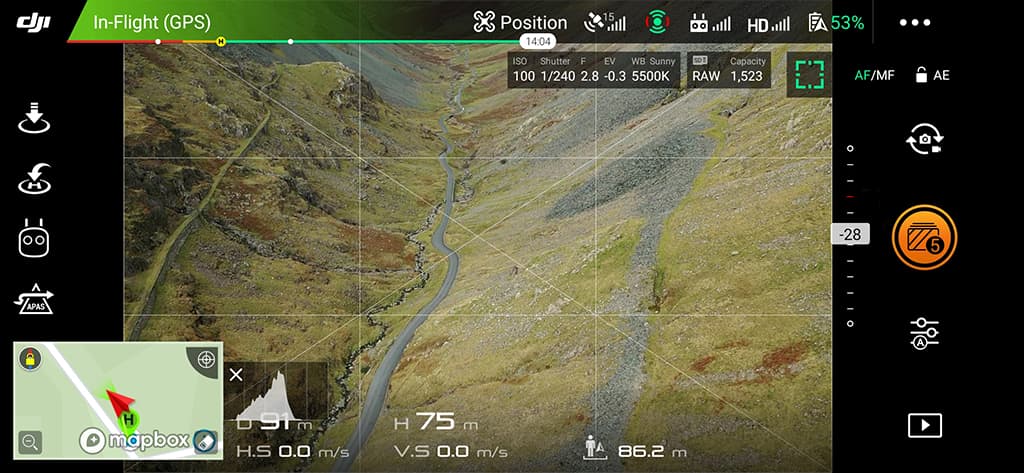
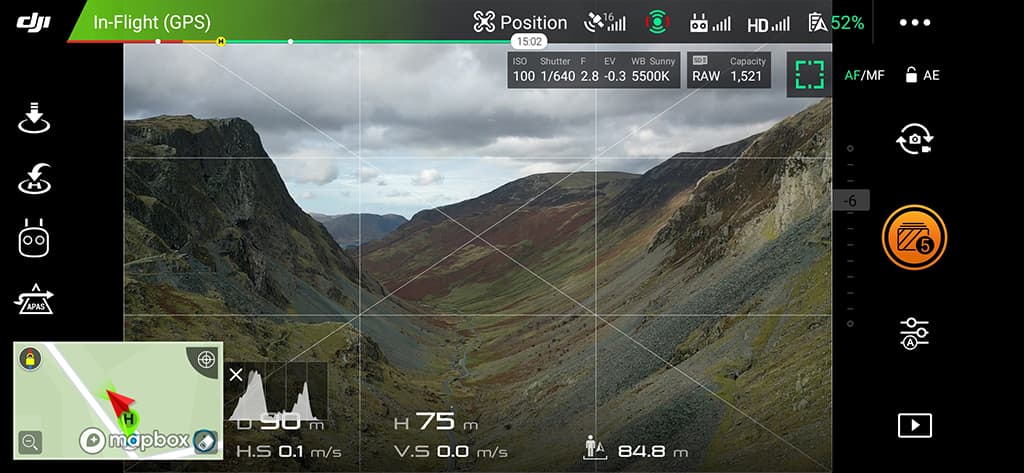
Honister Pass, Lake District
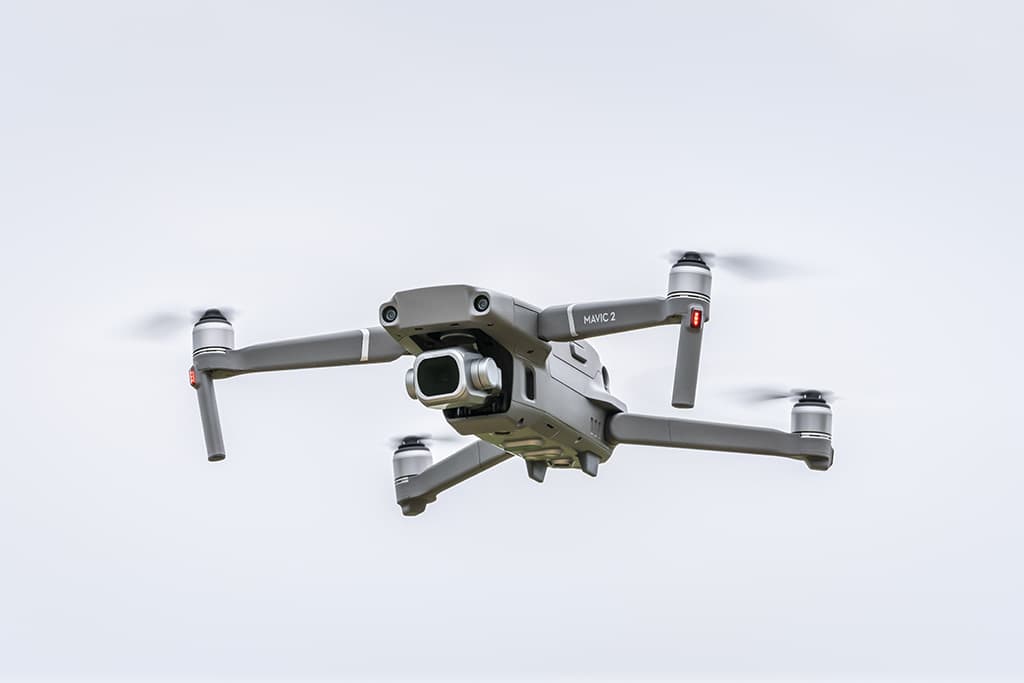
DJI Mavic 2 Pro
Why manual HD panos are best
DJI drones are actually capable of automatically shooting and stitching together vertical panos in JPEG format, with the option to save the original raw files.
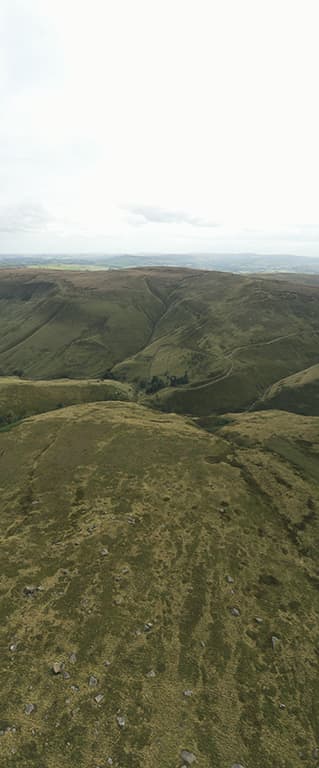
The image above is straight from camera and provides no sky detail while looking generally washed out.
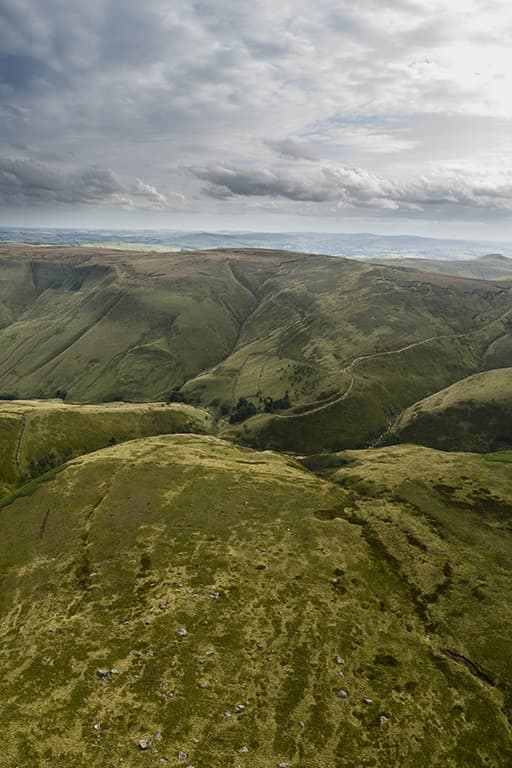
While this vertical pano was manually edited, but without bracketed exposures to create an HDR image there was only so much sky detail that could be recovered.
How to bracket your exposures
1 Position your drone
Use an app such as NATS Drone Assist to check the location you wish to fly at, to ensure it’s safe and legal to do so. Take-off and fly your drone into position, leaving it in a hover while you set up the camera to shoot five bracketed exposures using AEB (automatic exposure bracketing).
2 Set up the camera
Use the histogram to assess exposure and set it correctly for the middle exposure. If shooting with a drone with an adjustable aperture set it to between f/2.8 and f/4 in aperture priority mode and use exposure compensation. If shooting with a drone with a fixed aperture, simply set the shutter speed.
3 Take your shots
Take three or five bracketed shots, starting at the top or the bottom of the scene, making sure that each shot overlaps the last by 30-50% by changing the angle of the camera. You may need to adjust exposure slightly for each set of bracketed shots so that the middle exposure remains similar each time.
Top tip
When using the AEB feature on DJI drones, you’re given the option to shoot three or five bracketed exposures. These brackets are one stop apart, so if the contrast in the scene isn’t too large three exposures will be fine, but for scenes where the sky is significantly brighter than the ground, you’ll need to set five exposures.
Capture vertical scenes with more detail
There’s no denying that aerial photography can be awe-inspiring, but there’s one small limitation and it’s that all but one drone model can only shoot landscape-format images.
The original DJI Mavic Pro features a gimbal that can rotate the camera into portrait format, but the DJI Mavic 2 Pro and Mavic 2 Zoom, for instance, use larger heavier cameras that the gimbal is unable to rotate on the horizontal axis.
This means that you need to work harder to capture aerial uprights. Not only does this technique allow you to capture portrait-format images that will suit some locations more, but you’ll also increase the effective resolution of your drone which means larger prints and an increase in image quality. Most consumer drones have sensors of comparable size to mobile phones, while only a handful have a 1-inch sensor – which, while much larger, is still significantly smaller than APS-C or full-frame sensors.
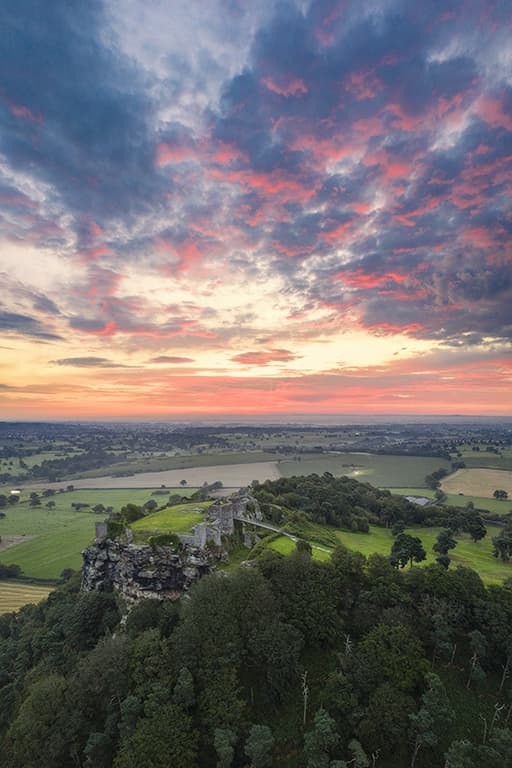
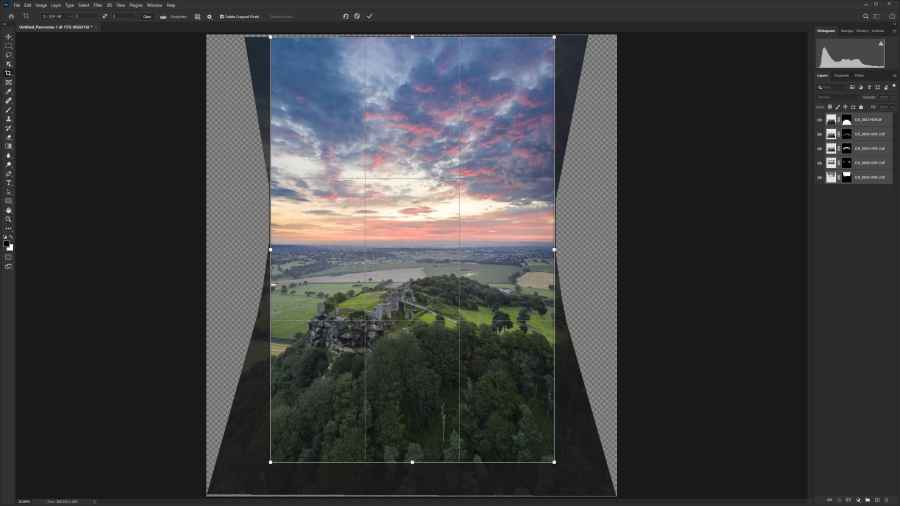
Beeston Castle, Cheshire DJI Mavic 2 Pro
Capture more detail
To further improve image quality, as well as shooting a vertical panoramic, each constituent section needs to be shot with exposure bracketing turned on. With three to five bracketed exposures taken at each point, detail can be captured from the shadows, through the midtones and to the highlights; the exposures can then be blended to create HDR images that are then merged to create the pano.
This sounds complicated, but in reality it’s incredibly easy. Once you’ve merged your three to five bracketed exposures for each section of the vertical panoramic to a single HDR image in Lightroom, you’ll be left with three to five landscape-format shots that will need to be merged in Photoshop because Photo Merge Panorama in Lightroom is unable to deal with vertical HDR panoramics.
Also, when creating HDR Panoramas in Lightroom, Deghosting is unavailable so ghosting – moving objects captured in different positions in the various exposures – can be an issue.
Step by step: how to merge your images
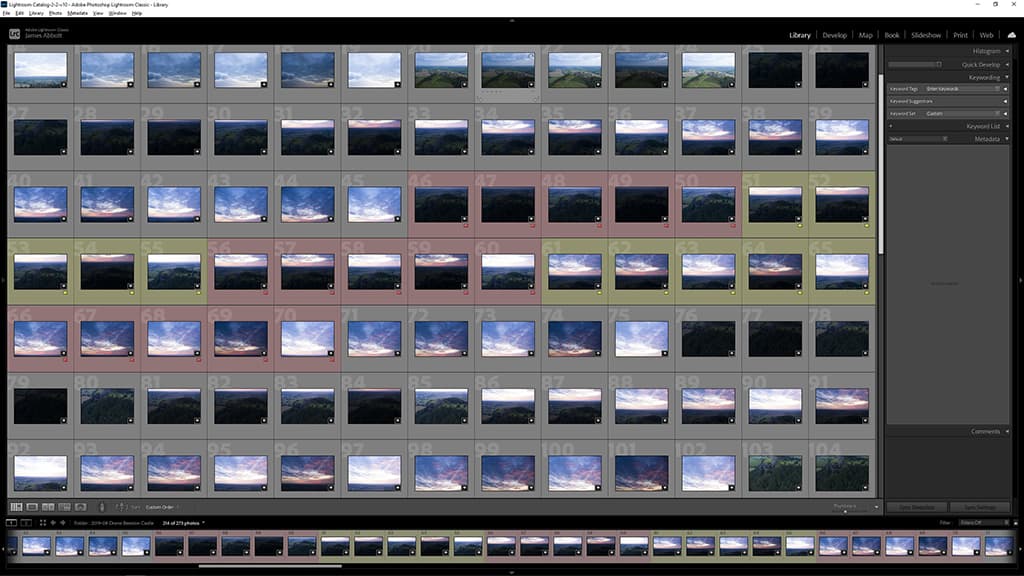
1 Highlight images
In the Library thumbnail view, locate your bracketed constituent pano images in Lightroom and colour label each one alternating red and yellow so you can quickly identify each set. Left mouse click on the first image of a bracket set, hold down Shift and click on the third or fifth image depending on how many brackets you shot, before pressing six on the keyboard for red, or seven for yellow. Repeat for each set of images.
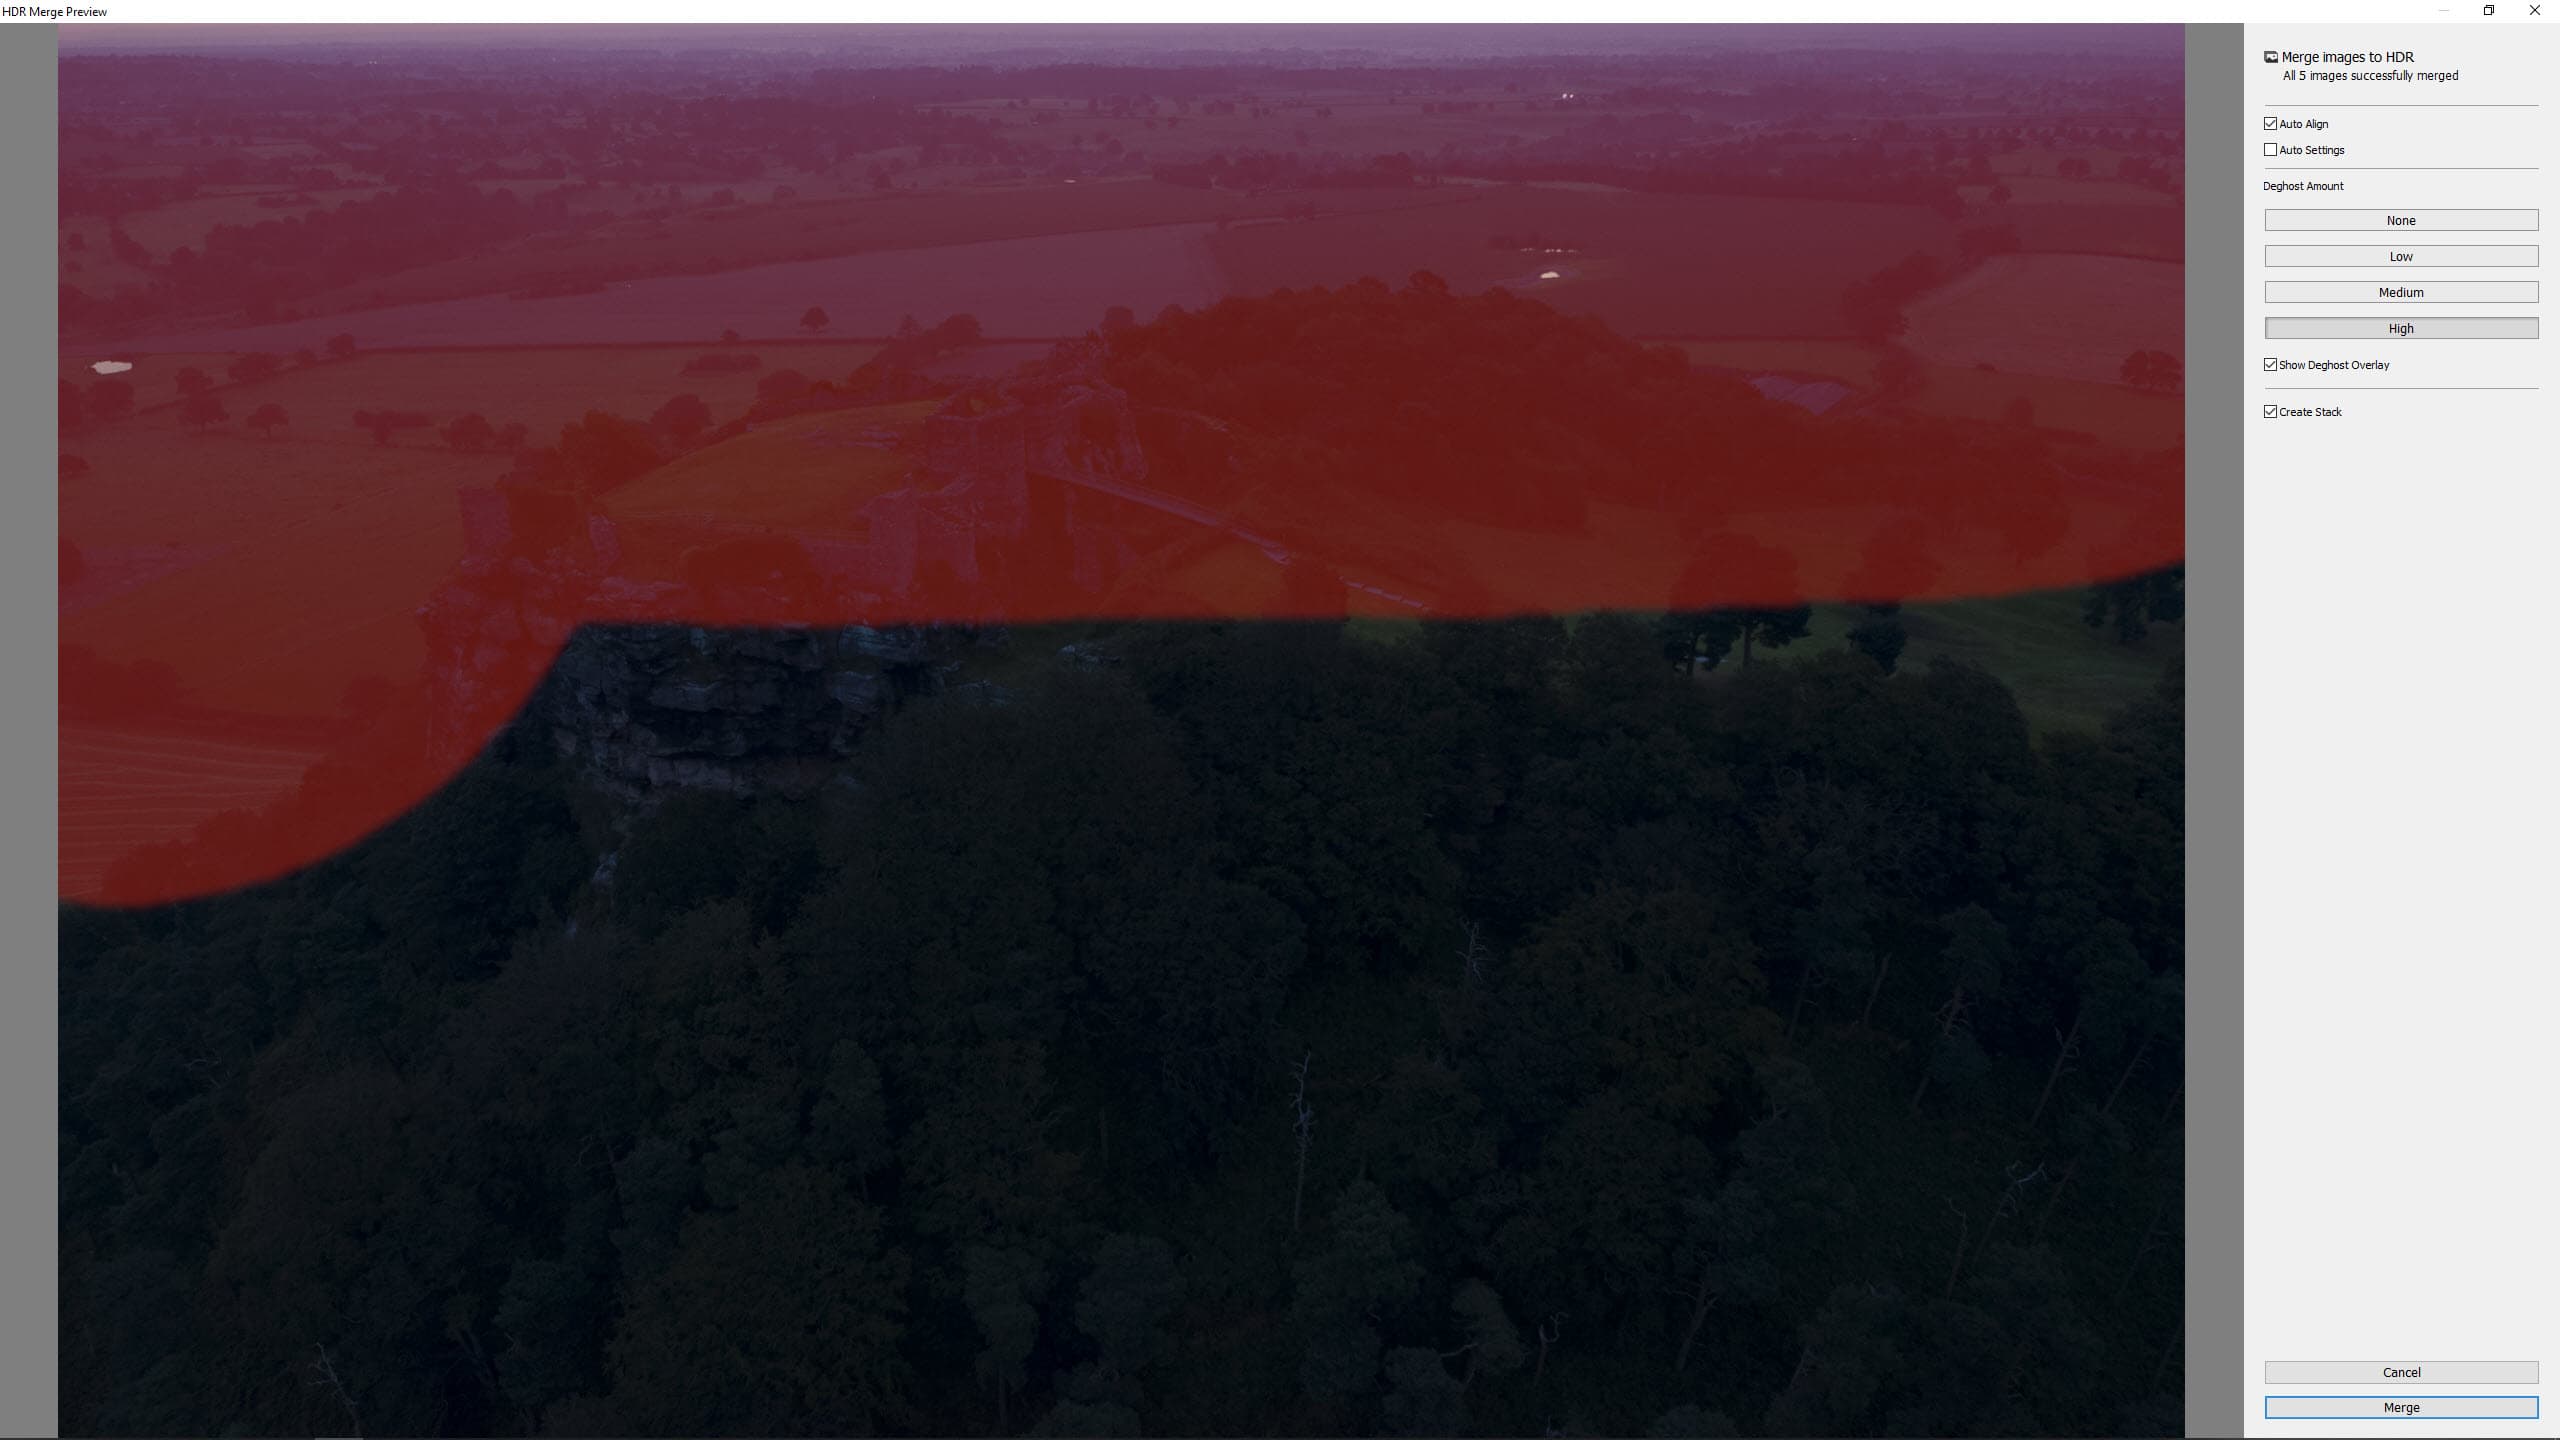
2 Merge to HDR
Select the first set of three or five bracketed images, right mouse click on the selected images and go to Photo Merge>HDR. When the dialogue window opens make sure Auto Align, Show Deghost Overlay and Create Stack are checked and that Auto Settings are unchecked. Try different Deghost Amounts to see which is most effective, using the lowest possible, and hit OK. Repeat this process for each set of bracketed images.
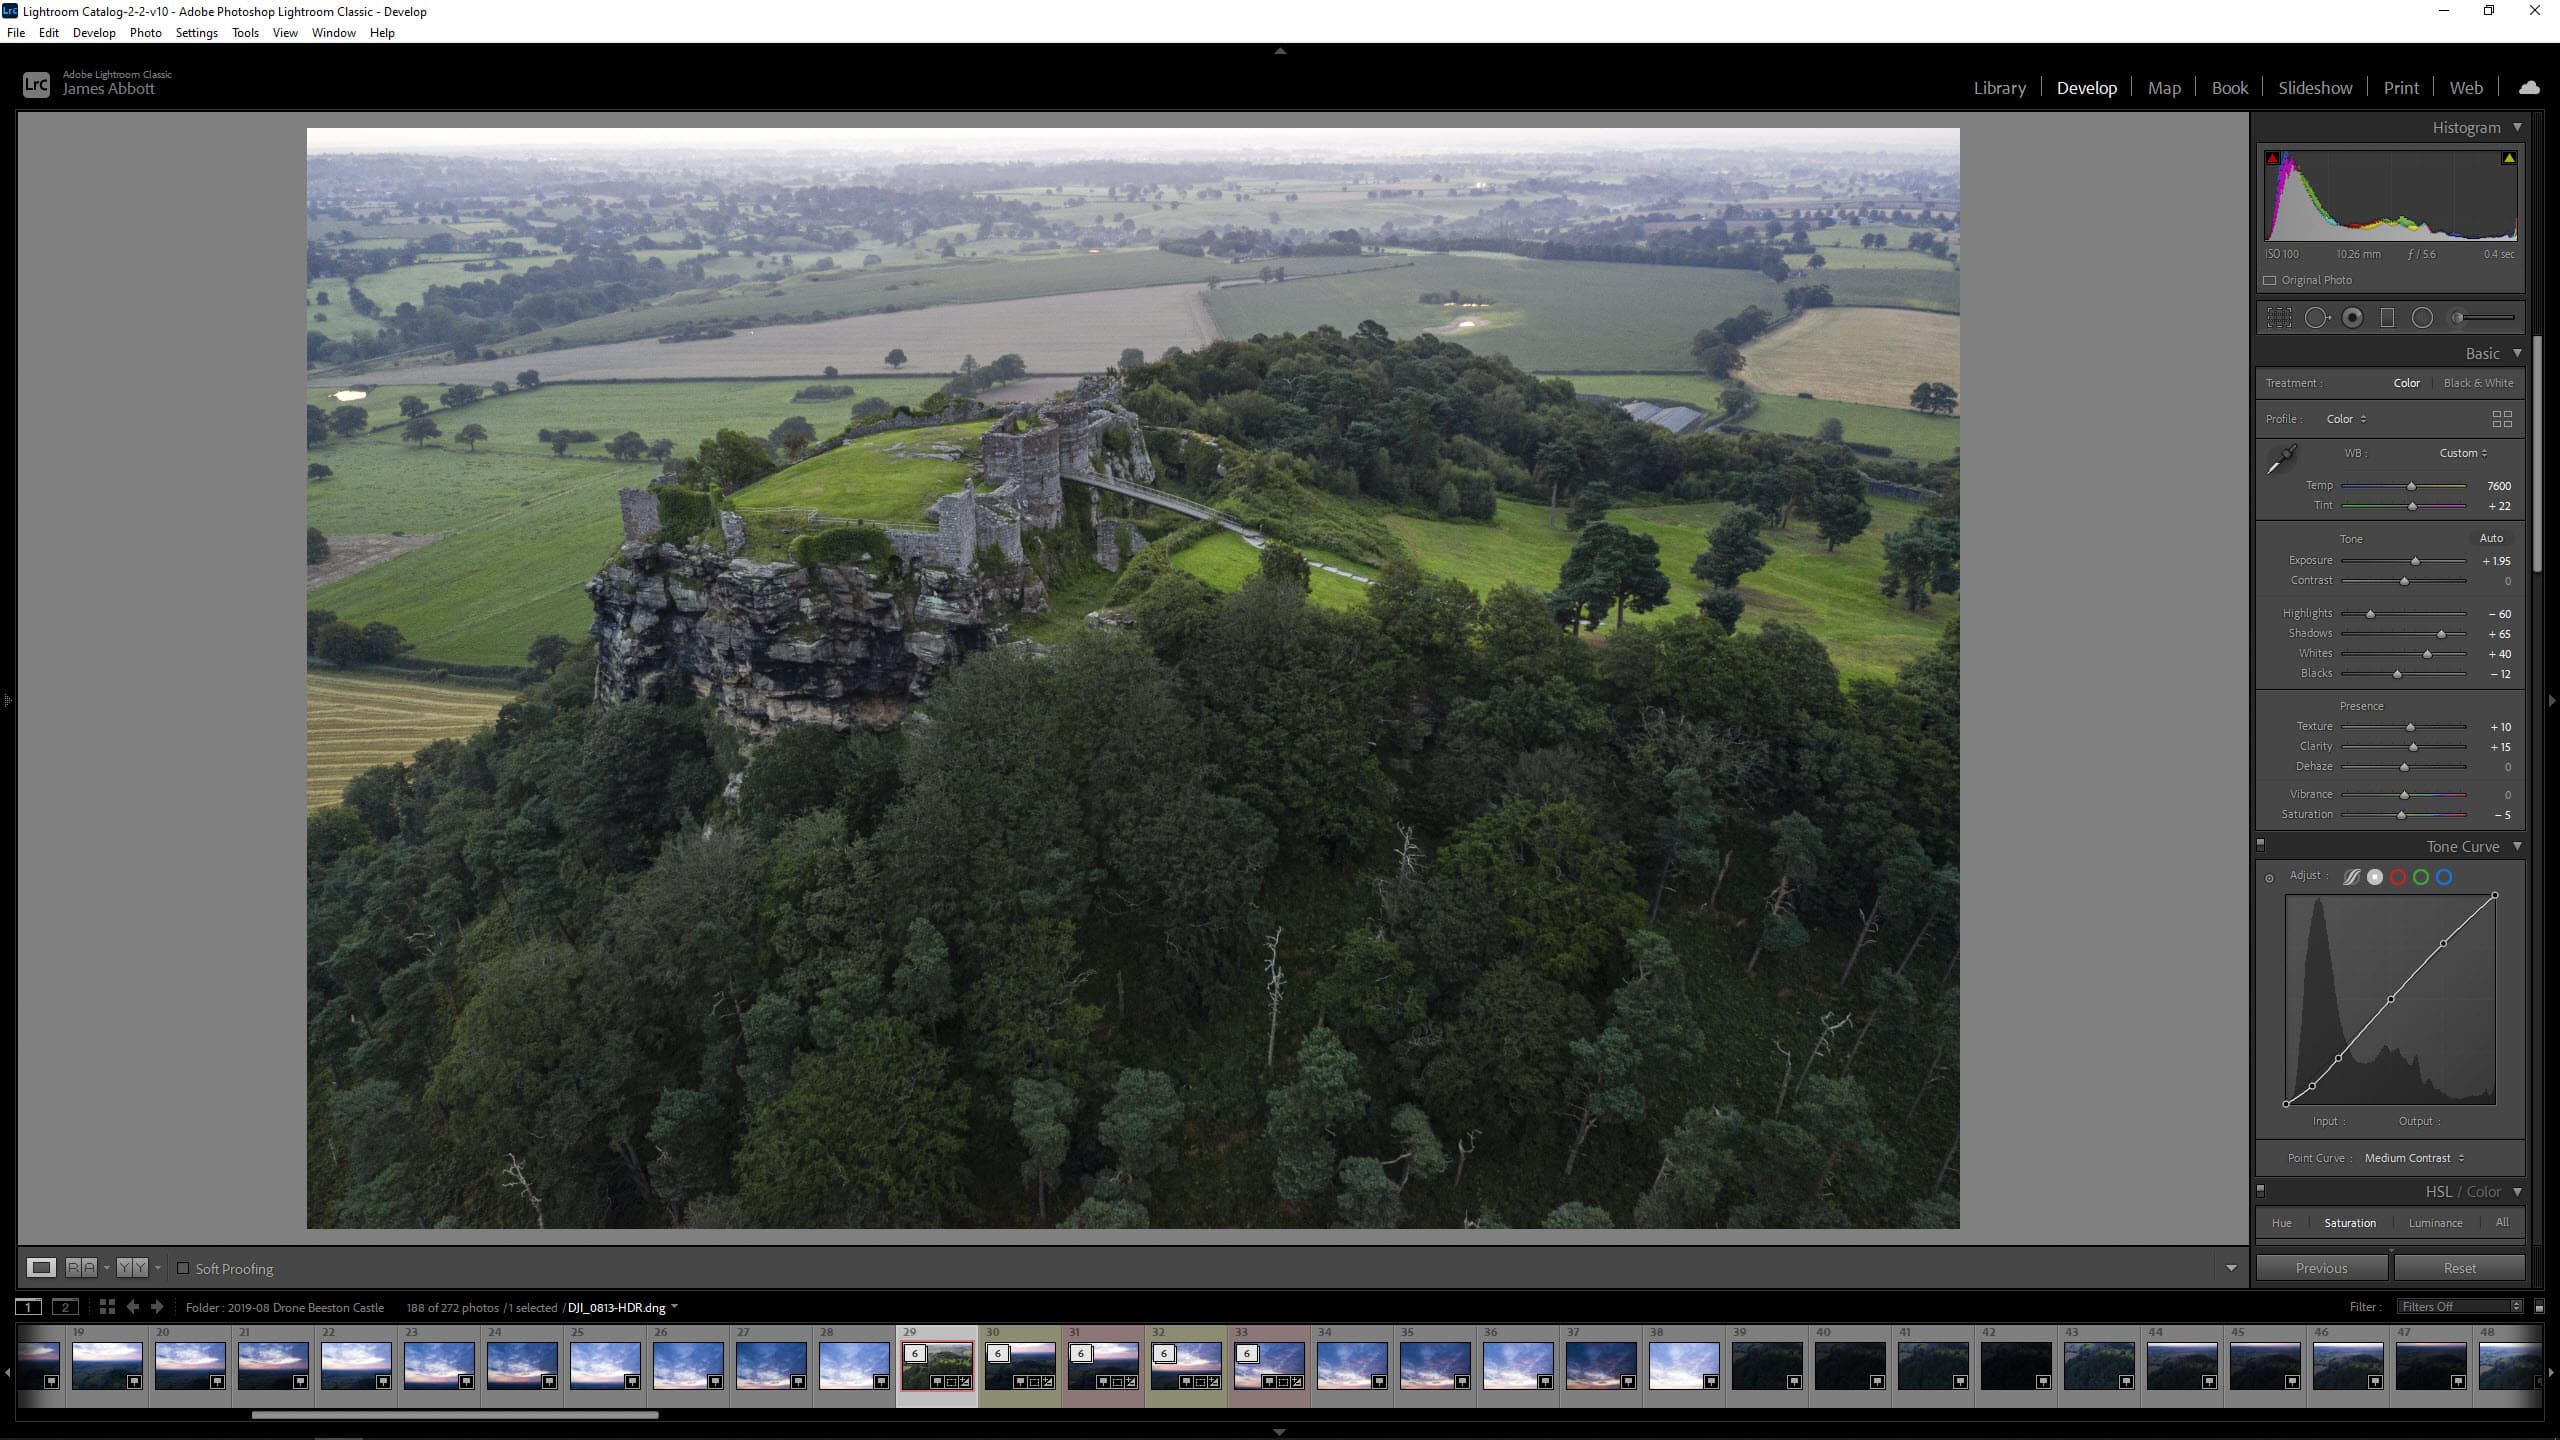
3 Edit first image
Edit the first image of the set in the Develop Module – this will be the HDR DNG at the top of the image stack created in the previous step. For HDR images, the Shadows and Highlights sliders allow you to recover detail, while the Whites and Blacks sliders can boost blacks and whites for a more natural-looking result. Don’t push the Shadows and highlights too far because this can cause halos along high-contrast subject edges.
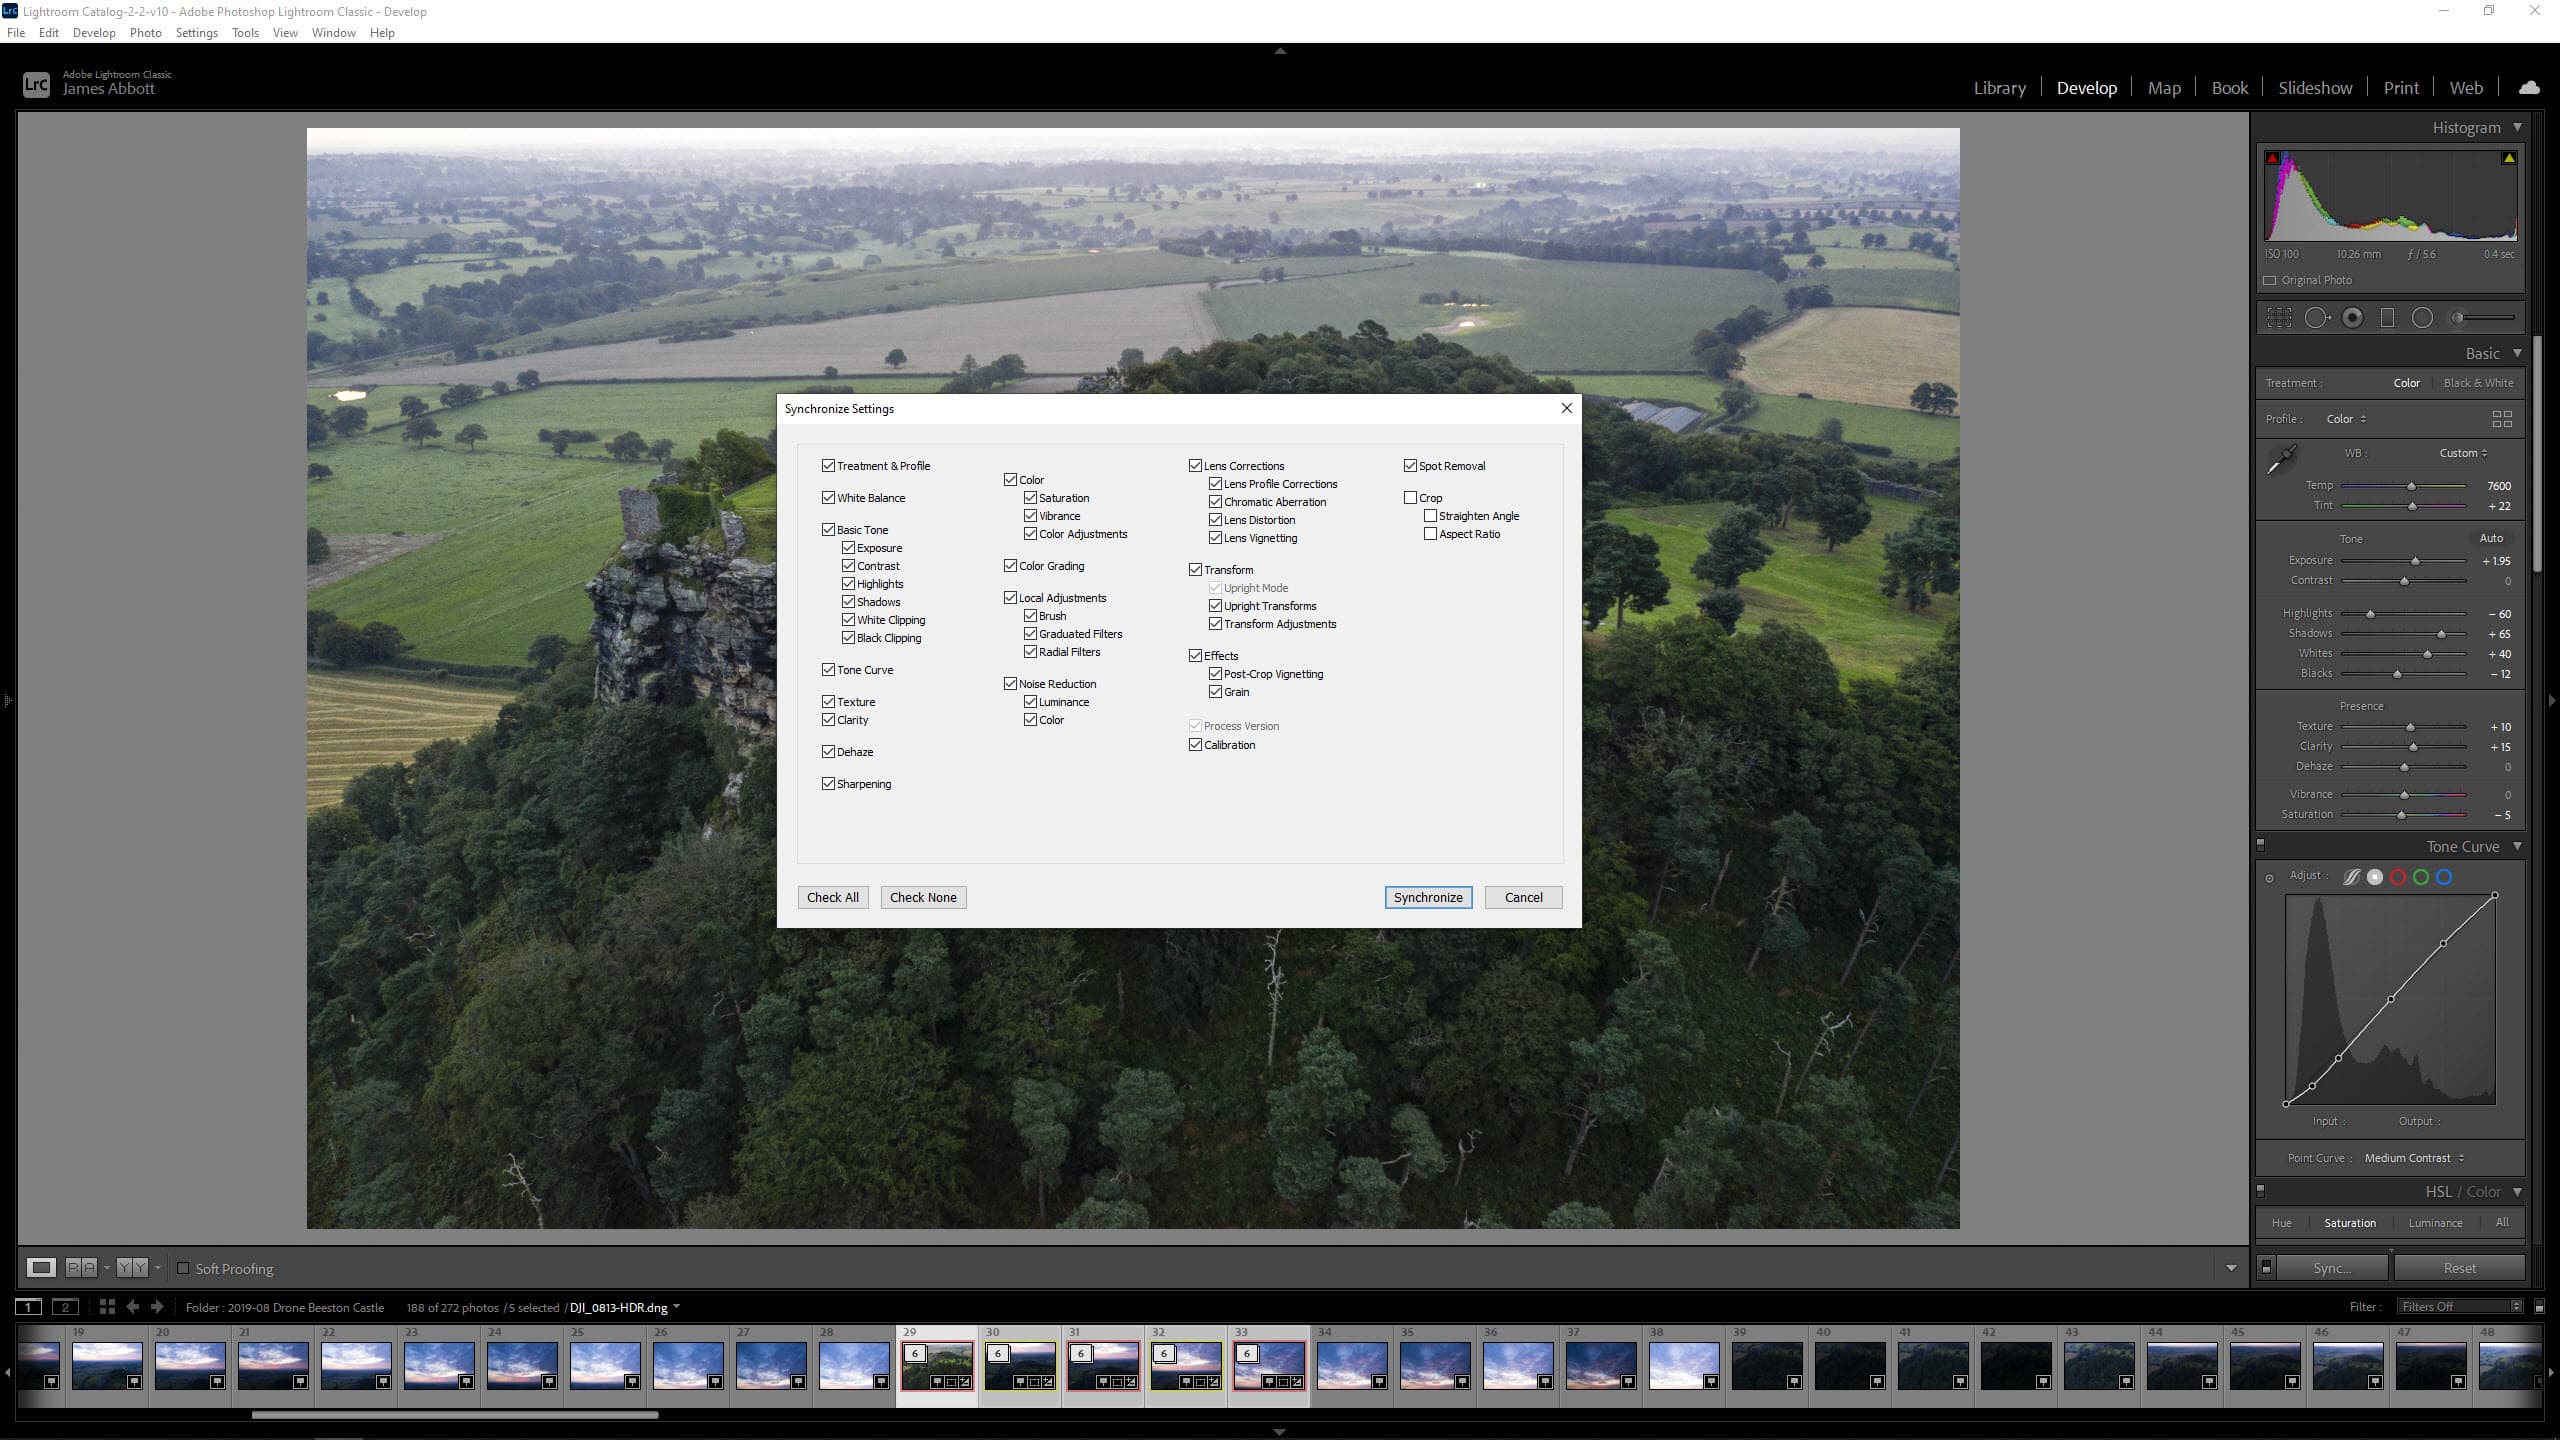
4 Synchronize Settings
With the first image highlighted, hold down Shift, left click on the final constituent image and click on the Sync button at the bottom of the interface. When the Synchronize Settings dialogue box opens, click on Check All and unselect Crop as each HDR image will have been cropped differently during the merge process. Next, click on Synchronize to apply the same settings to the rest of the images.
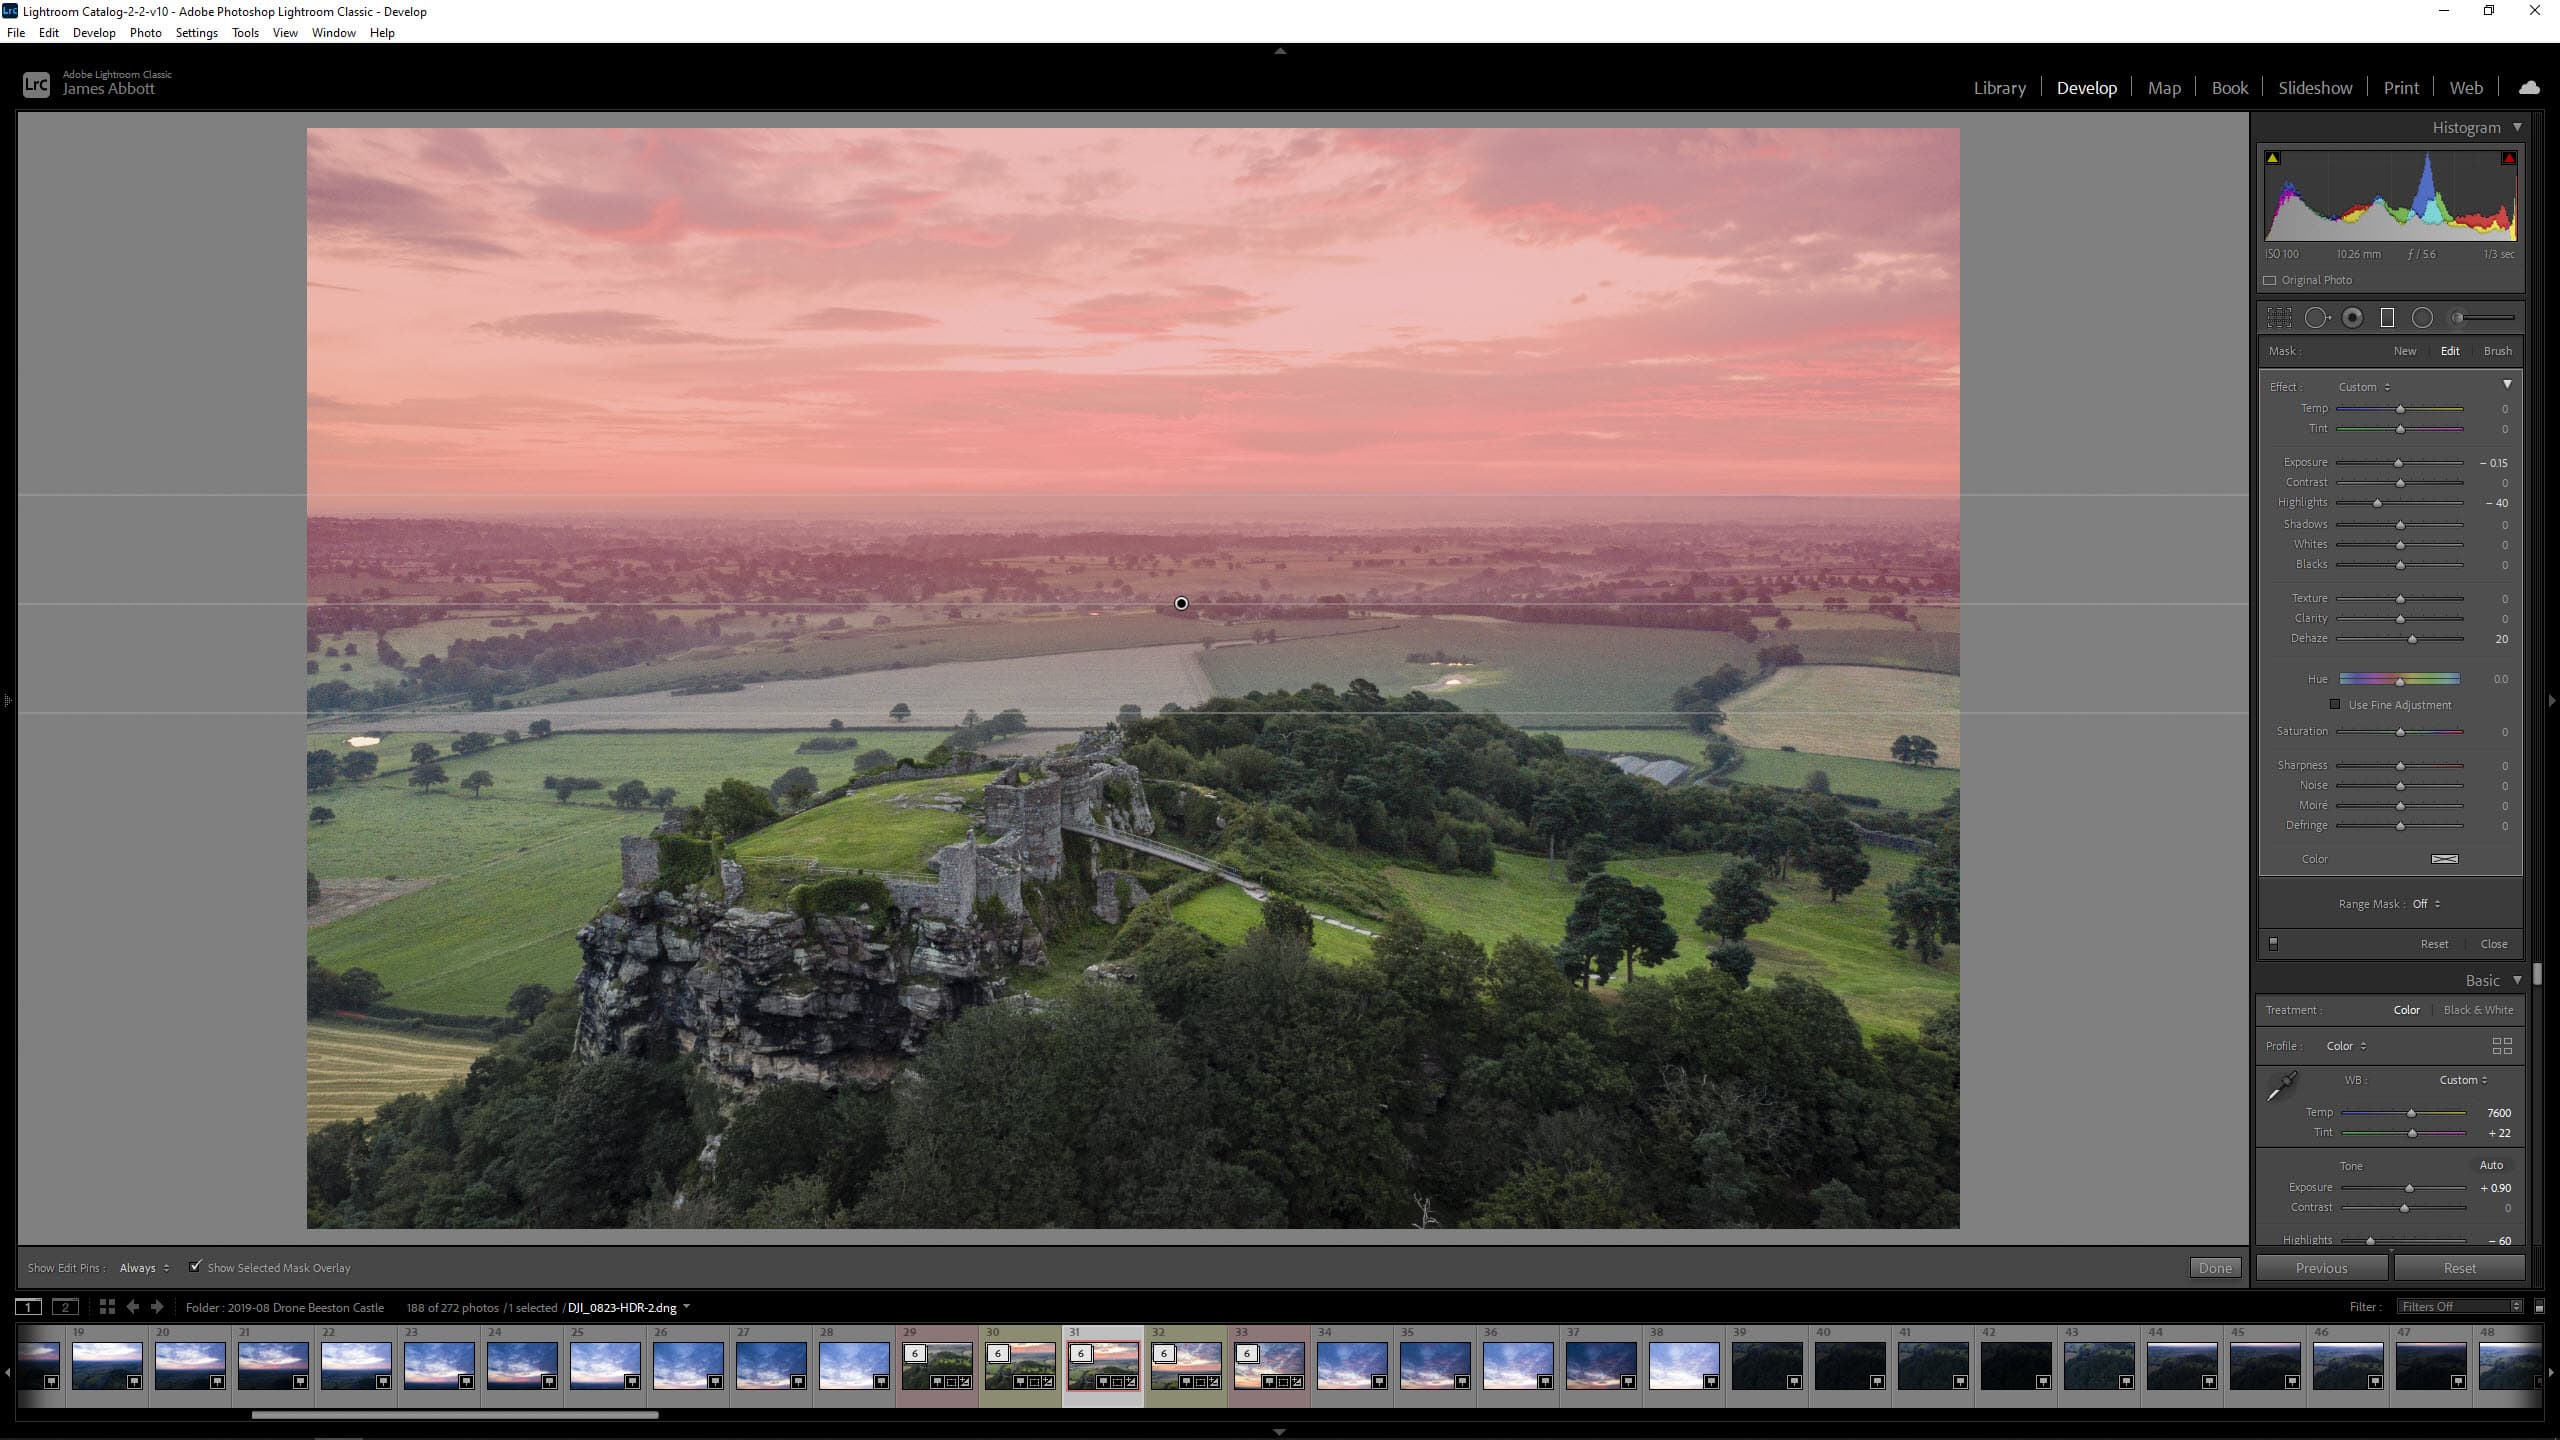
5 Fine-tune adjustments
The exposure in images just synced may be different from the first shot, so go through each and match exposure so it’s as close as possible from one image to the next. To further improve sky detail, use the Graduated filter to darken the sky and recover highlights. Apply a Graduated Filter individually to each image with sky visible because the size of the Graduated Filter will be different for each.
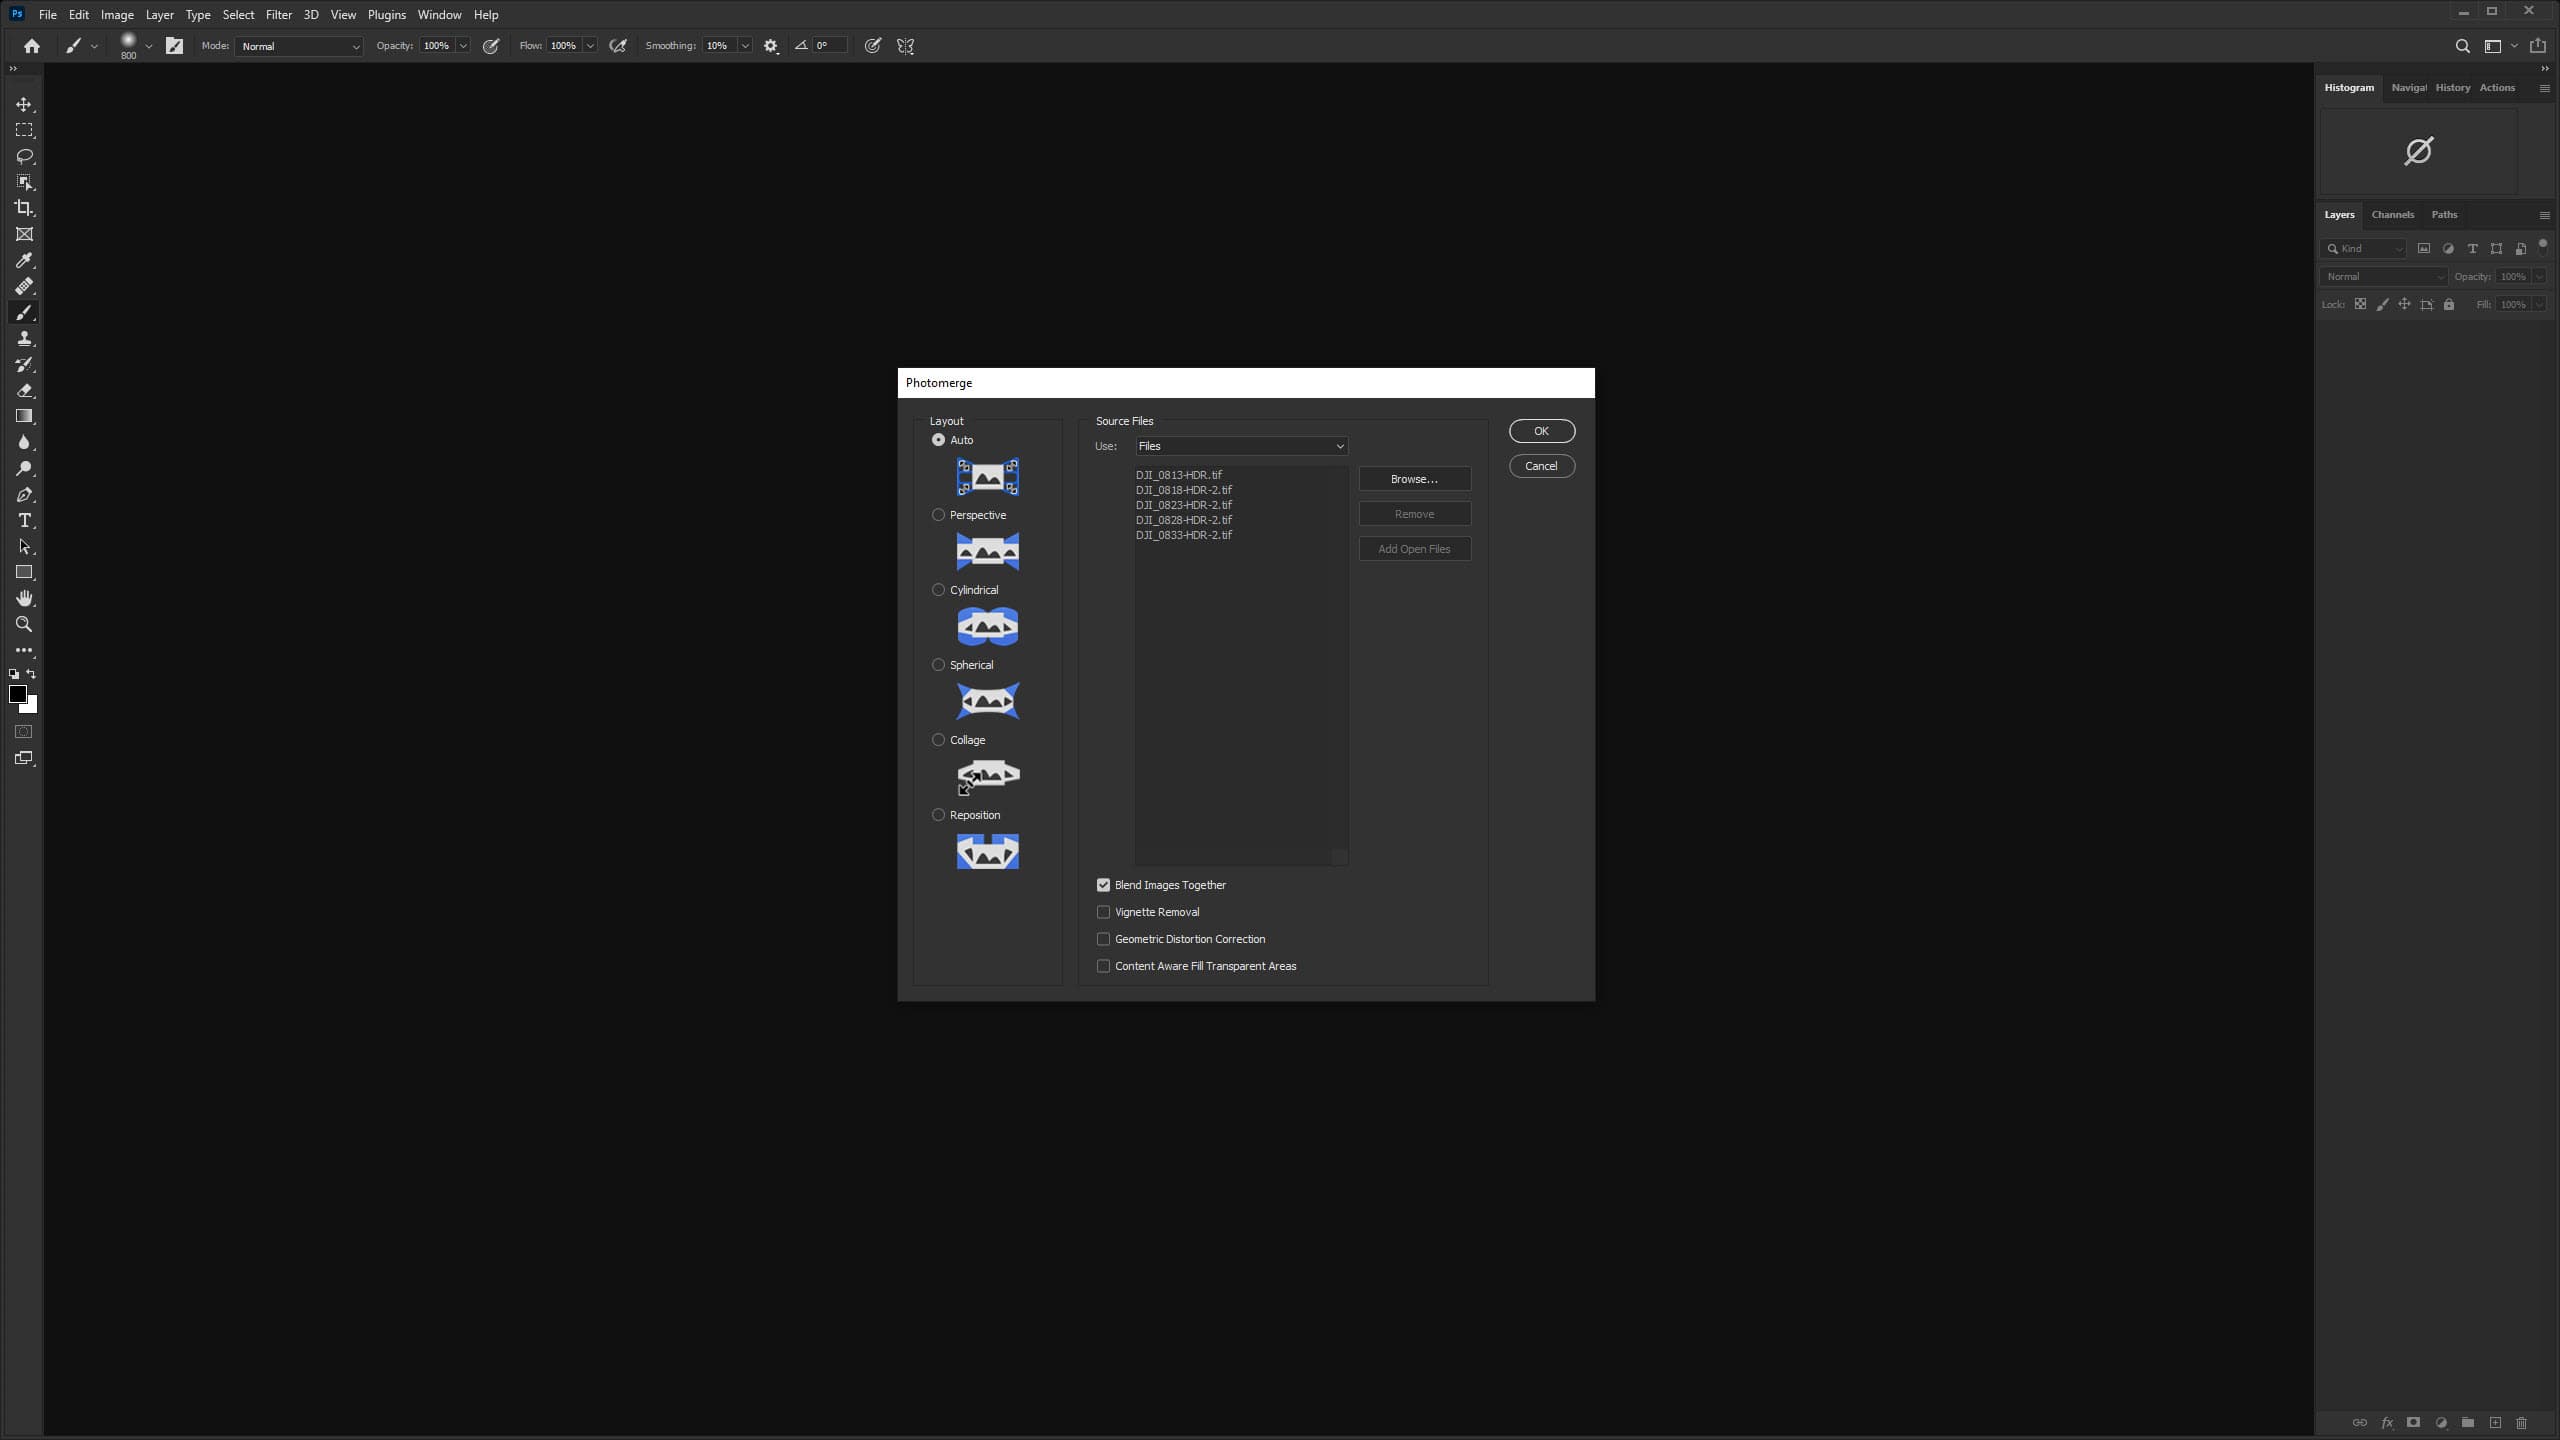
6 Export and Photomerge
Select all of the constituent pano images and hold down Ctrl+Shift+E to Export. Select file type – here, 16-bit TIFF was selected – and save to your desired location. Make sure After Export is set to Do Nothing. Open Photoshop and go to File>Automate>Photomerge and leave Layout set to Auto, Set Use to Files and click on Browse to locate your folder of images then click OK to merge.
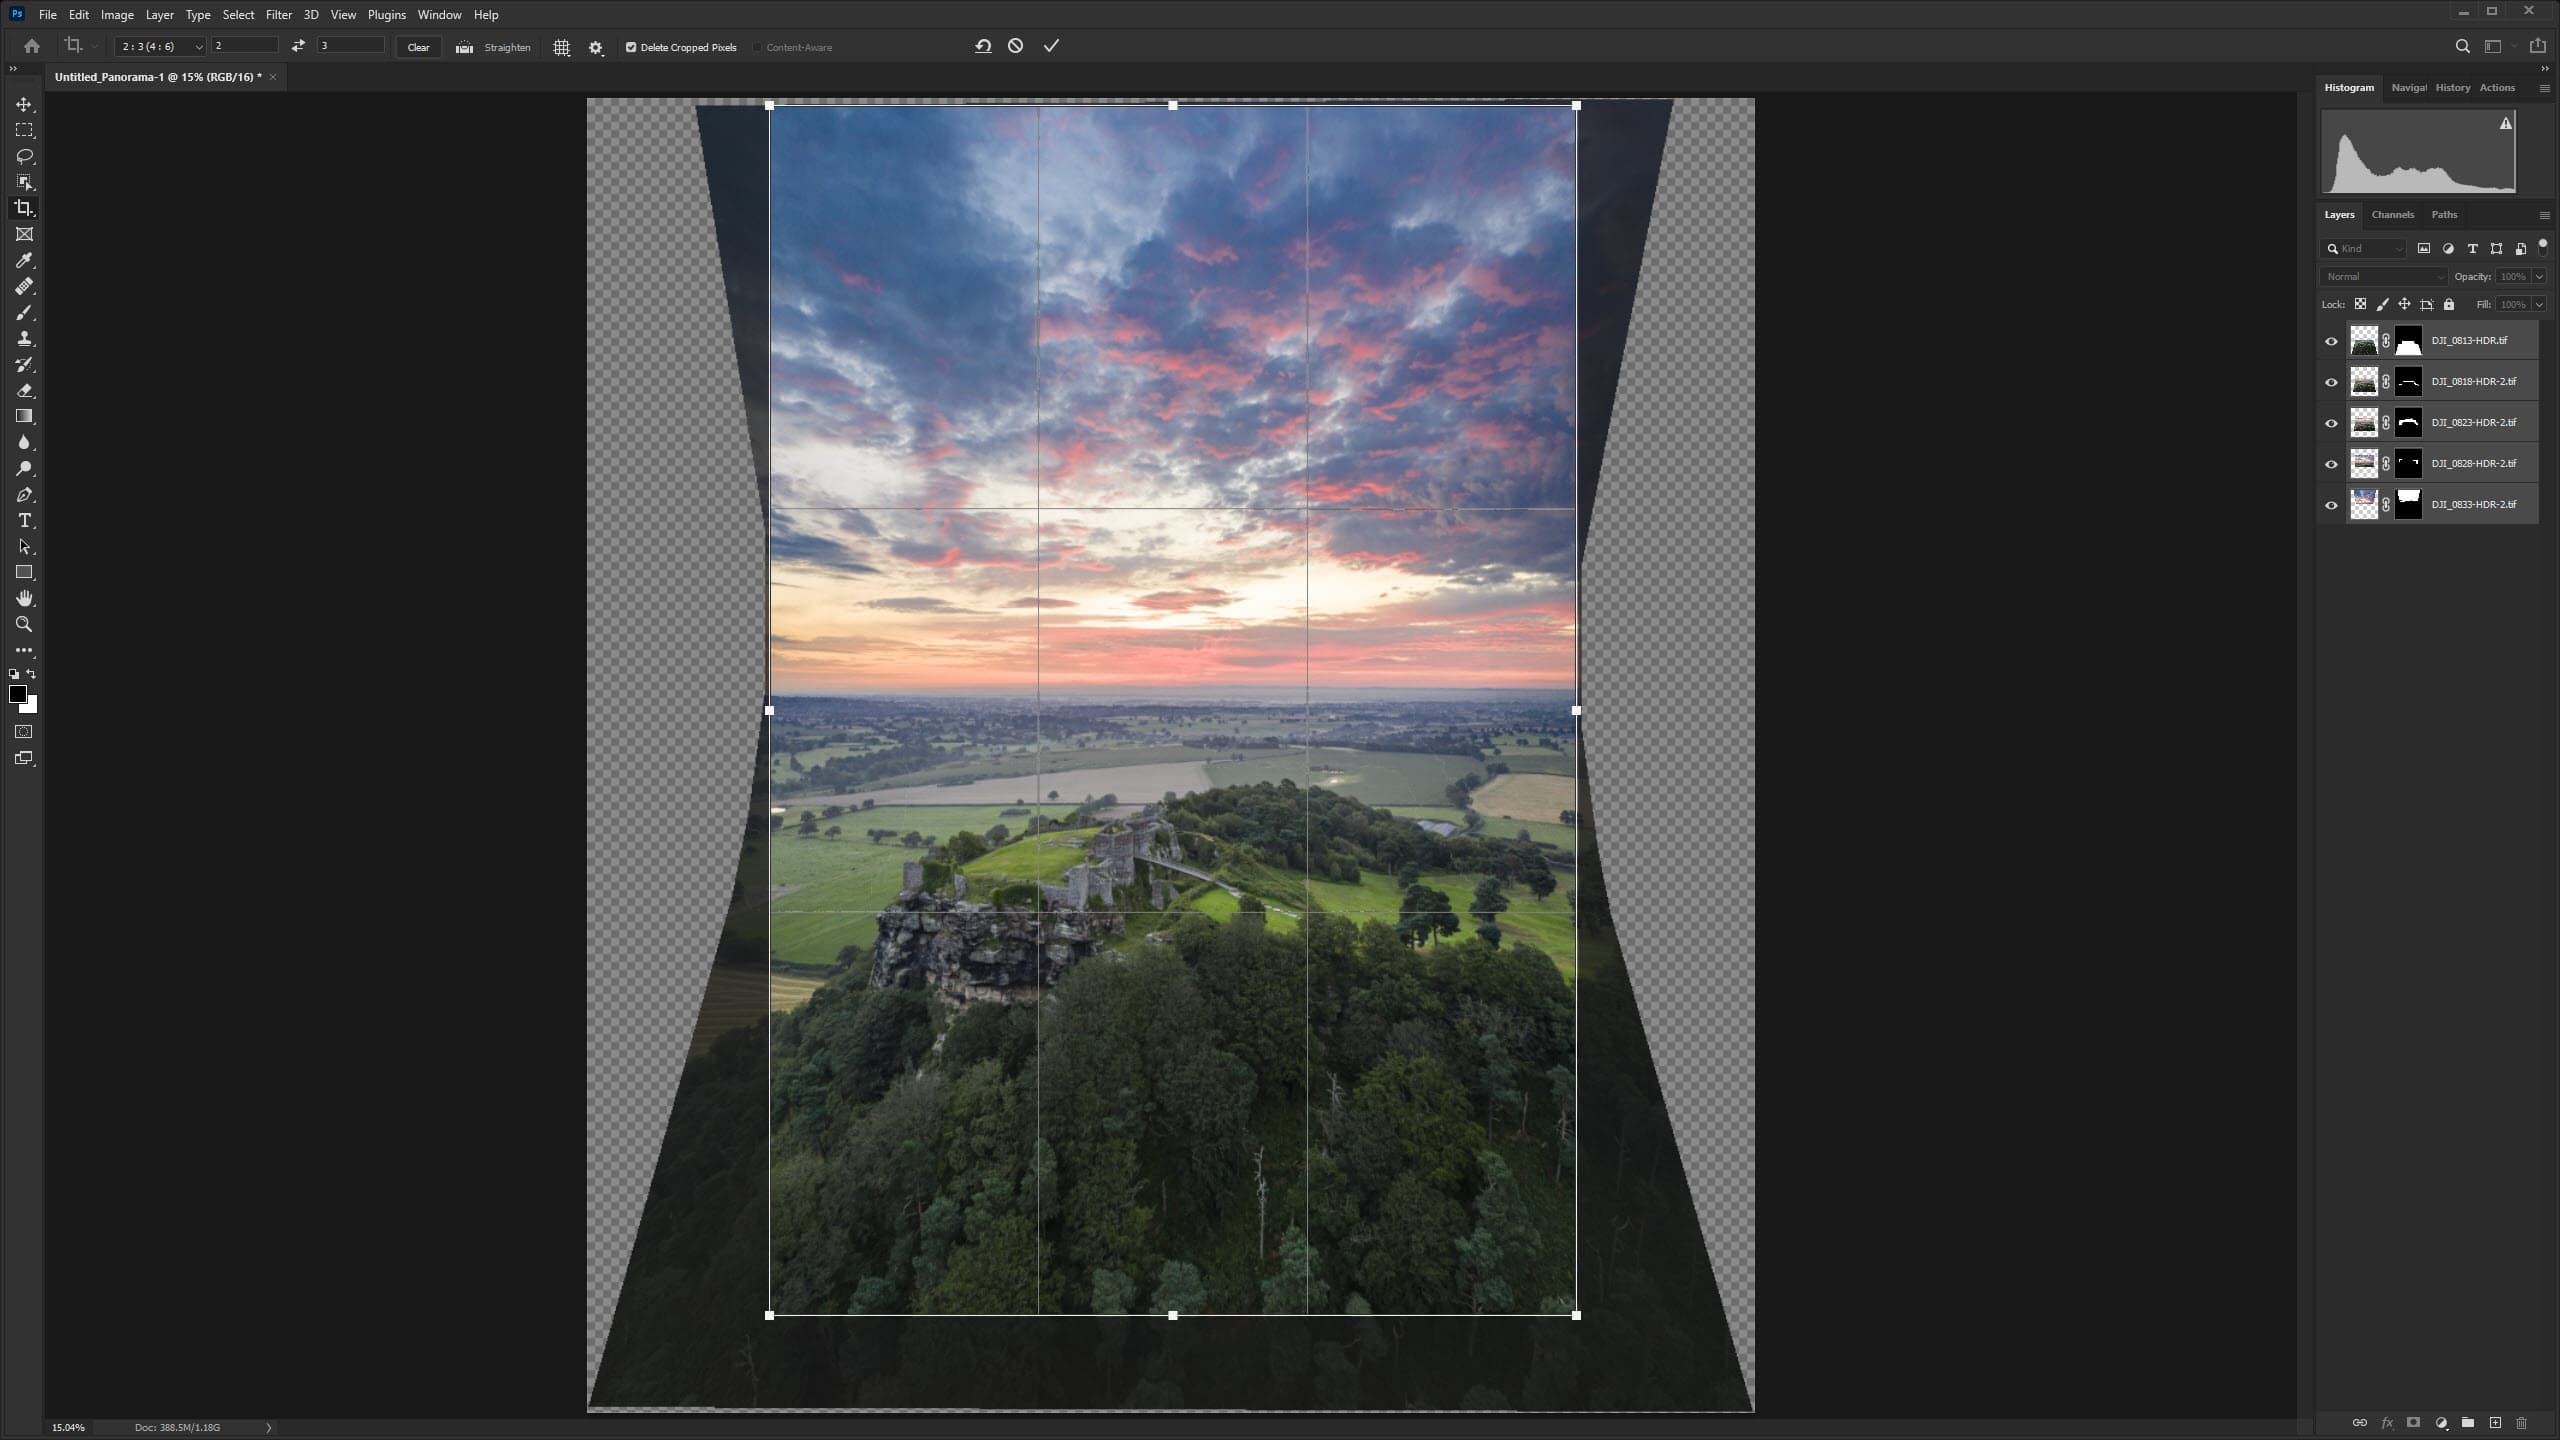
7 Crop to 2:3 format
The image will render, and you’ll see empty space around the image that needs to be cropped out. Press C on the keyboard to activate the Crop tool and set the crop ratio to 2:3 (4:6). Left click on the image and drag the guide out. Release and click on the centre of the crop guide to drag the guide into a new position if required. Click on the tick at the top of the interface to commit to the crop.
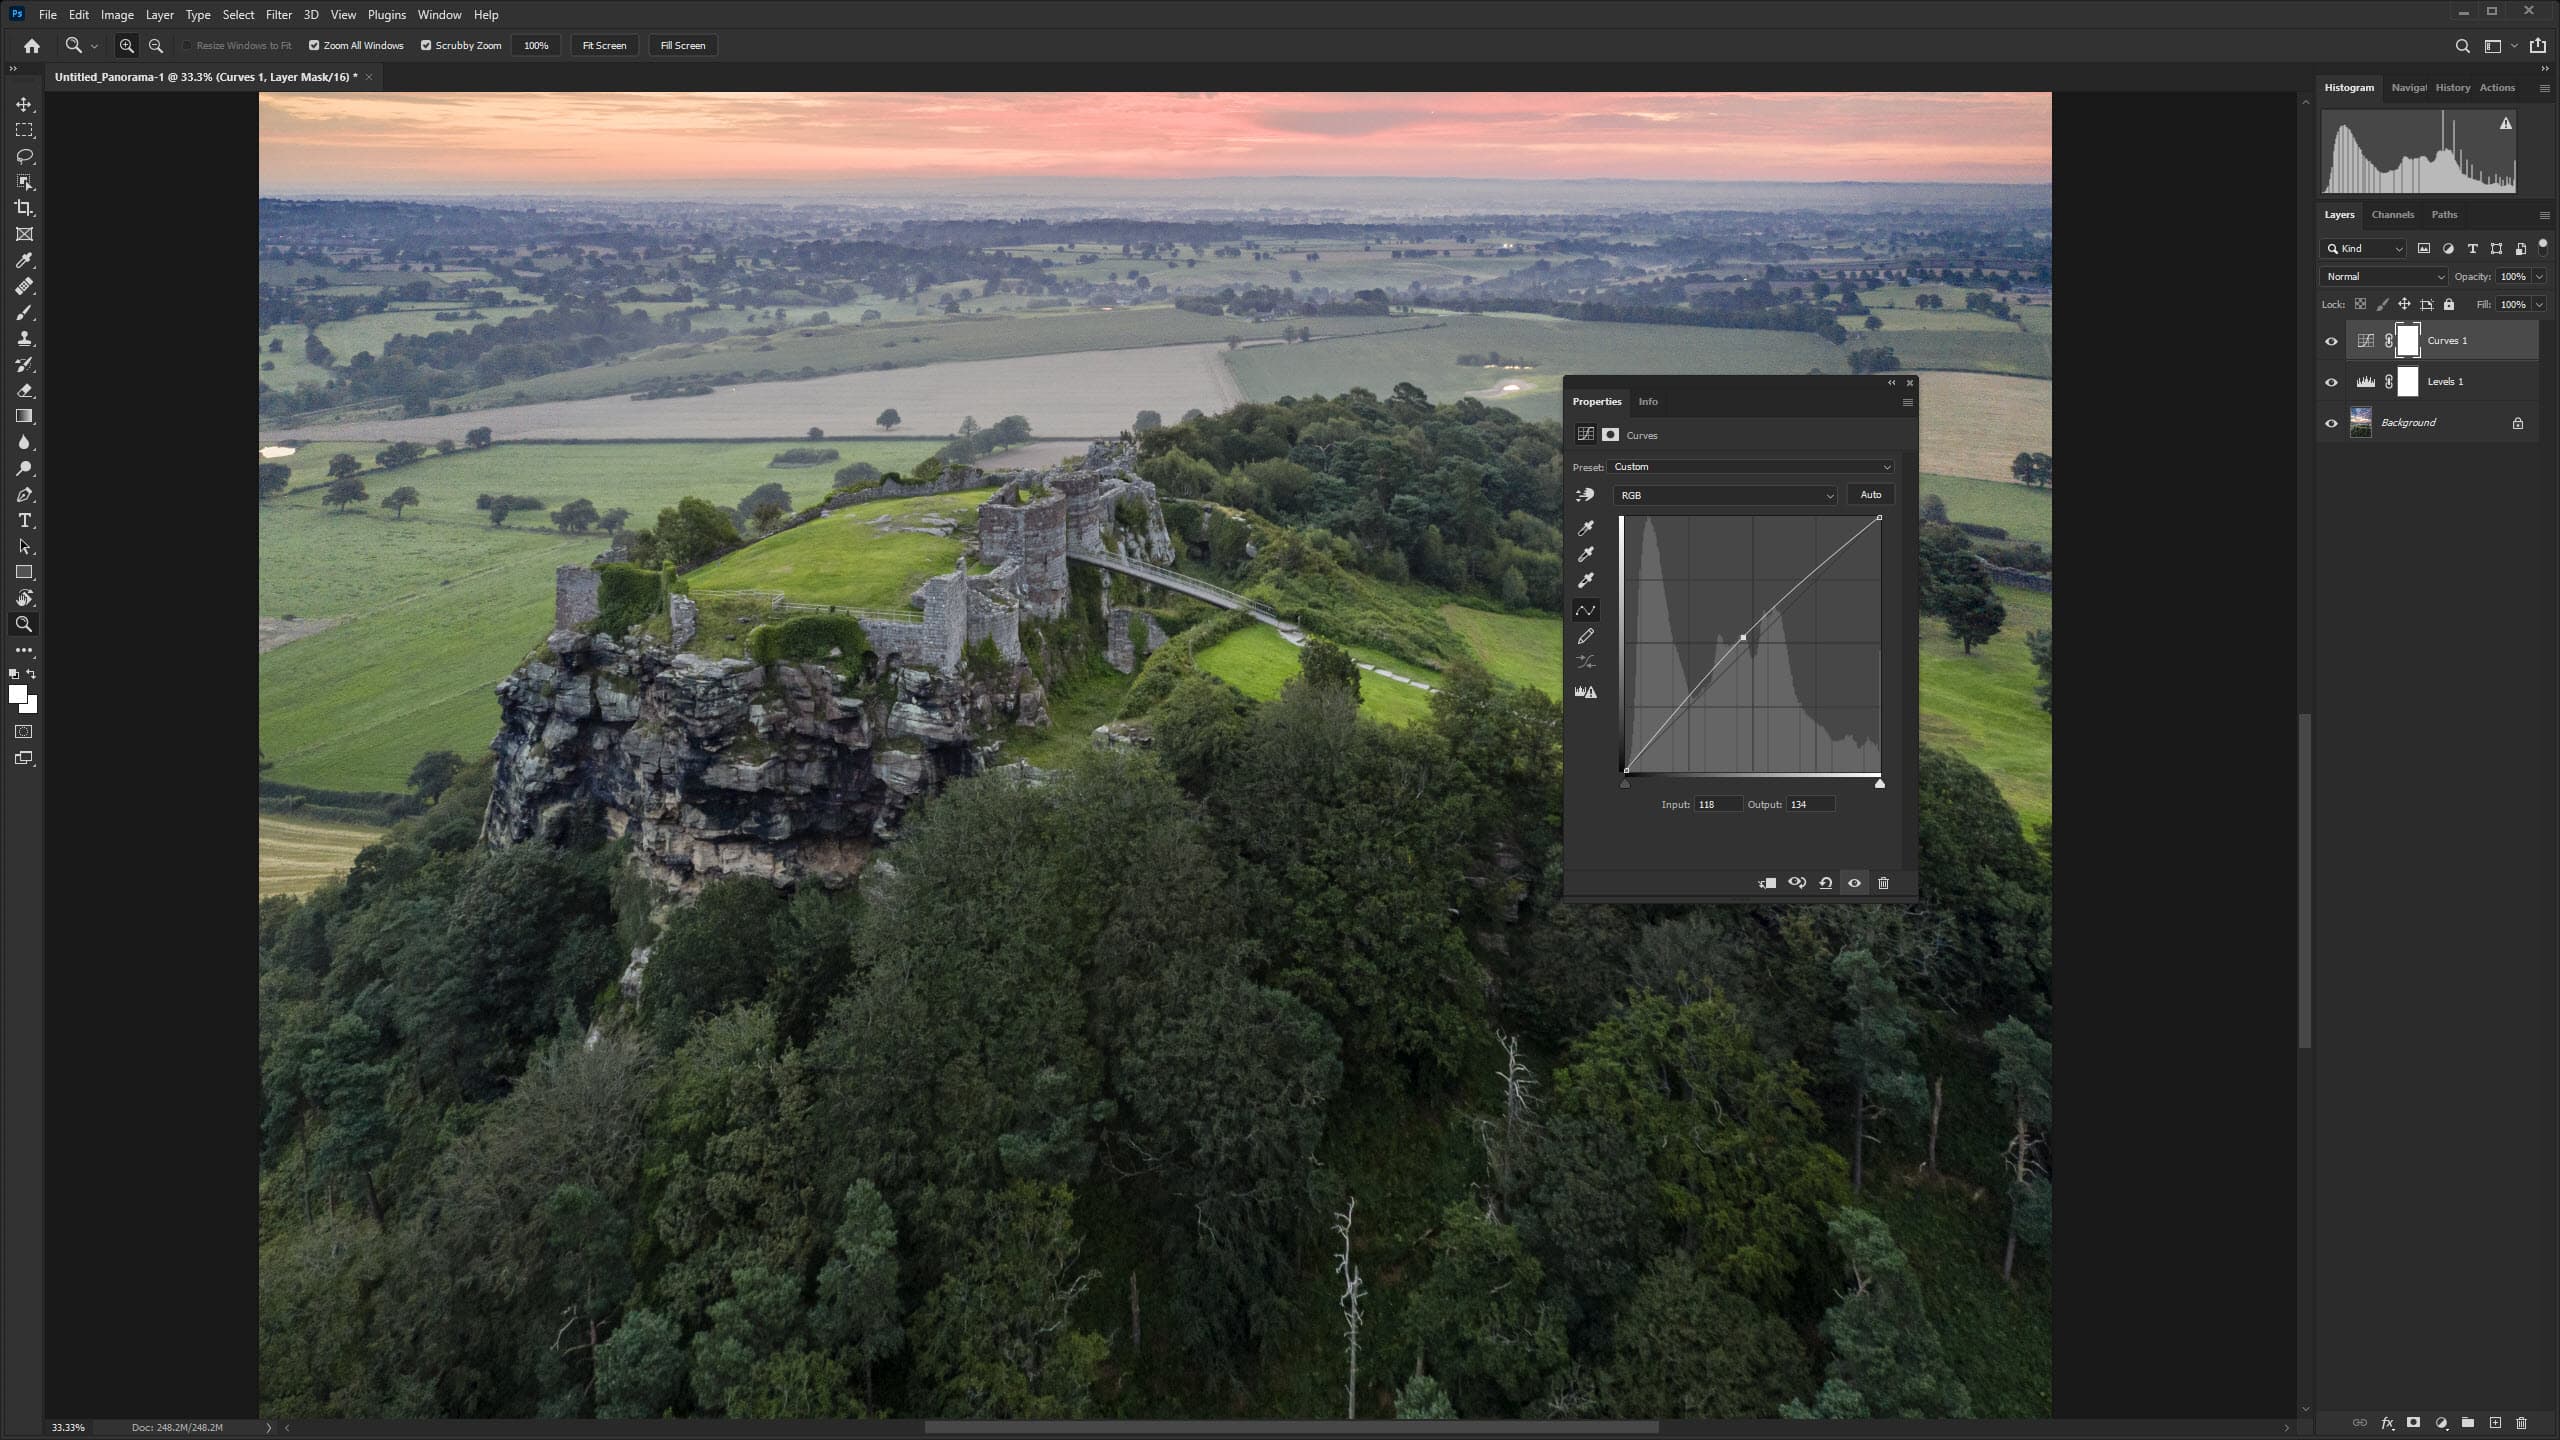
8 Flatten and edit
Right click on the Layers in the Layers panel and select Flatten Image. At this stage, you can apply adjustments as required to complete the processing of the image and save it in the required format. If you’d like to keep layers intact save as a TIFF, reducing bit depth to 16-bit by going to Image>Mode>8 Bits/Channel, or save as a JPEG if no Layers need to be kept.
To read more articles like this one subscribe to our print magazine today. You’ll save money every week and enjoy having each issue delivered to your door! Click here.


