Landscape photography tips
1. Look for a focal point

The best landscapes usually have a focal point within the frame for the eye to rest upon, be it a tree, a rock formation or a building. If you’re lucky you may even be able to find a wall, pathway or stream to lead the eye to the focal point. Don’t necessarily place the focal point in the centre of the frame either. Putting it one third of the way from either side usually works best.
2. Different seasons
Landscapes are constantly changing, not only from day to day (and within the day) but month to month. This means that a location rarely looks the same twice. So even if you’ve already photographed a place it’s well worth returning again and again to capture it in different seasons. Make a mental (or written) note of shooting positions so you can return to get the same viewpoint later in the year.
3. Look for foreground interest

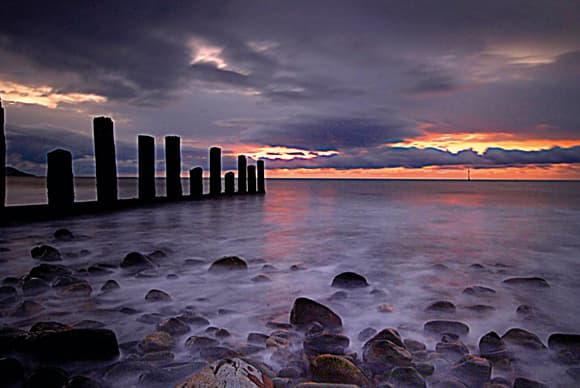
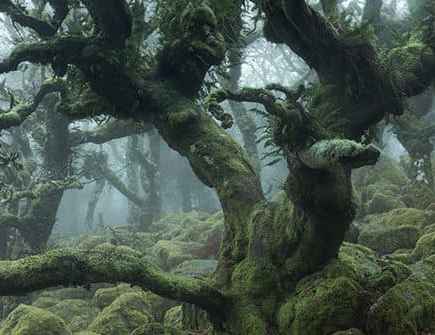
Landscapes where everything of interest is at the horizon can work every now and again but can often be boring. It’s usually better to find some foreground interest to place at the bottom of your frame which will provide a sense of depth. Shooting the coast? Place some rocks in the foreground. Shooting in the woods? Find a fallen tree trunk to place at the bottom of your composition.
4. Don’t fear the rain

You may not fancy going out in bad weather but if you do get out you can be rewarded with some great shots of stormy skies, falling rain and even lightning. Obviously it’s important to dress appropriately and protect the camera. A Kata rain-cover is a great accessory for keeping your camera dry. Also, when it comes to lightning think safety first. Don’t stand under that pylon!
5. Be prepared to walk
The best landscapes are rarely found right next to the side of the road – you’re probably going to have to do some walking to get to them. Invest in some good walking shoes and backpack for your gear so the weight is evenly distributed on your back. A raincoat, in case you get caught in a downpour, a phone and a snack of some sort are also a good idea.
6. Shoot early or late in the day

The best light for shooting landscapes occurs first thing in the morning, in the first couple of hours after sunrise, and late in the day, as the sun is setting. At these times the sun is low in the sky, casting attractive shadows. Early mornings have the advantage of being quieter, with fewer people around, making them the very best time to shoot.
7. Create blurred water effects

You must have seen those moody seascapes and landscapes with running water in which the water is a soft, misty blur while the landscape itself is sharp? They do divide opinion, with some people hating them, but if you like them and want to try them yourself they’re dead easy. Set up your shot with a body of moving water within the frame. The coast is ideal. Set the camera on a tripod and stop down the aperture until you get an exposure time of several seconds, at least. If you can’t stop down enough fit a neutral density filter (which is neutral grey all over) or, failing that, a polariser, to cut out more light and extend your shutter speed further.
8. Use a small aperture
With landscapes it’s important to get everything sharp from the foreground right to the horizon. To do this use a small aperture such as f/16 (though not the smallest as the image quality may not be good). The chances are that, combined with a low ISO for maximum image quality, this will result in a long exposure, so you’ll need to find something solid torest the camera on.
9. Different viewpoints
A common error in photographing scenic views is to start shooting from your initial spot, even though it may not be the best viewpoint. Before you start shooting explore it from different points to find the best one. It will pay dividends.
10. Use a spirit level
Few things spoil a landscape more than a wonky horizon, but they can be quite difficult to get level just using your eye. Many tripods come with a built-in spirit level. If yours does, use it. Alternatively you can buy one quite cheaply to fit on your camera’s hotshoe. A few of the newer DSLRs have a built-in digital spirit level which is more accurate.
11. Use a tripod
 The long exposure times that high-quality landscapes usually require means a tripod should be the number one item on your shopping list, after your camera. Sure, you can find the odd wall or fence post to rest the camera on but these are unlikely to be exactly where you’d like them to be. With a tripod you can set up the camera anywhere. If you can afford it, get a carbon fibre model as these are lighter
to carry.
12. Use ND Grads to balance sky exposure
One of the big problems with landscape photography is the difference in brightness between the ground and the sky. Expose for the foreground and the sky will be washed out. Expose to get some colour in the sky and the ground will be too dark. The solution is to use ND grad filters.
These are rectangular, with one half clear and the other neutral grey. By fitting one of these over the lens you darken the sky without darkening the ground, balancing the two together. They come in various strengths, and to work out which one you need here’s what you do:

Take a meter reading from the ground only, then from the sky.

Work out the difference, in stops, between them (e.g. if the ground is 1/4sec at f/11, and the sky is 1/30sec, that’s a difference of three stops.

Fit an ND grad of the right number of stops (e.g. three stops) over the lens. You can combine ND grads together if one isn’t strong enough.

Set the exposure for the foreground exposure reading, and shoot.
Need more landscape photography tips? See our landscape photography section for more great advice.


