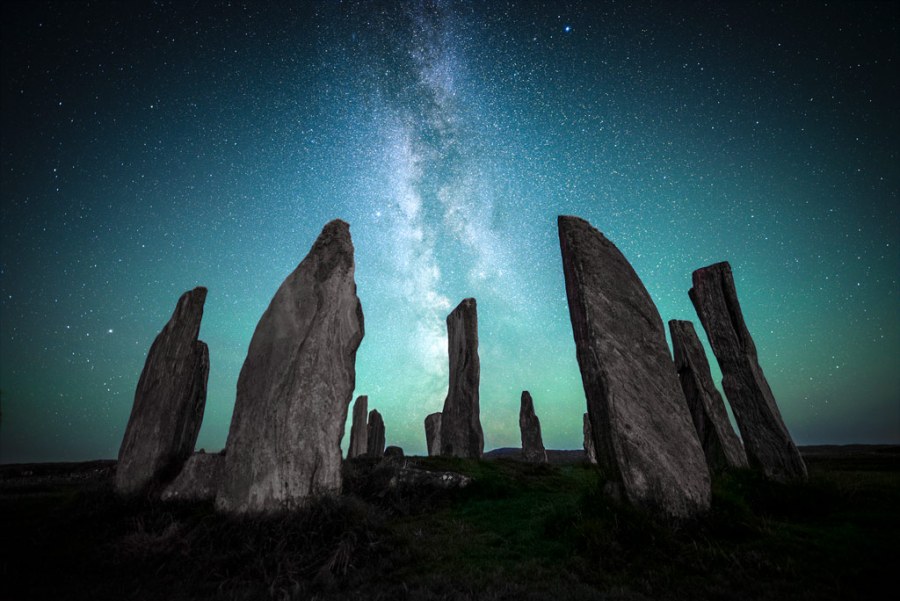
The Enigma of the North was shortlisted for this year’s Astronomy Photographer of the Year Competition in the Skyscapes category
Sony A7S II, 14mm, 8 sec at f/1.8, ISO 10,000. Image: Josh Dury
Our view of the universe is changing. It is more important than ever before, to capture images of the night sky in its entirety. If you are planning to shoot the stars and the night sky you may need one of the best cameras for astrophotography. In this astrophotography guide, Josh Dury delves into his process of capturing stunning photographs of the Milky Way, the Moon and more.
Professional landscape astrophotographer Josh Dury
Josh Dury Photo-Media is a recognised award-winning professional landscape astrophotographer, presenter, speaker and writer from the Mendip Hills in Somerset. His work is recognised by major publishing and media outlets, including the BBC, ITV and CNN amongst others. See more of his work at www.joshduryphoto-media.com
When planning to photograph the night sky, we first need to consider what is happening above our heads. The weather, as we know in the UK, can be unpredictable due to the jet stream and weather systems across the Atlantic Ocean. Therefore, we need to be prepared to photograph our subjects either in advance or at the last minute.
It is always good to have a number of weather apps to obtain an average for what is happening in the night sky over the coming days and weeks. I tend to use the BBC Weather, Met Office and Ventusky apps.
The Northern Lights from Tromso, Norway Sony A7S II, 14mm, 1.3sec at f/1.8, ISO 8000, Image: Josh Dury, astrophotography
ILCE-7SM2 · f/1.8 · 1/1s · 14mm · ISO8000
I usually try to plan for a clear sky that avoids any chances of clouds obscuring my shots. It depends on the photographer as to what you capture, but at the same time, clouds can lend some perspective and dynamism to your images. It depends on the subject and narrative you want to achieve.
Light pollution and surrounds
Next, we consider the impact of light pollution from our nearby towns and cities. There are a number of good light pollution maps out there, which indicate the strength of light pollution from your location.
Light Pollution Map or LPM, is a good app for measuring the light pollution of your area and shows the effect of artificial light at night, both nationwide and globally. In astronomical terms, this is measured on the Bortle Scale – this is a numeric scale from 1 to 9, with (1) being measured as ‘dark skies’ and (9) as severely ‘light polluted’. Try to find a location which is as dark as possible so you can observe details of greater clarity within the night sky.
Owing to the nature of my work, light pollution has made me very aware of the environments I photograph. It’s made me consider the scale of the impact it has, and appreciate and protect the dark skies we have left. For example, the Mendip Hills have recently become a Super National Nature Reserve in The King’s Series and I have become a partner of The Mendip Hills AONB (Area of Outstanding Natural Beauty) to raise public awareness of dark skies.
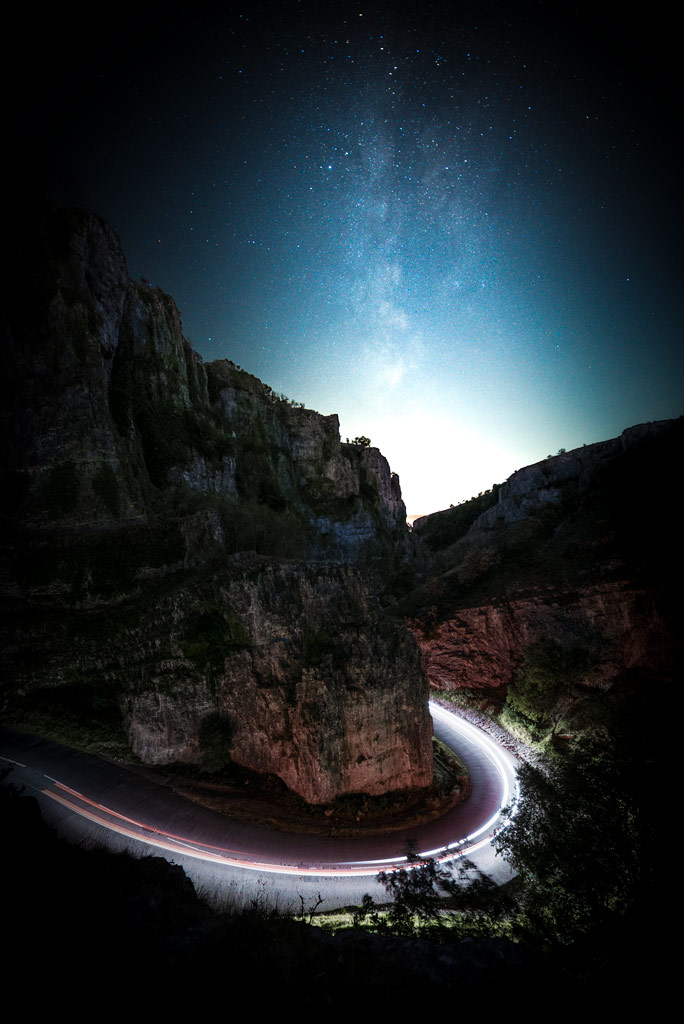
Geminides meteor shover at Stonehenge. Image: Josh Dury
ILCE-7SM2 · f/1.8 · 1/0s · 14mm · ISO2500
Celestial events
There are a number of different books and resources you can use to research and plan astronomical events throughout the year; from smartphone apps to online and physical resources. AuroraWatch, UK, the Aurora app, and Space Weather Live, are good apps for predicting the northern lights.
Since the age of seven, I have been able to navigate myself around the night sky. Therefore, I believe for astrophotography, it is really important to be connected with your subject, to understand what is happening in the environment around you and above your head. Whether that be recognising the major stars and constellations, to locating the galactic core of the Milky Way.
We have a series of celestial events, including meteor showers, eclipses and potential comets on the horizon. So, it’s always good to plan ahead for these dynamic celestial events. Nowadays, it is even possible to predict when the northern lights or ‘aurora borealis’ are visible from the UK.
As we reach solar maximum by the year 2025, the sun will increase in activity and sightings of the northern lights are becoming more apparent and is worth looking ahead if skies remain clear.
Josh’s Top Tips for Starry Night Astrophotography Shots
New locations
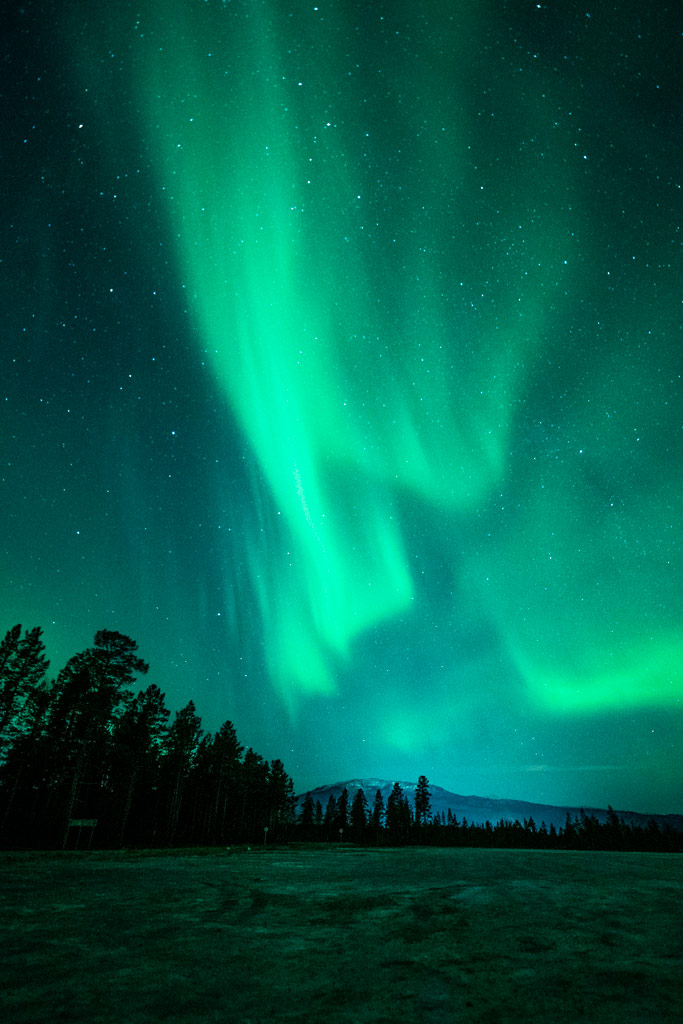
Stanton Drew Stone Circle with the Milky Way, Image: Josh Dury
ILCE-7SM2 · f/1.8 · 1/0s · 14mm · ISO4000
Have a go at shooting different locations and see what the results yield. When photographing different areas, the contrast of the night sky is very noticeable. See what areas work best for you. You might be surprised that some of the most photographed locations are severely impacted by light pollution.
Astrophotography techniques
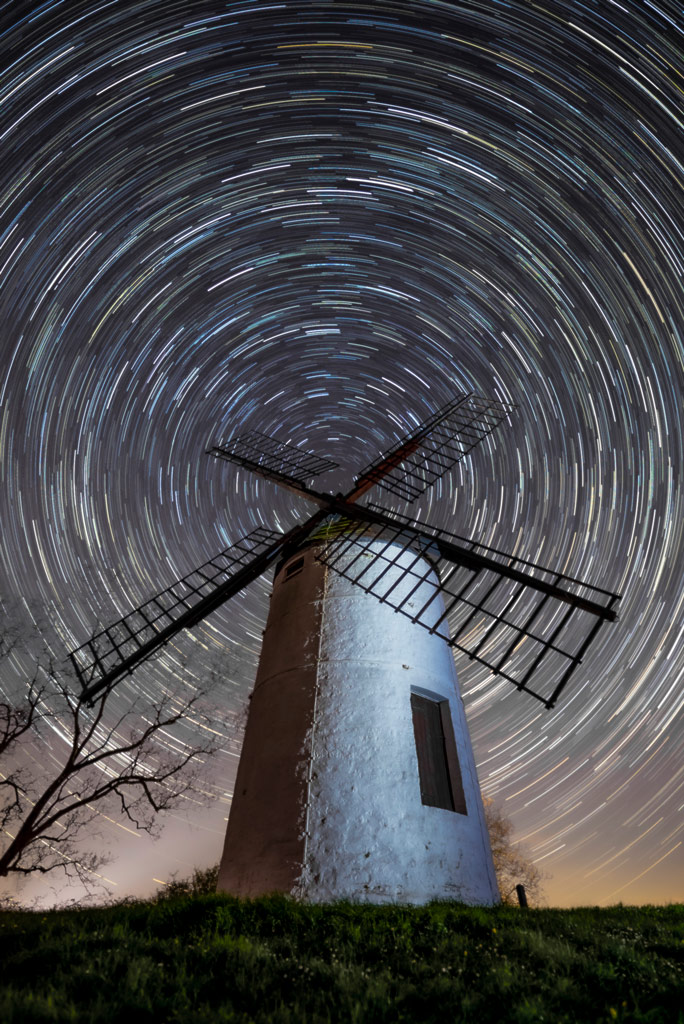
You may wish to tell the narrative somewhat differently by deploying a series of astrophotographic techniques, including star trails. These often result in abstract, timeless images, which can complement lend itself with the backdrop of your subject matter and colours of distant starlight.
Ashton Windmill with star trails, Image: Josh Dury
ILCE-7SM2 · f/1.8 · 1/0s · 14mm · ISO2000
What’s in the night sky?
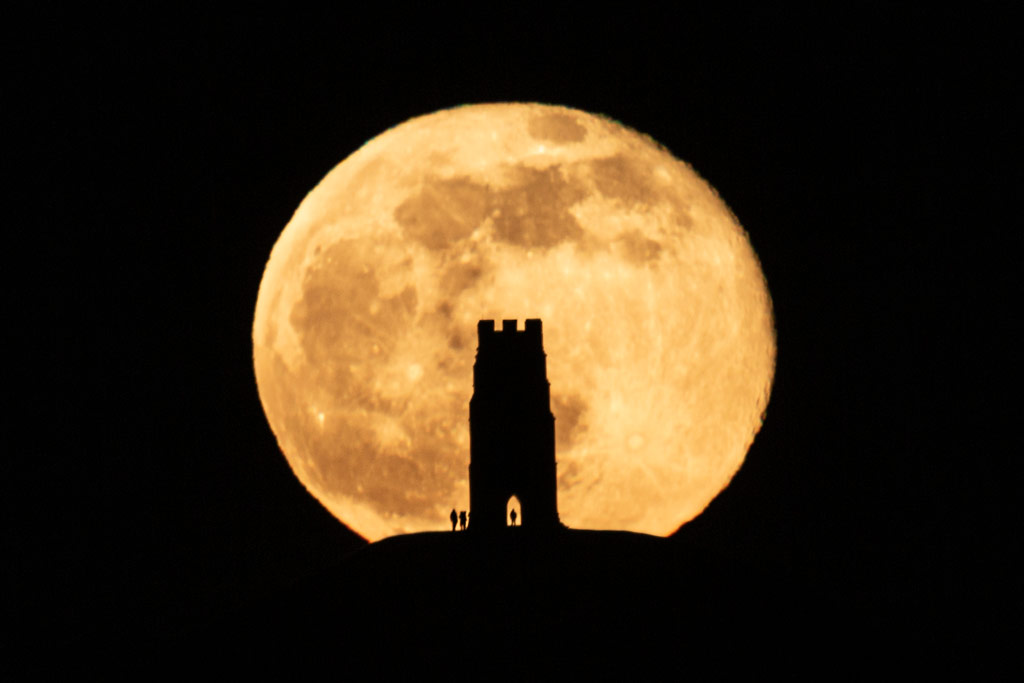
The night sky is always changing so why not have a go trying to photograph different celestial targets throughout the year? The moon is always an enjoyable photographic target with its lunar phases changing every single day and making for some dramatic moonrises at the time of the full moon.
Glastonbury Tor and the Full Moon, Image: Josh Dury
Canon EOS 5D Mark III · f/11 · 1/4s · 1200mm · ISO400
Keep up to date
Technology has really expanded in the past few years for astrophotography. With the Sun reaching solar maximum in 2025, why not have a go trying to spot the northern lights? Use the latest apps to predict when aurora may be visible from the fringes of the United Kingdom.
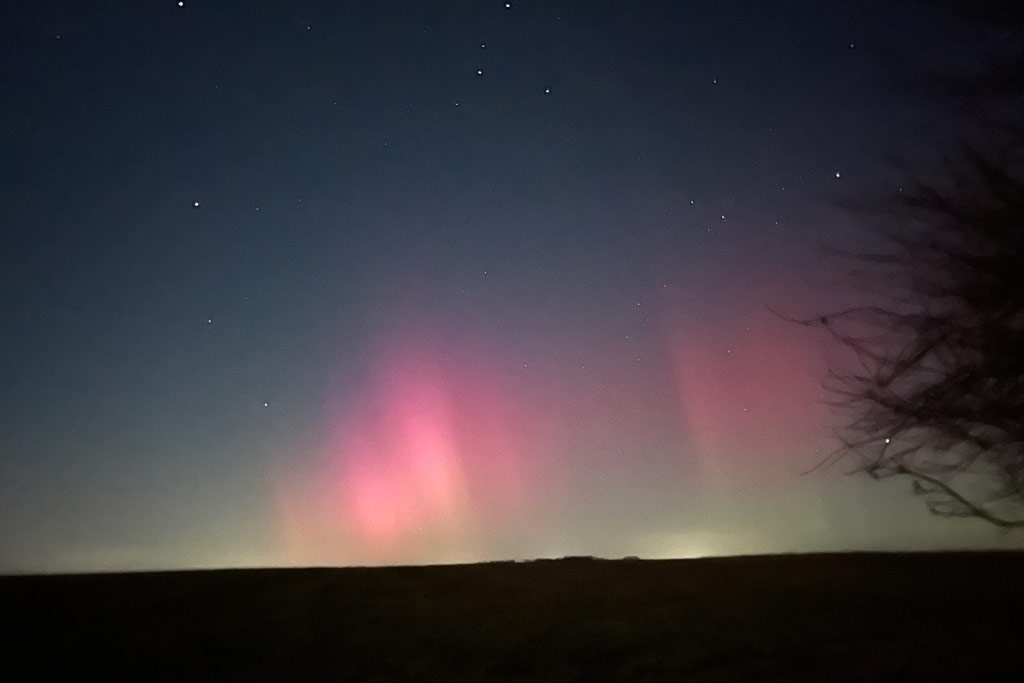
Aurora from South England, Image: Josh Dury
iPhone 13 Pro Max · f/1.5 · 1/1s · 5.7mm · ISO6400
Enjoy the darkness
Most importantly, enjoy the few dark sky places we have left. Luckily for astrophotographers, there are protected, designated areas that allow us to enjoy the true beauty of the night sky in all its entirety. But most importantly, this makes us appreciate the windows we have left on the open universe.
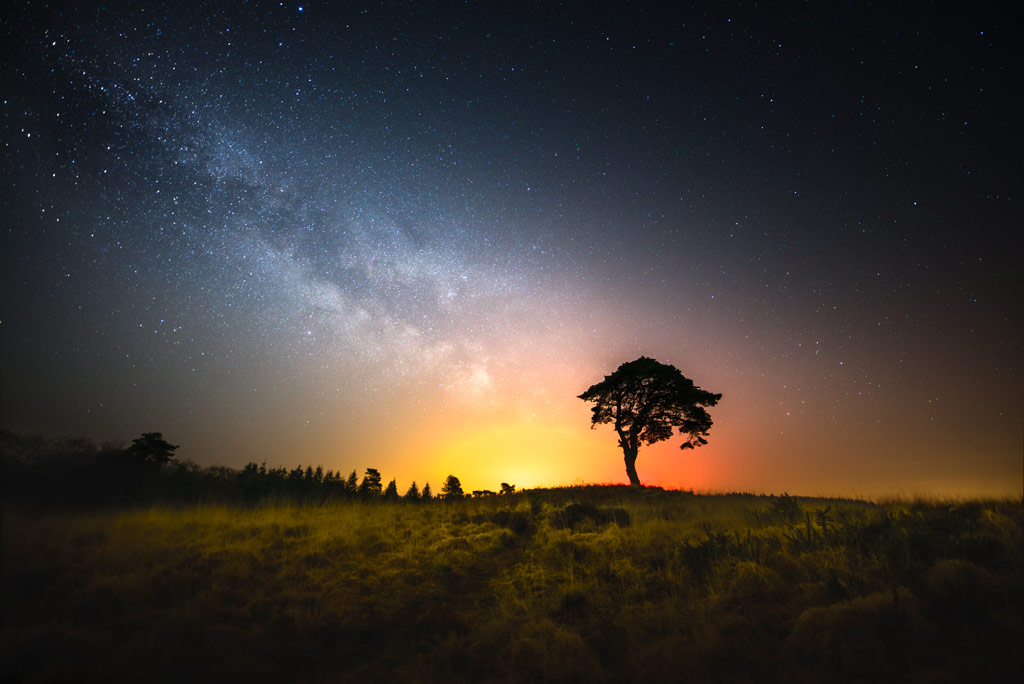
The Mendip tree with The Milky Way, Image: Josh Dury
ILCE-7SM2 · f/1.8 · 1/0s · 14mm · ISO2500
Astrophotography equipment set-up
Your equipment set-up is the most important element when taking photographs of the night sky and the battle with light pollution. Make sure you use a sturdy tripod. I often recommend an aluminium tripod because they are durable, yet lightweight and less susceptible to stronger wind conditions when shooting at night.
Also, think about the compactness of your equipment. Think about when you travel out on a shoot, how much equipment do you want to take with you? How long does it take to walk to your location? Do you need to plan a route when walking through landscapes at night?
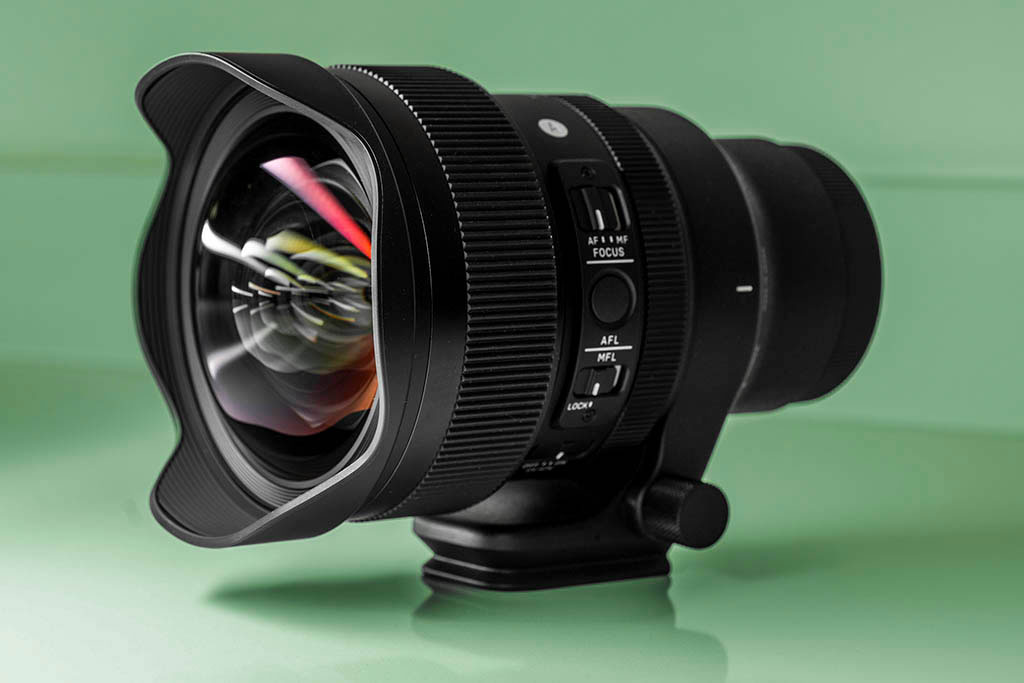
Personally, I like to shoot with as limited equipment as possible. This makes my compact camera set-up of the Sony A7S II and Sigma 14mm Art lens beneficial when travelling on foot to my desired location.
Shooting with a remote shutter release cable also makes it beneficial to reduce any sudden camera shake when releasing your camera’s shutter. We need to preserve as many details as possible when it comes to photographing the stars, and so taking your images from a distance helps to minimise camera shake.
Cosmic Energy, Sony A7S II, 14mm, 8sec at f/1.8, ISO 640, Image: Josh Dury
ILCE-7SM2 · f/1.8 · 1/0s · 14mm · ISO6400
Trial and error
The most important advice I have been given is to embrace trial and error. Use the equipment you already have. Everyone’s photographic set-up is going to be different so it’s important to become familiar with your camera and understand what you can achieve with different settings and adjustments.
This will push you to see how you can take it with your equipment. Sometimes, photographers are unsuccessful, and other times they are rewarded. The most important consideration is to persevere with your astrophotography set-up and keep shooting.
On location, you may decide to shoot differently from what you initially intended. For example, you may wish to shoot portrait orientation as opposed to landscape if the Milky Way feels more prominent.
At other times, weather conditions may change how you shoot. Instead of catching long exposures for star trails as an example, you may shoot for shorter periods of time when capturing details in the spiral arms of the Milky Way.
As you become more familiar with your set-up, your camera becomes an extension of you, and how you and your camera react to your subjects and environment as you become at one with the universe.
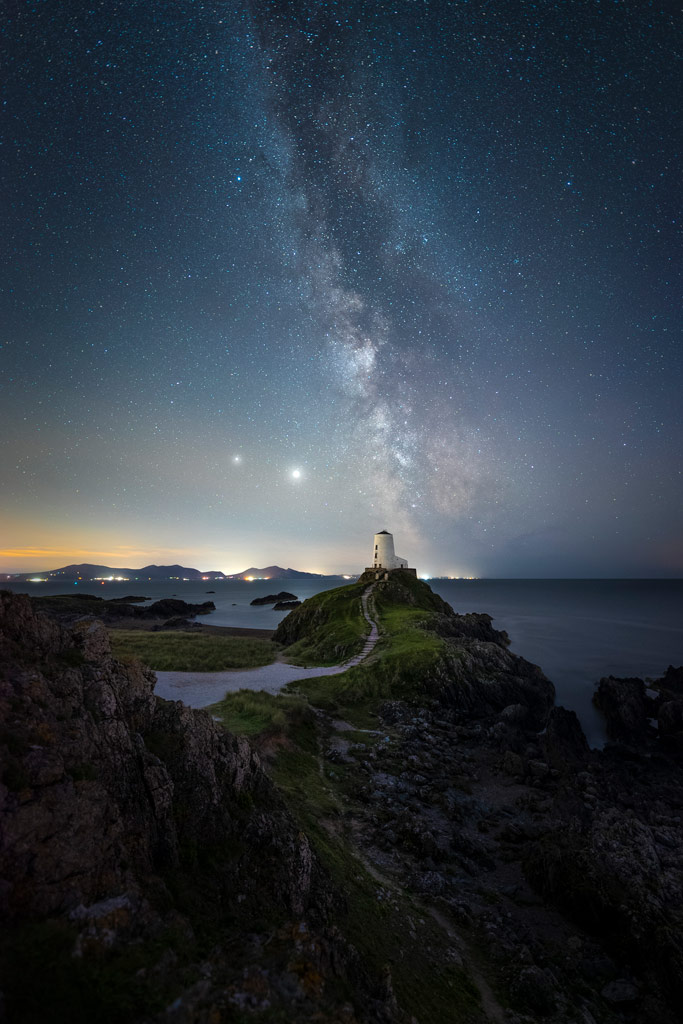
Nightscape image of The Milky Way above The Woollen Mill of Llandwyn Beach, Wales.
ILCE-7SM2 · f/1.8 · 1/0s · 14mm · ISO6400
10 steps for shooting astrophotography
1. Tripod: set up your tripod on level ground for sturdiness. Once your camera is attached, check the tripod adapter is tight to your camera to prevent it from sliding when capturing your images.
2. Torchlight: it is advised to use a red torch, not only to preserve your night vision but for ease of use when setting up your camera in dark environments.
3. Liveview: use the live view feature: on your camera, if it has one, and the tripod’s bubble level to aid composition. Don’t forget to zoom in to check for distractions, including along the edges of the frame.
4. Focus to infinity: To preserve as many foreground and background details in your shot as possible, set your focus to infinity to ensure stars are in focus.
5. Fine-tune: Sometimes, it might be necessary to fine-tune your focus using the live view function on your camera or by temporarily lighting up your subject.
6. White balance: set a neutral white balance in the region of 4000 to 5000 Kelvin; this may vary at the time of shooting depending on weather conditions and the phase of the moon.
7. File format: I tend to shoot RAW files to obtain the highest data acquisition from my shots. It also means I have more scope in post-production for adjustments.
8. Interval shooting: when you are confident your subject is in focus and composed as you require, set your shutter release to take images at set intervals. A good starting point is an 8-second exposure.
9. Aperture: keep your aperture as wide as possible, f/4 or wider, and aim for an ISO value between 1600 and 5000. Experiment with your settings to suit your preferences.
10. Shoot: You are ready to take a test exposure! Fire the shutter and see what your results are like. If required, make minor adjustments to your settings or composition as desired.
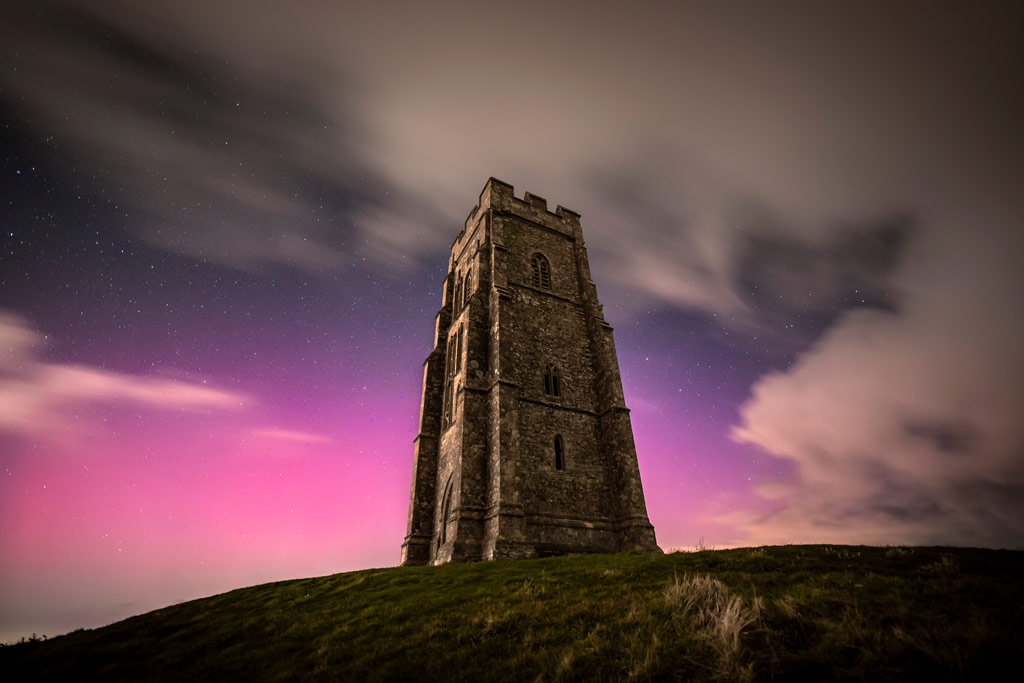
The Northern Lights from Glastonbury Tor, Sony A7S II, 14mm, 8sec at f/1.4, ISO 1600, Image: Josh Dury
Aurora in Southern England
To witness the northern lights from the iconic landmark of Glastonbury Tor was something of a once-in-a-lifetime opportunity. Owing to the unpredictable nature of the aurora borealis, it was something of a rarity to be able to see it from the extremities of southern England, let alone photograph it.
In the build up to capturing this photo, a strong solar wind was predicted to hit climbing the Tor at 3 am on a Monday morning. When shooting at f/1.4, the passing clouds were lit up by the lights of Glastonbury below. This proved to be a challenging, yet evocative image, balancing the lightshow of mother nature and our own creation of artificial light at night.
The AP Staff team are made up of a number of experts, photographers and professionally trained journalists and writers, with decades of experience in the photography industry, including expert reviewers with many years of knowledge. Find out more about the team that make up the AP Staff on the about us page.
Subscribe to Amateur Photographer for only £3.75 an issue
Subscribe now and stay up to date with everything from cutting edge techniques and gear.