It’s true the summer provides all-day shooting, when its not being ‘uncharacteristically’ wet for the season, but if you want to capture the drama of dawn’s first steps you need to get up at a pretty unpleasant hour of the night.
Mist is one of atutumn’s gifts to the visually aware, whether it is rolling around the earth like dry ice at a rock concert or descending from the heavens to conceal the treetops.
Make the most of its mysterious cloaking atmosphere for some haunting images or to portray a lonely subject. Mist rises around water and wet fields, making an excellent display both in the morning and in the late afternoon. As it tends to linger awhile you’ll have plenty of time to shoot, but watch out in the evening for the light falling off too much.
With mist acting like a big softbox in the sky, contrast is reduced, but use this to your advantage. With objects progressively losing contrast the further back they go in the scene, it can be a great way to emphasise depth in your shot and exaggerate the differences between near and far objects. Ideal subjects include isolated animal or human portraits, old or ruined buildings, large rocks or empty city streets with the building lights glowing through the haze.
How to photograph mist: What you will need
Misty pictures look great in black & white as well as in colour, but shoot in colour as you can always turn a colour image black & white later if you want to. As the light tends not to be great at this time of the year, and especially early or late on a misty day, you might want to consider taking a tripod or monopod to avoid camera shake with those long exposures. Try to use the slowest ISO setting you can, as the neutral grey of mist shows up the coloured speckles of image noise rather badly.
You won’t need any filters or a flash, but a spare battery is always a good idea in cold weather. Keep yourself warm and dry too, so you don’t get tempted to go home before you’ve got that prize-winning shot.
Lenses
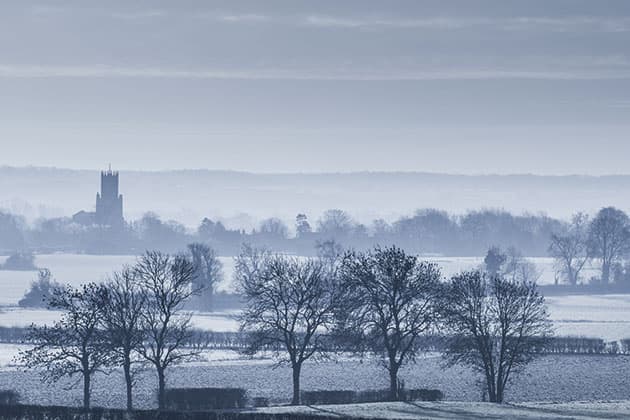
Take both wide and long lenses. Buildings and street scenes will need a wideangle lens, but shots like this one need a longer focal length.
Tripod
Atripod or monopod means you won’t have to risk a shaky picture, and you won’t need to use a faster, noisier ISO setting.
Batteries
Cold weather reduces the time batteries last so take a spare and keep it warm inside your clothing.
Warm Clothes
Keeping yourself warm and dry means you’ll be in better form for taking pictures.
How to photograph mist: Exposure
The biggest problem when shooting on a misty day is getting exposures right. With all that white around, the camera is likely to underexpose, so dial in 1/2EV-1EV exposure compensation, bracket like mad or use a grey card to take a reading from.
Bracketing is the best option, as it gives the most alternatives – and pleasant surprises. For spot metering in shots like this, the grass provides the most reliable target.
Be careful to avoid camera shake by keeping the shutter speed high or by using a tripod, especially with a long lens.
How to photograph mist: Depth of Field
Even though your depth of field will be restricted by the mist – distant objects will be hidden – it is still an important issue. To heighten the sense of isolation in this picture, and to make the cow really prominent, required careful focusing and considered depth-of-field.
A 200mm lens and an aperture of f/9 combined to good effect, softening the background even more and creating crispy sharpness around the cow’s head, making the ears stand out from the mist really well. The treetops have shape but their edges blend gently with the sky.
How to photograph mist: Enhancing Atmosphere
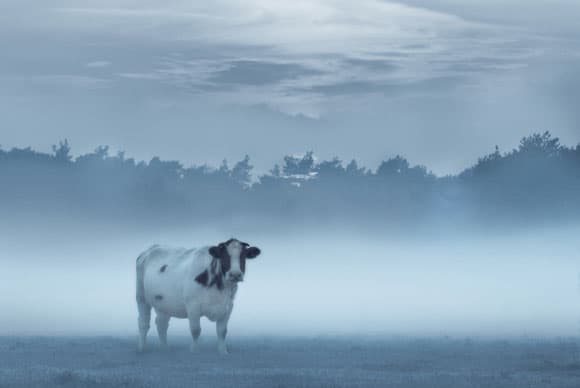
The soothing modulation of one fine tone into the next is what makes mist and clouds look fluffy and flowing. Those tiny changes of tone, the slightest shift from one grey to another, gives mist its shape, its characteristics and shows us it is moving.
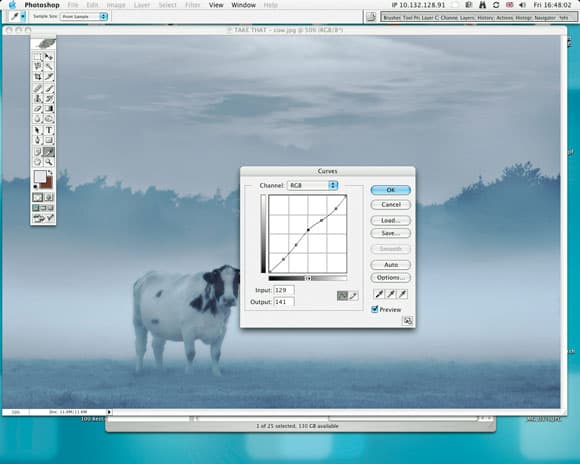
To maintain all those fine tones within your image requires careful manipulation of contrast – too much and they are destroyed, too little and the mist looks flat and boring.
Set your white and black points using Levels and ensure your ‘exposure’ looks right – maybe leave the black not quite black – and then gently tease the mid-tones into life in Curves. By picking points close to the centre of the curve line you can create separation just in the mid-tones while leaving the highlights and shadows locked into position.
Top Tips for photographing mist
- Mist quickly disappears in the morning, so make sure you’ve set your alarm early and you’re at your location before first light to ensure you don’t miss the perfect mix of mist and light.
- Mist reflects ambient light, so it can trick your meter into thinking it’s brighter than it actually is, so be ready to dial some exposure compensation to get round this.
- Try shooting with a long focal length to really compress the perspective and play on the extended feeling of depth that’s created from the mist, reducing the clarity in the raw conversion.
- As there’s a chance that water droplets will form on the front of your lens when out in these conditions, it’s worth taking a few tissues.
- White balance – to preserve the cool blue of a misty morning, select the Daylight white balance setting, rather than Auto or Cloudy. To make the blue even more pronounced try the Tungsten setting.
- Think about lighting – mist looks most impressive when lit from behind, as shown here. Try to position yourself with the mist between you and the sun or a street-light. Coloured bulbs and illuminated signs can lend their colours to the mist too.
- Sharpen and blur – enhance the difference between the sharpness of the subject and the softness of the mist using the Sharpening tool and Blurring filters on selected areas. Darkening subject edges against a light and misty backdrop using the Burning tool can help sharpness too.

