
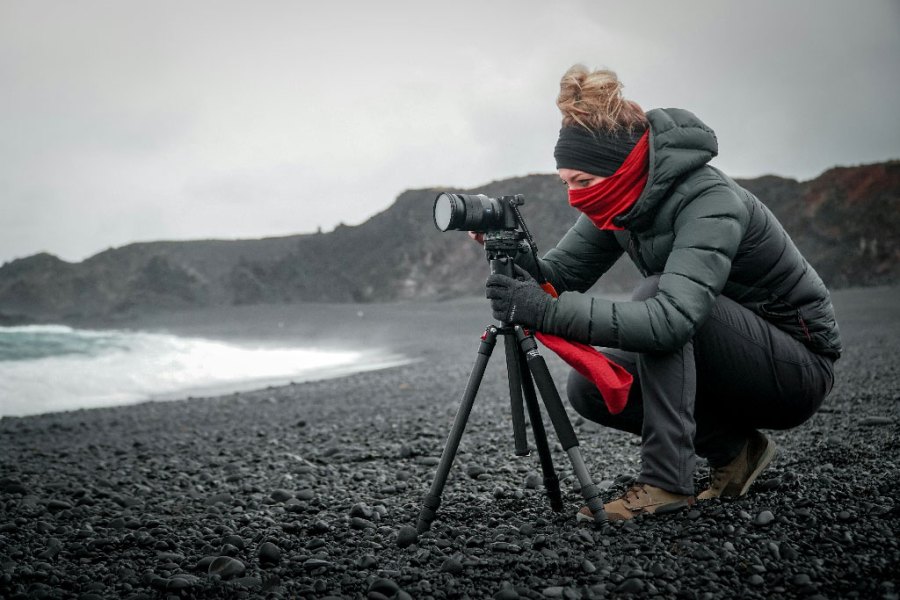
Why do we use tripods at all? Traditionally, it’s been to keep the camera steady during the exposure so that we don’t get blurry shots. However, over recent years there have been huge improvements in camera sensors and high-ISO image quality that allow much faster shutter speeds in low light.
Not only that, many cameras now have in-body stabilisation to reduce the effect of camera movement, so that camera shake can be eliminated even with slower shutter speeds.
What this means in practice is that there are almost no everyday circumstances in which we can’t expect to get a sharp, good-quality handheld shot, even in dimly lit interiors, even after dark. It’s a win-win. We can keep shutter speeds up by increasing the ISO and get shake-free shots even at slower shutter speeds.
So, what’s the catch? Well, although high-ISO image quality has come on in leaps and bounds, you do still pay a price in image quality when you shoot at higher ISOs. It might not be enough to matter, and it might even be hard to see, but it’s still a consideration.
And while IBIS systems can be very effective at combating camera shake, they are not a guarantee, any more than so-called ‘safe’ shutter speeds are a guarantee. They certainly increase your chances of getting a sharp shot at much slower shutter speeds than normal.
It’s safe to say, though, that for a lot of low light or long-range shooting, modern camera technologies have made tripods look redundant. But that doesn’t necessarily mean they are. We might not need tripods to reduce camera shake in the way that we used to, but there are many areas and styles of photography where they still make a difference.
So, let’s take a closer look at how handheld and tripod photography compares for practicality and image quality, and whether we can ditch the tripod once and for all.
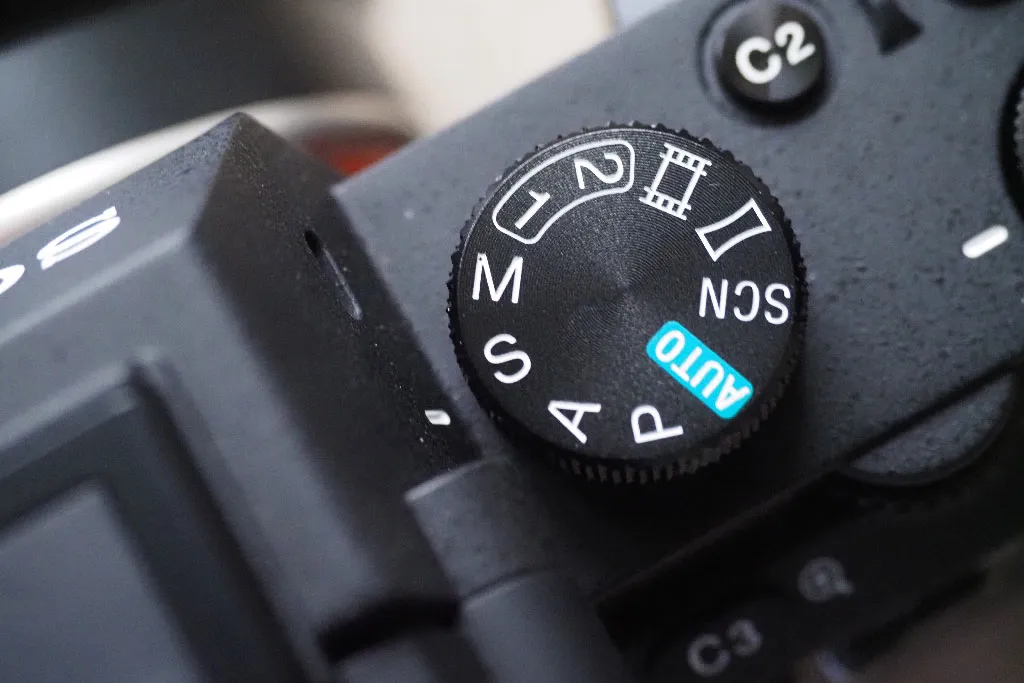
How long an exposure can you do handheld with IBIS?
In-body image stabilisation can be remarkably effective. I remember being present at the launch of the Olympus OM-1 Mark II, where photographers were capturing sharp handheld exposures of 1 second, 2 seconds or longer as darkness fell. Everyone was amazed. The truth is, though, that not everyone is good at steady handholding. I’m pretty poor, so I didn’t get the same long-exposure results the other photographers did.
So, when camera makers quote a compensation figure for their own stabilisation systems, think of this as the advantage that you might gain over your own ‘safe’ shutter speeds and not as any kind of absolute guarantee. For example, my ‘safe’ shutter speed with a 50mm lens is probably 1/125sec. Meanwhile, other people might say that for them it’s 1/60sec – this is the usual way of working out safe shutter speeds, dividing the lens’s focal length into 1 to get the nearest equivalent shutter speed.
Now if a camera’s in-body stabilisation offers 5 stops of compensation, that means that instead of shooting at 1/125sec, I should be able to get similarly sharp shots at shutter speeds 5 steps slower, which would be 1/4sec. That’s impressive!
Not all IBIS systems are equal, however. It’s important to remember that while stabilisation compensation figures are measured by independent testing body CIPA, these will typically be achieved with specific lenses and camera settings. They are a best-case scenario. Others may have a different experience, but whenever I test camera and lens IBIS systems, I rarely get more than about half the claimed compensation reliably.
Reliability is the key word here. Image stabilisation is not an absolute guarantee. While you may be able to get sharp photos with ridiculously long exposures now and again, can you rely on it?
There’s also a fundamental difference between faster shutter speeds and in-body stabilisation: subject movement. Stabilisation systems can counteract camera movement, but they can’t stop subject movement. If you need to ‘freeze’ moving subjects at night – in street photography, for example, or an indoor basketball game – a higher shutter speed is required.
Test your own IBIS
Find a subject or a scene with clear fine detail, where you have time to take a series of shots undisturbed and where the light is low enough to allow longer shutter speeds. The idea is to take a series of shots at different shutter speeds, with and without IBIS, to get a proper sense of the ‘safe’ shutter speeds with that camera and lens.
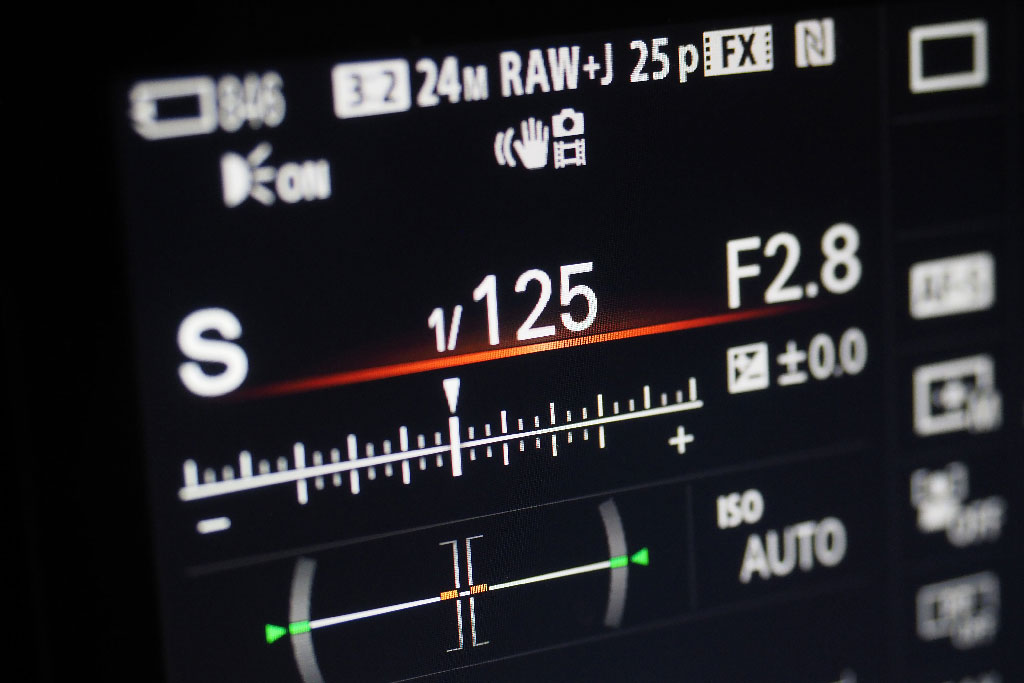
First, with the camera’s IBIS disabled, choose a ‘safe’ handheld shutter speed without IBIS, say 1/125sec for a 50mm lens, and take three shots so that you can get an idea of the ‘hit rate’ rather than relying on one result. Drop the shutter speed to 1/60sec and take three more shots. Repeat this at 1/30sec, 1/15sec and as far as you want to take it.
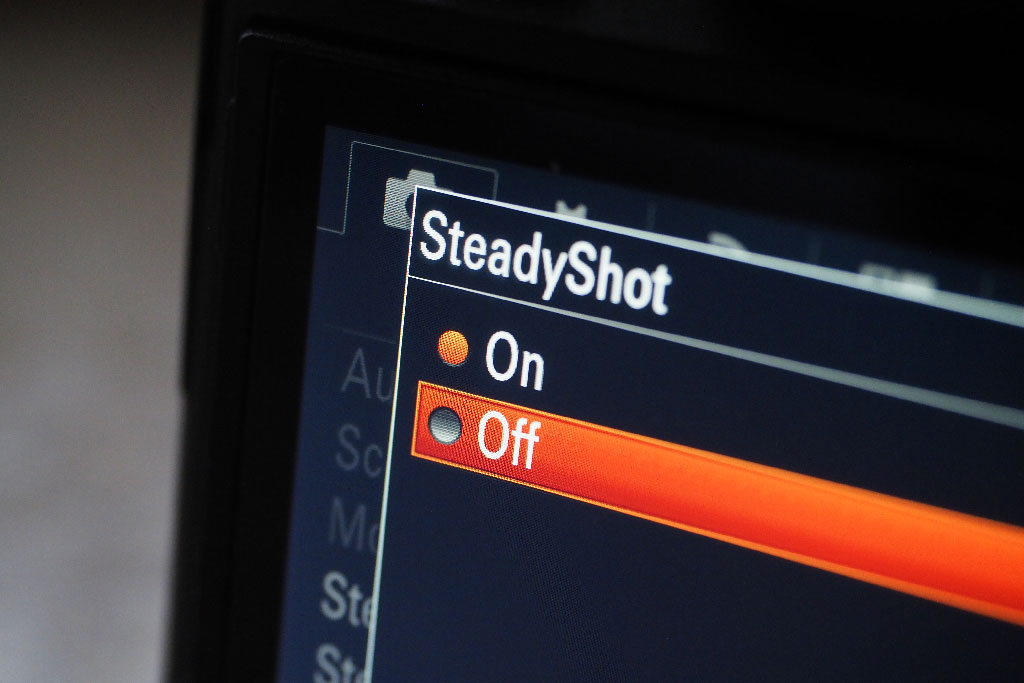
Turn on the in-body stabilisation and repeat the experiment. Afterwards you can compare your images to see which are sharp. When all three shots at a specific shutter speed are sharp, you can probably call this ‘safe’. If only two are sharp, then that’s a marginal shutter speed that might be okay, and if only one is sharp, then that’s a pretty poor hit rate.
How close are handheld low-light shots to tripod shots?
Can a photo taken handheld in low light match the quality of a picture taken on a tripod? If you have to shoot at a higher ISO, then technically the answer must be no. But photography is about what’s possible, not what’s perfect, and is there really enough noticeable difference to worry about it any more?
It’s tempting to say no. With modern camera sensors and IBIS, it’s now possible to take handheld pictures of city streets at night and magnificent but dimly lit interiors without worrying about image quality. Besides, try taking a tripod into the Doge’s Palace in Venice or the British Museum in London and see how far you get with it.
There’s a third factor – AI noise-reduction software. DxO PureRAW 4 is just one example of a number of programs that can use deep learning to identify and remove noise during the raw denoising process and ‘reconstruct’ details and textures that would normally be lost at high ISOs.
However, while you may be able to achieve similar levels of image quality by shooting handheld – or quality so good that the difference doesn’t matter – you won’t necessarily get the same kind of shot.
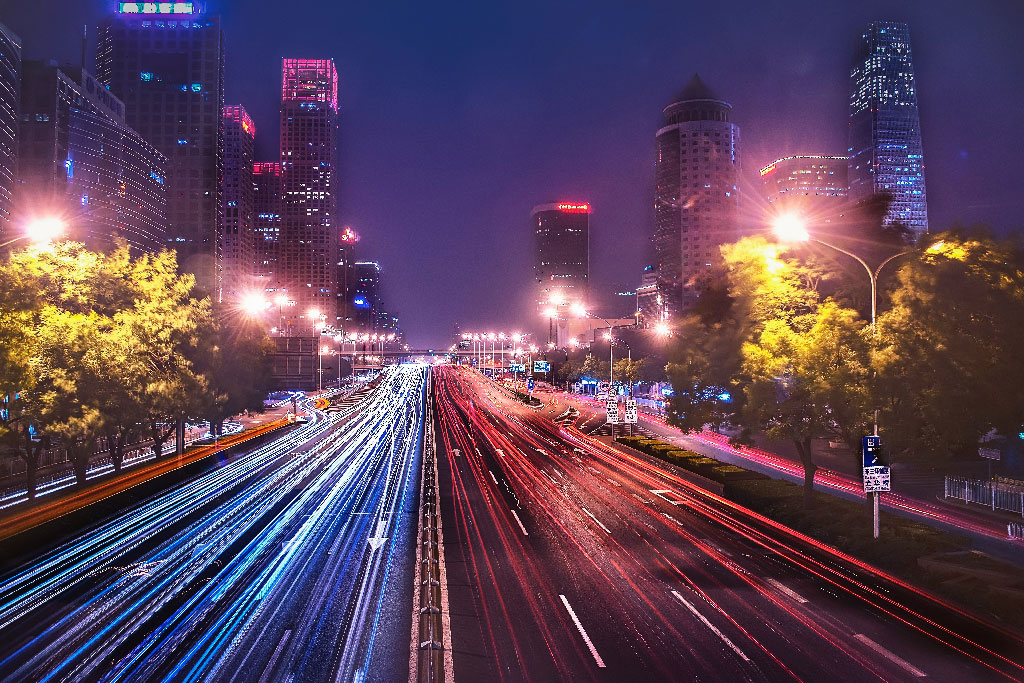
There’s a very obvious example. If you take pictures of a busy city at night, you might be aiming to capture an instantaneous moment in time, in which case high ISOs and image stabilisers are perfect for this.
But you might be capturing the rivers of light created by moving traffic, and you might want to blur pedestrians and passers-by so that they are less distracting. That’s a different technique. Long exposures bring their own particular look to night shots, and that’s when you need a tripod. We’ve yet to see an IBIS system that can capture a sharp two-minute exposure.
Can you use ND and grad filters handheld?
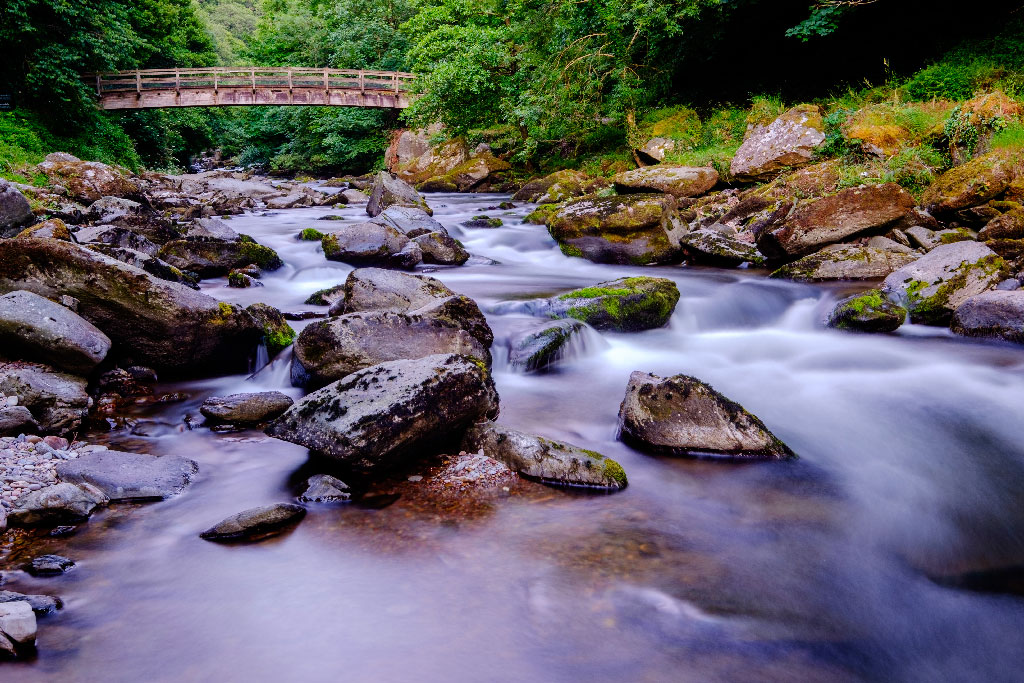
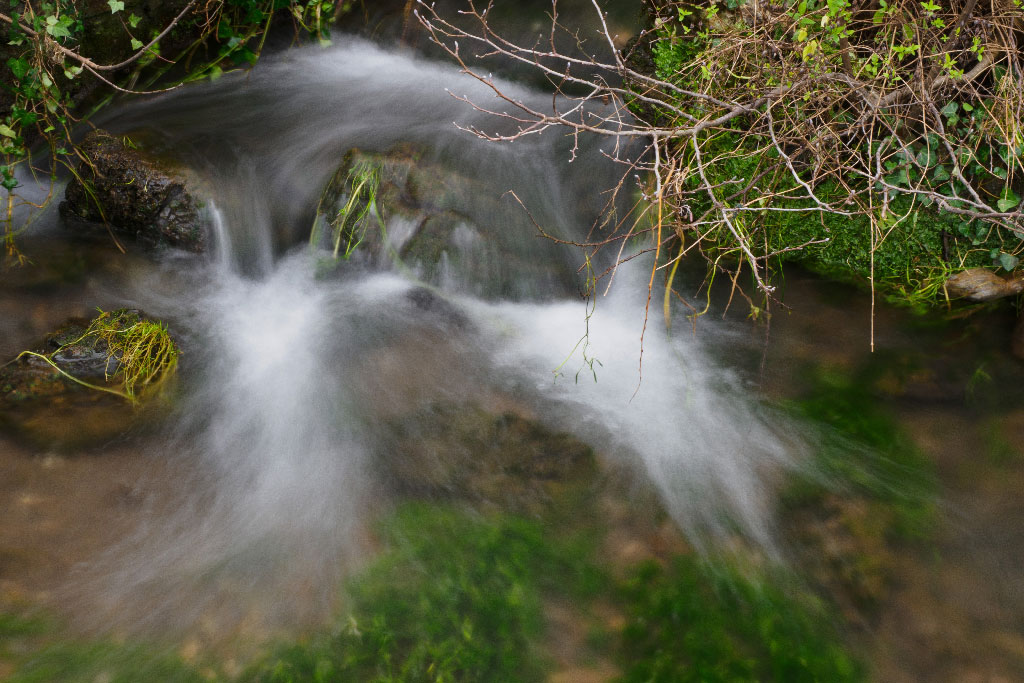
Long exposures are often used as a deliberate creative effect, and not necessarily something you’re forced into by low light. How many landscape shots have we seen with impressionistic smoky surf, or silky-smooth waterfalls? It’s a ‘look’ you can only get with long exposures, and that makes a tripod essential. IBIS systems do not look as if they will ever be able to reach this level, and who wants to hold a camera still all that time?
There is perhaps a small ‘window’ of exposure times where IBIS can make a difference. If you’re photographing fast-moving water, you can often get enough blur with an exposure of 1/4sec or 1/2sec, and that’s within the range of a good IBIS system. It’s worth trying this if you don’t have a tripod with you, or if you don’t have the time or the room to set one up.
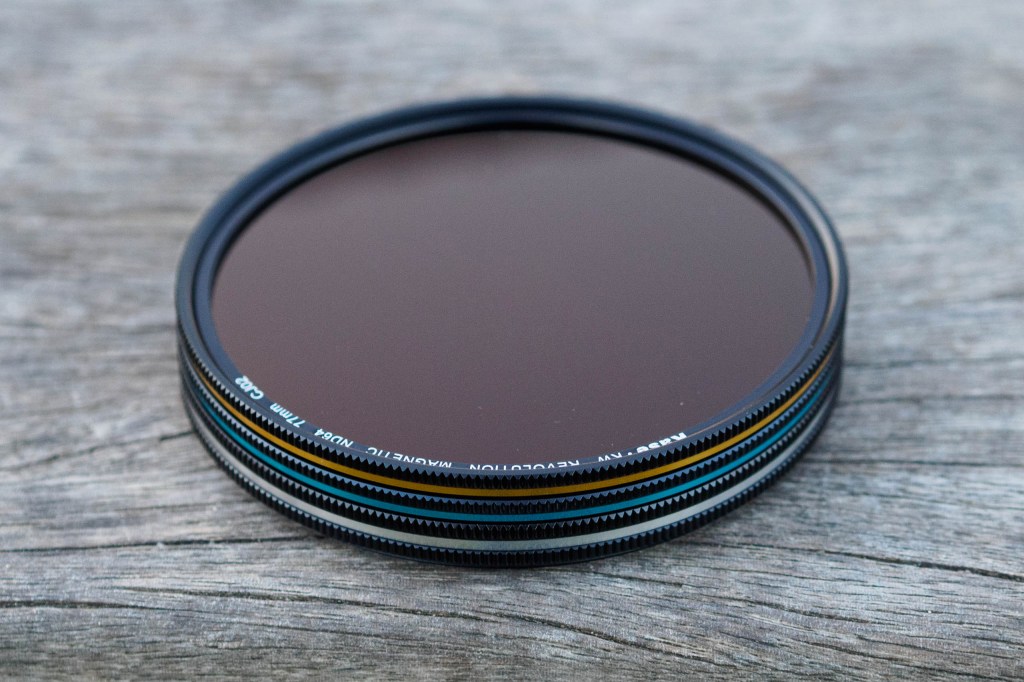
Sometimes an ND filter can help, especially in bright daylight, so there are circumstances where ND filters could be used handheld. Usually, though, ND filters are employed for much longer exposures, which is where IBIS won’t help, and a tripod becomes essential.
Other filters work perfectly well handheld. There’s no reason why you would need a tripod for a polarising filter, for example. You could even shoot handheld with graduated filters for controlling bright skies. I’ve done it plenty of times myself. It can be a little more difficult to get the grad transition in the right position and keep it there, but it’s perfectly do-able.
Perhaps the point is, though, that a tripod can make it much easier to manage, adjust and swap filters. If you’re trying to do this handheld, it constantly feels as if you need another pair of hands. If the camera is on a tripod, then your hands are free for swapping filters.
Using filters involves a certain amount of planning, consideration, and detailed adjustment. This tips it into tripod territory. Tripods aren’t just there to prevent wobble – they are part of a more considered approach that gives you time to think about what you’re doing and how to compose the shot.
Can you shoot macro handheld?
Does improved high-ISO image quality and IBIS make handheld macro photography practical? If there’s one instance where ditching the tripod really could save a lot of trouble it’s here, especially if you’re photographing tiny subjects in the wild.
There is a specific issue with macro photography, however, that can make handheld photography more difficult – focus ‘drift’. When you’re this close to your subject, you are fighting tiny but constant changes in distance just from the natural movement and sway in your body. IBIS can fix a lot of things, but not this. The tiniest of movements can throw your whole subject out of focus, or at least the part you’re trying to get sharp.
For pinpoint focus and composition, a tripod is still the best answer. But try it and see. A lot of what we call ‘macro’ photography is really more like ‘close-up’ photography which will probably work perfectly well handheld. If handheld macro photography is tricky one shot at a time, it might be hard to see how IBIS can help – but actually it can. If you have a camera that offers in-built focus stacking, you can capture a close-up as a sequence of pictures at different focus points then merge these images into a single image. This neatly gets around the issue of achieving and maintaining precise focus in close-up shots because you’re capturing a whole focus range.
Where IBIS comes in is that it will enable you to use slower shutter speeds in low- light conditions and it could also improve your chances of getting a set of images that align well enough for the camera to merge them effectively.
IBIS and macro photography

Image stabilisation can certainly help with close-ups, where you often need to stop down the aperture to get enough depth of field. This really slows down the shutter speed so the extra stability from a good IBIS system can make all the difference when you’re shooting handheld.
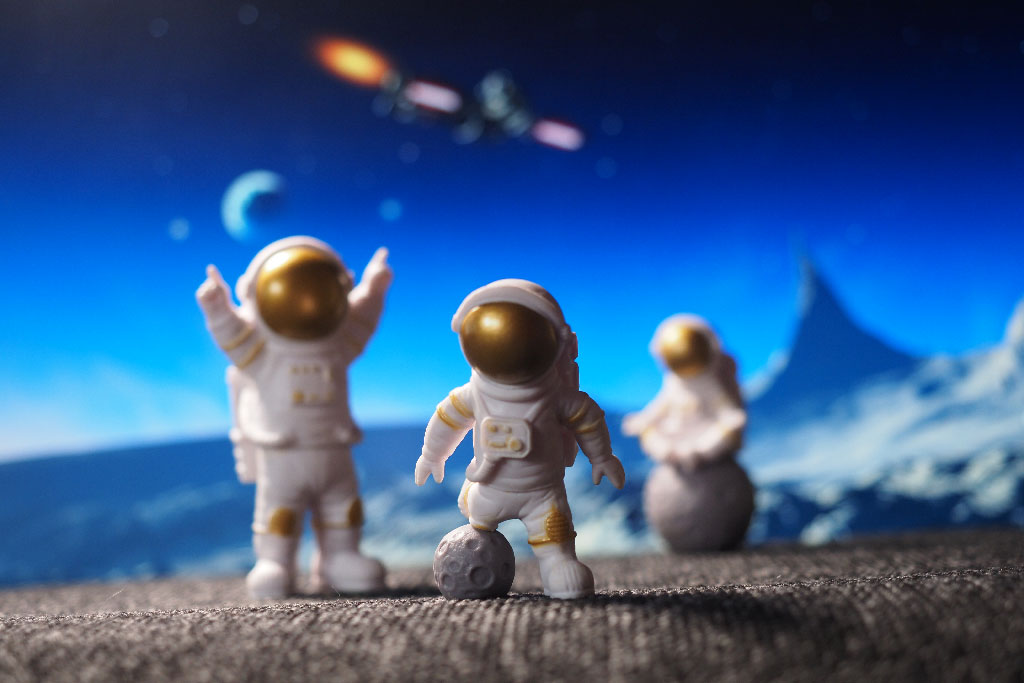
Without focus stacking, it may not be possible to keep subjects at different distances in focus. Focus stacking, and this can be carried out handheld with remarkable success. In-body stabilisation will reduce camera shake and might even keep your focus stack frames better aligned.

Here’s the ‘stacked’ version of our close-up. Handheld focus stacking can work just as well on ‘serious’ subjects as it does on our novelty astronauts here. We used an Olympus E-M1 Mark III in focus stacking mode. The sequence took a second to shoot and about half a minute to process.
Tripods do more than you think
So… can you ditch the tripod? Very probably, but not necessarily. It depends on your style, approach and photography genre. We may no longer need tripods simply to keep the camera steady, but there are still situations where tripods are essential, desirable or just make your life that much easier.
Here are some other tripod ‘values’ which may not be obvious
- Photographer Joel Meyerovitz once remarked that ‘a tripod remembers your last decision’. That’s a very powerful insight right there.
- A tripod leaves your hands free to fetch a filter, drink a coffee, eat a sandwich, make a phone call.
- Tripods allow the kind of precision needed for panning shots, panorama ‘stitchers’ and video movements.
- Tripods allow precise framing that doesn’t ‘drift’ once you’ve chosen your framing – and allow framing consistency between shots.
- Tripods can take the weight of heavy gear and make life easier on shoots with lots of waiting
- Tripods aren’t just about stability, they are also about time – the time it takes to step back and think.
Further reading:
- Best tripods for your camera – assessed for various applications
- The ultimate guide to tripods
- IBIS vs ISO – What’s best for low-light?
Follow AP on Facebook, Twitter, Instagram, YouTube and TikTok.


