
Whether you want to capture a painting, digitise old prints or take on a copy work job, knowing just how exactly to photograph artwork is a useful skill. But there’s more to it than pointing your camera at the canvas. Here we’ll look at a host of camera skills you can use to hone your technique, from lighting setups to cross-polarisation and more.
What kit do I need?
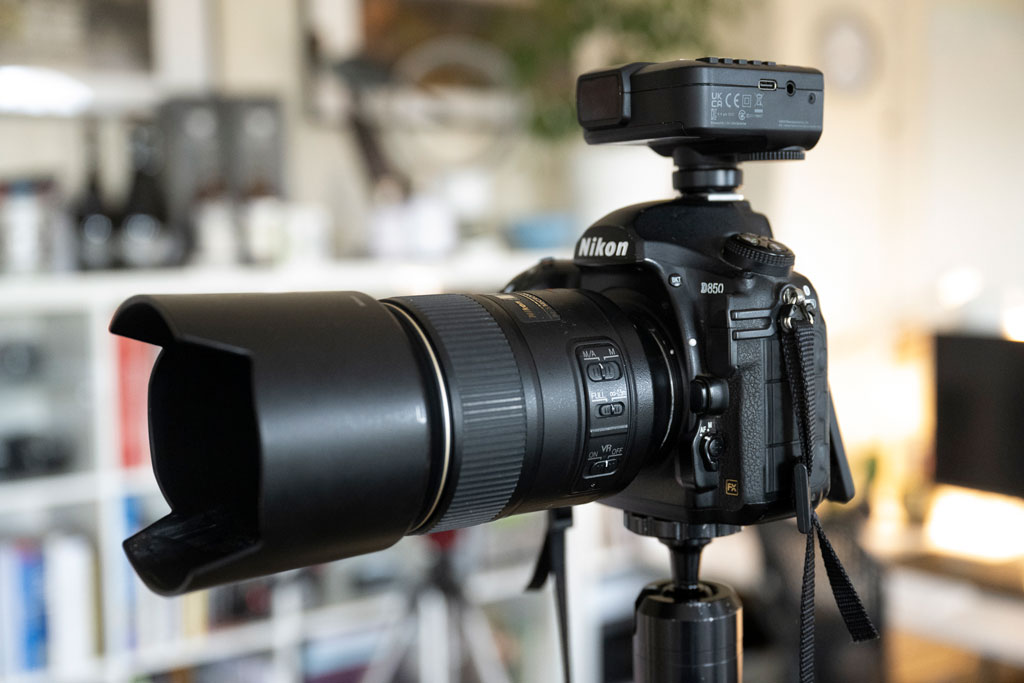
- Camera – a DSLR or mirrorless camera that lets you set manual exposure is ideal
- Lens – A 50mm prime or longer lens is the best option, we ‘re using a 105mm lens here
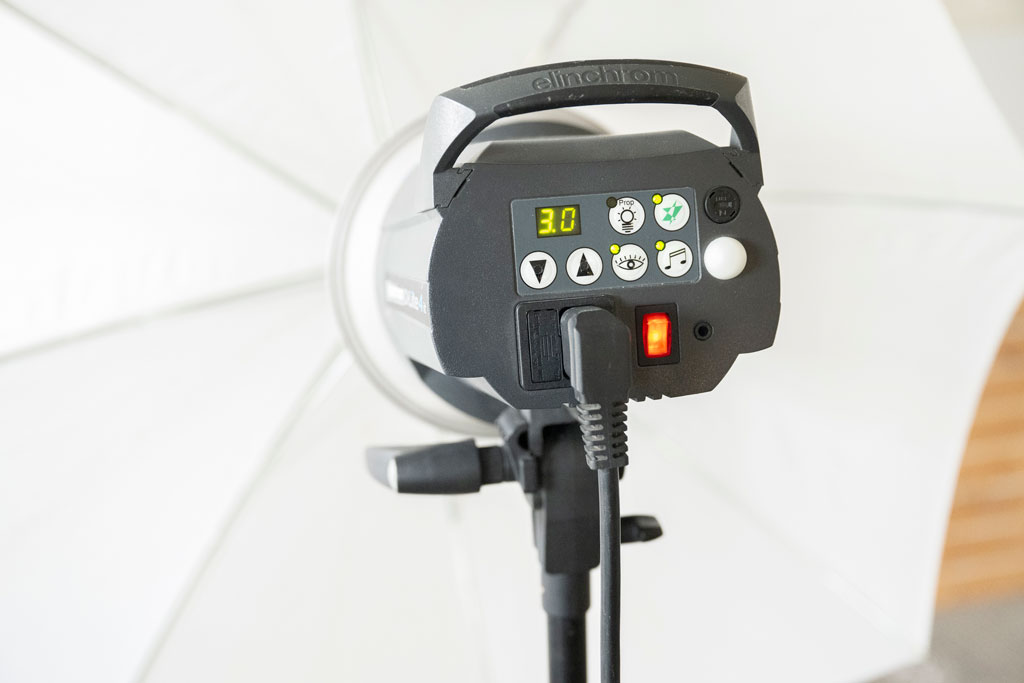
- Lights – Two speedlights or strobes are ideal, or strong LEDs, plus two stands and white umbrellas or softboxes
- Tripod – A tripod that lets you swivel the centre column to a horizontal position is helpful as it allows you to shoot downwards without including the tripod legs in the frame.
- Tape measure – Useful for matching the height of the painting with the camera
- Circular Polarising Filter and Polarising sheets – if you want to cut out glare completely by using the cross-polarisation technique
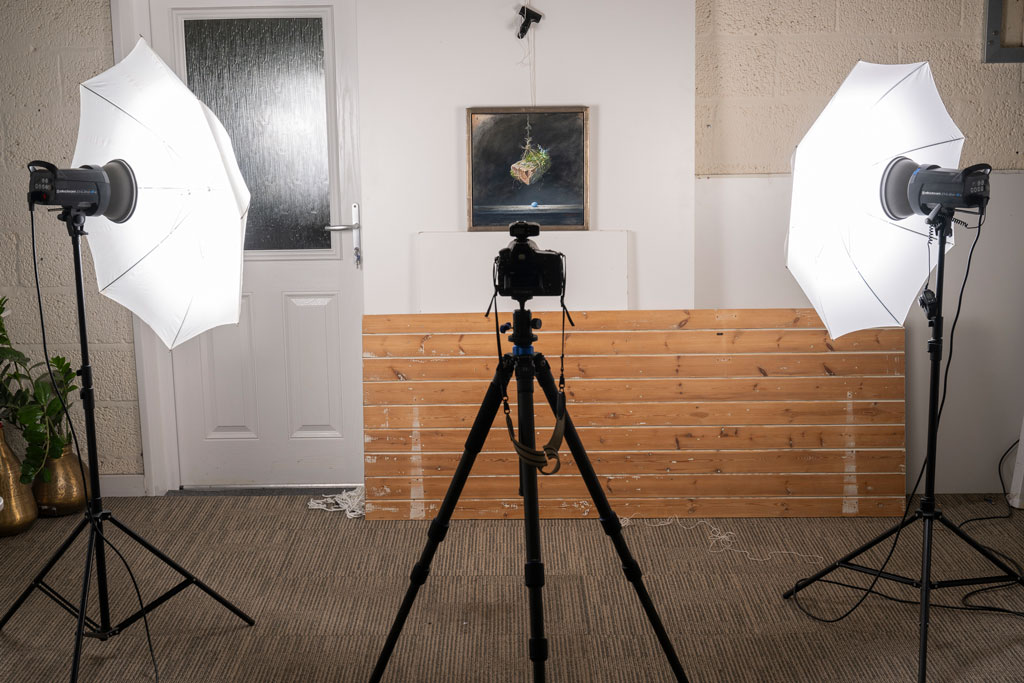
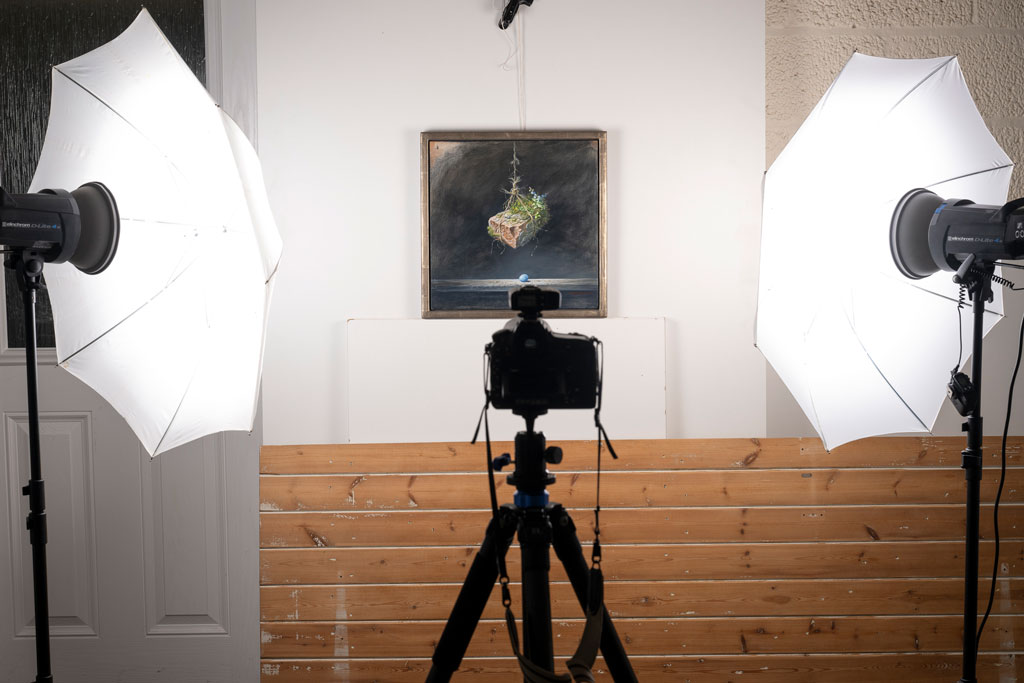
A simple lighting setup to photograph artwork
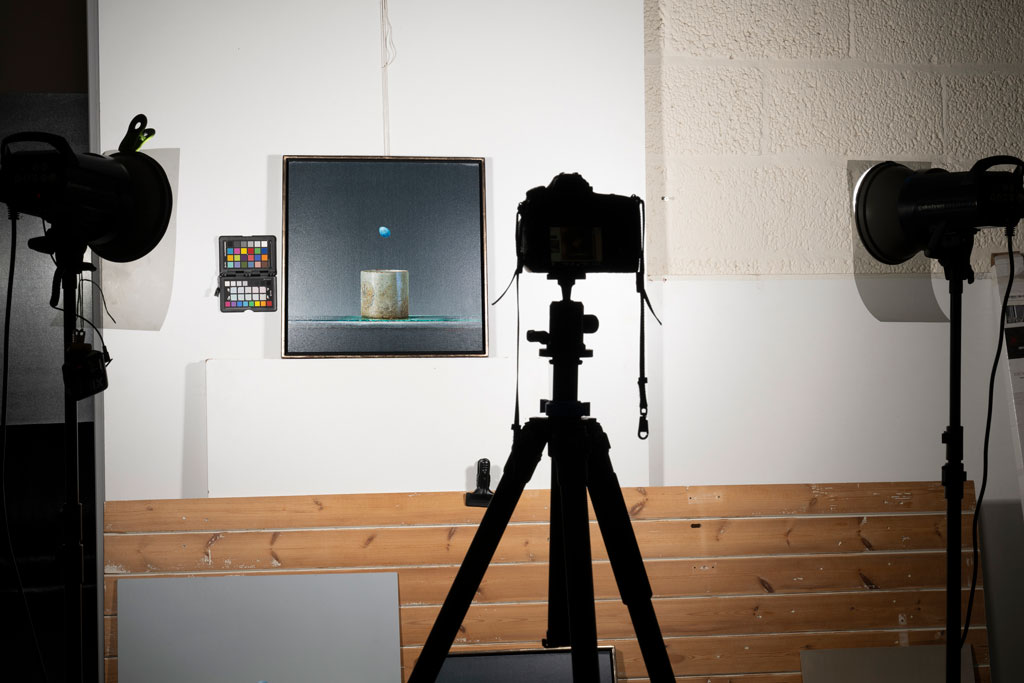
Sound lighting is the key ingredient to successful artwork photography. As such we need to control the power, spread and direction of the light so that we can capture paintings and prints evenly, with no glare or reflections. This requires off-camera, manoeuvrable light sources, either flashes or LEDs. Two lights are ideal as we can light the artwork evenly from either side.
The positioning of our lights is crucial. Consider how, if we use an on-camera light source like a pop-up flash then, by firing the light directly at the artwork from the camera position it will bounce straight back at us, and we’re likely to see a nasty reflection. Similarly, if the angle of our two lights is too acute (as in, too close to the camera) then – like a pop-up flash – you’re likely to see reflections and glare in the artwork, especially if it’s behind glass.
Like a snooker ball bouncing off a cushion, light reflects off a surface at the same angle as it is directed at it. The angle of incidence is equal to the angle of reflection (sometimes called the glancing angle of incidence).
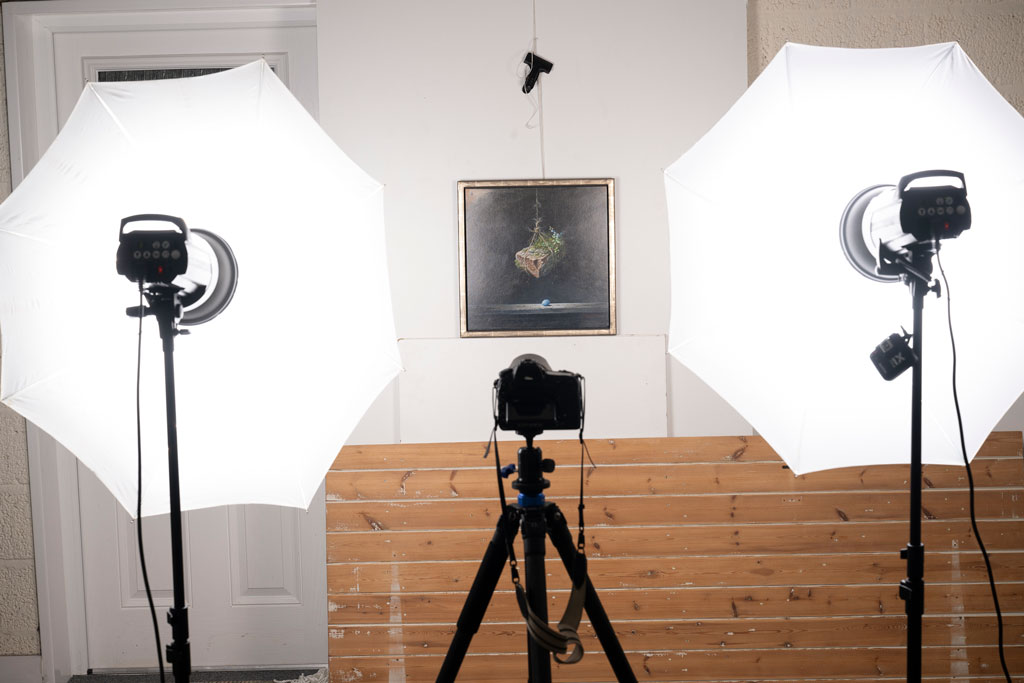
So, if we see glare, the solution is to swing both lights further around to the side so that the light glances off the surface of the artwork at an acute angle, at least 45 degrees or more. This way the reflected glare won’t be recorded by the camera.
Umbrellas and bare bulbs
Light modifiers like shoot-through white umbrellas are an inexpensive yet invaluable tool for flash photography, and they can be very helpful when photographing artwork. The larger the light source, the more diffuse the light. By using a white shoot through umbrella, we can transform the harsh light from the bare flash into something softer and more even. You don’t always have to use umbrellas or softboxes for copy work, but they can make for more even lighting.
It’s also worth thinking about the distance of the lights from the painting. Keep the inverse square law in mind. It states that when the distance between light source and subject is doubled, the subject will receive a quarter of the light. If the light is too close to the painting, then the rate of fall-off will be quicker than if the light is further away, and there may be a noticeable difference in brightness between the edge of the painting and the centre, especially if it’s a large painting. If you see this occurring, back the lights off and increase the output so that there’s less fall-off. A light meter can be handy for measuring the amount of light in different parts of the artwork.

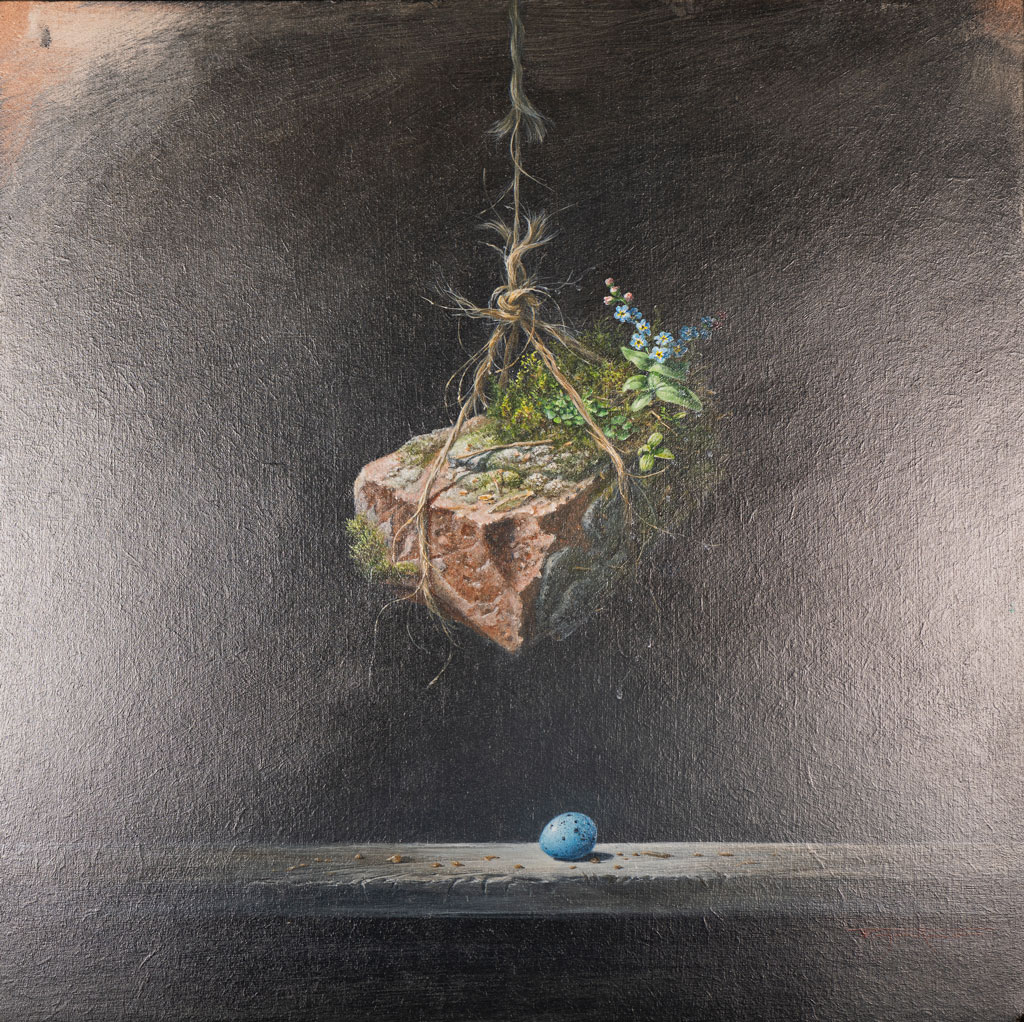
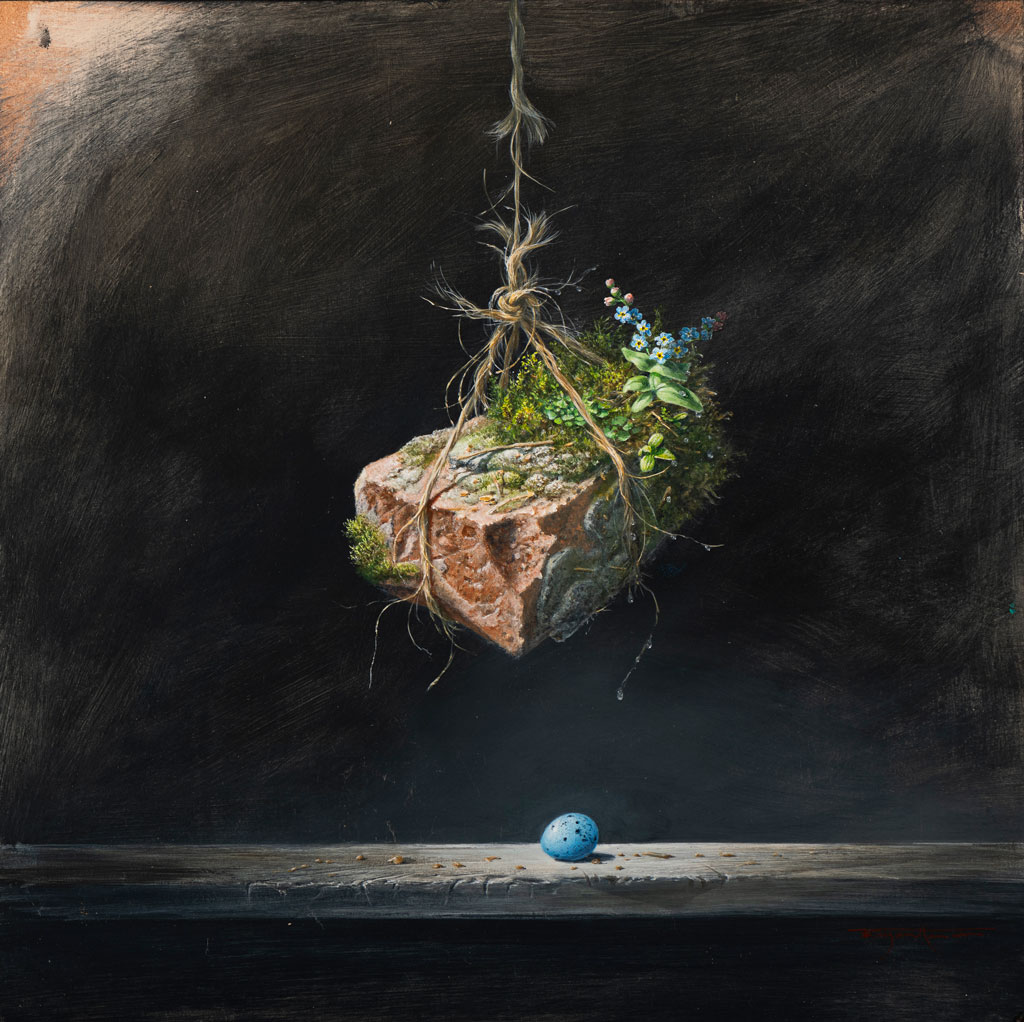
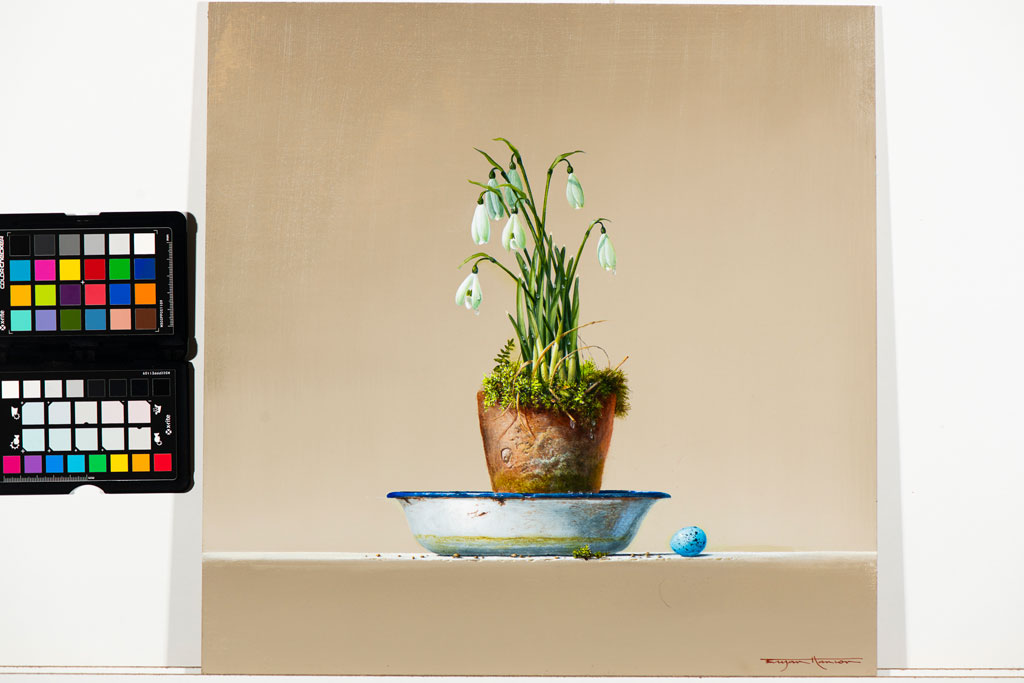
If the lights are too close to the painting, then – especially if it’s a larger painting – you might see unwanted fall-off between the edges and centre. The solution is to back the lights up and increase the power for more even, balanced lighting. Painting by Bryan Hanlon www.bhbronzes.com
Set up the camera to photograph artwork
It’s best to set manual exposure and either use a light meter or take test shots to nail your exposure. If you’re using flashes, make them work for you, rather than adapting to them. In other words, first set your exposure, then tweak your flash power to match it. Here’s a stock flash photography setting that works in most situations. Set ISO to 100 for max quality and aperture f/8, shutter speed 1/200 sec, then adjust your flash power (making sure both lights have the same output) until the exposure looks right.
If using constant lighting like LEDs or lamps then set ISO 100 and aperture f/8 and adjust your shutter speed. With these settings you’re likely to need a fairly slow shutter speed, which means guarding against camera shake. Use a 2-sec timer and – for DSLRs – lock the mirror up before shooting to prevent shake. Turn off any overhead lights to prevent colour casts.
Which lens?
As for lens choice, anything too wide may distort the image so use at least a 50mm focal length. Around 100mm lens is ideal, as it will give you enough room to position your lights. Prime lenses tend to be slightly sharper than zooms.
All lenses have a sweet spot, an aperture at which they will be sharpest. This varies, but it’s usually 2-3 stops down from the max aperture, so for a f/2.8 lens the sweet spot will likely be around f/5.6 to f/8.
Whatever lens you use, be sure to use a hood. With the lights at such acute angles there is a chance that light might spill towards the camera. This can cause flare which will wash out the colours and detail. So, use a lens hood or flag the lights to stop the spillage.
Positioning the camera
We also need to think about camera position. Ideally, we want the camera sensor to be parallel to the artwork, with the lens at the centre point. You can usually get away with eyeballing this, but if you want to be completely accurate, use a tape measure to work out the distance from the floor to the centre of the artwork (if the artwork is on the wall) then set the centre of your lens at exactly the same height. You can also use the tape measure to ensure both your lights are an equal distance from the artwork.
How to get accurate colours
Painters and illustrators choose their colours with great care, so we have a duty to record them as accurately as possible. Accuracy begins with your choice of lighting. Depending on your lights – the brand, model, and power output – there may be subtle differences in the colour output.
As such, if you’re using two lights then the best approach is to stick to the same brand and model for each. Light can be tinted by modifiers and the surfaces it reflects off, so if possible shoot in a neutral-coloured environment and ensure your umbrellas or other modifiers are neutral. Turn off any artificial lighting or tungsten house lights.
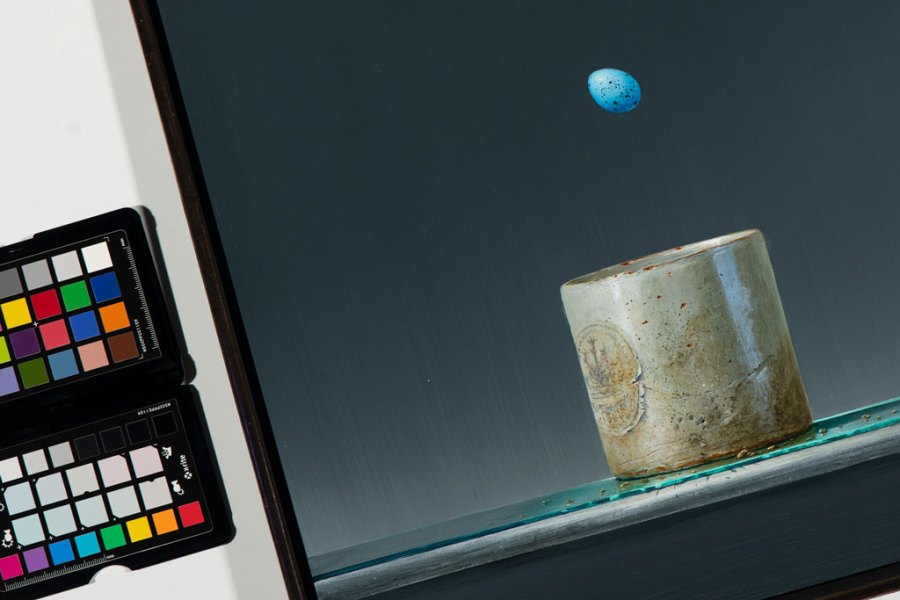
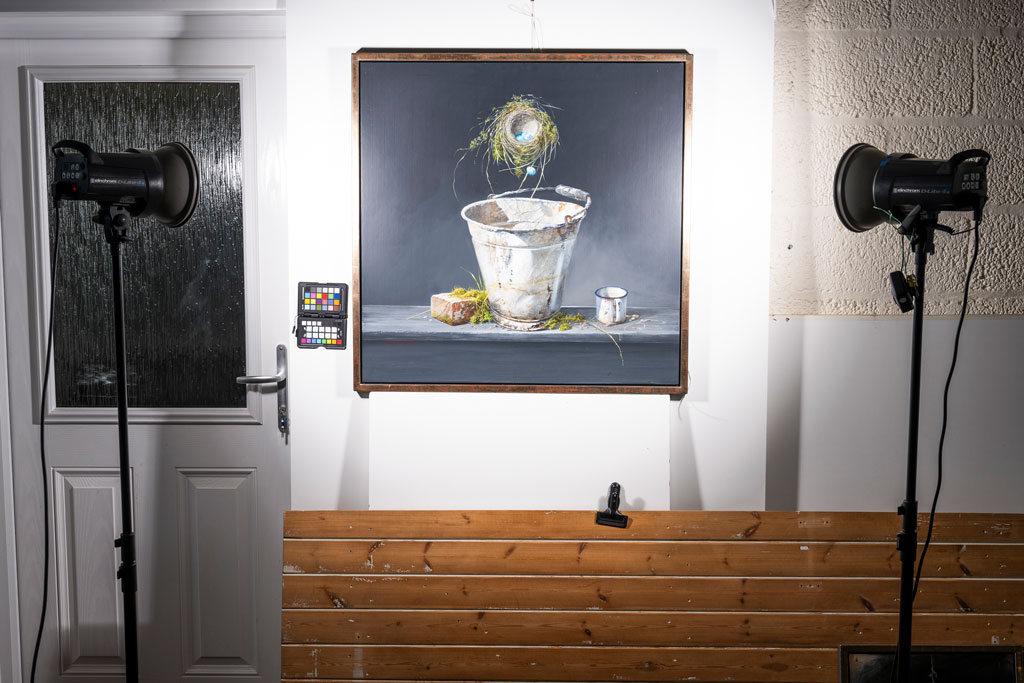
Use a colour chart
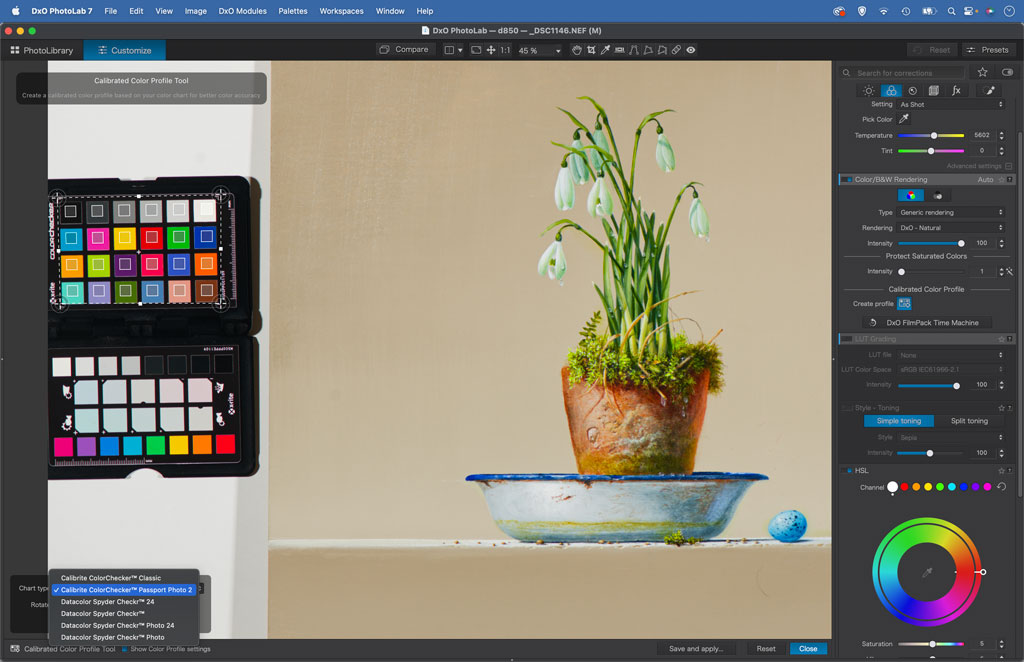
A colour reference chart is essential for precise copy work. The Colour Checker passport is a popular choice. Take a shot with the reference aid in the frame. We can use the image later to create a custom profile and ensure the colours in the image are as accurate as possible (you should also properly calibrate your monitors using a calibration tool like a Datacolor Spyder). There are several ways to create a custom profile. I like to use DxO Photolab 7, which has an excellent calibration tool built in.
Eliminate reflections on artwork with a polariser
A coat of heavy gloss or a tricky glass surface could mean that, despite all your best efforts with lighting, you might find that the artwork still shows glare or reflections. If so, try using a circular polarising filter. This can help you reduce reflections and record richer colours.
Cross polarisation magic
If a single polariser doesn’t work, then consider the cross polarisation technique. For this you need both a polarising filter on your lens and polarised light sources. This could be done by purchasing polarising sheets of film large enough to cover your lights. Tape them to your lights, then ensure there is no other light in the room.
By polarising the lights, we filter the random light waves so that the waveform travels in one linear direction. Then by rotating the polarising filter on our camera by 90 degrees, we can prevent the reflected linear light waves from entering the camera, thereby completely cutting out all reflections and glare.
Cross-polarisation can be especially useful for dark, glossy or faded paintings, as by reducing all reflections you can often get a clearer image of the brushwork. It also means you don’t necessarily need to place your lights at acute angles, so it can be a lifesaver when shooting in tight spaces.
You can even get away with using a single light positioned quite close to the camera. Just keep in mind that it’s not the best lighting technique for showing textures and ridges in the paint, and you might find the colour accuracy is affected so use a colour checker chart.


How to photograph old photos and prints
The process for photographing old prints is similar to paintings, but you might need to set up vertically over the print and place it on the floor or a tabletop.
Begin by wiping off any dust or fluff and position your two lights on either side of the print at 45 degree angles. Focus on the print and zoom in to check focus. If the print is bent or curled then you might need to weigh it down along the edges. Alternatively, if you have a flat-bed scanner this could be a better, simpler option.
Top post-processing tools
Here are three useful editing techniques for perfecting your artwork photography through photo editing…
Photoshop Perspective Crop
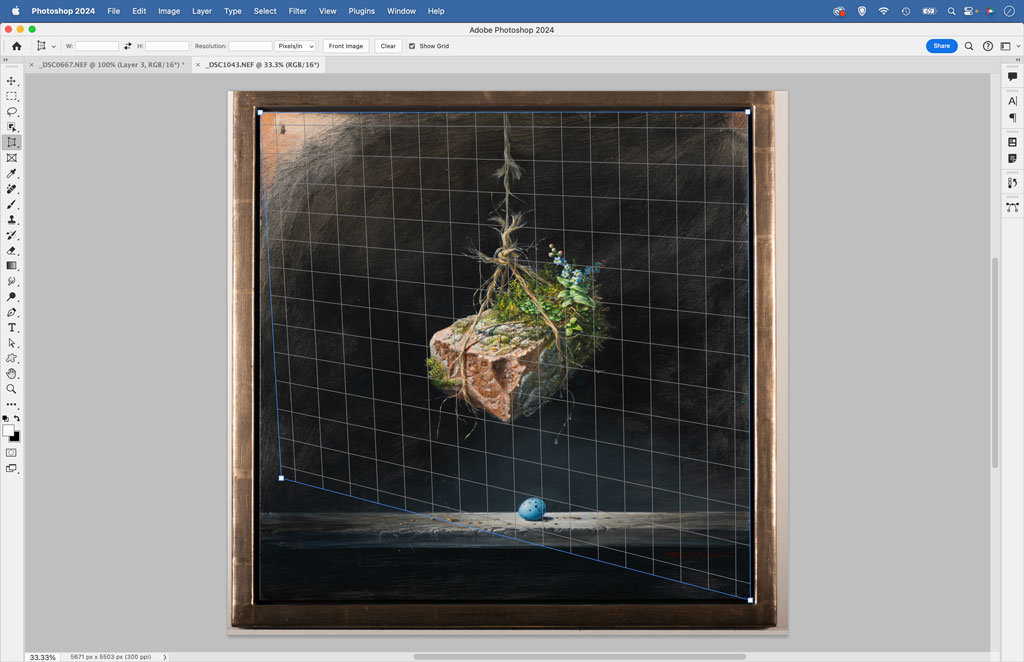
You’ll usually need to crop to remove unwanted edges around the frame. While the conventional Crop tool is perfectly fine, the Perspective Crop tool can be a better choice, especially if the frame is slightly wonky or off-centre. Grab the tool and click on the four corners of the artwork to make the crop.
Camera Raw / Lightroom White Balance
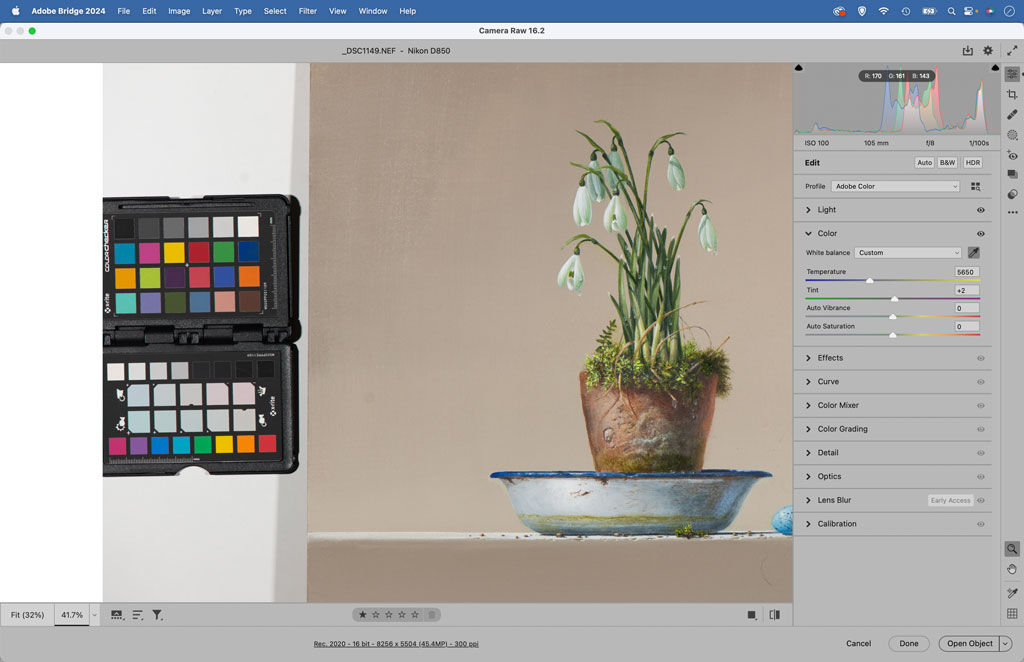
If you’ve photographed in raw quality and used a grey card or colour checker chart then you can perfect the white balance with ease. Grab the white balance eyedropper tool in Lightroom/Camera Raw and click on the grey. You can then sync the white balance settings to any other paintings shot under the same conditions.
Photoshop Unsharp Mask
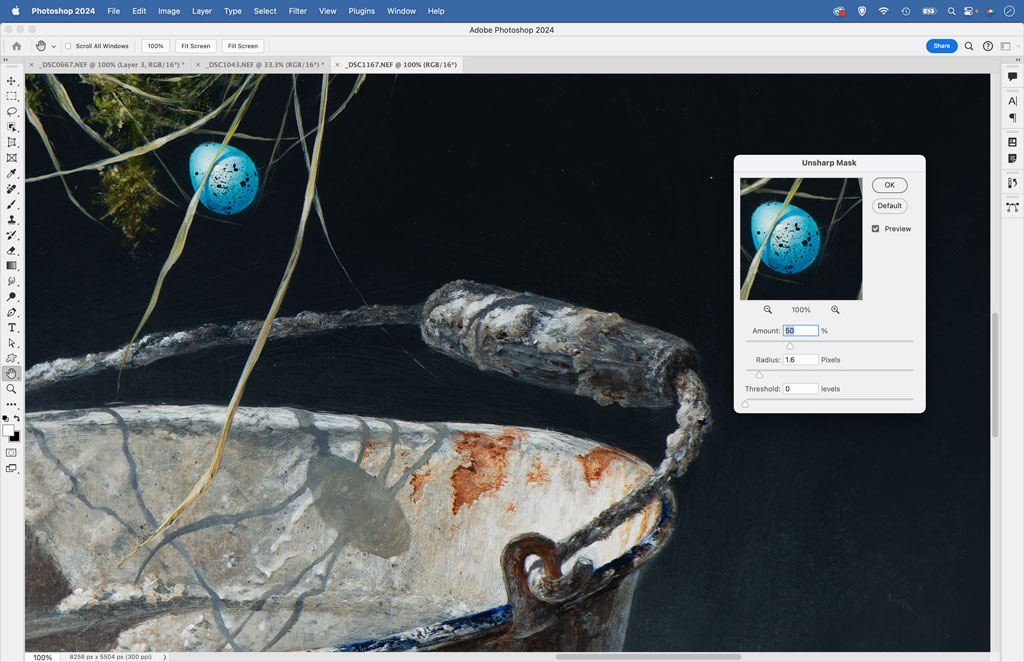
A touch of sharpening can help to define the edges of the brushwork. After cropping the image to the size you need to output it at, use Unsharp Masking in Photoshop (Filter > Sharpen > Unsharp Mask) to enhance the fine details.
Related reading:
- Best free photo editing software for computers and mobile in 2024
- Fine Art photography guide: what is it and how to do it
Article: James Paterson Photography: patersonphotos.com
Follow AP on Facebook, Twitter, Instagram, YouTube and TikTok.


