

A grasp of lighting equipment brings enormous benefits to your photography. It means you can lift your subject under any conditions, or achieve all manner of different styles. Good lighting can elevate a photo beyond the ordinary. It speaks of a professionalism and competence that separates the serious photographer from the amateur smartphone snapper, and it’s also a great deal of fun.
With supplemental lighting, our choices are huge. When we shoot with natural light alone then there’s usually only one exposure that lets us correctly capture the scene in front of us. But if we can start to add in our own light – be it with a speedlight, a studio head, a lamp, or even a torch – then we have freedom to create different looks and bend the exposure to our will. We could, for example, subtly boost our subject by filling in the shadows, or transform the look by overpowering the ambient light.
However, light can be a troublesome beast to master, and even those who have successfully used lighting equipment for years often struggle to fully control or even comprehend it. For the beginner, talk of guide numbers, light meters, modifiers and flash duration can be daunting. ‘I prefer to shoot exclusively with natural light’ is a common phrase, and a perfectly fine opinion. But there are plenty who would admit that, in part, the preference is because they are uncomfortable with using lighting equipment. With practice and understanding of a few fundamentals, there will be a lightbulb moment when everything suddenly clicks.
If, as we often hear, photography is ‘painting with light’, then think of lighting equipment as your artist’s paintbox. We’ll explore the most common types of photographic lighting – from speedlights to portable flash, studio lights and LEDs. Each has its benefits and drawbacks, and will be suited to different shooting conditions.
Lighting on location
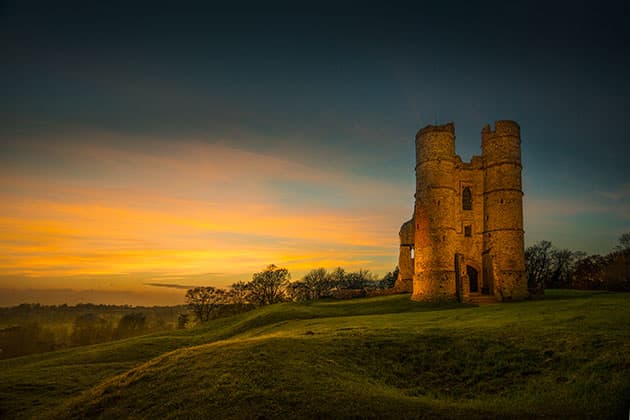
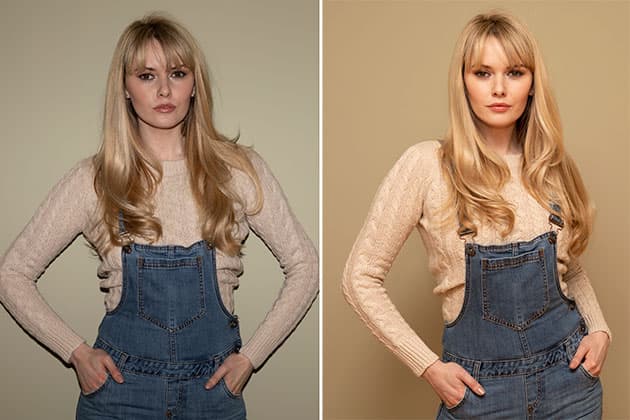
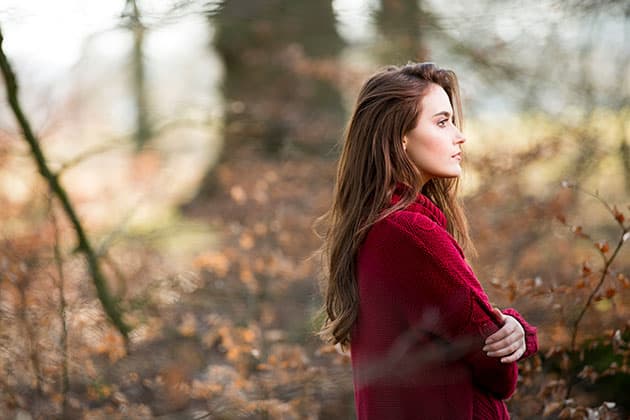
The castle here is lit with a speedlight fitted with an orange gel to match the warm colour of the sunset. Parts of the scene were illuminated over several frames, then merged together in software. Credit: James Paterson
Lighting equipment can open up a new world of photographic opportunities. Suddenly you don’t have to seek out the perfect light for your subject: take your lighting gear on a location shoot and you can make your own instead. Whether you want to photograph a person outdoors, capture an architectural interior, or lift any kind of subject, learning how to light on location can be a powerful weapon in your creative arsenal.
The right kit for location lighting will vary depending on what you intend to shoot, and the ambient lighting conditions. For example, in some scenarios, an LED (such as the portable and impressive Rotolight AEOS) can be a great location light as unlike flash you can judge the light by eye and adjust the colour temperature to match the surroundings. However, LEDs aren’t powerful enough to overpower the sun, so they’d be no use for lighting a portrait in direct sunlight. For this you’d need a more powerful flash.

Credit: James Paterson
Lighting on a budget
A basic speedlight (such as the cheap-as-chips, manual-only Neewer TT560) is ideal for all kinds of location lighting, as long as you have a separate wireless trigger to fire it off-camera. A budget trigger is similar in cost to a memory card, so it’s a worthwhile investment. Freed from the hotshoe, you can place your speedlight behind the subject or off to one side, up a tree, inside a building – anywhere you choose.
Two budget speedlights attached to stands with umbrellas were placed on either side of the subject for moody cross-lighting. Credit: James Paterson
Portable flash kits
A budget speedlight or two, plus a couple of stands and white umbrellas will serve you well for all kinds of location set-ups. But if you’re serious, the next step would be a set of portable flashes with a battery pack, like the Profoto B2s or the Elinchrom ELB range. They offer a higher max output than a speedlight, which not only means you can light subjects from further away or stop down to narrow apertures, but it also lets you use larger modifiers like octoboxes. There’s also the added convenience of battery packs, which offer faster recycling times and more flashes per charge. They have modelling lights too, which can be helpful when judging the direction and angle of the light.
Controlling flash and ambient light
For the beginner, working out an exposure for flash can be one of the biggest stumbling blocks – how do we expose for a light we can’t really see? One of the simplest ways to work out an exposure when using location lighting is to begin by leaving the lights off. This way, we can create a base exposure for the ambient light in the scene. It’s best to use Manual Exposure mode for this, as it locks your exposure in. Once done, we simply turn on the lights (one at a time if using multiple flashes), take a couple of test shots and fine-tune the output until the right amount of light hits our subject. This gives us ultimate control, as we force our lights to work for our chosen exposure rather than altering the exposure to suit the lights.
The trusty speedlight
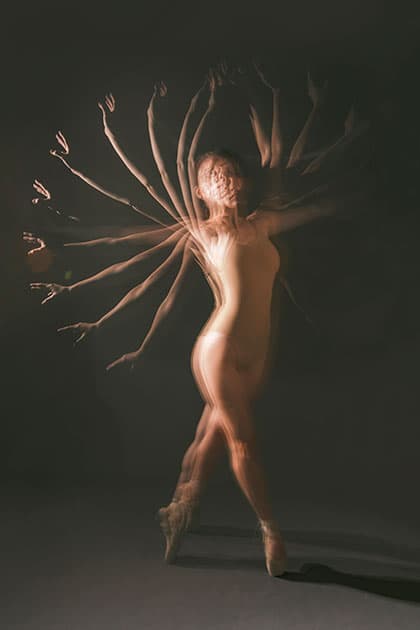
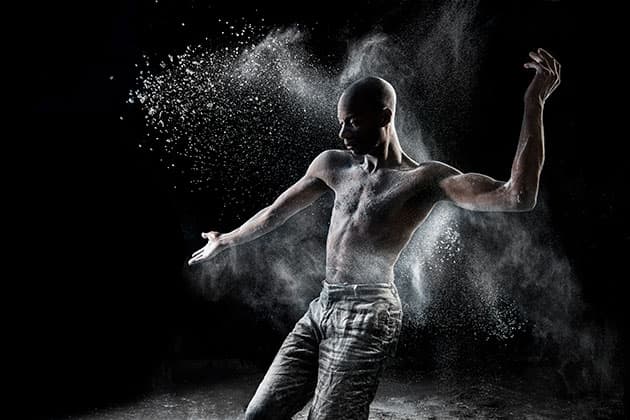
With stroboscopic mode engaged, a speedlight is capable of multiple, rapid-fire flashes for special effects like this. Credit: James Paterson
For many of us, our first encounter with flash comes when we engage the pop-up on our camera. The initial results are often dishearteningly poor. Harsh, frontal light from a pop-up flash is fine for snaps in dim interiors (and at a push, as a subtle fill for outdoor shots). But it destroys any sense of mood and obliterates the play of light and shade that gives form to our subjects.
If the pop-up doesn’t put the newcomer off flash for good, then the natural upgrade is to purchase a speedlight, also known as a flashgun. This trusty piece of kit can be useful for all kinds of situations. However, if we stick it on the hotshoe and point it at the subject the results will be much the same as the nasty pop-up. Luckily, we do have other options.
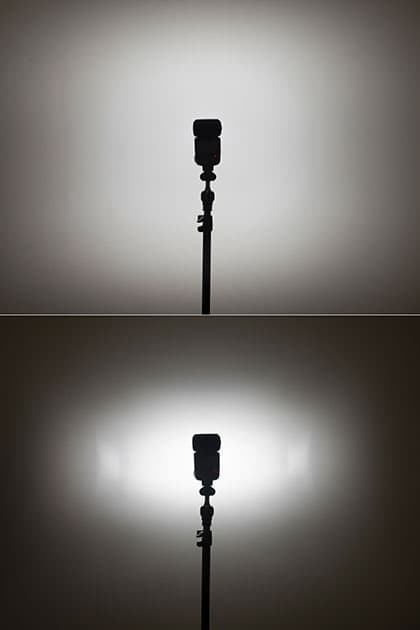
Some speedlights have a zoom that changes the spread of light to match your lens. Here’s the difference between 24mm (top) and 200mm (bottom). Credit: James Paterson
Bounce flash
Rather than firing it directly at the subject, we can bounce flash off nearby surfaces like a ceiling or wall. This effectively enlarges the light source, resulting in more flattering, softer light. All speedlights will have a tilt-and- swivel head for this purpose and the innovative Canon 470 EX-AI can even twist automatically and detect the best degree of bounce.
When it comes to buying a speedlight there is a huge variety. A cheap and cheerful Yongnuo 560 IV is capable of the same results as a staggeringly steep Profoto A1; however, the premium models will typically offer more features, higher output, better build and, crucially, greater compatibility with your camera.
The difference between direct flash (left) and bounced flash (right). The latter offers much more flattering results. Credit: James Paterson
What to look for
Through the Lens (TTL) is worth paying extra for. There are various subcategories of TTL, but in essence it means the camera determines the correct flash power for you. Encompassed within TTL is another useful feature – flash compensation. This allows you to dial in more or less light. Automatic zooming is helpful too. The speedlight will ‘zoom’ in harmony with the focal length of the lens by moving the bulb forwards or backwards within the casing, thereby adjusting the spread of light to match the angle of view. Look out for high speed sync compatibility too: this enables you to increase your shutter speed beyond the camera’s max flash sync speed. Finally, a stroboscopic mode can be a fun feature for rapid fire, multiple flash effects.
Guide numbers and distance
Flash output is often measured as a guide number (GN), which is calculated by multiplying distance (usually in metres) and aperture (as standard, the ISO is assumed to be 100). Distance is a crucial consideration when using flash as, in accordance with the inverse square law, halving the distance between light and subject increases the light by four times. If a flash has a guide number of 40, it can correctly expose a subject 10m away when the aperture is set to f/4, or 5m away when the aperture is set to f/8. Keep in mind that a speedlight’s max output will vary depending upon the spread or zoom of the flash, and adding on modifiers will weaken the light.
Studio lighting essentials
If you want to see how the lights have been positioned, look at the subject’s eyes. Here it’s clear two softboxes have been placed either side of the camera. Credit: James Paterson
Studio lighting can give your photos a crispness and clarity that is difficult to achieve in any other way. The quality you can get from even a basic home studio kit is immense. As such, this kind of lighting is ideally suited to portraiture, still-life photography and any other subject where maximum quality is key.
Credit: James Paterson
Complete control
Studio photographers often talk about ‘creating’ the shot rather than ‘taking’ it. When in the studio, we have ultimate control over many of the factors that go into our final shot. By positioning the lights, we control where the highlights and shadows fall. By using modifiers, we control the quality and softness of the light. By adjusting the output, we control the depth of field and by altering the ratios between our lights, we control the contrast. This might sound like a lot to take in and learn but the results can be well worth it.
Softboxes and umbrellas
One of the biggest benefits of using studio lighting is the wide array of modifiers you can attach to the lights. Each will alter the spread and the quality of the light. Two of the more common modifiers are softboxes and umbrellas. An umbrella will diffuse, bounce and spread the light over a large area, so it’s great for creating a wide spill of light. A softbox produces a similarly soft quality of light, but the spread is more narrow and therefore more controllable. Other common modifiers include barn doors, beauty dishes and snoots. Different lighting brands have their own methods of connection (like the Elinchrom S-mount) so your chosen modifiers need to be compatible with the lights you use.
A single studio flash fitted with a softbox produces wonderful diffuse illumination. Credit: James Paterson
Size and distance
With any light source, be it a softbox, umbrella, LED panel or window, the larger the light source, the softer the light. Keep in mind too that you can change the size of the light source in relation to the subject simply by moving it closer or further away. A softbox that is positioned 10m from the subject will produce harder, more contrasty light than one that is placed 2m away. Often studio photographers will bring their softboxes in very close to the subject – just out-of-frame – for soft light that wraps around the subject and gently transitions into shadows. However, it’s worth noting that the light falls off more steeply when it’s in close, so there’s more chance of uneven lighting between the part of the subject closest to the light and the part furthest away.
Setting up a home studio
A home studio starter kit (such as the Elinchrom D-Lite range) usually includes a couple of studio flash heads, plus stands and softboxes or umbrellas, and a wireless trigger. These kinds of heads are sometimes called monoblocks, as they are standalone units requiring mains power for each light. Each head will have simple power controls, plus a modelling light. For a basic studio portrait set-up, place your subject in front of a plain wall then fit umbrellas or softboxes to the lights. Set up one light to the side of the camera as a ‘key’ light, then adjust the power and work out an exposure for it (a good starting point is manual mode, 1/200sec at f/8, ISO 100). Once you’ve done this, set up the second light to act as a ‘fill ’by firing it at a lower power (ideally around 2 stops lower) than the first light so that it fills in the shadows. This is a classic key-and-fill set-up.
The benefits of LEDs
Credit: James Paterson
Continuous lighting has become increasingly popular over the past few years, particularly in the form of LED units. This kind of lighting brings a range of benefits over flash, especially for the beginner. First and foremost, there’s the what-you-see-is-what- you-get factor. Being able to eyeball the light source makes it easier to judge than flash, so there’s no call for test shots or light meters, and no need to make tricky exposure calculations. You can simply direct the light at the subject, tweak the power until it looks right, then start shooting. Of course, this also makes LEDs very useful for shooting video.

On a portrait shoot a Rotolight AEOS LED can provide a subtle lift to the face. Credit: James Paterson
Controlling the colour
Colour temperature control is another benefit. Flashes will have a fixed colour temperature – usually around 5600K. This can pose a problem if you want to balance them with the ambient light in the scene, necessitating the use of coloured gels in front of the bulb. By contrast, more advanced LED units will offer bi-colour control, so you can warm or cool the colour temperature to match the ambient light. Whether you want to shoot in tungsten-lit interiors or under a cool cloudy sky, you can easily tweak your lighting to work in harmony with the surroundings.
Credit: James Paterson
LED lighting can be a wonderful addition to portraits on location, but they’re also very useful for product shots and still life. With this kind of photography, correct positioning of the lights is vital. Being able to see the way the light works across the subject, where the highlights hit and how two or more lights work in combination can give you a crucial advantage.

Product shots and still-life photos are often easier to perfect when you can judge the continuous light by eye. Credit: James Paterson
The output issue
The drawback of continuous lighting is the output. Even the strongest LED can’t compare to a basic speedlight in terms of max output. Factor in modifiers, and the output drops considerably more. For some photographers this renders them useless, but there are lots of scenarios where the benefits of LED lighting outweigh the need for high output. And with today’s imaging sensors performing ever better in low light at higher sensitivities, a high max output isn’t the dealbreaker it used to be. Some brands have come up with innovative solutions to the output issue. The Rotolight range of LEDs includes an HSS flash mode which produces a burst of light more than double that of the max continuous output.
Innovative LEDs
Certain LEDs are innovative in other ways too. Lume Cubes are a popular portable option. These hardy little LED boxes are very bright, waterproof and practically bombproof. The shape of the LED housing is a major consideration as it plays its part in the quality of light. For instance, the Westcott Ice Light 2 creates a lovely thin, narrow beam of light, whereas Rotolight LEDs have a characteristic circular shape, which results in lovely round catchlights when shooting portraits.


