The Fujifilm Camera Remote app is a great tool to connect your smartphone to your Fujifilm cameras. Fujifilm may be know first and foremost for the impressive image quality that is generated using the brands’s X-series range of camera that captivated more and more photographers in recent years thanks to models like the X-T3, and X-Pro3, but the features don’t stop at the creation of stills.
Like many other cameras these days, Fujifilm models benefit from connectivity technology that enables images to be transferred to a smart device like your phone and for your smartphone to control the camera for remote shooting. These connectivity features are favoured by photographers who love to share while on the move and by bloggers who like to update their sites with content on the go.
The key to unlocking the connectivity features within these Fujifilm cameras is the free mobile app, named Fujifilm Camera Remote, which is avaialble for iOS and Android devices and can be downloaded from these platforms’ stores free of charge. The current incarnation of the app is Version 4 (v.4), which was introduced in March 2019 and saw a major overhaul over previous versions. At the time of writing, the latest downloadable version was v.4.4, which is playing catch up with iOS and will cause Apple users some issues.
Fujifilm Camera Remote app features
So, what can this app offer Fujifilm users? Well, the benefits can be split into two camps; the ability to transfer imagery from camera to phone and the ability to control the camera remotely via our device. Before you can access these features however, the app must be downloaded to your device and then paired to the camera. This is actually a speedy task. With Bluetooth and Wi-Fi active, simply access the Connectivity settings in the Menu and the camera will search for a device. With the app open on your device, you’ll be able to identify your camera model and then pair the two together, gaining access to all the features.
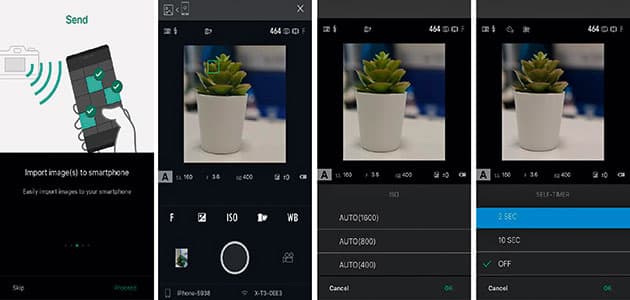
Here we see a selection of screengrabs from the app showing what you can expect when using it in Live View mode, which is very useful for remote shooting
Live View
In this mode, the smartphone app will display what the camera is seeing, making it particularly useful when capturing images remotely – say, when you want to set up the camera near a bird table in the garden and capture images from inside the house so you don’t disturb your subjects. You can trigger the shutter to capture the image, but the app also enables users to adjust a number of settings too. For example, the exposure can be fine-tuned by altering variables like the shutter speed, aperture and ISO level – plus the exposure compensation can be changed via an easy-to-use scrolling Menu. White Balance can be adjusted to alter the colour temperature in the frame and the flash can also be activated or turned off, too.
However, the options aren’t limited to exposure settings. Photographers can make more stylistic adjustments remotely, changing the Film Simulation modes that are available on the camera for different looks of the same scene. If the photographer is wishing to be in the picture too, a self-timer mode on the app will allow them to trigger the shutter via a 2- or 10-second countdown. As the name suggests, the Live View mode gives a real-time view of what the camera is seeing, although like other apps of this nature, there can be a tiny element of lag.
The Live View interface also displays useful camera information, such as the number of images available on the memory card, the battery life of the camera, the Image Quality of the image you’re taking (raw/JPEG) and which focus mode you’re using. Speaking of focus, one of the most admirable features of the Camera Remote app is the responsiveness of the focus system between app and camera. Much like using the touchscreen on the rear LCD of the camera, you can use the Live View feature to tap on the phone’s screen and establish a focus point in the scene. This feature is incredibly useful, enabling photographers to re-establish a new focal point if something new was to appear in the scene, without stepping anywhere near the camera. Again, using the bird table analogy, you could wait for the subject to y into the scene, tap the area of the phone screen and the camera would lock on to focus. I tested the app with the X-T3 and the connection time between tapping the phone screen and the camera’s autofocus system reaction was instantaneous, meaning you shouldn’t miss any moments.

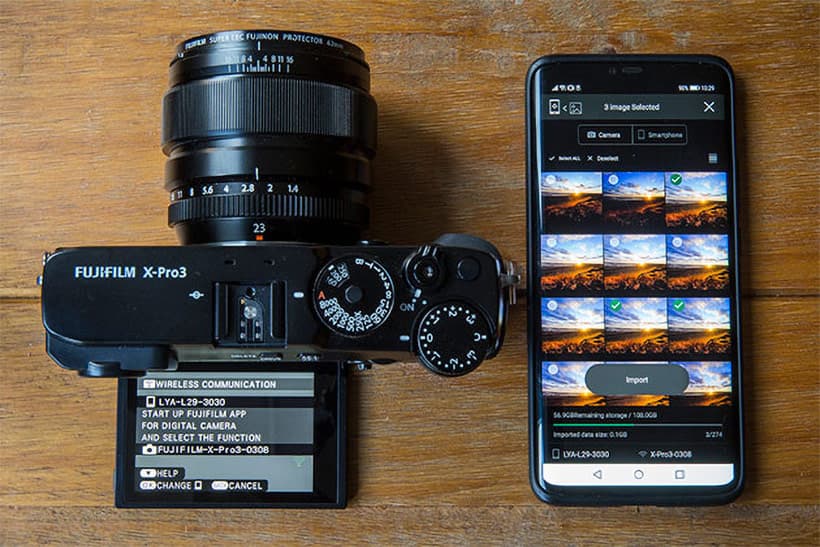
Shooting one minute and transferring the next is made easy on Fujifilm X-series models
Image transfer
Along with the remote-control options offered by the Fujifilm Camera Remote app, the other main benefit is the image transfer options that enable photographers to send a photo shot on the camera over to a phone. Why do this? Well, as mentioned, the ability to upload imagery instantly while on the move is crucial for bloggers and photographers who prioritise social media, but other photographers can take advantage of this feature too – perhaps you are scouting a location and want to send an image over to a model or picture editor for instant feedback. Within the app, photographers can choose to transfer just one image using the Single Image Transfer option, or opt for a bulk transfer of photos using the Import Image option. This may well depend on your preferred workflow or how much time you have on your hands to transfer images on the move. If you don’t require the full high-resolution version of the image, Fujifilm cameras allow you to transfer a resized version of the image and, if you plan on using the image for social media purposes such as Instagram, this may well be good enough for your needs.
During our tests it took about 3 seconds to transfer a 24MP image from the camera to the smartphone (with Resize Image for Smartphone (3MP) option turned off) and approximately half the time to transfer a 3MP image to smartphone (with Resize Image for Smartphone (3MP) option turned on). So, not a huge difference time-wise, but if you were transferring 50+ images, the extra seconds would soon stack up. If you do wish to go for the smaller file size, simply navigate to the menu section, find the Connection Setting option and then scroll to General Settings before selecting the ‘Resize Image for Smartphone 3MP’ option.
One final feature worthy of note is the virtual camera shutter trigger. This is controlled over Bluetooth rather than Wi-Fi so your device must have this technology. Not only can this feature fire the shutter, but it also enables the user to ‘lock’ the shutter, keeping it open for a long exposure. This feature effectively does away with the need for a remote release cable, saving you money and will be useful when using the camera’s Bulb mode. One thing to keep in mind when using the virtual camera shutter trigger is that the Bluetooth connection can get lost if there’s an obstruction between your smartphone and camera. For the best experience use it within close proximity of the camera with a clear line of sight.
How to connect your Fujifilm camera to your phone
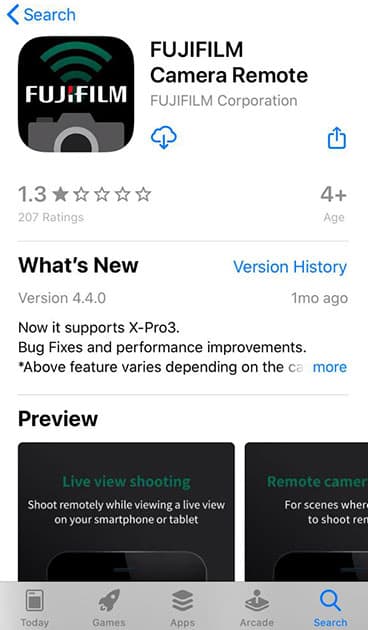
1. Search and download for free
Visit the app store on your phone (App Store for Apple or Google Play for Android) and download the free Fujifilm Camera Remote app. Make sure Wi-Fi and Bluetooth are both activated.
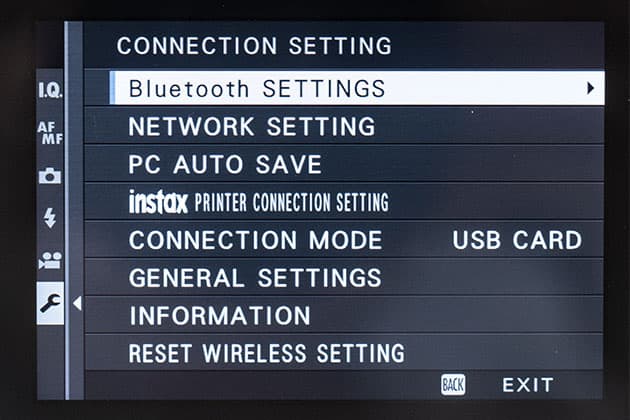
2. Activate Bluetooth on your Fujifilm camera
Head to the Connection setting in the Menu system and make sure the Bluetooth feature is activated before selecting the Pairing Registration option.
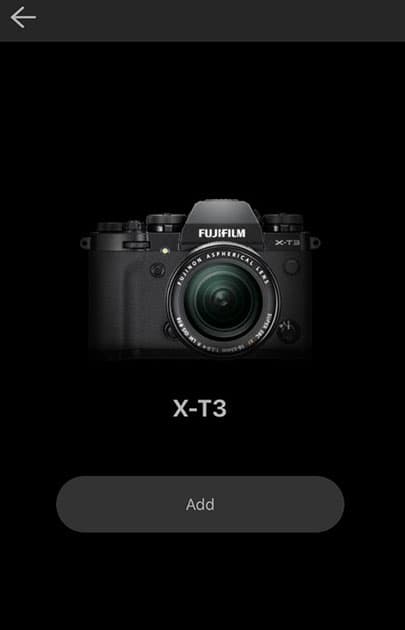
3. Pair the camera with the app
Open the Fujifilm Camera Remote app and follow the prompts. Next, select which Fujifilm camera you’re using from the menu choices and the app will then detect your camera, enabling you to pair the two devices.
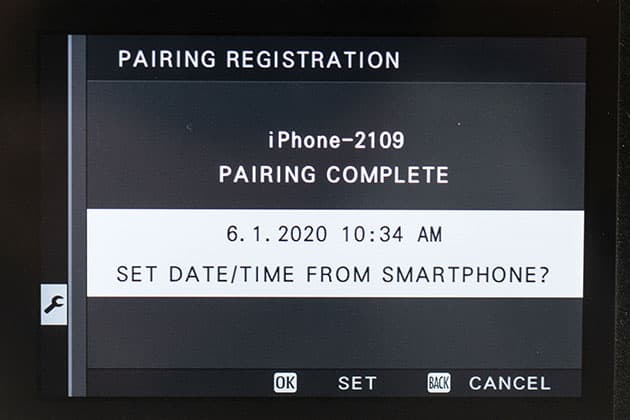
4. Set the date/time
The first time you connect the camera to the smartphone, the camera will display a message that will enable you to set the date and time from your smartphone, bypassing the need to do this manually on the camera.
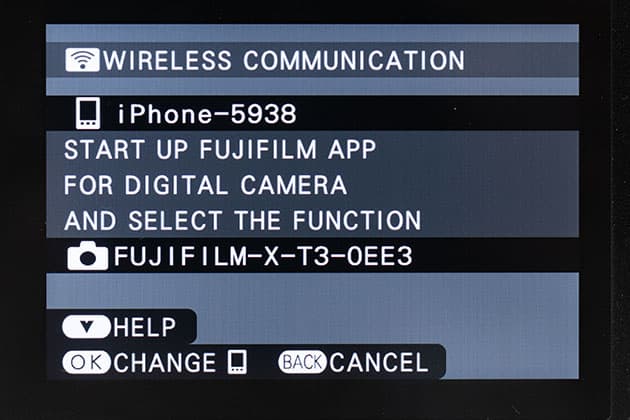
5. Activate the Wi-Fi
Back at the camera, navigate to the Shooting Menu and then select the Wireless communication option, which will then attempt to connect to your smartphone so that the Live View and Image Transfer modes can be used.
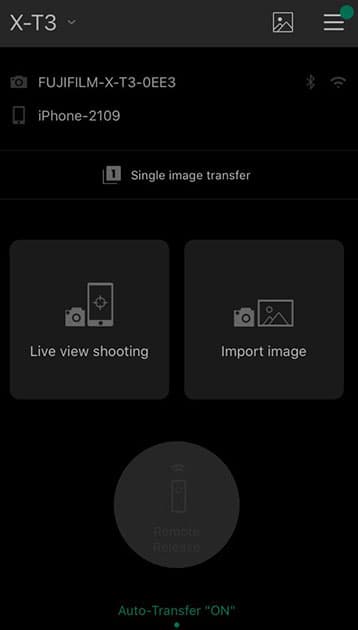
6. Choose your mode
When your smartphone connects to the camera’s Wi-Fi signal, you can then go back to the app and select which feature you would like to use (Live View or Image Transfer).
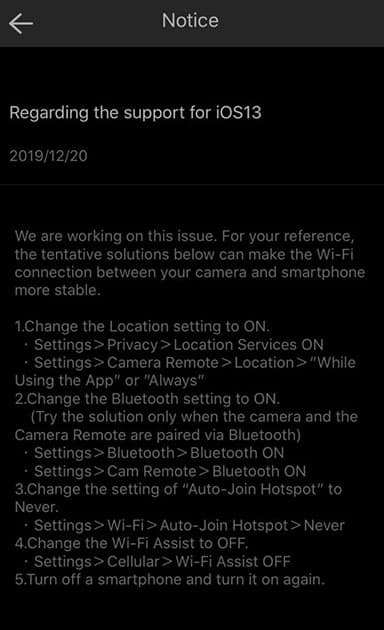
iOS 13 issues
Apple users who have upgraded to iOS 13 (the latest version of the operating platform that was launched in September 2019), may experience some issues with the Fujifilm app. Fujifilm has addressed these issues on its official website and offered advice to make the app more stable. These include changing the Location status on the smartphone to ‘Always On’ and changing the status of the Auto-Join Hotspot option to ‘Never’. While testing the app with the X-T3 I found that deleting the app and reinstalling it, a process that takes just a few seconds, was the key to securing a Wi-Fi connection between an Apple iPhone and the Fujifilm camera.
For and against
+ Quick to download and install
+ Easy-to-navigate interface
+ Takes 3secs to transfer a 24MP image to a smartphone
+ Good selection of options in Live View shooting mode
+ Option to send downsized 3MP images for faster transfers
– Users may experience some compatibility issues with Apple iOS 13 operating platform
– A little lag in Live View mode
Follow AP on Facebook, Twitter, Instagram, and YouTube.