Your guide: Guy Edwardes
Based in Dorset, Guy has been a professional landscape and nature photographer for over 25 years. His work has been widely published and he runs photographic workshops worldwide. See his website and @guyedwardes
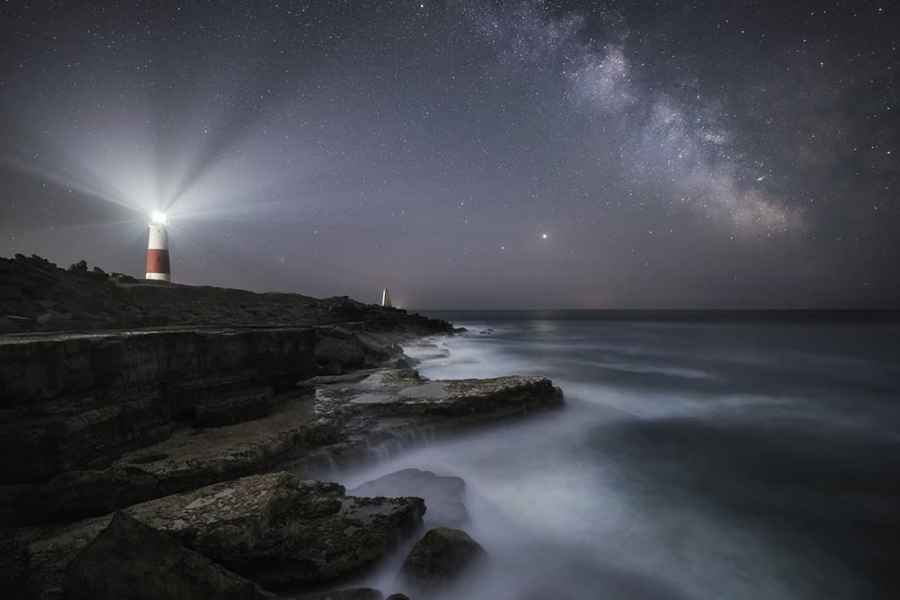
Starlight
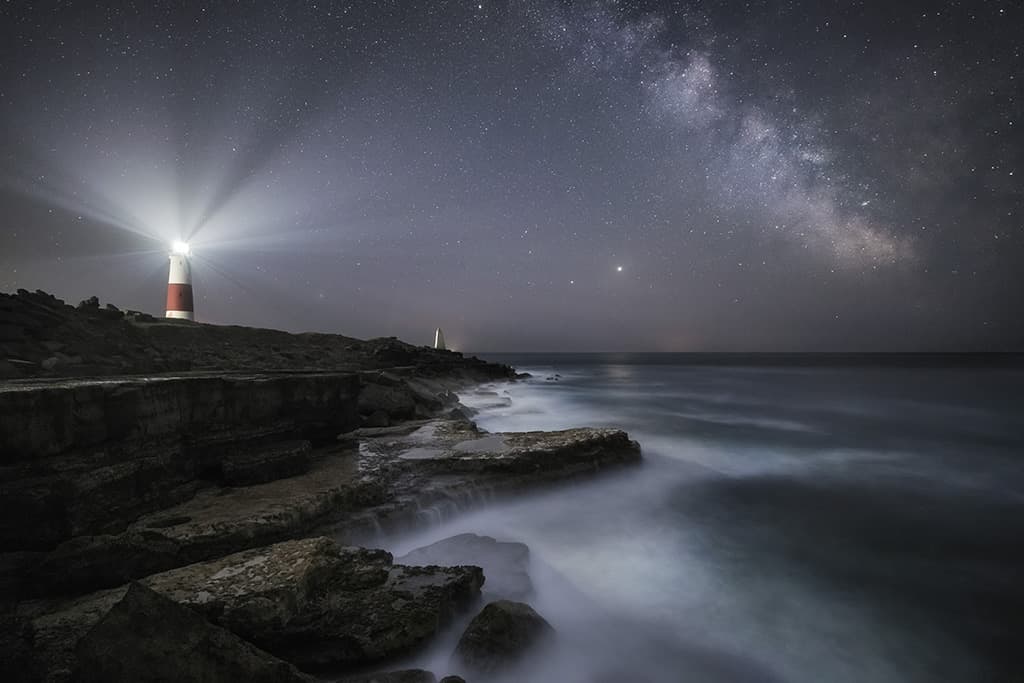
For the past three years I’ve been refining my technique for wide-field astro-landscape photography, mainly working close to home along Dorset’s Jurassic Coast. Looking south from this coastline, there is very little light pollution, making it ideal for capturing the night sky. This area can get very busy with tourists during the day, but at night I often have these beautiful locations to myself. Anywhere with minimal light pollution can work well on a clear night, so head into the countryside away from towns and villages.
I always look for a strong landscape composition – something that might work equally well during the day. I keep my processing quite subtle as the camera already reveals more detail in the night sky than we typically see with our eyes, so it’s easy to overdo it and end up with an image that looks a bit too sci-fi!
Gear and technique
The basic requirements for good astro-landscape photography are a camera capable of delivering good results at high ISO and a high-quality wideangle lens with a maximum aperture of at least f/2.8. A sturdy tripod is also a must.
With a set-up like this, in optimal dark sky conditions, you’ll typically be shooting at around ISO 6400 at f/2.8 to achieve an exposure time of 15 seconds – any longer and the stars will begin to distort. Image noise will be an issue when using such a high ISO, but it can be reduced by either stacking exposures or by using noise reduction software such as Topaz DeNoise AI, which is my preferred method.
Use a Sky Tracker
To maximise the quality of your night sky images, a sky tracker is the way to go. Once aligned with Polaris (in the northern hemisphere) it will move your camera at exactly the right speed to compensate for the Earth’s movement, permitting the use of much longer exposure times and therefore lower ISOs and smaller apertures.
My typical settings when using my iOptron SkyTracker Pro are ISO 400 at f/5.6 with an exposure time of around 2 minutes. The resulting images are virtually noise-free and the stars pin-sharp across the frame. Due to the movement of the tracker, it is necessary to shoot two images (one for the night sky taken with the tracker turned on and one for the foreground with it turned off) and blend them in Photoshop.
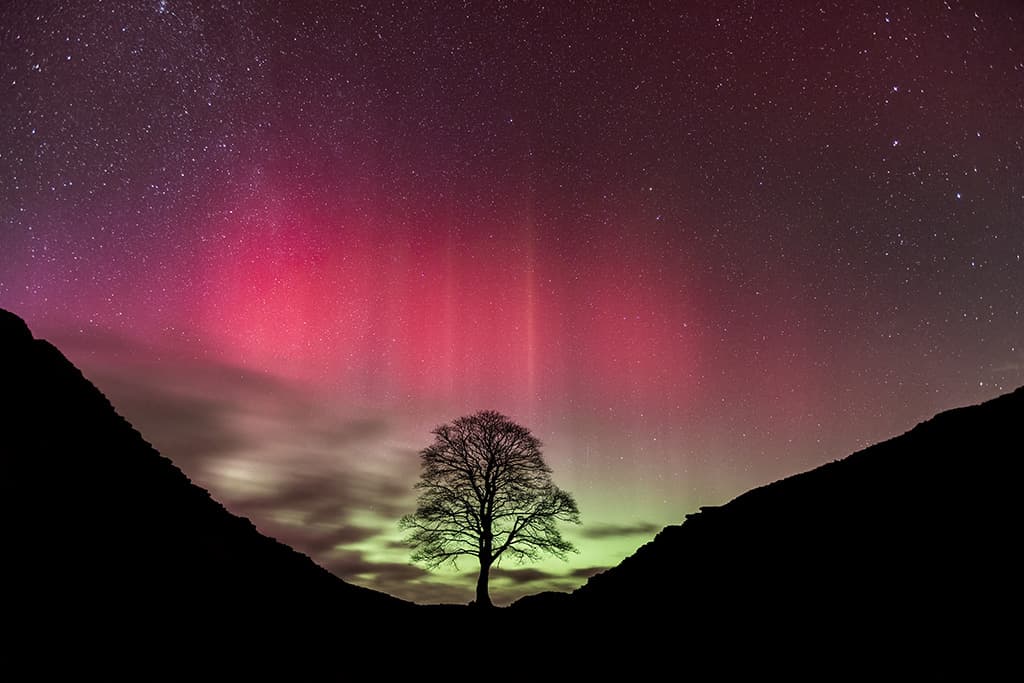
Shoot the Northern Lights
The aurora borealis can often be seen from northern parts of the UK (and further south occasionally). Register for live updates on aurora forecasting apps to be notified when conditions are promising. Search in advance and in daylight for foreground interest, as it can be hard to find in the dark.
Subjects that make interesting silhouettes, like lone trees and rock formations, work best. If the aurora is strong enough to reflect, then lakes and puddles can also work well. Equipment requirements and camera settings will be similar to those for normal astro-landscapes, but when the aurora is strong and active you’ll want to use a shorter exposure time to freeze its movement.
Five more ways to improve your shots
Check weather and moon cycle
Astrophotography relies upon dark, clear skies, so check as many weather forecasts as you can and use an app to ensure the moon won’t be up, as it’s guaranteed to spoil the show. Don’t be deterred if there’s a little cloud, as great night sky images can be taken through a brief break in the clouds.
Useful apps
There are plenty of apps that allow you to work out the position of the Milky Way such as PhotoPills, The Photographer’s Ephemeris and Planit Pro. My Aurora Forecast is a great free app for predicting the Northern Lights and Lumos is another useful app for following the phases of the moon, as well as moonrise and set times.
Get to know your camera
Familiarise yourself with your camera’s layout so that you canfind and operate all the buttons you need easily in the dark without having to switch on a head torch,
as this will spoil your night vision and possibly annoy your fellow photographers as they try to capture their shot!
Prevent fogging
When working at night, it is important to keep an eye on the front element of your lens, as it can easily mist or freeze over as the temperature drops, ruining your images. The solution is to use a CooWoo Lens Heater (£19.99; charged via a USB cable, it wraps around your lens to keep it warm) or to tape some hand warmers around your lens.
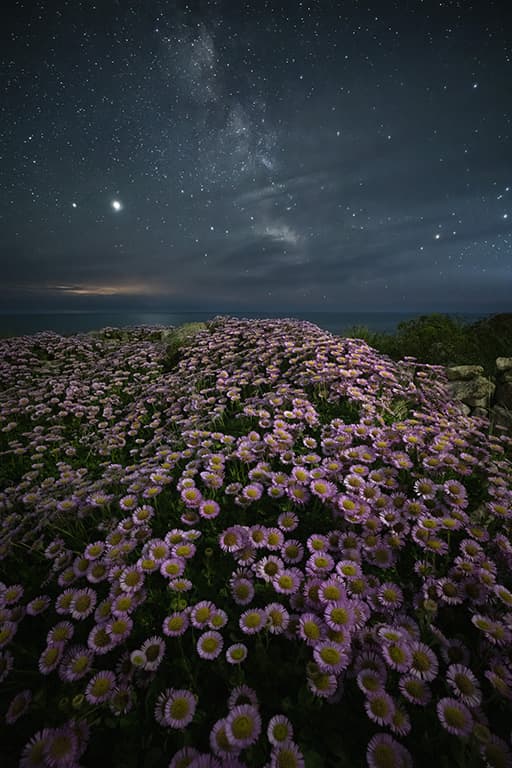
Light up the foreground
Sometimes a little artificial illumination can help to reveal detail in foreground elements, but keep it subtle or the effect will quickly become unnatural and unpleasant looking. I use a small LED light panel that allows me to fine-tune the strength and colour temperature of the light.
Lamplight

Your guide: Kingsley Singleton
Kingsley is an experienced photographer, tutor, and writer with decades of experience in shooting technique and image editing. Specialising in landscapes, nature and travel subjects, he lives in Lincolnshire but likes to travel to hillier places. @kingsley.photo
Whether it’s your first low-light shoot, or your hundredth, there’s a particular thrill to photographing after dark that never really goes away. All the well-worn maxims are actually true: yes, it can make dull daylight scenes into something spectacular; yes, it’s a great way to improve your exposure skills; and yes, non-photographers genuinely do wonder how you do it.
But once you’ve got a few low-light excursions under your belt, it’s natural to wonder how you can make your pictures more creative and impactful. I find that these lamp-lit scenes benefit from the same ideas that can improve regular landscapes, so once you’re comfortable with the basics of long exposures, try to find new angles, for instance, by getting up high above your town, using creative framing, or mixing things up by shooting with telephoto instead of wideangle lenses. You’ll soon find new ways of enjoying shooting in the dark.
Follow the light
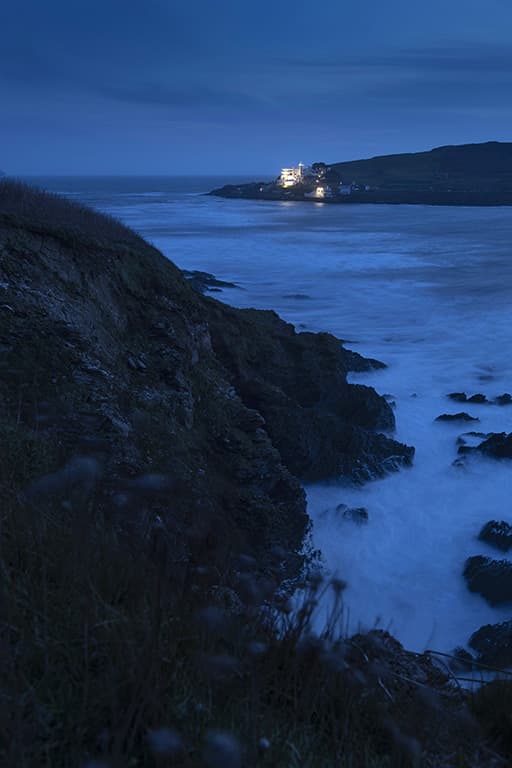
There can often be too much going on in a low-light shot – too many lights, too many colours, and too many focal points – and that can lead to a confusing mess. It’s a bit like all the instruments in an orchestra playing at once.
Less is often more, so if you can find a strong subject that dominates the scene, then try to frame up with that as the focal point, and minimise distractions around it. Preferably when shooting in low light, your focal point will be the strongest light source in the scene – or even the only light there is, as with this shot of the famous Burgh Island Hotel, near the Avon Estuary in Devon.
Just make sure you expose correctly. As it was so small compared to the dominant shadows which the camera’s meter wanted to brighten, in this four-second exposure I underexposed by two stops in order to keep the hotel from burning out.

Beat the traffic
Traffic trails are one of the most accessible and eye-catching things you can create in low-light conditions, but once you’ve got past the basics, there are a few things you can do to improve your efforts. Just as you might use a river, or a shoreline in a landscape shot, I always try to make the trails an important part of the composition, and use them as a lead into a low-light scene, rather than them being the purpose of the shot itself.
Timing is also important, because you want vehicles to be moving throughout the exposure and not stopping, if possible; a 10sec exposure could look great, but at 20secs some cars might have bunched up, messing up the lines too much. Avoid junctions entirely if you can, and if the scene allows, get a friend to drive up and down the road in question, so you’re in total control.
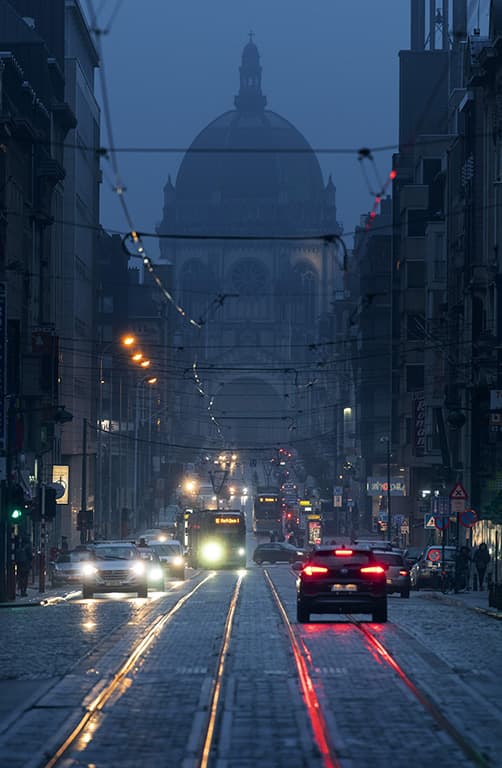
Reflected glory
Low-light photography is a winter favourite, often because blue hour can be that bit more accessible than other times in the year. What also comes with winter is rain, and lots of it. Fortunately, wet streets and puddles are the low-light photographer’s friend.
After all, it’s not uncommon for pro photographers and filmmakers to hose down a set to improve the look. Why? Wet surfaces are smoother and therefore more likely to reflect light in a specular way, while also deepening colour. Dry surfaces on the other hand diffuse light when it hits them, so you don’t get the same glimmer.
Angles are very important in finding reflections, so change your shooting height until you get the look you want, especially if you’re trying to catch the light skipping off a puddle, but watch out for splashes. And as great as wet tramlines are, like in this pic from Brussels, remember they also have trams on them.
Five more ways to improve your shots
Don’t believe your eyes
When you’re shooting in the dark, your eyes naturally become accustomed to the gloom, and therefore an exposure on screen can look a lot brighter than it
really is. Try using the exposure histogram to make sure you’re not underexposing.
Limit your locations
It depends on your outlook for low-light shooting, but remember if you want natural light in the scene or sky, you need to work fast. The light may only be right for 20-30 minutes, so get there early and try to limit your expectations in terms of moving to other locations.
The right white
Rather than leaving your camera set to auto, try picking a white balance that matches the dominant illumination in your low-light scene. Setting tungsten, for instance, will give bulbs a natural look, but turn what’s left of the daylight much bluer for a nice contrast.
Mind your legs
Setting up a tripod in urban areas can be tricky. You don’t want it to be knocked during an exposure, have vibrations affect image sharpness, or realise you’re blocking someone’s path and have to reframe, so be sure to choose your spots carefully.
Get more twinkle
Stop your aperture right down and points of light in the scene will flare into sunstars. Depending on their optics and the number of aperture blades they have, different lenses will give different looks, so try testing yours to see what looks best.
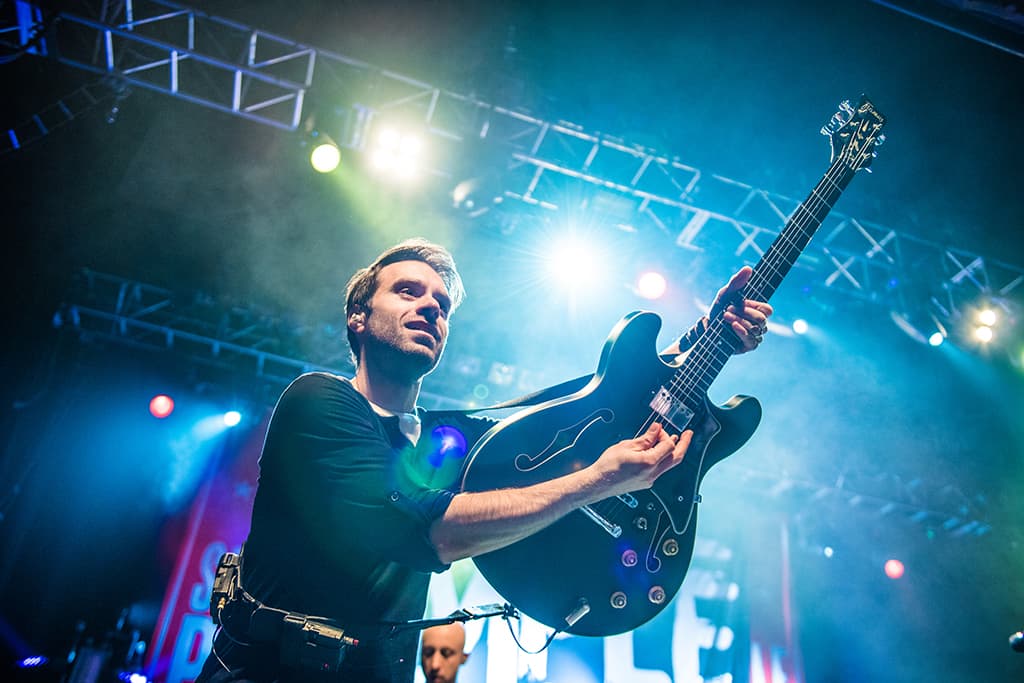
Spotlight

Your guide: Matt Higgs
Matt Higgs is an internationally published photographer and videographer. Based in London, he specialises in live music, portrait and travel images, and you can see more of his work at his website or via @matthiggs.
Whether it’s bands playing live, events work or atmospheric night shoots under available light, in many ways what I do has more in common with sports, wildlife and documentary work than regular portrait photography.
Even if the conditions seem bright to your eyes, there’s never as much light as you think at a gig or from the LEDs at a video shoot, and backlighting in particular can make it seem like there’s more than there really is when it comes to exposing your main subject.
What you’re left with is the need to freeze a fast-moving subject sharply, and most of the time you’ve only got the three sides of the exposure triangle to back you up. Just to ramp up the problems, tripods, monopods, and long shutter speeds are pointless, and it’s three songs and you’re out. But handle your camera the right way, and there are amazing opportunities, too.
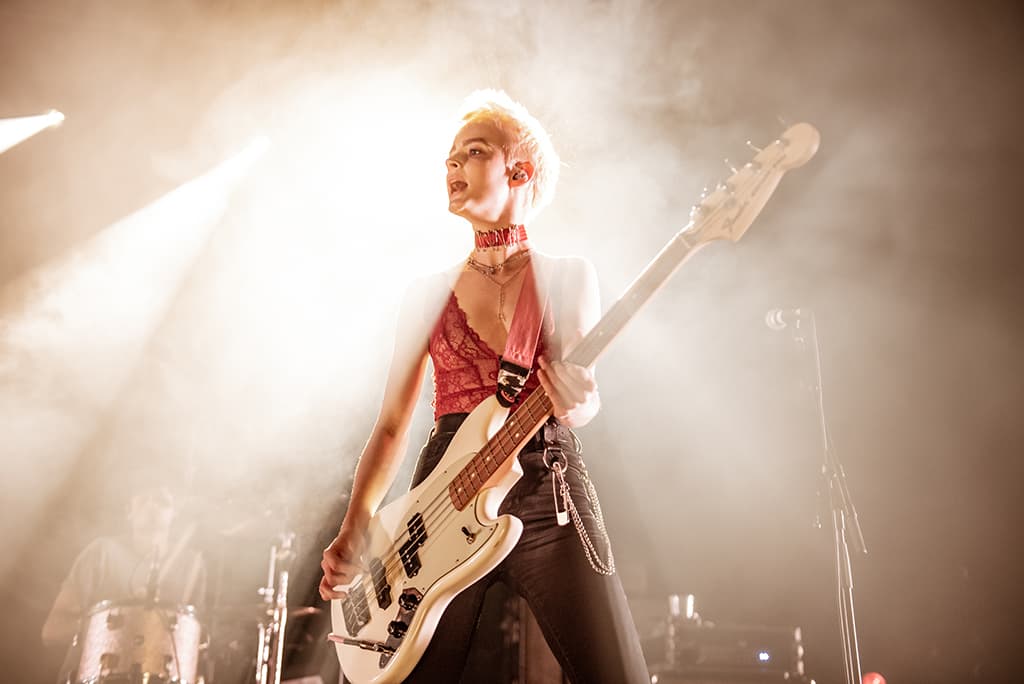
Get some exposure
For my low-light gig shots, I shoot in manual. Lighting will mix up the levels a lot, so it could be bright one second and awful the next, and using something like wide area metering and aperture priority won’t always cut it, and I’d rather blame myself, not my camera if I miss a shot.
The best approach I’ve found is to set the shutter speed at a minimum of 1/200sec to make sure I’m stopping the subject movement, then open up the aperture to f/2.8 or f/3.2. After that, it’s all about riding the ISO in response to changes, and pushing the shutter speed up, and then the aperture, if I can.
The artist’s face should nearly always be the basis of your exposure, like portraits in general, and if the rest of the scene is way darker or lighter than you’d like, it’s not the end of the world! With scenes that have such dramatic differences in light, you have to accept it may not all be perfect.
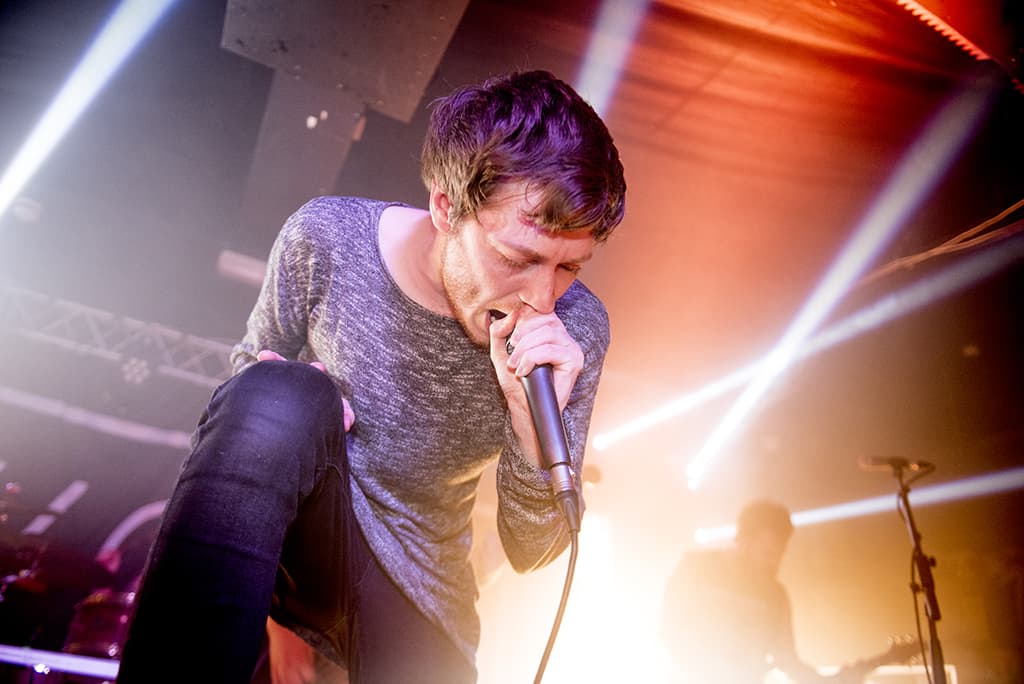
Feel the noise
In low light, where moving subjects have to be frozen, using high ISOs is vital. I wasn’t always confident in really jacking up my ISO level, because I was concerned about how noisy images would be, and I didn’t like to push it beyond 800 or 1200.
These days I’ll almost triple that. ISO 1600 is my baseline for these kinds of shoots, and I’ll happily jack it up to 3200 and still get great results from my Nikon D750. It’s easy to get hung up on the technical side, but with events and live music, the cost of capturing the atmosphere is often going to be a little bit of grain, and honestly bands and fans don’t care about it if you get a killer shot.
That confidence could mean you getting the image rather than a blurry mess. With new cameras handling noise so well, there’s even a trend for people applying grain to clean shots, just for the aesthetic, so it’s really nothing to worry about.
Ambient hits
Arena shows don’t let you use flash, but smaller gigs sometimes do, and if you’re shooting a regular low-light portrait, this tip also holds true: don’t let your flash overwhelm the lighting that’s already there.
Any light you use should add to the scene, not detract from it, maybe with a little kick to expose the subject better, but not kill the atmosphere and bleach out the ambience. I normally drag the shutter, keeping as much of the ambient light in as possible, and get the exposure right in camera before I add the flash rather than using the flash to get it right. Then I’ll have the flash set right down, maybe a couple of stops under the TTL reading, so it’s subtle.
Five more ways to improve your shots
Fast zooms
Whether it’s gigs or other live events in venues, it’s about making the most of whatever little light is there, so I’ll always have at least one lens with a constant aperture of at least f/2.8. If I’ve got primes such as an f/1.4 or f/1.8, that’s a bonus, but my go-to glass is the f/2.8 zooms.
Raw gives you more
In any environment where the light is changing constantly, it’s sensible to shoot in raw mode. Knowing that you’ve got the option to push shadows or crush highlights is incredibly valuable, and there can be so much variation in light colour and strength that it’s a real lifesaver.
Play it by eye
If you’re using live view on a mirrorless camera, you should be able to adapt exposure easily on the fly just by looking at the display, but it’s by no means vital. Don’t be afraid to do a bit of chimping to see if it’s working, and bring up a histogram for some security, too.
Shutter speed beats image stabilisation
Remember that image stabilisation has nothing to do with stopping subject movement. IS will do a great job of increasing sharpness if your shutter speed is on point, and it can really help if you’re shooting wideangle, but if it’s too slow all you’ll get is a sharp background and your subject will just be a blur of motion.
Shoot more than you need
I often shoot repeat images; you just stand a better chance that way in a fast-moving environment. You might catch a moment when the subject isn’t moving as much and will be sharper, or be able to pick the best expression. Get them in the can, because there aren’t any second chances at a live event.
Further reading
Get great shots of wildlife in low light