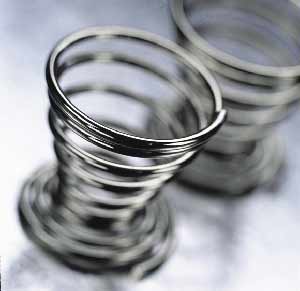
By using the lens’s widest aperture you can greatly enhance your photographs, from portraits to still lifes. Read on for John Freeman’s guide to shallow depth of field.

We’ve all seen those pictures where only a thin sliver of the image is in sharp focus, while everything else, whether in front or slightly behind the focal point, drifts into a blur. Such pictures are designed to draw your attention to a single area of the image, be it a person’s eyes, a flower in a field or an element in a still life. Done well, such images have enormous impact. There’s no trickery involved in creating this effect, but there are a few simple techniques that you’ll need to master to achieve the same effect yourself.
 The degree of sharp focus immediately in front of and behind the point that the lens has been focused on is known as its ‘depth of field’. The greater the depth of field the greater this zone of focus. The lens’s aperture is the biggest factor determining depth of field. The more the lens is stopped down, the greater the depth of field. Other factors include the choice of lens: the more telephoto the lens the greater the apparent depth of field (all other things being equal). Focal distance plays a part too, with close range shots having a more shallow depth of field at a certain aperture, than images focused on a point further away.
 Still life
Another area where I use the aperture wide open is when I’m shooting food or still lifes. In these cases you can really make a point of the main subjects – in this case the pastry. Even though there is minimum depth of field in this shot, the pastry is pin-sharp.
 Isolating detail
Wide apertures help to isolate detail. I was photographing this sleeping newborn baby when I became fascinated by its tiny hand. I decided that was to be the focus of interest but I still wanted to see the baby’s face. This time I used a No 2 extension tube, which allowed me to focus really close. Depth of field diminishes the closer your point of focus, so the combination of the extension tube and wide aperture created a really shallow zone of focus. The wide aperture also enabled me to shoot without flash.
Using a telephoto lens
One of the other benefits of using a wide aperture is that you can use a faster shutter speed. This is advantageous if your subject is fast-moving and you need to track it in the viewfinder. This was the case when I was photographing a butterfly and it only stayed on one of the flowers for a few seconds. I used a shutter speed of 1/1000th and an aperture of f/2.8. The shutter speed was fast enough to eliminate camera shake and to freeze any movement in the butterfly’s wings. By reducing the depth of field, the focus concentrated on the butterfly, while still allowing the viewer to distinguish the colourful flowers that made up the background.
Photoshop – How to simulate shallow depth of field
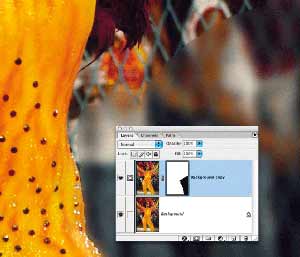
A shallow depth of field effect can be easily recreated on your PC by using your image-editing software. Using Photoshop, duplicate your background into a new layer ( Layer > Duplicate Layer). Apply a desired amount of Gaussian blur from the filter menu on to the background layer.
Now select the top layer and apply a layer mask ( Layer > Add Layer Mask > Reveal All). Using a suitable brush size, paint away the background area to expose the underlying blurred background. Change brush sizes as you get in close to your subject’s edges.
You will probably notice as you continue around the subject that the blurred edges from the layer below are just showing through. To remove this, select the bottom layer and use the Clone tool to duplicate areas of the background over the blurred edges to remove them.
Guide to Shallow Depth of Field – Useful Gear
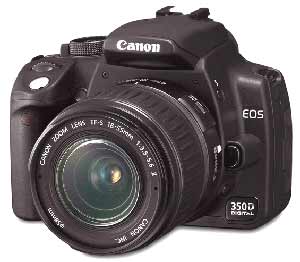 An SLR or ‘Prosumer’ Camera
The smaller the sensor, the greater the depth of field will be (all else being equal). With some compacts it’s almost impossible to get shallow depth of field. SLRs and enthusiast cameras with larger sensors produce shallower depth of field at wide apertures.
Telephoto Lens or Teleconverter
Telephoto lenses give the illusion of shallower depth of field. A similar result can be achieved using a teleconverter in conjunction with a compatible shorter focal length lens.
A Fast Lens (F/2.8 OR FASTER)
The wider the maximum aperture of your lens, the shallower the depth of field you’ll be able to achieve. If you can afford one, get a lens with a maximum aperture of f/2.8 or wider. Fixed focal length lenses often have wider apertures and can be bought quite cheaply second-hand.
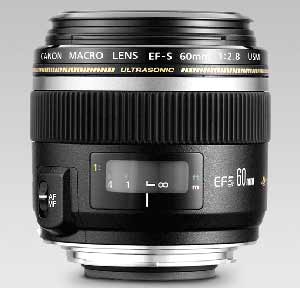 Macro Lens/Extension Tubes
The closer you are to your subject, the shallower your depth of field will be. If you don’t have a proper macro lens, an extension tube, fitted between the camera body and your lens, will enable you to get in really close to your subject.
The Eyes Have It
Shallow depth of field works especially well with close-up portrait shots. By focusing on the subject’s eyes, their ears and even the tip of the nose will drift out of focus, enhancing the sense of eye contact with the viewer.
Depth of Field
As you stop down the aperture, the area of sharp focus (depth of field) grows larger.
 Adding Dynamism
I was shooting an architectural fittings catalogue of handrails. They were beautifully engineered and designed objects. I wanted the shots to do justice to them and make them look as dynamic as possible. I could have just shot them straight on, stopped down and got everything as sharp as possible. Instead I fitted a No 1 extension tube to the camera. This fits between the camera body and the lens. It enables the lens to focus extremely closely, while reducing depth of field to a minimum. I chose a low angle, tilted the camera and focused on the handrail’s fitting, and took the shot at f/2.8. The focus is now firmly on the fitting – the main object – while the perforated metal balustrade falls out of focus quite quickly. This makes the shot far more interesting and draws our eye to the most important part.
No Distractions
Look at these three pictures. In picture A the lens was stopped down to f/22 and virtually everything is sharp. However, the people, who can be clearly seen in the background, are a distraction. When I opened the lens to f/8 (picture B) the background is less sharp but the people are still clearly visible. When I open up the aperture to f/2.8 (picture C) the background is completely out of focus and our full attention is on the girl. In this case it was far better to shoot ‘wide open’.
Guide to Shallow Depth of Field – John’s Top Aperture Tips
-
1. The more you can open up – in other words use a large aperture – the less the depth of field will be.
- 2. Even though you might be using fast shutter speeds a tripod is essential, especially if you are shooting still lifes.
- 3. Digital SLR cameras have the advantage of a depth of field preview button. Use this to see what difference it would make to your shot if you stopped down.
- 4. Use the aperture priority mode on your camera. This lets you select the aperture while the camera takes care of selecting the shutter speed.
- 5. Remember that the more telephoto the lens, the less depth of field; whereas with wideangle lenses, the greater the depth of field is.

