
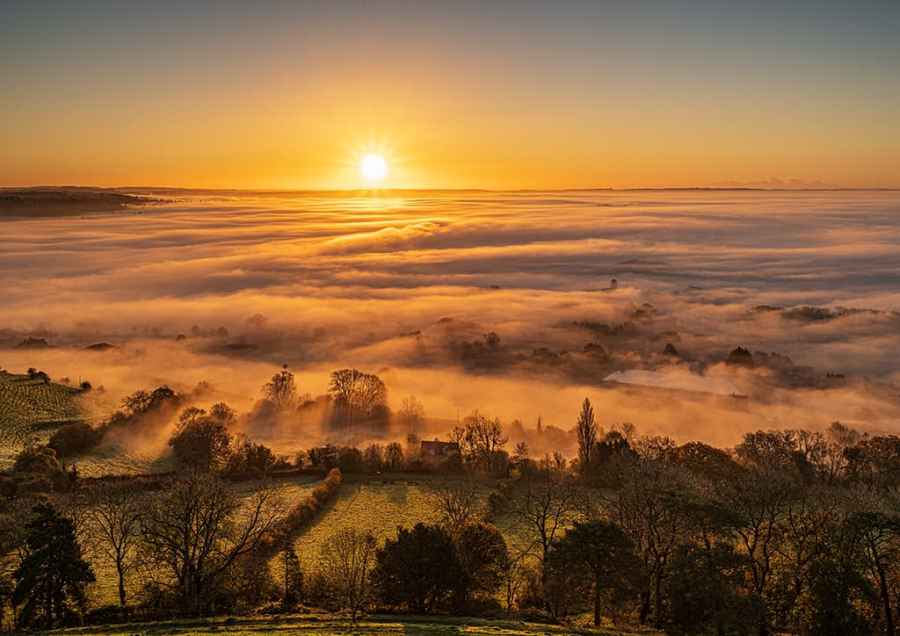
Now we are well into September it’s a great time of year to shoot misty landscapes. As cold air moves over moist, dewy terrain after a clear cloudless night, some of the water evaporates into the air, which then cools and condenses – causing fog and mist to form.
If you are lucky enough to live near a beauty spot or historic landmark (Corfe Castle in Dorset is the obvious example) you can get some stunning shots of misty mornings. Mist itself is not always particularly interesting, but when other elements are included, such as buildings or trees poking through, the images you take can be really memorable.
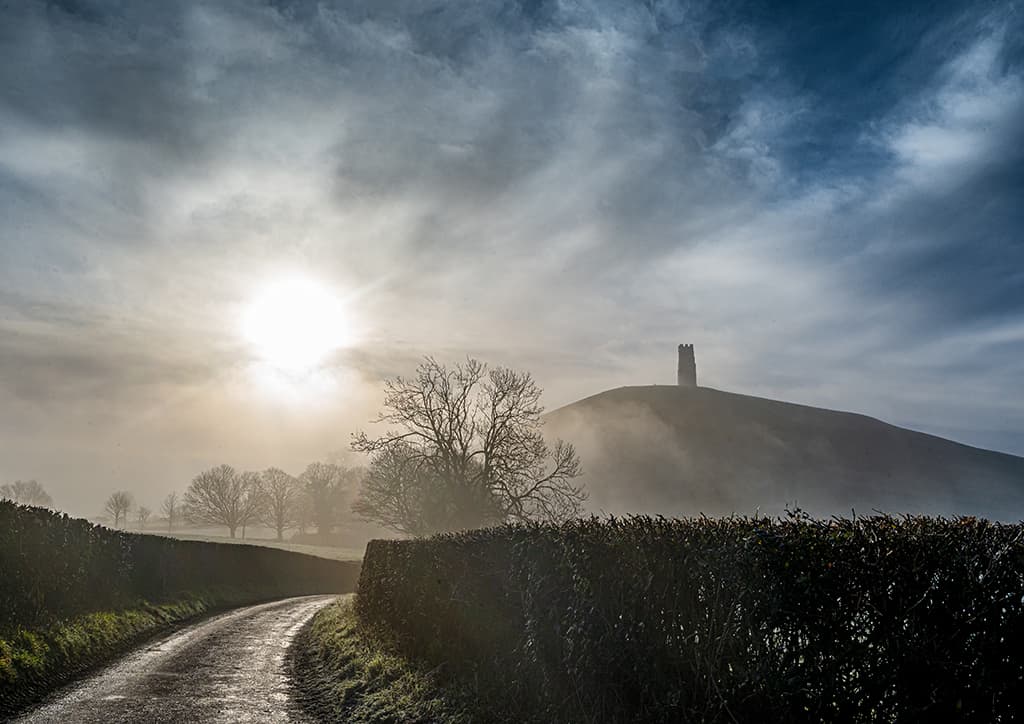
Michelle Cowbourne is lucky enough to live near a classic location for misty morning shots – Glastonbury Tor in Somerset. Michelle’s misty landscape scenes are regularly featured in the UK’s top daily newspapers and their websites, and she has also reached the finals of this year’s Weather Photographer of the Year. Not bad for somebody who only took up photography in 2017!
Here are Michelle’s tips for making the most of ‘mist opportunities’ as we come into the autumn
More than mist
“The biggest challenge I faced at the beginning was making sure the composition was right. You need to get the right mixture of mist and landscape features, such as trees or houses to come through. It’s important to add other elements of interest.”
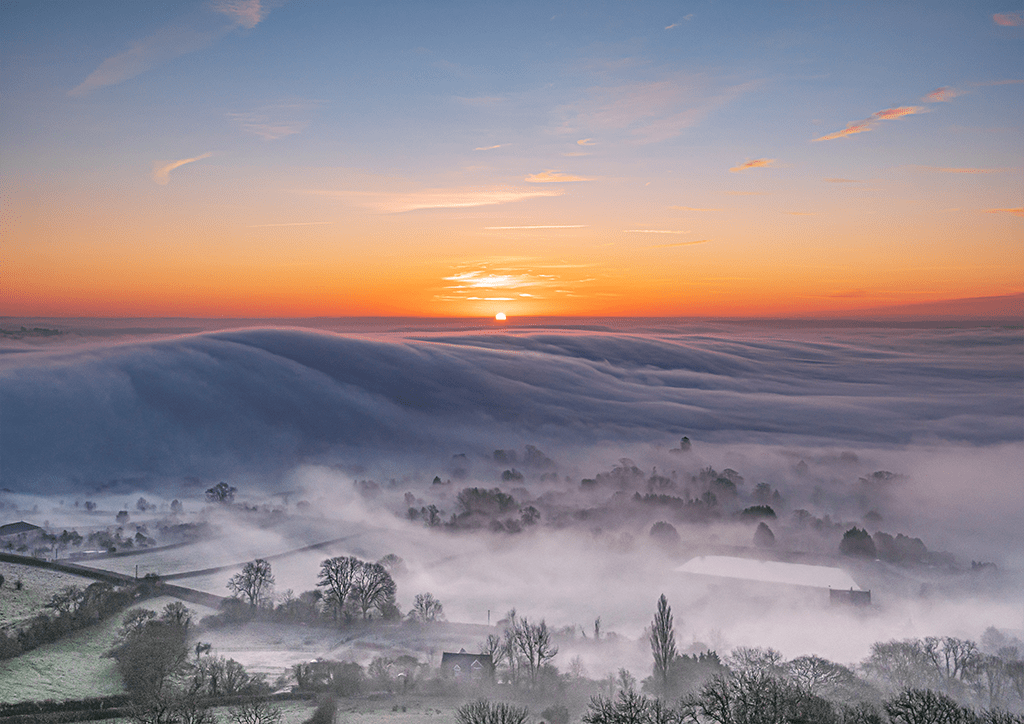
Michelle’s shortlisted image in Weather Photographer of the Year
Shooting and focussing
“I tend to shoot in aperture priority generally and switch manual focus to make sure I can focus where I need to. Focus peaking really helps here. Balancing the light is really important too – I like to photograph mist when the sun comes up.”

Filter choice
“I use LEE ND Grad filters to help with this, .6 and .9. As the sun comes up and the light gets harsher, I will switch as required. ND Grads help me balance the exposure and avoid blown-out highlights, which can be a risk with this mist photography.”
Tripod or not?
“Generally I don’t use a tripod – but if I know it’s going to be an amazing misty morning, I will take one along. Half the time you not sure, as weather apps are not particularly accurate. If I leave the tripod at home, I can still go quite slow handheld with the image stabilisation on my Nikon Z7 system.
Timing
“I get there half an hour before sunrise – this is the tough part, as there is a lot of waiting around, not to mention early starts. You also need to learn to see how the mist is moving and how it’s being affected by the breeze. That is something that comes with experience.
You will see mist build and drop. The sun can come up sometimes and it’s full on blanket mist, so you might need to wait. Try to wait for things to start to flow more and you can see other elements pointing through the mist.”
Work a spot you know
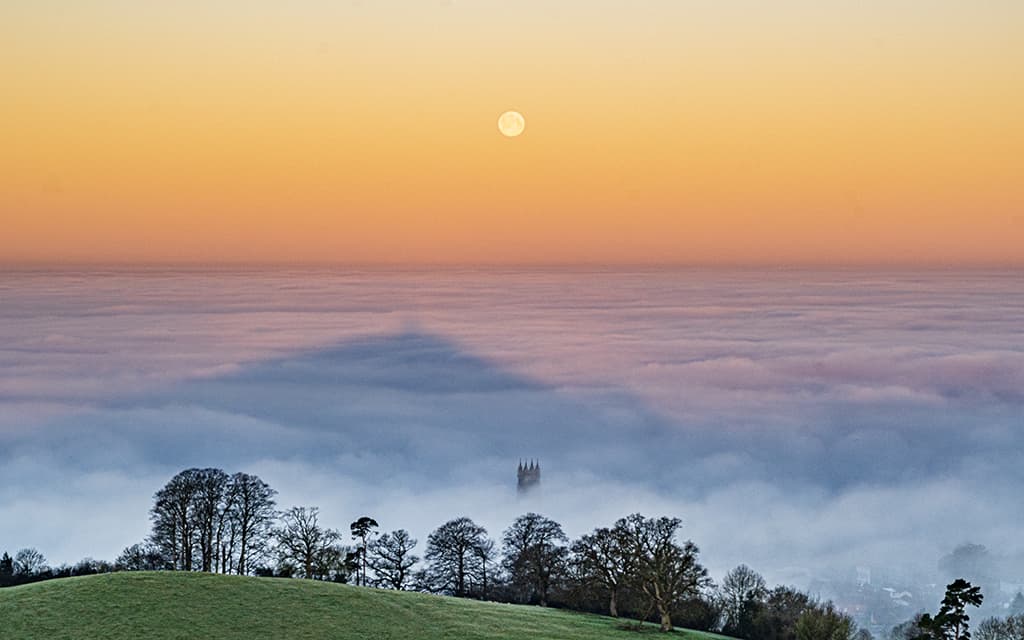
“People ask me why I don’t tend to shoot mist around other locations, but I believe in really working a local spot. Every day is different too. The mist can be quite high and go right over the Tor, or it can form pools of light around it – the light can change quickly and become very eerie.
You can also get amazing shots of the Tor reflected in banks of mist (see above). The skills I have learned shooting the Tor in mist are transferrable to other locations, too.”
Editing
“I don’t do much; I will tweak the highlights and shadows if necessary and add a little bit of Dehaze in Lightroom.”
See more of Michelle’s work here.
See our guide to the best photo editing software.
General tips for photographing mist
- Mist quickly disappears in the morning, so make sure you’ve set your alarm early and you’re at your location before first light to ensure you don’t miss the perfect mix of mist and light.
- Mist reflects ambient light, so it can trick your camera into thinking it’s brighter than it actually is, so be ready to dial some exposure compensation to get round this.
- Try shooting with a long focal length to really compress the perspective and play on the extended feeling of depth that’s created from the mist, reducing the clarity in the raw conversion.
- As there’s a chance that water droplets will form on the front of your lens when out in these conditions, it’s worth taking a few tissues.
- White balance – to preserve the cool blue of a misty morning, select the Daylight white balance setting, rather than Auto or Cloudy. To make the blue even more pronounced try the Tungsten setting.
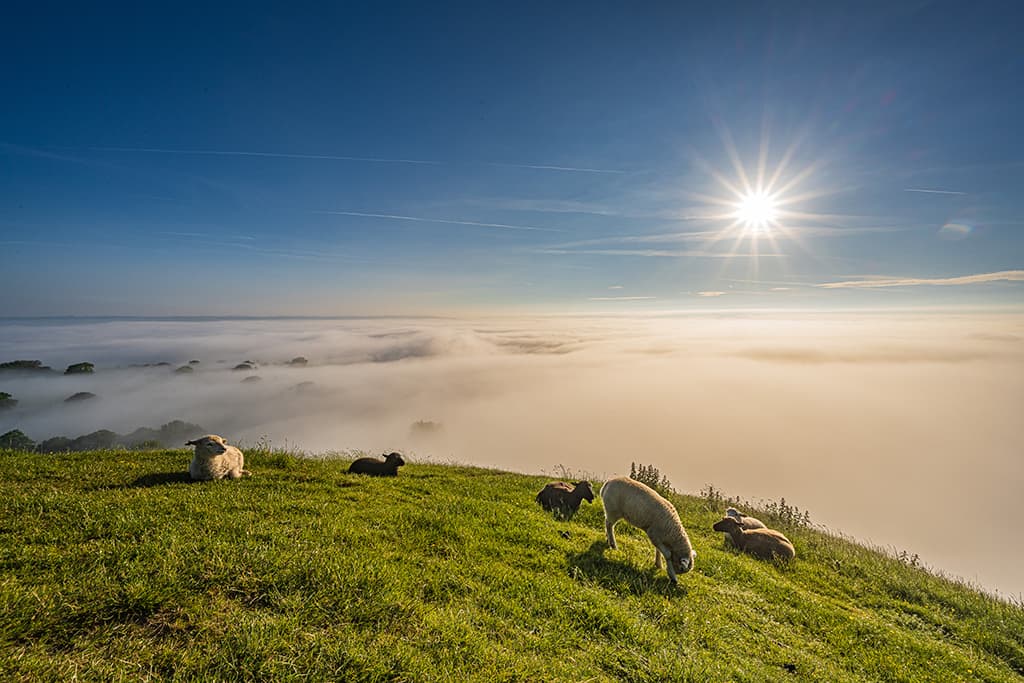
- Think about lighting – mist looks most impressive when lit from behind, as shown here. Try to position yourself with the mist between you and the sun or a street-light. Coloured bulbs and illuminated signs can lend their colours to the mist too.
- Sharpen and blur – enhance the difference between the sharpness of the subject and the softness of the mist using the Sharpening tool and Blurring filters on selected areas with your editing software. Darkening subject edges against a light and misty backdrop using the Burning tool can help sharpness too.
Related reading:
- White balance explained – how to get perfect colours.
- How to maximise dynamic range in images
- How to capture the toughest photography subjects
Follow AP on Facebook, Twitter, Instagram, YouTube and TikTok.


