Mirrorless cameras have introduced a range of new autofocus systems, so Angela Nicholson explains the good, the average and the downright amazing
As mirrorless cameras don’t have a mirror to bounce light into a viewfinder or onto a dedicated autofocus sensor, they use the imaging sensor to gather the focusing information to drive the lens. The first mirrorless cameras used contrast detection autofocusing, and although some manufacturers have stuck with it, most use phase detection or a hybrid system that combines phase and contrast detection.
Contrast detection is a very accurate method that looks at the edges of the subject and moves the focus until the point of highest contrast is found. Its problem is that the camera has no way of knowing which direction to adjust the focus initially, so it can go the wrong way.
It can also overshoot the point of highest contrast, and have to back up for perfect focus. Phase detection is usually faster, as the camera knows which way to adjust the focus group and how far. Mirrorless cameras that use phase detection have on-sensor pixels for assessing the focus and driving the lens to get the subject sharp. While the earliest mirrorless cameras weren’t able to match DSLRs for autofocus, they’re now generally very good.
In fact, you can shoot fast-moving sport and action with most enthusiast and pro-level mirrorless cameras, but naturally, some make it a bit easier than others. As a rule, mirrorless cameras have some advantages over DSLRs with regards to focusing. The AF points, for example, usually go closer to the edge of the frame, and the increasing availability of face and eye detection makes getting the most important part of a portrait sharp a cinch.
Selecting the right AF modes
As with a DSLR, one of the first decisions you have to make when shooting with a mirrorless camera is which focusing mode you want to use: single or continuous. Single-AF or One-Shot AF mode is designed for photographing stationary subjects while Continuous-AF is for moving subjects and is often combined with burst shooting. Some cameras also have an Auto-AF setting in which the camera switches automatically between Single-AF and Continuous-AF depending upon whether it detects any subject movement.
That can be handy, but generally, it’s best to opt for Single-AF or Continuous-AF according to your subject. Nikon’s mirrorless cameras have an extra AF mode available in video mode called Full-time AF. When this mode is selected, the camera focuses continuously without the need to half-press the shutter release. Now that cameras have more than one AF point there are modes to help with their selection. These allow you to specify whether you want to select individual AF points or groups of AF points to target the subject. Understanding the options and how they work is an integral part of getting the best from a camera’s AF system.
Canon
Canon’s mirrorless camera AF system has evolved into one of the best available
Canon’s current mirrorless cameras use Dual Pixel CMOS AF which means all of the pixels on their sensors have two photodiodes and microlenses rather than just one and they can be used for phase-detection focusing. Consequently, there are focusing points across most of the imaging area.
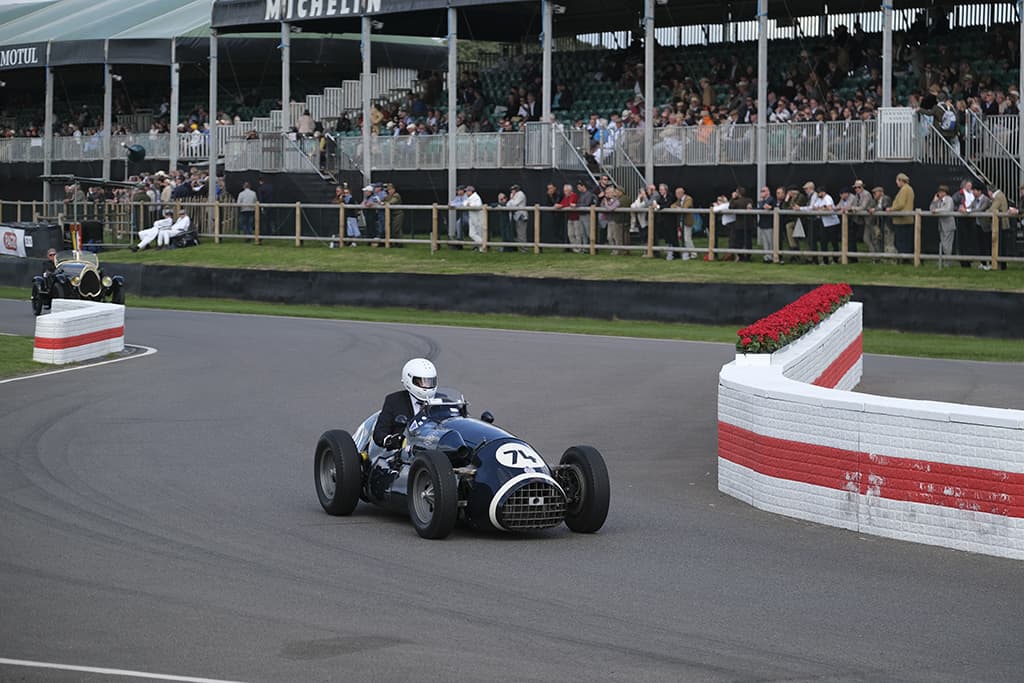
The Canon EOS R6’s Eye detection system can even keep up with fast-moving subjects
Getting started
Before you start shooting with a Canon mirrorless camera you need to select the ‘AF method’ via the main or Quick menus to determine how the active AF point is selected. The modes available vary by the camera but the list encompasses 1-point AF, Spot AF, Zone AF, Expand AF area, Expand AF area: Around and Face+Tracking AF.
Spot AF mode and 1-point AF mode are similar, allowing you to select a single point from all of those available, but the area is smaller in Spot AF mode. They are useful for targeting small subjects, with Spot AF being especially useful when there are other objects close to your subject.
Zone AF, Expand AF area, Expand AF area: Around are especially useful with moving subjects. With the Expand area modes, you select a single AF point, but the camera also uses the four or six surrounding points to keep it sharp. Some cameras have more than one Zone AF mode, giving you a choice of sizes and orientations (vertical or horizontal). In these modes, you select a fairly large area of the frame, and the camera selects the points to use within it. This is very useful with subjects that move unpredictably.
AF Configuration Tool
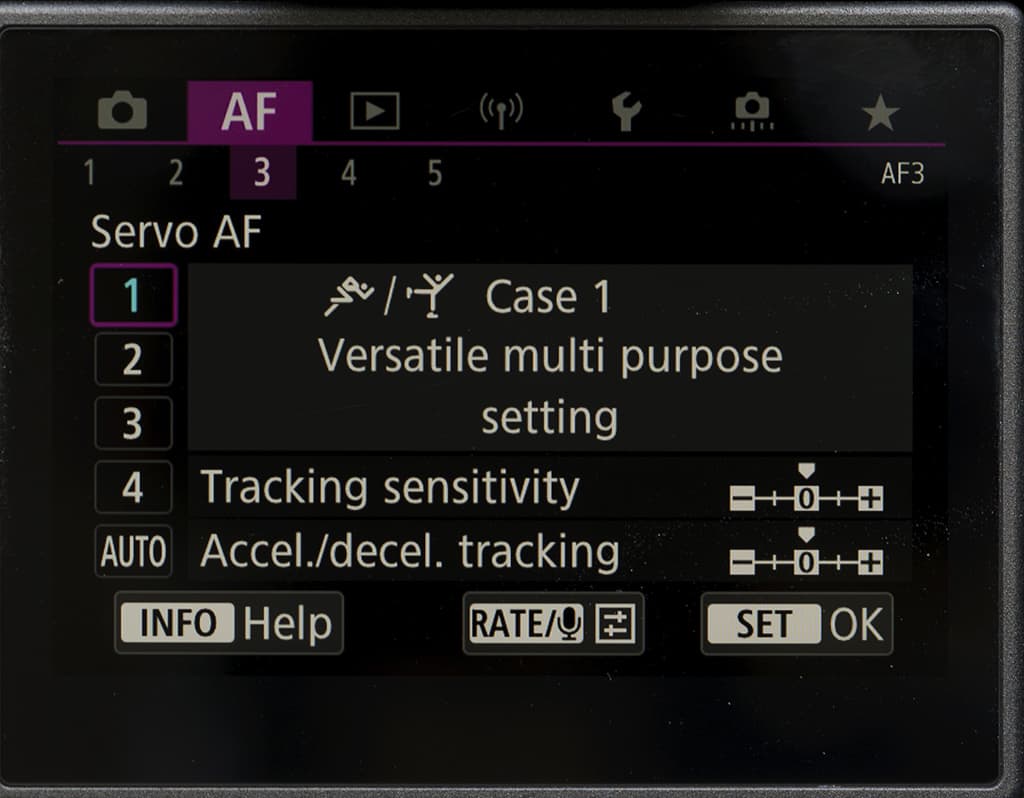
Canon’s most advanced mirrorless cameras have a series of Servo AF ‘Cases’ listed in the AF section of their menu. These control aspects such as the tracking sensitivity and how the camera responds to things like changes in the speed of the subject and when objects come between it and the target. Case 1 is a good general-purpose setting, but if it’s available, Case A is great as it adjusts to the subject’s movement automatically.
Using Canon’s Eye Detection
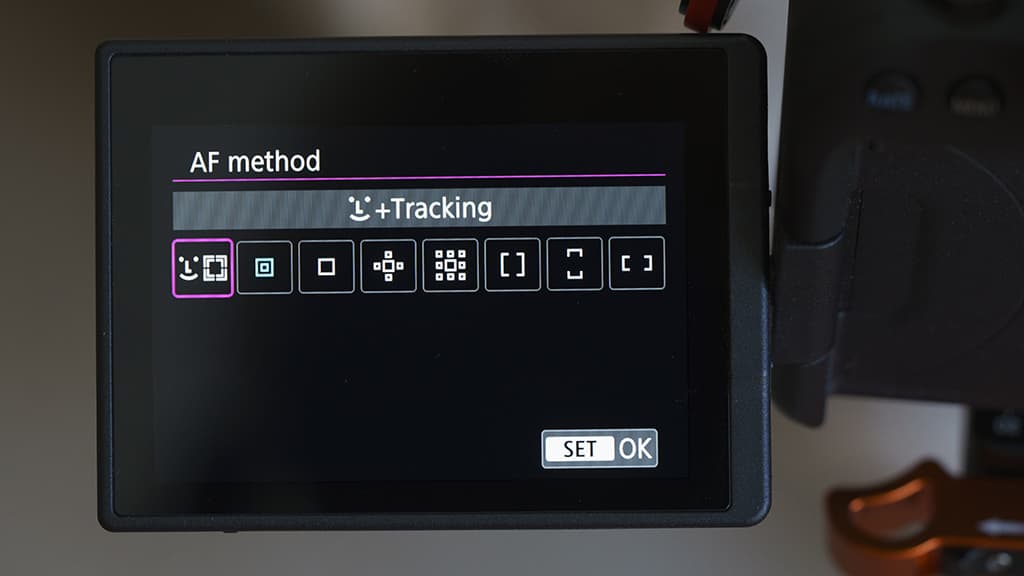
AF Method
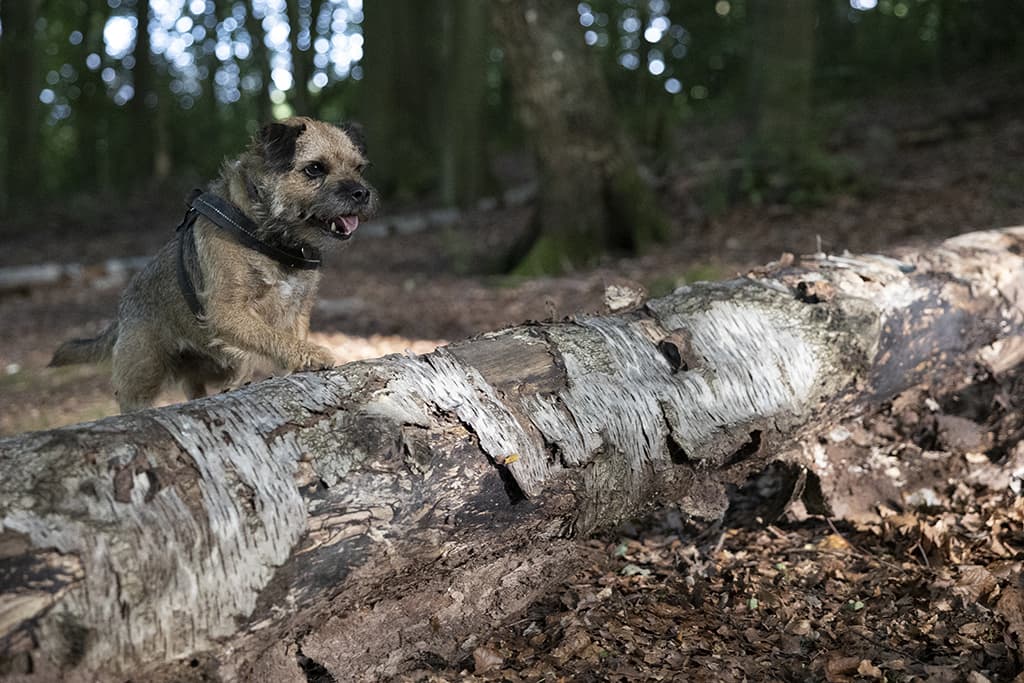
The EOS R was the first Canon camera to feature Eye detection, but it’s been developed further for the R5 and R6 where it can be set for human or animal eyes. It works brilliantly and is a major bonus for pet, wildlife and portrait photography. Press the menu button and find ‘AF method’ in the AF tab. Tap on ‘AF method’ followed by the ‘Face+Tracking’ icon.
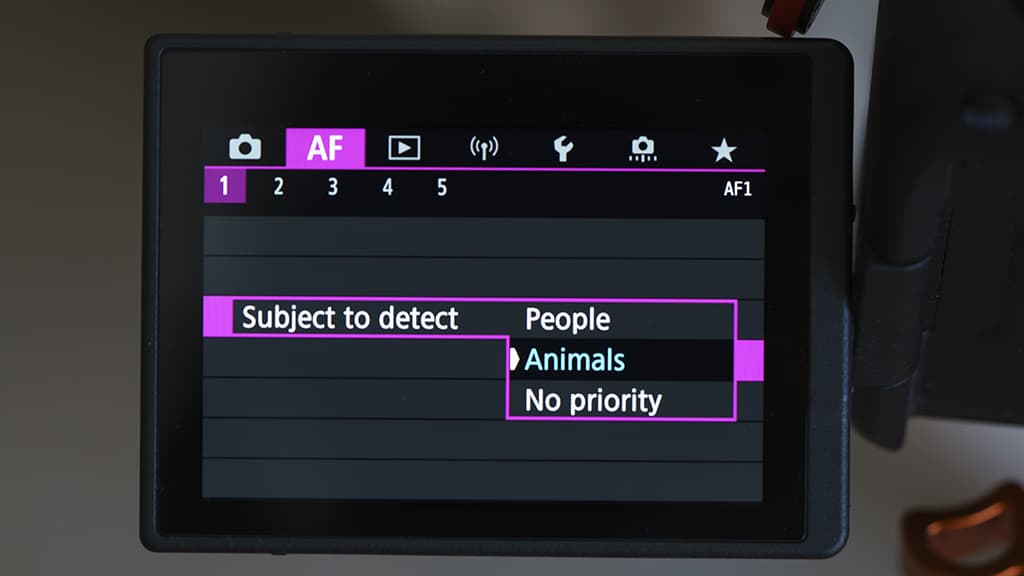
Subject to detect
Still in the AF tab, tap ‘Subject to detect’ followed by ‘People’, ‘Animals’ or ‘No Priority’. If the latter is selected, the camera will look for any eyes in the scene. Find ‘Eye detection’ in the AF section of the menu and set it to ‘Enable’. Alternatively, when Face+Tracking is active, you can activate and deactivate Eye detection by pressing the Info button.
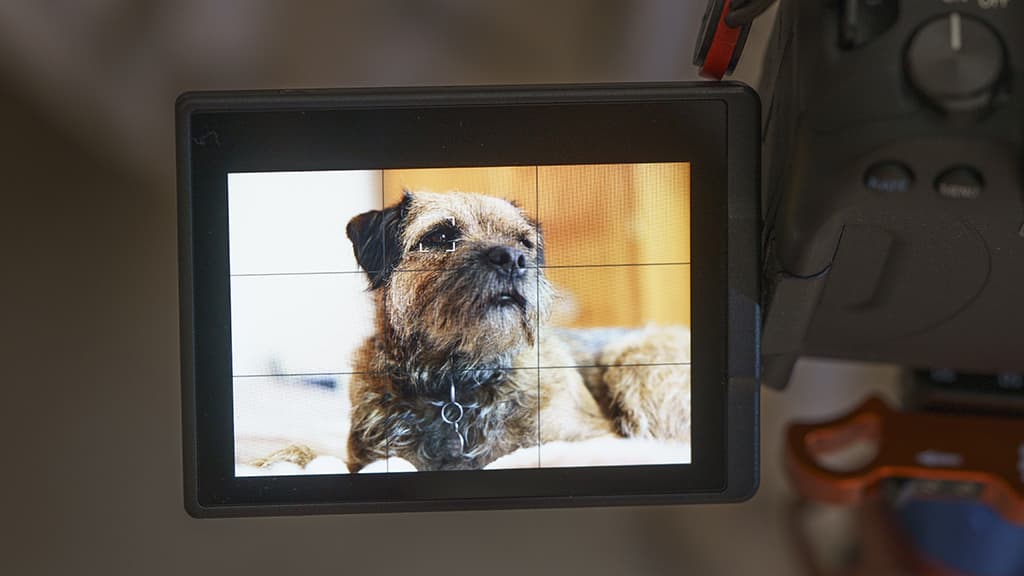
Select focus point
If the camera detects an eye in the frame, it will put a white square around it; when you half-press the shutter release it will focus on it and the square will turn green. If there’s more than one eye detected, arrows appear on either side of the selected eye – you can use the joystick to select another eye as
the focus point.
Fujfilm
Fujifilm’s autofocus system lets you target subjects precisely and track moving objects
Most of Fujifilm’s current X-series cameras have its fourth-generation X-Trans CMOS sensor paired with the X Process 4. This 26.1MP APS-C format sensor has phase detection pixels that combine with a contrast-detection system to facilitate the Intelligent Hybrid AF system which has 425 user-selectable AF points.
With so many points, you might think that it would be difficult or time-consuming to select the one that you want to use, but Fujifilm makes it easy and quick. Also, Fujifilm cameras like the X-S10 and X-T4 have a section of the menu that’s dedicated to focusing, so you can access the settings all from one place, but there are also some neat shortcuts.
It’s quick and easy to set up Fujifilm’s autofocus system to track moving subjects
Getting started
One of the first things that you may want to decide when setting up your Fujifilm camera is how many AF points you want to select from. There’s an option in the menu that lets you swap between 117 points in a 9×13 grid and 425 in a 17×25 grid.
I usually go for 425 because it gives you more scope to target exactly the point that you want in the scene. With that decided, you can then choose to use the points individually or in groups. You can do this using the Focus Area options in the main menu, but the quickest and easiest way is to set the AF mode in the Menu to ‘All’, then nudge the joystick on the back of the camera as if you’re going to select a point and rotate one of the command dials.
Going one way makes the area bigger while going the other makes it smaller. As the size of the area changes, you’ll see the name of the Focus Area mode change from Wide (Tracking in Continuous AF mode) to Zone and then to Single Point.
When you’ve selected the size of the area you want to use, tap the screen or use the joystick to move it to cover your subject in the viewfinder or on the screen. If Face/Eye Detection is turned on in the AF/MF section of the main or Quick menu, the camera will look for eyes and/or faces in the whole scene – not just within the selected AF area.
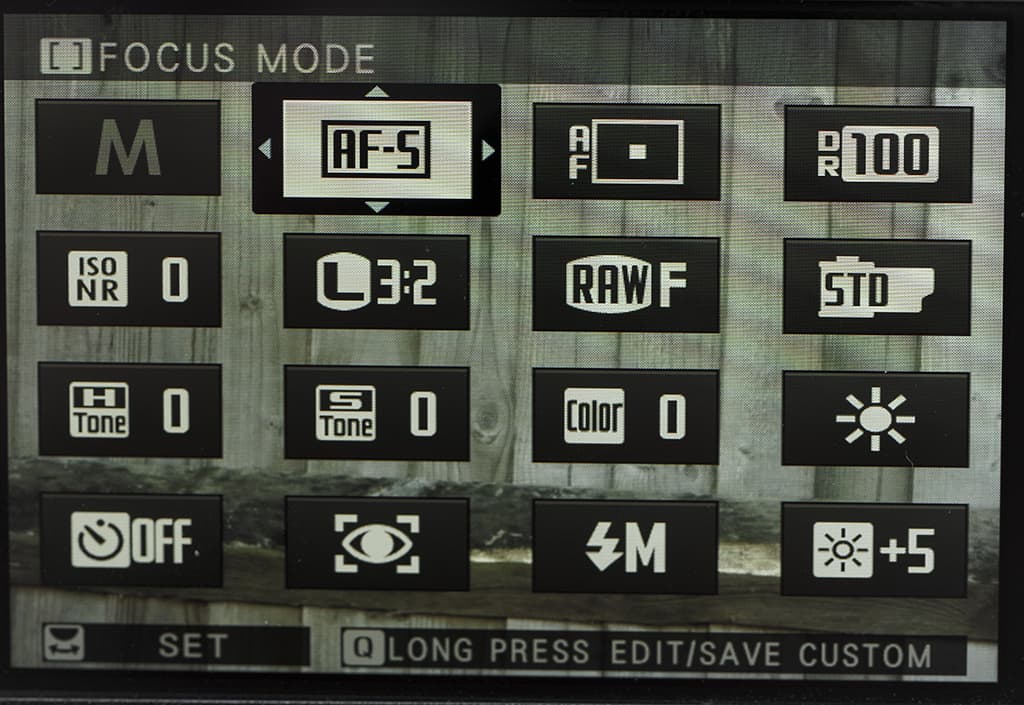
Some of Fujifilm’s cameras allow you to change focus mode as well as AF area via the Quick menu
You can even specify which eye should be targeted if you want. It’s well worth turning on the Eye Detection if you’re in a social setting or you’re photographing a portrait; however, with street scenes and the like, it’s prone
to latching onto eyes in advertisements and statues – that issue isn’t exclusive to Fujifilm though.
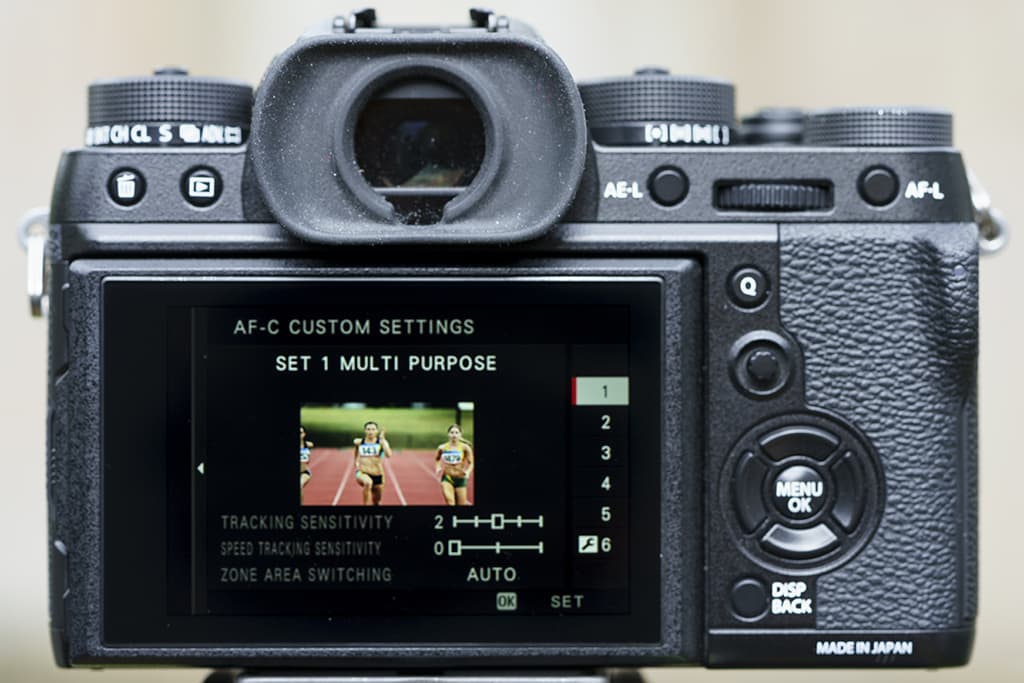
AF-C Custom Settings
Fujifilm’s enthusiast-level cameras have a selection of AF-C Custom Settings that dictate how the camera responds to certain subjects and situations. These can be tweaked, but it’s worth scrolling through the options and looking at the type of subjects they’re designed for and giving them a try before you start making adjustments.
Focus Mode
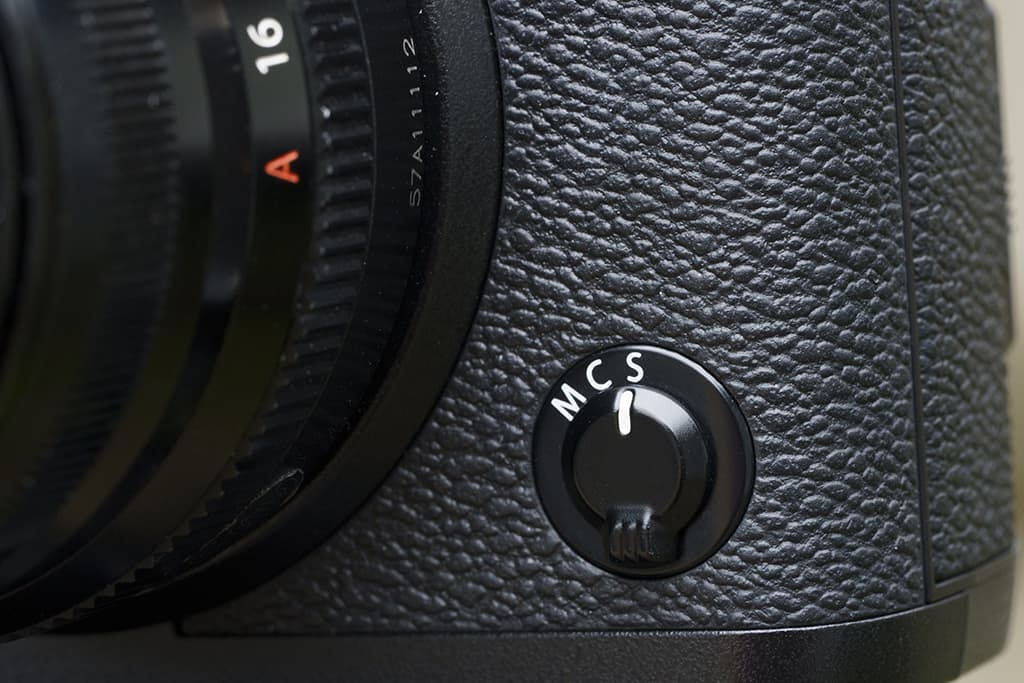
While the focus mode is set via the Quick or Main menu on Fujifilm cameras such as the X-E4 and S-X10, others like the X-T4 have a switch on their front near the lens mount to swap between Single AF, Continuous AF and Manual Focus mode. The switch makes it quicker to change the setting.
Nikon
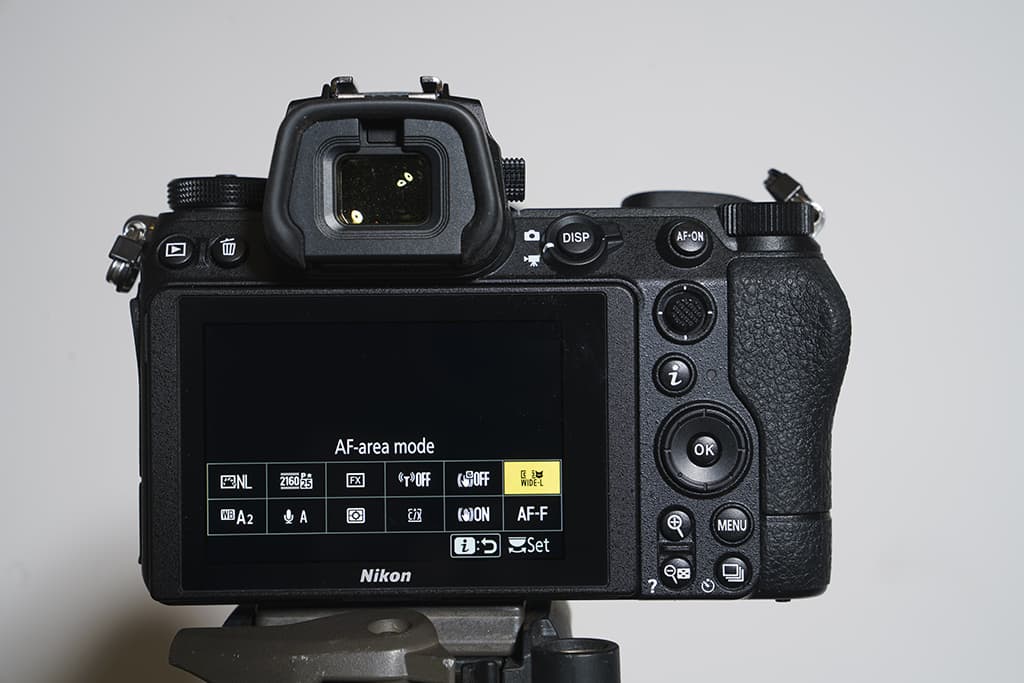
Nikon’s Z-series cameras have AF points covering 90% of the frame so you can compose with ease
Nikon’s mirrorless cameras have on-sensor phase detection pixels and use a hybrid AF system with between 209 and 493 AF points depending upon the model. All the cameras have AF points covering 90% of the imaging surface, which is great news for focusing on off-centre subjects.

Having AF points across 90% of the frame makes focusing on off-centre subjects a doddle
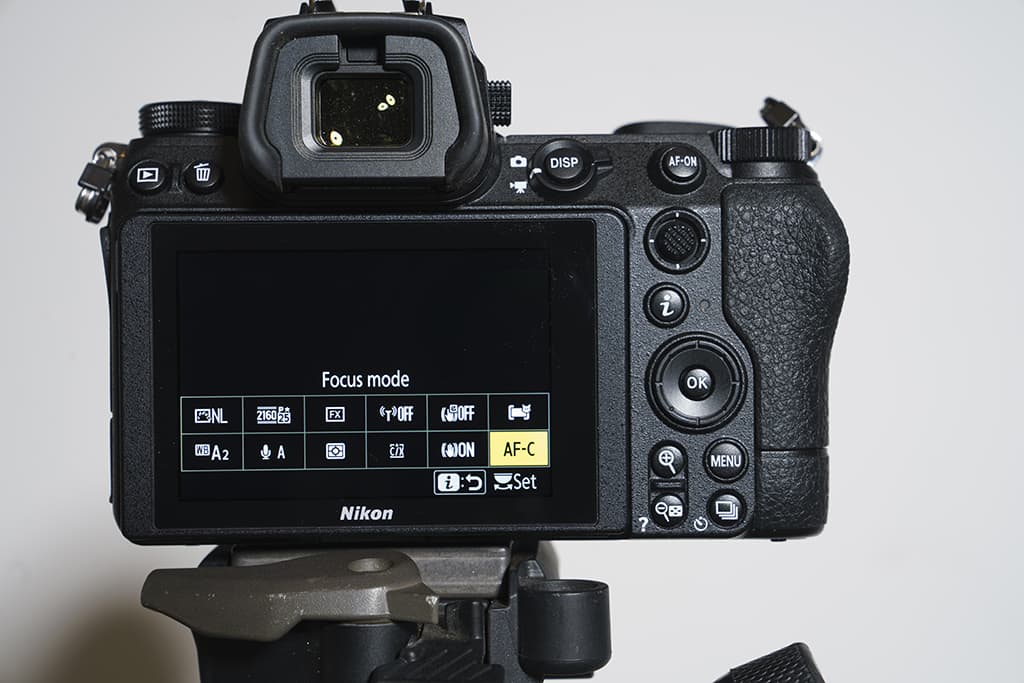
Nikon AF-Area modes
Nikon’s AF-Area modes allow you to select the focus point you want to use individually or in groups. The options available change depending on whether you have Single AF or Continuous AF mode selected. Here’s a breakdown of how the main AF-Area modes function:
The Z6 II and Z7 II have AF-Area modes for people and animals with options for wider coverage
Pinpoint AF and Single-point AF (AF-S)
These modes are great for targeting small stationary subjects but it takes a long time to move the point around the scene with the joystick in Pinpoint mode. But it’s a great choice when the camera is on a tripod and you can tap the screen to set the point.
Dynamic-area AF (AF-C)
This mode is ideal for moving subjects. It lets you select a point for focusing and the camera looks at it and the surrounding points to keep it sharp. As the AF area is larger than in Single-point AF mode, it’s easier to keep it over the subject.
Wide-area AF (Small) and Wide-area AF (Large)
These modes are useful when it’s hard to keep a single AF point or Dynamic Area AF point over a subject. The Large Wide-area AF is great when you have a rough idea of where the subject will be in the frame but it’s likely to move unpredictably, so you need a bigger area than the small version to keep the subject covered as it moves.
Wide-area AF (Large-people), Wide-area AF (Large-animals), Auto-area AF (people) and Auto-area AF (animals)
In these modes, the Z6 II or Z7 II look for the appropriate eyes within the frame, which is the majority of the imaging area with Auto-area mode and more targeted areas in the Wide-area modes. When multiple eyes are detected, use the joystick to select the one you want to focus on. These are great modes for portrait or pet photography. But they’re not so great for fast-moving subjects.
Auto-area AF (and Subject Tracking)
In this mode the camera selects the subject automatically, looking for objects close to the centre of the frame and near to the camera. If you press the ‘OK’ button, a white box appears at the centre of the frame. You then need to move the camera so that the box covers the subject and press ‘OK’ again.
The box will turn yellow and track the subject. The Subject Tracking works very well, and it’s great for keeping moving subjects sharp provided that you have time to set the point at the beginning.

Selecting the AF-area options
Eye Detection AF needs to be activated via the Custom Setting Menu on the Nikon Z 50, Z 5, Z 6 and Z 7. You also need to set ‘Face detection on’ or ‘Face and eye detection on’ to detect and focus on human subjects or ‘Animal detection on’ for animals.
The Focus mode and AF-area mode can be set via the main or ‘I’ menus, but it’s faster to press the FN2 button on the front of the camera while rotating the front and rear command dials.
Olympus
Olympus was quick to embrace subject recognition for focusing with its most advanced camera
Initially, only the OM-D E-M1 cameras in Olympus’s lineup featured hybrid focusing and used phase detection as well as contrast detection, but this was extended to the E-M5 series with the OM-D E-M5 Mark III. This means that the OM-D E-M10 line is the only one in Olympus’s interchangeable lens range to feature just contrast-detection focusing.
Nevertheless, all of Olympus’s most recent cameras have 121 AF points available for selection and, as usual, you can set the point you want to use by tapping on the screen or using the navigation pad. All of the most important settings, including the AF mode and AF area options, on Olympus cameras can be accessed via the Super Control Panel (SCP) which is accessed by pressing the ‘OK’ button.
The OM-D E-M5 Mark III features hybrid focusing and uses phase detection as
well as contrast detection
Once the panel appears on screen, you just double-tap on the feature that you want to adjust to reveal the available options and then use a control dial or the navigation pad to select the option you want before pressing ‘OK’. The Olympus OM-D E-M1 and E-M1X also have dedicated buttons to give a direct route to the focus mode options.
Much of the imaging area of Olympus’s latest cameras are covered by AF points, so you can focus close to the edges of the frame. You can also adjust the size of the AF area you want to use by pressing the dedicated AF area button or tapping the option in the Super Control Panel and then rotating the front control dial to toggle through the different-sized areas.
Face Priority and Face & Eye Priority can be activated and deactivated similarly, via the SCP or by pressing the AF area button and rotating the rear control dial to toggle through the options.
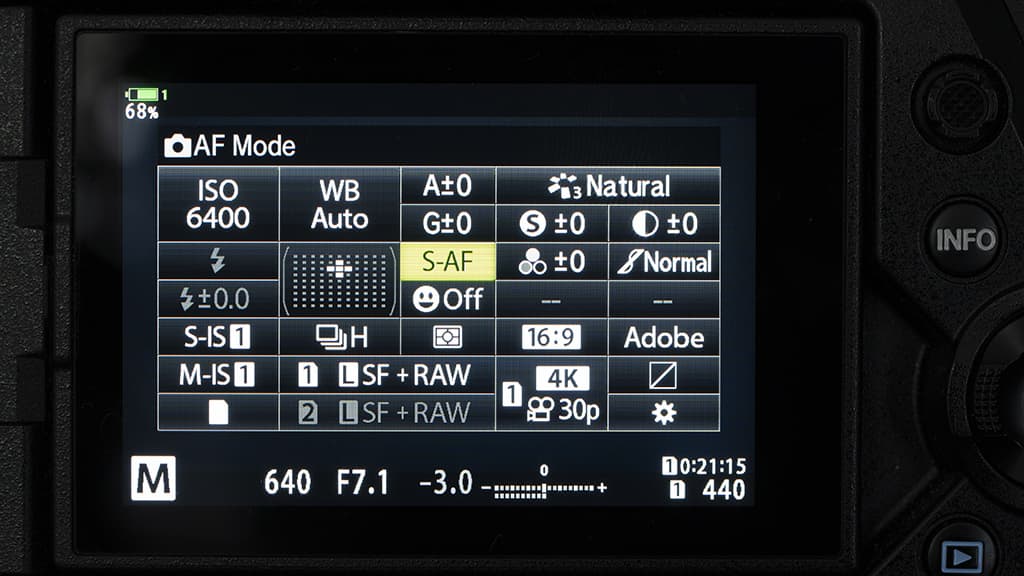
AF mode and AF area options can be easily accessed via the Super Control Panel (SCP)
Olympus OM-D E-M1X
The OM-D E-M1X has a Subject Tracking mode that uses AI to identify specific objects then track them, keeping them sharp. At launch, the options under this mode included trains, motorsports and aeroplanes, but a firmware update has added birds.
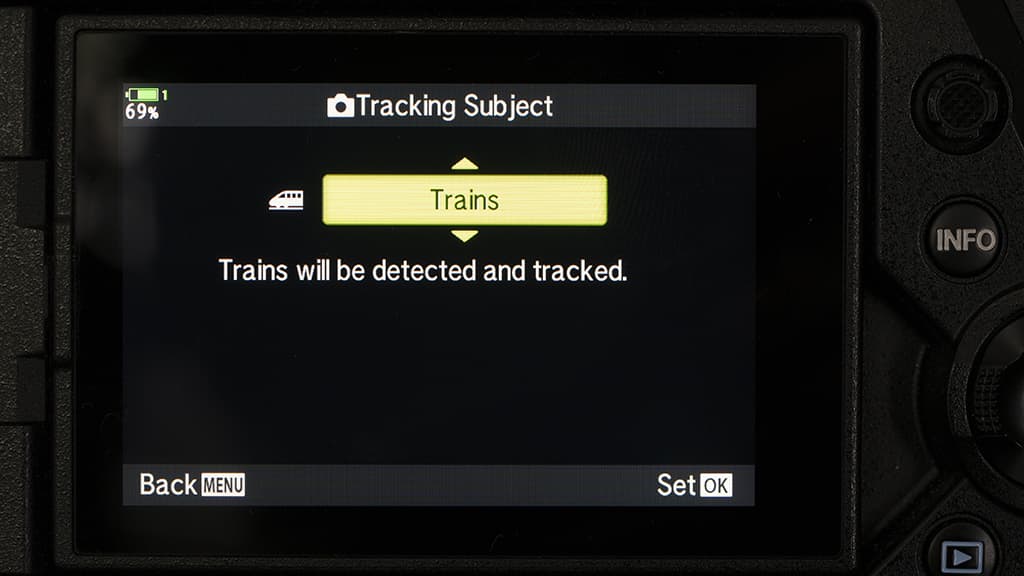
When the mode is active, the camera doesn’t just look for front-on shots of cars in motorsports mode, it can also find and track objects associated with motorsports such as crash helmets and the like. It’s activated as follows:
1 Press ‘Menu’ and then go to Custom Menu A3.AF/MF
2 Tap on ‘Tracking Subject’.
3 Select the type of subject you want to track and press the ‘OK’ button.
4 Exit the menu and press the ‘OK’ button again to open the Super Control Panel.
5 Tap on the Focus mode option and select C-AF + TR. The Continuous AF + Tracking works as normal until your chosen subject comes into the frame when the camera will put a box around it and start tracking it.
Continuous AF + Tracking
In addition to the usual focus modes, Single AF, Continuous AF and Manual, Olympus cameras also have a Continuous AF + Tracking mode. When this mode is selected, tap on the subject on the screen of your camera to track it around the frame. It can be very useful, but as a rule, it’s better to use C-AF and select an area large enough to
cover your subject, then keep it over the subject as you shoot. Olympus’s cameras with phase detection show their mettle with faster focus and much better subject-tracking than those that just rely on contrast detection.
Panasonic
Panasonic has stuck with contrast-detection AF but it has a trick to make it faster
Panasonic uses contrast-detection focusing in all its full-frame (S-series) and Micro Four Thirds (G-series) cameras. However, in 2014 it introduced its DFD (Depth From Defocus) technology to help to make it faster than usual.
The DFD system works by analysing the sharpness of two images taken at different focus distances. This enables the camera to understand which direction and how far to adjust the focus to render the subject sharp. Faster sensor readout speeds in Panasonic’s most advanced and recent cameras help to make the DFD technology even more effective, so the focusing is faster and more assured.
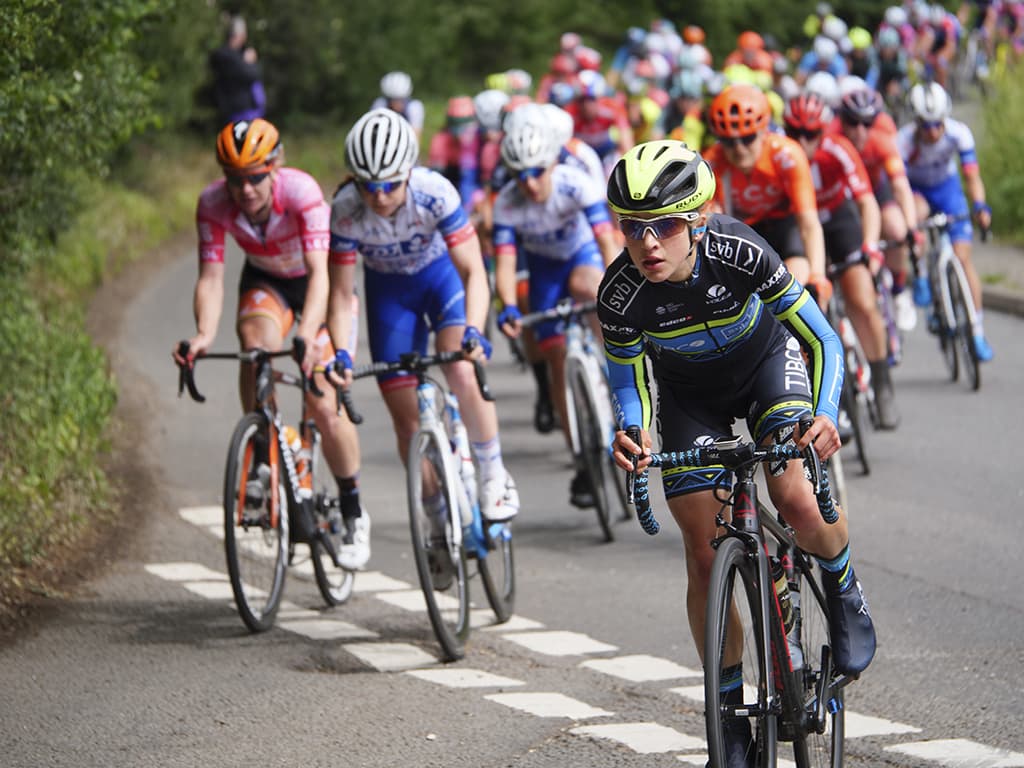
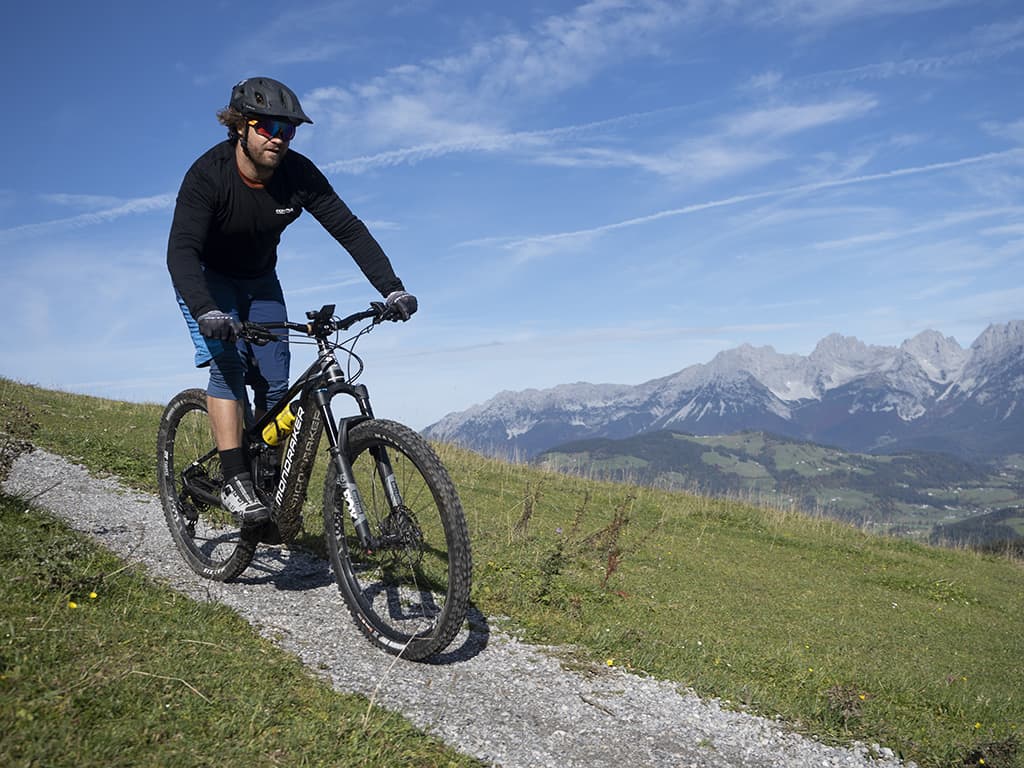
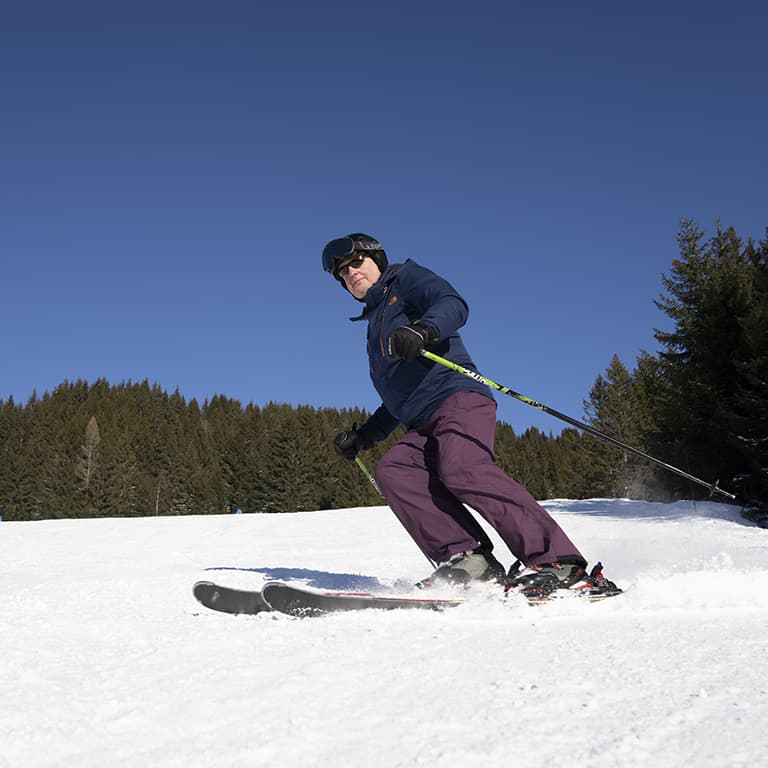
It might not be the choice of professional sports photographers, but I’ve photographed fast-paced sport like rugby and cycling with the likes of the Panasonic Lumix G9 and G90 and achieved a high hit rate. Because DFD technology needs to use detailed information about the lens’s image quality, it is only compatible with Panasonic’s lenses.
For action and sports photography, the Zone (Oval) mode is useful for fast-moving subjects
Getting started
Panasonic’s most photo enthusiast-centric mirrorless cameras, the Lumix G9, G90, S5 S1 and S1R, have a switch for selecting between manual, single, continuous and automatic AF (Auto Focus Flexible or AFF), which is quicker than dipping into a menu.
There’s also a dedicated button to access the autofocus point selection modes, which include Pinpoint, 1-Area, Custom Multi, 255-Area, Tracking and Face/Eye Detection. The full-frame S-series cameras work in a similar way but they add a few additional modes to the mix, Face/Eye/Body/Animal Detection, Zone (Vertical, Horizontal or Oval) and 1-Area+. Custom Multi and Zone are interesting options that enable you to define the shape and location of the active AF area.
For example, on the S1R, if you press the AF point selection button and highlight Zone (Vert./Horiz.) then nudge the joystick on the back of the camera down, you’ll see a grid of AF points with selected area in yellow. Rotating the front or rear control dial will increase and decrease the size of the band of selected focus points, while the joystick moves them and flips their orientation.
The Lumix G90 has a handy switch for selecting different AF settings quickly
While a line or band of AF might be useful on occasion – for example, if you’re photographing a running race looking down the track – I’ve found the Zone (Oval) to be the most useful for fast-moving subjects, but you have to keep the active area over the subject. Face/Eye/Body/Animal Detection Panasonic makes it easy to select Face/Eye/Body/Animal Detection mode on its advanced cameras as it’s amongst the AF point selection modes.
When it’s highlighted in the AF mode list, nudging the joystick on the back of the camera upwards toggles Animal detection on and off. Once that’s done, pushing the joystick down enables you to set the starting position for the AF point and begin taking photographs. The human eye detection is very good, and it’s certainly an asset for portrait photography.
The Animal Detection, however, doesn’t impress in comparison with Canon’s and Sony’s most recent versions of the function because it only identifies their bodies, not their eyes. If you’re shooting wide-aperture portraits of animals, you will need to use a single AF point to target the eyes.
AF Custom Setting
Panasonic’s enthusiast- and professional-level cameras have a selection of four customisation settings for the autofocus system in continuous AF mode. These control aspects such as how responsive the camera is to changes in the subject speed and distance and the speed with which it changes between AF areas.
As usual, the parameters can be adjusted, but it’s best to scroll through the four sets of settings first to find the one that best matches your situation.
Sony
Sony’s focusing system is simply superb at tracking moving subjects
Sony uses a hybrid AF system in its mirrorless cameras and they have hundreds of AF points. The popular full-frame A7 III, for example, has 693 phase detection points and 425 contrast detection points while the APS-C format A6600 has 425 points of each type, and they cover the majority of the imaging area.
Sony’s A7R IV has ‘Real-Time’ autofocus tracking, which is excellent for sport photography
While the Eye Detection system in Canon’s EOS R5 and R6 has a slight edge over Sony’s Eye AF system, it’s still very good and Sony’s ‘Real-Time’ AF Tracking in its most recent cameras leads the way for tracking moving subjects.
As usual, Sony cameras have a large collection of modes that aim to make selecting the active AF point easier.
Here’s how they operate:
Wide
In this mode, every focus point is available for automatic selection by the camera. When used with continuous autofocus mode (Sony calls it AF-C), Sony’s current cameras do a great job of spotting a
moving subject and activating the right points as it moves around the frame. It’s a great choice for photographing subjects that move unpredictably.
Zone
This is more targeted than Wide area AF and it’s a great choice for moving subjects if you know roughly where they will be in the frame. Unlike Wide mode, however, you need to keep the box over the subject in the frame. Center
This mode puts a rectangular focus area at the centre of the frame. This is handy if you like to focus and recompose as with an old-school SLR.
Flexible Spot
The go-to setting for stationary subjects, this can be set to small, medium or large as necessary to suit your subject. I tend to opt for small or medium.
Expand Flexible Spot
This is similar to Flexible Spot but the camera also uses the surrounding points if it needs to, so it’s helpful when the subject has low contrast.
Lock-on AF
Lock-on AF mode is only available in continuous autofocus mode. When it’s active, you set the starting focus point and, after the shutter button is half-pressed, the camera tracks the subject around the frame. The focus area can be set to several different sizes and starting points. This a useful mode for photographing moving subjects, but generally, Wide and Zone AF work so well, it’s not required.
Tracking AF
Sony’s most recent mirrorless cameras like the A1, A7R IV, A7S III, A7C, A6600 and A6400, have ‘Real-Time’ autofocus tracking. This has been developed using artificial intelligence (AI) to help the camera seamlessly track a subject, looking for eyes, faces and objects in that order of priority when Face/Eye Priority AF is activated via the menu. If this option is available on your camera, it’s brilliant for portrait, pet, sport, wedding and social photography.
As with Lock-on AF mode, this can beset to Tracking: Wide, Zone, Center, Spot (S, M, L) or Expand Spot to help you to target the most important area of the scene if necessary. You can also tap on the
subject in the screen on your camera to target it for tracking.
Face Registration
At weddings and celebrations there are usually a few people who take priority in any photographs. Sony’s ‘Face Registration’ system in cameras such as the A7 III, can help with this by enabling up to eight faces to be registered and prioritised for focusing. Once set, the camera will always target the person in the frame with the highest priority for focusing.
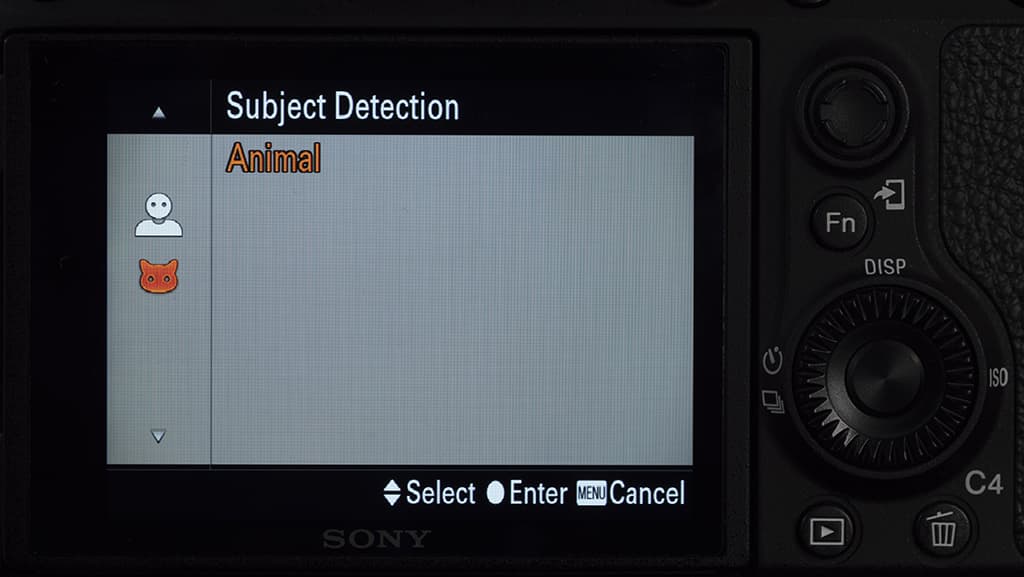
Using Eye AF
‘Face/Eye Priority in AF’ needs to be set to ‘on’ in a Sony camera’s main menu before it will scan for faces and eyes in the scene. Beneath that menu option, there’s ‘Face/Eye Subject’, which can be set to ‘Human’ or ‘Animal’ on some Sony cameras, and ‘Human’, ‘Animal’ or ‘Bird’ on the Alpha 1.
If you frequently swap between the different subject types, it’s worth customising a button to reach these options quickly, or at least adding ‘Face/Eye Subject’, to the ‘My Menu’, so you can find it quickly. If the Eye AF is active and a small AF area such as Center or Zone is selected, the camera will only focus on eyes within the selected AF area.
However, if ‘Face/Eye Frame Display’ is on, the camera will indicate when it has spotted a face in the frame, even if it’s outside of the AF area.
Further reading
Nobody Does It Better: Which maker has the best AF for moving subjects?