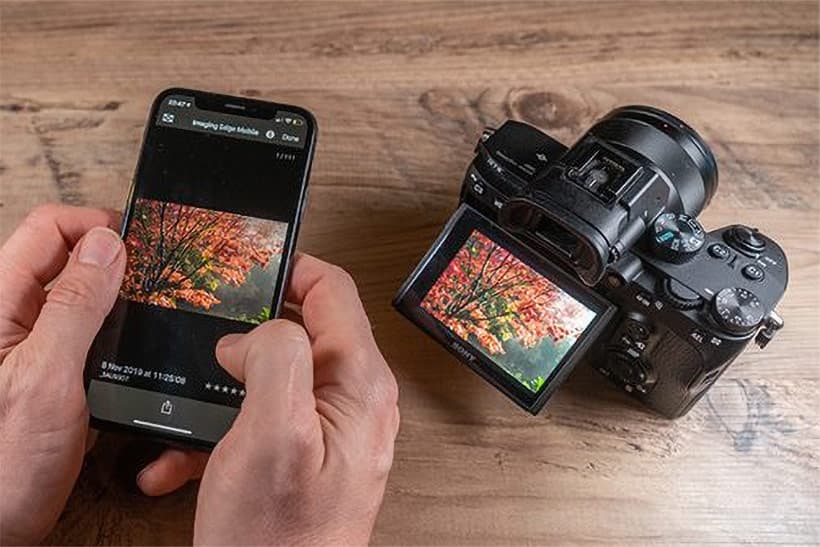
Depending on the model you own, Sony’s Imaging Edge Mobile App allows you to connect your phone to a Sony camera. Like many of the best photo editing apps for phones, it is available for both Android and iOS from Google Play Store and Apple Store.
If you have a Sony Alpha or RX, HX or even QX (remember them?) series camera that was introduced after 2012, there’s a good chance it will be supported. Exactly what functionality you will have can vary greatly from camera to camera so it’s worth visiting Sony’s support pages from where you can find out what your camera can do.
Although Sony Imaging Edge Mobile was only released in 2019, it is actually a rebranded version of the PlayMemories Mobile app that was previously used to connect a phone to a Sony camera. The idea behind the rebranding is that it brings the software in line with Sony’s Imaging Edge desktop software.
How to connect your phone to a Sony camera: different types of connection
There are a number of ways to connect your phone to a Sony camera; again, which you use will depend on your camera and smart device.
- Near Field Connectivity (NFC) is probably the fastest and smoothest method of making that initial connection, as this simply involves selecting the NFC option and touching the NFC points on the camera and your phone together to set up the Wi-Fi connection.
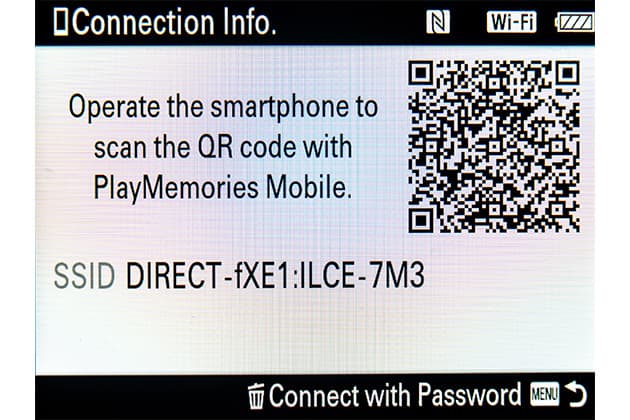
- QR codes provide the next method, which is equally as simple and the preferred option for iOS users. The app allows you to photograph a QR code on the camera which provides the information for the smartphone to create a Wi-Fi connection.
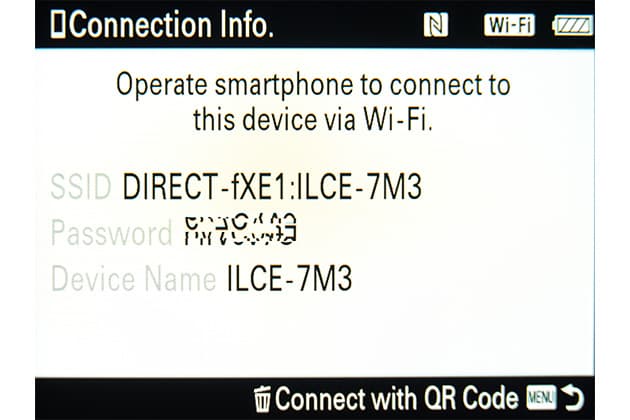
- Manual Wi-Fi connection – You can connect, the ‘old-fashioned’ way by selecting the camera in your phone’s Wi-Fi connection screen and using the password shown on the camera.
- A further option is to pair your camera and smartphone via Bluetooth to allow for location, time and date information to be added to the metadata of each image.
What happened to Sony PlayMemories mobile apps?
A few years ago, with the launch of the third generation of A7 cameras, Sony upgraded the operating system on its cameras, creating a new menu system. Although the new operating system is a big improvement, one thing that was lost was the ability to download and use PlayMemories mobile apps. The apps remain available for download until August 31, 2025.
If you have a compatible camera it is worth having a browse as there are some useful apps. Find the full selection at www.playmemoriescameraapps.com/portal. (You’ll see that the paid-for apps were discontinued in September 2023.)
Live view and remote shooting from your phone
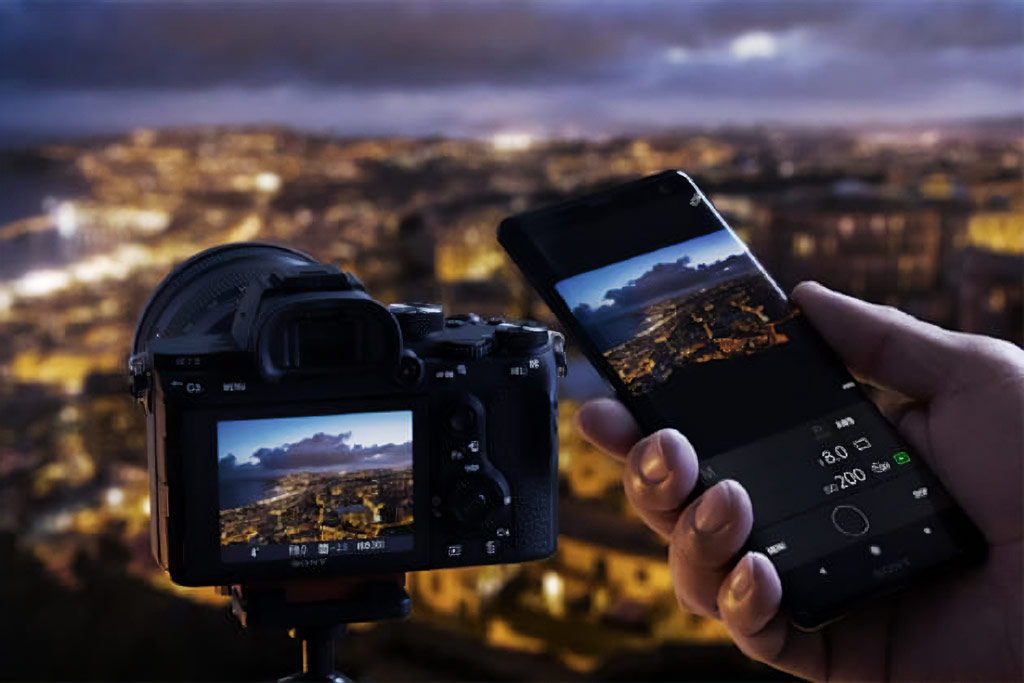
Once you have connected your phone to a Sony camera, you can shoot remotely. Like any app, the responsiveness of the live view display depends on the connection strength. Overall I found that there was little lag time between the onscreen camera display and the smartphone display; though like any such connection, there is the odd second where it stalls from time to time.
It is worth noting that the features available when remote shooting will vary according to the camera (and possibly firmware) that you are using. On cameras with a physical mode dial you cannot change the exposure mode ie. switch from aperture priority to shutter priority.
With the Sony A7 III, for example, if you are in aperture priority mode you can change the aperture, exposure compensation and ISO sensitivity. If the mode dial is set to Manual you will have full exposure control at your disposal.
Other settings that can be changed include the white balance, self timer, continuous shooting settings and the flash control settings. Sadly this is about it for the A7 III and other recent Sony cameras. It’s not possible to change the metering mode or any of the image styles such as Creative Styles, Picture Profiles or Dynamic Range Optimisation styles.
Autofocus
You’ll also notice one other major omission – the autofocus settings. With the Sony A7 III and the other more recent Sony cameras, there is still no option to change any of the autofocus settings, but perhaps most disappointing is that there is no way to change the AF point, or use touch AF from the phone. Given that this is most likely one of the key features of a remote control app, it does seem to be a huge oversight from Sony to not feature this.
Pressing the shutter button on the live view remote screen acts in exactly the same way as the camera’s physical camera shutter, so keep this in mind when remote shooting and set up the AF accordingly.
Video
With the camera switched to its video setting Imaging Edge Mobile allows for the exposure mode to be changed with the choice of manual, aperture or shutter priority, and the exposure settings changed accordingly.
As before the white balance can be set, but the Picture Profiles cannot, so that will need to be set beforehand. Recordings can be started and stopped using the app, and it is possible to transfer video, including 4K footage, from the camera to the smartphone, although transfer speed and playback is very dependent on the smartphone or tablet being used.
Image Transfer
Like the vast majority of cameras and apps, Imaging Edge Mobile only allows for the transfer of JPEG, and not raw, images. The JPEGs can be transferred in three sizes, VGA (640×480 pixels), 2MP, or full resolution. When you are shooting remotely a 2MP preview image is saved to your smartphone after the image has been taken.
Images can be transferred individually or in batches, and there is the option to select them either on the camera or on the smartphone screen. The Fn button makes it easy to call up the image transfer screen when in Playback mode, which saves having to delve deep into the camera’s main menu.
With regards to sizes, I would prefer another resolution in-between 2MP and full resolution. On cameras such as the A7R IV a 2MP or 61MP image is quite an extreme jump.
Using an iPhone XS and A7 III, it took less than three seconds to transfer a 2MP JPEG image, and around 17 seconds to transfer a full 24MP JPEG. Obviously these times will vary depending on your camera, phone, Wi-Fi connection and also the detail in the image, both in terms of resolution and file size due to JPEG compression.
The very latest Sony cameras can also transfer images in the background of the app, even when the camera is switched off. To take advantage of this feature you must have a Sony A9 (firmware 4.00 or higher is needed), A9 II, A7R IV, RX100 VI, RX100 VII, or newer models.
Once you’ve transferred your images, you can then edit photos in Snapseed or upload them straight to Instagram, etc.
Location data
By using a low-energy Bluetooth connection, the more recent Sony cameras can add location data to images. The first step is to pair the camera and phone via Bluetooth. Do this by selecting Network2>Bluetooth Function and switching to On. Then go to Network2>Bluetooth Function>Pairing; and then to Location Information Linkage in the Imaging Edge Mobile app and follow the simple onscreen instructions.
You should only need to set up and pair your smartphone and camera once. From this point, as long as Bluetooth remains set to ‘On’ on your camera, the camera and smartphone should pair automatically. Any images that you now shoot will take the location, date and time from your smartphone and add it to the metadata of the images that you shoot. It’s clever and most importantly, it works!
Sony Imaging Edge Mobile: Standout feature
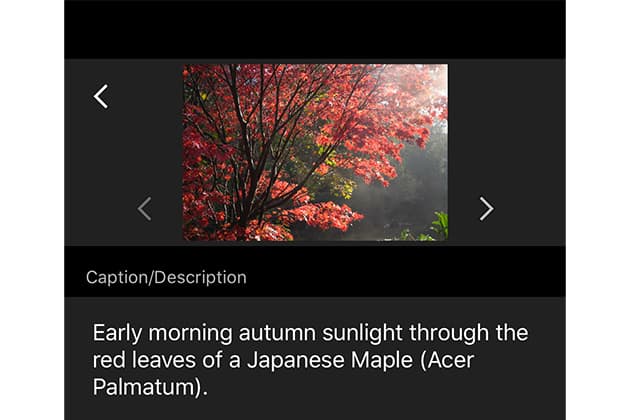
Transfer and Tag
Alongside the Imaging Edge Mobile app is a companion application simply called Transfer and Tag. The app is primarily designed for professional photographers needing to add titles, keywords and other information to images and then send them quickly to a File Transfer Protocol (FTP) server. However, it can also be useful for those wanting to back up important images to their own server back home whilst they are travelling.
The majority of new Sony cameras can be used, including the Sony A9, A9II, A7 III, Sony A7R III and Sony A7R IV can be used with the Transfer and Tag app. For more details on the app see support.d-imaging.sony.co.jp/app/transfer/en/instruction/index.php.
How to connect your phone to a Sony camera
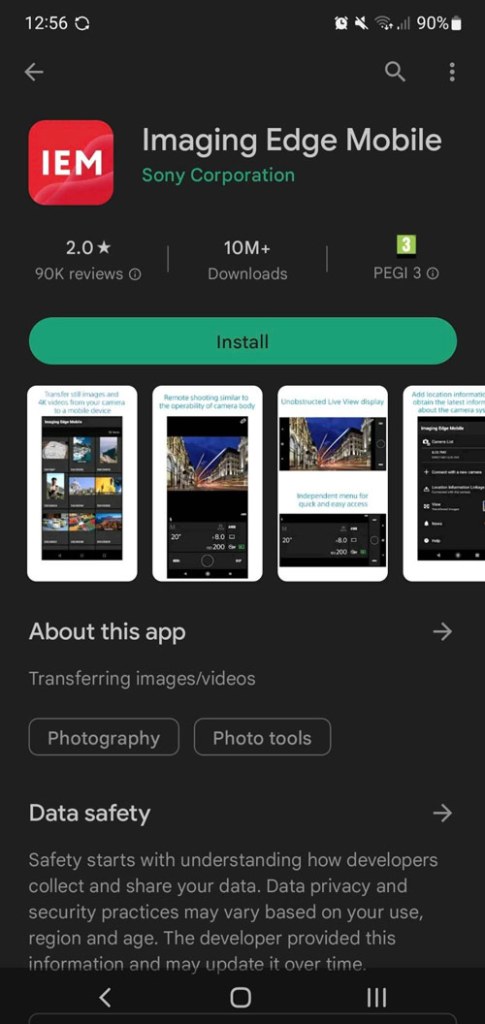
1. Search and download for free
Download the Sony Imaging Edge app from the Google Play or iOS App Store on your smartphone or tablet. On your phone make sure that you have both Bluetooth and Wi-Fi turned on.
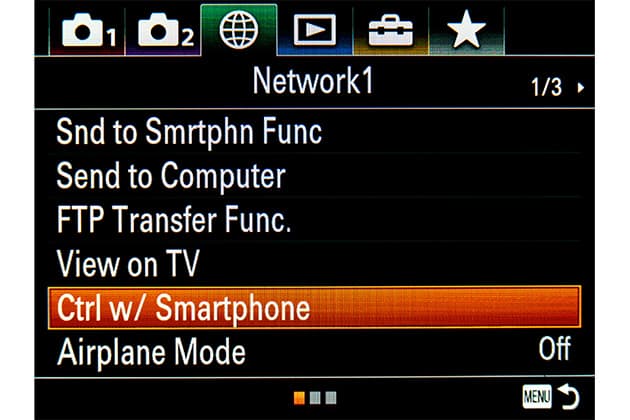
2. Connection settings
With the app installed, open the connection settings on your compatible Sony camera. The location may vary depending on the camera, but on the A7 III, it can be found at Network1 > Ctrl w/ Smartphone.
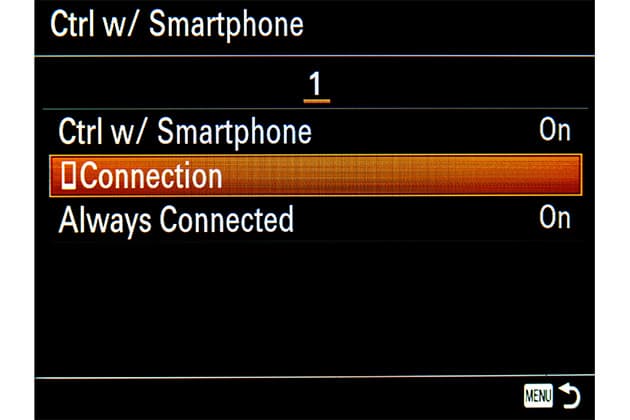
3. Wi-Fi signal
On the Ctrl w/Smartphone screen select Connection, which will open the connection screen and start emitting a Wi-Fi signal from the camera.
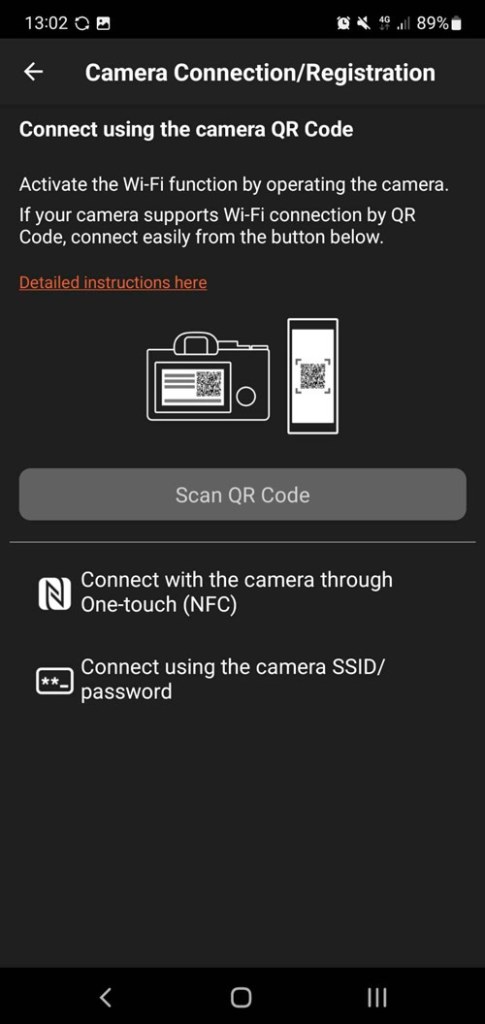
4. Pairing with NFC
On the Sony Imaging Edge app you should now select your connection method. For NFC select Scan NFC on the camera on the app and just touch the NFC points on your camera and smartphone together.
5. Photograph the QR code
If connecting via QR code, select this option in the app which will open the phone’s camera and allow you to photograph the QR code on the camera. Allow the connection to take place. Your smartphone should now be connected.
6. Connecting manually
Alternatively, you can connect manually. Search for your camera’s Wi-Fi connection and use the password displayed on the camera to allow the Wi-Fi to connect. Once your camera and smartphone are paired via Wi-Fi, open the app.
Pros
+ 24MP JPEG transferred in 17 secs (A7 III + iPhone XS)
+ iOS and Android support
+ Professional features available for free
+ Full-resolution JPEG transfer
+ NFC connectivity
Cons:
– No autofocusing control
– App looks a little dated
– A few quirks in terms of operation
Related reading
- Best Sony cameras
- Best Sony E-Mount lenses
- Best photo apps for your smartphone
- How to connect your camera to your smartphone
- 10 years of Sony A7 – the camera that killed the DSLR
Follow AP on Facebook, Twitter, Instagram, YouTube and TikTok.

