
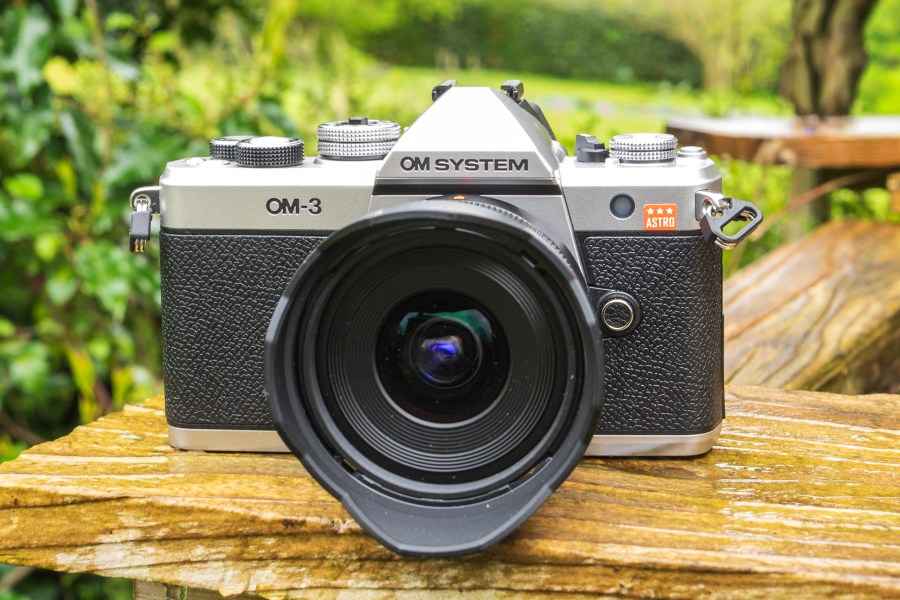
The OM System OM-3 Astro is a version of the firm’s OM-3 camera that’s optimised for astrophotography. This makes it an interesting proposition. Essentially, it is the body of an OM-3 with a dedicated IR cut filter in front of the sensor, that’s tuned for Hydrogen Alpha wavelengths in order to view and capture vivid red nebulae and sharp celestial details. However, simply adjusting the IR filter in front of the sensor would not be quite so useful were it not for a series of very interesting tweaks, both basic and computational, that play to the strengths of OM System bodies, but which are calibrated specifically for night skies.
OM System OM-3 Astro at a glance:
- $2500 / £1899 body-only
- 20MP Four Thirds sensor
- Astro-dedicated IR cut filter
- Starry Sky autofocus
- Live View Boost for night composition
- High Res stacking feature
- Custom white balance and colour settings for night shooting
First is that the fabulous Starry Sky Autofocus is now automatically set to the AF On button. Secondly, the back LCD screen uses Live View Boost/Night Vision to help frame up your shots without the need of a torch to place the foreground properly. Also, three of the Custom settings are already dialled in: C1 and C2 for starry skies and starry skies with landscapes respectively, with both already set up for Handheld High Res mode, and C3 for single long exposures. White balance and Colour Modes are already pre-set, too, to save further adjustments.
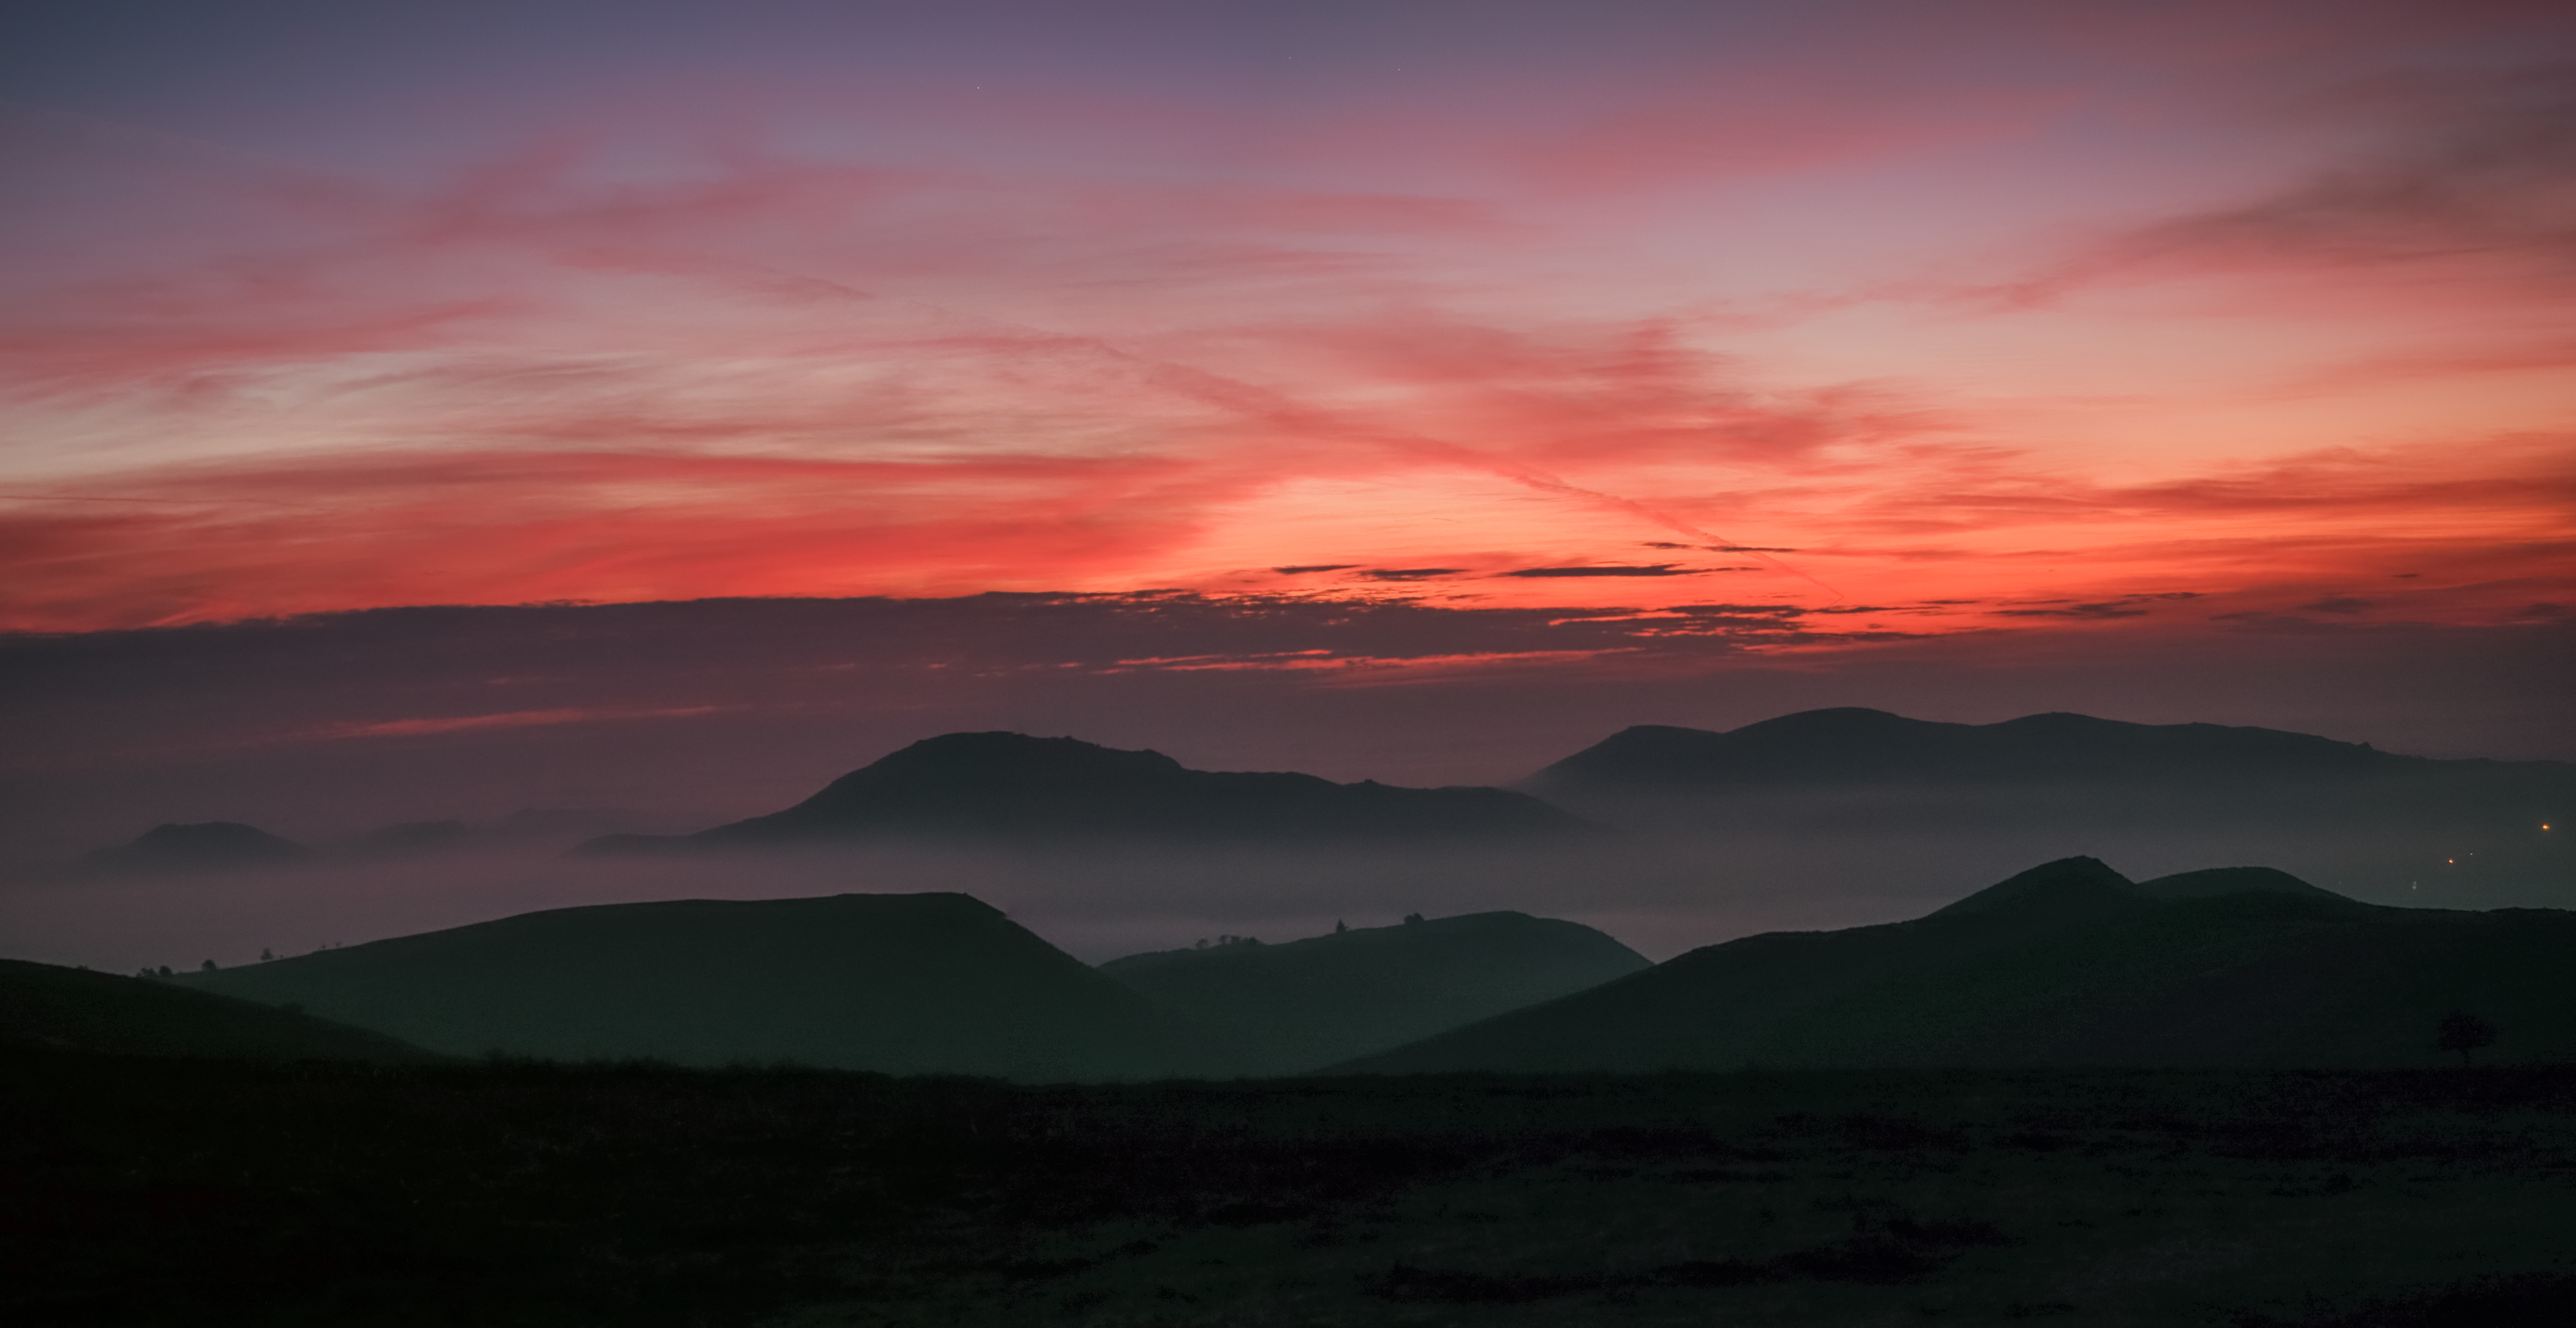
First impressions are that once again OM System is doing its best to reduce the difficulties in achieving beautiful photos. In this sense, it is possibly trying to appeal to two audiences – beginners who just want to set up a shot and get their first milky way/sky pics, but also more experienced photographers who want to take advantage of the tools on offer to develop their night sky work further. Please do note it’s not good idea to buy an OM-3 Astro to use it both for stars and daylight shots, as it gives a quite extreme red tint for the latter. However as we’ll see, this can work well for dawn landscape photos.
For a detailed breakdown on how to shoot the stars, read our complete guide to astrophotography.
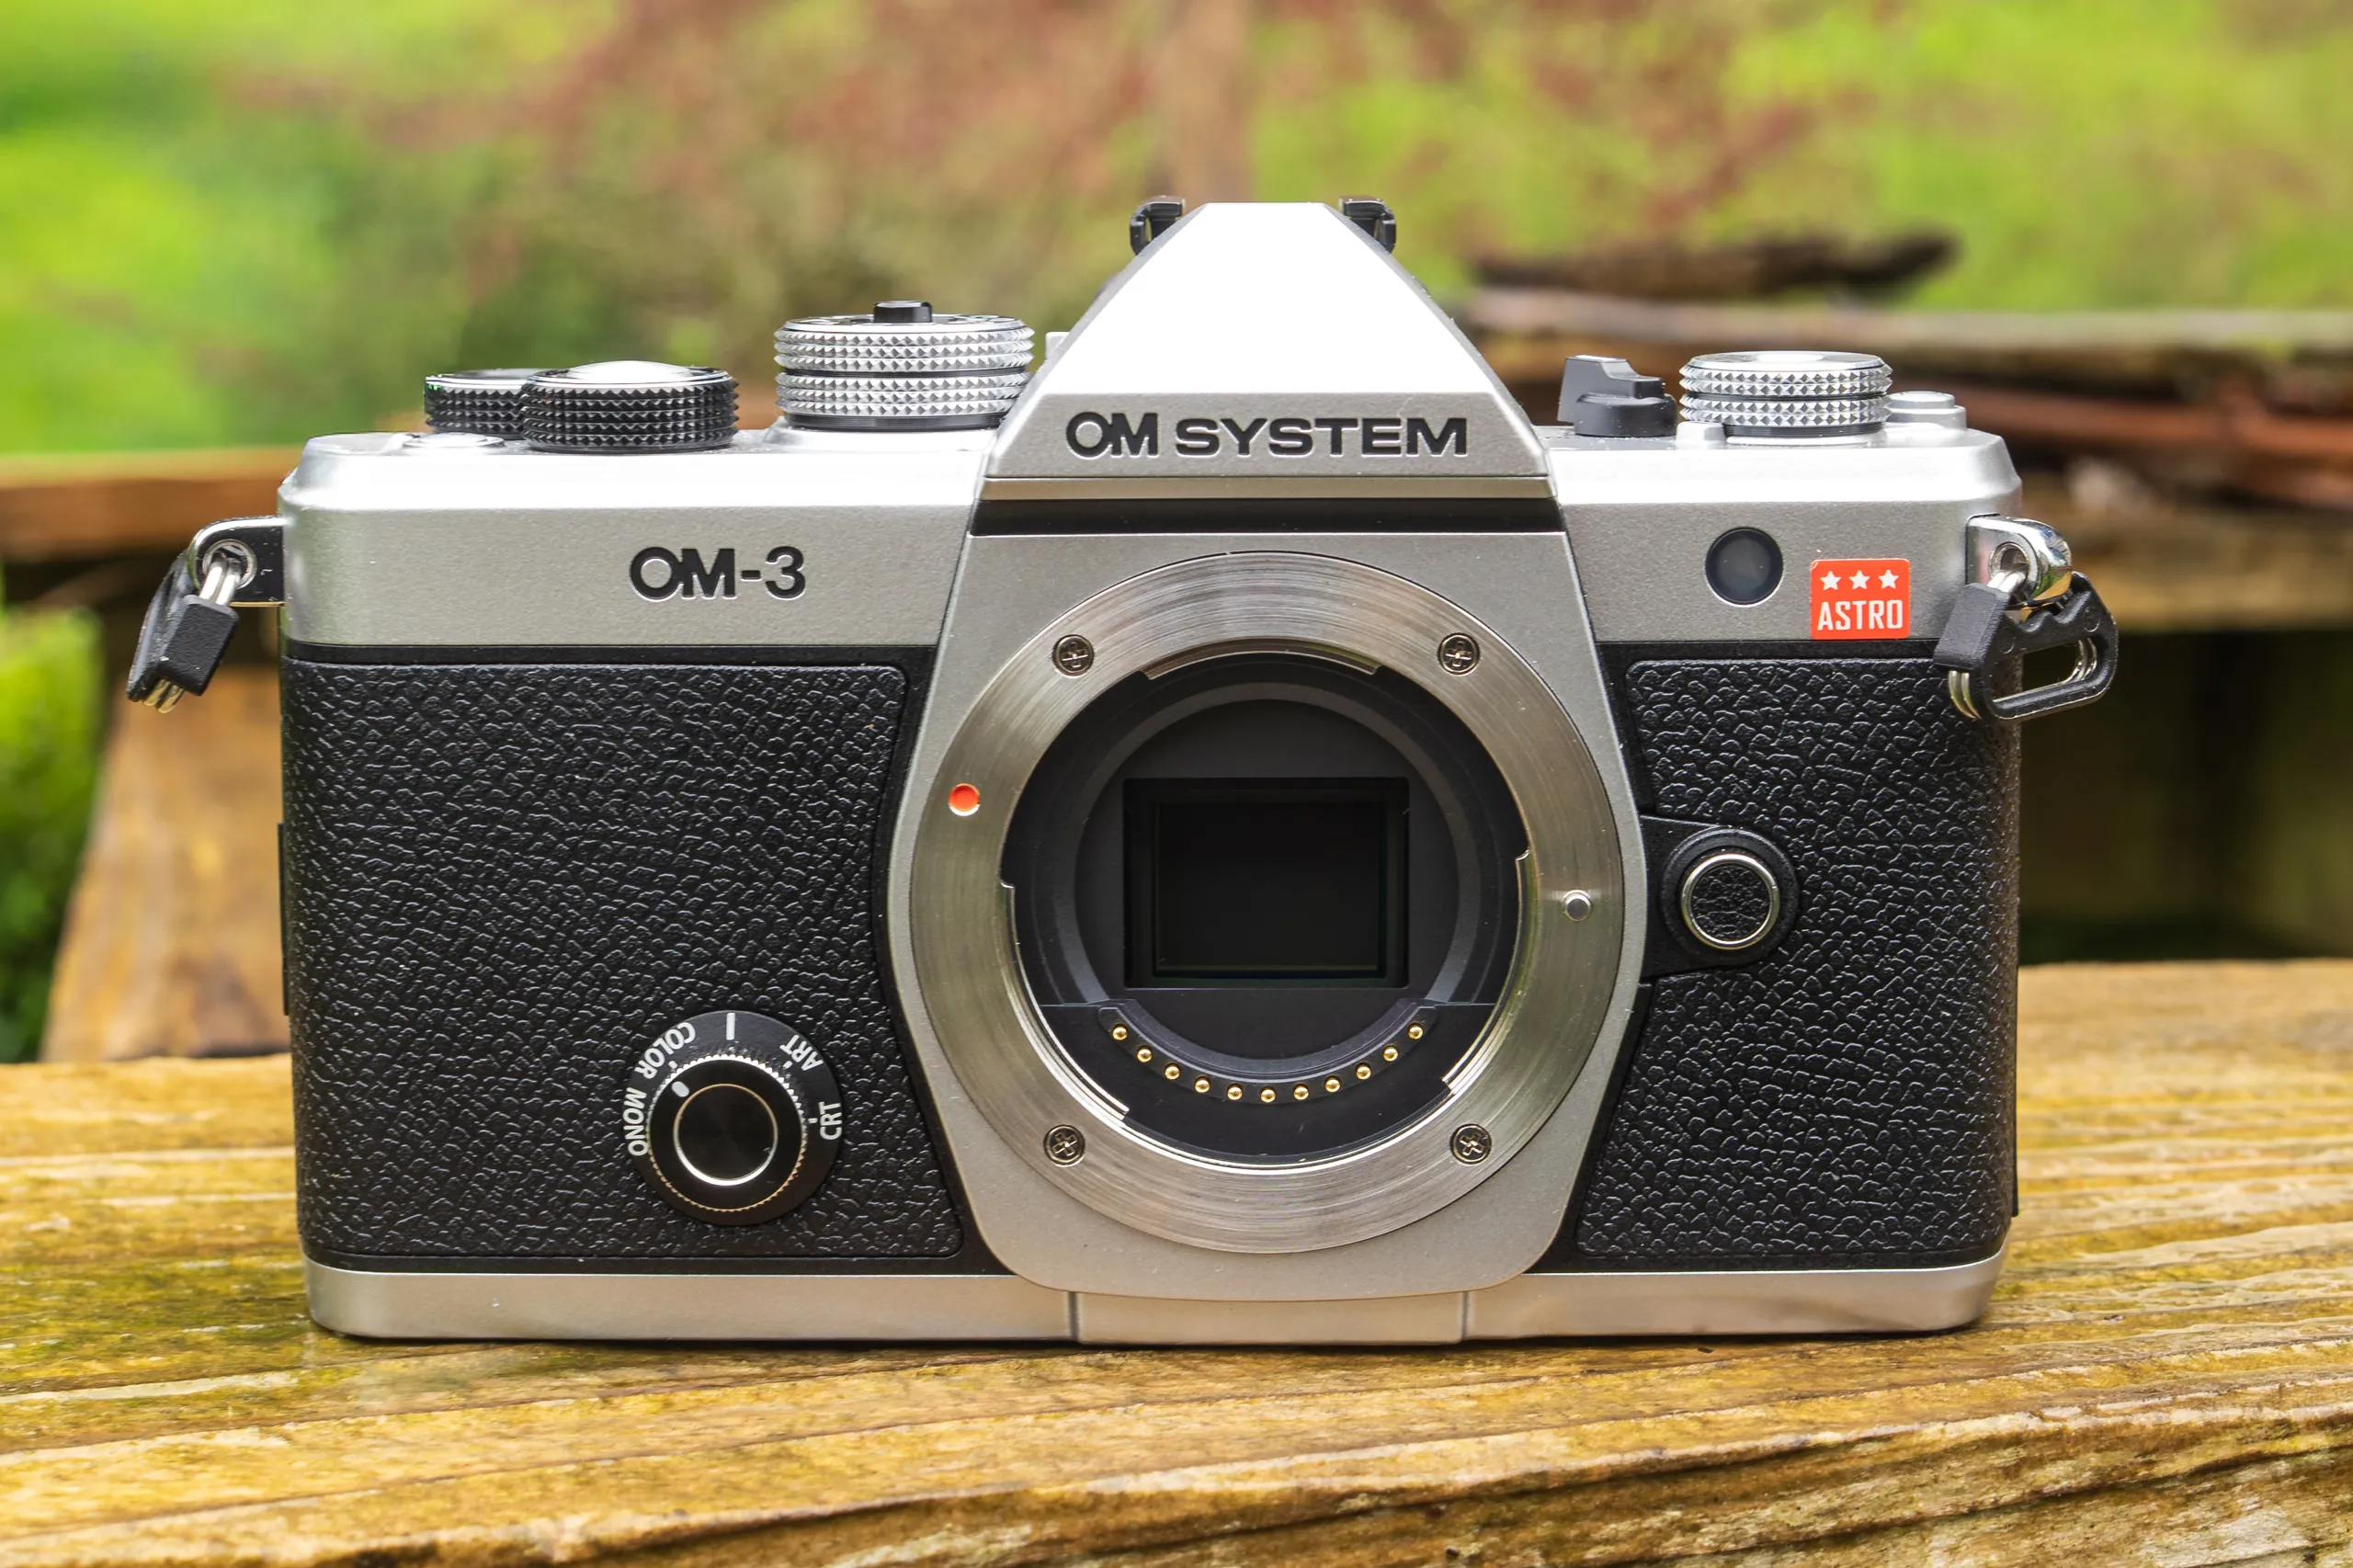
I was lucky enough to get one of the first of these cameras in the UK to have a play, and it’s also the first OM-3 I have handled. There have been comments about the lack of a grip but for Astro, this is irrelevant, as the camera will be on a tripod all the time.
OM System OM-3 Astro – In the middle of the night
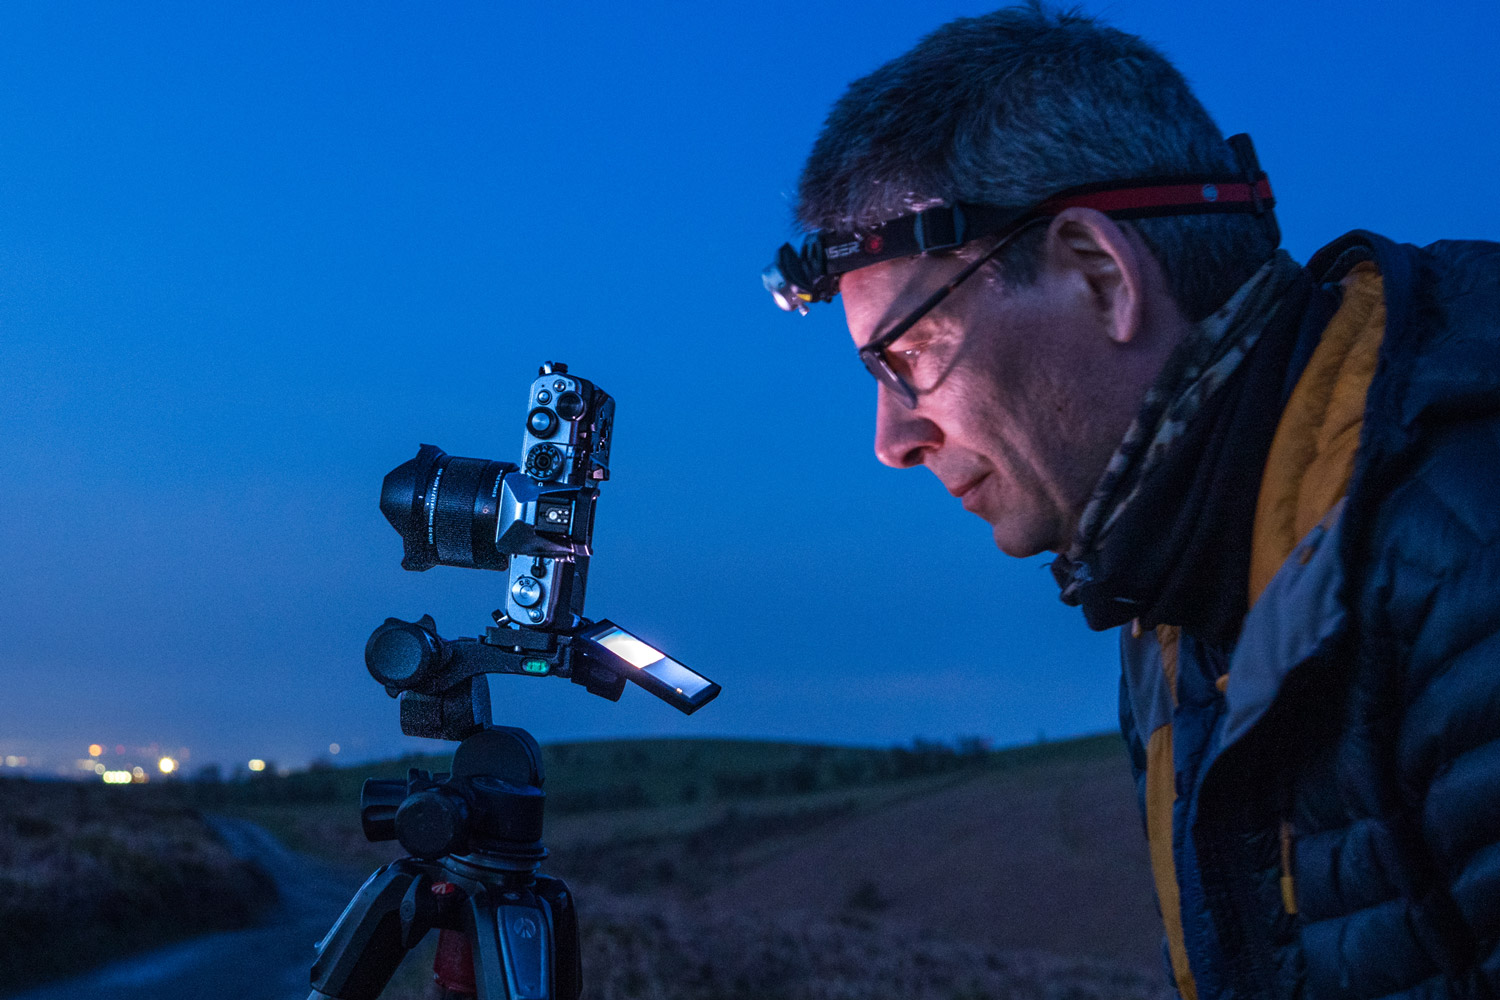
During March when I was starting work with this body, the Milky Way is very unobliging – requiring getting up at 1.30am and being up in the hills near me by 2am. At this time of year, the core of the Milky Way is just above the horizon. The Long Mynd nature reserve in Shropshire is classed as a Dark Sky Discovery Site, which is hilarious, as sadly it really is not. When I started Astro in 2014, there was some light pollution from local towns, but it has got markedly worse – so I had to work with what I had.
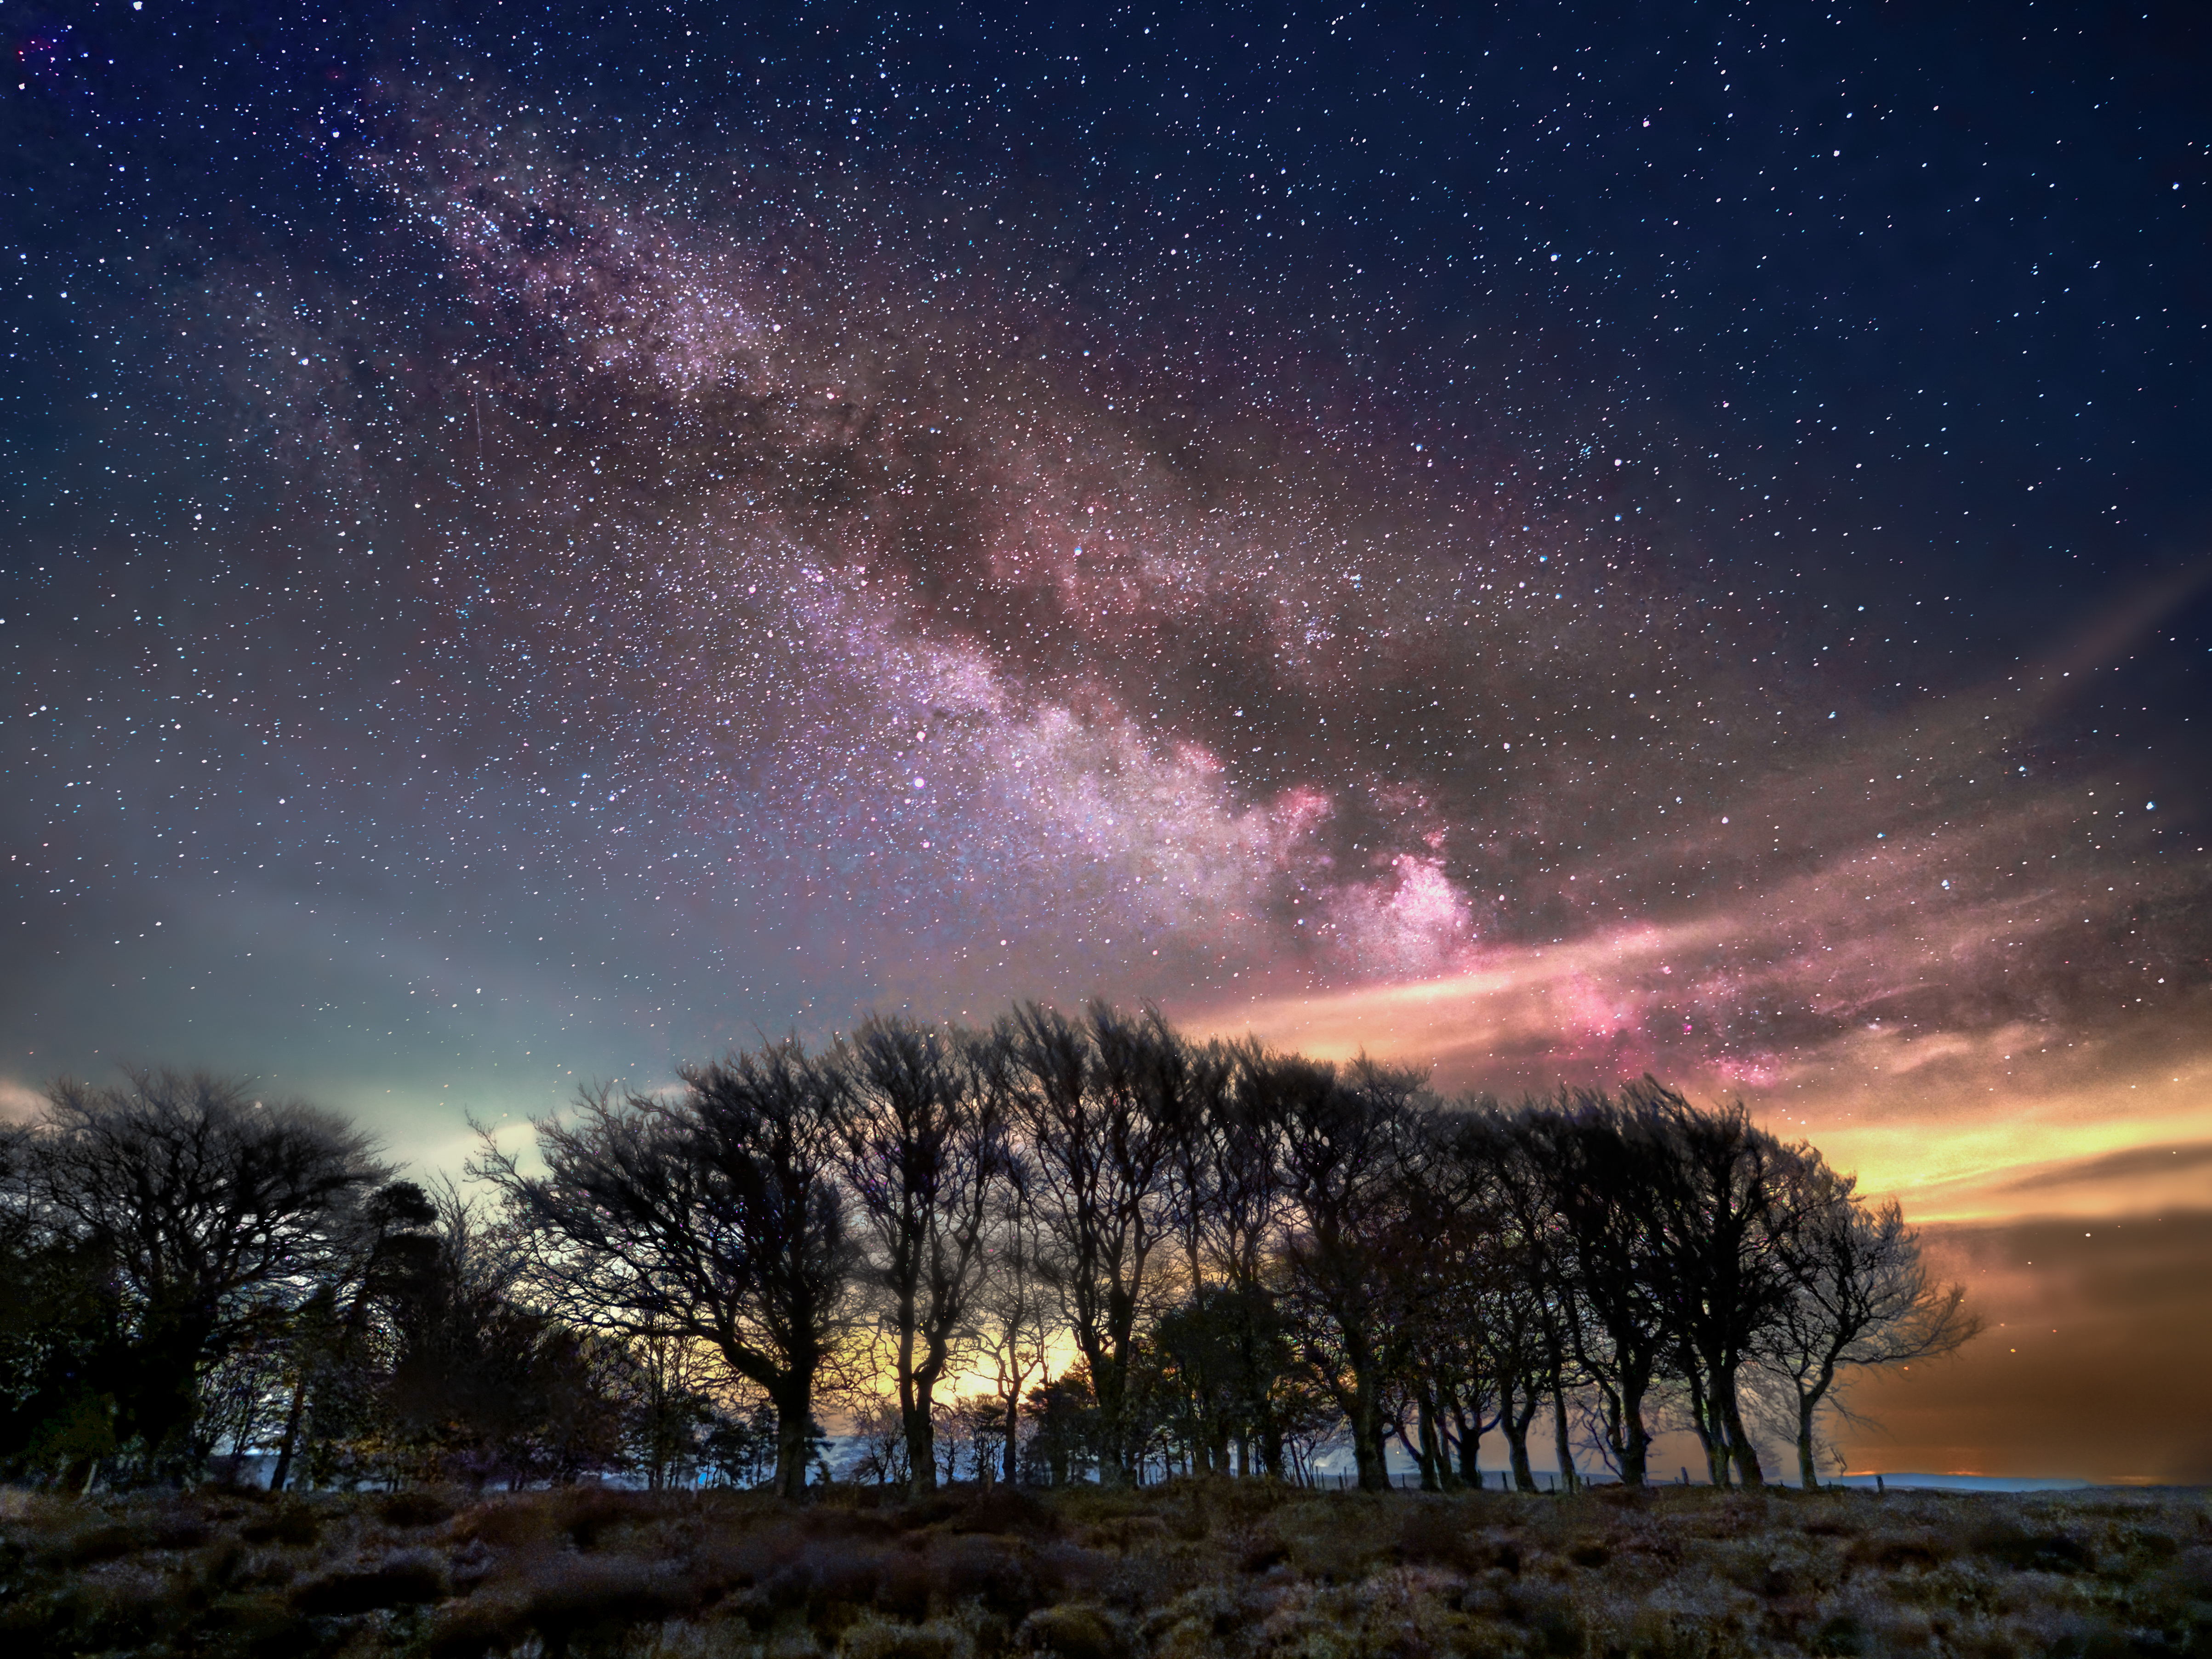
Once up on top of the Mynd, I headed to the bog pools and reeds to set up my shot. Putting up my tripod and aiming at the trees, I could just see the Milky Way with my bare eyes, but the Live View Boost on my back screen meant I could instantly frame up. Once I had the camera level with my geared head (which is very much recommended for astro, as you can make minute adjustments quickly), it was time to dial in my settings. In this case with my Panasonic Leica DG 9mm F1.7, it was 20 seconds at F1.7 and ISO 6400.
By the way, let’s dispel the myth that high ISO is only the preserve of full-frame cameras. The stacked sensor in the OM1/OM-3 series of bodies can easily shrug off noise, especially with software like DxO Deep-Prime or the denoise tool in Lightroom. I will come to the other noise trick this body supplies shortly.
OM System OM-3 Astro – Starry Sky AF
Although this autofocus feature is available on other bodies, the way it is implemented in the OM-3 Astro is a delight and a game changer. I cannot think of how many shoots over the years where I have come home only to see out-of-focus stars on my computer screen. If you have spent considerable time and effort to capture night skies, this is a basic and costly mistake.
Once you have used Night Vision to frame your shot, you can use the arrows on the d-pad to move your green focus box to a spot in the sky where the stars are most visible. Simply press the AF ON button, and it will spend a while focusing on the stars and confirm once AF has been achieved. This feature, found in the menu, has two settings, Speed, which is faster, and Accuracy, which does what it says on the tin, and the one that is automatic for C1 And C2 dial settings. No more manual focus to infinity and hope for the best. In this game, you need pin sharp stars and right focus is literally the foundation.
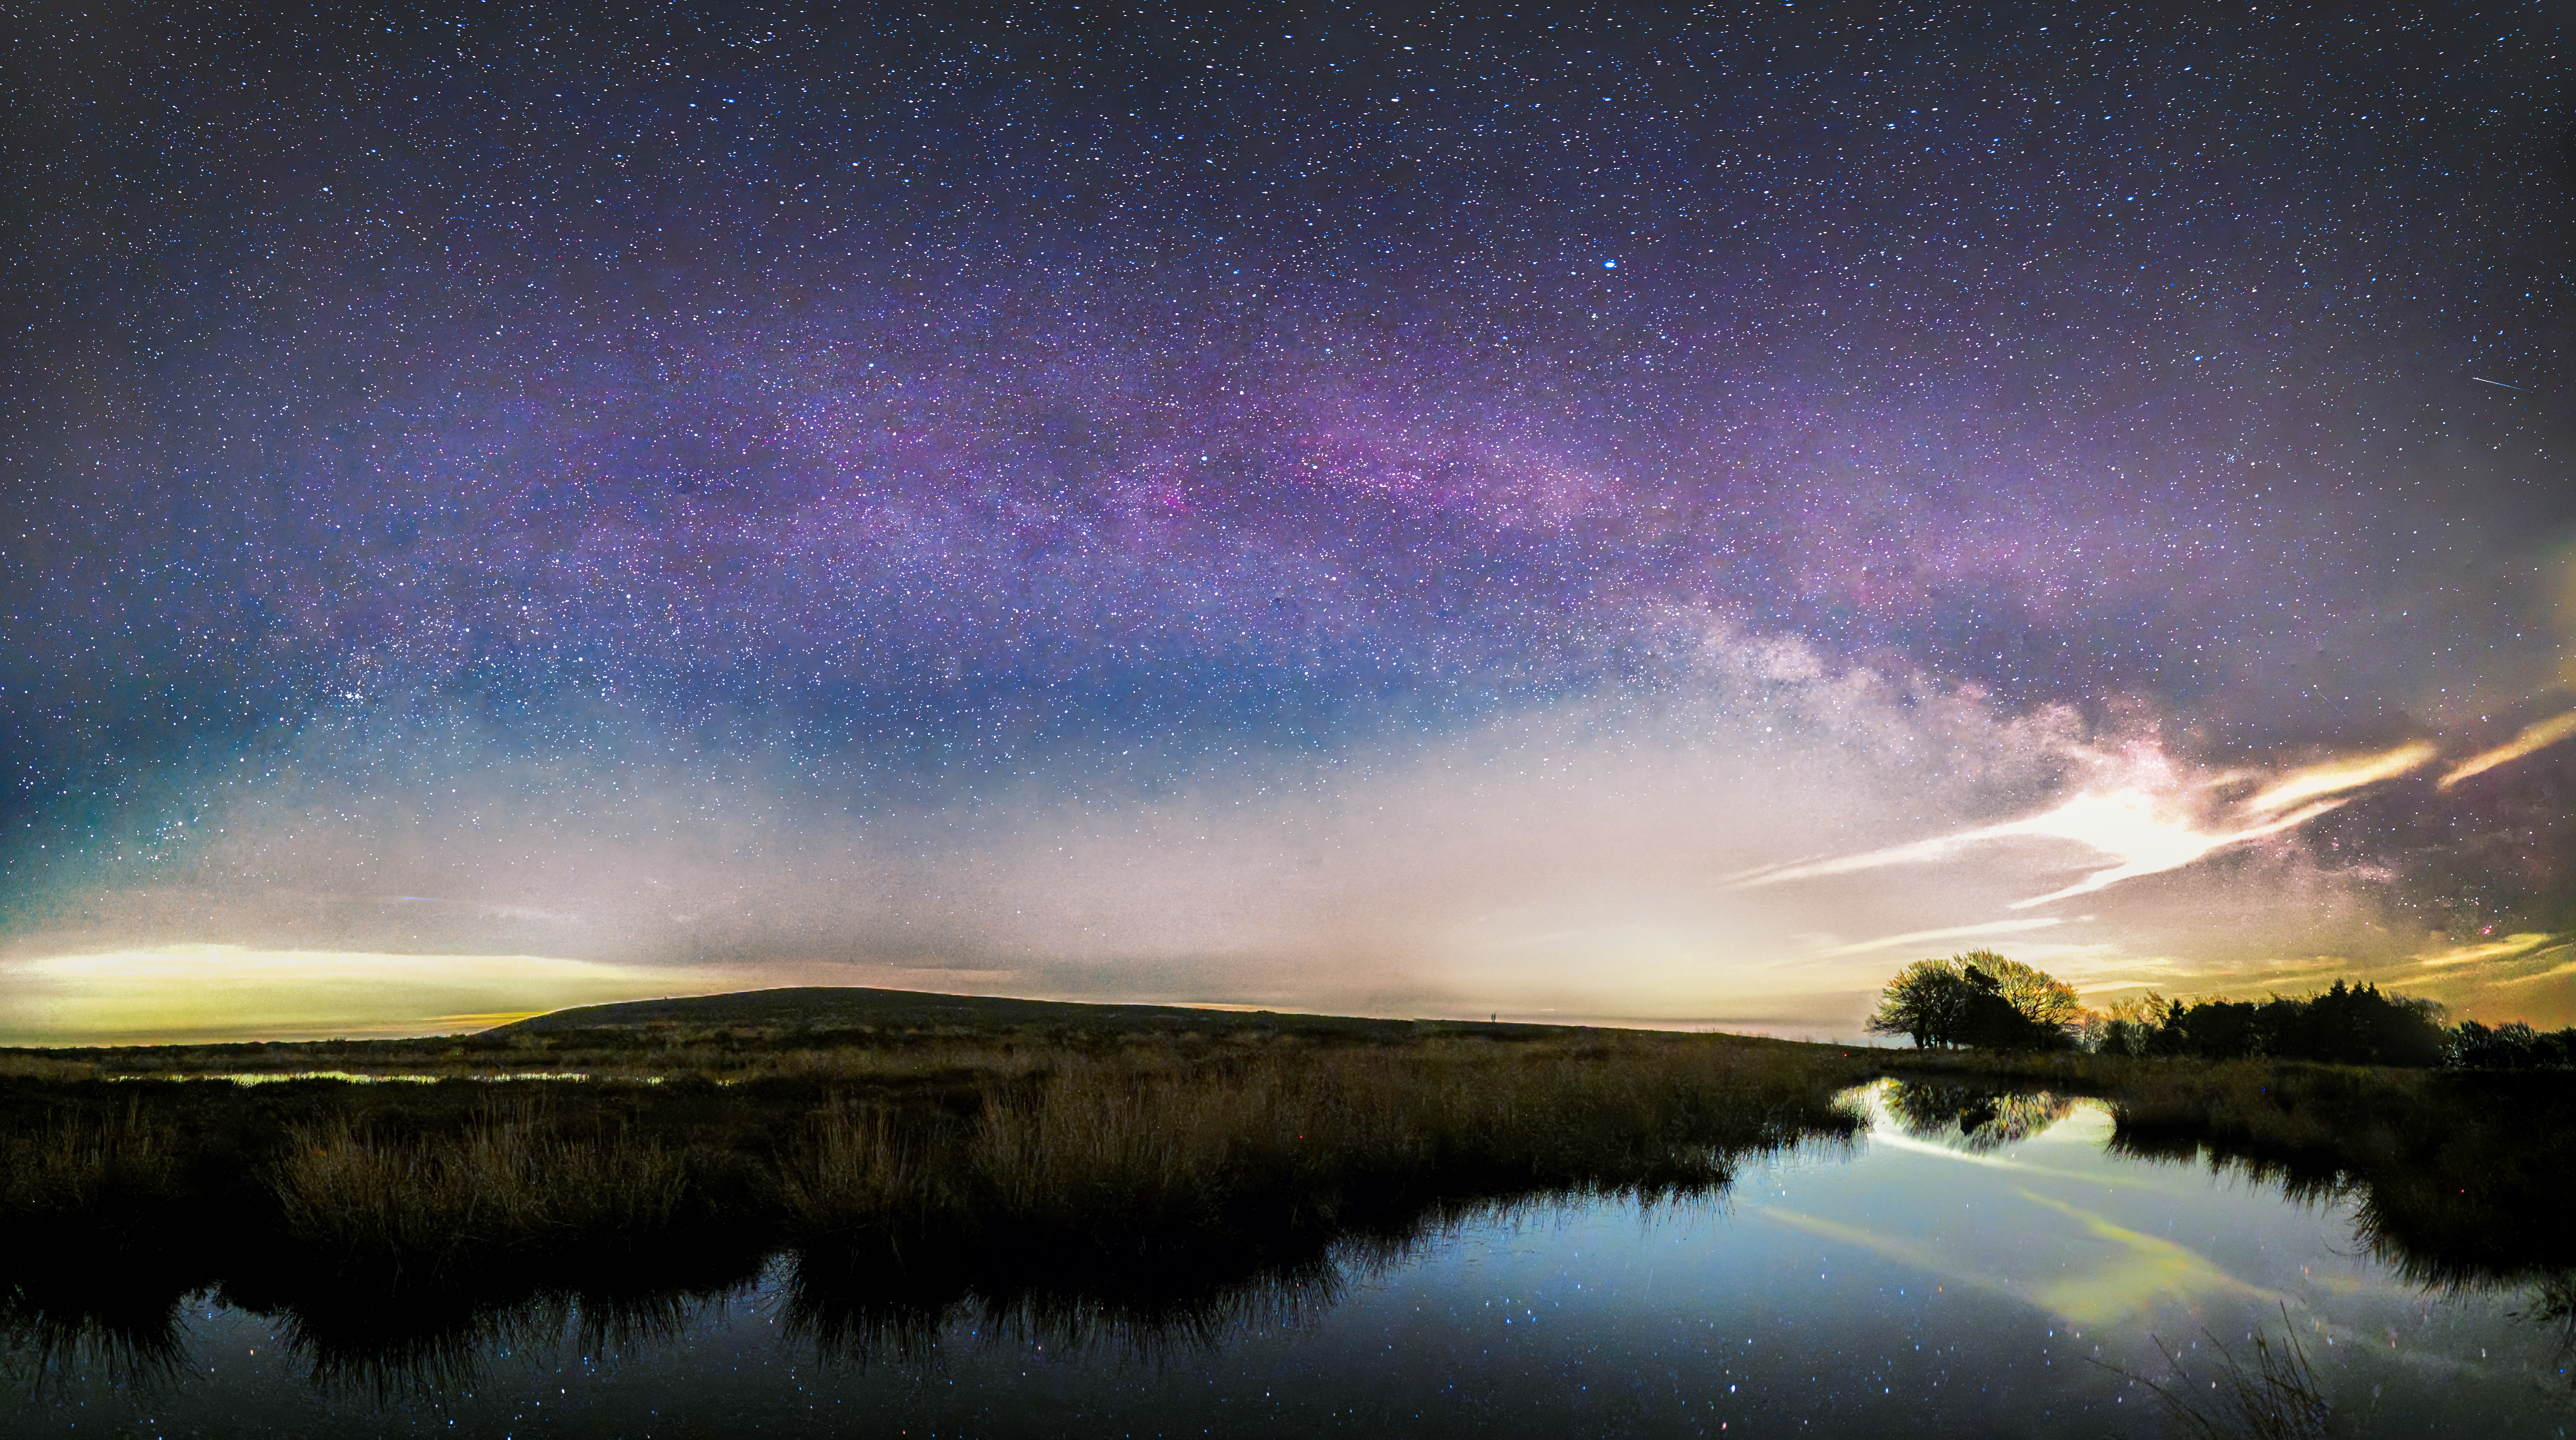
It is important to mention here that this body has no remote-control jack input, and the shutter can only be activated through the very good but expensive RM-WR2 OM System remote, or via the OM Image Share app on your phone. This also means if you have a star tracker that connects to a camera body, it won’t be this one, which is not brilliant. However, the tiny RM-WR2 is pretty good. I was pleased with the way this single shot turned out with the editing help of my fellow OM Ambassador Moises Cugat. You can start to see some of the Hydrogen Alpha colours, despite the light pollution, and the Milky Way panorama came out well.
OM System OM-3 Astro – Night Vision
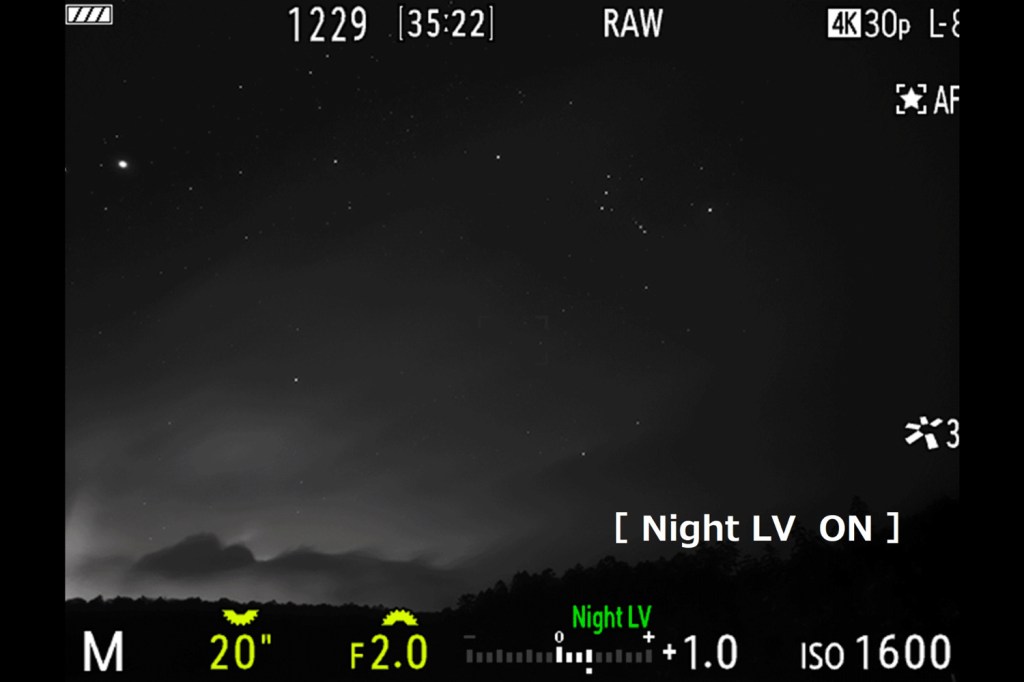
Live View Boost, or Night LV, is automatically set when you turn the camera on to set up under night skies. This automatically boosts the brightness so that both stars and foreground are visible in the frame, if you are shooting wide angle landscape and starry skies. I cannot emphasise how very practical and useful this is. It meant that when I was trying to frame up in front of a bog pool and stand of trees on the Long Mynd, I could set up the shot simply by viewing the rear screen and adjusting my geared head with ease.
Back in the day, when I was shooting with a different system, the only way I could get a shot like this right was to use a head torch to illuminate the foreground to get the right composition. It makes sense for an Astro-dedicated body to have this view as a starting point to remove one of the main hassles before beginning a long exposure.
OM System OM-3 Astro – Handheld High Res Shot
Here is one of the main adaptations of an already known feature that makes absolute sense. However, on the OM-3 Astro, it’s used for exposure stacking. Set to C1 or C2, the body takes 12 successive shots and then combines them into a larger 50MP image. The effect of stacking does three things. It greatly increases detail, in low-light areas you have a real chance of capturing intense red colours, and with the increase in dynamic range you get a significant decrease in noise.
Astro photographers will often take multiple shots (called Lights) and dark frames (Darks) to achieve a similar effect. However, that takes more work and processing time. OM System have stated that this body can show what can be achieved straight out of camera.
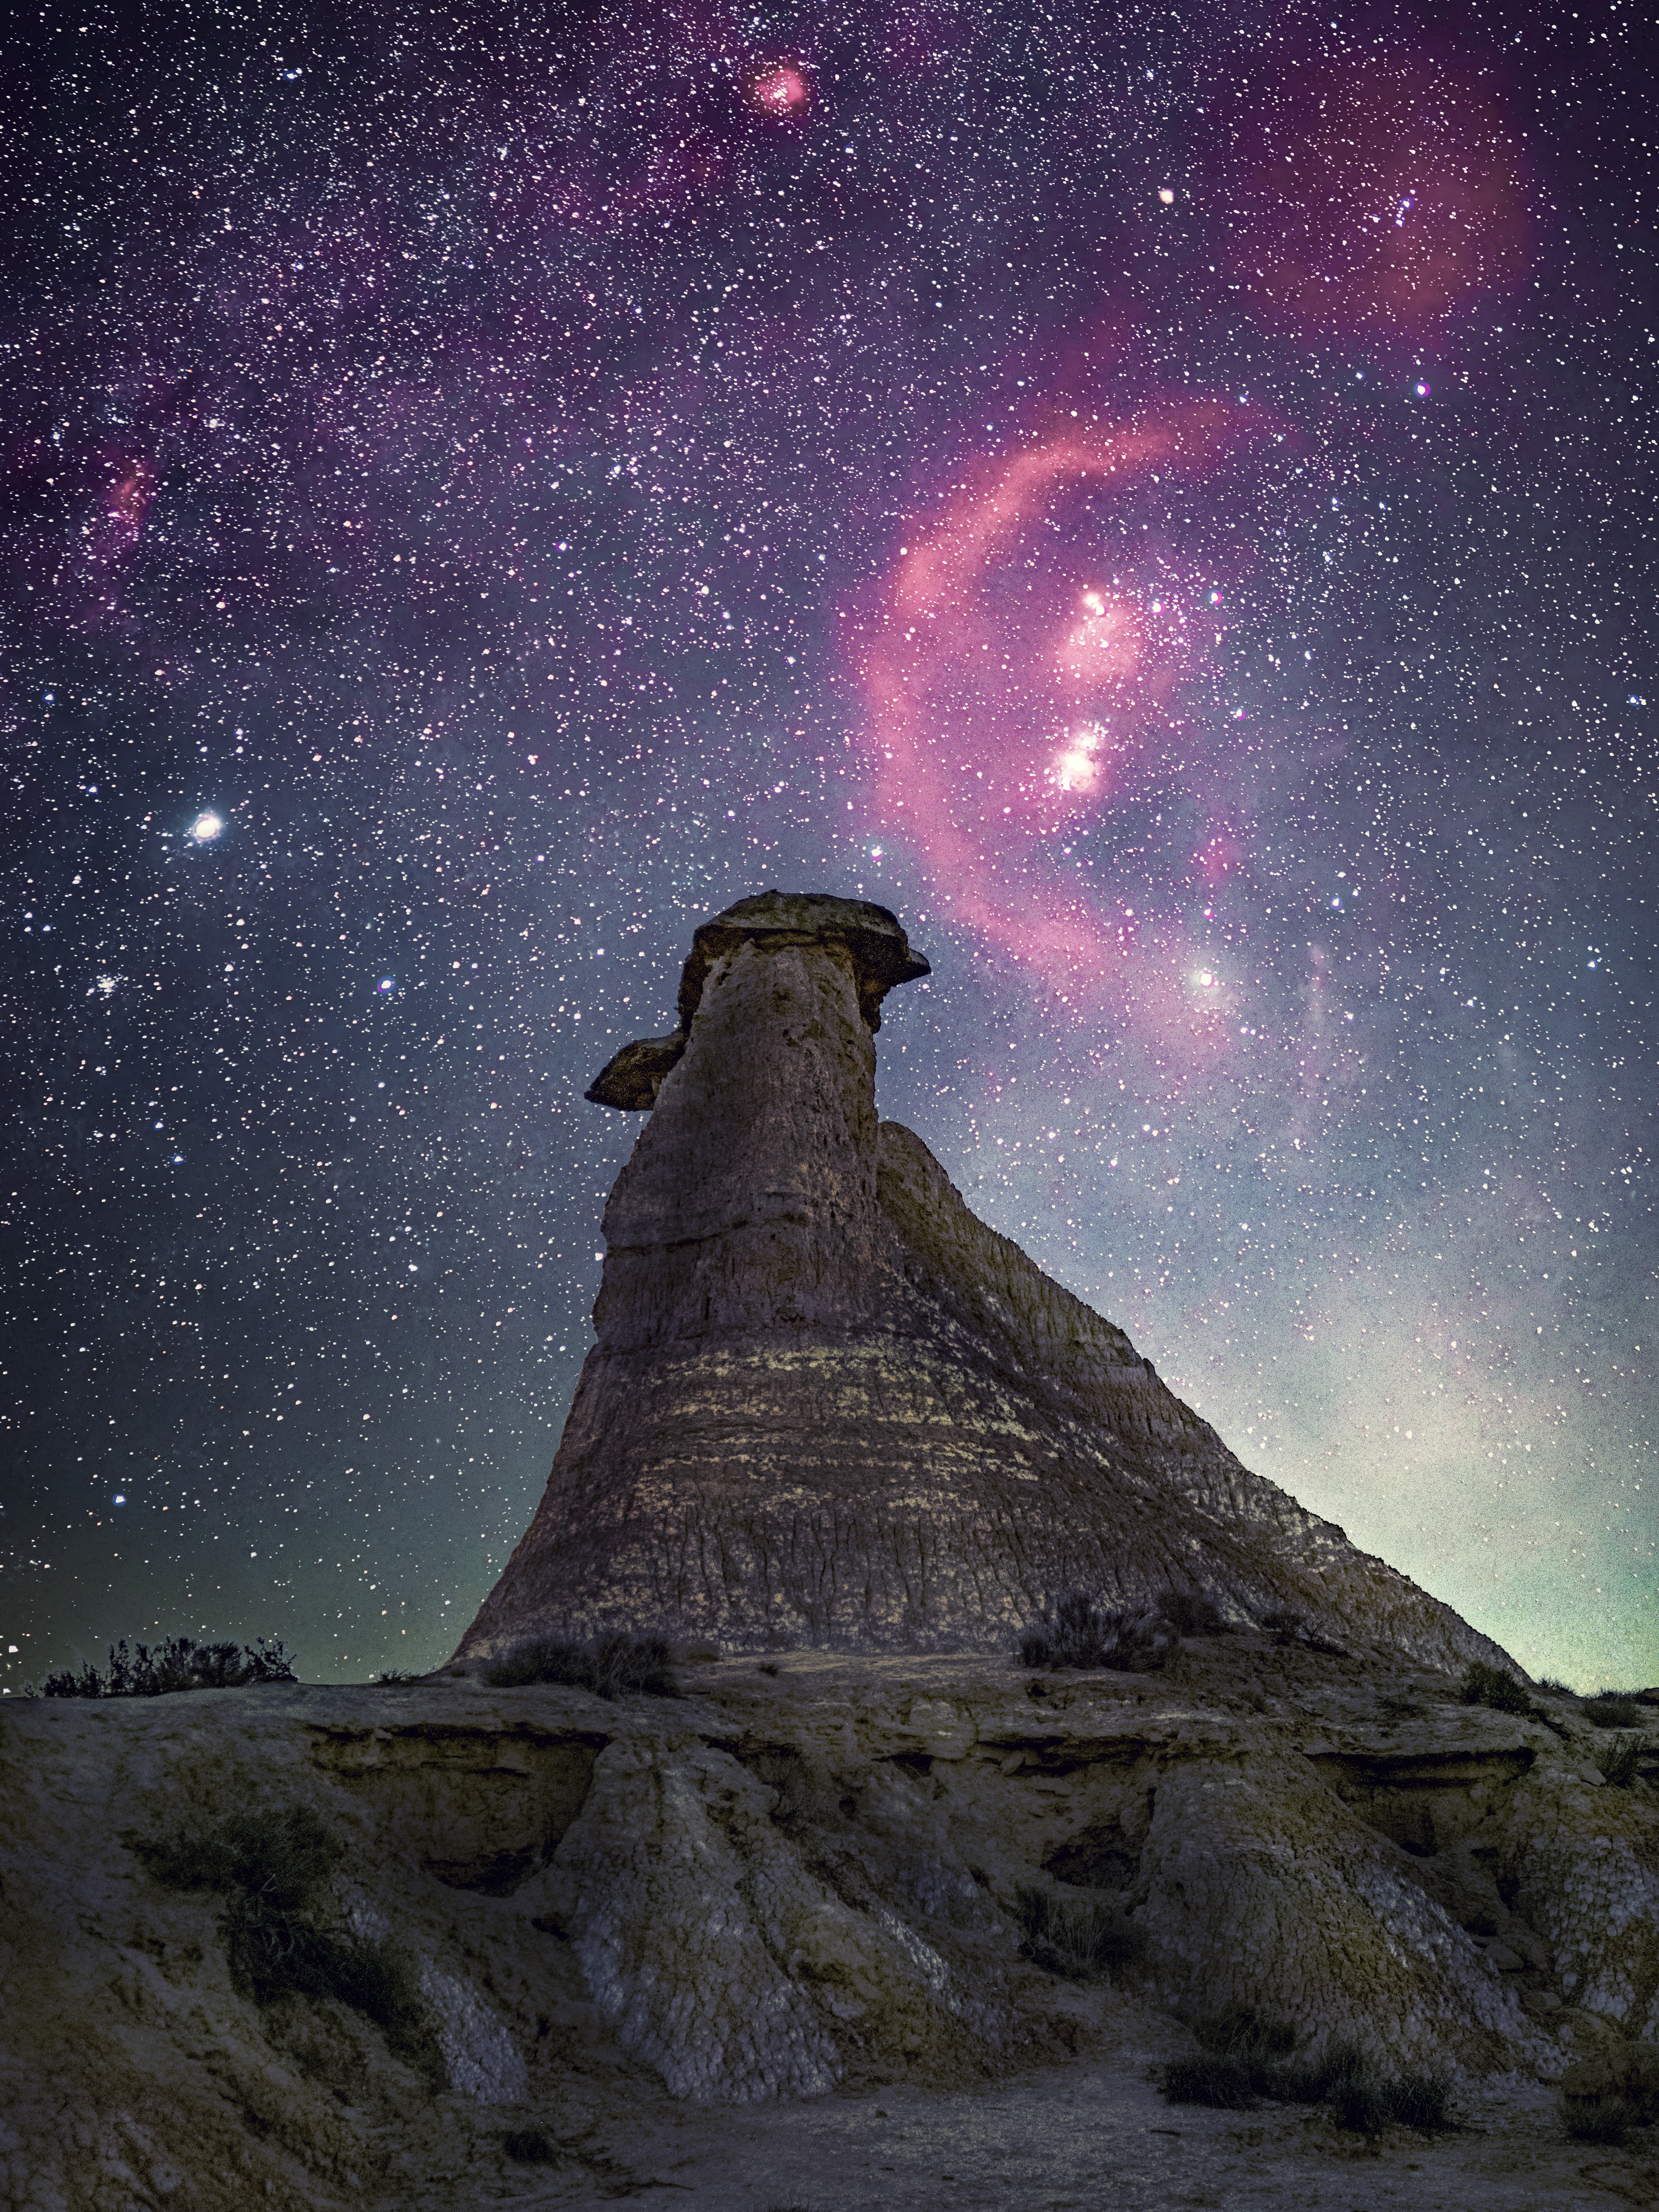
I struggled with this feature on the Long Mynd, and was grateful that Moises Cugat could showcase its potential in the dark sky hills where he lives in Spain. Here we can see the Orion Nebula set off stunningly over stark rock formations. You are going to need a rock-solid tripod, no wind and almost no light pollution to take advantage of this.
One thing that’s not made clear in the manual is that the C2 setting specifies capturing images with a balance of starry skies and terrestrial scenery. I assumed that the computational feature would not only compensate for star movement, but also give you a sharp foreground. This is sadly not the case (at least not yet; maybe later, via a firmware update?). So once you have your high res starscape, you also have to take a separate single shot of the landscape, reduce the 50MP starscape down to 20MP, and then blend the two together.
OM System OM-3 Astro – Star Trails and Live Comp
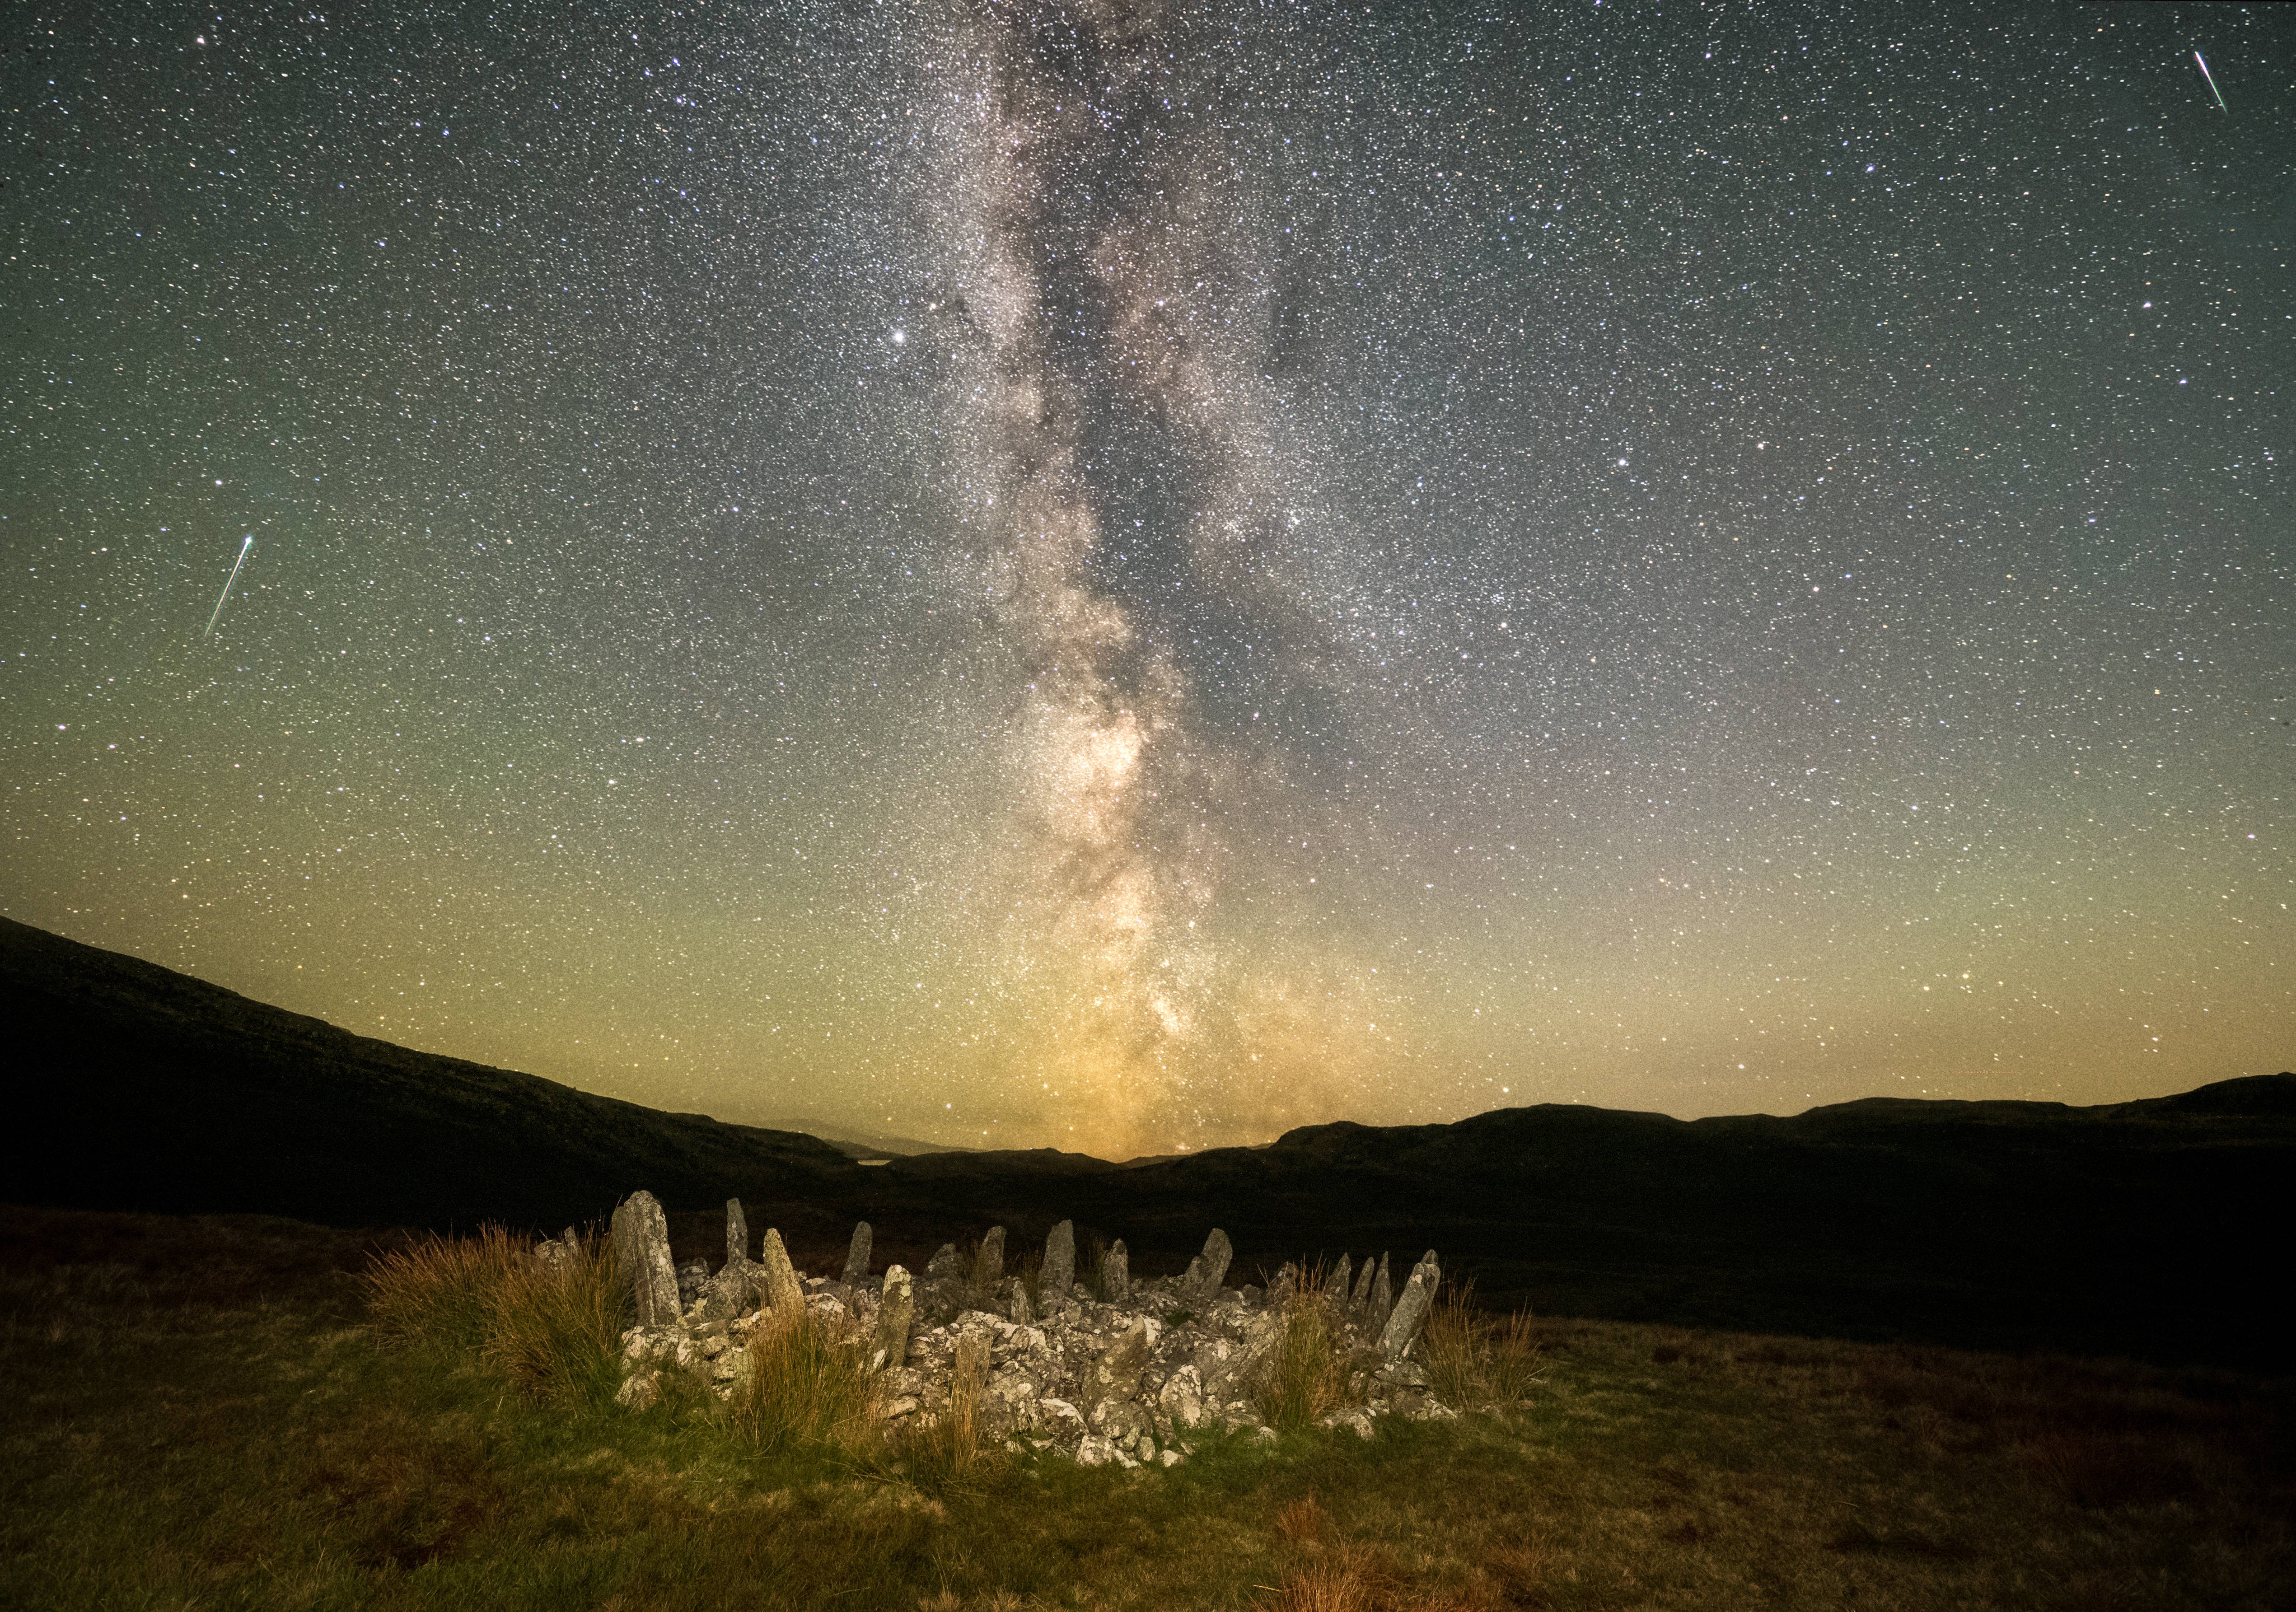
Of course you can do Star Trails on any OM body, but once again the two headline features that made this a doddle to set up were Night Vision and Starry Sky AF. I had been thinking about this type of shot at Diamond Rock on the Stiperstones for many years, but finally I had the right body to maybe make it happen. The above features saved me a lot of time.
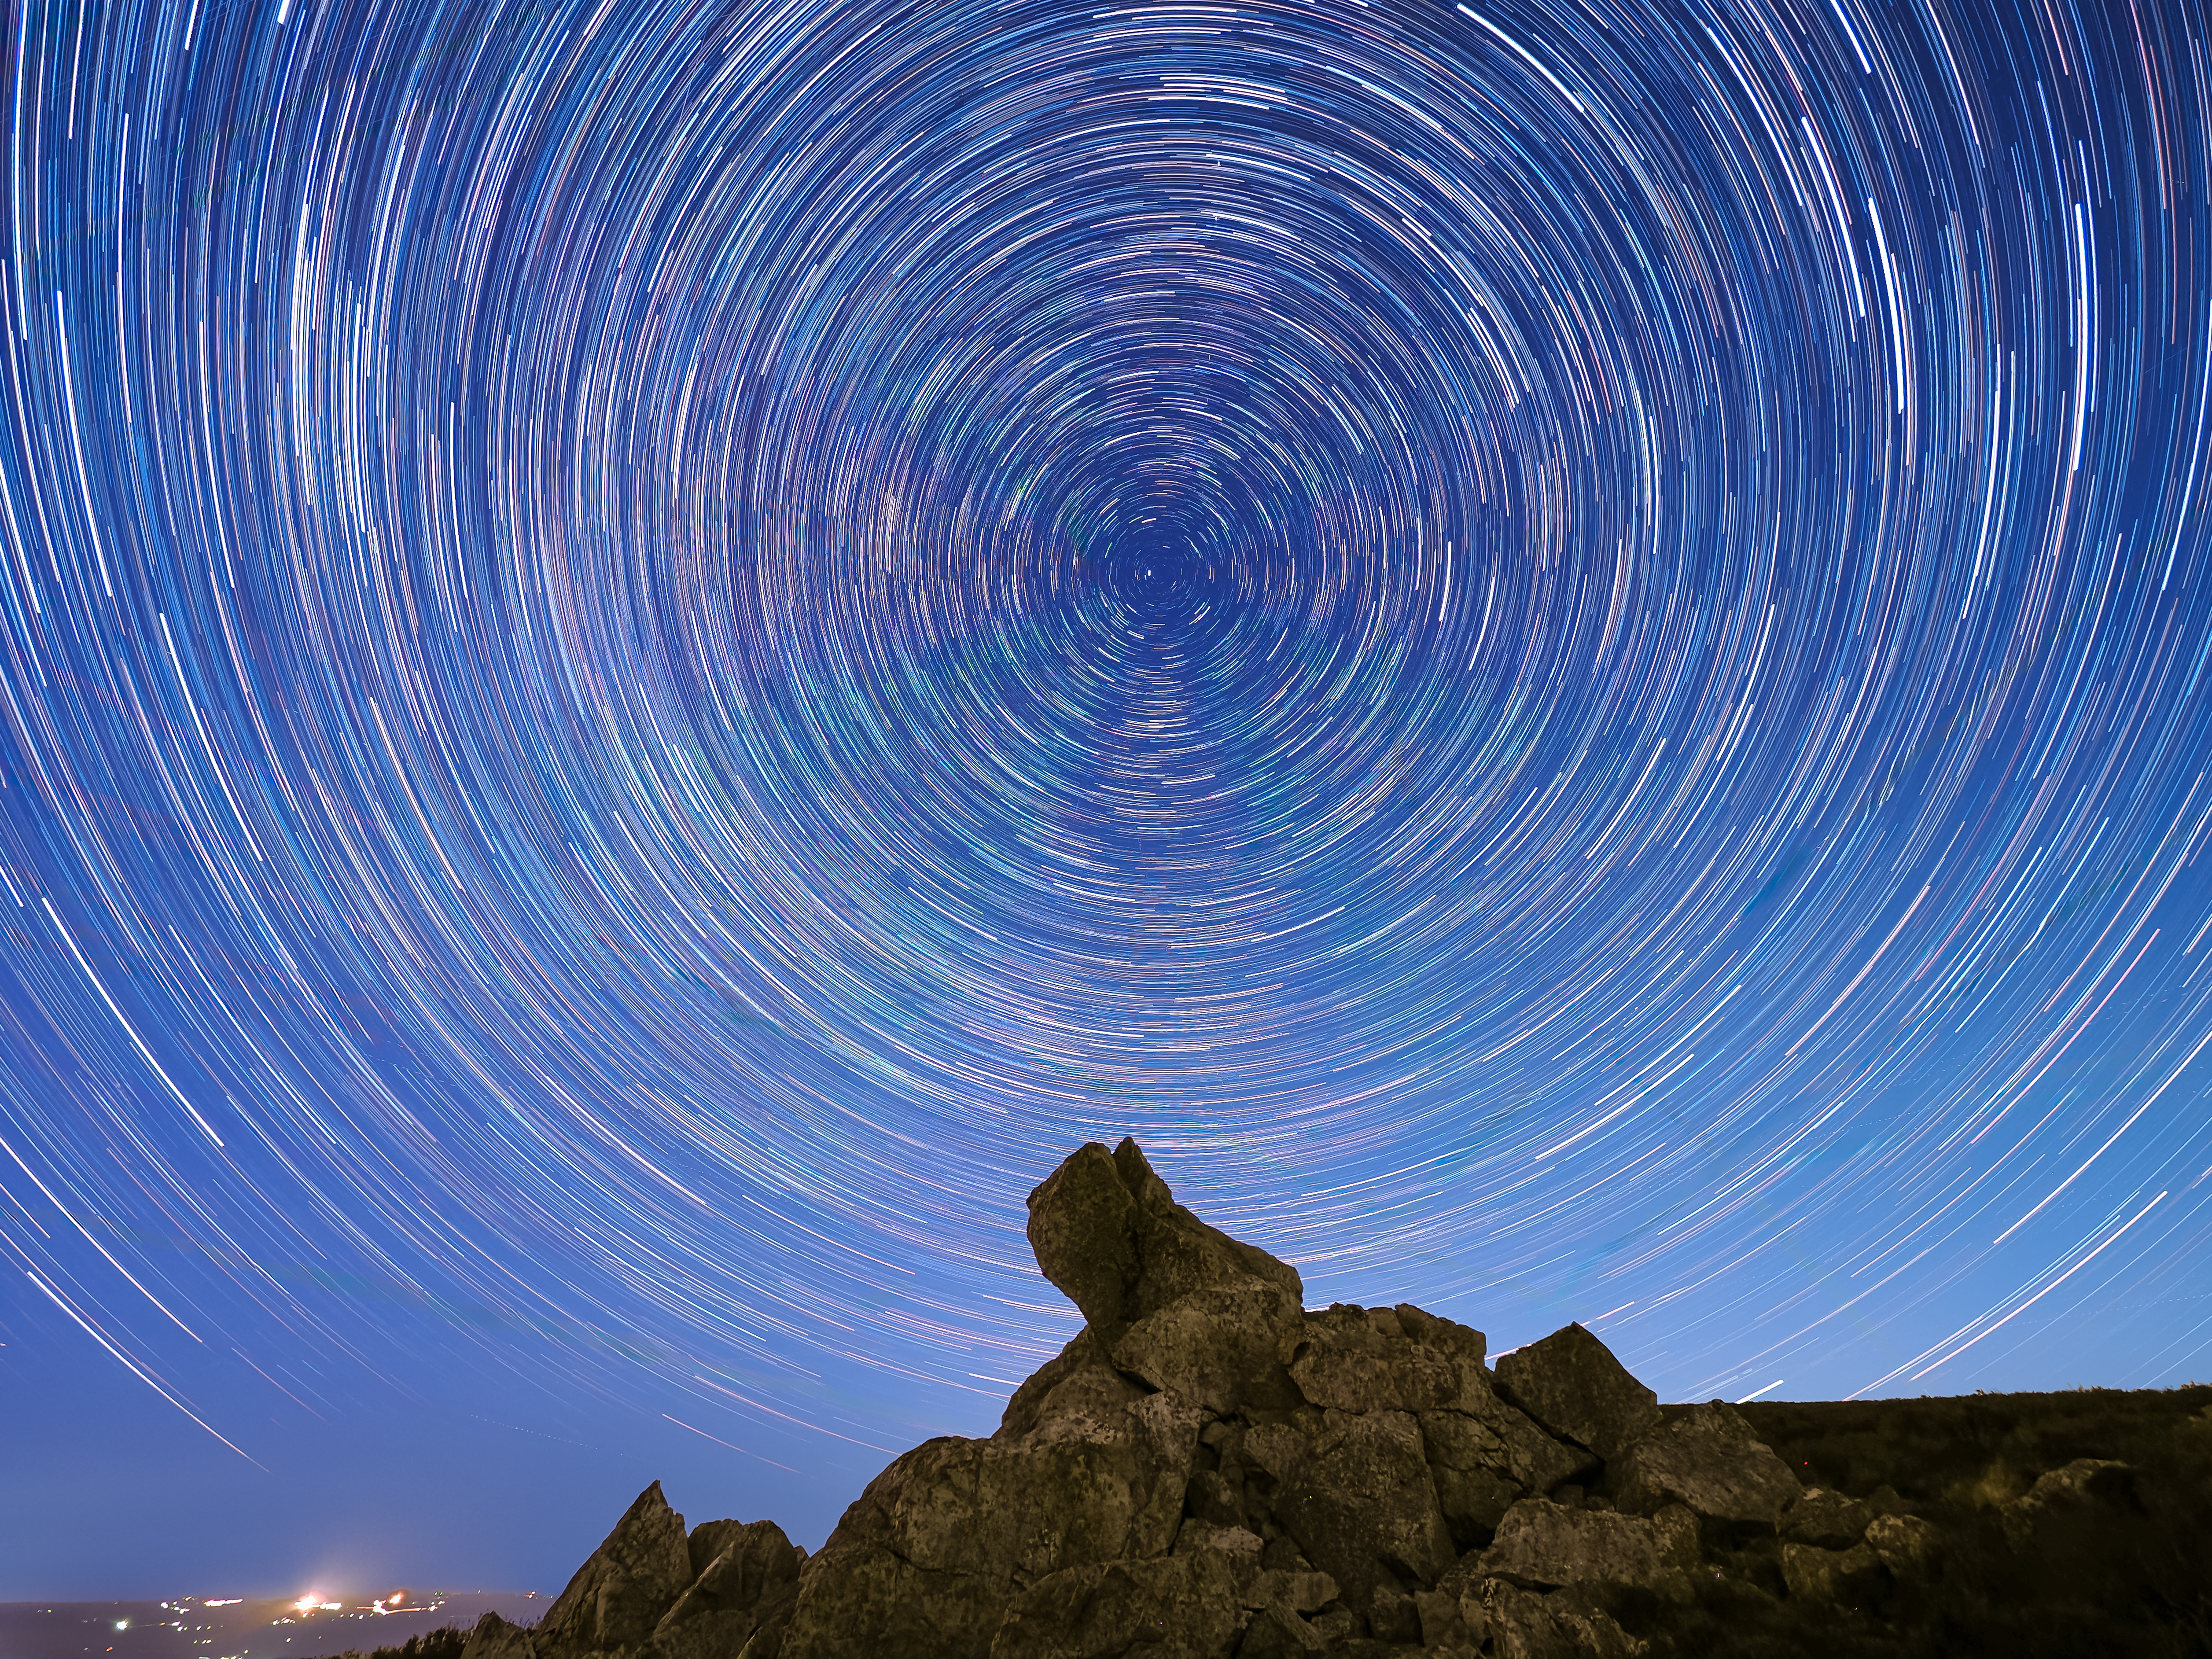
In particular, I needed to find Polaris in the night sky – first by using my eyes, and then once the camera was in almost the right position, fine-tuning using Night Vision and framing the quartzite outcrop below it. In this case, Live Composite is one of those computational tools that I could not live without. You can simply set a base exposure – in this case 30 seconds, F2.8 on my Olympus 7-14mm, and ISO 2500. The camera will then take exposures over a period of time: I set it to 2 hours.
As each frame is taken, the light is added to the shot before, without blowing highlights if your base exposure is set correctly, and you can gradually see the trails beginning to form. It really felt like a spiritual moment, alone on top of this ancient ridge watching the stars slowly circle – this shot later made the national papers.
OM System OM-3 Astro – Our Verdict
I am in two minds about this camera. With all the computational know-how, it would be great to have the stacking also work with the landscape in the shot, while the lack of a connection for a wired remote shutter release or star-tracker does hold it back. Also, simply adding longer exposure times to a Bulb Shot, for example 4 minutes for a tracked photo, would give us more control.
However, the computational aspects do make the whole experience that much easier, and I will admit one of my main struggles was with light pollution and no fault of the camera. So, in the end, there really are some compelling positives that will make the difference to shooting, whether you are a night-sky beginner or a seasoned astrophotographer. Live View Boost, Starry AF and the Hi-Res stacking features, as well as the adjusted infra-red cut filter and the ready to go Custom modes, not only show that a lot of thought has been put into this camera, but they are tools that will enhance your night sky safaris.
Many thanks to Moises Cugat for his advice, his editing of my Milky Way shots and his allowing me to use his superb pic of the Orion Nebula.
Related reading:
- How to take stunning starry night scenes this summer
- Best lenses for astrophotography – galactic glass for night skies
- Best cameras for astrophotography – reach for the stars
Follow AP on Facebook, Instagram, YouTube and TikTok.


