DxO PureRAW 3 at a glance:
- $129 / £115
- £69 for upgrade from version 1 or 2
- For Mac and PC
- Free 30-day trial available
- www.dxo.com/dxo-pureraw
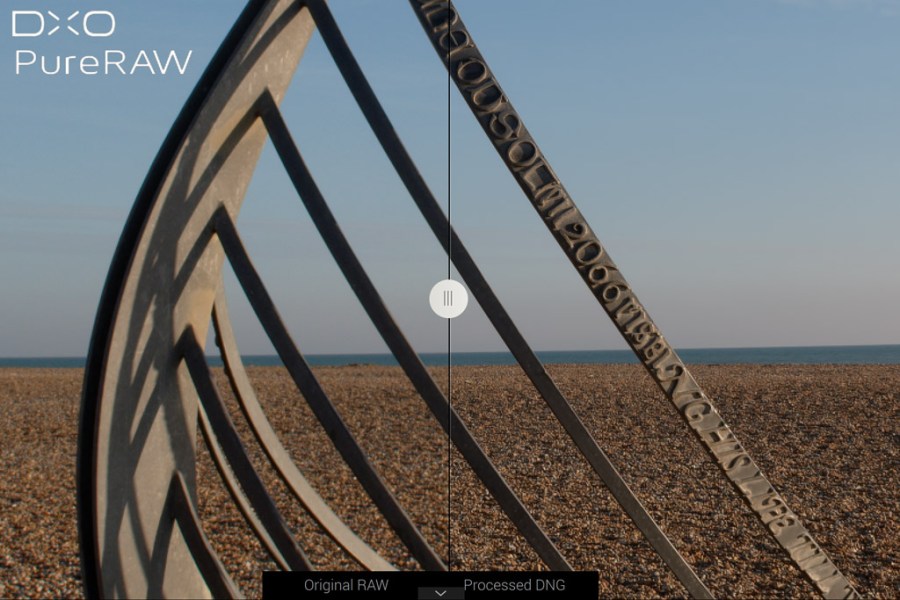
Two years after its original launch, DxO’s PureRAW software is still unlike anything else on the market. Like its predecessors, the latest iteration, DxO PureRAW 3, takes camera raw files and converts them to DNG raw files for use in your favourite imaging software. Crucially, it does so while applying the firm’s impressive lens correction and noise reduction algorithms, which can give dramatically better final output compared to developing your files using Adobe software such as Lightroom or Camera Raw.

PureRAW 3 gains DxO’s DeepPRIME XD algorithm, which renders extra detail. Fujifilm X-H2S, XF100-400mm F4.5-5.6 R LM OIS WR at 400mm, 1/1000sec at f/5.6, ISO 640, 1.7x crop. Processed using DeepPrime XD. Image credit: Andy Westlake
Click on any sample image to see the full-resolution version
The 16-bit linear DNG files that PureRAW creates can still be adjusted in exactly the same way as the original camera raw files, in terms of white balance, colour and tonality. This allows you to get the benefit of DxO’s image processing expertise without changing your existing workflow.
For comparison, see our reviews of DxO PureRAW and DxO PureRAW2
DxO PureRAW 3: What’s new?
Compared to last year’s version, DxO PureRAW 3 comes with some significant updates. Firstly, it gains DxO’s latest DeepPRIME XD processing algorithm. The XD label indicates that this is designed deliver extra detail compared to the existing DeepPRIME, at the expense of longer processing times.
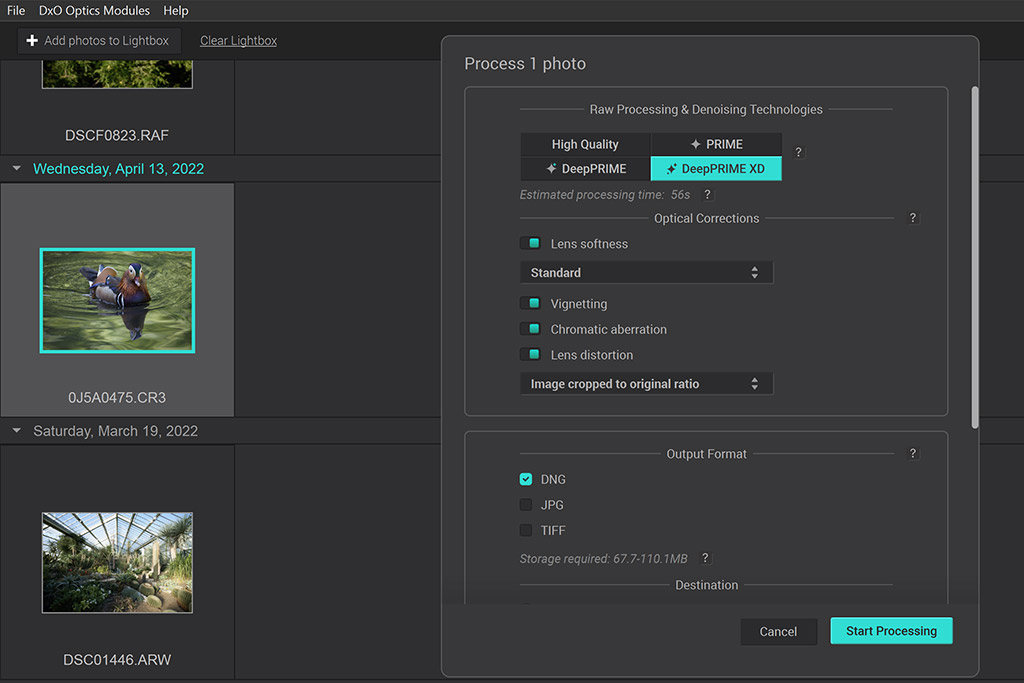
DxO PureRAW 3 adds the DeepPRIME XD processing algorithm, plus other new options. Image credit: Andy Westlake
The second major update concerns how lens aberration corrections are applied. Previously, you didn’t get a whole lot of control over this. But now, lens softness can be corrected across a choice of four levels; vignetting and chromatic aberration corrections can each be toggled on or off; and distortion correction can be applied with a choice of three cropping modes.
Thirdly, there’s a new file queueing system, which allows you to set up batches of raw files to be processed, with the option to re-prioritise them as you go along. So if you come across a file that you’d like to process immediately, it can be pushed up the order. This can be a handy option to have available, given that the penalty for PureRAW’s increased image quality lies in the sheer length of time it takes to process the camera raw files.
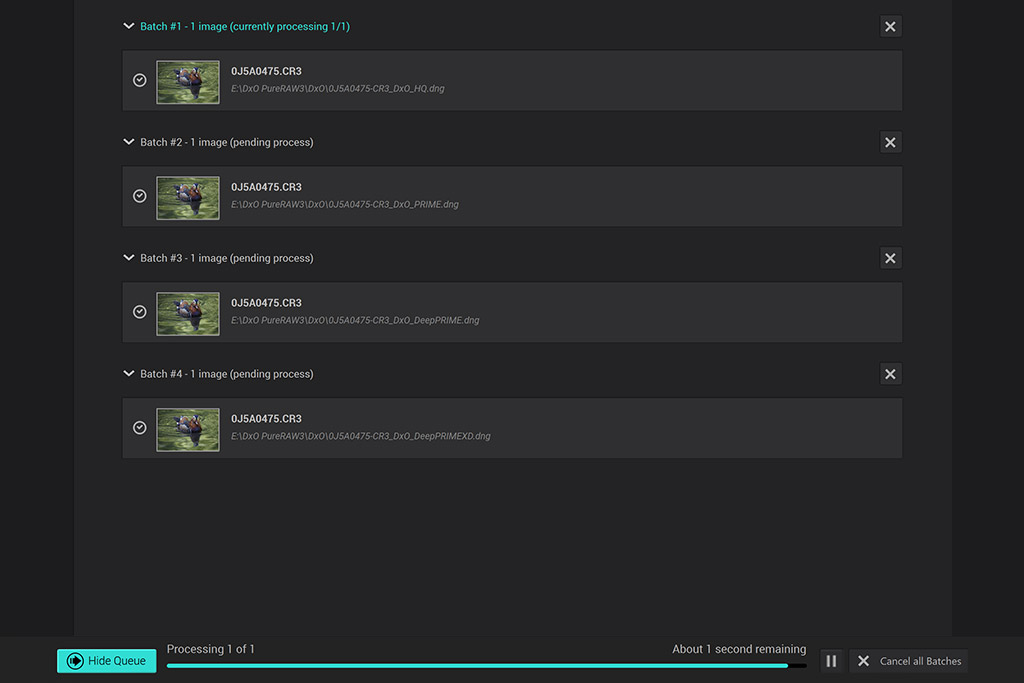
DxO PureRAW 3 now has a processing queue. Image credit: Andy Westlake
It’s also now possible to export your images as TIFF files, in a choice of 8-bit or 16-bit colour depths. This makes PureRAW 3 compatible with a wider range of image processing programs that don’t support DNG files. The interface has been cosmetically redesigned, too, with a cleaner look.
At $129 / £115 for a one-off licence, or £69 for users of previous versions to upgrade, DxO PureRAW 3 may look expensive for a program that turns your raw files into better raw files, but doesn’t produce finished output. However, with previous versions I concluded that it could easily represent money well spent. Let’s see if version 3 is a worthy update.
DxO PureRAW 3: summary of new features
- Adds DeepPRIME XD demosaicing / denoising algorithm
- Substantially increased control over lens corrections
- New file queuing system
- TIFF image output (8-bit or 16-bit)
How do you use DxO PureRAW 3?
PureRAW can be used in several different ways. Firstly, it can work as a standalone program, into which you import your raw files and then process them. Secondly, you can batch process files directly from the Windows desktop or Mac finder, with a choice of algorithms and output file types selectable, all without having to open the program itself. Lightroom users can even invoke PureRAW directly within the program, using the ‘Export – Process using DxO PureRAW 3’ command.
As the updates mainly affect the standalone program, I’m going to concentrate on that.
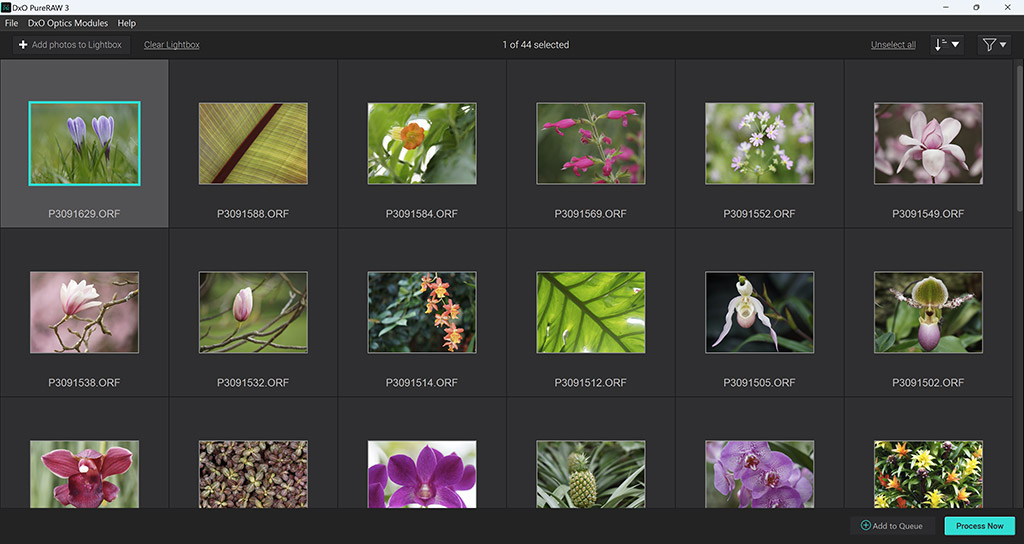
DxO PureRAW 3’s main screen shows a thumbnail view of files you’ve imported. Image credit: Andy Westlake
When you open PureRAW and import a set of images, it’ll first attempt to identify the cameras and lenses you used, and then ask you to download the requisite Optics Modules (which you only need to do once). DxO’s database is vast, so most combinations are covered, but it can take a little while for the latest products to be added via the monthly updates. With unsupported lenses, the software will still work, but you’ll end up with uncorrected images.
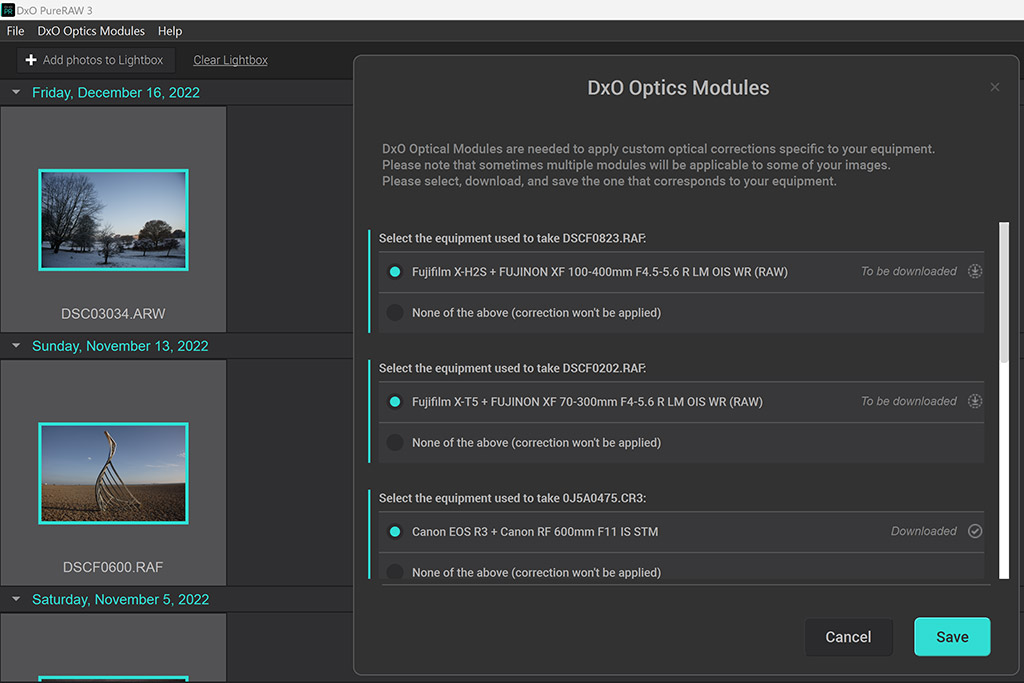
The first step is to download Optics Modules for the cameras and lenses you’ve used. Image credit: Andy Westlake
Select a file or files and click ‘Process Now’, and a window pops up prompting you to choose the processing method (High Quality, PRIME, DeepPRIME or DeepPRIME XD); the lens corrections you wish to apply, the output format (DNG, TIFF or JPG); and where the processed files should be saved. Alternatively, if you click the new ‘Add to Queue’ option, your files will get added to a queue that the program will work through progressively. Click on the ‘Show Queue’ button, and you can change the processing order simply by dragging batches up and down the list. It’s straightforward and easy to use.
Usefully, PureRAW 3 will automatically name its DNG files according to the processing algorithm used. However, it isn’t smart enough to do the same with lens corrections. Instead, if you queue up variants of an image with different combinations of corrections, by default they’ll be assigned the same filename and end up overwriting each other. So you need to make a point of using the File Renaming option, which is somewhat hidden away in the dialogue box. This is something DxO really needs to fix.
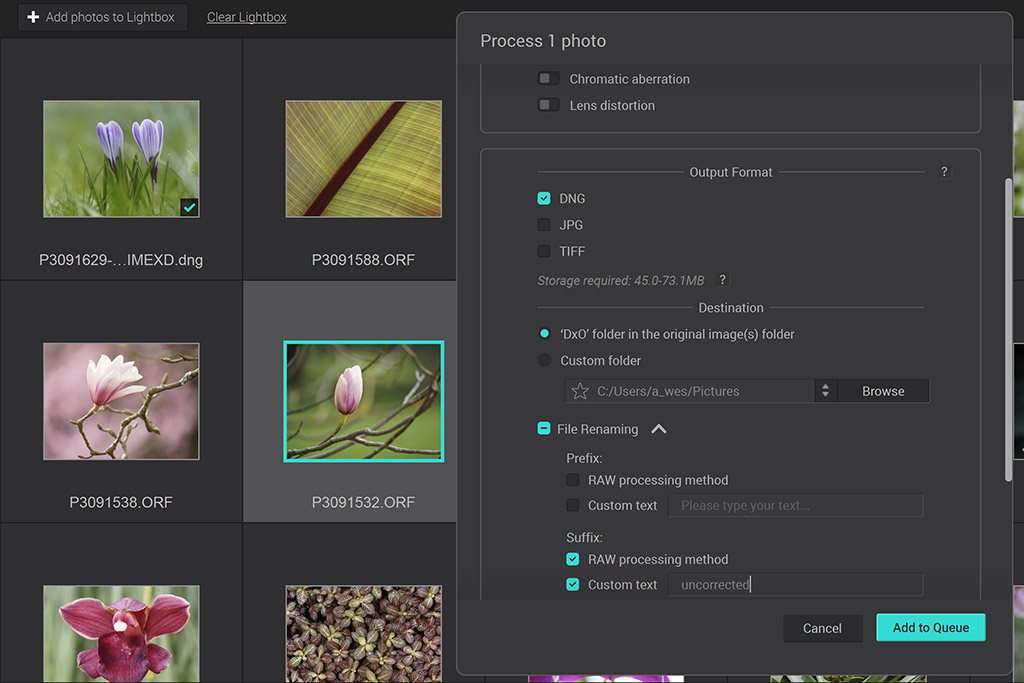
DxO’s file renaming dialogue is usually hidden, making it easy to miss. image credit: Andy Westlake
You can export the processed DNGs directly to Adobe Lightroom or Photoshop, and in the latter case, they’ll open in Camera Raw. Any settings you’ve previously applied to the raw files in terms of colour, white balance and tonality will be carried over. It’s also possible to export the original raw files alongside for comparison purposes.
DxO PureRAW 3: Which processing algorithm is best?
I compared PureRAW’s four algorithms using files from a variety of cameras across the full range of ISO settings. While HQ provides only a modest improvement over Adobe’s processing, I found that PRIME provides around a stop of improvement in terms of noise reduction, and DeepPRIME gives a similar step up again. DeepPRIME XD brings no further advantage at low or even moderately high ISOs, but comes into its own by enhancing detail at the very highest ISO settings.

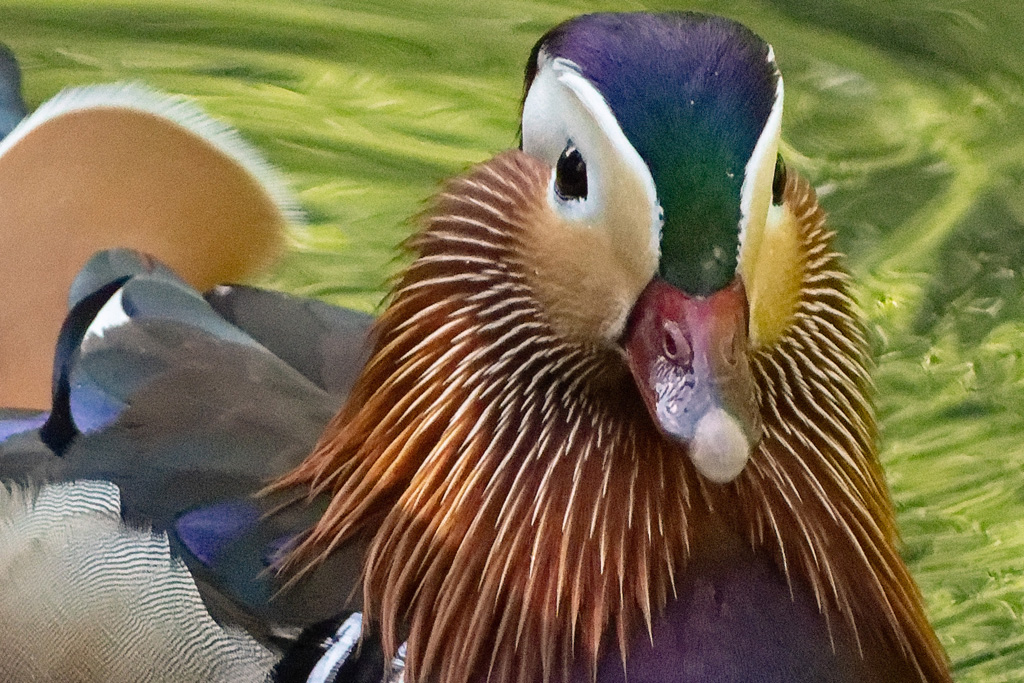
Canon EOS R3 + RF 600mm F11 IS STM, 1/2000sec at f/11, ISO 25,600. Processed using Adobe Camera Raw only. Image credit: Andy Westlake
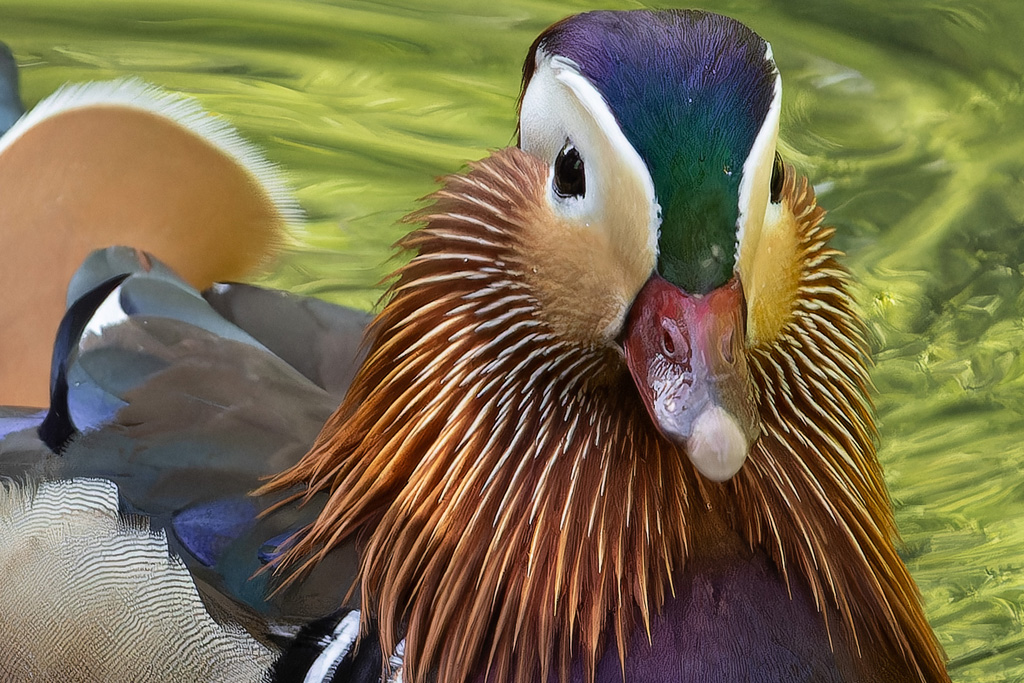
A good example is provided by a photo I shot of a mandarin duck using the Canon EOS R3 and RF 600mm F11 IS STM lens at ISO 25,600. Firstly, DxO’s HQ processing is only a little better than Adobe Camera Raw with its default noise reduction, which means it’s barely worth the effort:
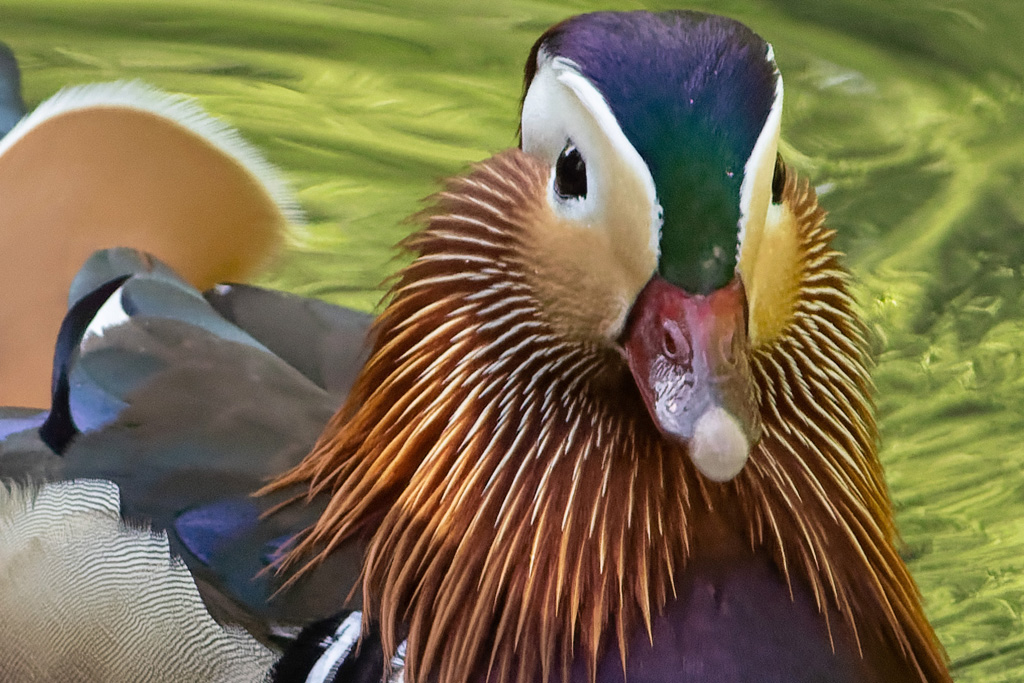
In comparison, PRIME is visibly more effective at suppressing noise, but it doesn’t really recover any more detail:
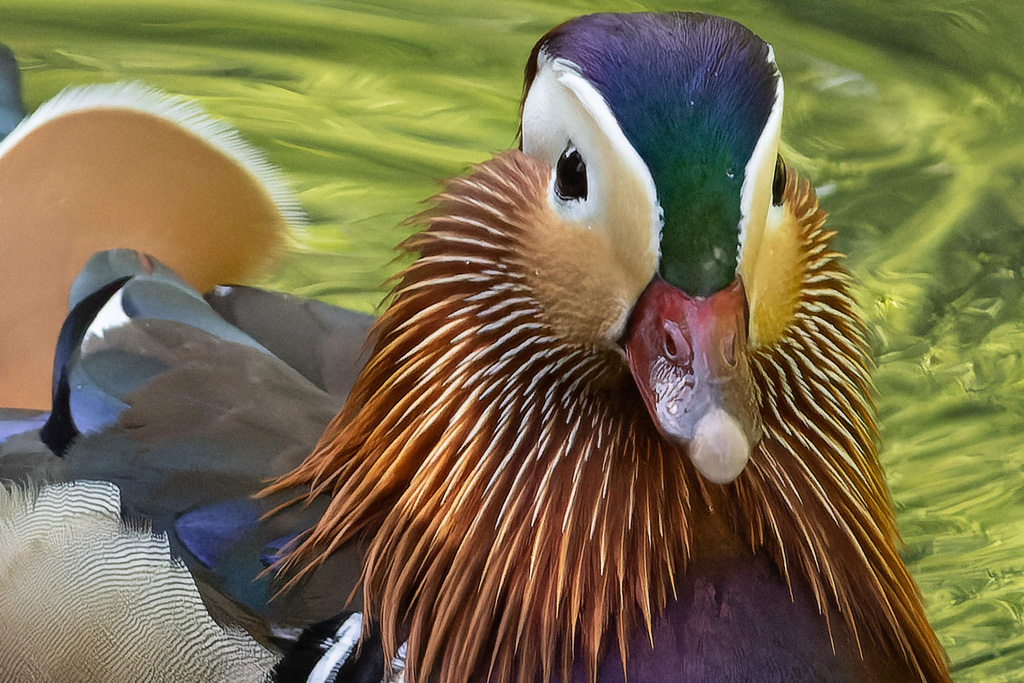
However, DeepPRIME is a clear improvement, doing a superb job of rendering more detail without any noise penalty:
DeepPRIME XD is even better here, teasing out even more fine detail in the feathers. This is real detail, too, not invented texture; it’s visible in Adobe’s conversion, but right on the edge of what can be distinguished from noise. In other situations, though, DeepPRIME XD can look unnatural; for example, it can overly accentuate skin texture in portraits, which you really don’t want.
Overall, PureRAW will probably allow you to use ISO settings two stops higher than you’d previously have found acceptable. That’s a larger improvement than you’re likely to get from exchanging all your camera kit for the next sensor size up, which puts the price into perspective.
DxO PureRAW 3: Image processing time
The trade-off for PureRAW’s increased output quality is its processing time. It takes much, much longer to convert raw files to DNGs, than Adobe software does to convert the same files to finished JPEGs. As a result, you’ll probably want either to batch convert a set of files while you go off and do something else, or to convert only selected images when necessary.
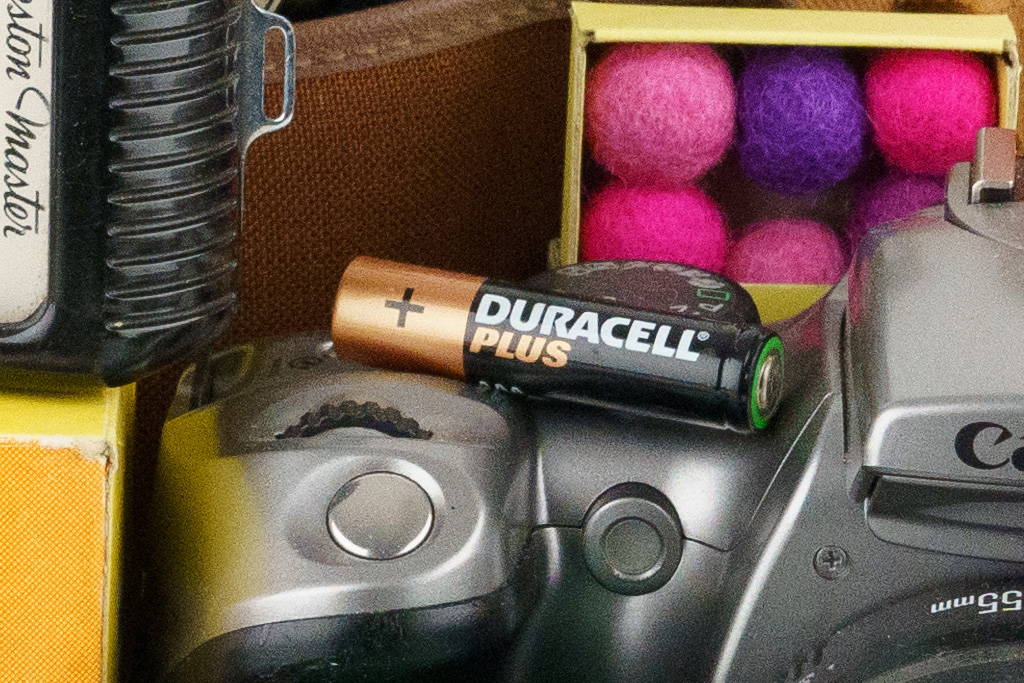
Exactly how long PureRAW will take to process your files is dependent upon all sorts of factors – pixel count, image content, ISO, and the lens corrections required, plus of course your computer hardware. But for comparison purposes, I tested it using a set of 13 raw files of our studio scene from the 24MP Sony Alpha 7C, one for each ISO setting (50-204,800).
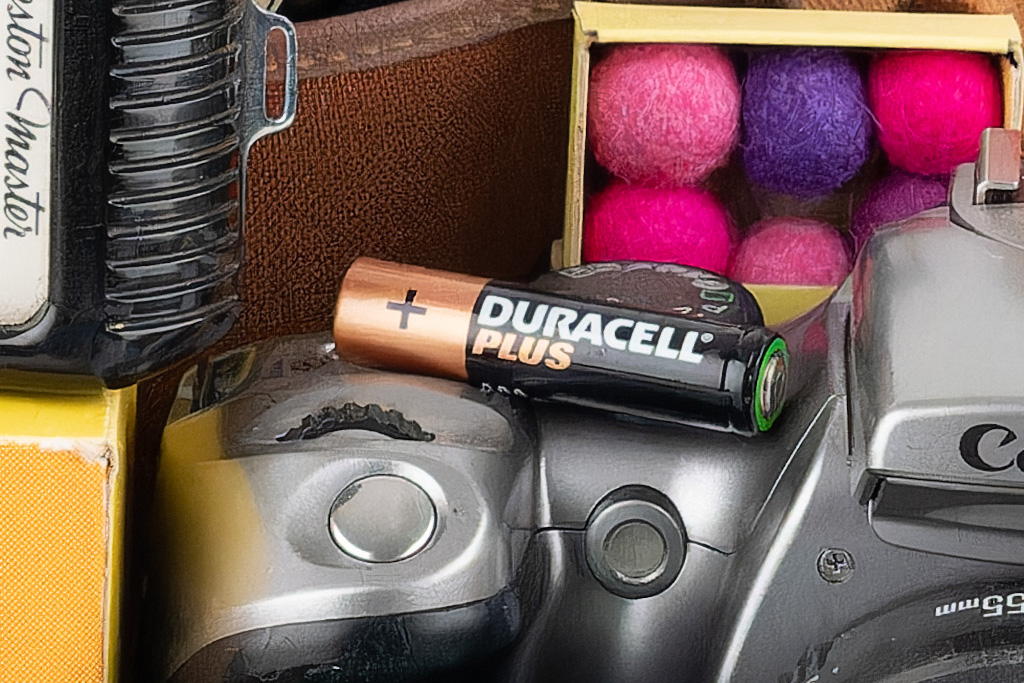
DxO PureRAW 3 gives cleaner images at 2 stops higher ISO than ACR, while maintaining a strong impression of detail. Sony Alpha 7C, raw + DxO PureRAW 3 using DeepPRIME XD, ISO 25,600, 100% crop
Using my 2019 Dell XPS 15 laptop running Windows 11 (Core i9-8950, Nvidia GeForce GTX 1050 Ti GPU), Adobe Camera Raw processed them in 15 seconds. In contrast, PureRAW took 2min 23sec in HQ mode; 8min 11sec using PRIME; 4min 35sec in DeepPRIME; and 9min 54sec with DeepPRIME XD. To my mind, this makes DeepPRIME the best option for regular use.
DxO PureRAW 3: Optical Corrections
The other major advance in PureRAW 3 comes with the control it provides over lens corrections. Previously, you could only enable/disable distortion and sharpness compensation, with corrections for vignetting and chromatic aberration always being applied. Now, you can control them all. I have no idea why you’d ever want to turn off CA correction, but I’m happy to gain the option to exploit the lens’s natural vignetting for aesthetic effect.
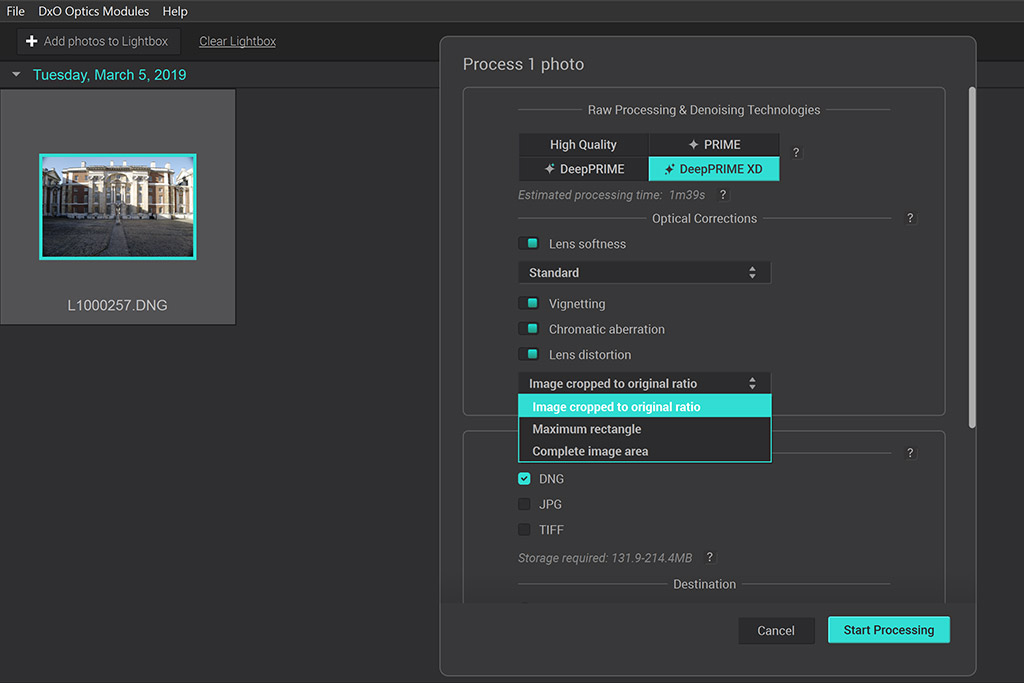
You now get multiple cropping options when using distortion correction. Image credit: Andy Westlake
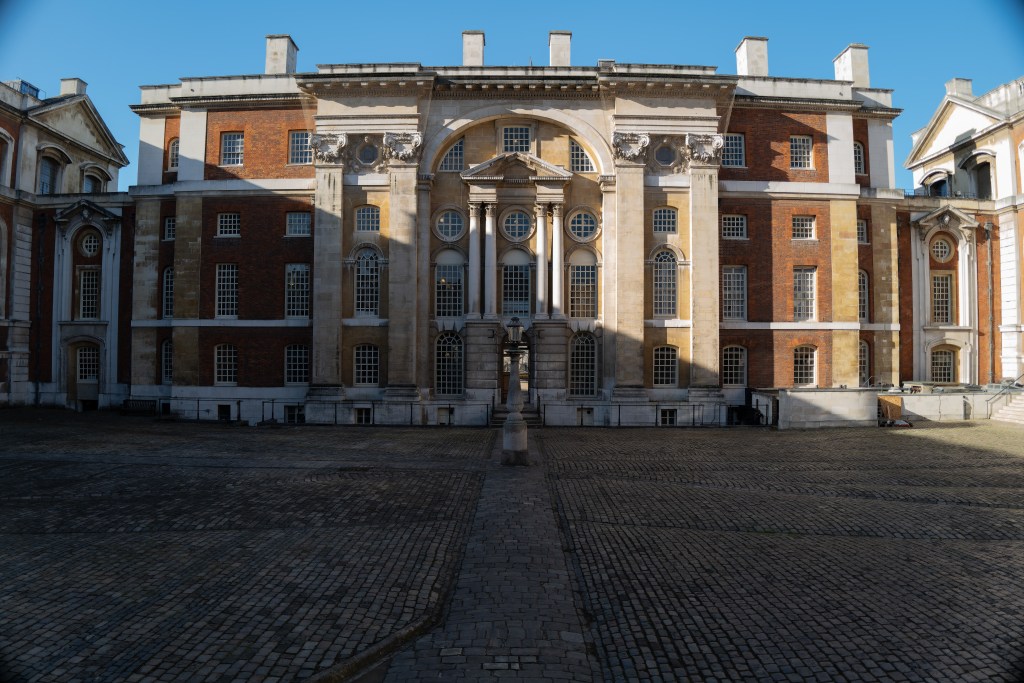
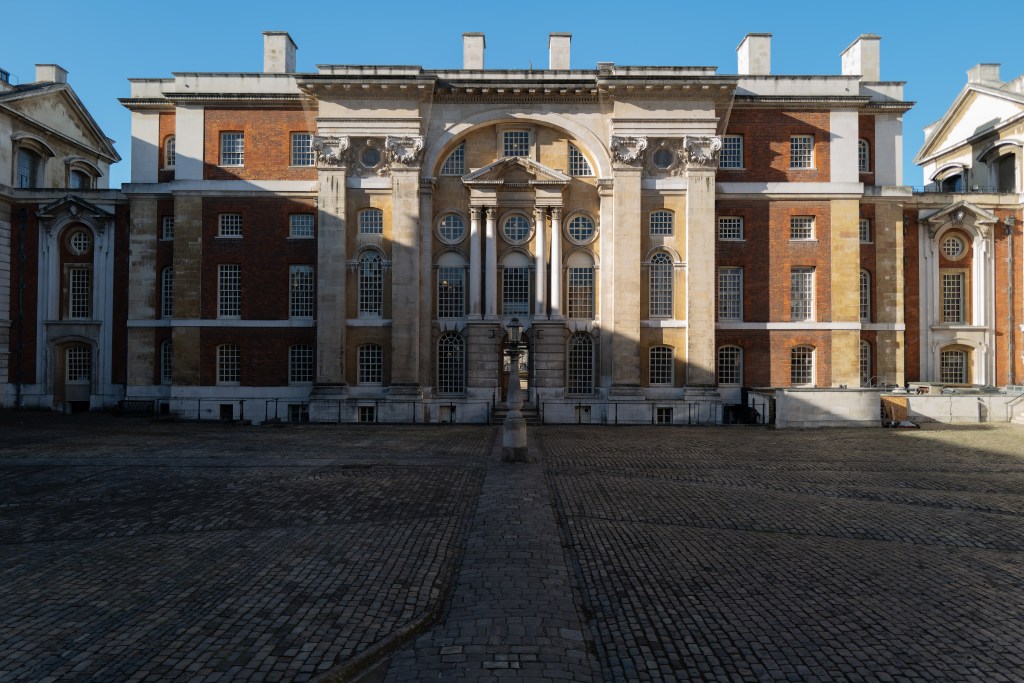
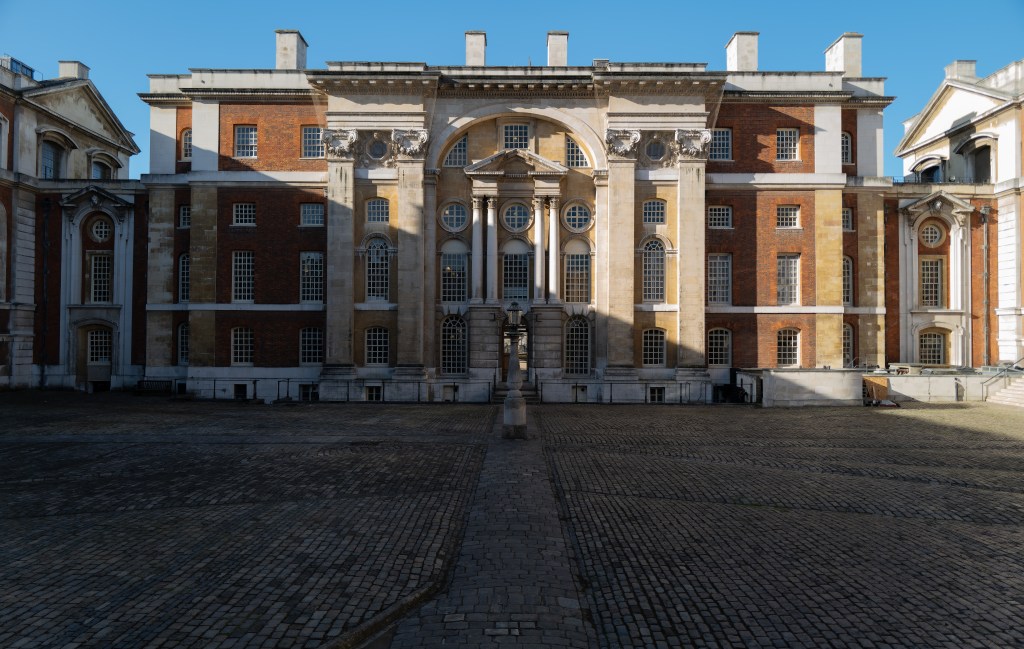
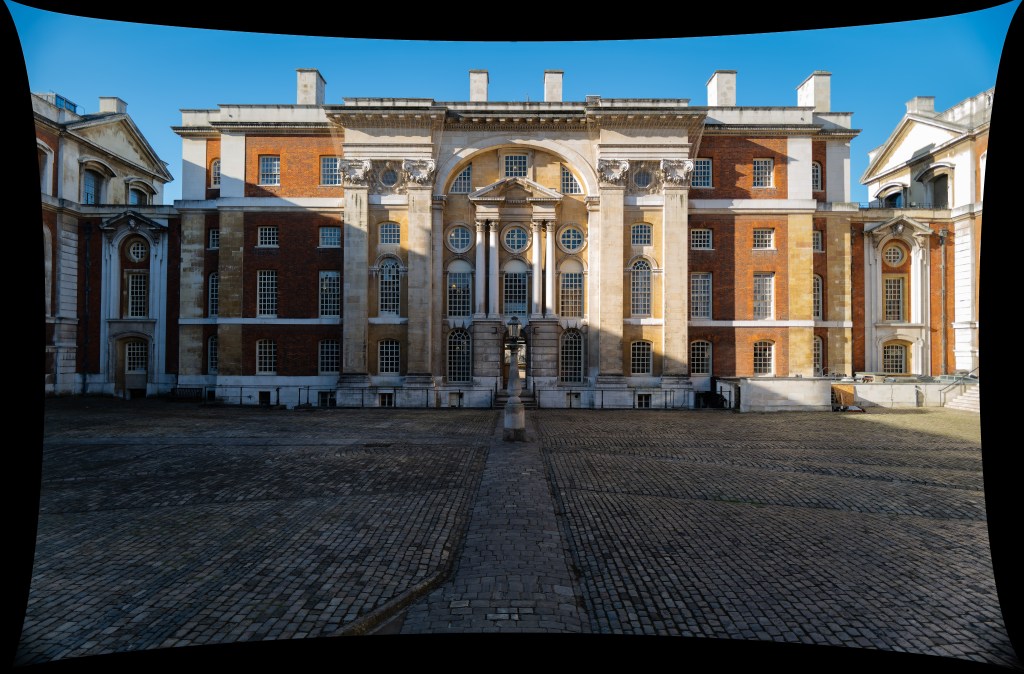
As previously mentioned, with distortion correction you now get multiple cropping options. Alongside the standard output at the camera’s original aspect ratio, you can also choose ‘maximum rectangle’ (which will be a little wider), and ‘complete image area’, which includes all the data captured by the camera (other areas are filled in with black). These options maximise flexibility when it comes to making further perspective corrections and cropping. But it’s worth bearing in mind that you’ll be working slightly outside the lens’s design parameters at the extreme edges of the image.
Here are the available options, illustrated using an image from the Leica Q2, which employs significant barrel distortion correction:
There’s also now a choice of four levels of lens softness correction – Soft, Standard, Strong, and Hard – with the latter two providing an increased effect compared to PureRAW 2. This isn’t merely a boost in overall sharpening, but is profiled to address the cross-frame sharpness variation for each lens design. It should be especially interesting for photographers who choose their lenses for convenience and value, rather than paying a premium for the sharpest optics.
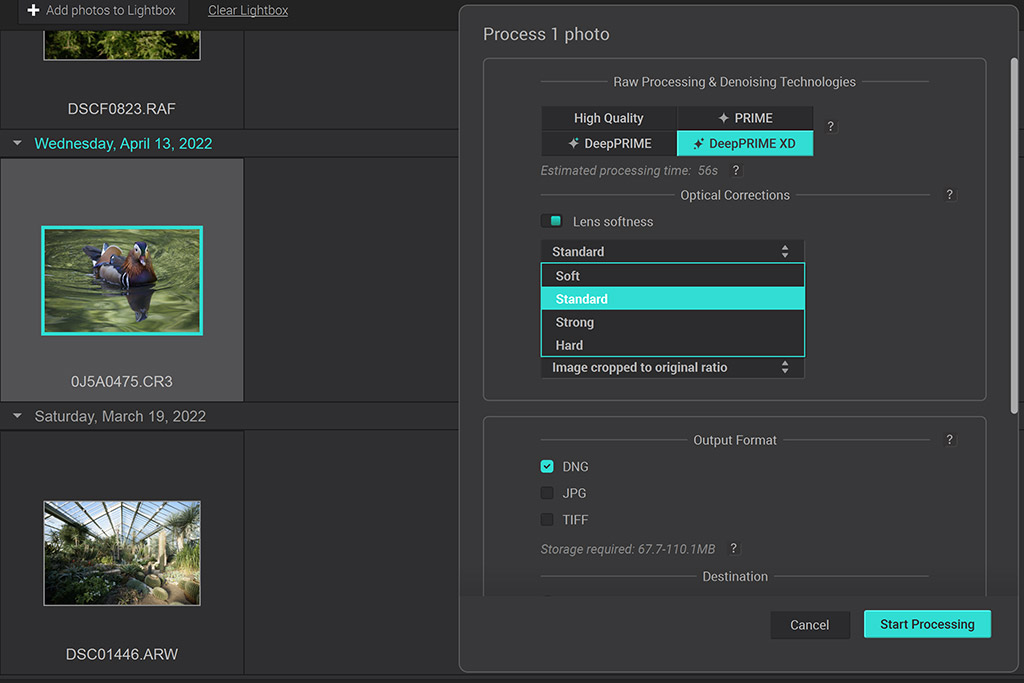
There are now four options for lens softness correction, of different strengths. Image credit: Andy Westlake
To illustrate this, I tested the correction settings using a landscape image from the Fujifilm X-T5 with the XF 16-80mm F4 R OIS WR, which isn’t known for its sharpness at wideangle. I was impressed by how PureRAW improved the overall contrast and detail rendition, particularly with the stronger settings. It’s not the same as upgrading to a sharper lens, but it’s the next best thing.

Fujifilm X-T5, XF 16-80mm F4 R OIS WR at 16mm, 1/120sec at f/11, ISO 125. DeepPrime processing, lens softness correction Hard. Image credit: Andy Westlake
Below are 100% crops comparing each of the available lens softness correction settings.
Likewise, PureRAW 3 can transform images shot with older kit. It produced excellent results with an old shot of a pair of penguins that I took using the Canon EOS 350D and EF 75-300mm f/4-5.6 IS USM lens. That’s an 8MP DSLR dating from 2005, and a lens that was introduced a decade earlier (you can see the result below). As to which of the settings is ‘best’, I preferred Hard for the landscape shot, but felt Strong looked more natural with the wildlife. It’s good to have the choice.
DxO PureRAW 3: Our Verdict
I’ve used PureRAW as part of my workflow for a couple of years now, mainly to improve files shot at high ISOs. So I’m pleased to report that DxO PureRAW 3 builds on previous versions with some useful new features. It may look like you’re being asked to pay a lot of money for a program that doesn’t do very much, but nothing could be further from the truth. You’ll get strikingly better high-ISO image quality from your camera, and sharper images out of your lenses. It’s like upgrading all your kit, all at once – plus every camera and lens you previously owned, too.
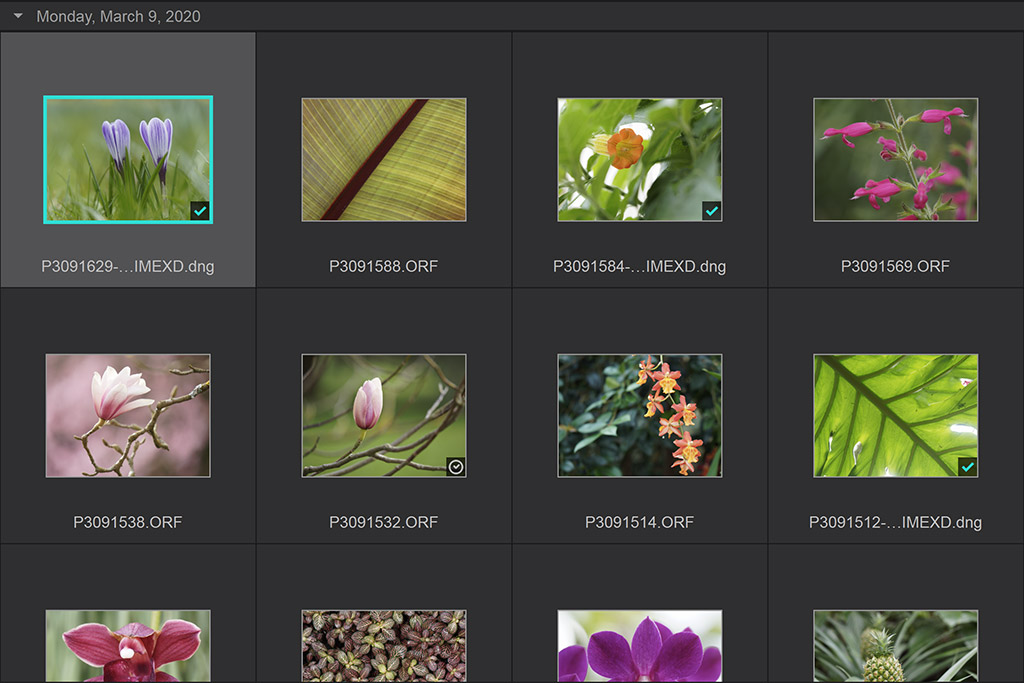
DxO PureRAW 3 marks files you’ve already converted with a blue tick, and shows their new filename. Queued images have a black tick. Image credit: Andy Westlake
There’s an argument that PureRAW is expensive compared to DxO Optics Pro, which provides a fully-fledged raw converter for £199. But this rather misses the point, as PureRAW is specifically designed for people who don’t want to change their workflow and learn a whole new program.

DxO PureRAW 3 works wonders with older cameras and lenses. Canon EOS 350D, EF 75-300mm f/4-5.6 IS USM at 145mm, 1/640sec at f/10, ISO 400. Image credit: Andy Westlake
PureRAW does have its limitations, of course. Most obviously, it takes a long time to process camera raw files, so make sure you try the free trial version first, to ensure it’ll meet your needs. And of course, while it does a brilliant job of addressing high-ISO noise and lens softness, it can’t fix blur from other sources, such as camera shake and subject motion. But that aside, it’s one of the most cost-effective ways available of boosting the technical quality of your images.

Follow AP on Facebook, Twitter, Instagram, and YouTube.

