In this photo-editing masterclass, Martin Evening shows you how to make optical corrections in Lightroom and Camera Raw.
Martin Evening has a background in advertising and landscape photography. He is also well known for his knowledge of Photoshop and Lightroom, plus books on digital imaging. See www.martinevening.com.
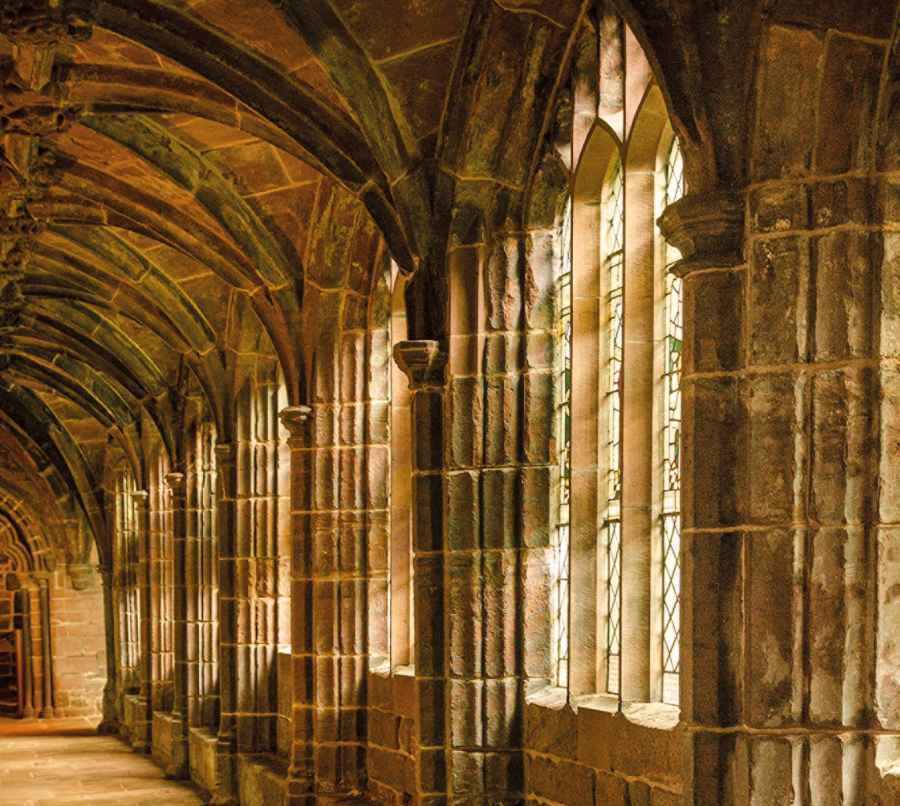
Chester Cathedral Cloisters by Mark Burstow
Mark is a specialist railway engineer working for Network Rail who started taking photographs as a teenager, learning basic black & white darkroom techniques. See Mark Burstow | Flickr.
Pictured here are the cloisters of Chester Cathedral. Mark writes, ‘I was drawn to the contrast between the light flooding through the cloisters and shadows, highlighting the texture and weathering of the stone; and how the repeating and receding pattern of the lighting added depth to the image.’ I thought this photograph showed a dramatic view of the cathedral.
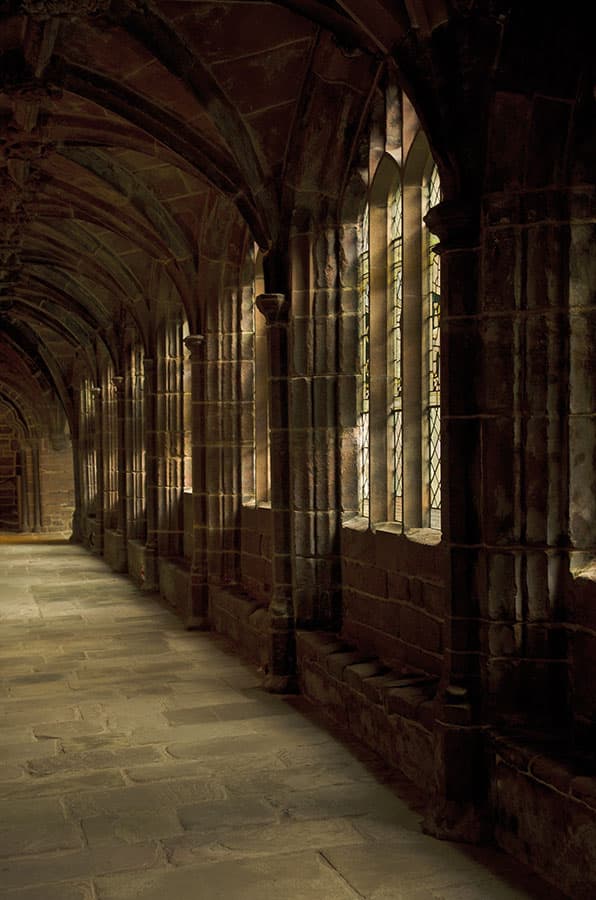
Before
With architectural subjects I generally feel it is important to optimise the optical geometry and perspective. Unless I have the camera on a tripod and check the angles with a spirit level, I struggle to capture the subject perfectly. Fortunately, advanced raw processing software programs, including Capture One and DxO, now provide the tools to make your lenses appear optically correct and also allow you to define the vertical and horizontal edges manually.
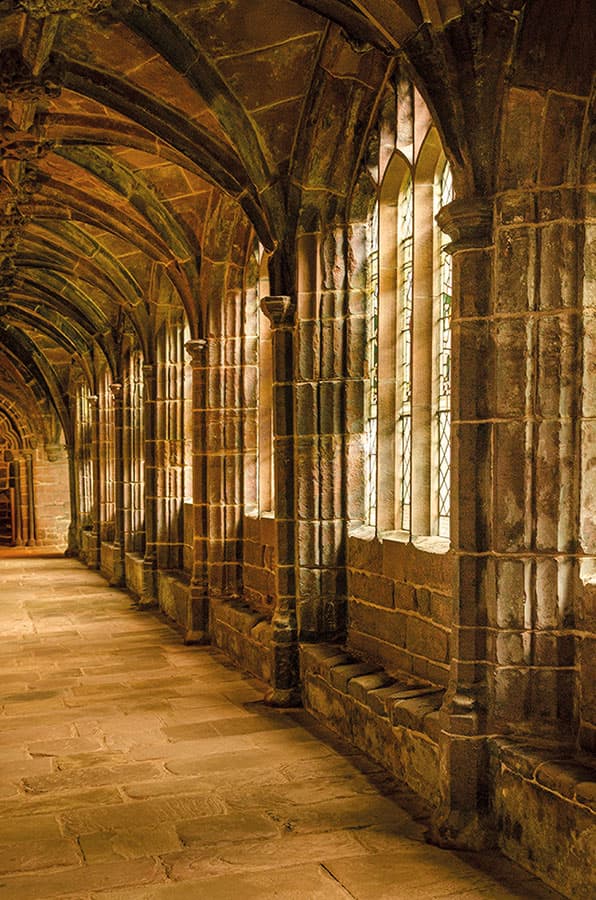
After
Using Guided Upright adjustments to correct optical perspective
When working in Camera Raw and Lightroom you can use the Upright button controls in the Geometry/Transform panel to correct the perspective. For example, you can simply click on the Auto or Full Upright option to apply an instant correction. Or, as I’ve shown here, you can apply a more precise perspective correction.
Select the Guided Upright tool and click and drag to define the vertical and horizontal edges you wish to have appear straight. You will need to apply two guides to correct the verticals and a minimum of one extra guide to correct the horizontals.
Martin’s step-by-step guide to optical correction
1. Lighten the image
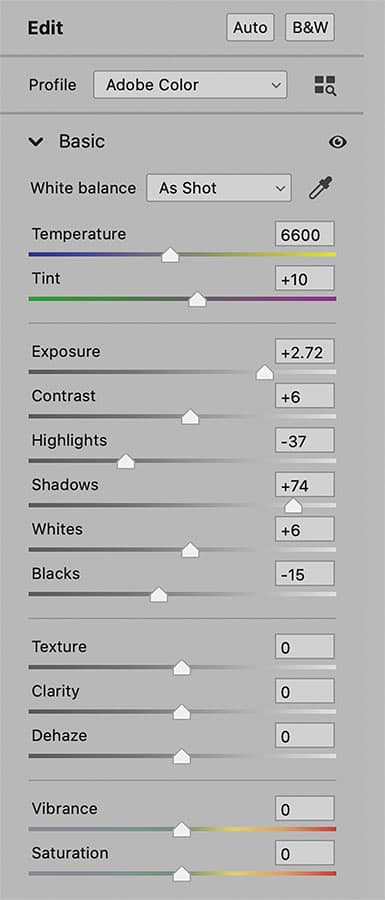
The original image was underexposed. Therefore, I needed to fix this problem first. I went to the Edit Basic panel and dragged the Exposure slider to the right to lighten the image. I also adjusted the remaining tone sliders to optimise the tone and contrast.
2. Add Saturation and Texture
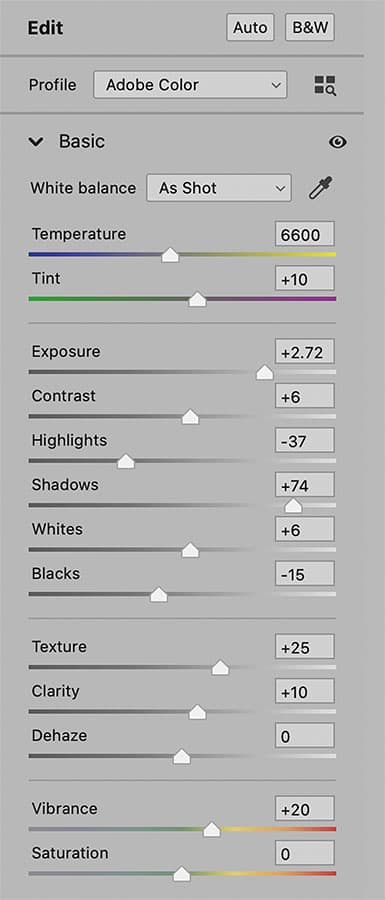
In the Basic panel Presence section, I increased the Texture to add more sharpness and detail to the stonework. I also increased the Clarity slightly and added Vibrance to increase the colour saturation.
3. Apply a Lens Profile Correction
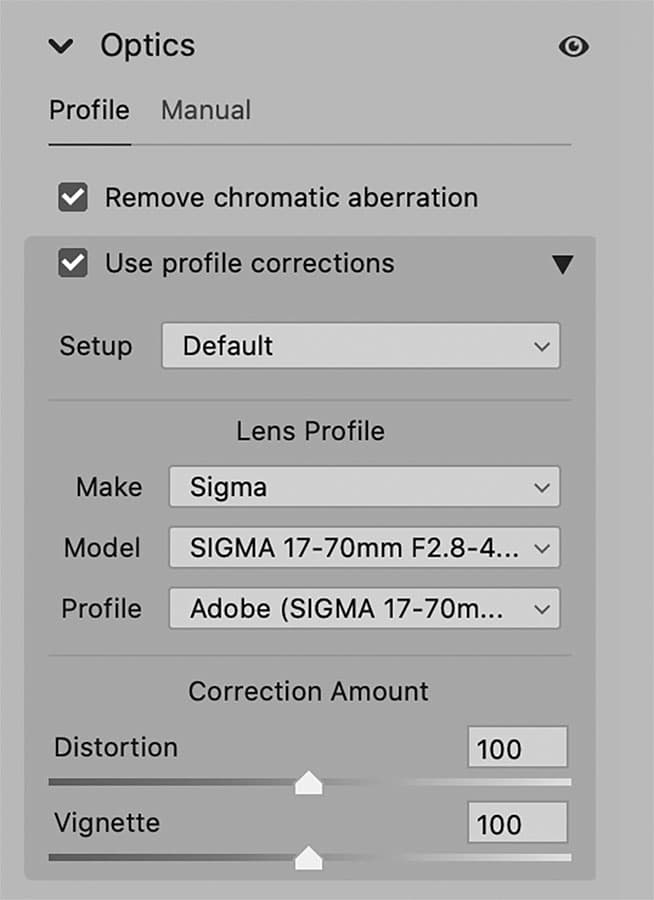
With an architectural subject, such as this photograph, you want the capture image to be as optically correct as possible. In the Optics panel I clicked to enable Remove chromatic aberrations. I also checked Use profile corrections, so as to apply a profiled lens correction.
4. Apply a Guided Upright Adjustment
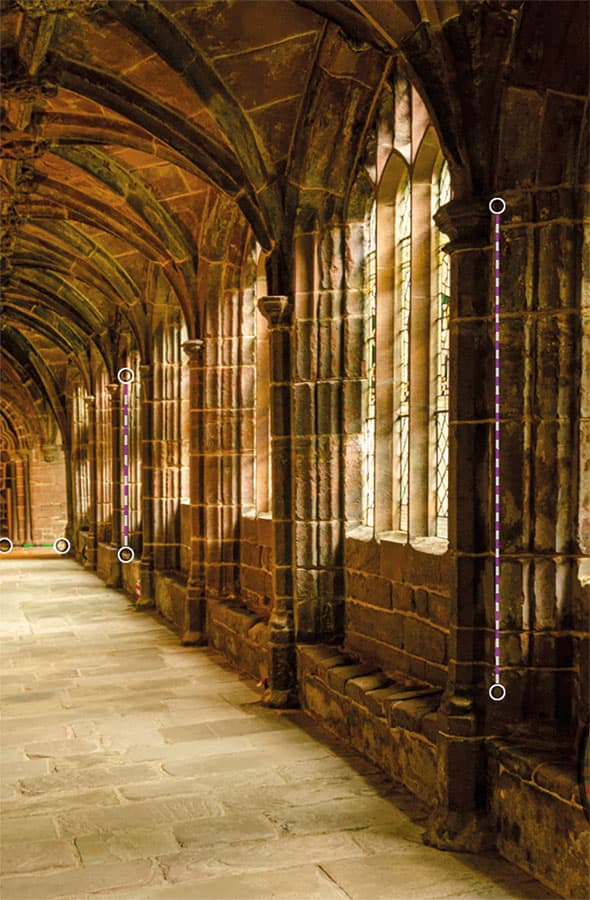
Now that the photo was optically correct, I went to the Geometry panel in Camera Raw and selected the Guided Upright option. Here, I added two vertical guides to correct the vertical edges. I then added a single horizontal guide to straighten the horizon.
5. Add a Graduated Filter Adjustment
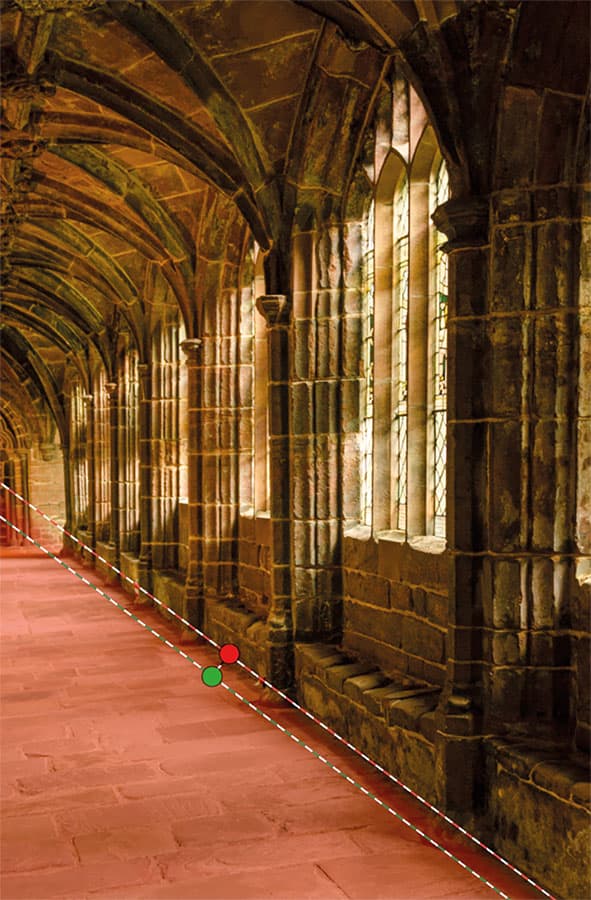
After lightening the image, the cloister floor paving slabs also appeared lighter. Now, to my mind I quite liked the tonal contrast here. But I chose here to add a Linear Gradient (G) adjustment to darken the floor, to see how this compared.
6. Add a Brush Adjustment
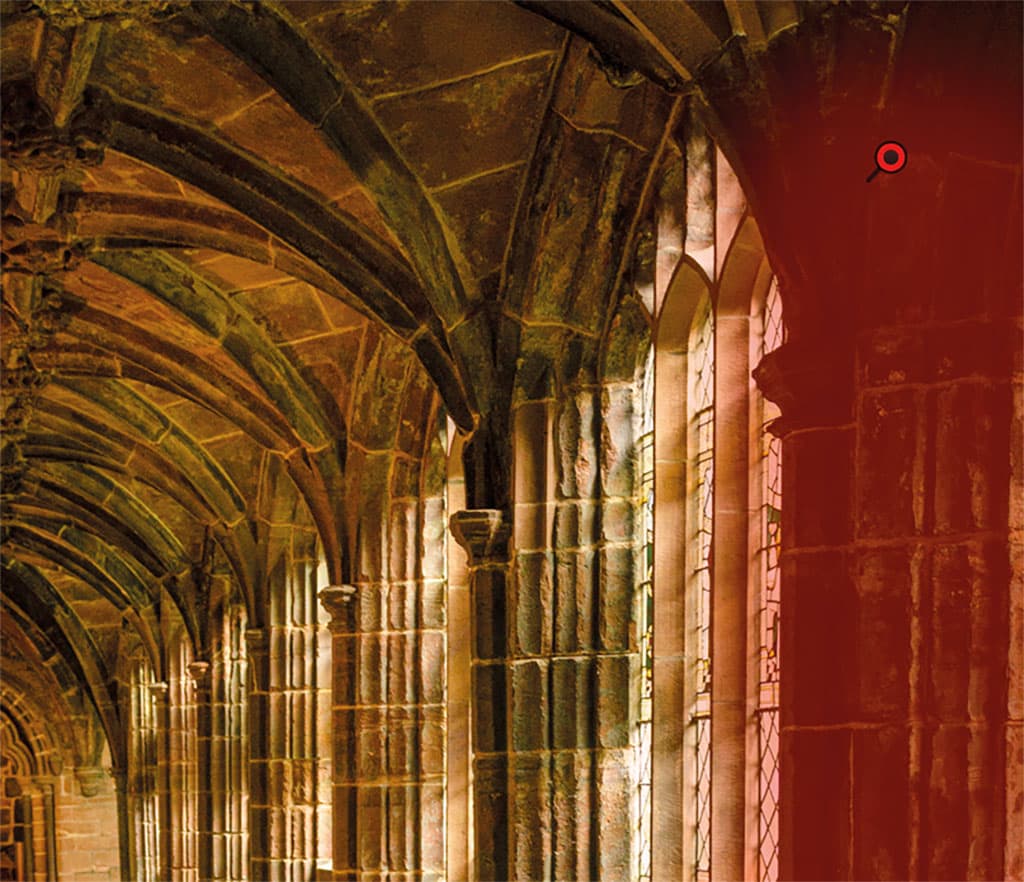
The window arch column in the foreground appeared more shaded than the others. To selectively lighten this area I chose the Adjustment brush tool (K). I then clicked on the column and brushed over it, adding an Exposure lightening adjustment.
Submit your images
To see your photo here and for a chance to win Martin’s new book, email submissions to [email protected] with “Evening Class” in the subject line.
Further reading
How to replace skies in Photoshop

