Here are some great tips to inspire you to enter the Movement round of APOY. Controlling motion is as much a part of photography as capturing light, whether freezing action for that decisive moment or deliberately stretching time to convey speed. Caroline Schmidt speaks to experts for their insights and inspiration
Portraits
Your guide: Caroline Schmidt
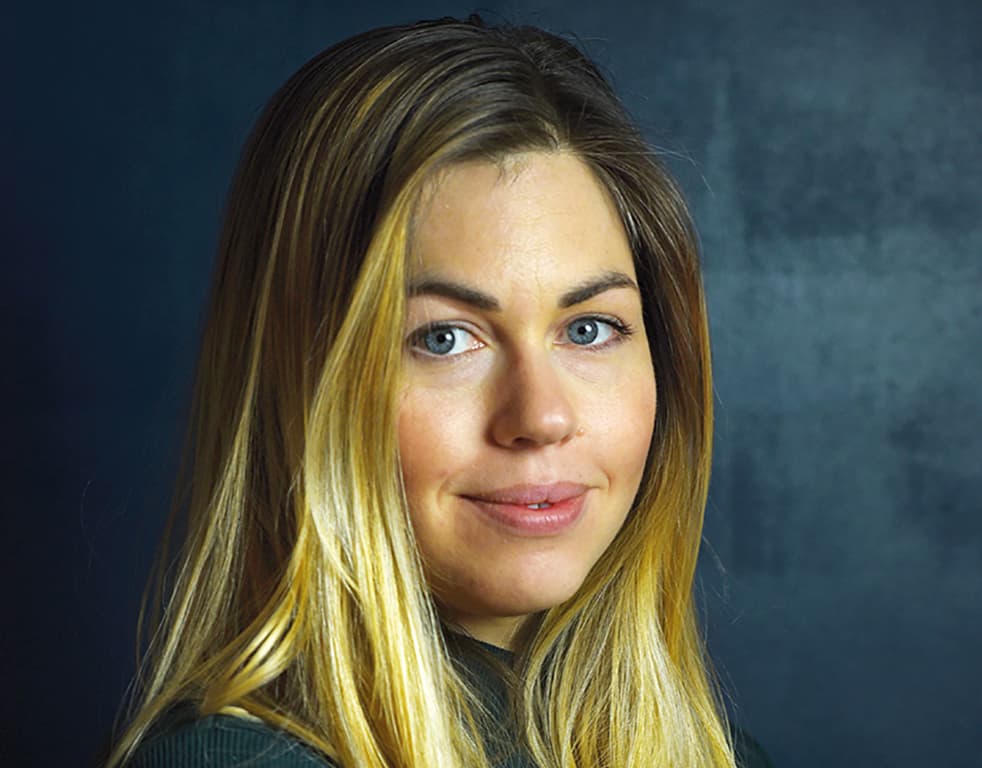
An experienced family and children’s photographer, Caroline’s portraits and expertise is regularly published online and in magazines as well as shared during photography workshops.
www.carolineannphotography.co.uk. See Instagram: @carolineannphotography.
Capturing children
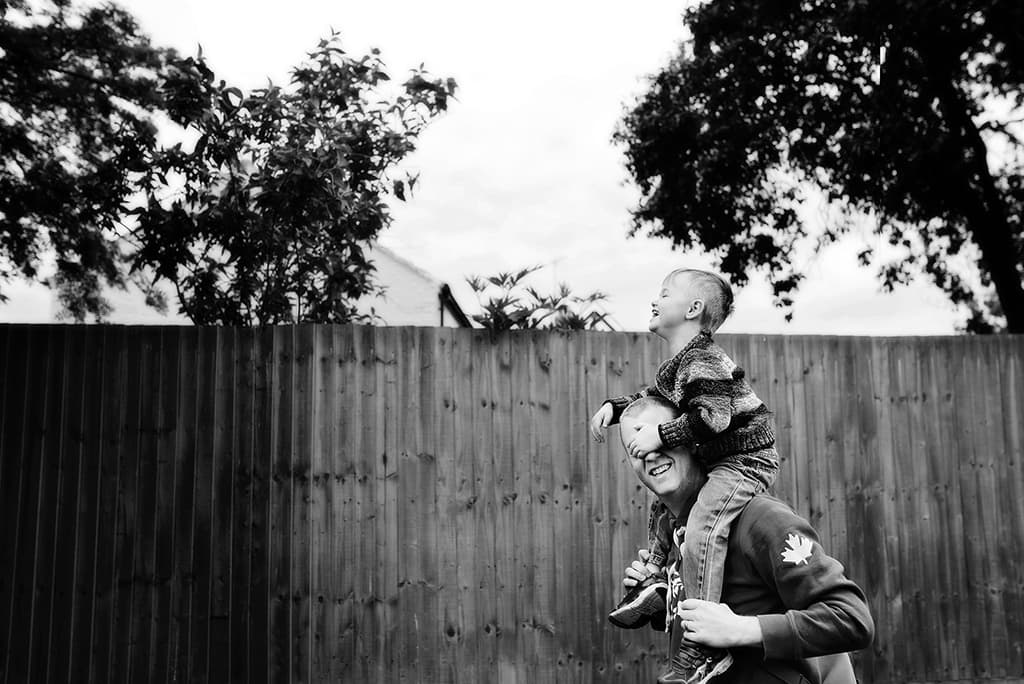
Children aren’t best known for staying still for long, following instructions nor giving genuine smiles to the camera on cue but, so long as you have this expectation, you’ll have the patience to capture great portraits. Children are meant to be free and playful, and when they’re enjoying themselves the picture-potential comes thick and fast – you just have to be ready to capture it.
Having a good camera with fast and accurate autofocus, such as the Nikon D750 and Sony A7R III, will dramatically increase your chances of isolating those perfect expressions – the smallest of lags between pressing the shutter and the frame firing can result in a miss.
Use continuous focusing mode so that the camera detects the subject’s movements and refocuses accordingly to keep the subject sharp. Combining this with back-button focus will give you more control over your focusing, too, and continuous burst mode will increase your chances of getting ‘the’ shot between acts of chaos.
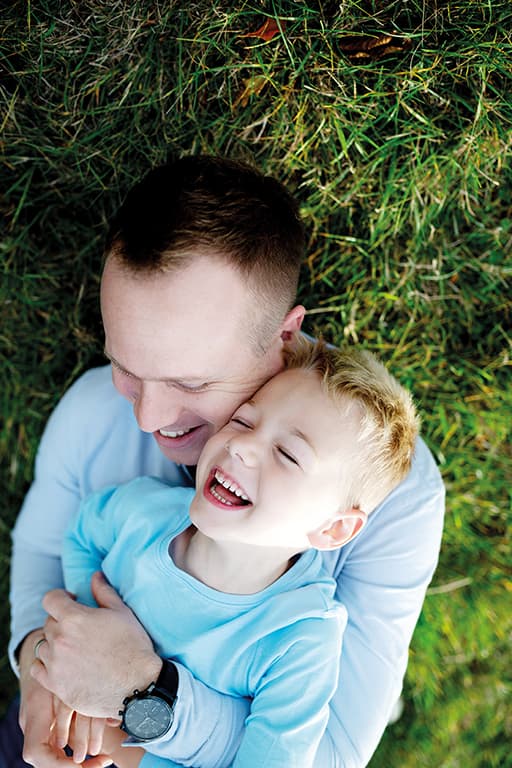
For your shutter speed, it’s best not to drop below 1/250sec-1/320sec so this may mean increasing your ISO to accommodate a smaller aperture like f/5.6; having more depth of field will give you more image space for a child to move in without falling out of focus.
Ultimately, however, once you’ve mastered your techniques you can aim to shoot at wider apertures like f/1.4-f/2.5, whilst retaining focus on their eyes, for a beautiful balance of sharpness and blur that helps produce a better portrait. Aside from the technicalities of photographing children, a lot of your best portraits come from controlling the chaos. Children love to play so encourage that by initiating games, but ensure it’s in an area with a clutter-free background and good lighting so that you can focus your attention on them.
By setting the portraits up, you can try to predict their expressions and when you should start to fire your shutter. Don’t wait until you see the perfect portrait because that will be too late; begin firing frames when you think it’s on its way and don’t stop shooting until the moment passes completely, and somewhere in the middle you capture the unexpected.
Pets and Sport

Your guide: Jordan Butters
A professional automotive photographer and dog owner, Jordan specialises in creating dynamic and energetic images in the automotive sector but enjoys photographing his own and other people’s canine friends. See www.jordanbutters.co.uk, Instagram: @jordanbutters, Twitter: @jordanbutters.
Dogs make for great subjects – they’re animated, easily bribed into position and when they’re in motion, with gums and ears flapping, they’re the ideal subject for showing off movement. There are two ways to approach capturing dogs.
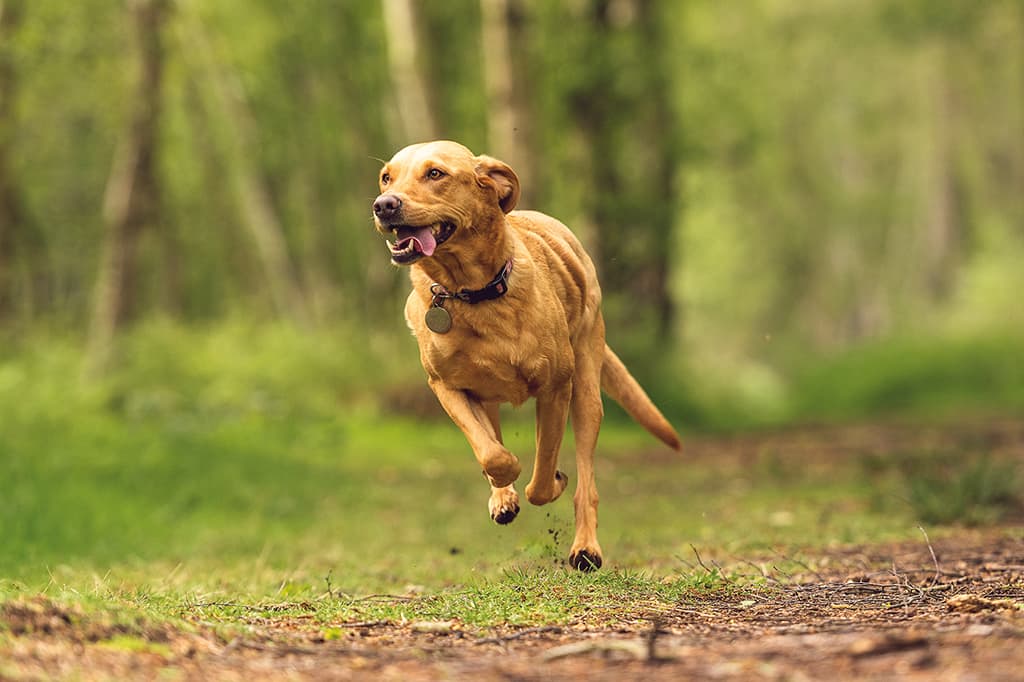
You can use aperture-priority mode to select your widest aperture, which will ensure that you get the fastest-possible shutter speed for the correct exposure. Or use shutter-priority mode and choose a fast shutter speed. If you choose the latter, keep an eye on the aperture readout – if it’s flashing it means that your aperture can’t go wide enough to expose the image correctly. Matching your ISO to the light you’re shooting in will help achieve the right exposure, too.
Bumping up the ISO higher can help you to reach those fast shutter speeds needed to freeze the moment. A shutter speed of 1/320sec or faster should be quick enough to freeze the speediest pups. Choose a long lens and get down low for that eye-level perspective. Select continuous burst shooting mode and use continuous autofocus so the camera adjusts the focus as the dog gets closer. Then ask someone to hold the dog in place while you tempt them with a treat and move a good distance away.
Then, on your command, they release the dog and step out of the frame as you call it towards you. Fire off as many frames as you can, placing your focus point/s on the dog’s eyes. Just remember to put the camera down and prepare for landing before the pup gets too close – there’s nothing more painful!
“”
Sports
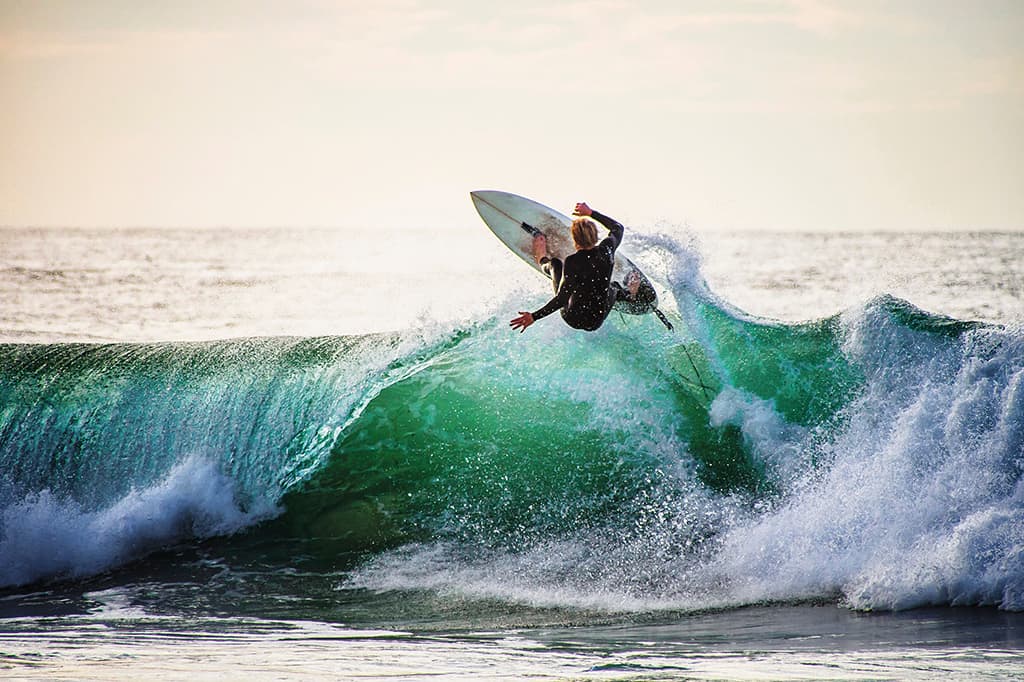
Whether it’s photographing a children’s five-a-side football match or a Premiership game, splashing in the pool or competitive swimmers, most of the time you want to stop movement in its tracks. It relies on good timing, accurate focusing and very fast shutter speeds.
A great sports shot shows a subject at the peak of its action, like a sprinter crossing the finishing line, a dancer at the top of a move, or a diver finger-tip distance from the water’s surface. As well as camera skills, you need to understand the subject’s behaviour so you can predict when that peak will be and the best viewpoint from which to capture it from.
All the factors have to work in unison and a split-second delay can make all the difference between getting a great image or not. Use aperture-priority or shutter-priority mode, and assess the speed of the sport. Start at 1/250sec, which is the average speed for children running, and increase as deemed necessary – a fast-paced football game needs at least 1/500sec but 1/1000sec isn’t unheard of if light levels allow.
For slower movements, or if you want to introduce blur to convey a sense of motion (see panning), you can get away with a shutter speed like 1/125sec. To get high speeds when ambient light is low often means shooting wide open with high ISOs.
The shallow depth of field means that focus needs to be very precise, so set continuous autofocus (or your camera’s equivalent) to track your subjects and a high burst rate so you can take multiple frames per second. Explore back-button focusing too in order to help keep your main subject sharp, even if other subjects in the frame interrupt the camera’s autofocus.
You could also consider using off-camera flash, when appropriate, as this will provide equivalent shutter speeds far faster than anything your camera is capable of (see high-speed flash on page 39) and explore flash settings such as slow-sync mode that will allow you to drag the shutter to record movement whilst the flash freezes your subject.
Still Life
Your guide: Caroline Lowe
Award-winning food photographer, Hampshire-based Catharine shoots regularly for restaurants, magazines, events and food companies. Cath is a winner of Pink Lady Food Photographer of the Year, Portraits, 2021. See more at www.cathlowe.com, @cathlowephoto.
Fantastic food
Sieving, stirring and sprinkling are a few of the actions you can expect to capture when endeavouring to use motion to make food still-life images more dynamic. Alongside your choice of light, shutter speed plays a key role. Do you want the movement of a whisk in a bowl to be blurred or crisp?
Every scenario is different, every liquid or particle moves at different speeds so there’s no set suggested shutter speed. You need to consider how fast your subject is moving, how much motion you want to show and then experiment with various shutter speeds.
To achieve a fast shutter speed, whilst maintaining a mid-to-small aperture for sufficient depth of field, you will need a lot of light. It could come from a bright, close-by window bounced off a white card for extra diffusion; or use flash and its high-speed sync mode so you can shoot faster than your camera’s sync speed (typically 1/160sec-1/200sec). Increasing your ISO can help, too.
A tripod and remote shutter release are also essential so you can create the action whilst still firing the shutter. For hands-free shooting use the camera’s self-timer mode. Use continuous shooting mode to increase your chances of capturing a great image, but shoot a scene-setter before you take an action shot.
Getting an unspoilt image of the set-up before you introduce any mess will be invaluable as you can use it to clean up images in post-production.
Pouring
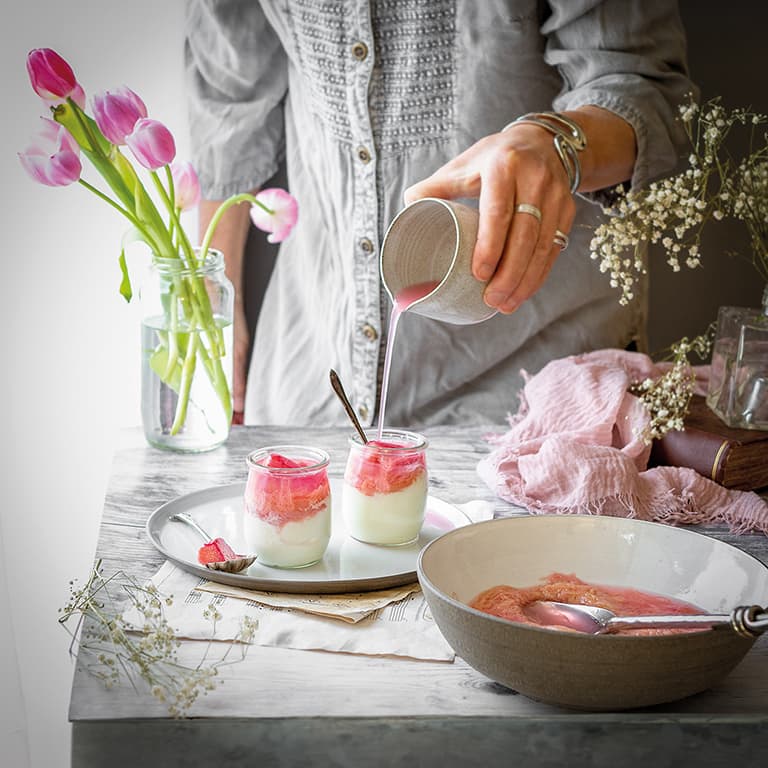
Once you’ve shot a scene-setter, try taking an image with the pouring vessel empty so that you can see where best to hold it for the final picture. Take a number of shots pouring onto your subjects in a few places to give yourself choice. Ensure the vessel is turned towards the light so the liquid is nicely lit.
This image of pouring rhubarb liquid was taken using daylight and at 1/45sec as I wanted some blur to show the liquid was moving.
Splash
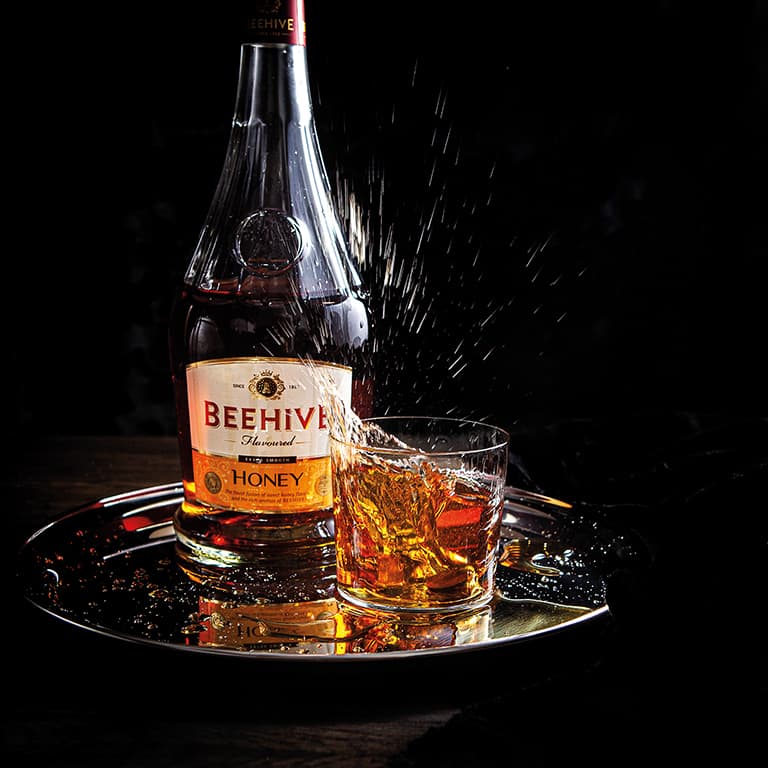
When preparing a big splash, ensure that no flying liquid can hit electronic equipment or that no props can be damaged by spilt liquid. For a big splash, fill your glass to the brim so the liquid can escape easily. Coins make dramatic splashes when dropped but can look odd in transparent liquid so I often blend a shot of clear liquid with another image with a great splash (but with about 20 coins within).
Sieving
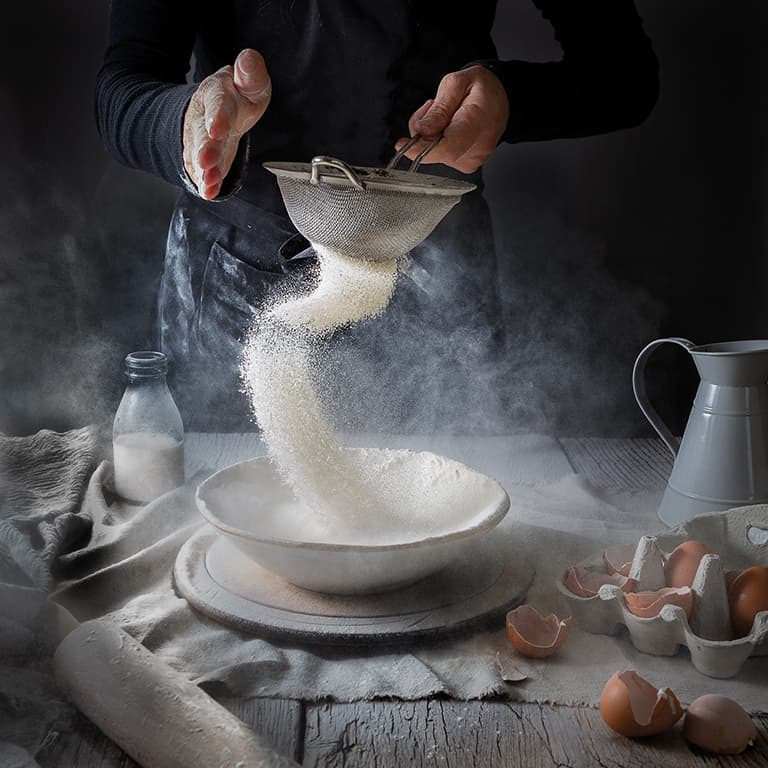
Flour and icing sugar can look beautiful when sieved and swirled from side to side at different speeds. Try tapping the side of the sieve rather than moving across for lovely movement and make sure you choose a contrasting background so that white swirls show up, ensure your hands are presentable and your clothing doesn’t distract from the scene.
I used flash here and experimented until I got a mixture of blur and sharpness to give a real sense of movement.
High-speed water and still life
Your guide: Richard Webb
A photography enthusiast and full-time air traffic controller from Hampshire, Richard spends any free time he has that’s not with his family shooting spectacular water motion photography. He constantly develops creative ways to capture the beauty of water in a blink of an eye. Facebook @rich.rwphotography.
I have a love affair with water. I spend my time looking for things I can put in my dunk tank and new ways to create splashes or drops. Whilst you can shoot water droplets with no more than natural light, a hole in a plastic bag and a shutter speed of 1/500sec or faster, it’s imprecise and time-consuming.
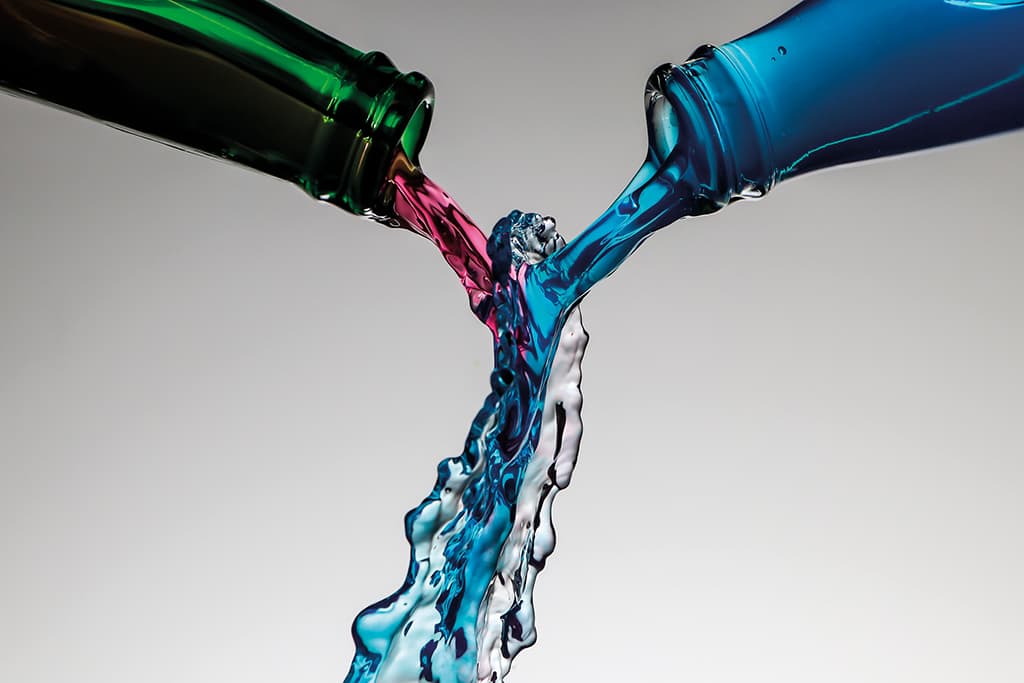
For me, speedlights and a splash water drop kit revolutionised the quality of my work and the success of my images, allowing me to become more creative and look for objects to use such as creating a droplet within a bubble or a bottle.
The drop kit syncs my camera and flash for when the droplet impacts the water’s surface, almost guaranteeing sharp and impactful shots. Without it, the process is very hit-and-miss as you have to predict the moment of impact and fire a remote release in unison. Using flash gives me an equivalent shutter speed far quicker than a camera is capable of without compromising on depth of field through using a wide aperture and a high ISO to achieve a shutter speed fast enough to freeze imprecise action.
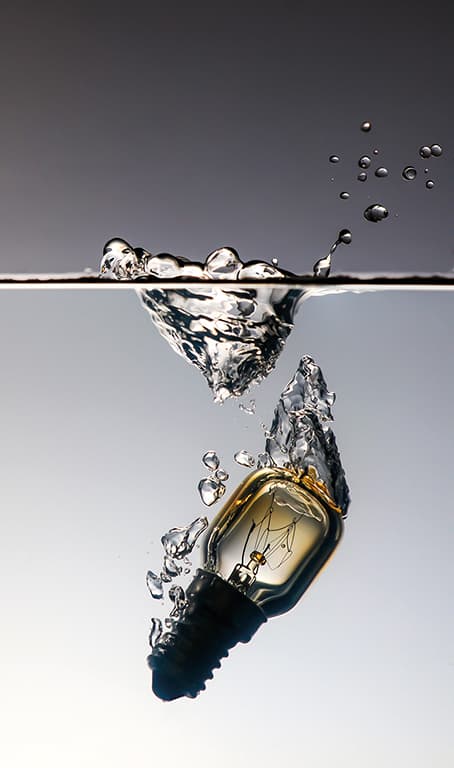
I always set my lens to a mid-aperture, like f/8 to f/11, and my camera’s flash sync speed of 1/160sec; the flash is what freezes the action whilst the shutter speed captures the ambient light. I almost always use 1/64 power on my flash, sometimes increasing it to 1/16 power if I’m bouncing it off a white surface behind the set-up.
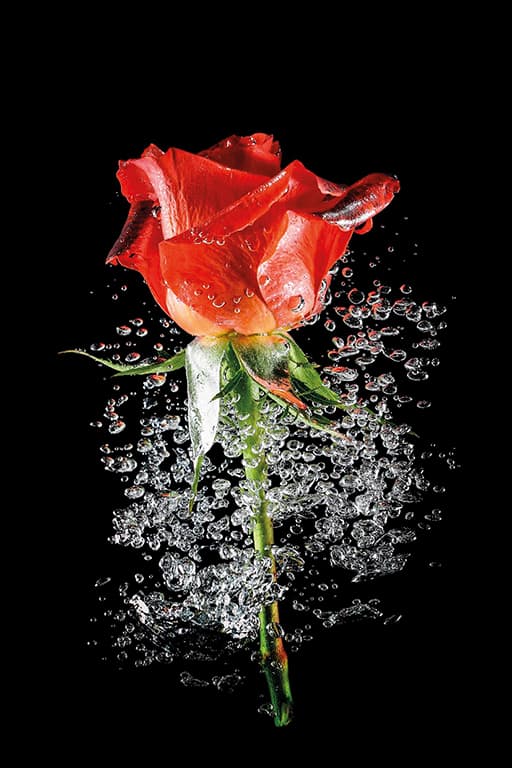
Backlighting is nearly always the most effective way to light water splashes and glass as you avoid reflections, glare and unsightly highlights. It’s one reason why I only use water or coffee; milk, not being transparent, needs to be lit from the front too to avoid them becoming silhouetted and creates glare spots.
The beauty of high-speed water still-life shots is that the set-ups do not need to be big; I do all mine in my garage studio, often in a space the size of a sheet of A3 paper. Instead of a macro lens, I prefer the flexibility and greater depth of field of an 18-135mm lens and use a humble Canon EOS 80D – creating great images needn’t be expensive.
Street

Your guide: Helen Trust
An award-winning amateur photographer, Helen has a passion for architectural photography that takes her around the world. She is an ambassador for Formatt-Hitech filters with a penchant for long exposures and minimalism. Instagram @Helen_Trust, helentrustphotography.com.
When photographing cities, I’m always negotiating people – sometimes including them helps to bring context and scale, other times using a long exposure rids the scene of movement to focus on the architecture. When shooting indoors, tripods aren’t often allowed but to blur or eliminate moving people you do need some support during a long exposure.
Banisters, walls and discreet Joby tripods can work well, but it helps to find a viewpoint that doesn’t have any heavy traffic. In the Oculus New York, its white walls and fluorescent lights make it very bright so I found I had to stop all the way to f/22 at ISO 100 to get a long enough shutter speed.
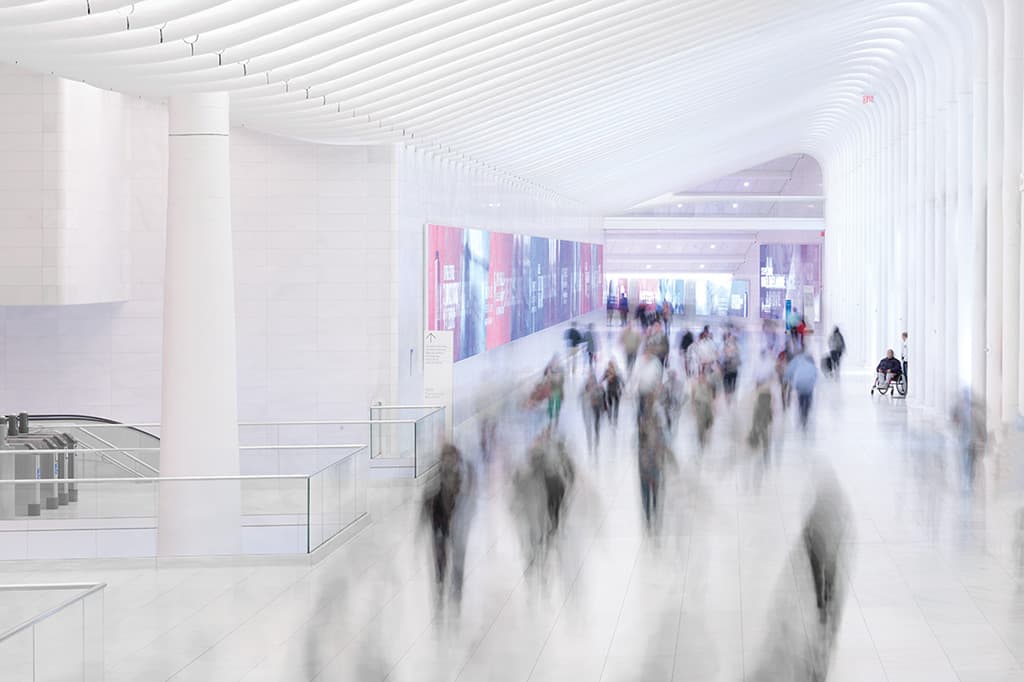
I often begin with a sharp shot and then adjust the shutter speed until the people blur but retain some structure. The exposure depends on how fast they’re moving. Generally, anything longer than half a second will introduce movement. To vacate a busy scene, you need a shutter speed of at least four to ten seconds to avoid any ghosting stragglers.
Photographing a flow of people leaving a train in one direction, for instance, is easier than having walkers coming from different directions at different speeds as it’s likely at least one or two people will be rendered as ghosts in the exposure – though that’s not always a bad thing.
Panning

Your guide: Jordan Butters
A professional automotive photographer, based in Northamptonshire, Jordan specialises in creating dynamic and energetic images in the automotive sector. He works for a mixture of commercial and editorial clients across the globe. See www.jordanbutters.co.uk, Instagram: @jordanbutters, Twitter: @jordanbutters.
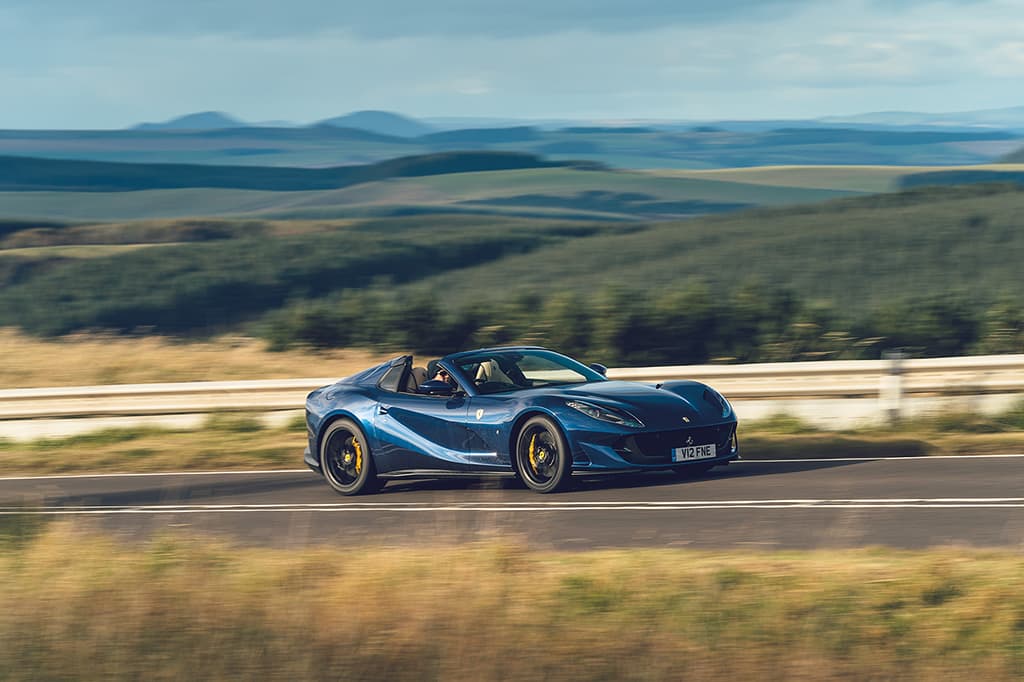
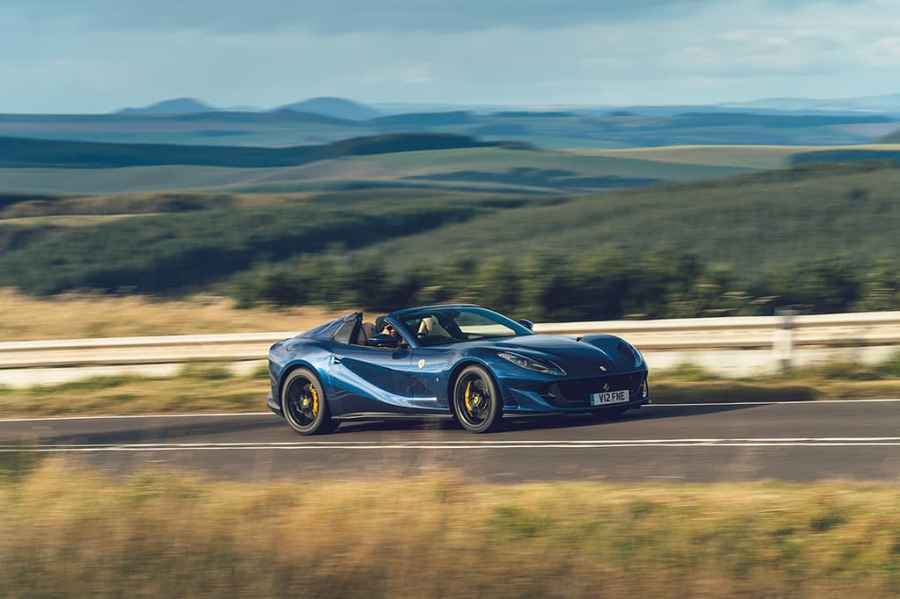
From capturing split-second moments using a fast shutter speed to bolting cameras onto cars to capture motion around your subject, there are a lot of creative possibilities you can explore when photographing moving cars, but the best one to begin with is panning. The technique – usually carried out in shutter-priority mode – has you tracking the passing subject with your camera, keeping it in the same place within your viewfinder, whilst triggering a continuous burst of images.
It’s a technique that can be honed from the spectator areas at a racetrack, but photographing any passing car (or cyclist) is good practice. Whilst perfecting your panning motion is important, choosing the right shutter speed is equally importrtant and there are variables you’ll need to consider, namely the speed and direction in which the car is travelling in relation to where you stand. Cars moving parallel to the camera are the easiest to capture: set your camera to shutter-priority mode and choose single-point, continuous autofocus, as well as continuous burst mode.
Begin by picking a ‘safe’ shutter speed roughly three-to-four times the speed the car is passing you. For example, on a 40mph road, choose 1/125sec; for a car passing at 60mph choose 1/200sec. As the car approaches, stand with your feet shoulder-width apart and lock your elbows tightly into your sides. Look through the viewfinder, place your focus point onto the car, and rotate only your torso at the hips as the car passes, whilst firing off as many shots as you can until the car has passed completely.
At these ‘safe’ shutter speeds there will probably be some motion in the car’s wheels, but not much in the background. Once you start seeing consistent results, start stopping the shutter speed down. Once you get to a 1:1 correlation between the car’s speed and shutter speed (i.e. 1/40sec at 40mph) you’ll notice a lot more background movement, and with enough practice, slower speeds such as 1/10sec on a car passing at 100mph becomes entirely doable! If the car approaches or moves away from you at an angle, slow shutter speeds become increasingly difficult as the distance between you and the car is always changing.
Panning is a technique that requires technical skill, the right physical movement and a pinch of luck.
Camera and light painting
Your guide: Jason D Page
A light painter, Jason’s work focuses on using a camera as an instrument for recording light rather than a tool for documentation. He’s the founder of LightPaintingPhotography.com, an educational resource for all things light painting, and is the inventor of the light painting tool system, Light Painting Brushes. See www.lightpaintingbrushes.com, www.instagram.com/jasondpage_lightpainter, www.facebook.com/jasondpage, www.youtube.com/user/LightPaintingPhoto.
Kinetic light painting, otherwise known as camera painting, is when the camera rotates to create a wild kaleidoscopic design of light over a static scene. To be able to rotate the camera 360°, you need a Panoramic Tripod Gimbal and a hotshoe-mounted spirit level to see the degree of rotation.

What’s fantastic about this technique is that it can produce amazing images from the most mundane scenes so long as there’s a lot of ambient light such as bright buildings and neon signs. It’s important to triple-check your camera is securely attached to the gimbal before turning it upside down, then find your centre axis rotation point. It’s easy to do in live view with the grid active, then slowly rotate the camera to make sure the point stays in the centre throughout the 360° rotation.
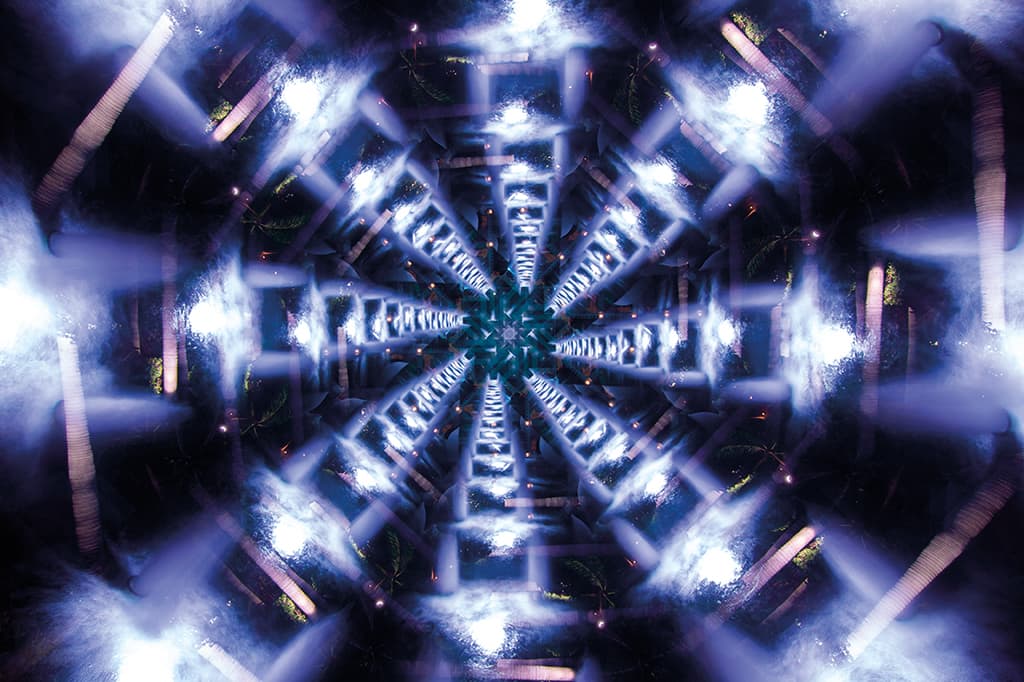
For your exposure, find a baseline for the scene and start there. For instance, if it’s a night scene it might require f/8 at three seconds (ISO 100), in which case you switch to Bulb mode and only remove the lens cap for three seconds at a time. Start the exposure with the lens cap on so the sensor cannot record any light and stop the exposure by replacing the cap.
For an intricate design, you could stop every 45° to remove the lens cap for three seconds before replacing it and rotating the camera another 45° before repeating the process for a full 360°.
Traffic trails
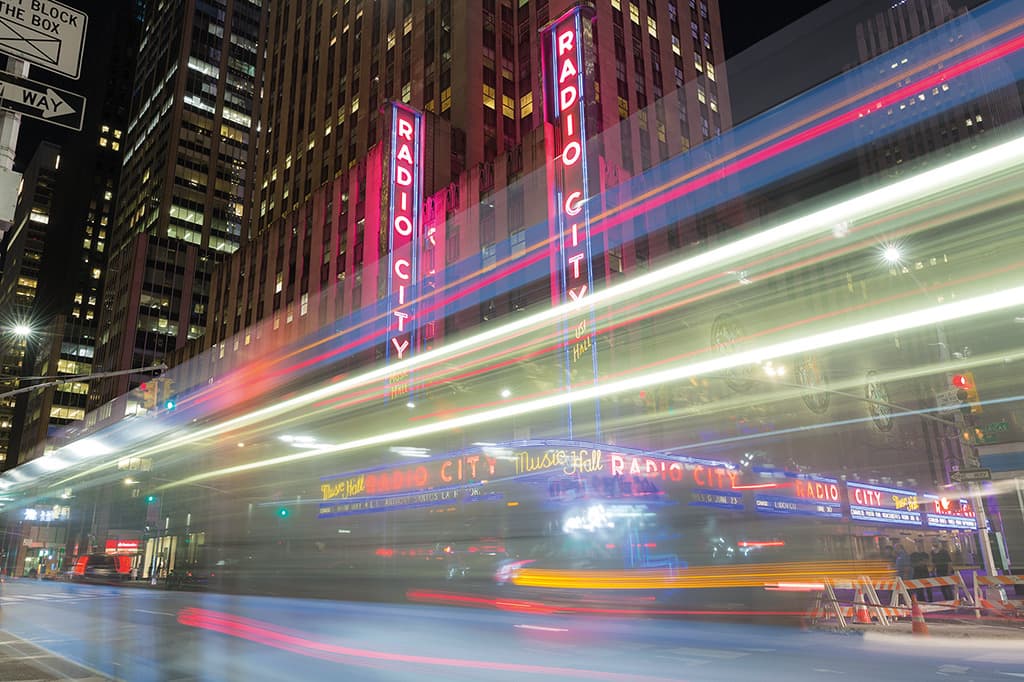
At night, cities can have so much energy and atmosphere, which traffic trails do well to capture. For mesmerising, continuous streaks of light created by passing head or tail lights, position yourself with a wideangle lens and a tripod by the side of a road (remember to wear reflective clothing)!
A wideangle lens will exaggerate the streaks closest to the camera as well as include background detail. If there’s a lot of sky in your image, aim to shoot into twilight so the sky is still blue against the city’s lights. To calculate your exposure time, count how long it takes for a vehicle to pass through your frame to ensure the trails don’t start or end abruptly in the frame.
Use shutter-priority or manual mode and a small aperture of f/8-f/11 to extend depth of field to the background; Depending on the speed of the traffic, you’ll probably find that between five and 30 seconds works well.
Light painting
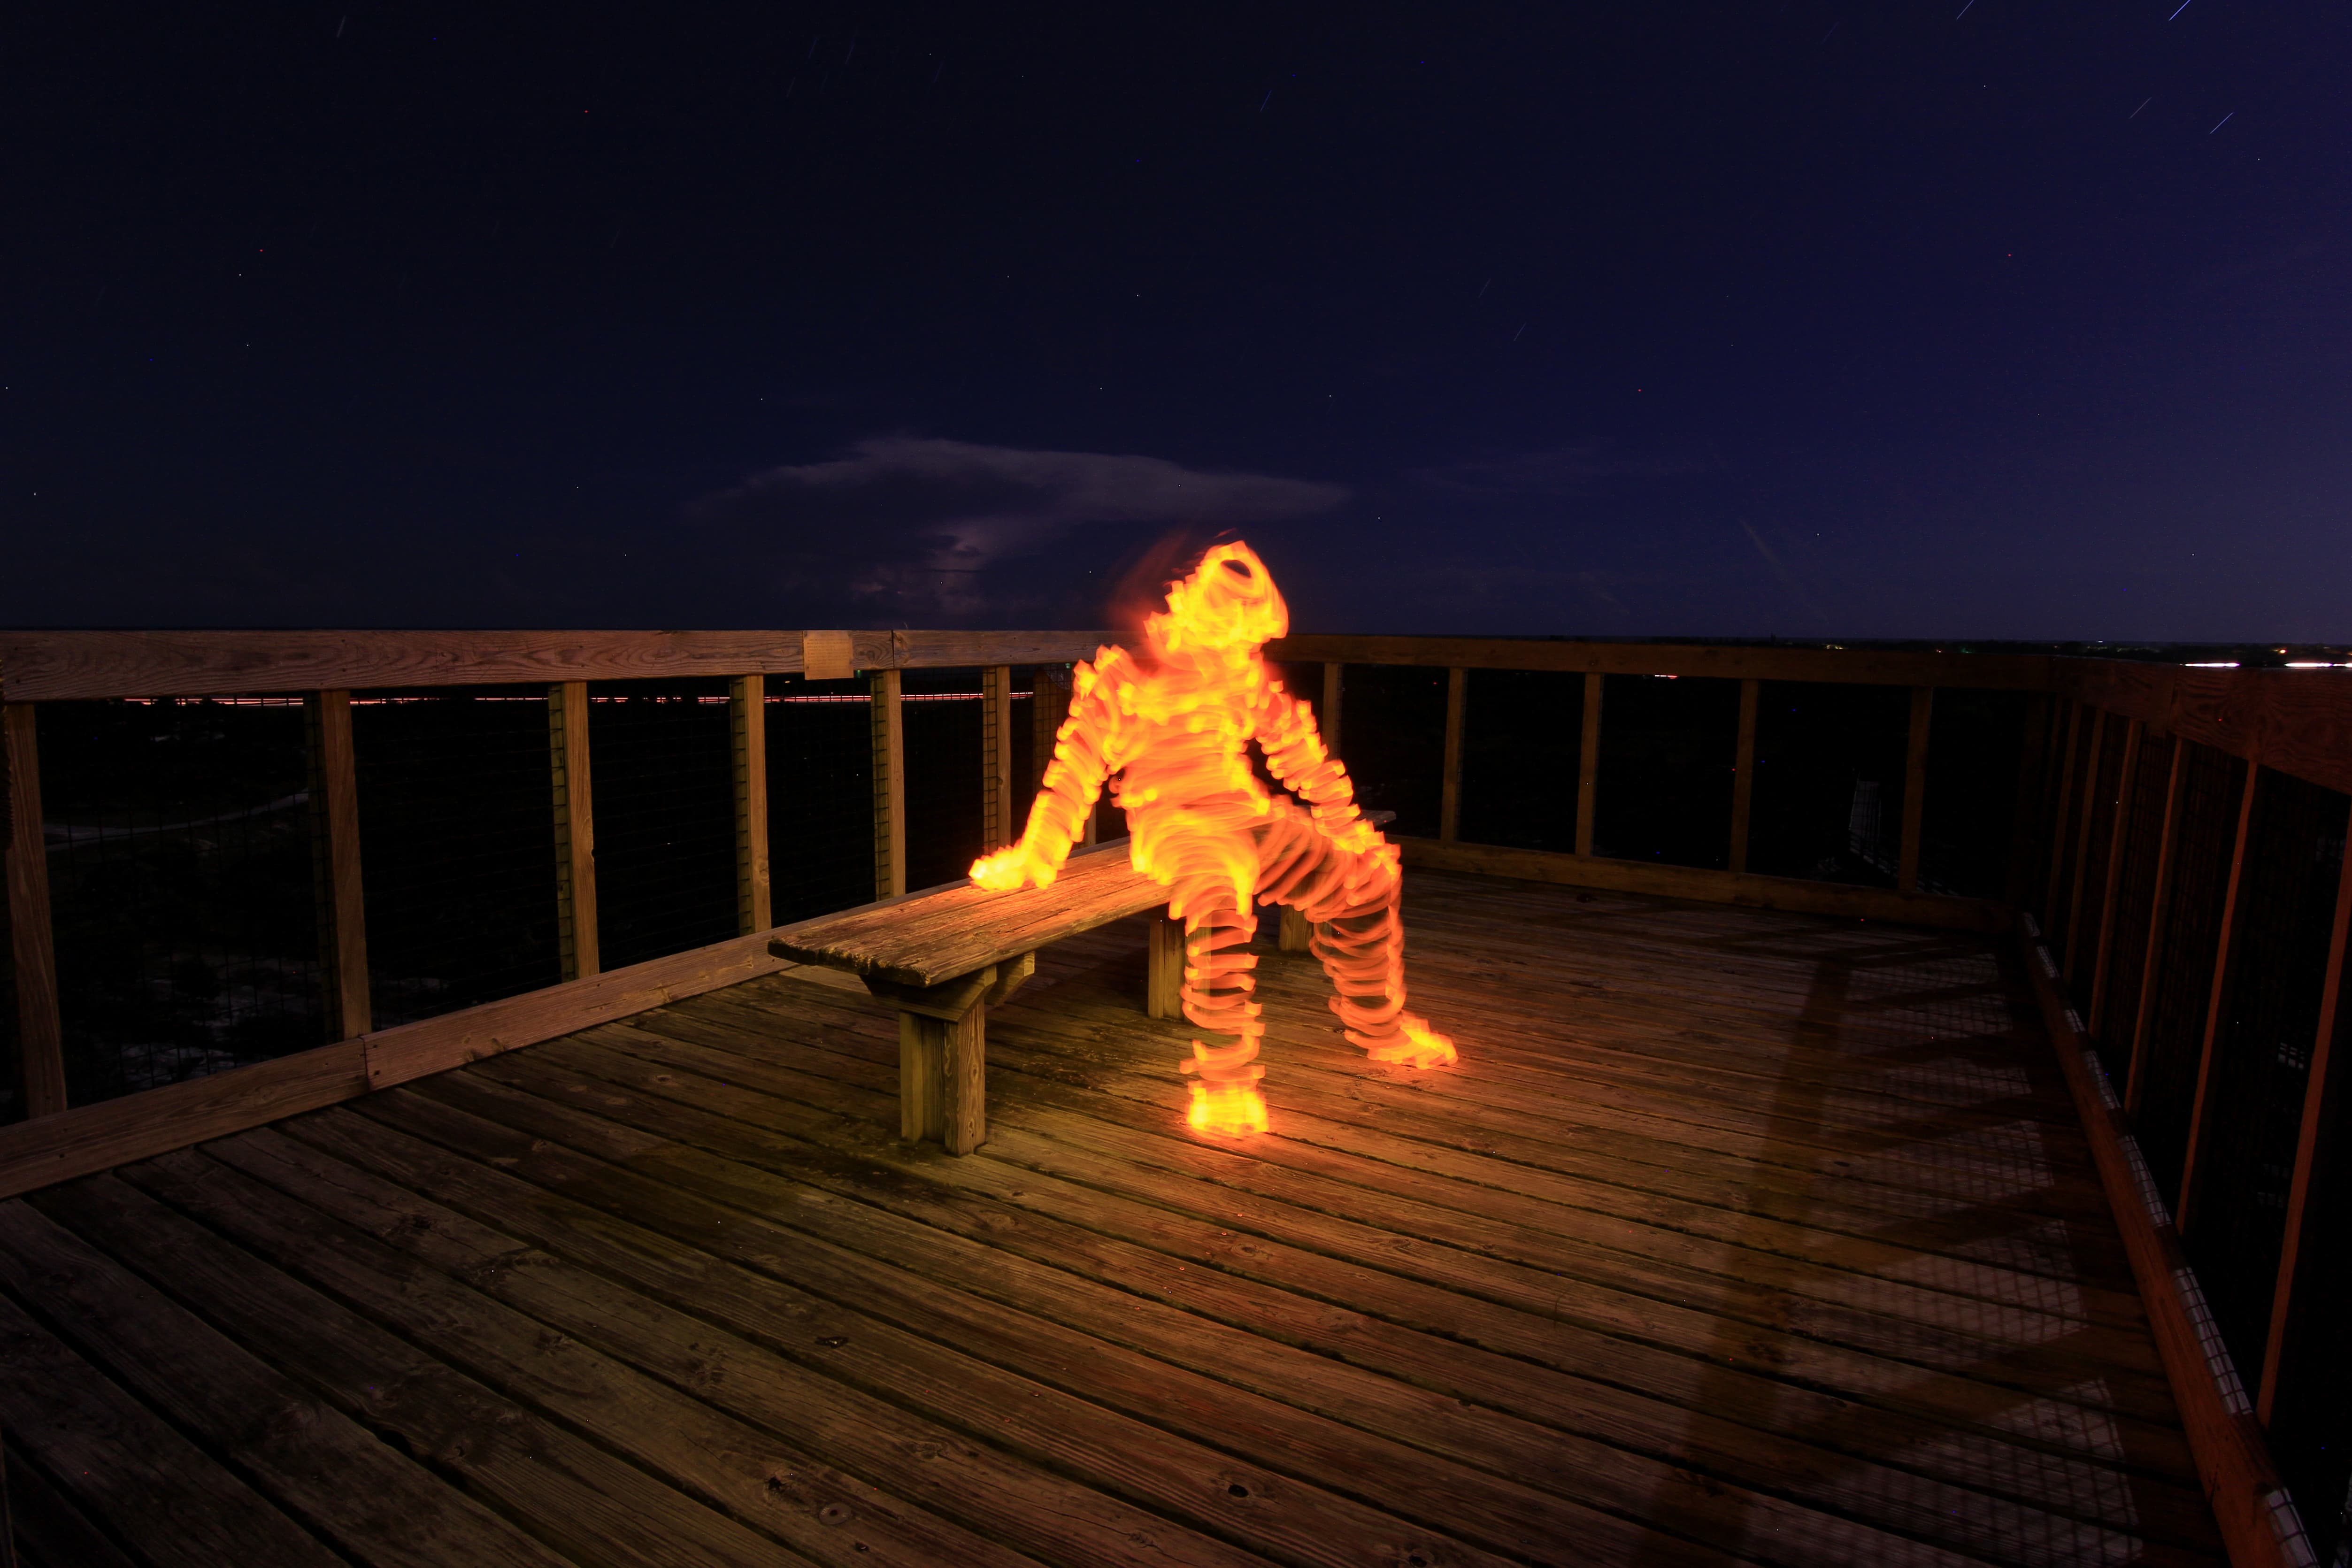
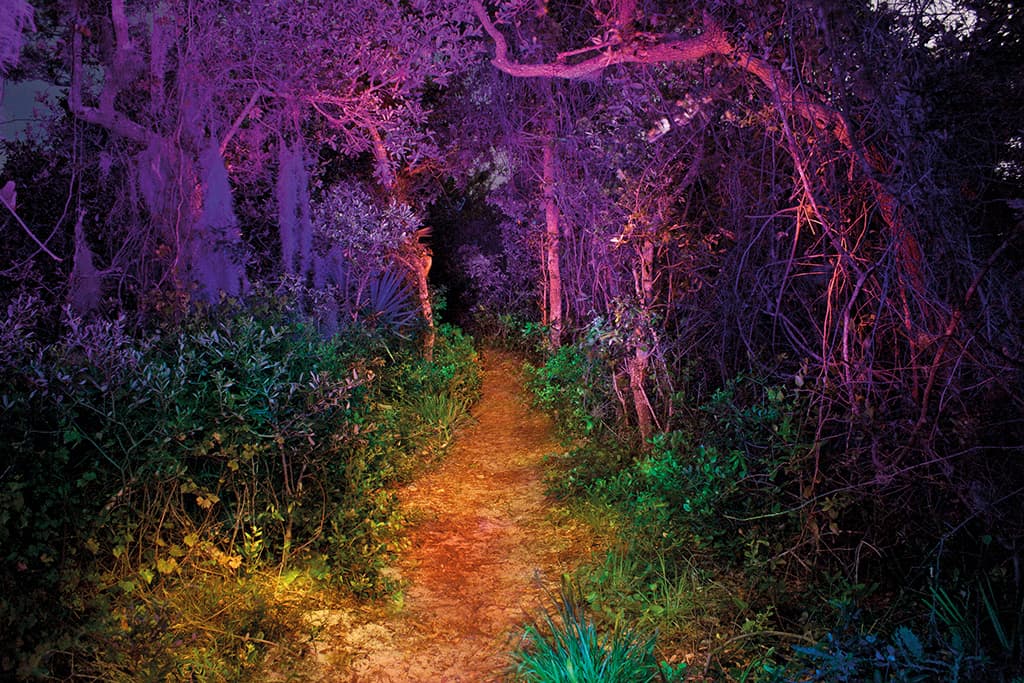
Light painting and drawing can yield surreal results as the camera captures the illuminated brush strokes of the light painter during a long exposure. When scouting for open locations, be mindful of any ambient light like street lights that might intrude into your scene at night.
Even the moon can affect exposures: a full moon will emit much more light than a new moon. Also look for tripping hazards in the light for when it’s dark; and always let someone know where you’re going. Light painting is when you project light from a handheld source on to areas of a scene to illuminate them.
In this forest image, I used various colours from the Light Painting Brushes Color Hood set and moved through the scene, ‘painting’ it with light for the course of its 857-second exposure. By using a hooded light source, the camera doesn’t record any light streaks and, by wearing dark clothes and constantly moving around, I’m not recorded either.

Light drawing, however, is different in that the light source is recorded by the camera as it’s shone directly at the lens – whether that’s writing words, drawing around subjects or creating my own shapes, as I have here. I turned the light source on and off while I drew diamonds and rotated my body 360° to create an orb. Each time you turn the light on, it leaves an impression on the camera’s sensor.
The exposure for light painting relies on a recipe of ingredients: the ambient light, the light source’s lumen output, the tools you’re using, the speed at which you move and your camera settings. Tweaking any of these elements can dramatically change your image. You just need to find the right combination to bring your creative vision to life.
A good place to start is in Bulb mode at f/8 and ISO 100. See how long it takes to get a good exposure of the scene without any light painting, then you can work it out from there. A three-minute exposure will mean
I know I have three minutes to create my drawing. If I know it will take more or less time to finish the design, I adjust the exposure accordingly. Most of my landscape images are generally created at ISO 100 between f/5.6 and f/11 and anywhere between 30 seconds to many minutes.
Landscapes
Your guide: Helen Dixon
Cornwall-based landscape photographer Helen is a self-taught professional and widely published in magazines and newspapers. Her work is used for calendars, greeting cards, brochures and can be found on the walls of many corporate clients and art galleries. See www.helendixonphotography.co.uk.
Wind
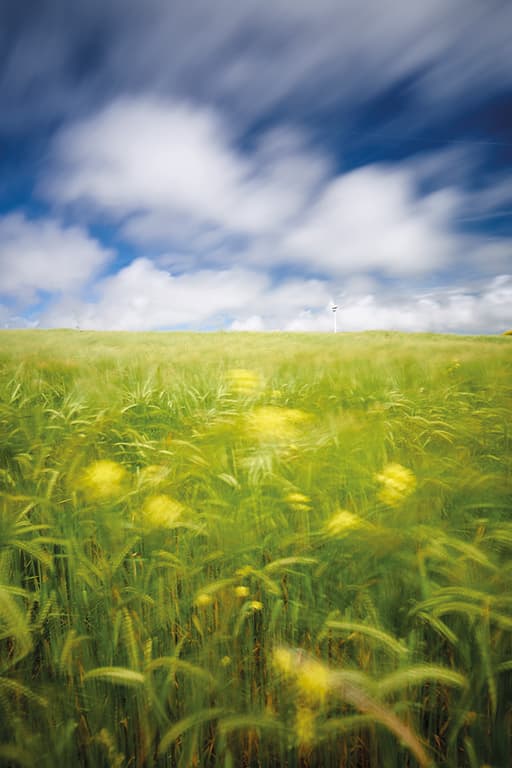
Trees, crops, clouds, flowers… wind – whether a gentle breeze or a fierce gust – creates fantastic opportunities for making static landscapes more dynamic. By embracing the wind rather than flighting against it, I can add energy to my images.
A wideangle lens lets me fill the foreground with movement and still retain a sharp background, and 1/2sec is often a good place to start. Finding the right balance between blur and retaining some detail and texture takes practice and experimentation – the right speed could be anywhere between 1/2sec and three seconds. In really strong winds, you may need to increase to 1/10sec.
If there’s a lovely breeze by the coast, I often like to use a ten-stop ND (or a 0.9ND at twilight) with the purpose of blurring clouds moving towards or away from me – I look for low clouds that are punctuated by sky as these move faster and show movement.
Sea
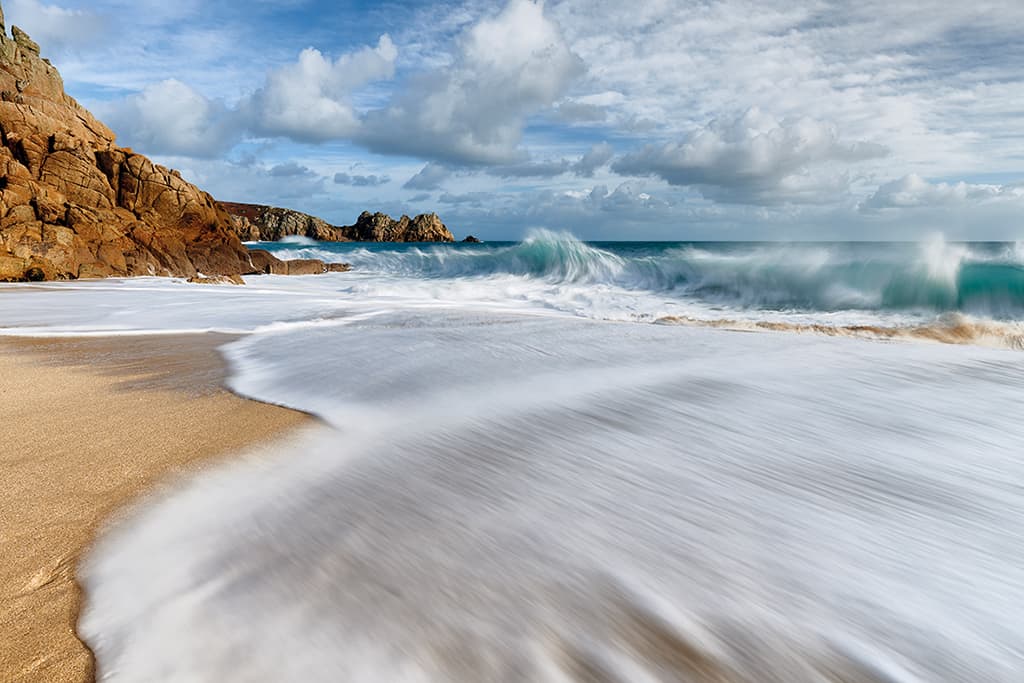
Water in a landscape offers countless possibilities: waves crashing on rocks or shoreline, wispy waterfalls, smooth meandering streams and glass-like sea are a few of the styles that adjusting your shutter speed can yield. I prefer to capture my water with some texture.
With big waves, 1/3sec is often enough to blur movement without losing detail and I try to include a static, manmade subject like a lighthouse or groynes to bring a sense of scale to the waves when I can. When seas are calm and in a retreating tide, that’s when I make the most of them with a longer exposure for a surface that’s smooth as glass and wispy lines in the tide.
If the sea is stormy, I opt for an exposure of 1/50sec to 1/250sec to freeze those droplets in mid-air. Extending your exposure can require a combination of ND and ND Grad filters, but I begin with a polarising filter for its two-stop advantage and glare-eliminating benefits. Sometimes this can be enough without an ND but on bright days, I may also need to use a two- or three-stop ND filter.
Intentional Camera Movement
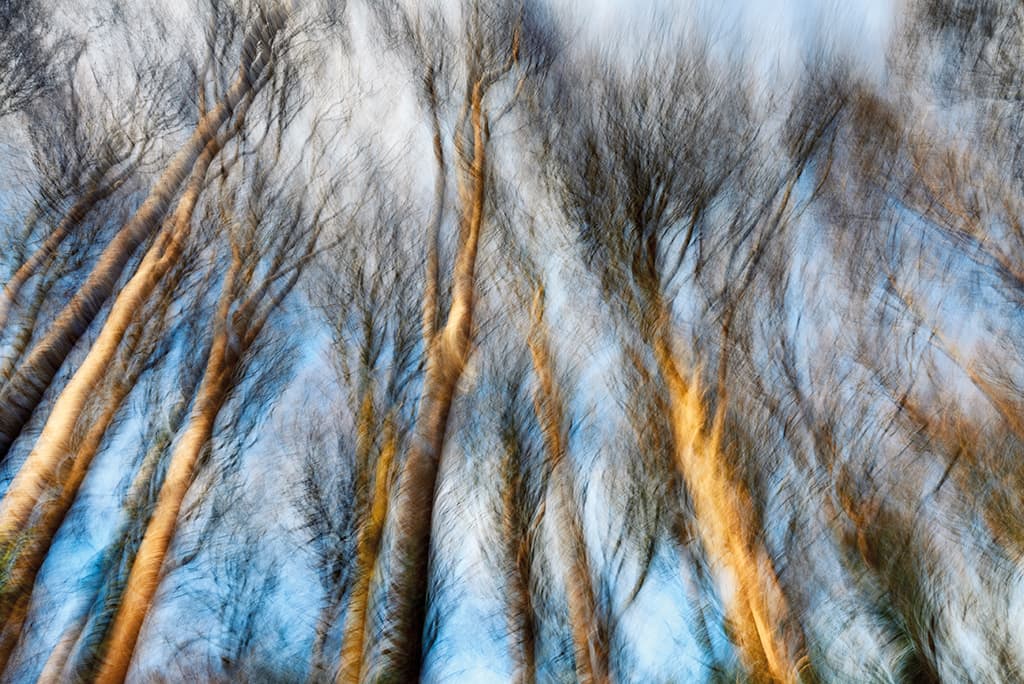
ICM, as it is commonly known, is a technique that deliberately introduces controlled blur and movement to a frame as you move the camera during an exposure. My favourite effect is when the camera is moved vertically in a woodland, rendering the trees colourful streaks, or panning horizontally in a field of flowers like daisies and poppies.
Moving the camera horizontally across the coastal horizon during an exposure blends all the scene’s colours into a soft, streaky palette. I often use a 24-70mm lens to keep my framing tight and my lens is focused to infinity. I use a mid-aperture and aim for at least 1/20sec or longer – sometimes an ND filter is needed to help lengthen the shutter speed to complete a panning, zooming or rotating movement.
A tripod can help to keep lines straight, but it is possible to do the technique handheld. Start at the top of the scene and carefully drag the camera in a downward, or sideward, motion at a consistent speed.

