Photographer Garry Pycroft combines the past and present into a single hyperlong exposure image that spans 100 years. He shows you how in this guide
Your guide: Garry Pycroft
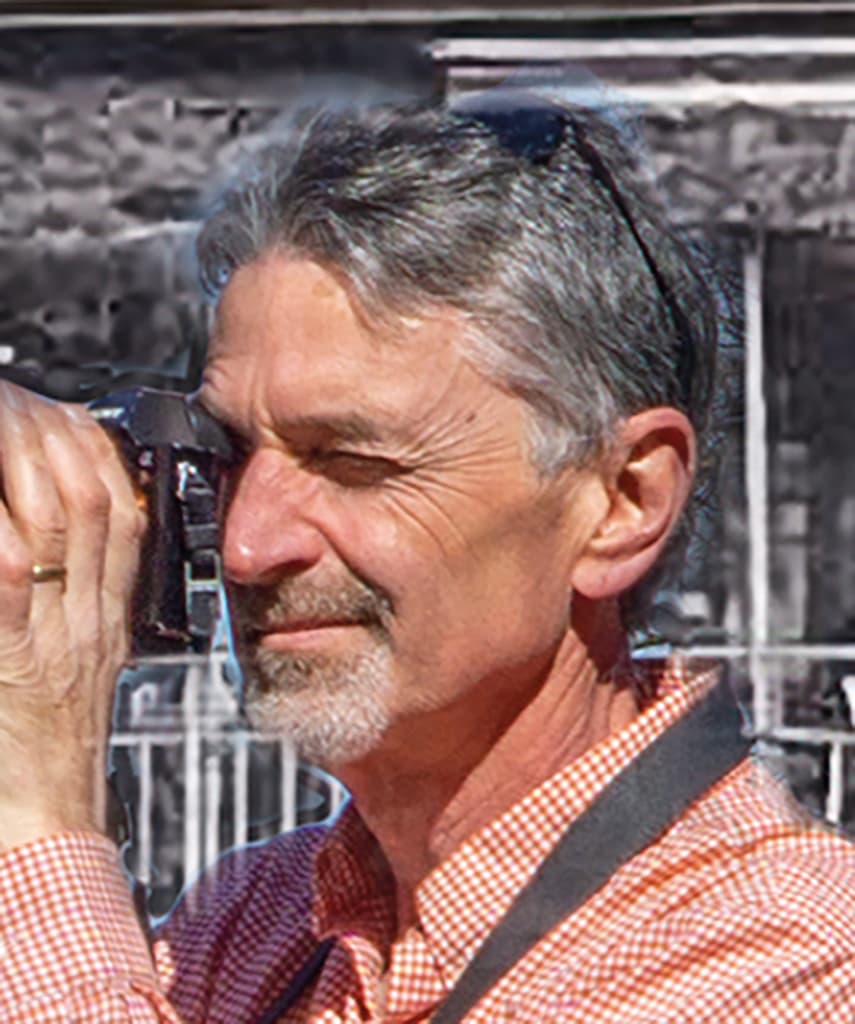
Garry Pycroft is a self-taught photographer, courtesy of YouTube. Fortunate enough to live in the French Alps, he is therefore spoilt for choice when it comes to photographic locations. He has been spent the past five years building up his photography portfolio. To see more of his work, see alpinephotographers.com and hyperlongexposure.com.
Living in the French Alps I have an abundance of stunning scenery on my doorstep; however, this isn’t what I’m passionate about. Photography for me is being able to tell a story. It wasn’t until I received a photograph from a friend showing the past and present of a street scene in San Francisco that something ignited inside me. This approach to capturing the essence of time totally resonated with me. I saw so many stories and the opportunity to include people and how they go about their daily lives, and how this has changed over time.
I chose to refer to this technique as ‘Hyperlong exposure’ photography. Traditionally long-exposure photography is where we maintain the shutter open for several seconds or minutes; here however, the end result is the culmination of the original photographers’ initial photos and my photo taken typically 100 years apart, so I would consider that ‘hyperlong’!
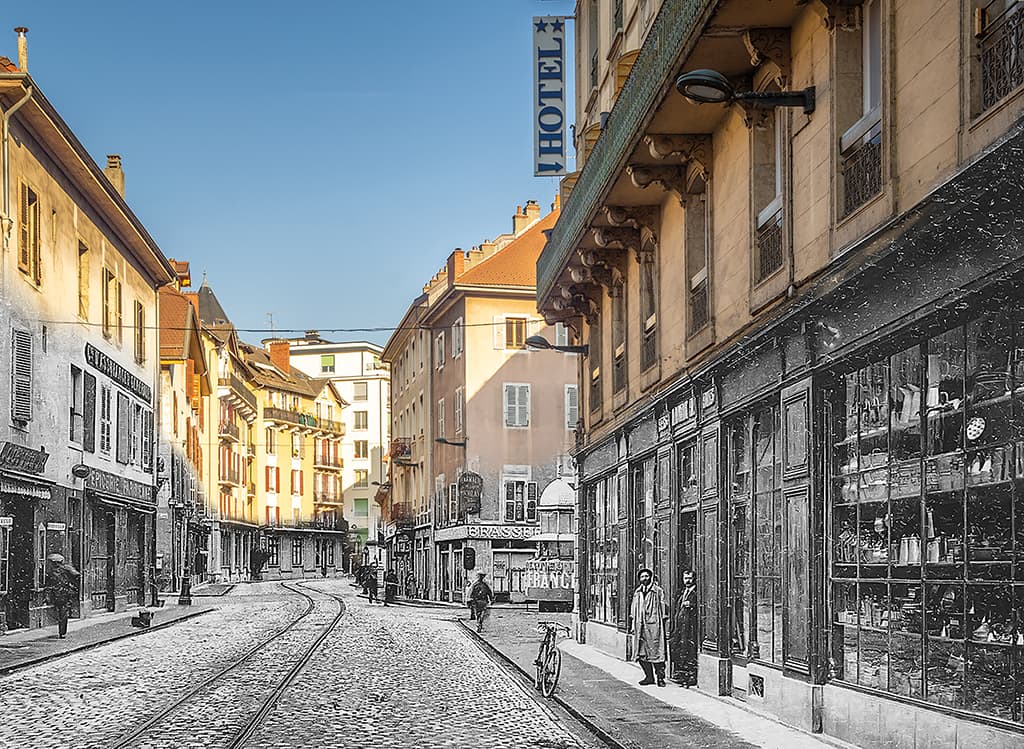
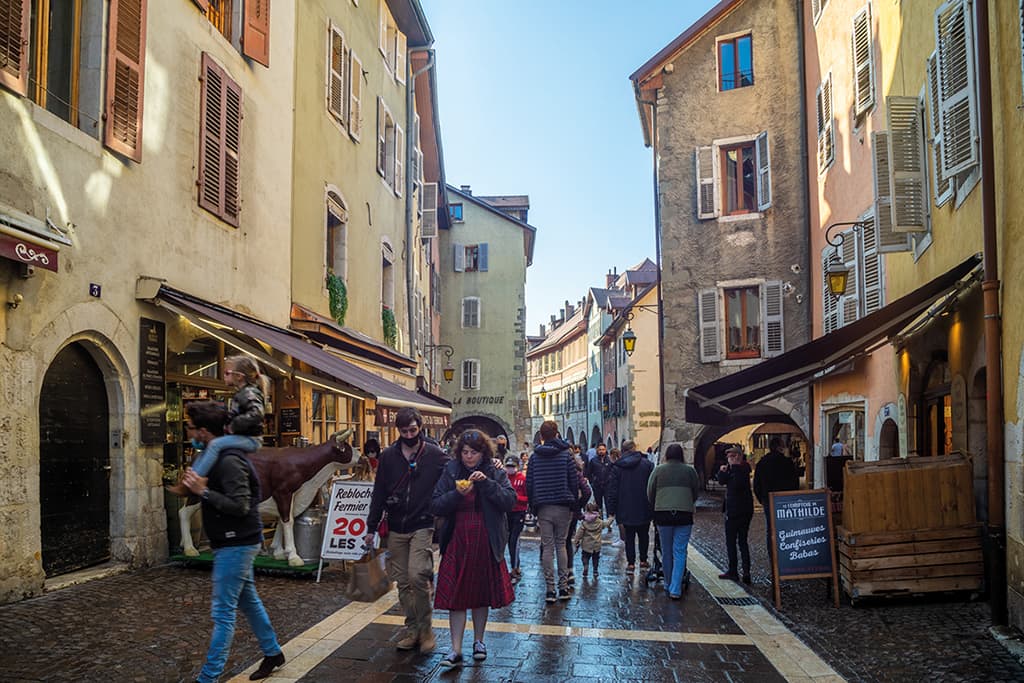
Rue Vaugelas, Annecy, France
Getting started
For this technique you will need a sophisticated photo-editing software such as Photoshop as you will be using and manipulating layers. It goes without saying that a good understanding of how layers work is required. Everything of course starts with the original image, and this is maybe the most important step in the entire process. Without a good foundation to work from, the chances of achieving a great end result are going to be challenging.
I look for images that show the people and life as it was at the time. Avoid images that purely show the landscape; it’s highly unlikely this will lead to the story you want to create in your final image. To find your source image my first approach is the town’s archive department. You will often find these online, and if not, a visit to your local museum may be required. The benefit here, compared post card retailers, for example, is the quality of the image.
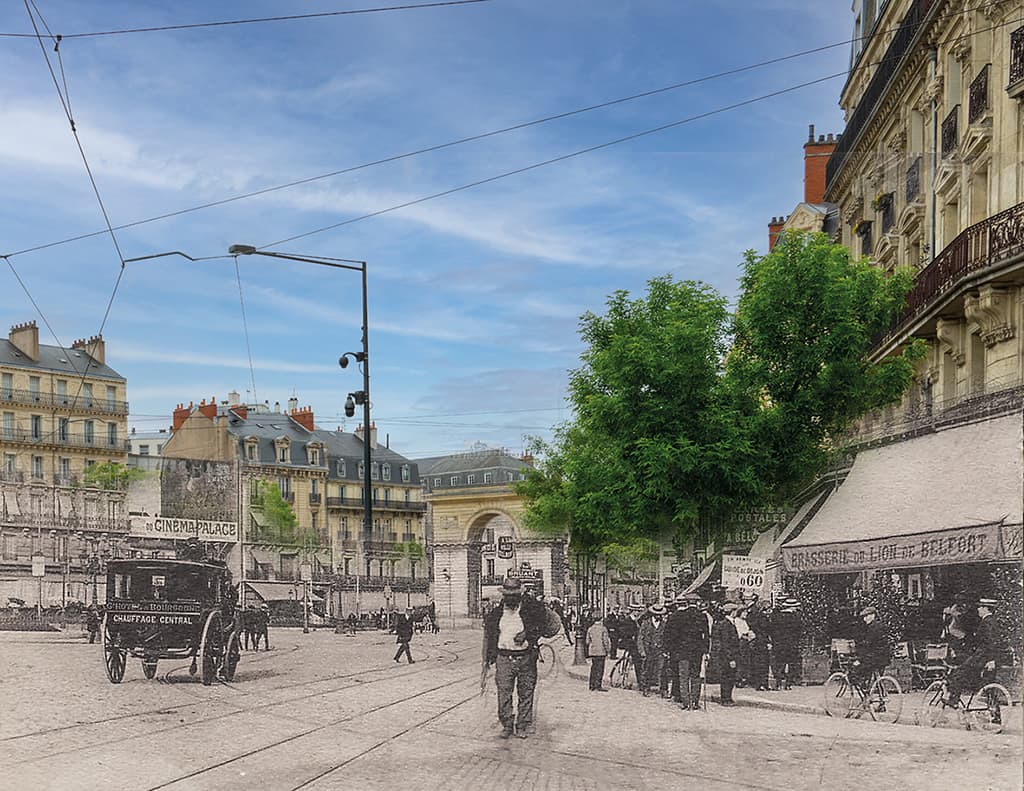
Place Darcy, Dijon, France
Another aspect that is very important is noting the photographer or editor of the original image. Recognising copyright obligations is something I strongly adhere to and all images I use I go through the process to determine the rights. I would suggest having several images available of your chosen location, as you will find matters have changed at the original location, such as trees being planted in the middle of the scene and of course new construction. These are common issues I face when sourcing images.
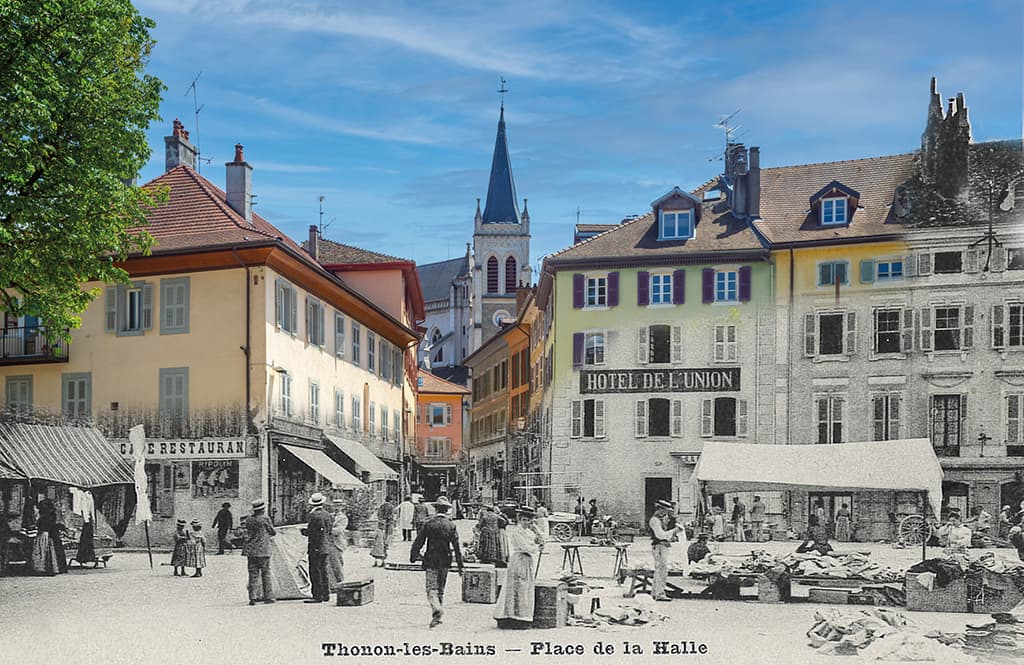
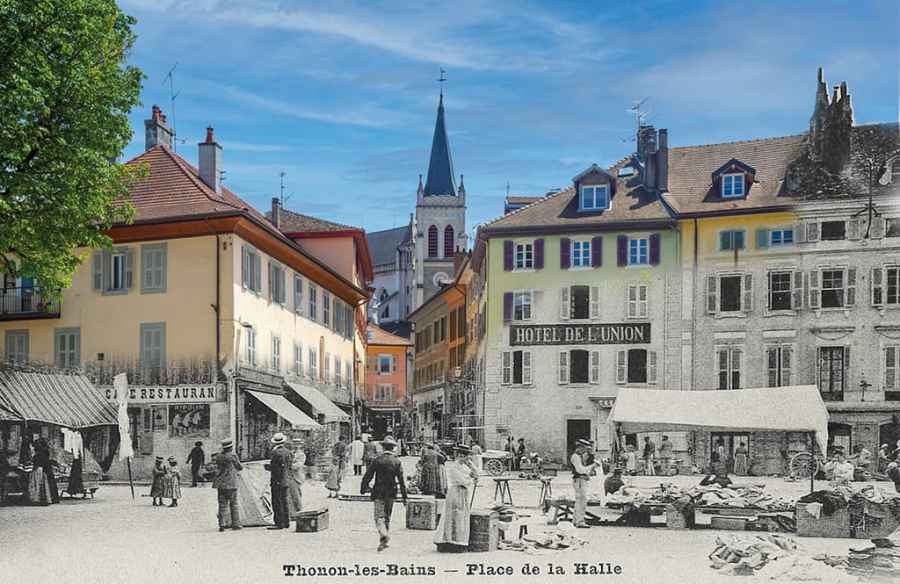
Place de l’hotel de Ville, Thonon, France
When it comes to visiting your chosen location to capture the present day, check for street names or any info supplied with the past photographs. I then suggest spending some time on Google Maps with Street View rather than spending hours walking around searching for the location on arrival.
It’s worth pointing out now that on many occasions I’ve found the streets have been renamed, which is why research before the shoot is imperative. Another thing to bear in mind when preparing for your shoot is what time of day and light conditions were the images shot in? It will look unusual to have a composite image that has a random combination of light conditions. I’ve often found that daylight is the norm.
When you’re on location and you’ve established that the buildings still exist, no trees are blocking the view and the sun is not blinding you, look carefully at your original image. If you have hills in the background, where do they intersect the buildings? Look at how buildings intersect with each other, where does one rooftop cross an adjacent building? I recommend capturing six images from the true location, moving a couple of yards each time in different directions to cover a range of angles. Sometimes the smallest shift can help bring everything together perfectly.
Unless you have a tilt-and-shift lens your images will have keystoning where the buildings appear to be falling inwards; you can compensate for this in post processing, but I try to include a 10% border as this will leave blank areas in the photograph.
Another aspect I love about these images is that I don’t need to be concerned if there are people or cars present when I’m shooting, because in all likelihood the base of your composite image is going to be replaced by the people from the original photograph. So, if it’s a busy location, no problem. Just dodge any double decker buses!
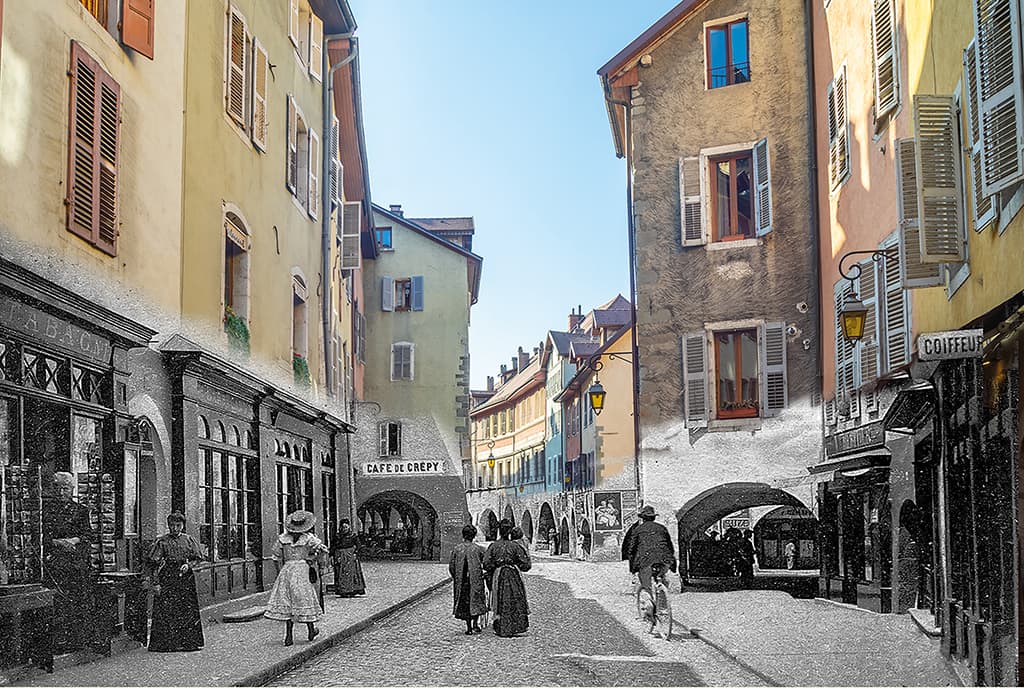
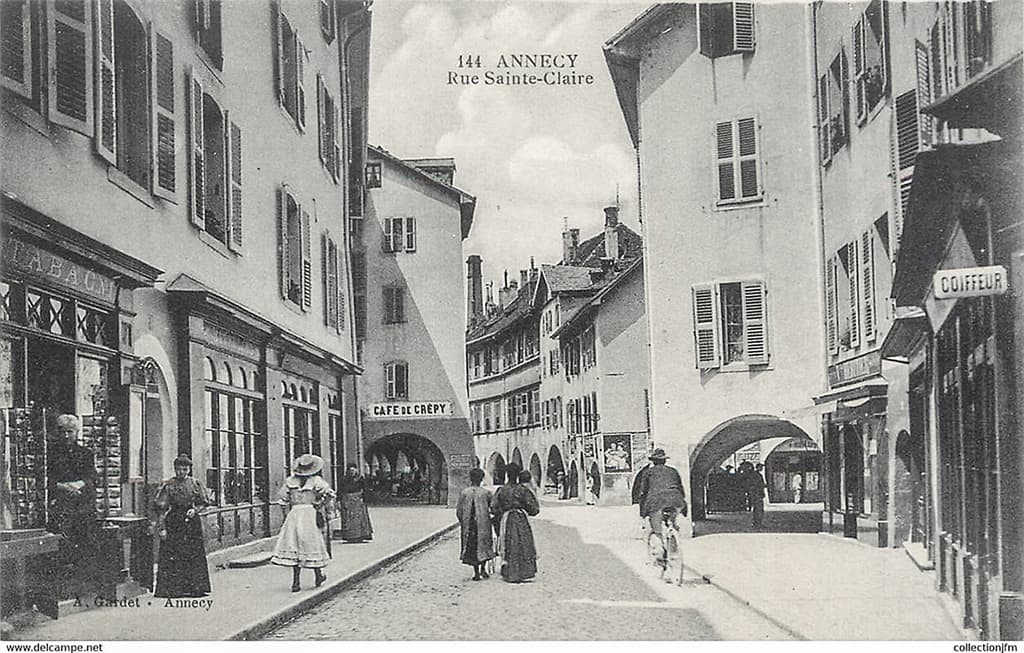
Rue Sainte Claire, Annecy, France
How to create a hyperlong exposure
1. Reduce saturation

Starting with the old image in Lightroom, I slightly desaturate it. It’s likely the detail is less than perfect, but it’s all part of the contrast in the two images. Increase the clarity to try to highlight some detail while reducing texture to remove noise and also any small blemishes that may be present.
2. Compare scenes
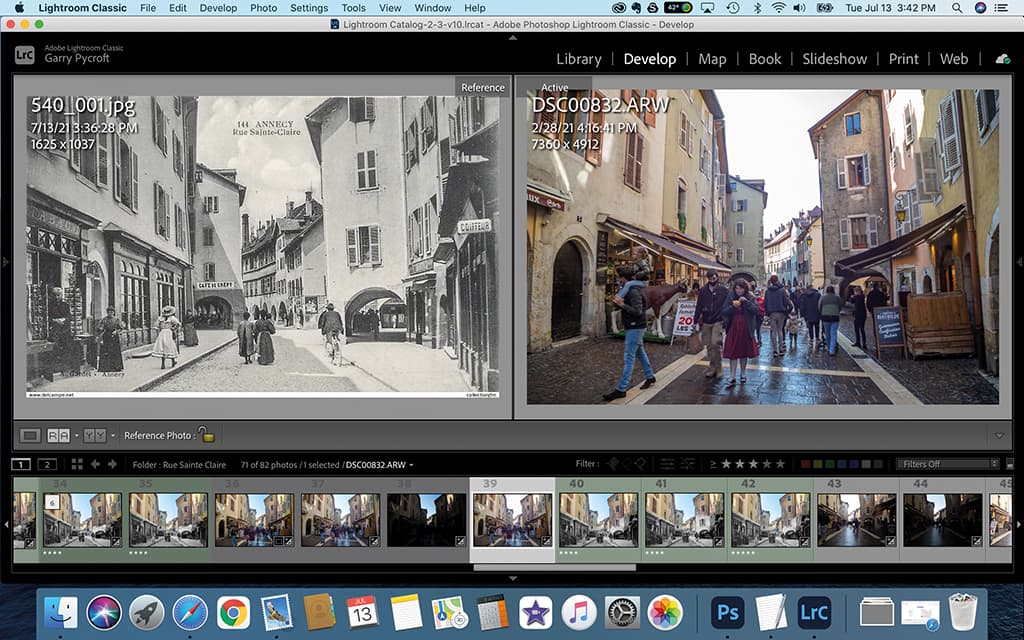
If any major flaws need removing, I open the image in Photoshop and use the Spot Healing Brush tool. I then return to the library panel in Lightroom and use the compare mode to study my images to determine which one best appears to align to the old image. Apply any lens corrections required now.
3. Brighten up
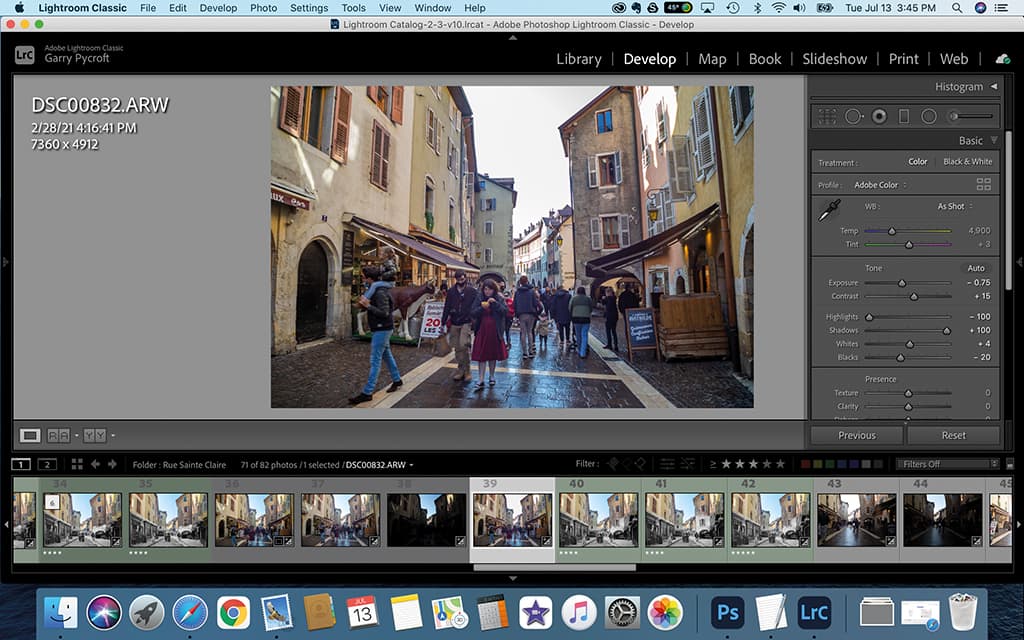
In Lightroom’s Basic panel I tweak a few of the parameters to brighten up my ‘current day’ scene. I like to add extra vibrance to highlight the contrast between the monochrome age and the vibrant colourful scenes we see today. Export to Photoshop for the finishing touches.
4. Enable Guides
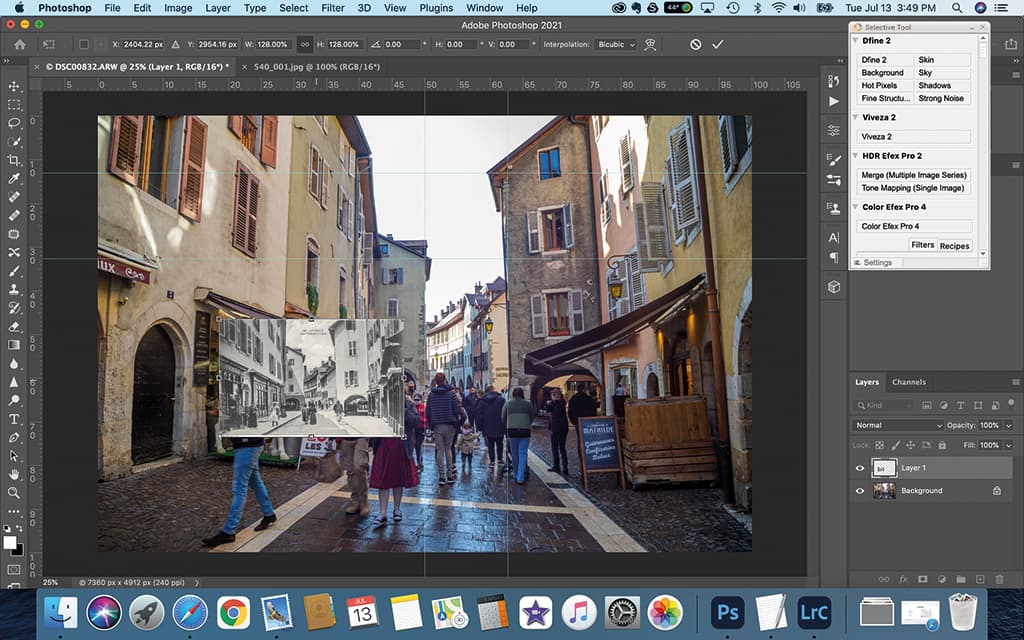
Starting with the new image, I enable guides to help me to align the distinguishing features in the images, such as the walls, rooftop, base of the door, or a chimney etc. Copy and paste (or drag) the old image onto the new image – this will appear as a separate layer in your Layers panel.
5. Align images
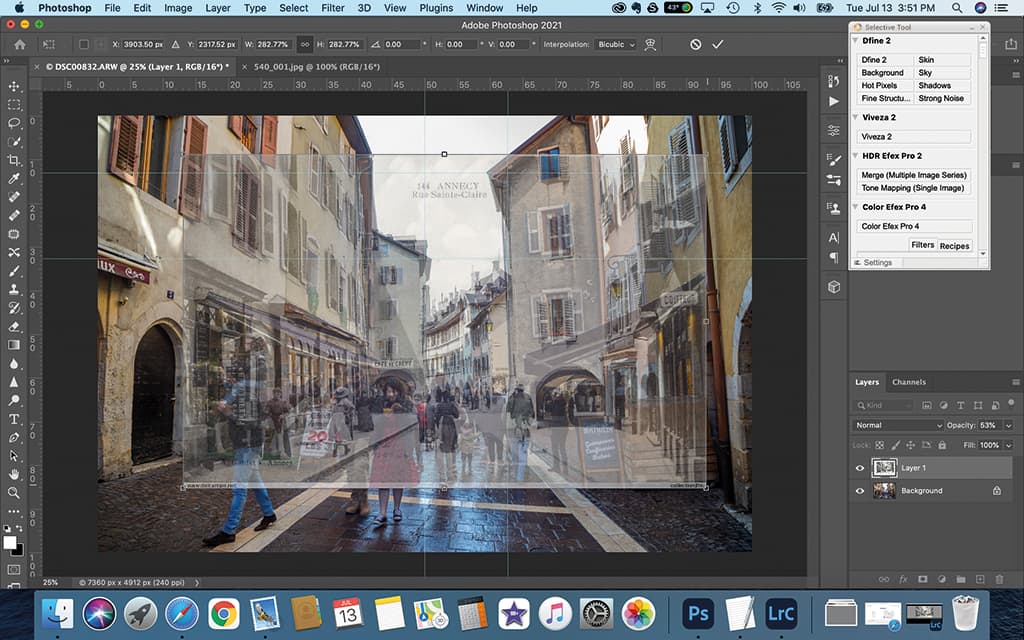
Using the guides, position the old image. It may also require scaling and minor distortion editing to align buildings past and present. To fine-tune the process, it helps to reduce the old image layer opacity to 50%. Pay close attention to people within the image, so they don’t become overly distorted.
6. Use Layer Masks
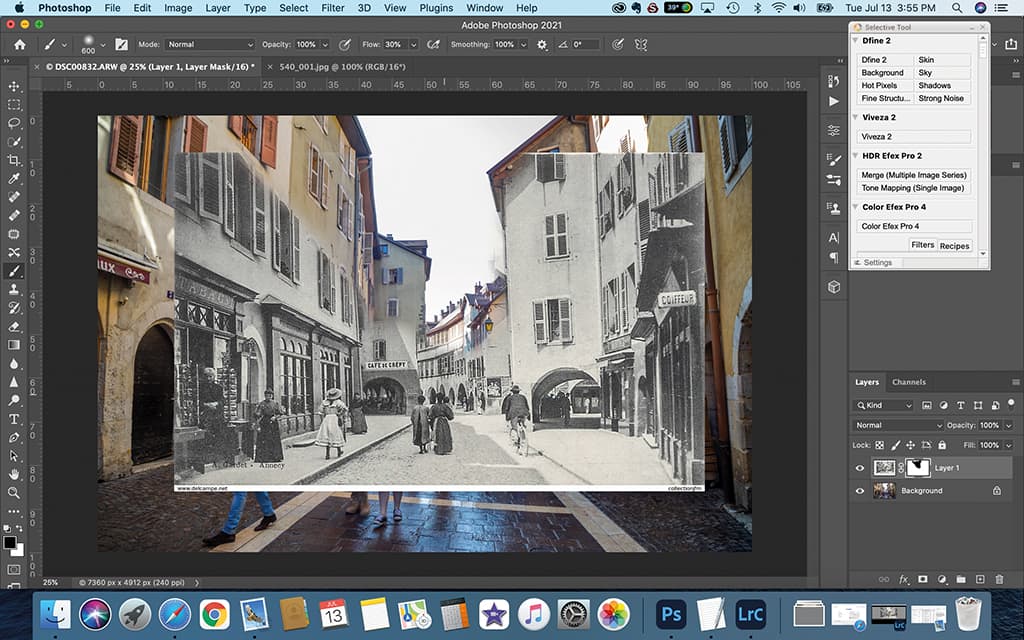
With the old image at the top of the layer stack paint with a black brush to reveal the new image layer beneath. Reduce brush opacity to soften the edges for a gradual transition between the two. Now you can apply the finishing touches such as adjusting the colours or retouching for blemish removal.
Further reading
Is this the world’s longest-ever exposure?