If you’re looking to level up your landscape, portrait and still-life photography, see below for our best ever landscape, portrait, and still life tips from AP staff and professional photographers, all in one place.
We include tips on lighting, settings, kit, and editing as well as more genre-specific tips on getting aerial landscape shots, enhancing the eyes in portraiture and collecting props for still life photography.
Landscape photography tips
From identifying great light to playing with aspect ratios, we offer some landscape photography advice for land lovers.
What makes great light?
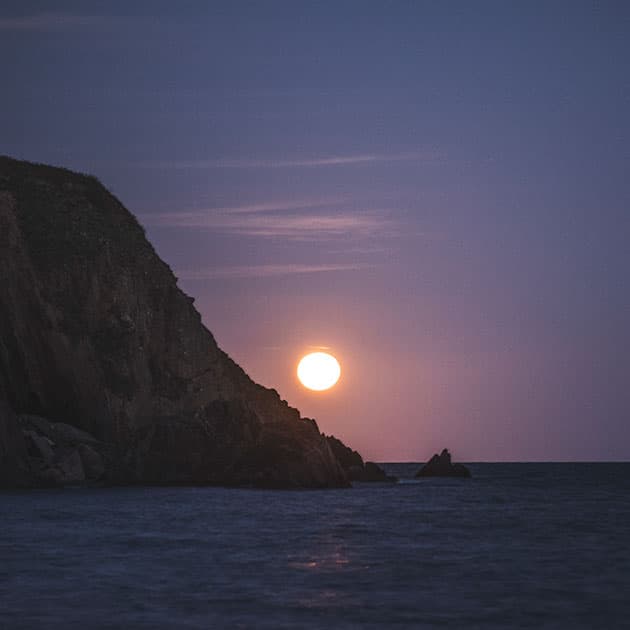
There is no magic solution for knowing when and exactly where a magnificent sunrise or sunset will happen; however to up your odds there are certain conditions to look out for. Clouds are good but not so many that they are too dense – between 30-70% is ideal. Rain about two to six hours before sunset can be good as it can clear the atmosphere, but remember it’s best not to have too much wind. It’s still a bit of a game of chance so keep trying and getting out there with your camera. AP
Go high
There are many ways to get an aerial shot but the easiest these days is to take to the skies with a drone. The midday light is perfect for aerial shots as it illuminates everything evenly from above, making colours pop. Remember to follow the correct safety procedures and only fly in approved locations. AP
Credit: Claire Gillo
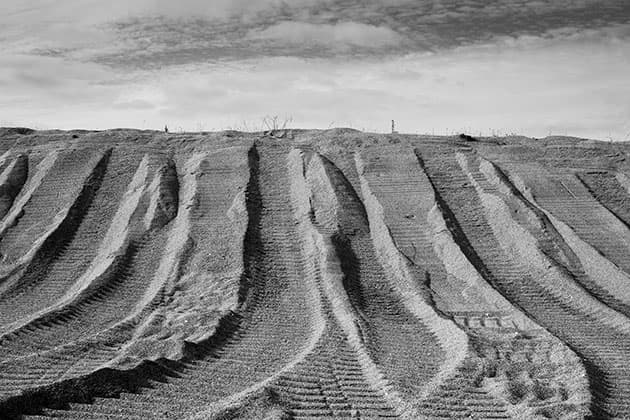
Patterns and shapes
The landscape is full of patterns and shapes (both natural and man-made) and in the landscape genre searching for these will help you to get great results. By converting your image to black & white you can highlight the pattern formation to a further degree. AP
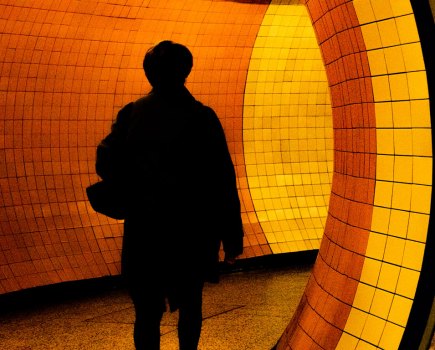
Person in the landscape
There are times when the inclusion of a person can better your landscape shot. People can be used in the landscape genre to gain a better perspective of the scale of the land or simply to create an ambience. You could even include yourself in the distance as a landscape/self-portrait mixture to create an interesting frame. AP
Credit: Claire Gillo
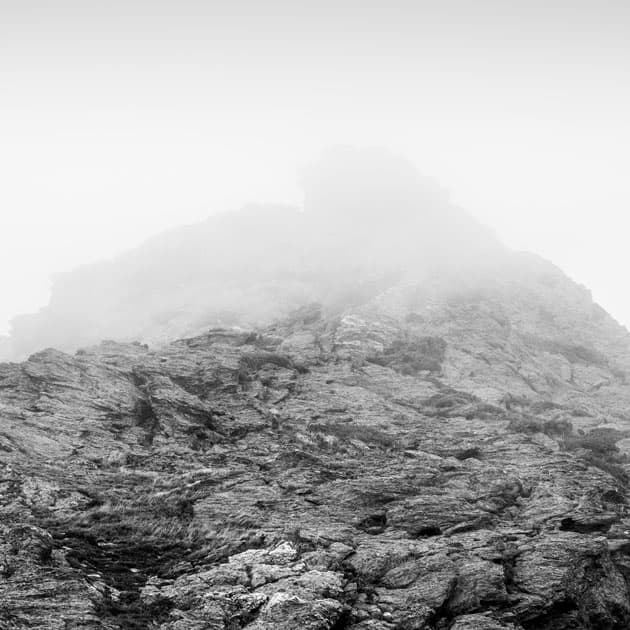
Dull days
Whilst glorious sunsets and heavenly skies are an excellent opportunity, don’t forget you can still get great results with heavy clouds and dull misty days. Go for a minimal approach and try converting your image to black & white to enhance the textures in the land, which adds another element to the scene. AP
Go slow
During the middle of the day in bright light it’s still possible to slow down time and achieve a long exposure time by attaching an ND filter. ND filters come in a variety of strengths that measure in stops. A 10-stop filter is considered strong; however if that doesn’t reduce your shutter speed enough, you can stack filters together. Soften moving clouds and turn water into soft silk. AP
Credit: Claire Gillo
Change the aspect ratio
Although it’s tempting to shoot in a 2:3 ratio, mix it up a bit from time to time. The landscape genre works well in a square format or as a long panorama, so keep that in mind. AP
Revisit
Be patient and determined, and keep revisiting a location. Many pros will head back to a local spot on numerous occasions to photograph it in different weather conditions. AP
Credit: Claire Gillo
Textured skies
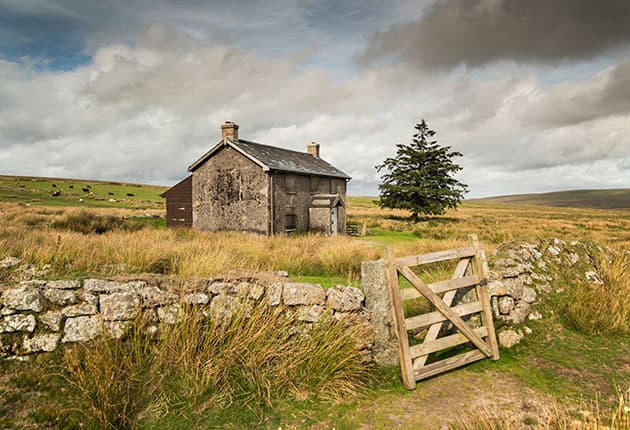
A landscape photographer’s worst nightmare is clear blue skies. Look for textured clouds to bring another element into the scene. This image (left), taken on Dartmoor, shows where textured clouds add that touch of magic and hold the eye. AP
Lens choice
Often a wideangle lens for a landscape shoot will be the first port of call, and for good reason. However don’t forget to take your telephoto zoom lens for a different approach to the genre. Telephoto lenses work really well from high vantage points and to compress the scene where the main focal point may get lost with a wideangle lens. AP
The Photographer’s Ephemeris
This app is a great tool for any photographer planning a landscape photo shoot. With sun and moon set-and-rise times and direction of travel of light from pinpoint accuracy on a map, you can be sure to know exactly the best time of day to be on location. AP
Make a project
It can be good to give your landscape images a connection and a theme that link them together. It could be that you want to start a 365-day project or if that seems too big a challenge then pick an achievable theme you can capture over time. If your work has a concept it will make the image stronger and give more of a connection to the audience. AP
Add a grad post-production
The Graduated Filter in Adobe Camera Raw works wonders over skies by allowing you to darken the tones, enhance contrast and boost colour. Simply grab the tool from the toolbar, drag down from sky to land (hold Shift while dragging for a horizontal line), then adjust the tonal sliders to the right to alter the area covered by the grad.
James Paterson, www.patersonphotos.com
Print it!
I love printing. It’s only when we print an image that it emerges from the ephemeral digital world and becomes a tangible artefact. Even if you’re not yet ready to print images yourself, it’s worth paying extra to get your best pictures printed professionally on fine-art paper. Think about which paper you’d like to try, as this will have a huge impact on your photograph. It’s cheaper than buying that new lens, and may make more of a difference to your work.
Rachael Talibart, www.rachaeltalibart.com
The magic three
To increase your shutter speed or reduce glare keep three filters in your bag: a Neutral Density, Neutral Density Grad and a polariser. For how to make the most of them, look out for our 26 October issue. AP
Ride the colour temperature
Rather than relying on a pre-programmed white balance value (like sunny or cloudy), choose the K setting and set a white balance to match the scene you’re shooting. Higher values of K warm the scene up, whereas lower values cool it down. It’s a great idea to match your live-view screen to what you see, as this really helps to provide you with a great starting point when it comes to processing.
David Clapp, www.davidclapp.co.uk
Leave out the sky
When I first started capturing landscape photographs I would make sure I had everything in the frame: the foreground, background and the sky. This not only made it a struggle to expose correctly, but it also made my images quite ‘messy’. On workshops, I often give the advice to avoid including the sky in your compositions. This allows you to concentrate on the scene in front of you without the distraction of dealing with the bright highlights often found in the sky.
Verity Milligan, www.veritymilliganphotography.com
Think outside the box
Whilst it’s tempting to set up your camera in a well-known location there is somewhat of an empty feeling knowing you are copying a composition that has been done to death. It takes time and effort to find a strong composition but the reward is so much sweeter when you get it. AP
Clean your tripod
It can be thrilling to explore the great outdoors, but your tripod won’t thank you for it if you don’t take care of it. If the legs are covered in seawater rinse them post shoot or the catches will erode far quicker and seize up. AP
Bracket expose
If you don’t have a graduated filter, bracket your exposures by taking one shot for the highlights, one for the midtones and one for the shadows. You can then use elements of each image and blend them together at the editing stage. A tripod is essential for this technique. AP
Portrait photography tips
Controlling the light, accurate focus, and displaying confidence are all vital skills when it comes to shooting portrait photography.
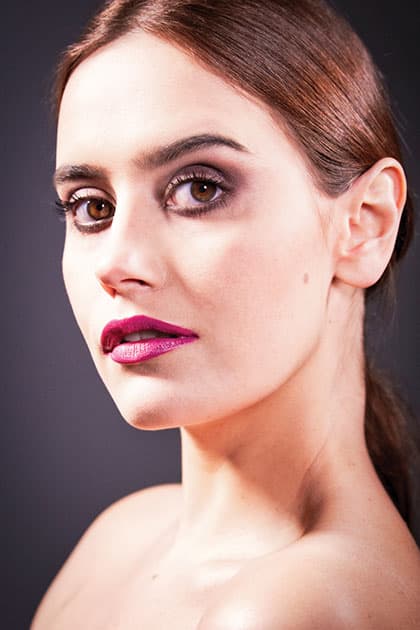
It’s all about the eyes
Portraits are about the eyes. Even if your subject’s eyes are closed and this is deliberate it will impact how the viewer interprets and connects to the subject. If they are open and the main focal point, then keep those eyes sharp, sharp, sharp! They are the soul of the picture and the viewer’s connection to the subject. AP
Credit: Claire Gillo
Make the most of ambient light
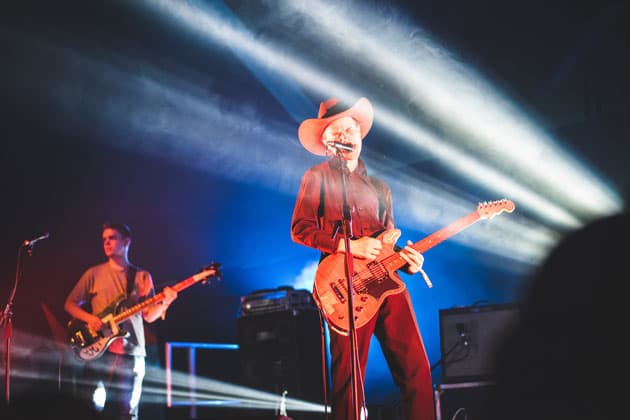
When it comes to capturing music or other stage-lit events then some fantastic lighting has already been done for you. This image of young band Black Midi is the perfect example of waiting for that optimum moment and using the lights to create a great portrait. AP
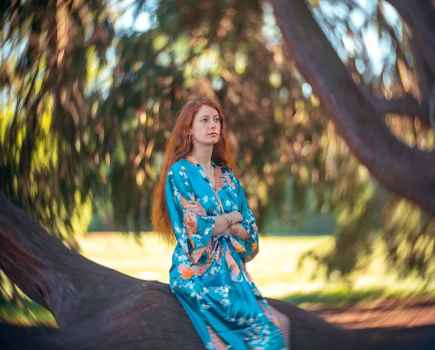
Environmental portrait
In portraiture we often feel the need to zoom in and get close to our subject. Whilst this closeness can be effective in some scenarios, in others – just by taking a few steps back and capturing someone in his or her familiar surroundings and environment – we can reveal so much more about them. Take for example a person at work such as this engineer at a wind farm. The background and subject are linked together giving the image a more interesting concept. AP
Credit: James Paterson
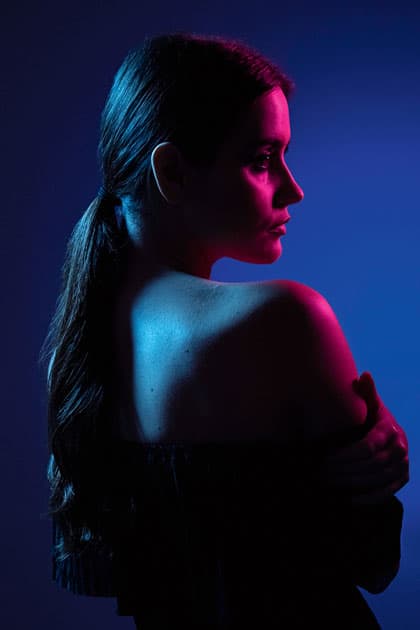
Mix gels (colours)
Although using gels might feel like a big step in your lighting skills they are actually relatively simple. You can even use a piece of cellophane over the end of your flashgun or light to tint your subject with a different colour. When it comes to mixing your palette look for colours on the opposite end of the spectrum. For example contrasting colours work well together – red and green, orange and blue, yellow and purple. AP
The background
In portraiture the background is just as important as the subject. If you’re in the studio then a plain background is the easiest solution; however the colour you select will have a massive impact (e.g. black, white, red, blue, etc.) on the end result. If you’re on location then make sure that your background sets your subject in the best surroundings. Look for distracting elements that will detract, and make sure that the subject doesn’t have anything sticking out of their head. This will ruin the shot completely. AP
Credit: Claire Gillo
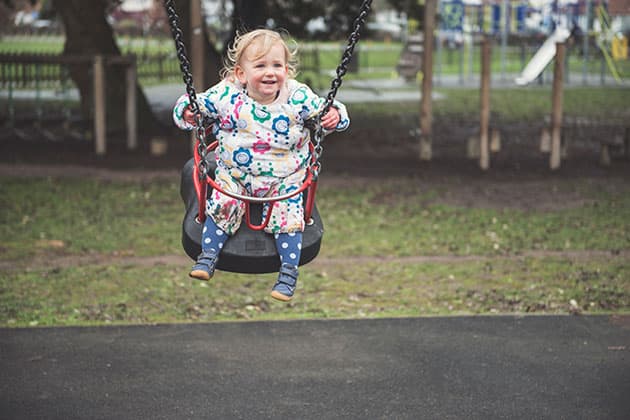
Moving subjects
They say never work with children or animals… however you’re missing out if you don’t as they are pure bundles of joy! Trying to keep them still in the frame can be a nightmare so our advice is to let them be free. Set your focus to the tracking feature and capture them running around and in that moment of joy to get a great action portrait. Sure it’s hard to keep up with them but if you’re smart you can predict their moves and set the focus to the space they are moving into. AP
Use natural light
Don’t get bogged down with the technicalities of using complicated lights – just utilise natural light; after all, most studio lights are trying to replicate daylight anyway. Using the natural sunlight as it begins to soften and drop in the sky creates amazing opportunities for striking portraits. AP
Credit: James Paterson
Build the light
When two lights complement one another, the results can be wonderful, but finding the sweet spot between them isn’t always easy. Whether using flash or LEDs, a common mistake is to turn all the lights on and then attempt to assess the overall look. It might look good, but if it doesn’t, then it can be tricky to determine which light needs adjusting. It’s often easier to build the lights, one at a time.
This way you can start by positioning one light – usually your main or ‘key’ light – then add a second from another direction, and perhaps even a third. It’s a methodical approach that takes the guesswork out of multiple-light set-ups.
James Paterson, www.patersonphotos.com
Flash recycle time
Instead of shooting with your external flashgun at full power (e.g. 1/1) decrease this and push your ISO up to compensate. That way when you’re shooting portraits your flash will recycle much faster making it quicker to shoot frames and capture the moment. AP
Give direction
A portrait image is almost as much about the photographer as it is about the model. If you’re relaxed and give them good direction they will respond. If you’re tense and not clear on what you want, they will appear awkward. Spend some time before the shoot getting to know them (if you don’t already) and ascertain what you both want from the shoot. AP
Five in one
A 5-in-1 reflector is the perfect accessory for any portrait photographer. The diffuser is a great tool for spreading light through. The silver side picks up the shadows and adds in a cooler tone; the gold side, warm. The white side lightens and the black blocks the light. A must- have in your kit bag. AP
Create shadows
Creating shadows on the face adds character, shape and dimension. You can completely change the look of a person’s face depending on where you allow the shadows and highlights to fall. Try placing the side of your subject’s face near a wall and watch their face gently fall into shadow.
Chris Bailey, www.chrisbaileyphotography.co.uk
Use a long shutter speed
This isn’t the normal ‘rule’ but rules are made to be broken, and if you want to capture something a bit unique then this is a fun technique to try. Set your camera up on a tripod and reduce your shutter speed down to one second. Get your subject to move their head and you’re left with an interesting ghostly effect. AP
Think about your aperture
In portraiture your aperture setting is one of the most important settings that determines how much depth of field you see in the facial features. Depending on who you are shooting and for what, you will need to take a different approach. For example if you intentionally want a dreamy and blurred effect then opting to open it to the largest setting (for example, f/1.8) will work well. Make sure that the eyes are sharp though. But if you were shooting a headshot where everything needs to be sharp then you will want an aperture of at least f/5.6 to keep the model’s eyes to ears sharp. AP
Non-destructive cloning
When it comes to editing, a little tidy-up can go a long way. However, keep the results as natural as possible as an over-processed portrait looks fake. The Spot Healing brush and Clone tool are both excellent assets in Photoshop for removing spots and blemishes. When healing or cloning, make a new empty layer then set the tools to ‘Sample All Layers’ to keep the edits non-destructive.
James Paterson, www.patersonphotos.com
Enhancing eyes
One of the best tools for boosting eyes in Photoshop is the Adjustment Brush. Found in Camera Raw and Lightroom (or via the Camera Raw filter in Photoshop), this tool lets you apply several tonal changes at once. So with an iris, we might want to load the tool with positive Saturation, Clarity, Exposure and Contrast, then paint precisely over the iris (making sure not to go over the pupil).
James Paterson, www.patersonphotos.com
Headshots at 85mm
Generally, 85mm primes and longer focal lengths are best for headshots as they capture facial features in a more flattering way. If you’re just starting out, a 50mm f/1.8 lens from Canon or Nikon is a relatively cheap lens which delivers fantastic results.
Chris Bailey, www.chrisbaileyphotography.co.uk
Take supplies
When out on location with a model, take supplies. If it’s a hot day pack plenty of water; if it’s cold, a flask of tea and some biscuits will prove to be popular with your model. You’ll need to keep energy levels up so they perform well. AP
Don’t neglect your post-processing
Used with skill, your camera will record the scene with great accuracy. What it can rarely do though is truthfully capture the whole feeling of the moment. The editing process can be a good way to bring the emotion back.
Tiree Dawson, www.tireedawson.co.uk
Find the direction of the light
When the sun is high, the light will be harder and produce strong shadows, but when the sun is low, the light will be softer and produce more even results. The direction of light matters, and placing your subject in relation to the sun is crucial. I find this position by placing my hand out in front of me and turning around in a full circle. This may sound silly and look odd but observe how the light quality changes on your hand as you move it.
Chris Bailey, www.chrisbaileyphotography.co.uk
Still life photography tips
Fake horizons, objects arranged in threes, and bits of flattened bark – welcome to the world of the still life. Still life photography is a great genre to try when stuck indoors.
Credit: Tim Clinch
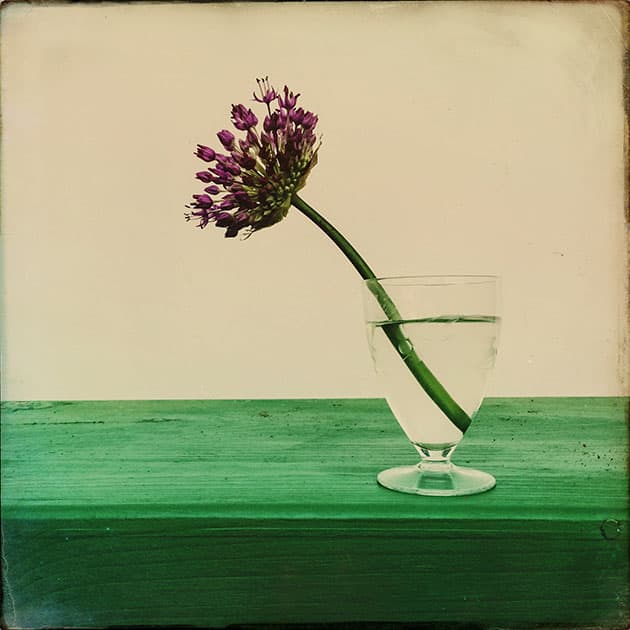
Look to the horizon
Use a horizon line. This line anchors an image on to something by taking your eye straight to the object of the picture, thus introducing an element of stability to the scene in front of you.
Tim Clinch, www.timclinchphotography.com
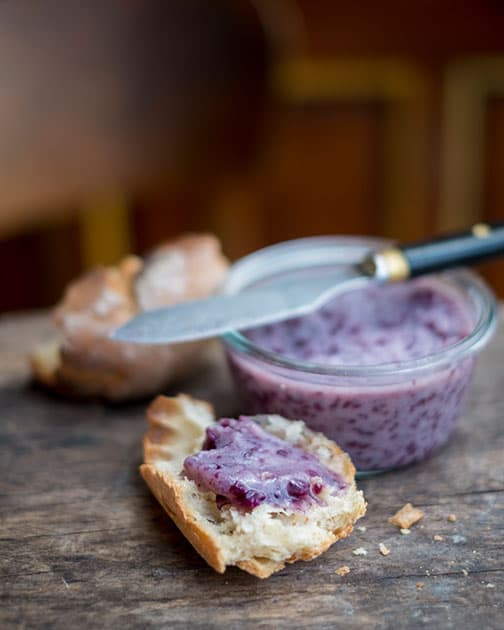
Think about the styling
With food photography, attention to detail is key. Aside from the arrangement of the food, think about the plate and the surface underneath – do you want a rustic feel or something more clean and contemporary? For a simple lighting set-up, shoot side-on to a window with a reflector opposite your subject.
James Paterson, www.patersonphotos.com
Credit: Tim Clinch
Observe the light
If you’re using a window as a light source (my favourite) try to leave your set-up in place so that you can see what happens as the light changes throughout the day. An alternative is a small LEDGO light put through a diffuser to achieve the same result.
Tim Clinch, www.timclinchphotography.com
Shop around
If you’re looking for textured backdrops for still-life arrangements head to your local car boot sale. I recently picked up three sheets of flattened bark for just £1 from a florist having a clear-out. You can also pick up old pieces of metal, wood and fabric.
Tracy Calder, www.cupoty.com

Credit: Tim Clinch
Use odd numbers
When arranging your still-life scenes use odd numbers rather than even. Three objects invariably work better than two or four. I genuinely have no idea why, but it’s true. Try it yourself and find out.
Tim Clinch, www.timclinchphotography.com
Make small movements
Make lots of small adjustments. Moving an element just a centimetre can make all of the difference to the finished picture. The closer you are, the more critical this becomes.
Tim Clinch, www.timclinchphotography.com
Have a go
You may think you need a fancy studio and access to expensive lights to have a go at still-life photography but that’s simply not the case. A piece of card and a lamp can do just as good a job if you’re smart about how you go about it. A mobile phone is also a great lighting tool, and tablets and large phones make great backgrounds for small product shots. AP
Collect props
Build up a collection of versatile props: enamel jugs, vases, scraps of fabric, antique cutlery etc. I’ve been collecting old upholstery scissors and jelly moulds for a while now, and it’s amazing how often they come in useful.
Tracy Calder, www.cupoty.com
Slow down
Plan your picture. Sketch out ideas, draw a storyboard, and look at other artworks – especially paintings by the old masters – for ideas. Move objects around until the balance between them feels right. Above all, take your time. AP
Find more tips and techniques here.
Further reading:
Guide to Landscape Photography
Complete guide to Portrait photography – How to get started
Still life photography: How to perfect still life photos