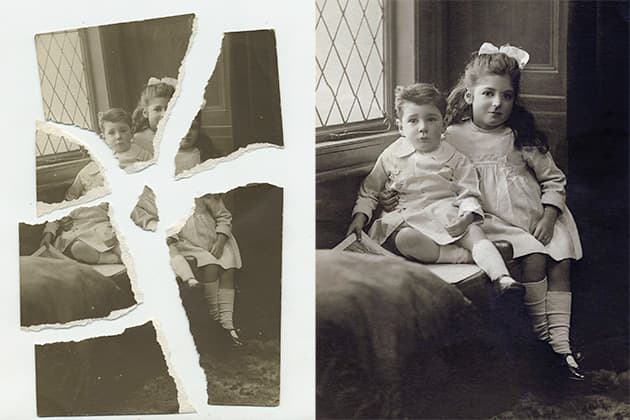
Like the cherished family memories they often depict, old prints will inevitably fade over time. Colours deteriorate, dirt and grime accumulate, edges get bent and battered, mould infiltrates the paper. Wear and tear is unavoidable, but if you can digitise and restore your old photos in Photoshop then the ravages of time can be undone and the print can be safeguarded for the future.
We’ll look at some of the key tools for photo restoration in Adobe Photoshop, and explore a range of essential techniques. From restoring faded details, sharpening images, fixing broken prints and adding hand-coloured effects, you’ll find a host of ways to breathe new life into your treasured old photos. With a little work and a few simple skills, they can be appreciated for generations to come.
How to restore old photos in Adobe Photoshop
How to fix dirt and scratches
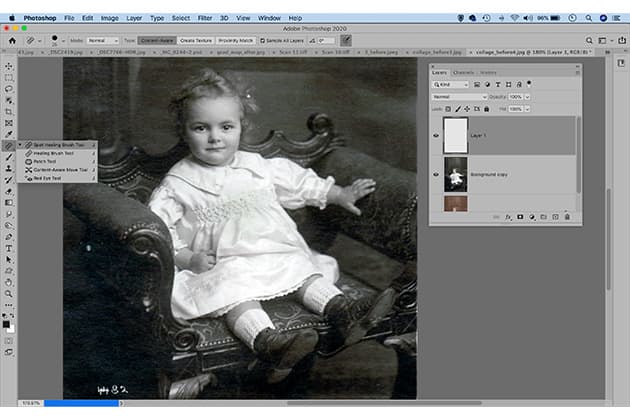
The Spot Healing Brush Tool is an essential part of the modern photo restorer’s arsenal. Credit: James Paterson
Prints can accumulate all kinds of grime over the years. When it comes to removing dirt, fixing scratches and correcting creases, the healing and clone tools are the key weapons in the restorer’s arsenal. Both these tools work by sampling nearby pixels to fix the problem area. The Clone Stamp allows you to do this by Alt-clicking on a clear area nearby. Then you can paint over the problem area to fix it. The tool can also be used at a low opacity to smooth out larger rough patches.
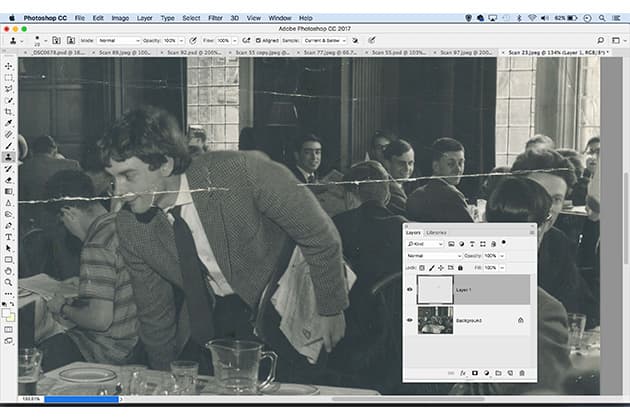
Folds and creases are another common problem, fixed relatively easy in Photoshop. Credit: James Paterson
The Healing Brush works in a similar way, but rather than a straightforward copy of pixels from one area to another, it instead intelligently analyses the area when making the fix. By contrast, the Spot Healing Brush is often the easiest of the three to use as there’s no need to Alt-click to sample a source, you simply paint over the area and let the tool do the rest. Of course, it can occasionally slip up – but at this point, switch to the Healing Brush or Clone Stamp to tidy up.
How to hand colour vintage photos
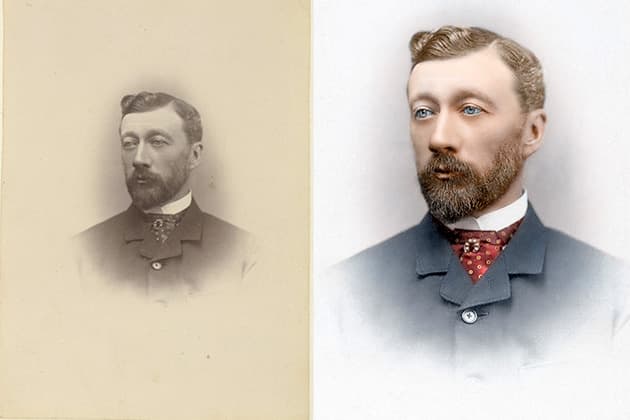
The classic hand-tinted look can transform an old portrait. Credit: James Paterson
Why not breathe new life into faded old photos by giving them a hand-coloured treatment? The technique is very easy – simply make a new layer in the Layers Panel then change the layer blend mode from Normal to Colour. Next grab the Brush tool, choose a colour and start painting over the image to colourise it (or alternatively, select areas with the Object Selection tool then fill them with a colour).
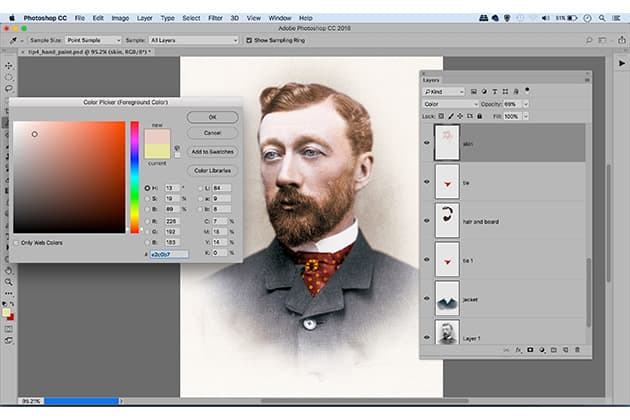
Carefully adjust colours and tones for that unique retro look – don’t fall at the final hurdle. Credit: James Paterson
If on reflection the colour needs tweaking, you can change it either by using the Hue/Saturation command (Cmd/ Ctrl+U) or tone it down by lowering the layer opacity. Once a colour is done, make a new layer and begin adding another to build up the colour effect. It’s a wonderful way to refresh an old photo, and an interesting challenge to pick colours that suit the era.
Photo restoration: six essential restoration techniques
Credit: James Paterson
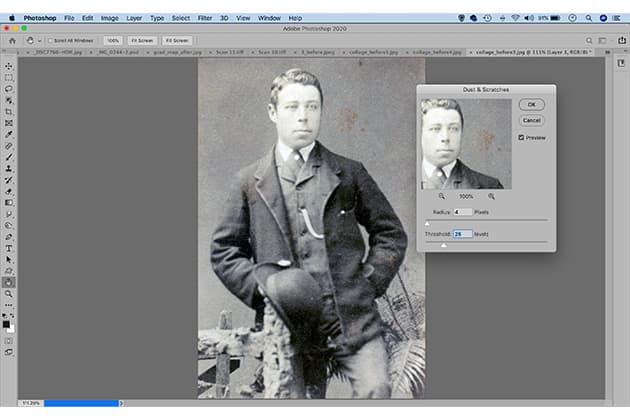
1. Fix dust and scratches
As the name suggests, the Dust and Scratches lter can be useful for tidying up messy old prints. Go to Filter>Noise>Dust and Scratches to begin, then adjust the Amount and Threshold to target the dust without removing fine detail. Often it helps to apply different strengths of the filter to different areas of the print.
Credit: James Paterson
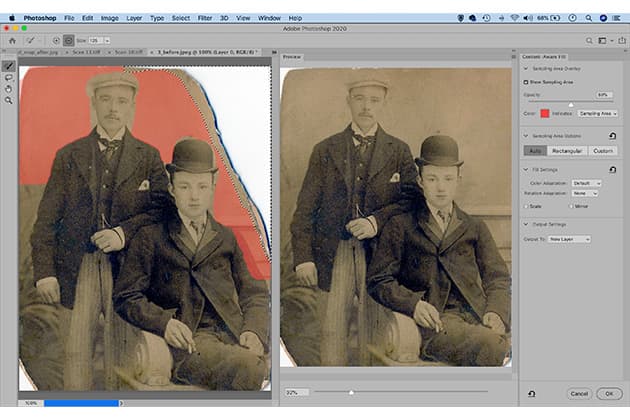
2. Fill missing parts
The Content-Aware Fill dialog is ideal for replacing detail in damaged corners of a print. Make a loose selection of the missing corner then go to Edit>Content-Aware Fill. Use the add and subtract tools to adjust the sample area so it only targets similar areas, like the plain background here.
Credit: James Paterson
3. Rebuild ripped prints
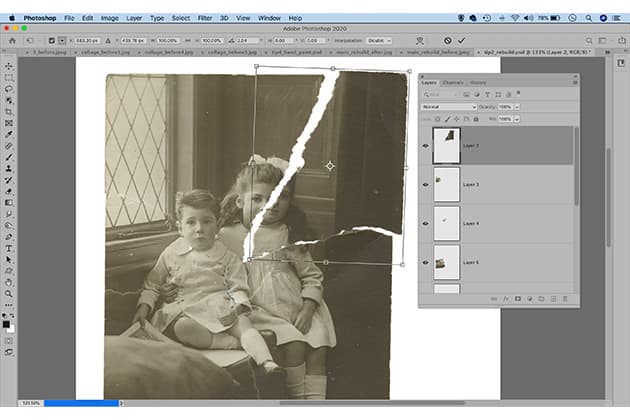
Make a selection of each individual piece of the print using the Object Selection tool then duplicate each to a new layer with Cmd/Ctrl+J. Hit Cmd/Ctrl+T to transform and position each piece like a jigsaw puzzle. Once done, make a new layer then use the Spot Healing Brush to fix the cracks.
Credit: James Paterson
4. Improve soft details and sharpen images
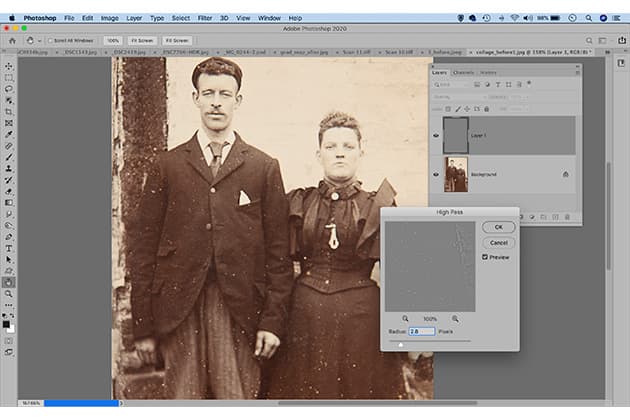
One of the best sharpening methods for old photos is the High Pass technique. Duplicate the layer and change the Blend Mode to Overlay then go to Filter>Other>High Pass. Increase the amount to apply a sharpening effect to the image that targets the details without amplifying noise and fine grain.
There are a number of other ways to improve the sharpness of an image in Photoshop, and if you’re using other sharpening methods, it’s important to make sure you have removed the noise and scratches first, as you don’t want to be sharpening the noise (or film grain).
Here are some of the other ways to sharpen images in Photoshop:
- Filter>Noise>Reduce Noise – options here include reducing noise, plus sharpening options
- Filter>Sharpen>Unsharp Mask – here you can adjust settings to tweak sharpness levels
Credit: James Paterson
5. Dodging and burning
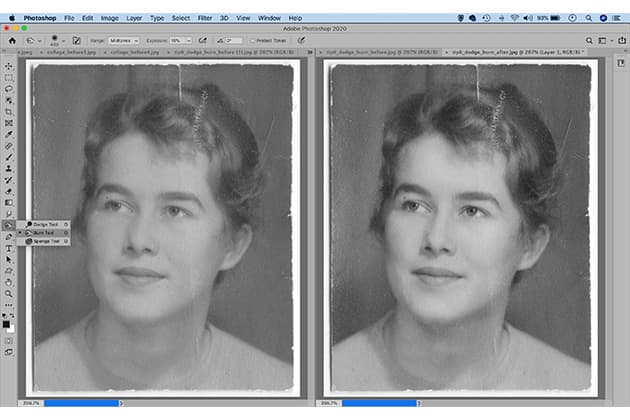
The dodge and burn tools are very useful for teasing out detail in parts of an image or adding extra depth to flat photos, especially portraits. Paint over brighter areas in the face with the Dodge tool (set to Range: Highlights) and use the Burn tool (set to Midtones or Shadows) to deepen the shadows.
Credit: James Paterson
6. Use grain to sharpen
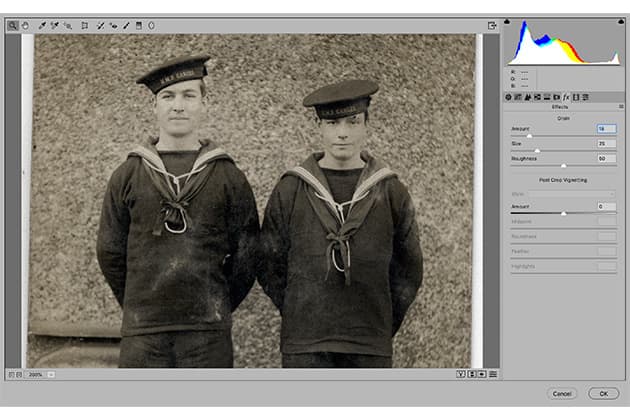
Old photos will often look soft or slightly out of focus. We can’t add in detail if it’s not there, but we can often give the illusion of sharpness by adding a touch of grain or noise to the image. Go to Filter>Camera Raw Filter then head to the FX panel to use the grain controls within.
Photo restoration: 10 quick restoration tips
- Use Auto tone If the tones or contrast look wrong then often Photoshop’s auto-correct features will do the job – hit Cmd/Ctrl+Shift+B for auto colour and Cmd/Ctrl+Shift+L for auto levels.
- Speedy zooming Restoration work (or any kind of retouching) involves a lot of zooming in and out – hold Cmd/Ctrl+Space and drag right or left for quick ‘scrubby’ zooming.
- Brush shortcuts When using the healing and clone tools you can quickly resize the brush tip by pressing ] and [ or alternatively hold Alt + right mouse button and drag right or left.
- Try bird’s eye view When zoomed in close to an image you can hold H then click-drag to fly out quickly to a ‘bird’s-eye view’ then release to zoom back in to another part of the frame.
- Sharpen selectively Often we don’t want to sharpen the whole image, just the most important areas. The Sharpen tool can be useful for painting in sharpness to the areas that need it most.
- Finish with split-toning Once restoration is complete, try adding a vintage profile or use the Split toning panel in the Camera Raw filter to give the image a colour tint.
- Restore the contrast The highlights and shadows in old prints will fade over time, so a quick boost in contrast can often work wonders – use Curves for this, or the tonal sliders in the Camera Raw filter.
- Neutralise colour casts To fix colour casts in old colour prints make a Levels adjustment (Cmd/Ctrl+L) then grab the midpoint eyedropper and click over a point that should be white or grey.
- Retouch non-destructively Checking ‘Sample All Layers in the Clone, Patch, Healing and Sharpen tool options allows you to non-destructively retouch marks and blemishes on an empty layer above the original.
- Use a pen and tablet A mouse will do, but a pen and tablet offers extra speed and precision for the kind of intensive retouching work that restoration often requires.
James Paterson is as skilled a photo editor as he is a photographer. His work has appeared in countless magazines and books. His subjects range from portraits to landscapes, architecture and underwater scenes.
Related reading:
- How to photograph film using your DSLR or mirrorless camera
- Best photo editing software in 2023 – subscription free
- Best free photo editing software for computers and mobile 2023
- How to use Photoshop Actions for a faster workflow
- How to get pin-sharp close-up and macro shots

