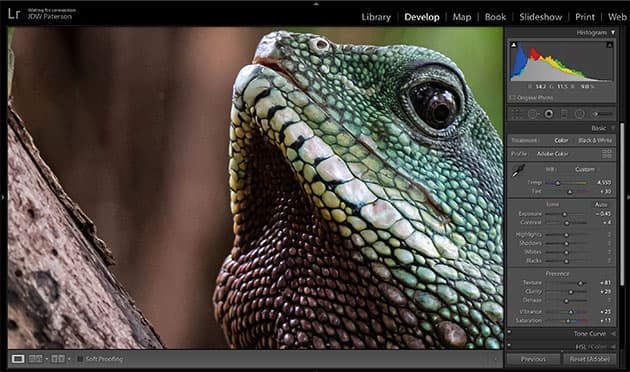
Amongst the latest updates to the Lightroom family of apps are a few stand-out features. For many photographers, the headline feature will be the new Texture control. Found within the Basic Panel alongside the Clarity slider, Texture works in a similar way to its detail-enhancing neighbour. But the results are gentler, making it ideal for accentuating details like skin and hair. There is a new Help tool in Lightroom CC, and a new Home Screen in Lightroom for iOS/Android devices. Another notable inclusion in Lightroom Classic is the Flat-Field Correction tool, which allows you to correct colour drifting and vignetting by referencing a calibration frame taken of a neutral surface using the same camera/lens combo as your other shots. Let’s explore the key features.
Credit: James Paterson
Texture and frequency
Most images will display areas of high-, mid- and low-range frequencies. High-frequency areas will be those with lots of detail and contrast, while low frequencies will be smooth areas, blocks of colour or out-of-focus parts. Some tools are designed to target certain frequencies. Sharpening, for example, works on high-frequency details, while clarity affects a wider range of frequencies including some high and some low. The new Texture command is more tightly confined to mid-frequency details. Subtler than Clarity, but heavier than sharpening, it’s great for enhancing details like skin.
Credit: James Paterson
Revealing details
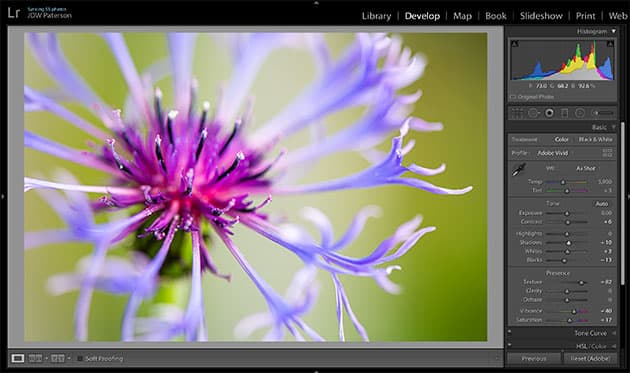
By targeting mid-range frequencies, Texture can be very useful for sharpening certain kinds of details in landscapes and macro shots. Because it doesn’t affect the highest frequencies it won’t amplify noise, which can often happen unintentionally when sharpening an image. By ignoring higher frequencies, Texture can bypass noise and enhance broader details underneath. Put simply, you can crispen details without making the image more noisy. As well as leaving noise untouched, Texture ignores low-frequency details, making it good for macro shots with lots of low-frequency blurred areas.
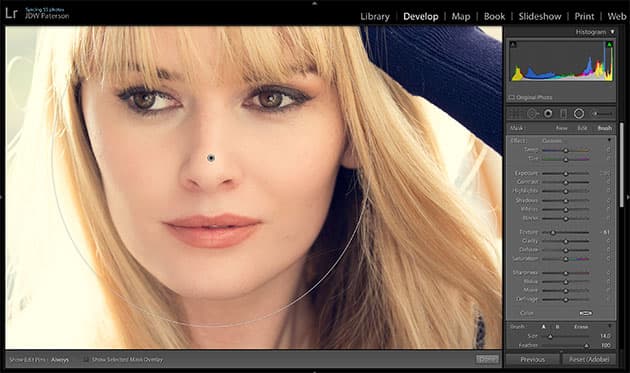
The new Texture slider is great for smoothing out skin, leaving fine detail unaffected. Credit: James Paterson
Skin smoothing with Texture
As the name suggests, the new Texture slider in Lightroom is useful for pulling detail out of surfaces. However, it was originally conceived as a tool for smoothing out fine details, a task at which it’s equally adept. Set to a negative value, it de-emphasises mid-frequency details, resulting in a subtle smoothing effect that is especially useful for skin. Just as the Texture control doesn’t emphasise image noise, it also leaves the fine detail in skin unaffected. This means that you don’t get the horrid, plastic-looking skin that some skin-smoothing techniques can cause. Instead, you’re able to soften the skin while still retaining that all-important detail in the pores. You can apply negative Texture universally to your portrait, but it’s usually more successful as a skin smoother when combined with either the Adjustment Brush or Radial Filter. Here I’ve dragged a circular radial filter over the face, lowered Texture, then used the brush to erase the eyes and lips from the effect. Of course, you could also use the command in combination with Range Masking, then sample the skin colours to zero in on them.
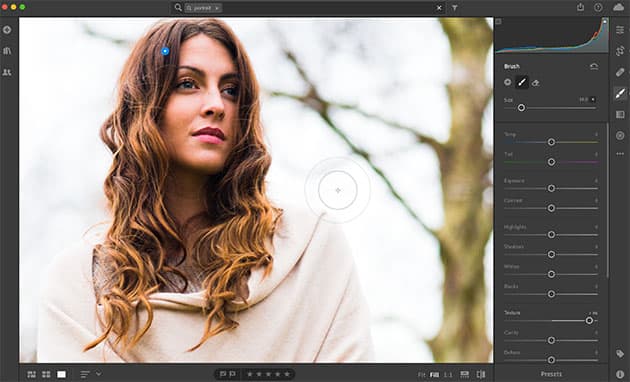
The Texture command is highly effective for enhancing hair, and fur in animal portraits. Credit: James Paterson
Enhancing hair
As well as being useful for skin smoothing, the Texture command can also be highly effective for enhancing hair in your portraits, or fur in animal photos. As with the skin smoothing technique, it’s best to use the Texture command in combination with one of the local adjustment tools. This time, I’ve used the Adjustment Brush, which allowed me to paint an adjustment over the hair. Loaded with positive Texture, the Adjustment Brush allowed me to isolate and enhance details in the hair, adding punch and contrast to the shape of the hair without overly crunching fine details. This is a good example where Texture has the edge over both Clarity and Sharpening. Clarity would make the hair look too grungy, while sharpening would crispen up the fine strands of hair too much, resulting in halos.
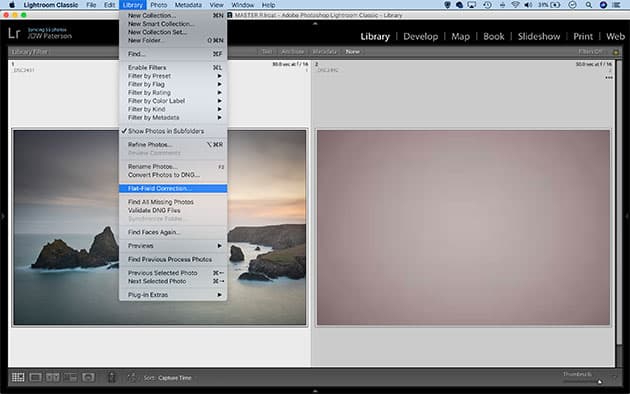
By shooting and referencing a calibration frame you can eradicate colour drifts. Credit: James Paterson
Flat-field correction explained
Different combinations of cameras and lenses can sometimes result in unnatural shifts in tone and colour. These can manifest in different ways. For instance, there may be a slight colour cast across the image, or colour drift – where a colour cast becomes stronger towards the edges of the frame. Vignetting and shading (coloured vignettes) can also occur. These issues typically arise with mirrorless cameras or digital medium-format backs, especially when third-party wideangle lenses are used. Lightroom already features lens-correction tools that can fix some of these issues by applying lens profiles, as well as a manual vignette correction tool. However, these corrections are standardised and will not be tailored for your specific lens/camera combination at a specific focal length, aperture and focus point. This is where flat-field correction comes in. By shooting and then referencing a calibration frame, you can use this new feature to make a precise correction and eradicate these unwanted colour drifts.
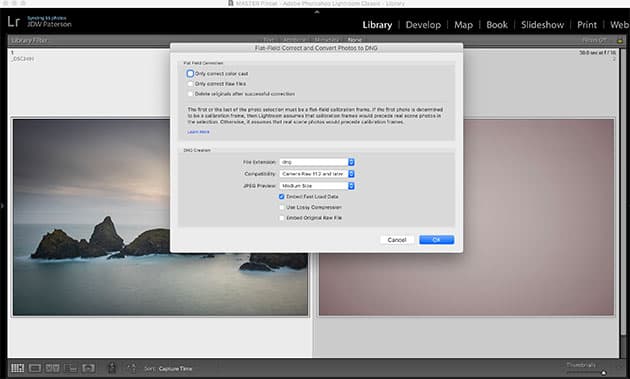
Once you hit OK Lightroom applies flat-field correction before converting files to DNGs. Credit: James Paterson
Calibration frames for flat-field correction
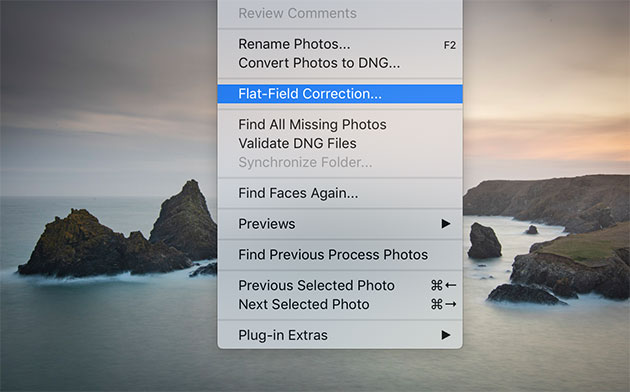
The easiest way to shoot a calibration frame to use with the new Flat-Field Correction command is to photograph a plain white or grey wall, or use a diffuser card in front of the lens (this doesn’t necessarily need to be done at the time of shooting). Once you have your images open in Lightroom Classic, you can use the calibration frame to correct other images taken with the same lens and camera. To use this feature, first select all of the photographs you want to correct (either with the calibration frame at the beginning or end of the set), then choose Library>Flat-Field Correction. This opens the ‘Flat-Field Correct and Convert Photos to DNG’ dialog, with practical and file-handling options. Once you hit OK, Lightroom automatically detects the calibration frames and applies the flat-field correction to the corresponding photos before converting them to the DNG file format.
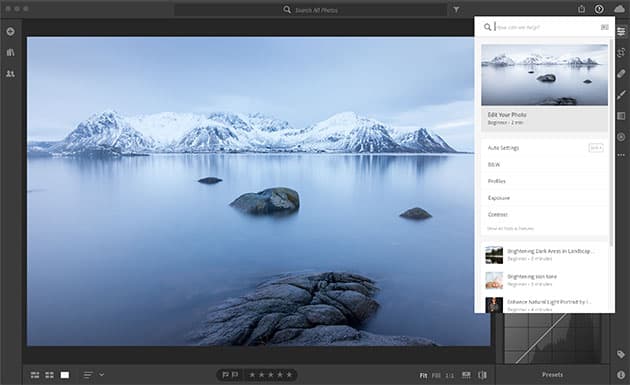
The new help command offers suggestions on how to edit your current images. Credit: James Paterson
Helpful in-app learning
Lightroom CC has a new contextual help command that offers access to tutorials and advice. Found by clicking the question mark icon at the top right of the app, the help command gives you suggestions on how to edit your current image, as well as offering other images with step-by-step guidance on how they can be edited. In an intuitive design, blue tips and highlights will appear over your Lightroom interface, guiding you to the relevant tools. If you’re unfamiliar with Lightroom CC, this can be a useful way to find your way around the controls, and it gives you an idea not just of the tools used to enhance an image, but also of typical amounts and setting strengths that experienced image editors might use.
New Lightroom updates: six of the best
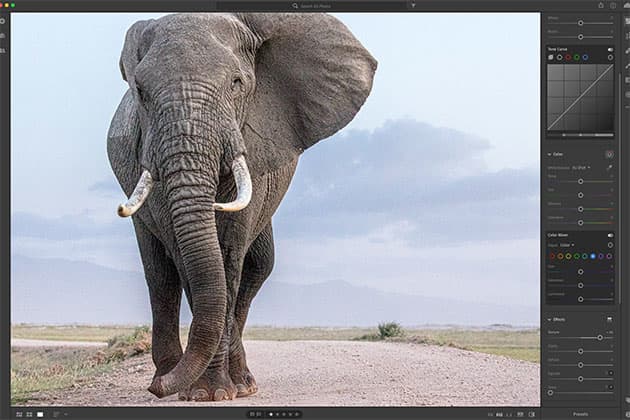
Credit: James Paterson
The Texture slider
This new slider in Lightroom Classic and CC affects mid-range detail in an image, letting you either enhance textures and surfaces or smooth them out with a negative setting. As well as the option to apply Texture universally, you can use it in combination with the local adjustment tools.
Credit: James Paterson
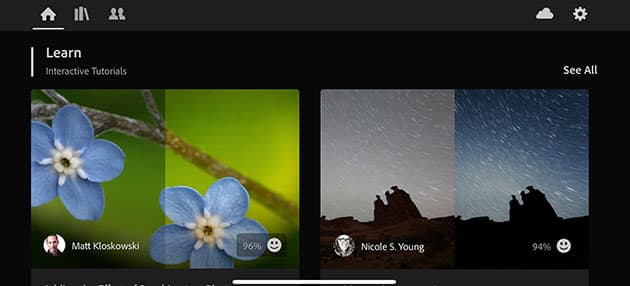
New Home on mobile
Lightroom for IOS/Android has a new home screen. Alongside your recently added photos you will find an array of tutorials and image inspiration – with advice on how each image was edited, step by step. The home screen will soon appear in the desktop version of Lightroom CC too.
Credit: James Paterson
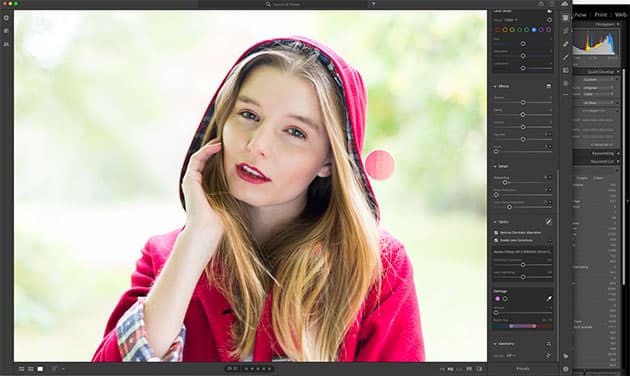
Defringe in CC
New to the cloud-based Lightroom CC desktop app, the Defringe command helps remove colour fringing. Found under the Optics tab, it offers more control than ‘Remove Chromatic Aberration’, with a ‘Fringe Selector’ that allows you to sample a colour from the fringing you would like to remove.
Credit: James Paterson
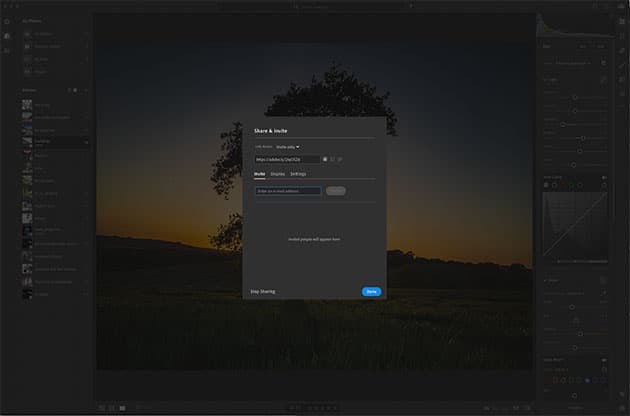
Album sharing
Lightroom CC and Mobile uses ‘Albums’ to group sets of photos. These can now be shared with others by inviting them to access and contribute to the album. To do so in the desktop version, right-click an album and go to ‘Share & Invite’. On LR Mobile, tap the three-dot icon next to an album name.
Credit: James Paterson
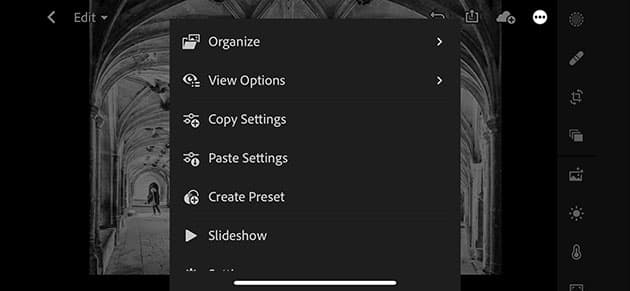
Batch edit on Android
Lightroom for Android now offers a handy batch process feature that makes it easy to copy edits from one image to an entire set. Simply highlight the already-edited photo, tap the three-dot icon and ‘Copy Settings’ then go to the grid view, select the other photos and select ‘Paste Settings’.
Credit: James Paterson
Flat-field correction
This is a new feature for Lightroom Classic. It was previously only available as a plug-in, but now lives in the Library Module under Library>Flat-Field Correction. The command helps to correct for sensor and lens issues that typically afflict mirrorless cameras resulting in unnatural colour shifts or vignetting.


