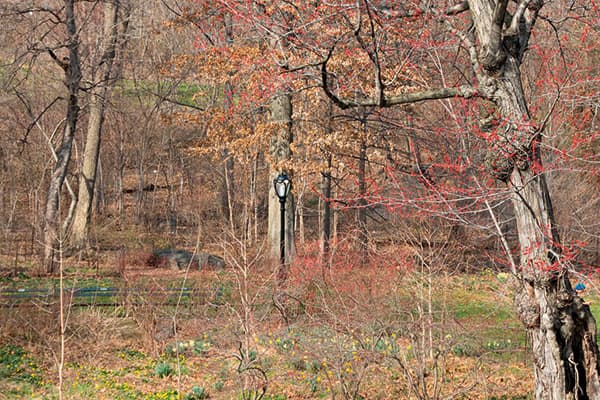
After sharpening
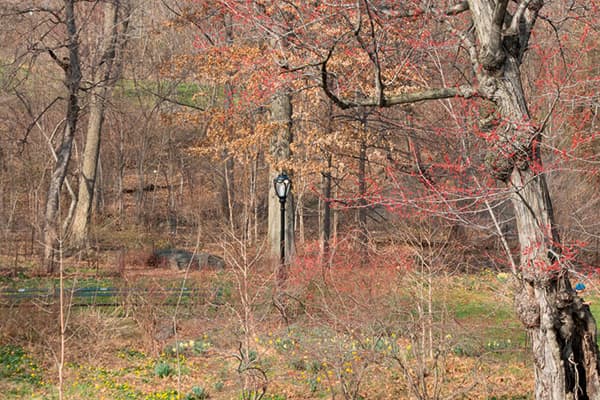
Before sharpening
Sharpening is an essential step in the editing workflow, as the actual image recorded by your camera is not necessarily the sharpest result you’ll be able to achieve. However good your technique or lens, nearly all digital images will benefit from some sharpening in software.
Put simply, sharpening works by slightly blurring a version of the original image to create a mask, which is then subtracted away from the original image to detect the presence of edges. By increasing the contrast along these edges, you can achieve a sharper final image.
When correctly applied, sharpening can really benefit your image, but the trick is to know how much of it to apply. Less is often more here. It may be tempting to oversharpen your image, but telltale halos can appear around the edges, leaving you with an unattractive, unnatural-looking end result.
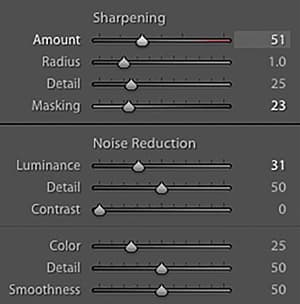
Use Lightroom’s tools cautiously to avoid haloes
Sharpening raw images
Raw files particularly benefit from some kind of sharpening, as they are not processed files like JPEGs. Remember, JPEG files have already been sharpened by the camera at the point of capture, but raw files are like the digital equivalent of a negative.
Raw converters offer some powerful controls that allow you to apply sharpening to the image. Both Adobe Camera Raw and Lightroom offer a dedicated Detail tab, for instance, with sliders controlling the Amount, Radius, Detail and Masking. These tools do an identical job in Lightroom and Adobe Camera Raw.
Amount As the name suggests, this slider controls the amount of sharpening – 0 being nothing, and 150 being maximum.Radius The Radius slider controls the amount of blurring needed on the original to create the mask, affecting the edges you wish to enhance.Detail This slider suppresses the halo effect when sharpening an image, allowing you to push the Amount further without the quality of the image deteriorating.
Masking The Masking slider helps you remove sharpening from areas of smooth tone, so it’s useful when working with skin tones and clear blue skies. The higher the number, the greater the area of the image masked (depending on the original amount of detail in the shot).
The ‘mix’ you apply to your sharpening will vary from image to image. For instance, a good starting point for a landscape shot would be 40, 1, 35, 0, while a portrait might suit 35, 1.5, 15, 60.
You’ll also need to zoom in 100% on your image to see any changes made, while you can hold the Alt key to preview the effect of the adjustment as you alter each slider for even greater control.
Don’t forget that Lightroom enables you to sharpen selected areas of the image using the Adjustment Brush. You can also add further output sharpening (for print, for example) when you export an image.
Unsharp Mask
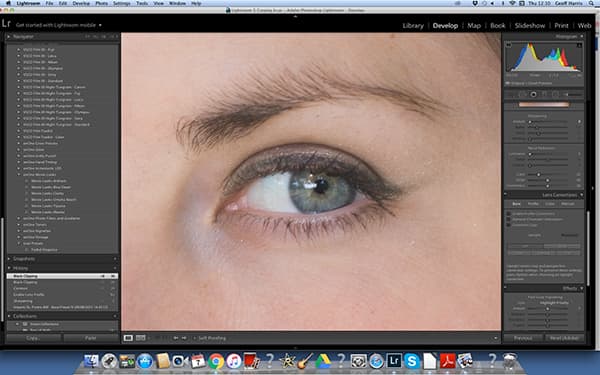
Before
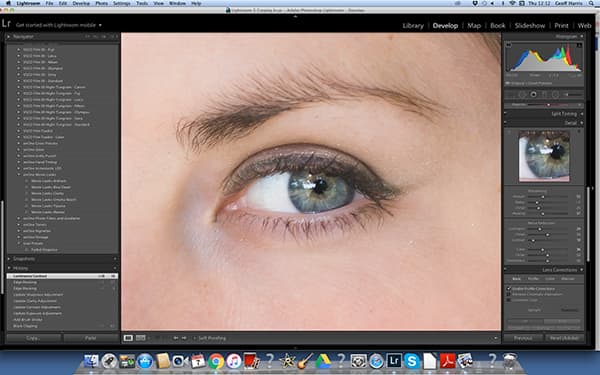
After.
Keep the Threshold low enough to sharpen key details and push Amount as needed, checking the effect in the Preview window
Images can also be sharpened in Photoshop and other image-editing programs, and while JPEG files have had image sharpening applied in-camera, some can still benefit from a certain amount of sharpening later.
We’d recommend you duplicate the layer first before you make changes, so any sharpening doesn’t save over the original file. Instead, you have a sharpened layer that can be easily altered or removed. Sharpening should also be your final editing task before saving.
Unsharp Mask may sound like it has the opposite effect to sharpening, but like the Raw converter process, a blurred mask of the image is created to ascertain the edges in the image.
Found in the Sharpen category of Filters, Unsharp Mask offers similar controls to those found in Photoshop’s Raw converter, but with the absence of Detail and Mask sliders. Instead, it has a Threshold control, which controls what is considered as an edge in the image. At higher values, only high-contrast edges are sharpened, with a good starting point of around 5-10 being the norm.
High Pass Filter
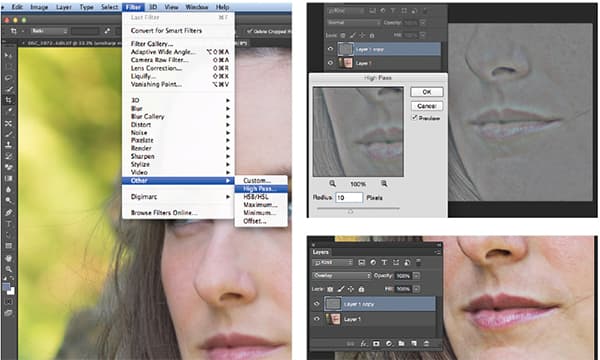
Duplicate the background layer and again, sharpen sparingly so it’s not crude or obvious
The High Pass Filter technique is less well known than Unsharp Mask, but in many ways it’s the better of the two sharpening methods. This is because the only areas that have sharpening applied are the edges, leaving skin tones and clear skies unaffected.
It’s a simple process, but it requires a couple of steps to achieve. By starting with your Layers palette open, Duplicate the Background layer, and then change the blending mode of the new layer to Overlay.
With this done go to Filter, and from the drop-down list, select Other and then choose High Pass. Set the Radius to 10, and then hit OK. You can now fine-tune the sharpening with the Opacity slider for the duplicated background layer – zoom in to 100% on the image, and decrease the Opacity until you’re happy with the result.
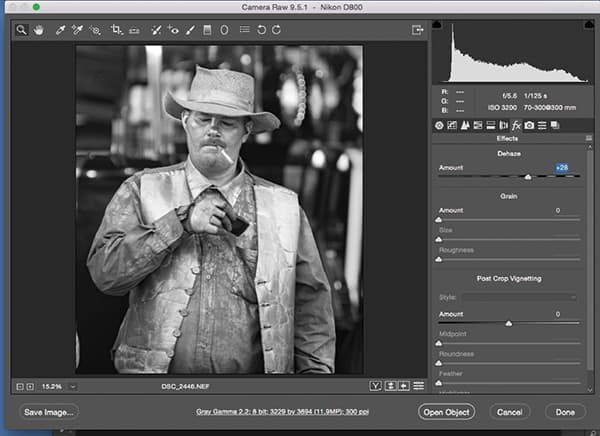
Stop the shakes (and haze)
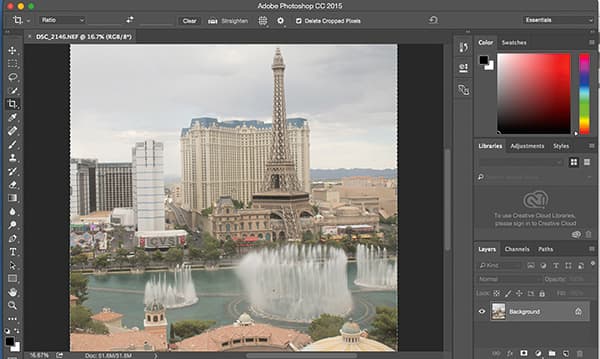
Before
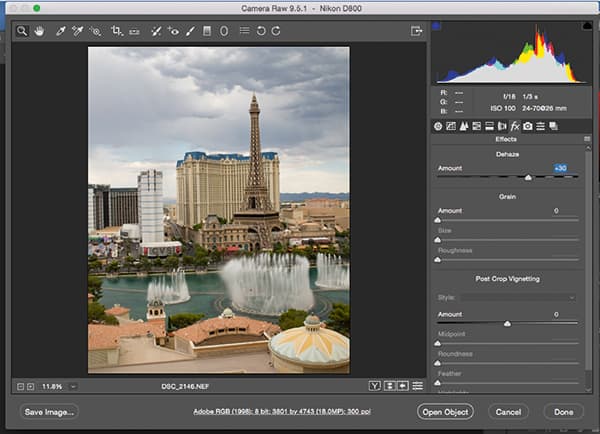
After.
As well as mist, Dehaze is great for sharpening up shots taken through glass
Newer versions of Photoshop have some more handy tools for sharpening your shots. The Shake Reduction filter (found under Filter> Sharpen>Shake Reduction) automatically analyses the image and selects the area it thinks is suffering from camera shake. For finer control, you can add your own ‘Blur Estimation’ boxes to selections of the image, using the Smoothness and Artifact Suppression sliders to keep everything looking natural.
Dehaze, introduced in Creative Cloud 2015, is another useful slider when working with raw files. The Dehaze technology is based on a physical model of how light is transmitted, and it tries to estimate light that is lost owing to absorption and scattering through the atmosphere. It comes in particularly handy when shooting in misty mornings or in the golden hour. For the best results, set the white balance for the image before using Dehaze. Then, in the Effects panel, move the slider to the right in order to remove the haze from the original scene. Moving the slider to the left adds a creative haze effect for a moody, gauzy atmosphere. If you’re pushing the slider to the extreme, it’s good to refine the image using the Basic panel (increasing the shadow detail or refining the Vibrance slider) to keep the image natural. Dehaze also helps to reduce glare from windows and increase contrast in areas of middle grey in b&w images.
