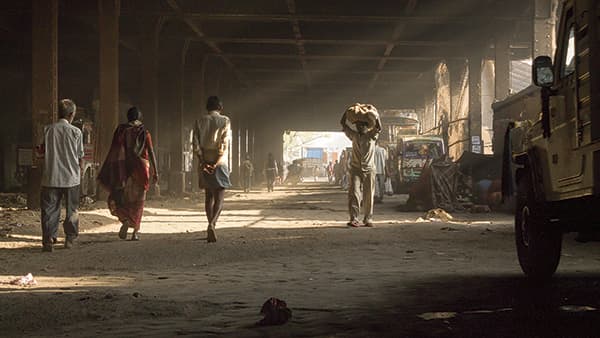
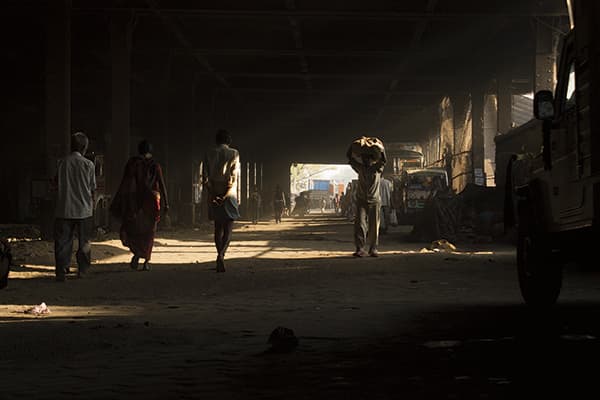
Auto camera features are great for making photographers’ lives easier, although it’s best not to become reliant on them – you still need to be aware of when it is best to override auto settings. For example, in this photograph by Riddhi Deb, the centre of the frame is pointed at the bright daylight area in the distance. As a result, the camera’s auto metering was fooled into compensating by selecting a darker exposure.
Judging by the focusing, it looks like the lens was focused on the distance, too. However, auto functions can also be used to improve images at the post-processing stage. In Camera Raw, there are auto settings such as the Auto tone adjustment option in the Basic panel, which adjusts parameters such as Exposure, Contrast, Shadows and Highlights to give a balanced range of tones. It won’t always work flawlessly, but sometimes a single auto-tone click adjustment is all you need to correct an image.
1. Auto select tone sliders
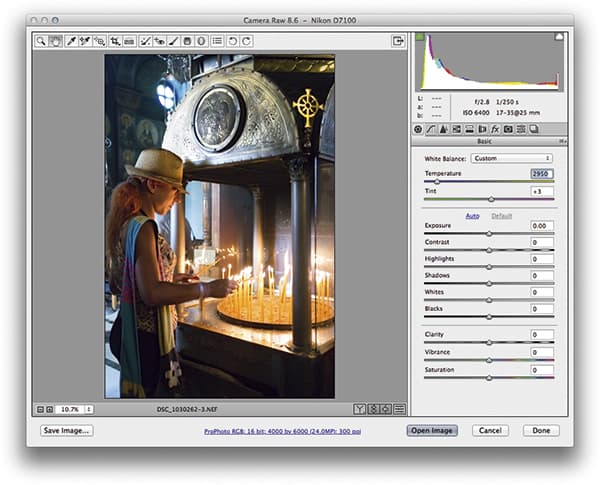 This particular photograph was rather dark and obviously needed lightening. To do this, I clicked on the Auto button in the Basic panel, which auto-set the tone sliders to what Camera Raw reckoned to be the optimum tone settings. This won’t always work effectively on every image, but in this case there was no need to make any further adjustments.
2. Removing noise
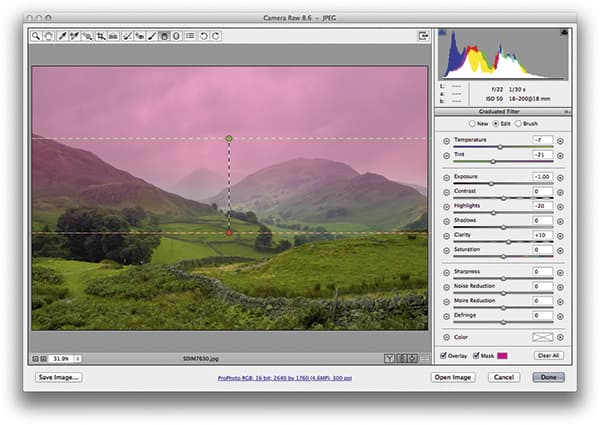 I noticed that the photograph had been shot as a JPEG at ISO 800. Although the camera’s on-board processor would have processed the image to remove some of the noise, I went to the Detail panel and applied the settings shown here to remove more of the luminance noise. I also added more sharpness to compensate for the additional smoothing.
3. Cropping to give focus
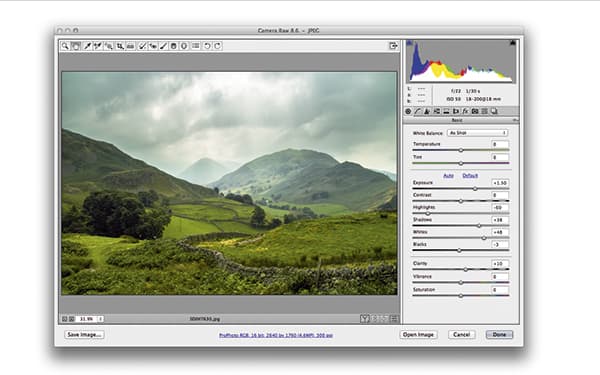 Looking at the full-frame image, the main areas of interest were all in the centre portion of the frame, so I applied an extreme landscape crop to create a more cinema-style-format cropping. This removed the extraneous areas and focused the eye on the more important areas of interest in this scene.
Noise reduction in Camera Raw
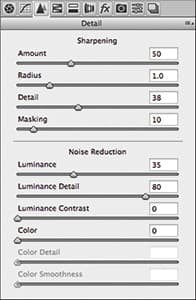
If you process JPEG images using Camera Raw or Lightroom, you shouldn’t need additional sharpening or noise reduction, which is why these settings are always set to zero by default when processing a JPEG image. Raw files, however, always need some sharpening and colour noise reduction applied by default, to which you can modify the sharpen and noise reduction settings as necessary. When editing the Noise Reduction sliders in the Detail panel, the Luminance slider can be raised to help remove the luminance (random pattern) noise and fine-tuned by further adjusting the Luminance Detail and Luminance Contrast sliders. With raw images the Color slider is always set to a default setting of 25, but it can be raised where there’s a lot of colour noise. Colour bleed can be controlled by adjusting the Color Detail slider.

