
Follow the steps below for converting to black and white to see if this simple method could work wonders for your images…

Step one: Channels
Open your image in Photoshop. You’ll need to see the Channels palette so if it isn’t already visible go to Window and make sure Channels is ticked.
If you’re successful in this you’ll be able to see the various colour components that your image is composed from. In this case we have three: red, green and blue as well as a composite, labelled RGB.
 Step two: Lab
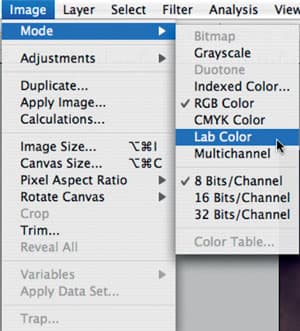
Select Image > Mode > Lab Color. Not much will happen to the actual photograph, but your Channels palette should look quite different.
Here, red, green and blue have been exchanged for a Lightness channel and two colour channels, a and b. As before we also have a composite of all three, this time called Lab.
Step three: Delete channels
We only need the Lightness information so drag and drop channels a and b into the trash. Also dispose of the spare ‘Alpha 2’ channel that appears.
The image should now be purely black & white and lighter than before without any detrimental effects to shadows or highlights.
Go back to your original colour mode (Image > Mode > Grayscale, then Image > Mode > RGB).


