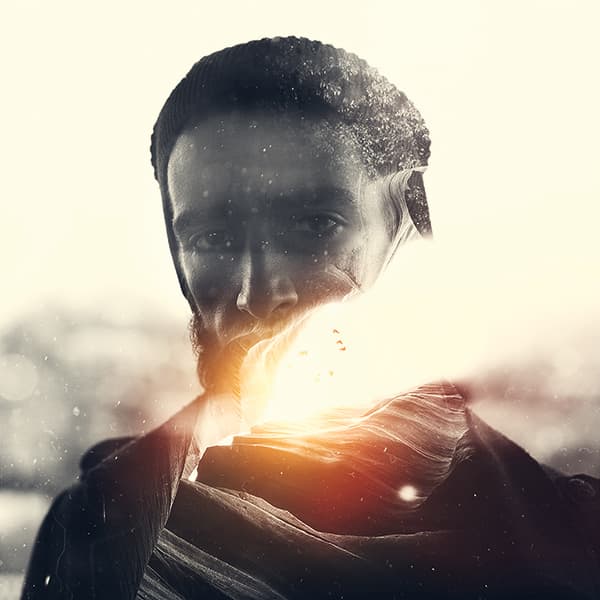
All the things we say final image
There was a very dark period in my life when I was feeling lonely, frustrated, angry, stressed – all the emotions you don’t want to experience. But sometimes you need to hit rock bottom to find out who you are and where you want to go.
I was lost for a really long time, trying to find the way to live, to be myself. From a young age I was interested in photography, music and graphic design. Eventually, I found surreal art to be my escape.
I was experimenting with a lot of different concepts, but the double-exposure technique was something so different that I decided to take this idea and recreate it in Photoshop. My work is not traditional texture overlaying, but photo manipulation, which involves two, three or more processed images.
The technique
To recreate this technique in Photoshop, you need to know how to use just a few tools, namely blending modes, masks and basic adjustment layers such as curves and colour balance. For the base image I found that photographing the model against a brighter background, so you can see your subject almost as a black silhouette, helps to overlay layers later in post-processing.
For the second image, I preferred something that could break my subject’s natural lines, such as a cityscape or forest. After that, I worked with textures to overlay the whole image, such as dust, blurry raindrops or street lights. I usually go one step further, adding light leaks to make my artwork ‘pop’.
Top tip
Always stay connected with the natural world and use it for inspiration. It’s an endless space from which you can take images. Textures, colours, people, stories around you – everything can be a source of inspiration. From a technical point of view, make sure you always have your camera with you and keep shooting. I shot the blurry raindrops you see in this tutorial in one of my favourite coffee shops. I was just playing around with the depth of field while sitting next to a large window. This series of photographs ended up being on the top of my most often-used textures.
Key images
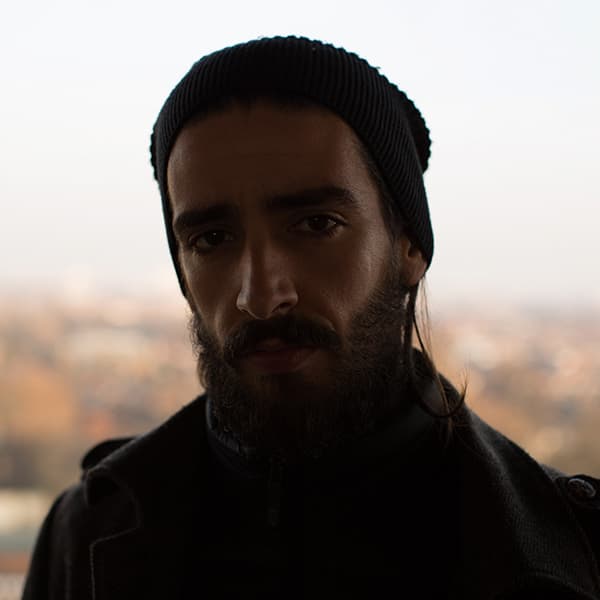
For the base image, Piotr shot his model as a near black silhouette, which helps when overlaying further layers
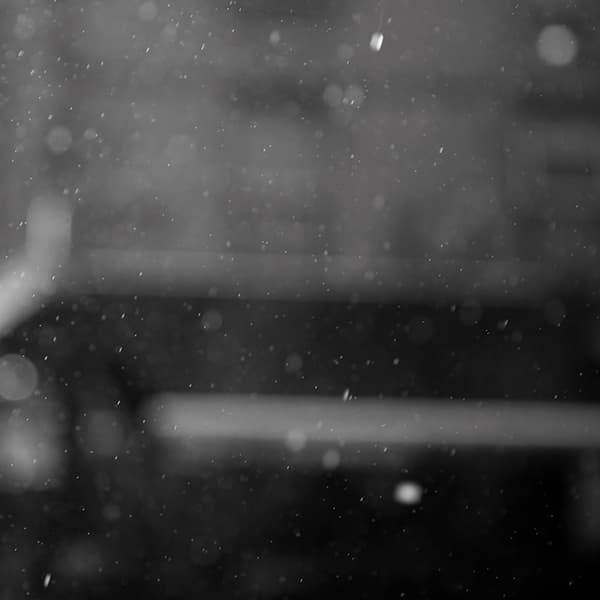
Piotr wanted another dimension for his image, so he took this picture of rain and added it to the final composition
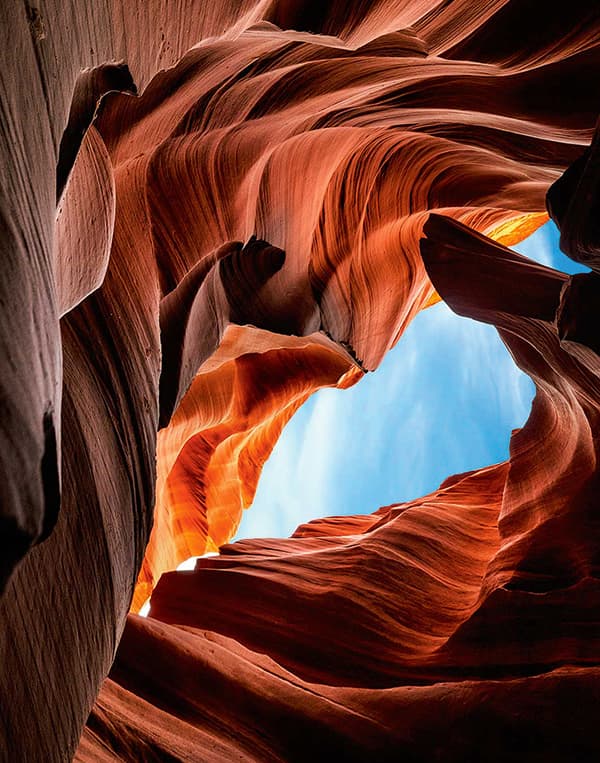
For the secondary image, Piotr selected this picture taken from the bottom of a canyon
Step by step
1. Open the base image
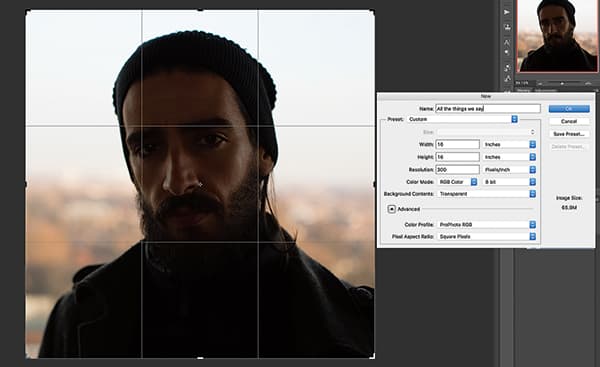
Remember the settings before you start. If you wish to print, start by working at 300dpi and ProPhoto RGB colour space. It will not only give you extra depth when sharpening the image at the end, but will also help you to get rich colours. These may be small details, but they make a difference.
2. Open the second image
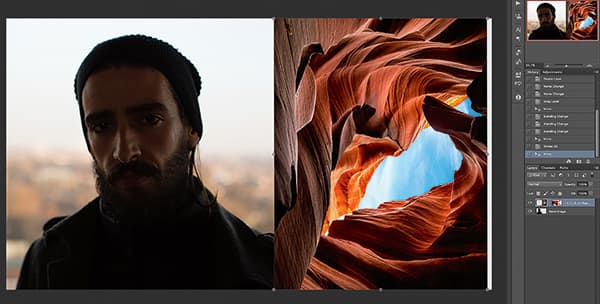
With the base image kept on-screen, open the second image that you want to overlay your first. Make sure you use an image that will break your first subject’s shape and form.
3. Change the blending mode
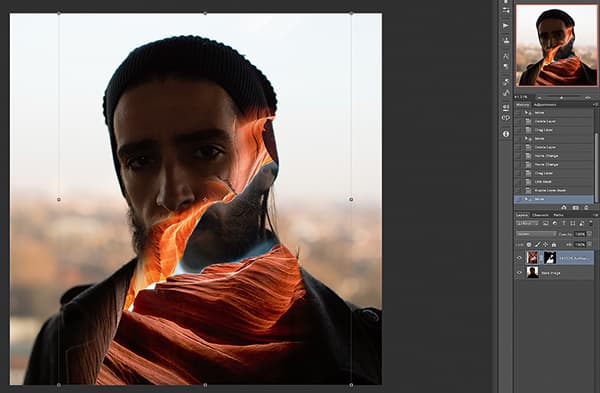
With the second image selected, change the blending mode to Screen and then reposition it. You want the sky in the canyon image to be on the model’s mouth, so you can create a crack in his ‘head line’ on the left. Then you can mask the unwanted areas.
4. Reveal the sky
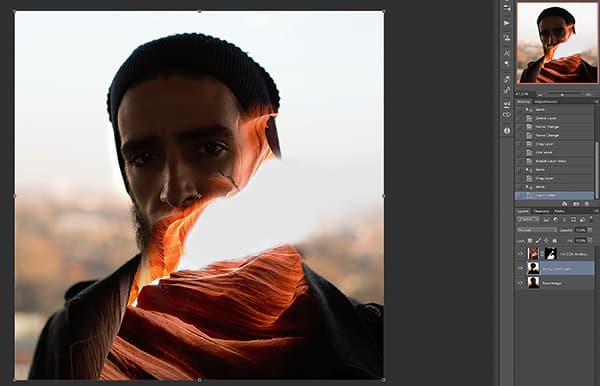
We want to reveal some of the sky in the face, so start painting white under the canyon photo to perfectly blend it with the background and create a more surreal, abstract look to the image.
5. Add texture
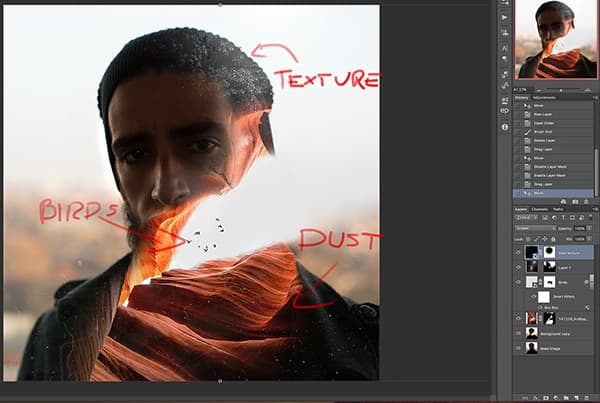
Add birds, a dust texture for extra depth and a forest texture on the model’s head. Change all the images’ blending modes to Screen and Mask unwanted areas. Pay close attention to the eyes. You don’t want too many textures over the model’s eyes, nose and forehead. You still need to see he is human!
6. Bring in the rain
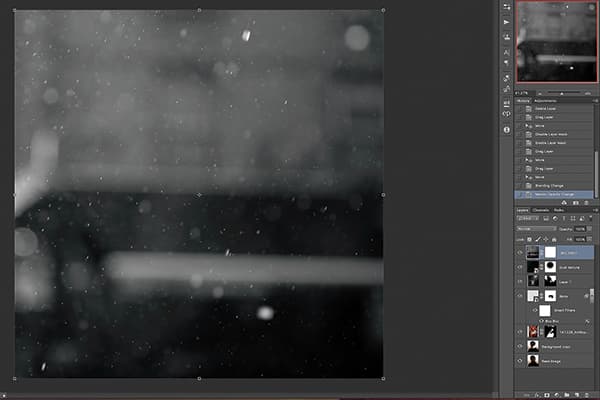
I want to add one final texture to the image – a shot of rain. With this imported and at the top of the layer stack, change the blending mode to Screen.
7. Contrast and desaturation
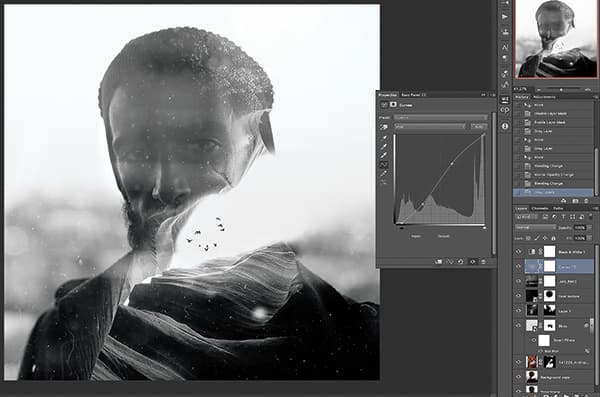
While doing this, you need to remember that most of the layers added in Screen mode will be a bit brighter than those in other modes. Use contrast to add depth and reveal the upper part of the model’s face.
8. Add the lens flare
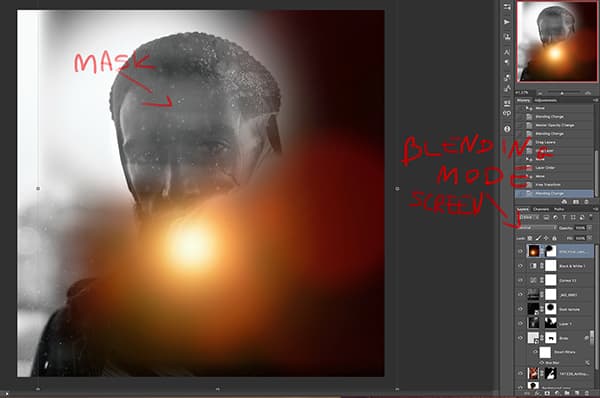
Change the blending mode to Screen again and position it at the beginning of the canyon. Mask the image on the model’s face. Always look for the source of light when doing this. Don’t put extra light layers where they don’t belong. It may be a surreal image, but it still needs to have some sense of reality!
9. Final touches
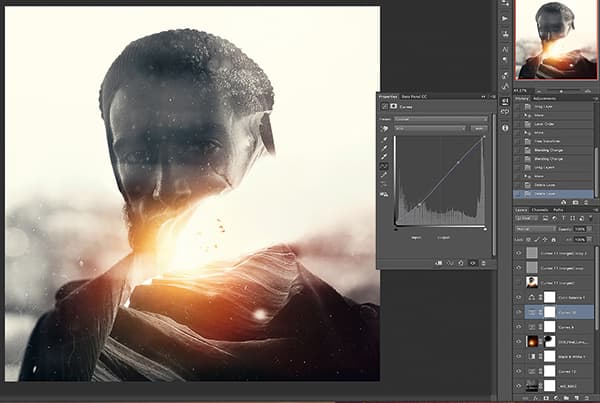
Add more contrast to the whole image. Add yellows to the Highlights and just a bit of blues to the Shadows. Those two steps will help you to make the whole thing ‘pop’. Don’t be afraid to experiment with the sliders and curves. Sharpen the image using High Pass filter, and you’re done!
About Piotr Skoczylas
Piotr is a London-based surrealist portrait photographer who first started shooting in 2012, and since then has found surreal art to be a way to connect with the world and to express himself.
www.piotrphotography.com

