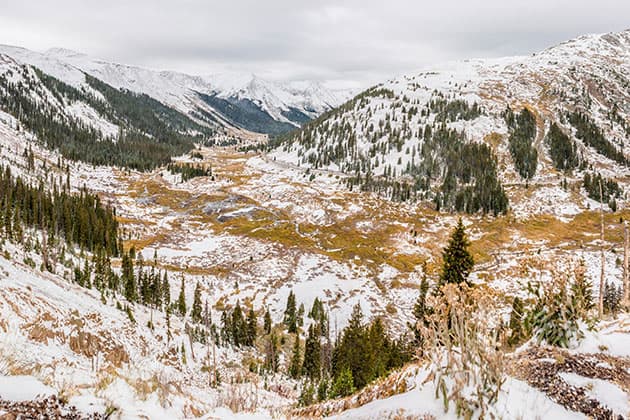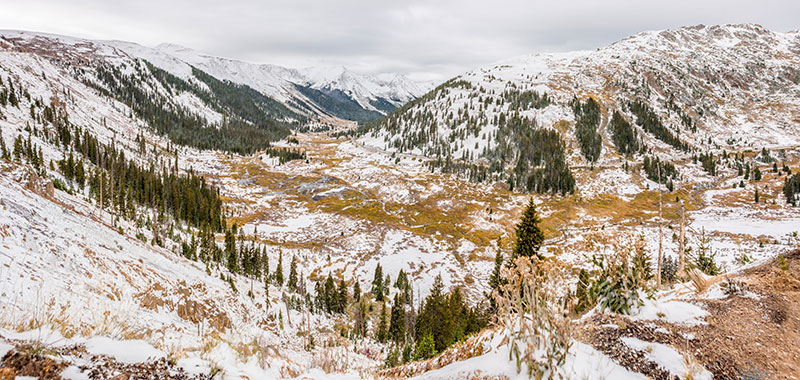
Panorama stitching is a great technique to use to extend your angle of view. Credit: Martin Evening
For those times where you find yourself squeezed for space, or lacking a wide enough lens, panorama stitching is a great technique to use if you wish to extend the angle of view, or you simply want to capture more pixels or create sharper images. There are a number of programs out there you can use, including smartphone apps, and not least the highly acclaimed PTGui. But both Photoshop and Lightroom have powerful panorama-building features, including the Panorama Photo Merge in Camera Raw.
When photographing a sequence of individual photos that you intend to stitch together, it helps if you capture a significant overlap between each one. Ideally, the photos should be shot using a moderate wideangle lens or longer, and there should be at least a 25% overlap. With extreme wideangle/fisheye lenses you should aim for a 70% overlap. It helps if you have the camera mounted on a tripod or better yet, use a special tripod head that allows you to align the nodal point of the lens to the rotation axis. But you can certainly get good enough results when shooting handheld. Ideally, the exposure setting should be consistent, but even if the photos are captured with a variance of exposure, the Photo Merge process can even these out to a certain extent.
I mostly prefer to use Camera Raw’s Merge to Panorama method, which creates DNG panoramas from raw as well as non-raw files. The resulting files are 16-bit integer DNGs, which are demosaiced and saved as raw linear RGB data. Although the images are partially processed, you still retain the ability to apply Develop module edits and update to later process versions as they become available. Lens warp, vignette, and chromatic aberration are automatically applied to the images behind the scenes before stitching, so such settings in the source images, as well as Upright and Crop adjustments are ignored. Other adjustments, such as Basic panel, Tone Curve, Lens Corrections panel defringe adjustments and colour adjustments, are copied though.
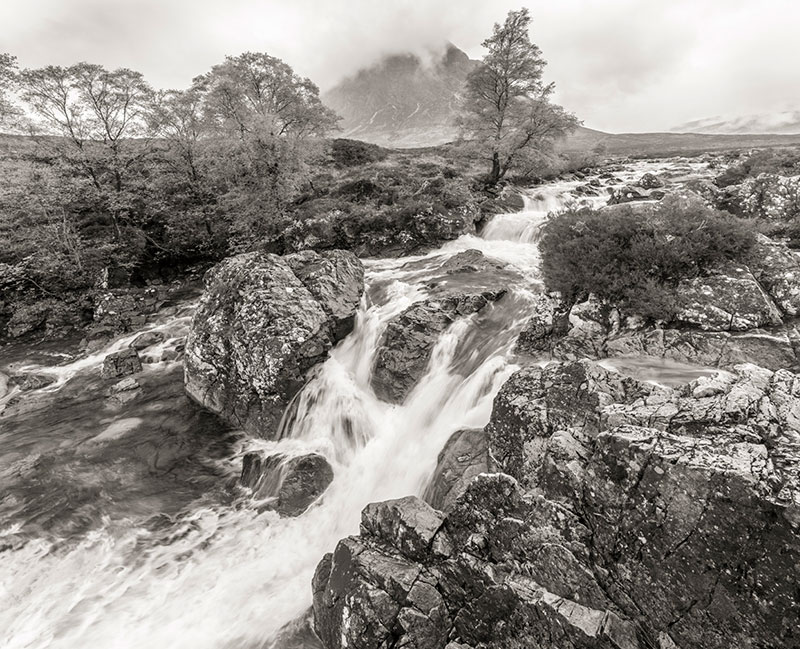
For best results, use a tripod and make sure each exposure is consistent. Credit: Martin Evening
Creating Photomerge DNGs
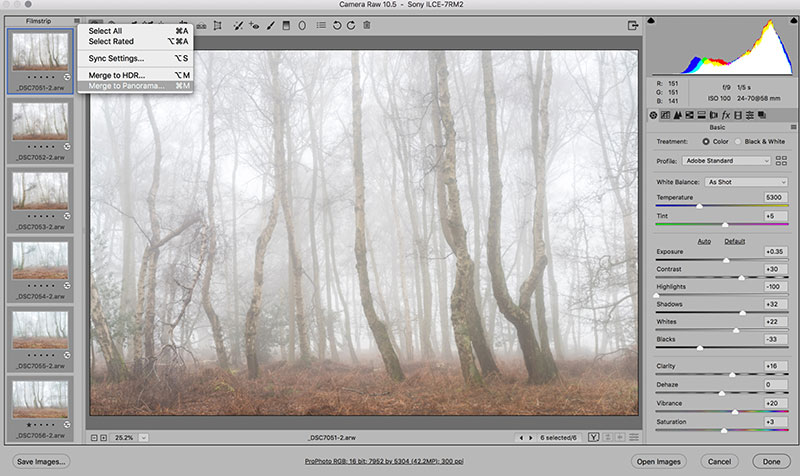
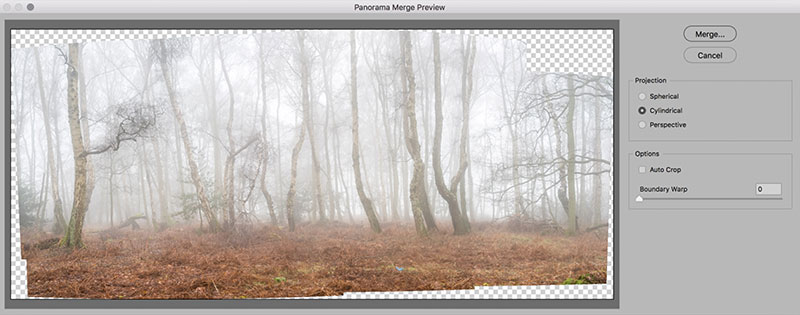
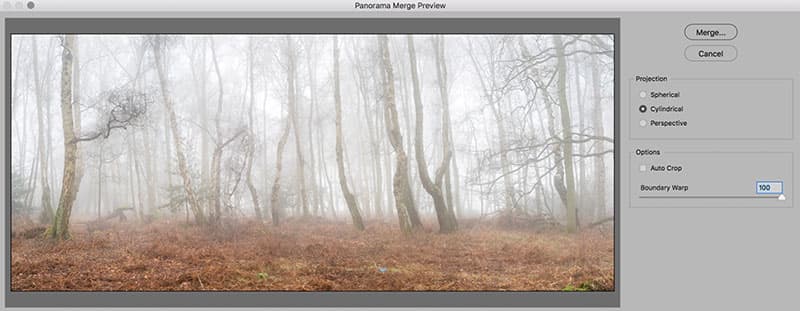
To create a Panorama Photomerge DNG, make a selection of photos in Adobe Bridge and choose File > Open in Camera Raw. Select all the photos in the Camera Raw Filmstrip and, from the Filmstrip menu, choose Merge to Panorama. This opens the Photomerge Preview dialog, where you can select from three projection methods. In the following steps I used the Cylindrical option. The Spherical mode transforms the photos both horizontally and vertically. This method can be more adaptable when it comes to aligning tricky panoramic sequences. So, for example, when you shoot a sequence of images that consists of two or more rows, a Spherical projection mode may produce better results than the Cylindrical method. The unadjusted preview may appear distorted in shape, but by dragging the Boundary Warp slider to the right you can warp the image to fill the bounds of the image frame. It is worth bearing in mind that Camera Raw-generated panoramas contain the necessary metadata to allow them to later be perspective-corrected using the Adaptive Wide Angle filter in Photoshop CC, should you prefer. Or, you can make use of the Transform controls in Camera Raw to edit the perspective.
The Photoshop Photomerge method offers an alternative approach. You can access this by selecting the photos in Bridge and choosing Tools > Photoshop > Photomerge. This Photoshop feature predates the Camera Raw method of stitching. However Photomerge processing can sometimes cause the highlight values to clip. You may carefully set the highlight end points at the pre-Photomerge stage, only to find they become clipped in the resulting Photomerge composite. This is why I generally prefer to use the Panorama Photo Merge in Camera Raw and Lightroom, because this method preserves the raw file data and provides you with full control over the tones, and avoids undesired clipping.
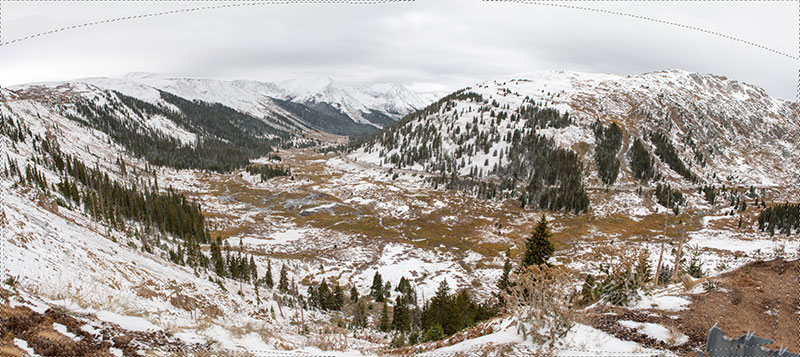
The Cylindrical layout option is great for panoramic landscapes such as this example. Credit: Martin Evening
Photoshop Photomerge method
You can also use the Photomerge feature in Photoshop to create panorama images. The best way to do this is to use Bridge to select the photos you wish to process and then choose Photomerge via the Bridge Tools > Photoshop submenu. In most cases the Auto layout option is all you will need to get good-looking panoramas, although the Cylindrical layout option will again work best for panoramic landscapes, such as the example shown here.
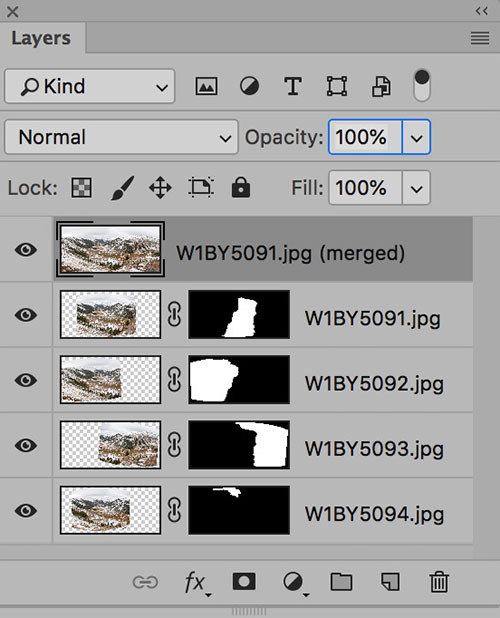
The Blend Image Together option completes the process and adds a layer mask to each Photomerged layer.
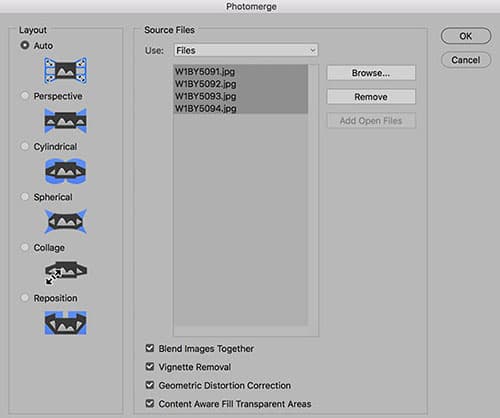
Once you’ve selected your files and chosen your layout you can tick more options to fine-tune the results.
The Blend Images Together option completes the Photomerge processing as it adds layer masks to each of the Photomerged layers. The Vignette Removal option can help improve the result of the final image blending, especially if you are merging photos that were shot using a wideangle lens. When the Geometric Distortion Correction checkbox is enabled, Photomerge aims to create a better stitch result by directly estimating the lens distortion in the individual image layers. And finally, if you select Content Aware Fill Transparent Areas this adds a merged panorama layer to the layer stack and uses Content-Aware Fill to fill the transparent edges.
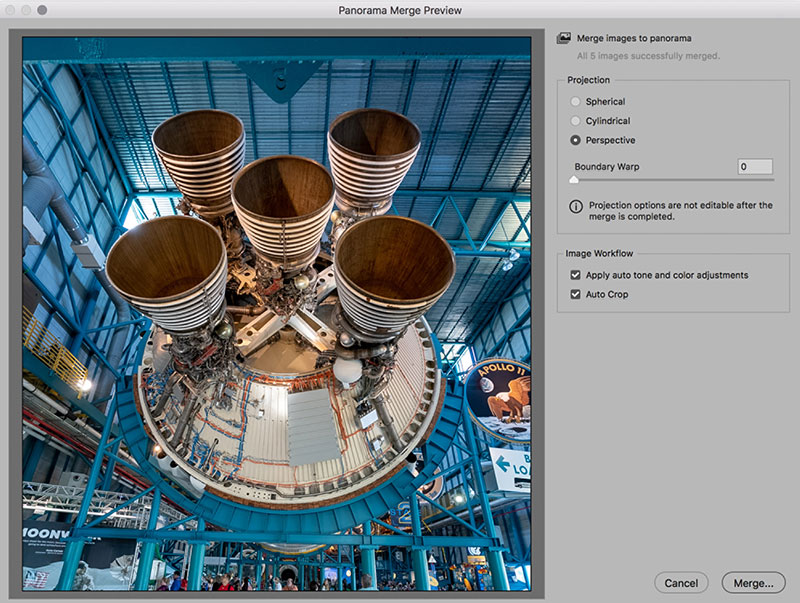
To avoid distortion use the Perspective mode to process architectural images. Credit: Martin Evening
Creating panoramas of architectural subjects
The Perspective mode is the best option to choose when using the Camera Raw Panorama Photo Merge method to process architectural subjects. This is because the Perspective projection method ensures that straight edges remain straight and you most certainly would not want to apply a Boundary Warp adjustment to expand the image. Even though the preview may show some perspective distortion, this can easily be corrected using the Transform controls to adjust either the Vertical or Horizontal transform sliders. In the example shown here I could have subsequently used a Vertical slider adjustment to correct for the keystone perspective in this Panorama Photo Merge.
Camera Raw’s panorama photo merge
Credit: Martin Evening
1. Merge to Panorama
Select your raw image files and open them all in Photoshop. As they are raw files, they will automatically open in the Camera Raw hosted plugin. Click on the Filmstrip fly-out menu and choose Merge to Panorama. This will open the Panorama Merge Preview dialog box.
Credit: Martin Evening
2. Select Projection
Select the desired projection and preview the result before committing to create a full Photo Merge. Here, I selected Cylindrical, which ensured the photos were correctly aligned to the horizontal axis. This mode is particularly appropriate when merging single rows of photographs that make up a super-wide panorama.
Credit: Martin Evening
3. Boundary Warp
You can adjust the Boundary Warp slider to make the boundary of the panorama fit more closely to the edges of the frame. In my example, I set the Boundary Warp slider to 100% to warp the image and extend it to fit the surrounding rectangular frame.
Credit: Martin Evening
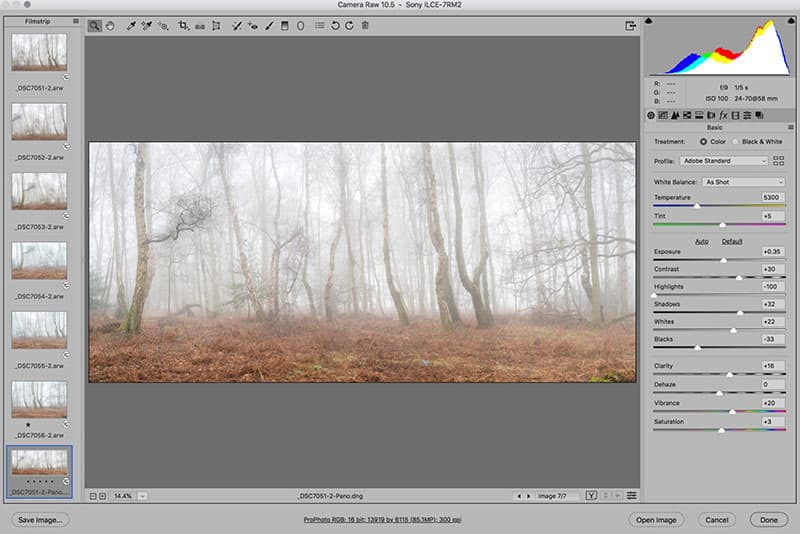
4. Hit Merge
Click the Merge button in the Panorama Merge Preview dialog to create a full Photo Merge Panorama DNG, which will be added to the Filmstrip and named, based on the most selected image by adding a –Pano suffix. The Develop settings applied here were based on the most selected photo in Step 1.
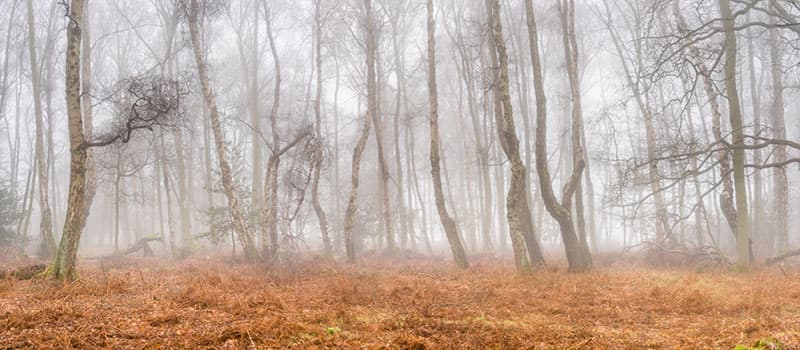
Credit: Martin Evening
5. Finishing touches
The final step requires fine-tuning the colour and tone settings in the Basic panel. I also added a Graduated Filter adjustment to the top half of the image to darken the highlights and bring out more detail in the trees to produce the finished version shown here.

