
Photographing jewellery and other small objects is a fun and creative way to grow your photography. Not only will you gain technical skills in the process, you’ll also capture some wonderful images for your portfolio, and expand your macro photography.
“True greatness consists in being great in little things” (Charles Simmons)
What I love about this type of photography is the control over the outcome afforded to the photographer – from background choices to object position to lighting. Nothing is left to chance or circumstance as it is in other subject genres. The environment is at the command of the photographer, which really allows for creativity and expression.
Before we begin: jewellery or jewelry? This depends where you are. The first spelling is British and the other American. Writing this in the UK, I’ll use the British!

Get creative when photographing jewellery from using bright colours to bringing in props. Jewellery by Lawrence Gibson. Supplied for the photo shoot by Little Blue Budgie. Photo copyright: Claire Gillo
What kit do I need for jewellery photography?
Firstly – to remove a common perception – you don’t need expensive, fancy studio kit for impressive results in this genre. For all the images featured in this article I had to hand the following in my home DIY kit:
- Camera – with an interchangeable lens system, such as a mirrorless camera.
- Lights – two external flashguns (for the majority of my setups, however, I used just one light).
- Tripod – A tripod helps you slow down and create the perfect composition as the result can be tweaked until everything sits in the frame perfectly (as you see it!).
- Lens – I used my Tokina 100mm f/2.8 Macro lens. Ideally, use a macro lens that can capture subjects at a 1:1 ratio. There are alternative cheaper options (see tip below).
- Backgrounds – A variety of coloured paper.
- Jewellery – Much of the jewellery featured in this feature was supplied by Little Blue Budgie.
- Additional props – Use additional props such as sweets, flowers and Lego to bring extra colour and areas of interest in the frame.
- Blu Tack – Great for keeping small objects like jewellery propped up!
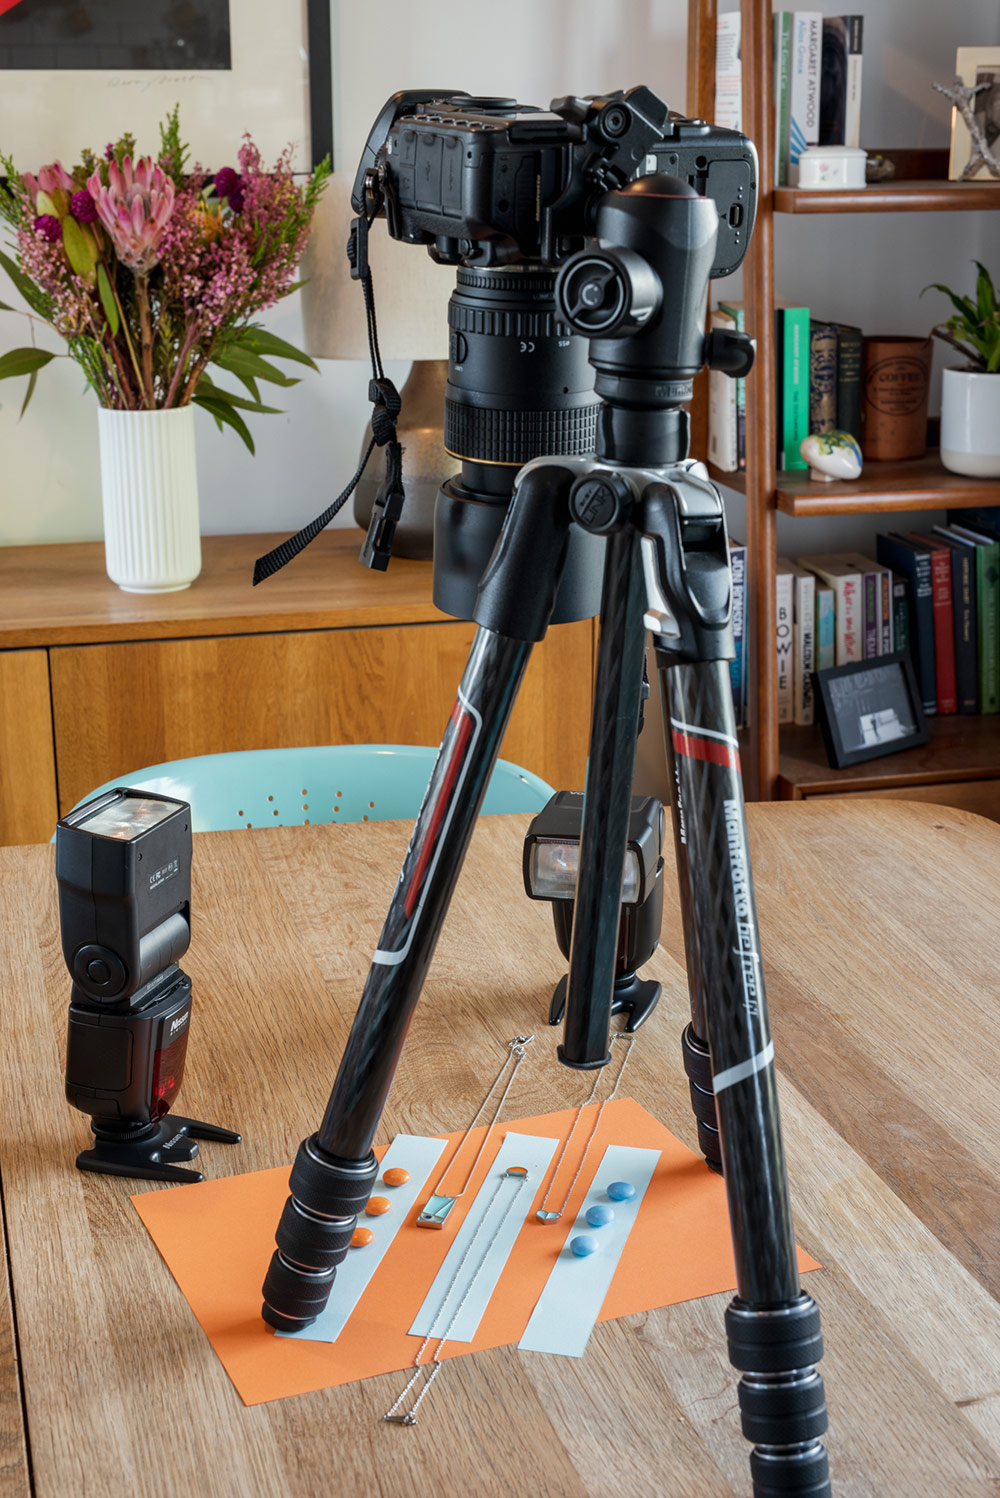
A simple setup can be achieved on a small budget using minimal kit. Photo copyright: Claire Gillo
On a budget?
There are plenty of ways to keep cost down for those on a budget. A simple and effective setup for beginners is to use natural light if lacking an external flashgun, for example. Set your objects up in front of a large window and use a piece of tinfoil or reflector to bounce the light back into the shadows.
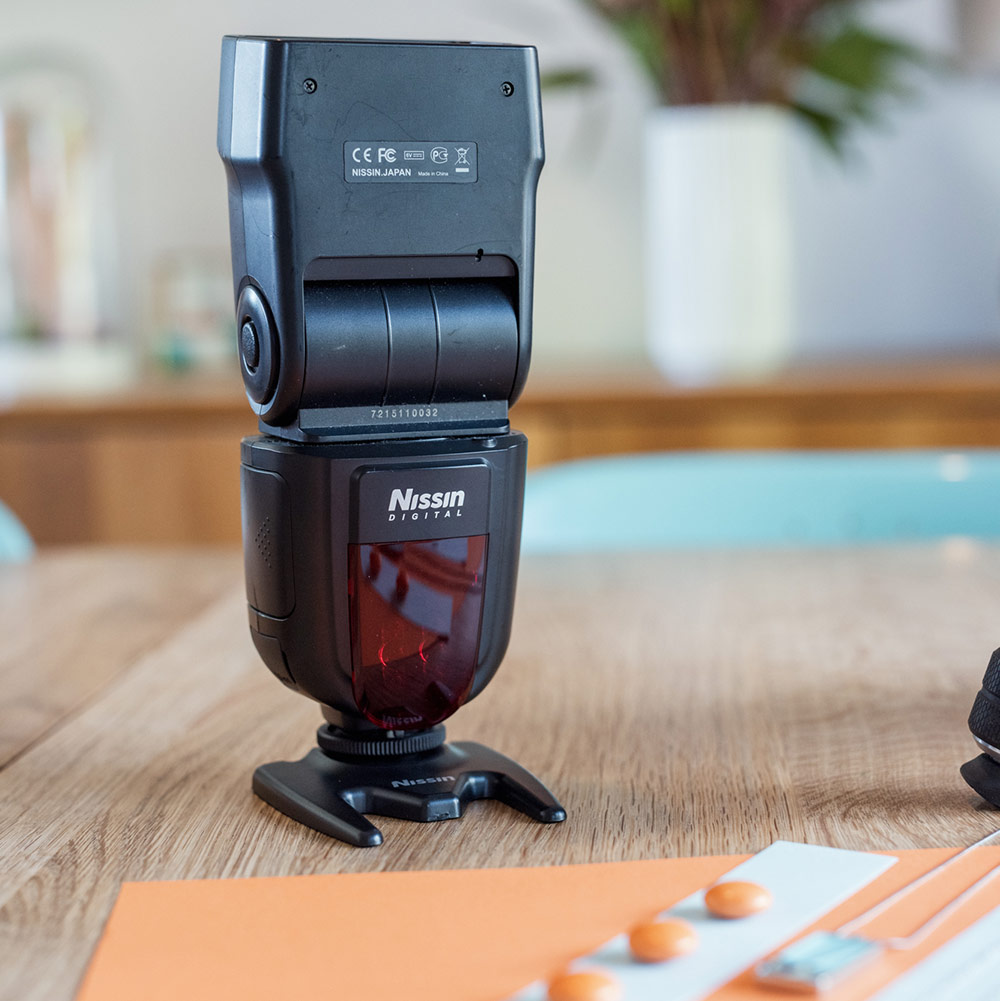
For the next level quality you will need an external flashgun. I used two on my photo shoot, though one will do. Flashguns can be expensive, but needn’t be – my Nissin Di700A was purchased second hand for under £80 ($100) – brand new they cost around £200 ($250), including the trigger. Alternatively look at any budget flashgun/s. It doesn’t need to perform fancy tricks – as long as it can be fired in the manual mode.
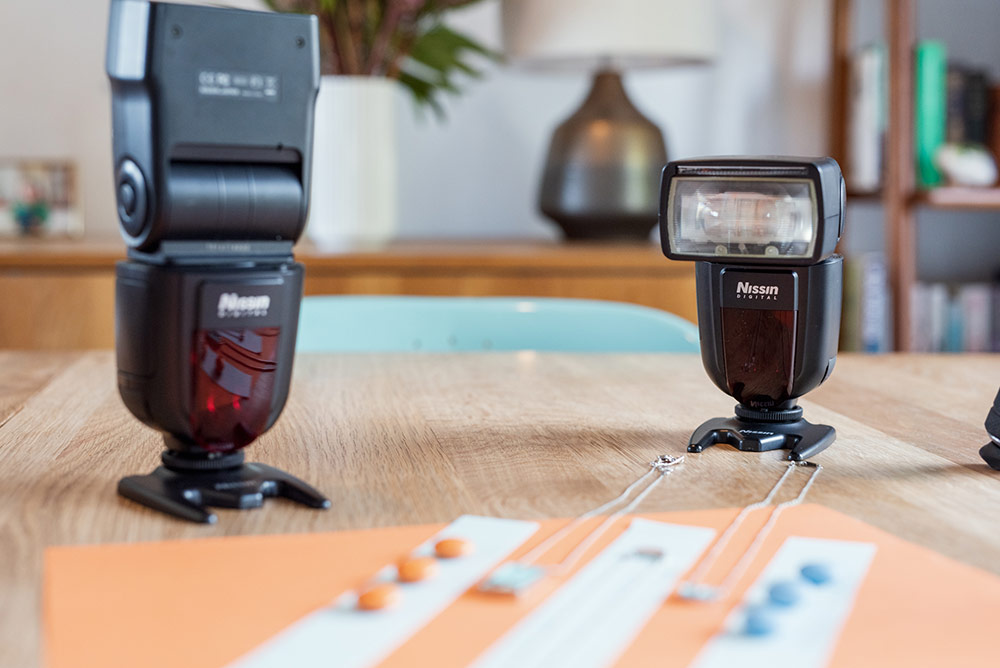
To create a simple yet effective setup shoot using one or two external flashguns for professional results. Photo copyright: Claire Gillo
The right lens
It’s best to photograph small objects using a macro lens with a reproduction ratio of 1:1. That way you can capture the fine detail and get in close. We took all of our images using an affordable Tokina Macro 100mm f/2.8. However, if this type of lens is out of your budget (look around the second hand market too) then an extension tube with a standard lens is a viable option. Extension tubes work by being mounted between the camera body and lens to create more distance between the lens and image sensor. By increasing the distance your lens is forced to focus closer than it normally would be able to. Extension tubes can be bought for as little as £20 and go up to around £200, depending on quality. If this beyond your means, make your own at home. See our DIY hack for more information.
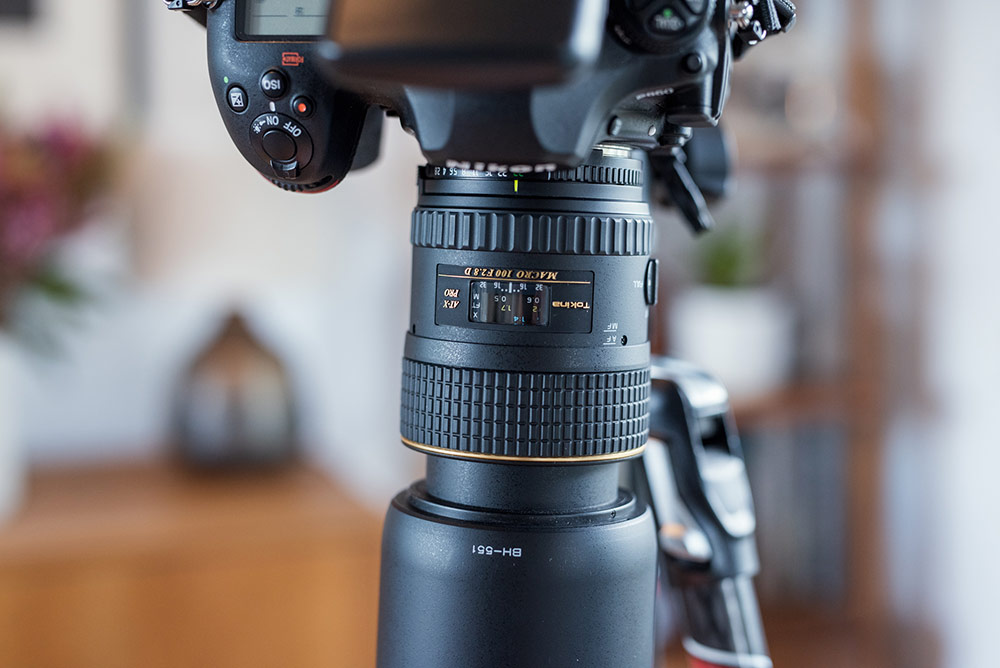
Shooting with a lens that is capable of capturing objects at a 1:1 ratio will get you close into the scene. Photo copyright: Claire Gillo
Shooting jewellery tips
What camera settings do I need? Camera setup:
If you are shooting using flash, put your camera into the Manual mode. I always start by setting my ISO at 100 and the Shutter Speed to 1/200 sec to sync with the flashlight. I then adjust the Aperture and control the flash strength to balance the exposure. Usually I aim to have the Aperture around f/8 to f/11.
If you are shooting using natural light then I find it easiest to shoot in either the Manual or Aperture priority mode. Set the ISO low to 100 and aperture around f/11. I’d recommend mounting your camera on a tripod to help create the perfect composition (see tripod tip below), so it doesn’t matter what the Shutter Speed setting is reading.
Setting up your flash
Set your flash to fire in the manual mode as this is the easiest way to control the output. Your flash at full power will fire at the 1/1 setting. If you want less light, simply turn down the output to the next stop which is 1/2 power. Each time you turn the power down you are halving the amount of light being fired. Your flashgun will go as low as 1/128 power.
You may find even at the lowest setting the light is still too bright due to the close proximity of everything. If this is the case either move your light source further away from your setup, shut the aperture setting down, turn your ISO down, or diffuse the light somehow.
Bounce the light
A neat trick for a clean soft light is to bounce the flash. Simply point the flash at the ceiling so as to let the light fall back over the subject. When bouncing the flash remember the light needs to travel further compared with being directly pointed so you will need to increase the power – how much depends on your ceiling height so you’ll need to experiment here.
Bounce light, Photo copyright: Claire Gillo
Using a tripod
A tripod will greatly help you achieve the perfect composition. There are many different angles from which to shoot jewellery, but an effective way that always works for me is the bird’s eye view. I first set up my camera on a tripod and point the lens down. Then I bring in the background and objects, building the scene as I go. Liveview is really useful for this. I keep checking and tweaking the composition until I am happy with how it is working.

Composition – Photo copyright: Claire Gillo
There’s too much blur
When photographing an object close up, even when you stop down the aperture, the depth of field you can work with is much smaller. This means that, even when shooting at f/8 or f/11 – which in a landscape setting would sharpen the whole scene – there is still a lot of blur close up. The way around this is to either: shoot the object flat on, so the whole object is on the same aperture plane, and use the blurred effect to advantage and purposely play around with it: or use a technique called focus stacking. Focus stacking is where you take many different shots of the same scene, but shifting the focus across as you shoot; then combine multiple frames together. To learn more about this technique, follow Geraint Radford’s guide to focus stacking.
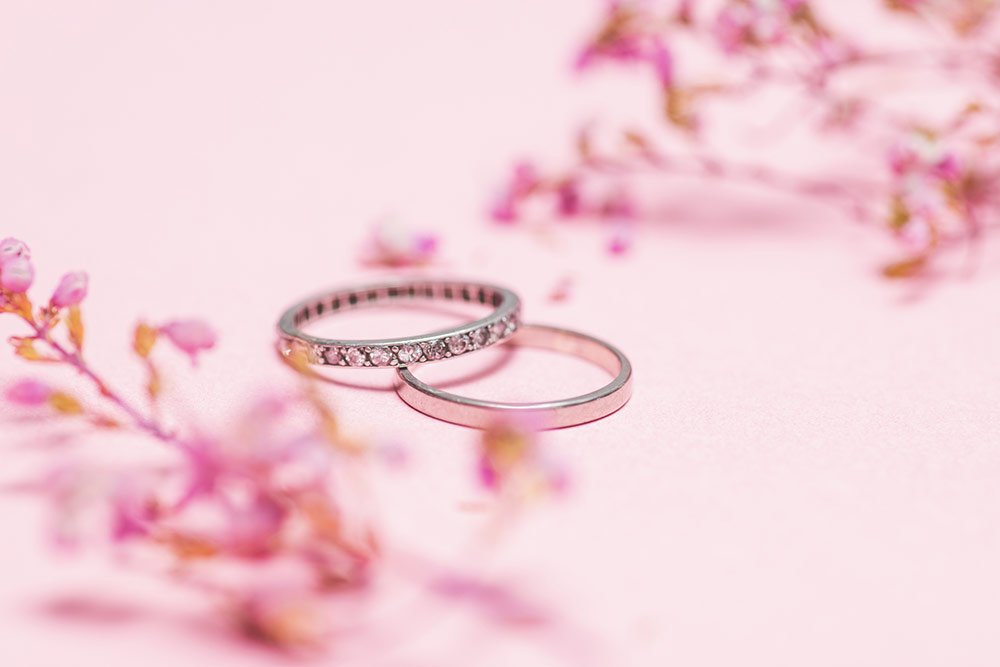
In this example the foreground and background blur adds to the final effect of the image. Photo copyright: Claire Gillo
Creative jewellery ideas…
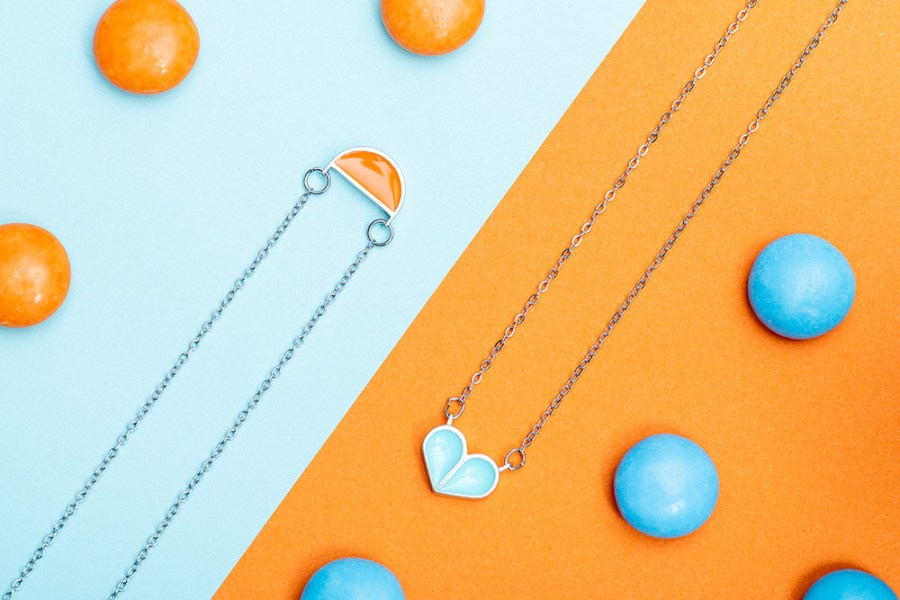
Sweets and bright colours
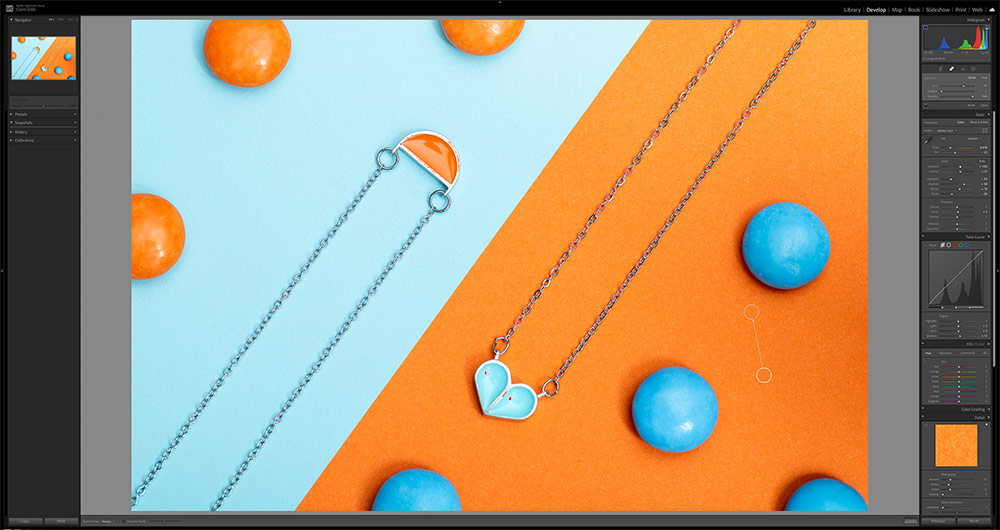
For inspiration, let the object you are photographing find it for you! I bought a packet of “Smarties” (“Rockets” to US readers?!) as I thought it could be interesting to play around with the dots of colour. As the jewellery I was photographing was orange and blue I picked out these colour sweets and matched the background setting to them. Finally teamed with a soft bounced flashlight the end result is bold and fun.
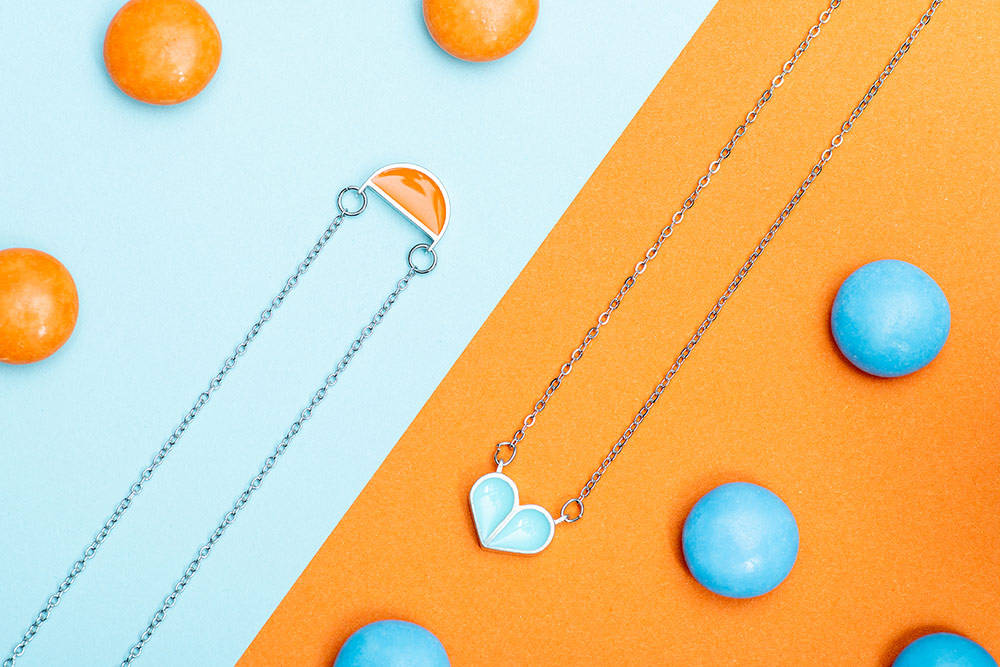
Get creative and bring in additional props such as candy will help brighten up your picture. Use sweets or other brightly coloured objects to create a bold and fun result. Jewellery by Lawrence Gibson. Supplied for the photo shoot by Little Blue Budgie. Photo copyright: Claire Gillo
Lego fun
The techniques in this feature work the same with any type of small object of interest. Here I have raided my kids Lego set and I’ve created this fun result. I did so by using a single flashgun and bounced the light.
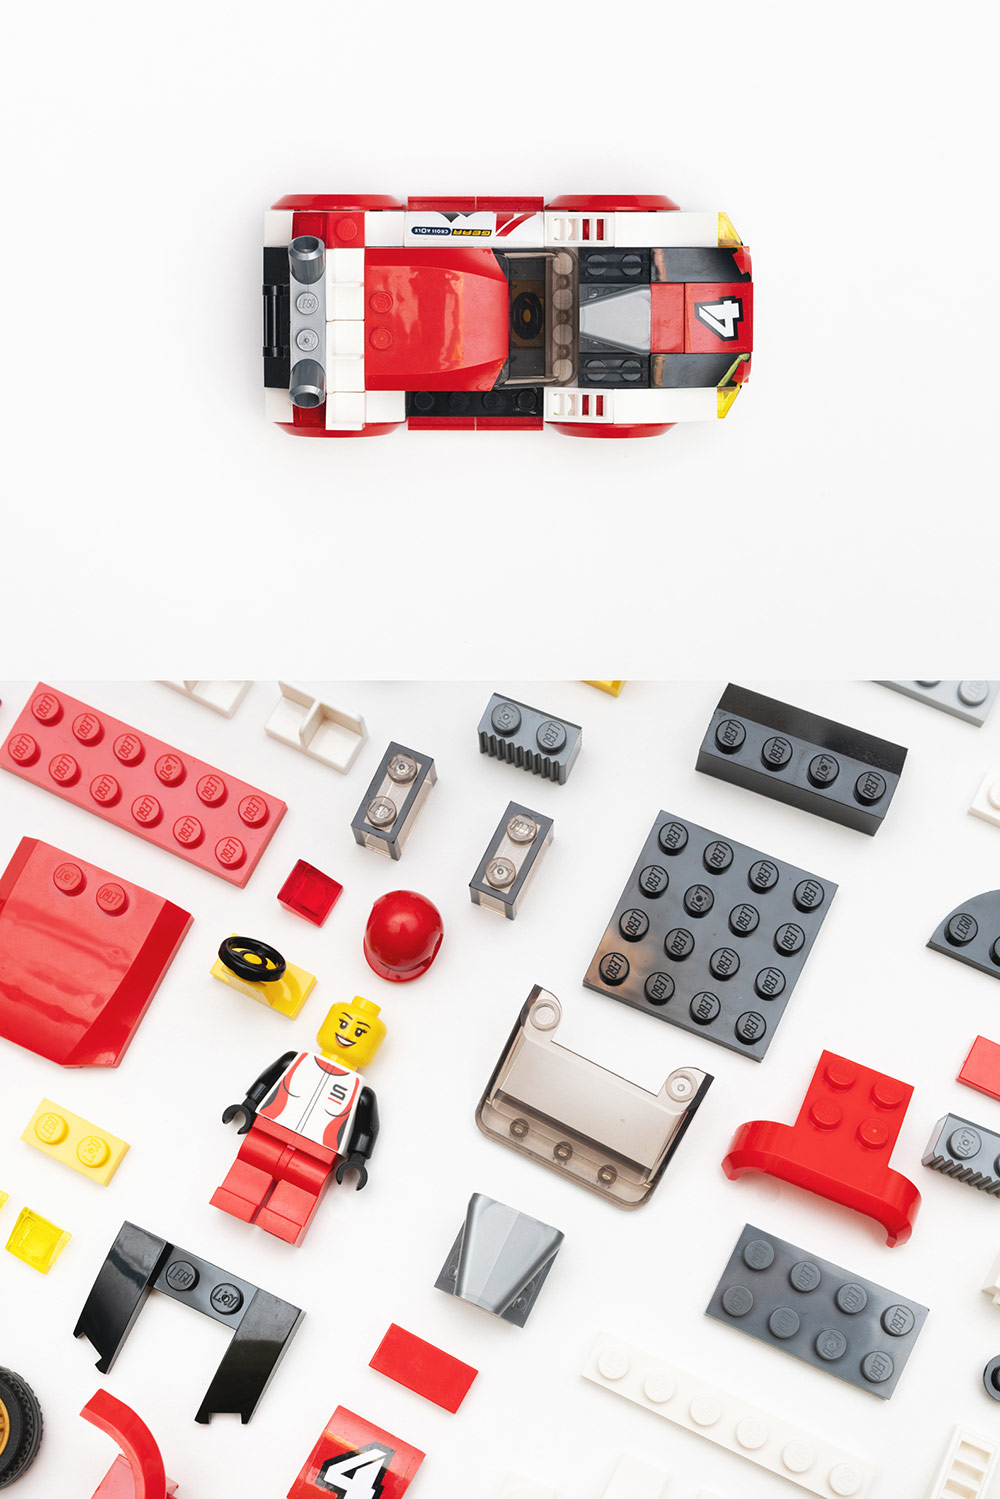
Find fun and creative ways to photograph lego or other small objects. Photo copyright: Claire Gillo
Out of this world
These Lulu McQueen space earrings were so much fun to shoot, and when I saw the planet style designs I instantly wanted to create a solar system effect. I used smaller earring studs (also designed by the jeweller) in the foreground and background of the frame and intentionally blurred them out by shooting with a shallow depth of field to create the pings of round blurred light. To light the earring, I used a single flashgun and pointed it from the side and behind the main subject. I then had a bit of Photoshop fun adding the lens flare and a few more stars to the solar system using the paint brush tool.
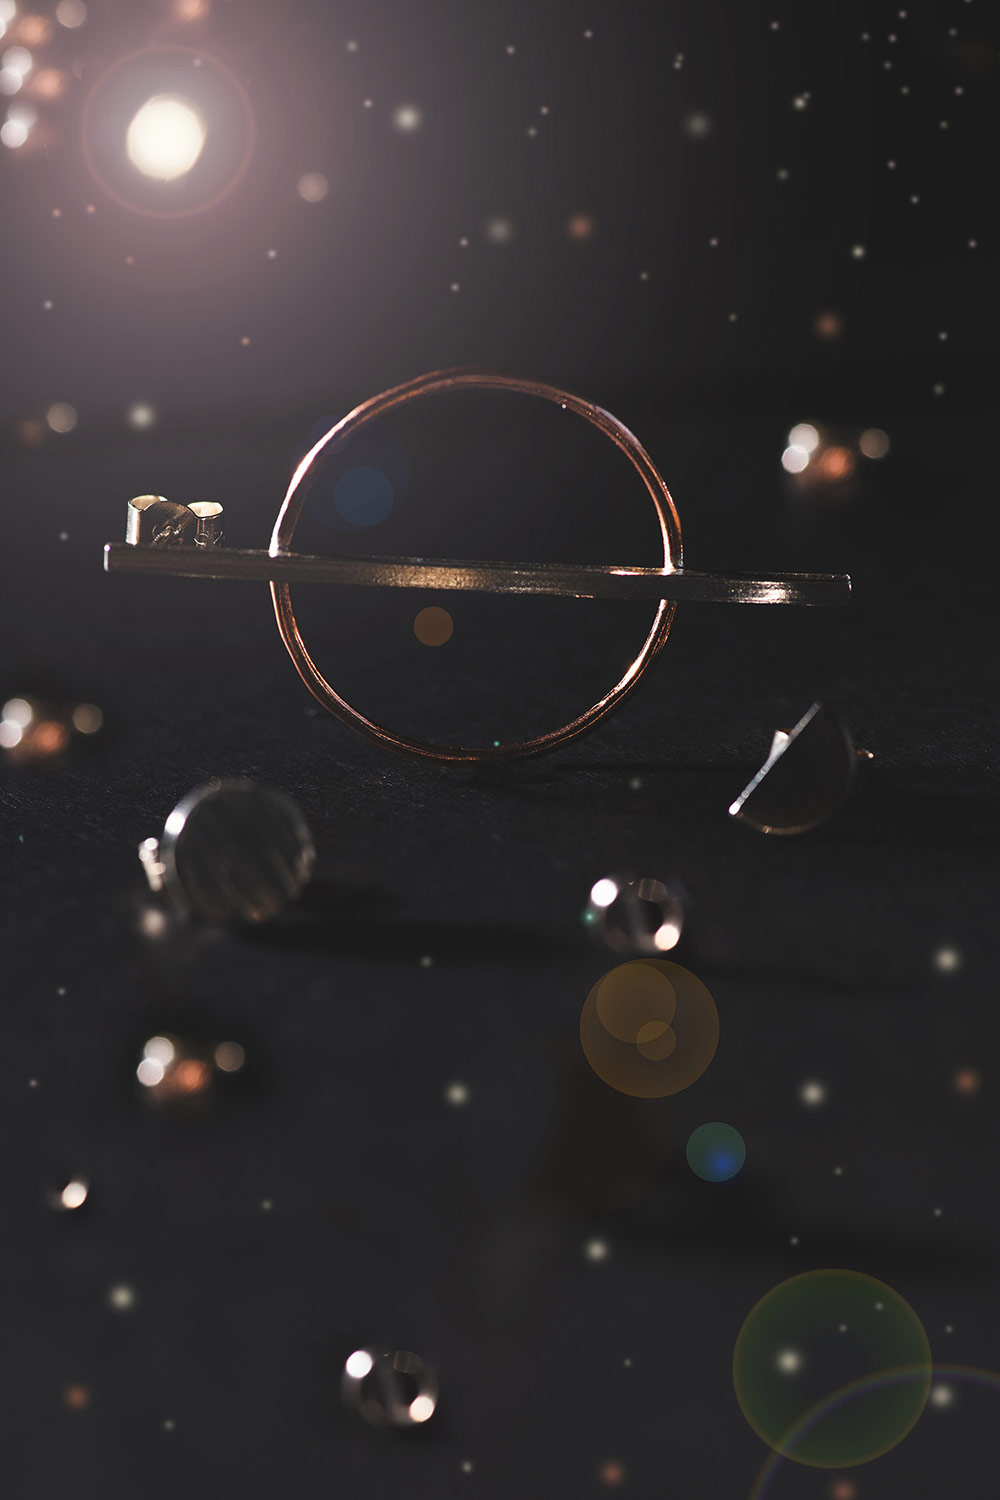
A solar system effect created using a touch of Photoshop and a simple setup. Jewellery by Lulu McQueen. Supplied for the photo shoot by Little Blue Budgie. Photo copyright: Claire Gillo
Here’s another setup of the space earrings using a piece of Perspex with an image of a dark blue starry sky slotted underneath. The earrings were lit from the side to create a more dramatic and moody effect.
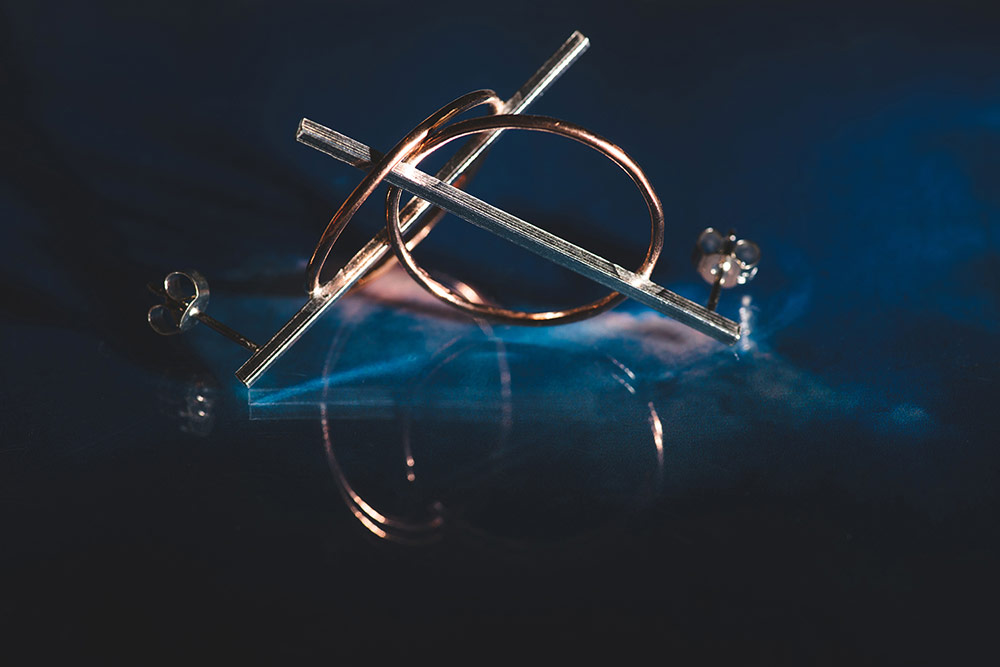
Use perspex to create an interesting reflection. Jewellery by Lulu McQueen. Supplied for the photo shoot by Little Blue Budgie. Photo copyright: Claire Gillo
Jewellery out on location
Shooting jewellery doesn’t isn’t restricted to a controlled indoor environment – there are many different and creative ways you can capture it on location. For example, the crab pots in my local town made the perfect backdrop for this necklace. This image was shot using natural light and a shallow depth of field at f/2.8. The wide aperture setting softens the crab pot in the background to make the necklace stand out.
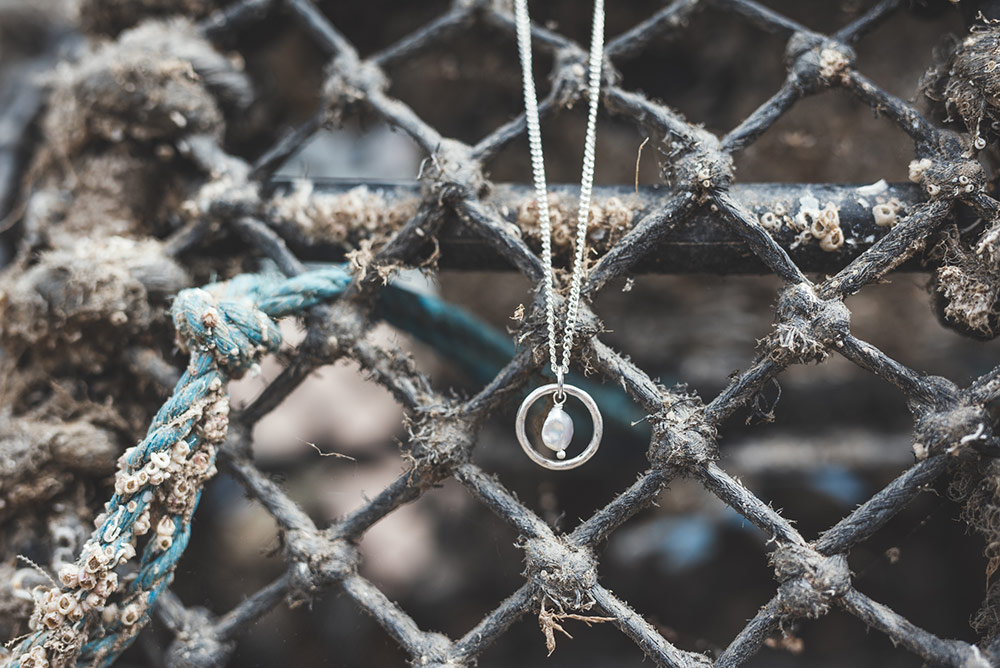
Crab pots along the seafront in Dartmouth make an excellent setting. Jewellery supplied by 11 Clothing. Photo copyright: Claire Gillo
Editing jewellery – the final touches
When it comes to editing your images, you will need to make some basic adjustments for your final results to really ping. I always shoot in Raw as this gives more flexibility and options at the editing stage. I would recommend you do the same unless you don’t intend to edit your images post-production: then I would suggest shooting Jpeg, and ensure you get the exposure and camera settings spot on!
There are many image editing programs out there that all perform similar tasks. I use the Adobe photography package that consists of Lightroom Classic, Lightroom and Photoshop. To make tonal and exposure adjustments I use Lightroom Classic or to do further creative effects I use Photoshop. Alternative software such as Affinity Photo and even the free software such as Nikon’s NX Studio and Canon’s Digital Photo Professional (DPP) are more than capable of doing the job as well.
As a basic starting point, tweak or correct these settings to make your image pop.
- Exposure – is your image exposed correctly? If it’s too dark, push the slider up or, if too light, bring it down.
- White Balance – make sure the white balance in your image is correct. Select a neutral tone in the image or use a grey card to get it right.
- Highlights, Shadows, Blacks and Whites – Use these to boost the tone and contrast of your image.
- Curve Tone – again useful for boosting the overall tone and contrast of your image.
- Sharpening – tweak the sharpening so your object appears crisp in the frame.
- Clone and Heal tools – Finally when shooting close up you often capture unwanted specks of dirt and dust. Remove these using the Clone tool or Spot Healing brush.
Make basic tweaks and adjustments to make your jewellery images ping from the page. Photo copyright: Claire Gillo
Article Claire Gillo, all images in feature Copyright to Claire Gillo
Further reading:
- Top Macro Photography Tips
- Best free photo editing software for PC/Mac and mobile
- Best value macro lenses available to buy
This article is part of the AP Improve Your Photography Series – in partnership with MPB. Find more Improve Your Photography articles here.
Follow AP on Facebook, Twitter, Instagram, and YouTube.


