
Hollie Latham Hucker speaks to six award-winning travel photographers for their top tips on how to prepare, pack light and pull off a successful travel photography shoot, no matter what your subject is or where you are in the world.
Travel Photography tips from the experts
Travel photography tips from Tom Svensson
Tom Svensson is an award-winning conservation photographer and an environmental influencer. See more at www.tomsvensson.se, Facebook @TomSvensson.conservationphotographer or @ tomsvensson1 on Instagram
Appropriate kit
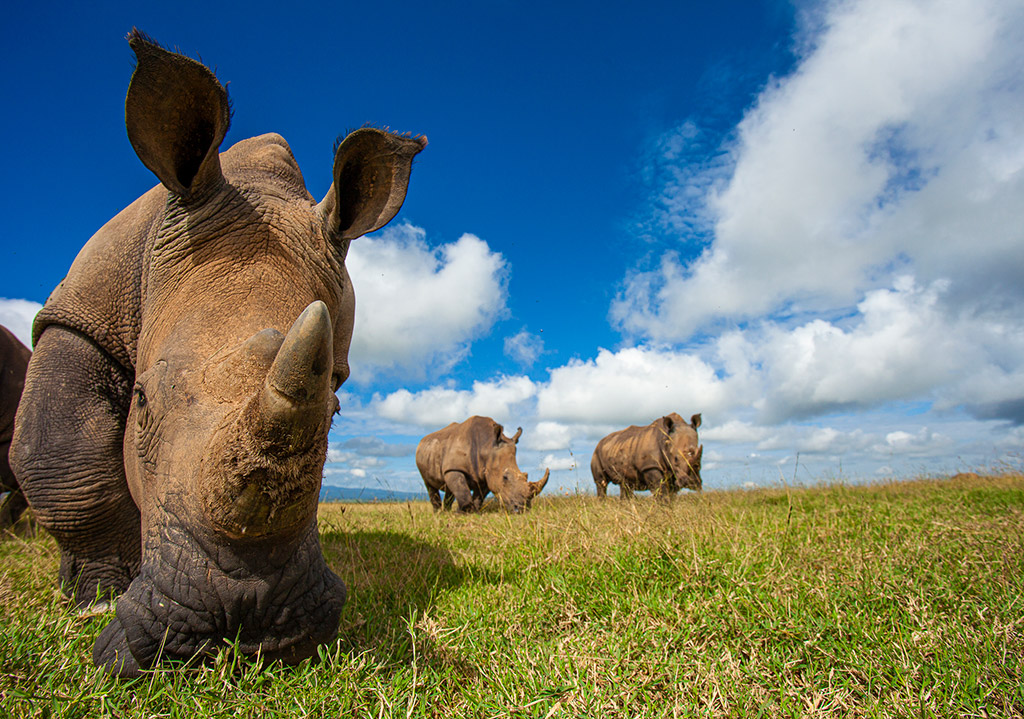
Make sure your kit is in good working order and all batteries are charged. But perhaps even more important is bringing the right gear for the place you’re visiting and the photo you’re hoping to get. For example, on a recent trip I wanted a close-up of a rhino so I started to do some research on where I might find some. Once I’d chosen a location to visit I decided it was best to use a remote car to capture the image I had in mind.
This was key to me achieving this photograph below. Another piece of advice is to test out all your kit at home before you go, so you know how it works. When it comes to packing, I always group my kit together in separate bags for specific assignments, so I can easily access the exact kit I need for each photo I plan for.
Careful planning
Plan your trip thoroughly. This all comes down to ensuring you visit the correct location at the right time of year. Not only do you need to find out exactly where your wildlife subject can be found before you arrive, you need to know which season they are most active and therefore more likely to be seen. Also, it’s important to know the type of environment you’re going to so you can bring the most appropriate kit, clothing, and footwear. I also take the time to see what other photos have been captured previously so I know what kind of photo I can expect to achieve while also ensuring that I capture something unique.
Fieldcraft
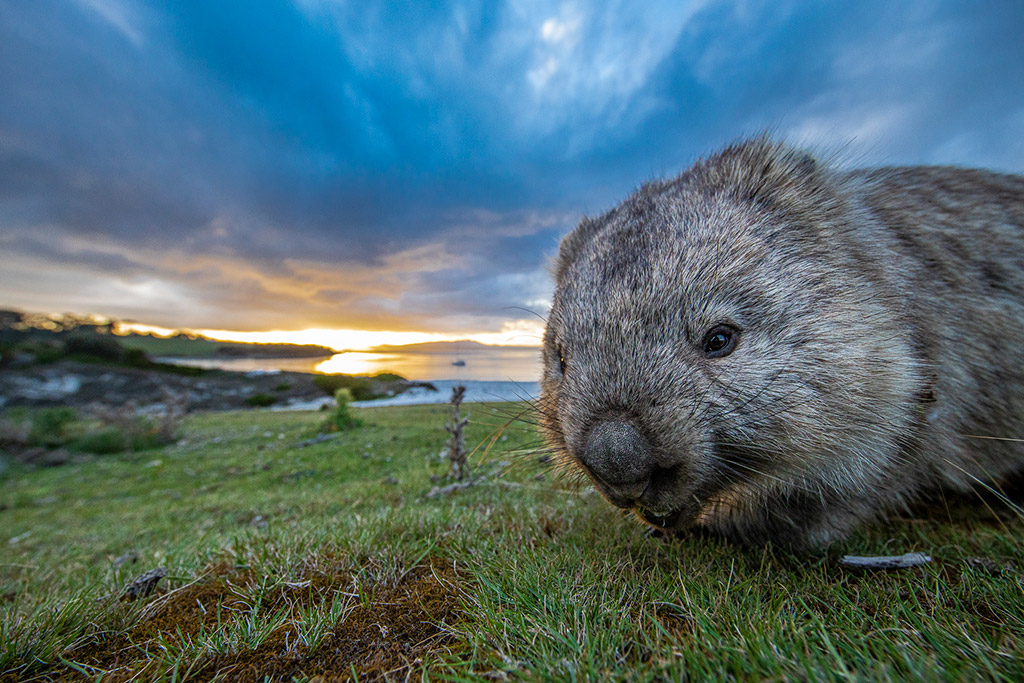
When I think about capturing an image of a special species, I allow time to research them thoroughly. I want to know more about their habitat, where you can find them, understanding their behaviour, habits and calls, and the time of day and year to photograph them. This will also help you build a picture of what type of light and background you can expect to achieve in your photos, which may dictate what kit you need. To give an example, I love wombats but they are nocturnal so that was my first hurdle. I kept researching and eventually came across a location where they are out during day. That completely changed how I could photograph them! It just goes to show that preparation makes all the difference.
Tom’s recommended kit for Travel Photography
Mirrorless camera
I have completely converted to the mirrorless system as there are many advantages that come with the kit. One of the biggest is the amazing autofocus systems the cameras have. I currently use the Canon EOS R3 and R5 models. Another benefit is weight, so now all my gear is under 12kg when I travel.
Range of focal lengths
My mirrorless Canon set-up right now includes a trio of RF lenses. I use the RF 24-105mm, RF 70-200mm and my absolute favourite, the RF 100-500mm – I tend to use this the most. This range of focal lengths covers a wide range of subject matter.
Travel photography tips from Tesni Ward
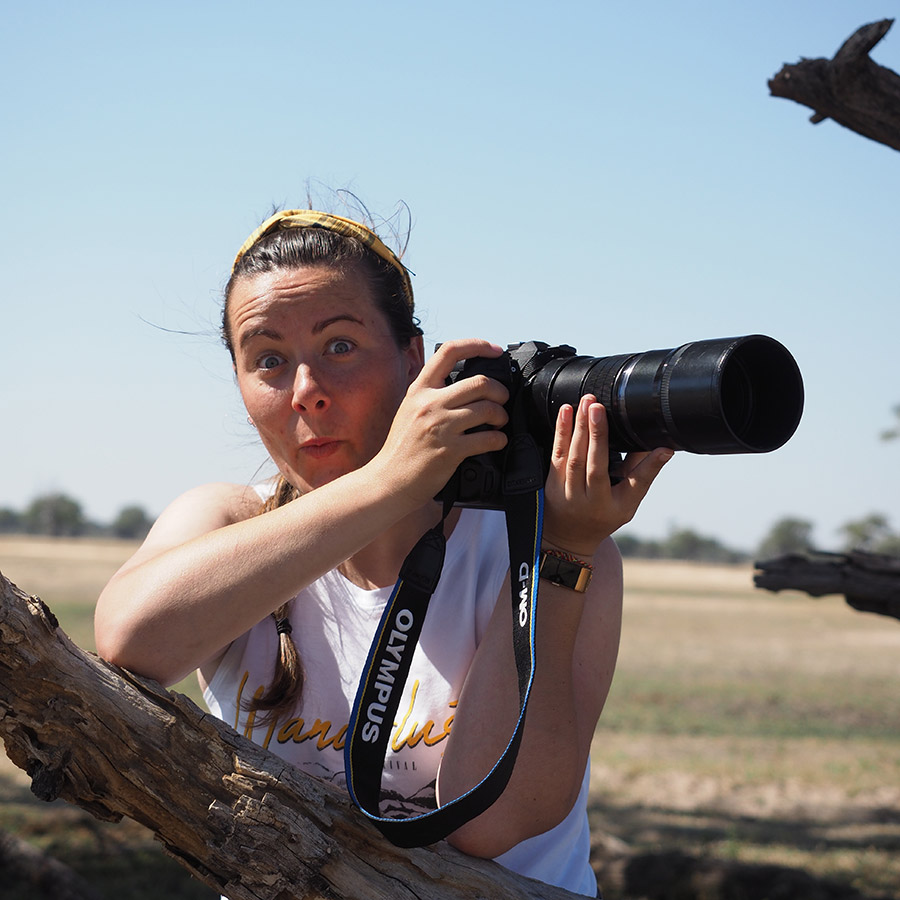
Tesni Ward is an award-winning, professional wildlife photographer and OM System ambassador based on the outskirts of the Peak District. See more at www.tesniward.co.uk and on Instagram @tesniward
Research, research, research!
So, you’re going on a ‘once in a lifetime’ trip and you want to make the most of every opportunity. When we travel for photography, we’re working at a disadvantage compared to those who live there because we only have a limited amount of time to photograph. Going in blind can be one of the biggest mistakes you make, so do as much preparation and research as possible before you go: look through social media using location tags to see the kind of images that can be achieved and the sort of focal lengths you may need. Check if there’s a certain time of the year that’s more productive in terms of light and activity or events you wish to see. If you’re going on a guided trip, a few questions to the guide can go a long way.
Don’t buy all new gear a week before you travel
Familiarity with your equipment can be the difference between getting an incredible image or missing it entirely and I can’t stress enough how important it is that you feel comfortable and competent with your kit. Make sure if you’re planning on investing in new gear before your trip that you do it a couple of months prior at the very least. If the camera has been a bit neglected over the past few months, commit some time to go on a few local outings to reacquaint yourself with everything and make sure things are working as expected.
Flight faff
Kit can often be heavier or larger than what’s permitted in hand luggage, but it’s ill-advised to put kit in your check-in baggage: many airlines won’t allow lithium batteries in the hold and insurance rarely covers it if anything goes wrong. Paying for extra carry-on bags and creative packing can ease the stress. I will often wear clothes with plenty of pockets (fishing jackets are surprisingly handy for this) so that if I have issues getting through I can pop lenses and accessories into pockets or even a couple of camera bodies across my shoulders under my jacket. Smaller domestic flights can be a different kettle of fish if they’re weighing you!
Tesni’s recommended kit for Travel Photography
Telephoto lens
A telephoto lens is an absolute must for me when travelling. You have a limited amount of time to get a portfolio of images, so having that flexibility to capture a wide range of images is essential.
Second camera
You should always prepare for the unexpected when travelling, so having a second shooter camera is non-negotiable for me. This will also allow you to cover a wide range of focal lengths to ensure you get the shot in unexpected encounters.
Travel photography tips from David Tipling
David Tipling is renowned for his artistic images of birds. He is the author or commissioned photographer for many books. He will lead a tour with Zoom Photo Tours in November. See davidtipling.com and www.norfolkphotosafaris.com
Keep an eye on ISO
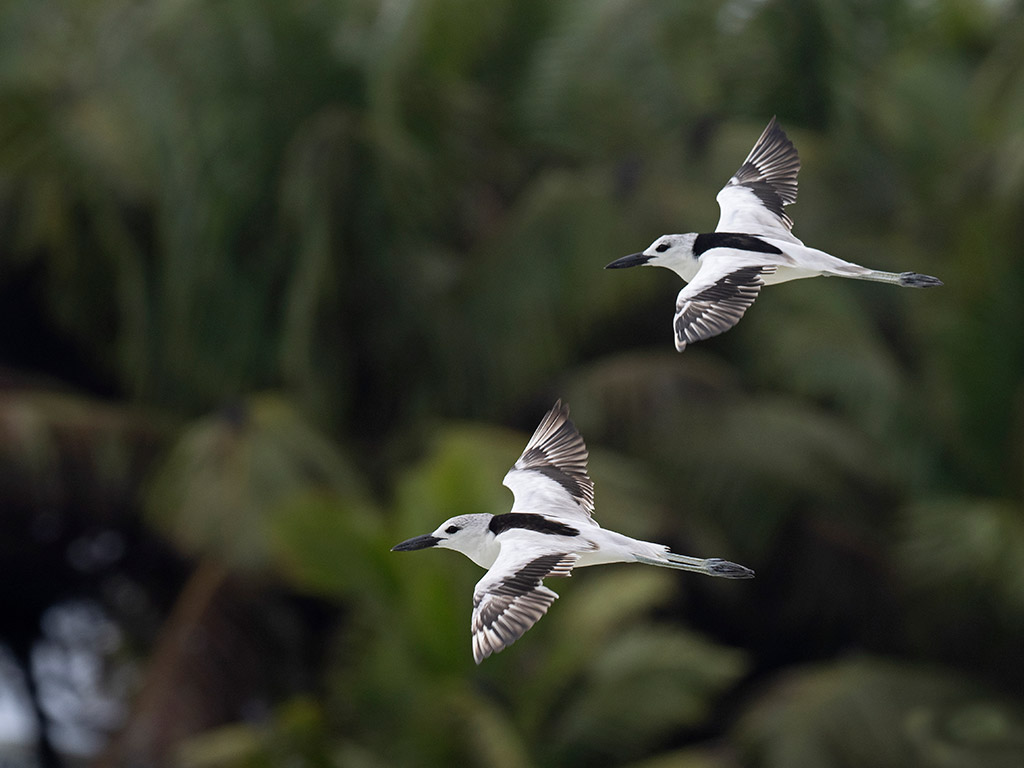
Pumping up the ISO to achieve a high shutter speed is not always necessary when photographing in bright light. Too high an ISO can affect colour saturation and lose fine feather detail in birds. So, if you use Auto ISO think about keeping the upper limit lower than the camera’s default. Often our cameras will automatically choose a higher ISO than is required and although de-noise software does a good job of cleaning the image up, it is better to obtain the best quality you can when you shoot. These crab plovers (below) were photographed in the Seychelles in bright tropical light at 1/1250sec. This was fast enough to freeze their wings and at an aperture of f/7.1 to ensure I had enough depth of field for both to be in focus. I only needed an ISO of 200 because of the intensity of light.
Behaviour
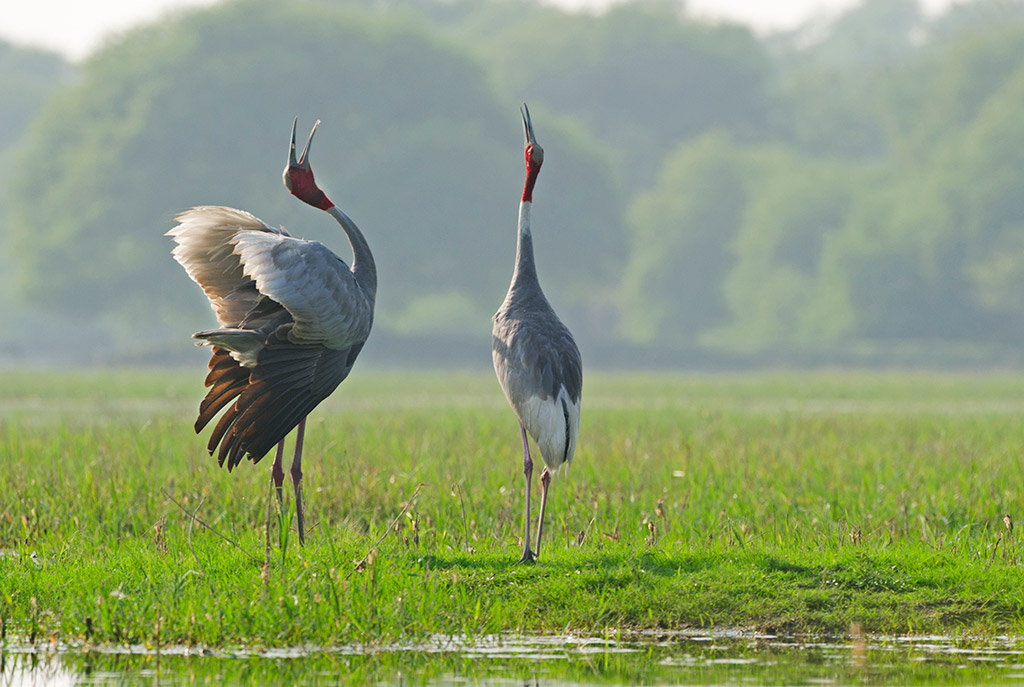
Anticipating when something interesting might happen is a skill learnt over time, but a bit of background research can go a long way to assist this process. These displaying sarus cranes were photographed early in the morning at Bharatpur in northern India. They were standing side by side feeding, and when one stood up erect and the other then stood and started to point towards the sky, I knew from experience that the other bird would then call and lift its wings. A behaviour that is quite fleeting but as I knew what was about to happen, I was already focused and fired the shutter as soon as it happened. Whether it is duetting cranes or perhaps a duck bobbing its head before take-off, watching for the signals birds give off can give you that extra second or two to capture the action.
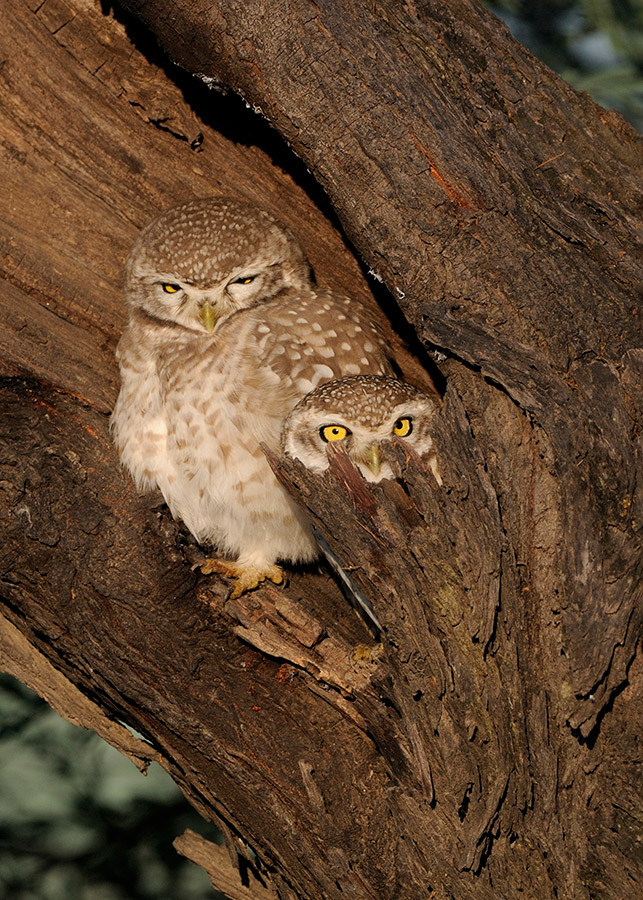
Early and late
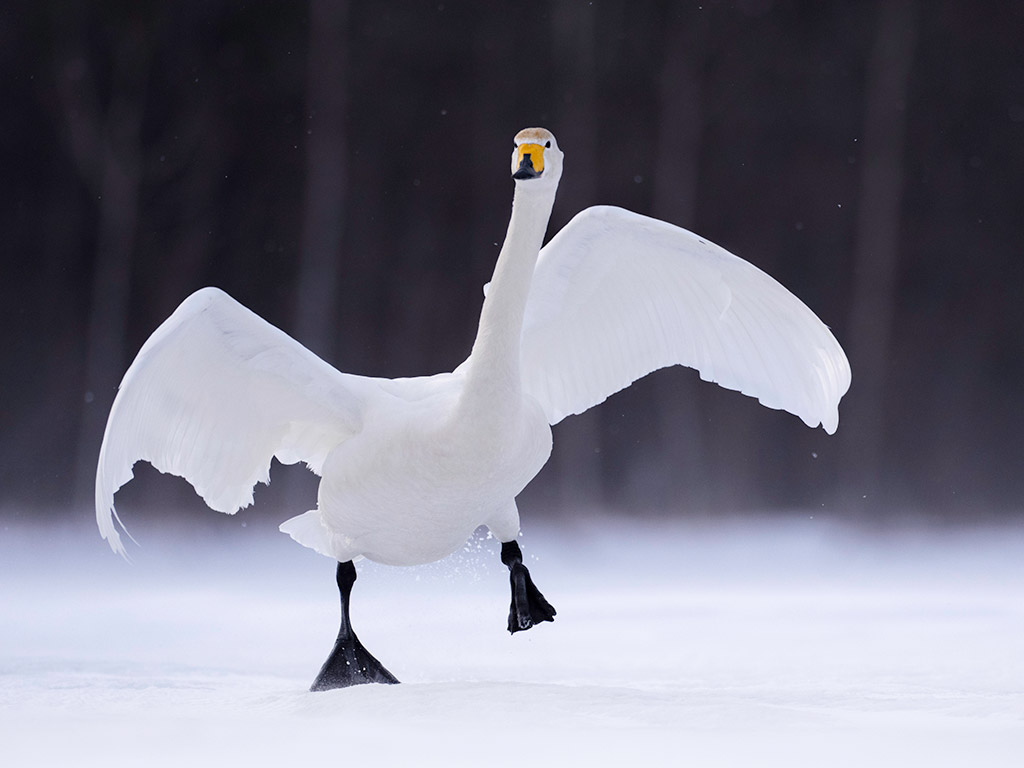
Birds in countries with hotter temperatures than our own are often most active at dawn and then sometimes again later in the day. Being out as the sun comes up can be the most rewarding time of day for photography. If you are in a location where the light can become quite harsh by mid-morning then getting up early to make the most of that good light is essential. These spotted owlets photographed at Bharatpur in northern India frequently roosted by day in the same place, often disappearing down a hole during the heat of the day. But frequently at dawn they would sit warming up in the early morning sun, which is when this image was taken. The early bird catches the worm.
David’s recommended kit for travel photography:
Remote trigger
When abroad I occasionally have opportunities to photograph birds within their habitat using wideangle lenses, which might require setting the camera on a remote and triggering from a safe distance.
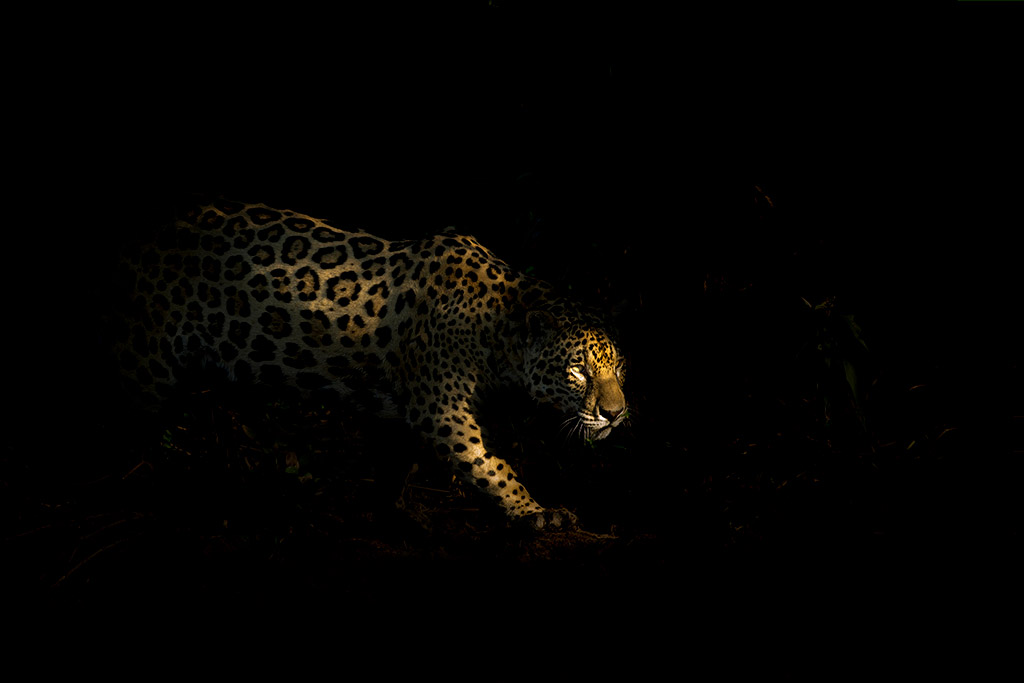
High-powered torch
In the tropics owls can often be photographed at night. I prefer to illuminate nocturnal subjects by shining a torch below for lighting rather than use flash, in order to give a natural feel.
Travel photography tips from Ben Hall
Ben is one of the UK’s leading professional wildlife photographers and has multiple international awards. He leads workshops and will host a Zoom Photo Tour in August. See www.benhallphotography.com, Instagram @benhallphotography, FB @benhallphoto
Research your location
Whilst knowledge of your subject is paramount for success, knowing your location well is also vital. I recommend doing at least one or two recces to build up an understanding of your chosen site. Pay careful attention to the light and how it changes throughout the day. Make a note of the areas that have most potential for morning light, and which areas benefit from afternoon or evening light. Observe potential subjects and note down any behavioural patterns that you notice. This information will pay dividends and ultimately will help you to position yourself in the best possible way for any situation that may arise. Try to visualise potential images by looking at backgrounds and foregrounds and note the direction of the light.

Get the most from your gear
When travelling to a new location, having a variety of focal lengths with you will ensure that you are able to take advantage of any given opportunity. When covering a long distance on foot, however, I prefer to travel as light as possible. Not being too laden down with gear will also allow you to react faster and take advantage of those opportune moments. For this reason, when hiking I prefer to take a tele-zoom rather than carry a heavy prime. A monopod is also useful when covering large distances. A sturdy monopod will take the weight out of even the heaviest of lenses whilst being considerably lighter than a tripod. When travelling to a new or unfamiliar location, using a smartphone app that calculates the position of the sun such as PhotoPills or Magic Hour can prove invaluable.
Try to capture something different
When tackling a particular subject, consider the potential for capturing images that are unique. There are plenty of locations around the world that have become well known for certain subjects. This is usually for good reason, either the subjects are numerous, or accessible, or often both. With so many photographers visiting the same place to shoot the same subject, it can be difficult to come away with images that stand out from the crowd. Turning to a lens that you would not normally use may just inspire you to look at your subject in a new light. Try a shorter lens to incorporate the environment, or perhaps look for a more abstract way to interpret your subject. Capturing movement is a great way to add an artistic element to your work. Try shooting moving birds or animals with a slow shutter speed to capture a sense of motion and energy.
Ben’s recommended kit for travel photography
Gimbal tripod head
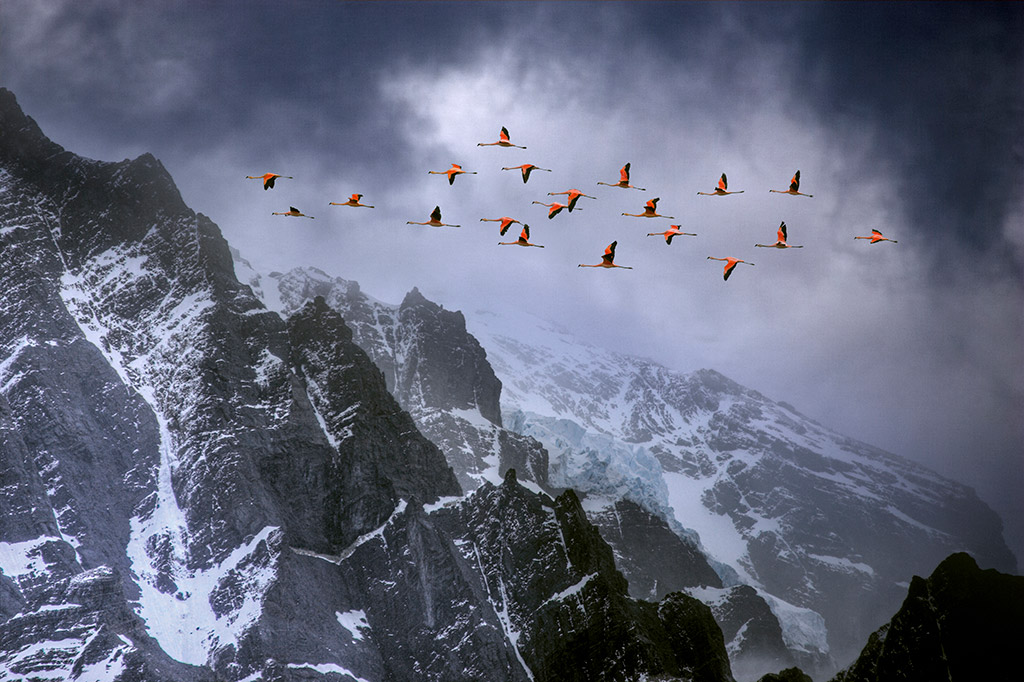
A gimbal tripod head eliminates the weight of a long, heavy lens and allows complete freedom of movement. This is especially useful for flight photography.
Canon 100-400mm f/4.5-5.6L IS II
This tele-zoom lens has been a firm favourite of mine for over two decades. Not only is it relatively lightweight, but it also gives me the flexibility that I need when composing environmental images.
Travel photography tips from Philip Lee Harvey

Philip Lee Harvey is a multi-award-winning photographer and filmmaker. In June he will be hosting a tour of Sweden with Zoom Photo Tours and AP. See Instagram @philip_lee_harvey_photographer and www.philipleeharvey.com
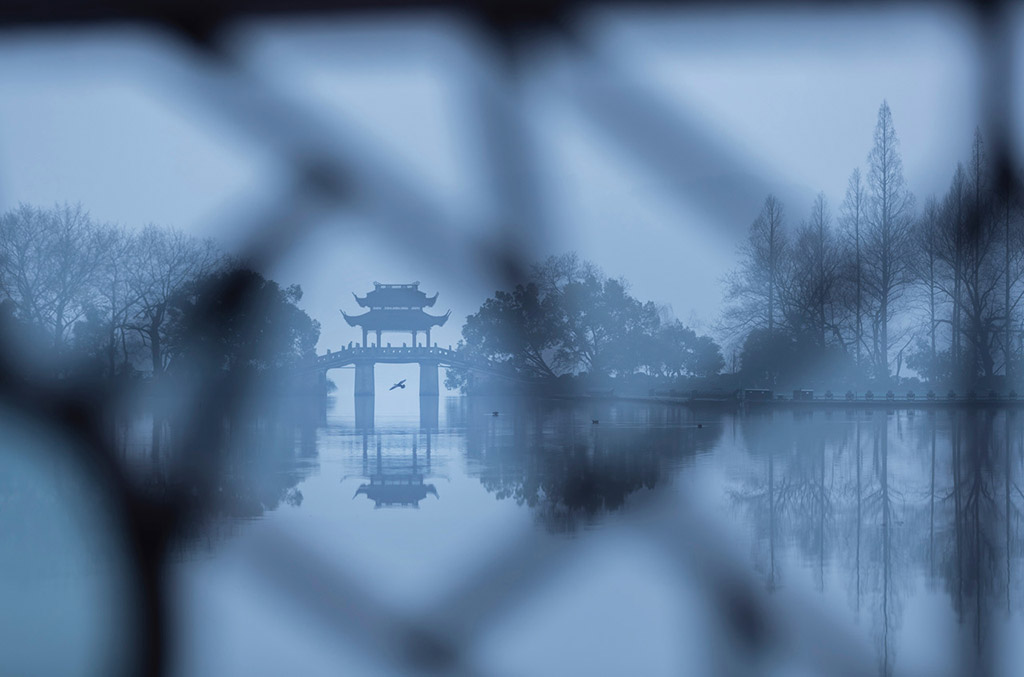
Don’t be like everyone else
Find your own way to see the world. This takes time, but to succeed you need to stand out and have a voice. When you begin it’s easy to just try to mimic other photographers, but this has no longevity and soon it will become just a formula. Try to use mood boards to determine the things that you like. I often shoot the obvious first, to get it out of the way, then I have the confidence to experiment and add my own twist to the image. In this case (below), I was influenced by broken Chinese pottery.
Height of the camera
Don’t just stand and shoot; the height of your camera can drastically change the quality of the image. Lay on the ground or go up high, this is the difference between a pro and a novice… effort! If photographing wildlife, get your camera to their eye-line as it’s far more engaging. Remember, if you look down on your subject, it makes them submissive, go low and you make them the hero; just look at early propaganda and travel posters for examples.
Advanced preparation
Try to scout a location before you shoot but do it with a camera. This allows you to see how different angles and lenses will change the scene. I also use a sun tracking app, such as Sun Seeker, to determine the best time of day to shoot any given place. It can save a lot of time in the planning and lets you achieve more in any given day.
Philip’s recommended kit for travel photography
50mm prime
Having a very fast prime lens in your kit, ideally an f/1.2, can really help with portraits and details. It gives a very cinematic feel and lets you shoot in low light when everything else has failed.
Blackout cloth
We often see white and silver reflectors used, but negative fill is just as important in controlling light.
An LCDVF screen loupe
This is essential for viewing images on the back of the camera in strong daylight. I also use them attached to external monitors when shooting video.
Travel photography tips from Ulla Lohmann
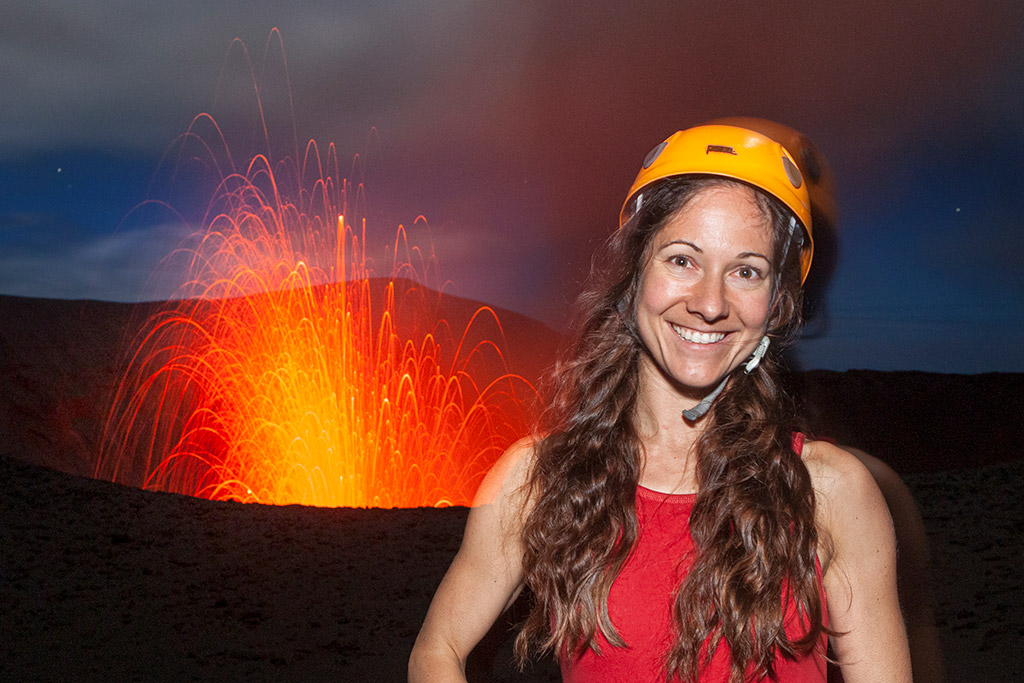
Ulla is a photojournalist and filmmaker. She specialises in active volcanoes and works regularly for National Geographic. She is a Canon ambassador and also offers photo tours. www.ullalohmann.com and @ullalohmann
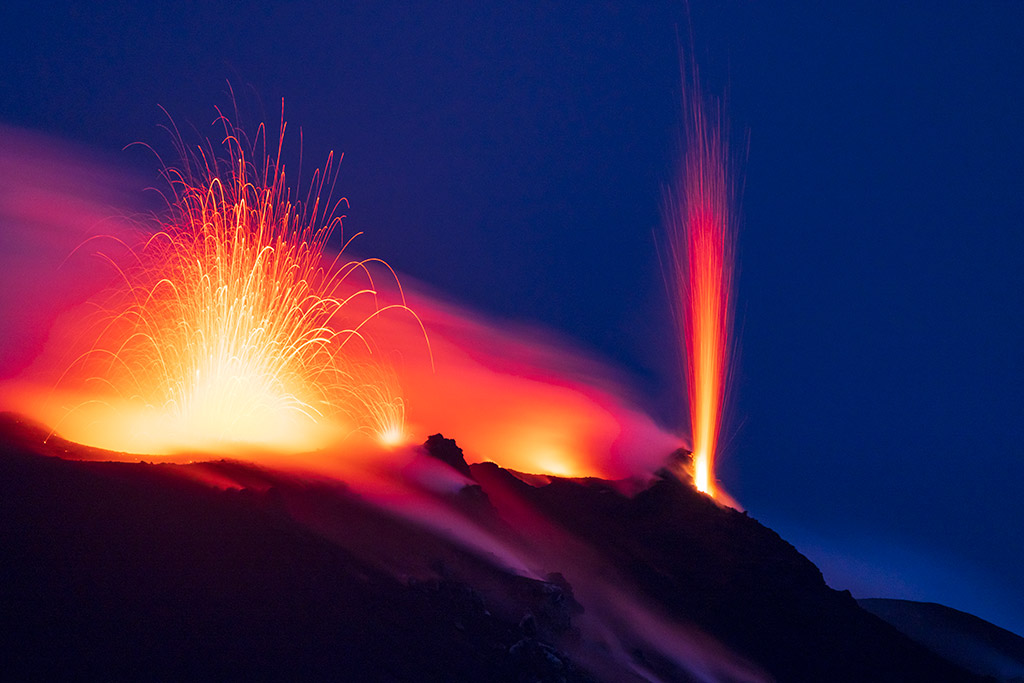
The right place at the right time
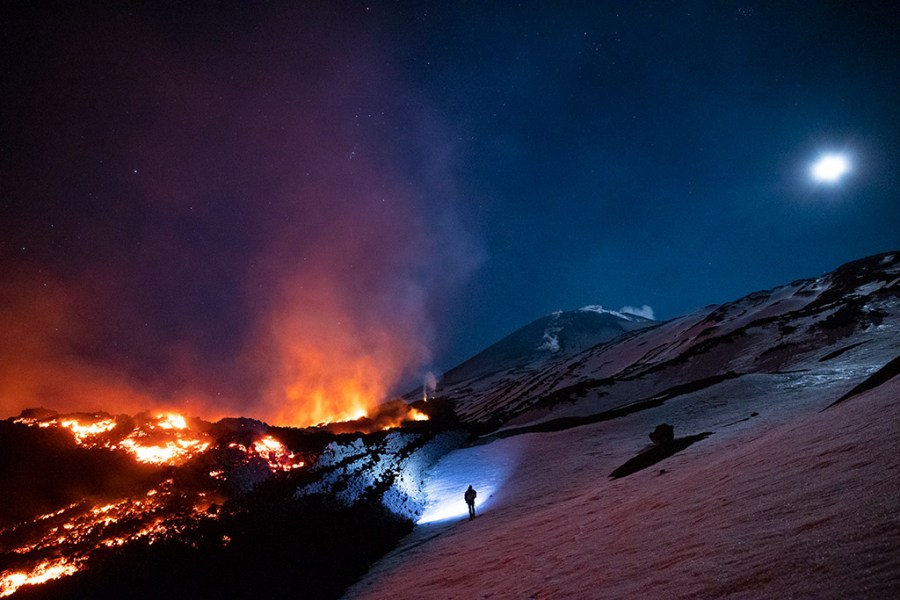
To photograph erupting volcanoes, it is very important to be well informed of what to expect and how to keep safe beforehand. Local Volcano Observatories are helpful, as well as webcams and Instagram for visual references of the state of activity. Also check the local laws; it’s often very expensive to trespass and it’s important to be aware for security measures. Time your ascent of the volcano so that you can photograph during the blue hour, when the lava glows yellow, the blue sky offers a wonderful contrast, and you can still see foreground details. Another option is to make use of the light of the full moon. If possible, plan multiple visits and prepare to spend more time than you think at the volcano. It is a life-changing experience!

The right exposure
Lava is like water – you can show it in drops or as a veil. The shorter the exposure, the more you can see the individual glowing rocks. Personally I like it when you can see the ‘trail’ of the so-called lava bombs. Usually I choose a longer exposure, starting from five seconds onwards. I press the shutter shortly after the initial blast to avoid overexposure. I use the camera in manual mode, which gives me more freedom to expose for what I want to show, and I like to set my white balance to a very low Kelvin figure (around 3400K) to emphasise the blues in the sky.
Sharpness
Depending on your camera, it can be very hard to focus during the night. You can try to set it manually but depending on the volcano it can be hard because gases and steam might give you an illusion. You can set the focus during the day and then put it on manual and not change it any more, or make use of a large explosion to set your focus during the night, or use a light source in a similar distance to focus. If you are close to the volcano, you might find that you can’t get sharp images at all – yes, this is because of volcanic quakes. Either you see it as an effect, or you just take many images with a shorter exposure. One of them will be sharp.

Ulla’s recommended kit for travel photography:
Tripod
This is essential for long exposures. It must be robust, but light enough to carry because there is usually a lot of walking required when shooting volcanoes.
Backpack
Essential to not only store your equipment but also warm clothes, food, water, torch and if needed, a helmet and gas mask. Make sure you prepare well – volcanoes are not playgrounds and can really be dangerous!
You can join these travel photography experts on our upcoming AP Photography Holidays! Whether it’s in the UK or abroad, there is something for all photographers. Upcoming tours include:
South Africa: Wildlife, Wine and White Sharks with Tom Svensson and Nigel Atherton 14 – 21 May 2023
Red Grouse with Ben Hall 24 – 27 August 2023
Orangutans and Komodo Dragons with Tom Svensson and Tesni Ward 7-16 October 2023
Birds of India with David Tipling 12 – 18 November 2023
See the Best used travel zoom cameras and best travel cameras.
Amazing images win in Travel Photographer of the Year
Do travel photography like a street photographer
Follow AP on Facebook, X, Instagram, YouTube and TikTok.


