
Claire Gillo speaks to three pros to find out their top tips for photographing architecture and interiors from different eras, angles and perspectives. If you find these insights helpful and take some great building shots, make sure you enter the Architecture round of APOY, which closes on June 11th – get your skates on!

Modern Exteriors – Dug Wilder
Dug started specialising in architecture and interior photography eight years ago. He shoots mainly for architects, interior designers and building manufacturers in the UK and NZ. See him on Instagram
@dug_wilders or www.dugwilders.co.uk
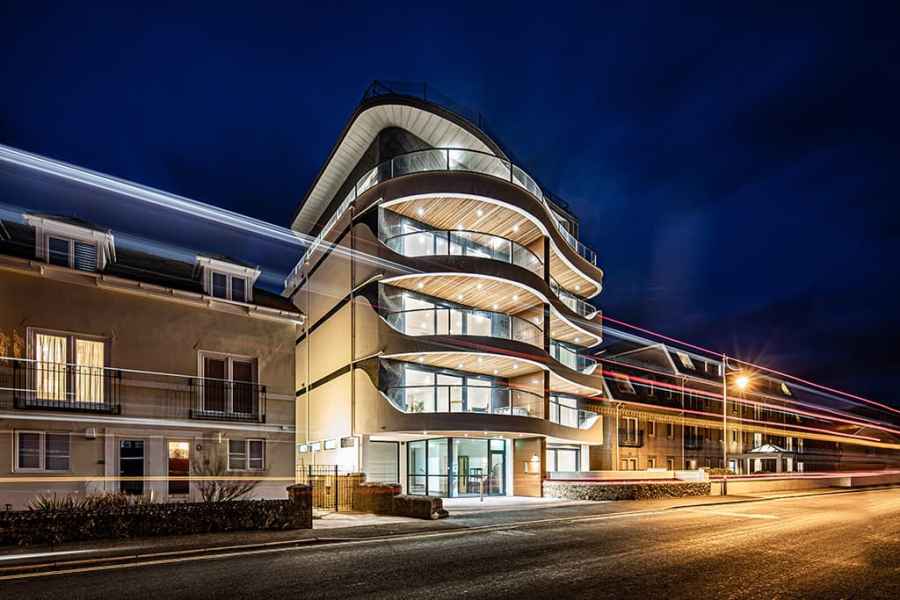
Low light
Shooting when it’s dark or at dusk can create some fantastic effects. It shows off the lighting which the client may have spent thousands of pounds on. Shooting at night will nearly always require some post production work to create a professional finish. Often the difference in light levels need tweaking, and this takes time to get right but the effects are worth the effort.

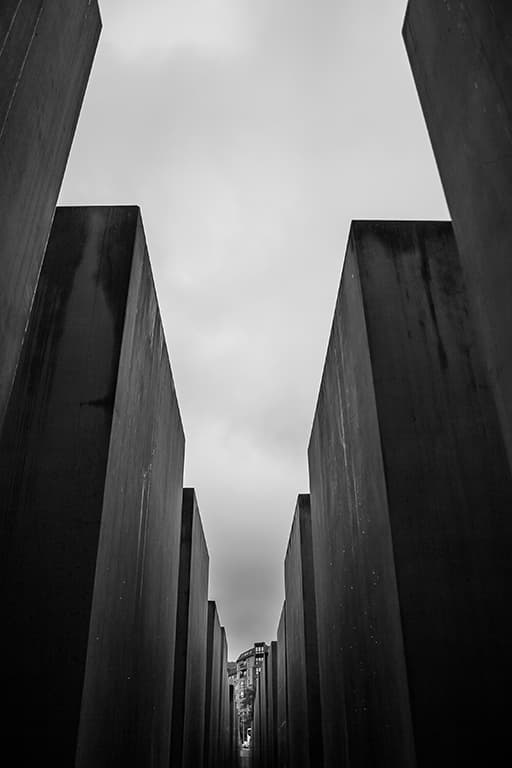
Symmetry is your friend
Bracketing your shots (taking various exposures) is something I do for all my shots, but for night photography you need to really extend that range to make sure everything is covered, from the dark foreground to the bright internal lights.
Symmetry is your friend I love finding the central point of a building and trying to create the most symmetrical shot possible, as it’s pleasing to the eye and impactful. With symmetrical shots I often have to take several shots and stitch them together because usually you can’t stand far enough back.
Often there will be another building or detracting item in the way. Take your time with this kind of shot as just being slightly off-centre can sometimes be horribly obvious.
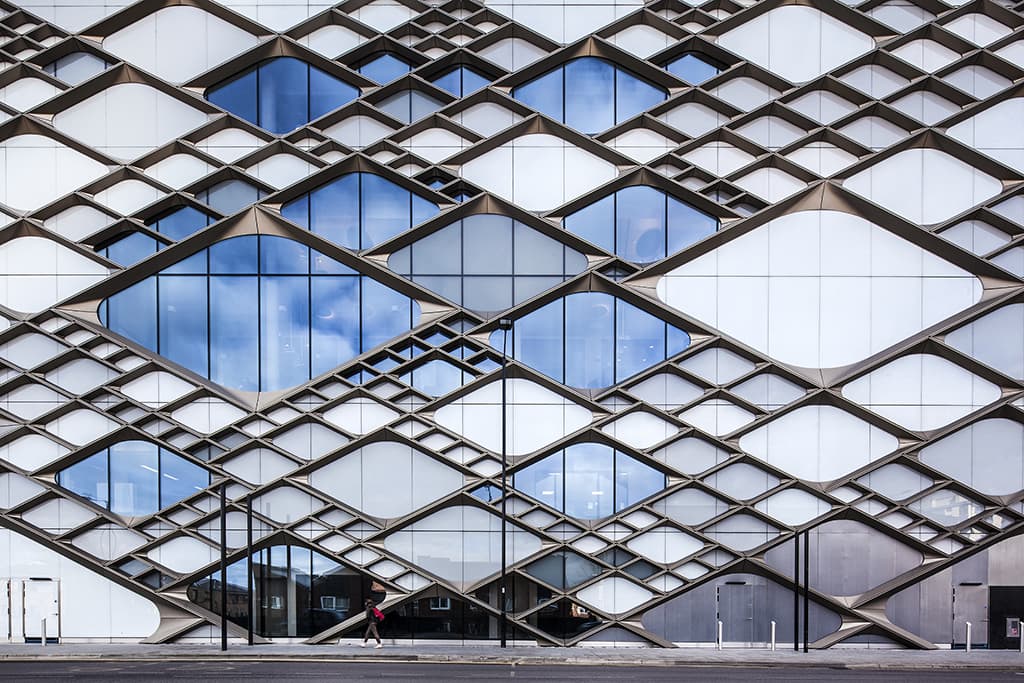
Add another element
By adding a human or animal to a shot you add life to the scene. It’s a quick and easy way to transform what otherwise may have been a lifeless shot, especially when the building itself doesn’t excite you.
Unfortunately you don’t always get to shoot stand-out buildings! Often it takes a bit of patience to get the right moment but a crowd or individual crossing in the right place really can make a difference.
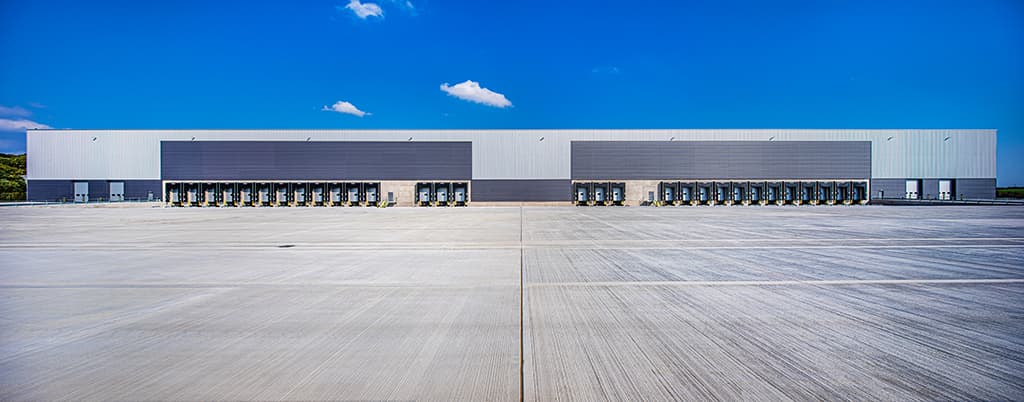
Go long(ish)
Long(ish) lenses are great for architectural photography. When I first started shooting I always wanted a wideangle lens on a full-frame body, however now I’m moving back to longer lenses, and getting further back from the subject to shoot either part or the whole building.
The effect is more subtle, more proportioned and shows the property in its surroundings. On a typical shoot I’ll capture the shots half wide and half long. Usually the wide is for the essential shots the client requires of the whole property, and the fun stuff is done with a 24-105mm.
Keep your vertical lines vertical
Nothing shouts amateur architectural photography more than converging lines (with the odd exception when it has been intentional). There are a few ways to do this, but keeping your camera level (preferably on a tripod) using either the built-in spirit level or one that fits to your camera’s hot shoe is the first step.
I always work with a Canon 17mm Tilt-Shift lens that allows for the horizon to be raised or lowered whilst keeping the camera horizontal, however these lenses are not cheap. Until I could afford one I used a super-wideangle lens and cropped it, creating the same effect but with a smaller res image.
At the post production stage I nearly always tweak my images with the lens correction tool to make sure all the lines in an image are both horizontal and vertical.
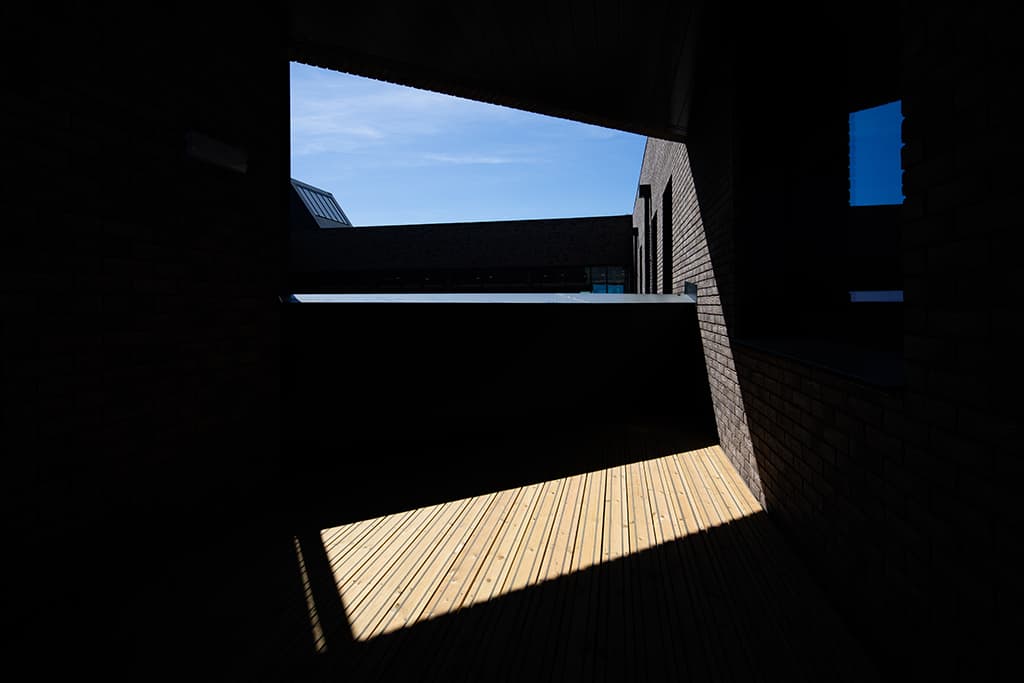
Dark and light
Don’t be afraid to let the shadows be dark and the highlights be bright. It’s very easy now especially with an HDR technique (which I personally don’t use any more after dabbling with it when it was first created years ago) to make the whole image too bright and visible.
However by keeping areas in shade it helps to show off the bright, reflecting parts of the building, which is especially effective on bright sunny days.
Best kit
- 27in 5K iMac – Architectural photography requires a lot of editing, with mixing levels of different exposures, correcting lens barrel distortion and removing any unsightly skips/cars/people. Having a large high-resolution screen to do these edits can help.
- Canon 17mm Tilt-Shift lens – My go to architectural lens creates stunning images with almost no distortion, and with the shift function offers views of buildings otherwise impossible. Although it has no autofocus, this inconvenience is outweighed by the end results that this stunning lens can achieve.
- A big breakfast – I spend hours lugging my big tripod, full-frame camera and heavy lenses around buildings and I love it, but it can be tiring so I need a good breakfast to keep me going.

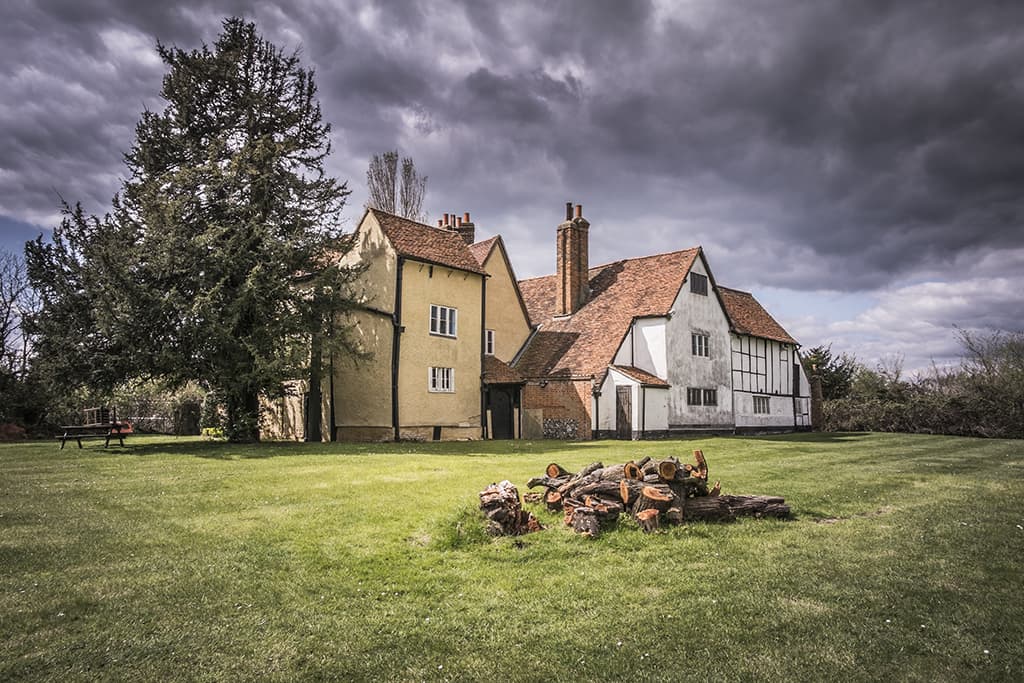
Historic buildings – Duncan Shields
Duncan is a heritage and museum photographer and photographic historian. He uses a variety of digital and historic processes within the heritage industry and gained his PhD in photographic history in 2017. See www.duncanshields.co.uk.
Steady as she goes
Use a variety of tripods and stabilisation devices such as mini tripods, flexi-legged tripods, a monopod and bean bags. Keeping your camera steady in the dark, and often tight places is a must to get sharp and usable results.
Old buildings in particular are often small and difficult to manoeuvre around, but by having a couple of size options you can get into angles that show the less-seen aspects.
Also, balancing the light without creating terribly over-produced HDR imagery means balancing the light in camera, so filters and portable LED lights or speedlights are the order of the day.

Strip it down
Try to carry only the most vital pieces of equipment. Smaller and lighter mirrorless cameras and wideangle zooms make getting the shot you want easier than lugging around massive DSLRs and all the lenses you own.
Wideangle lenses between 10-24mm are a go-to for both interior and exterior work, but a standard zoom or 35-50mm prime lenses are also vital to cover every eventuality and opens more photographic possibilities.
Stack ’em high!
Learn to use focus stacking and in-camera bracketing for various situations. Focus stacking can be extremely useful to capture the minutiae of a place’s history. Getting everything in sharp focus allows the viewer to experience the photograph in great detail, however never underestimate the value of a narrow depth of field to focus attention on specific areas of the image.
It depends on your aesthetic choices and the story you are trying to impart as to which techniques are relevant for which place.
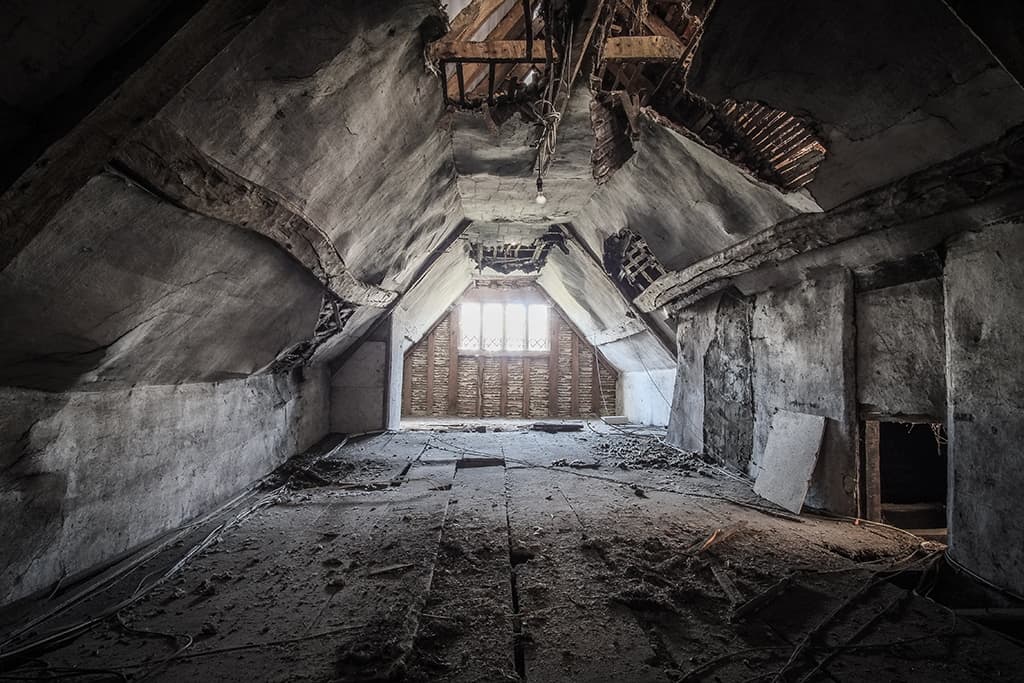
Remember your composition
Slow down and consider your compositional elements for every shot. Try looking for interesting symmetrical positions or try to challenge your usual compositional angles; but make sure you pause and consider what each shot is adding to your story of the place.
For example, aspects of a building’s use, or even parts of the building’s fabric itself, may have changed throughout its history – find the view less seen, perhaps one that is more in keeping with the history of the building and thereby tell the story of its use.
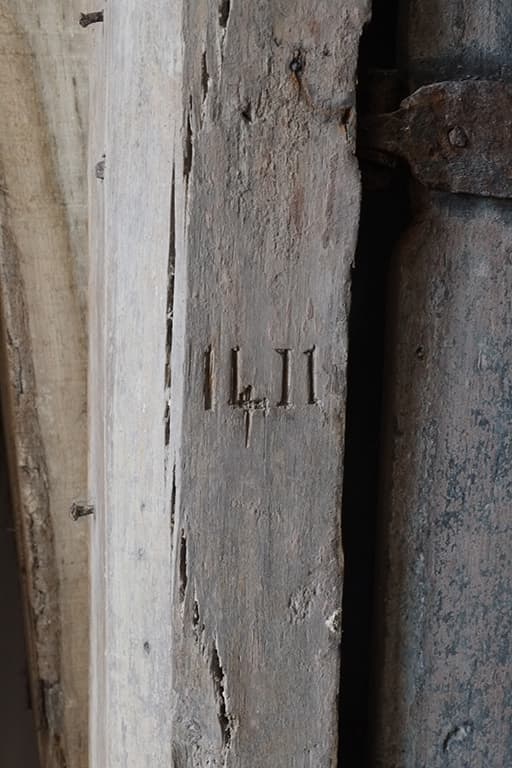
Research
Learn the history of the place and aim to tell that story in your images. It’s also vital to know any restrictions and rules pertaining to photography and access before turning up, especially places that might be derelict and potentially dangerous. Visit the site before the day of the shoot, look for the hidden details that show why this building or place is special as well as the wider context shots.
Old buildings in particular have been photographed throughout the history of photography; find those photographs and think about how you want to show this history.
Tread lightly
Remember these places are special. They have existed for a long time, sometimes thousands of years, and as such require a modicum of respect. Pay attention to listing and conservation advice at all times; never try to adjust or alter the nature of the place you are photographing and never, never, never do any harm.
The fabric of the building or the safety of the site is more important than your shot. If in doubt, check on the advice for photography issued by governing bodies such as Historic England or the National Trust, and always follow information provided by staff.
Best kit
- Laser measurer – Useful to locate the exact same viewpoint over long periods of time when documenting images such as before and after changes to buildings during restoration. Just make sure to measure your position in all dimensions from features that won’t change during repair.
- Portable LED lights – It’s rare to find a historic building or open-air heritage site that doesn’t need some form of lighting and many will not have power available. Remember to take plenty of spare batteries.
- Colour checker – To accurately reproduce colours I use a colour checker for each viewpoint or change in light. A grey card also comes in handy for white balance adjustments on the fly.
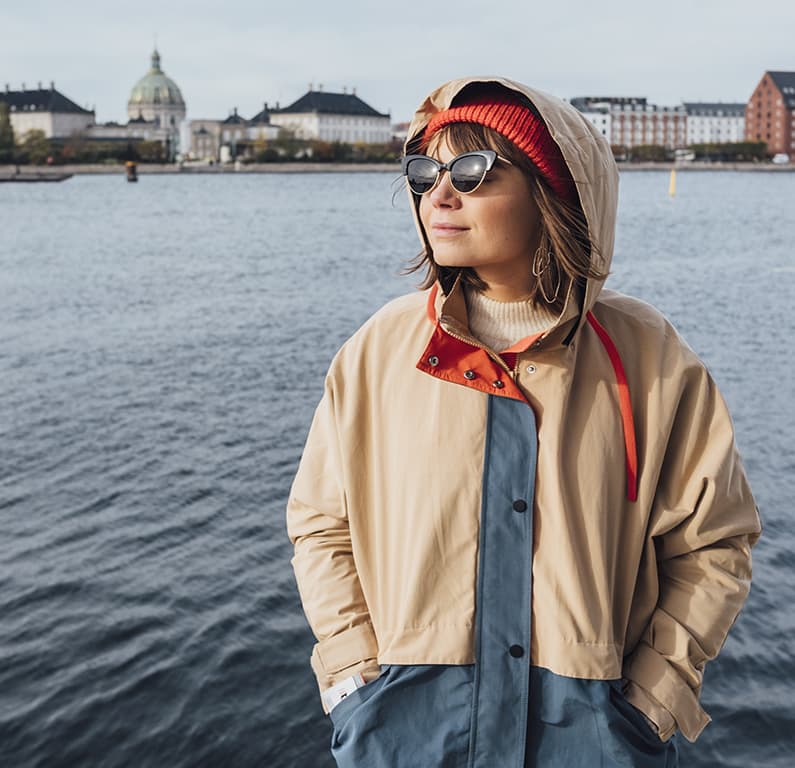
Trendy interiors – Hanna Polczyńska from kroniki.studio
Hanna works in the field of travel, interior, and architecture photography. She creates aesthetic visual stories (also called kroniki) for designers, interior-oriented brands, restaurants and hotels. See her on Instagram @kroniki or www.kroniki.studio
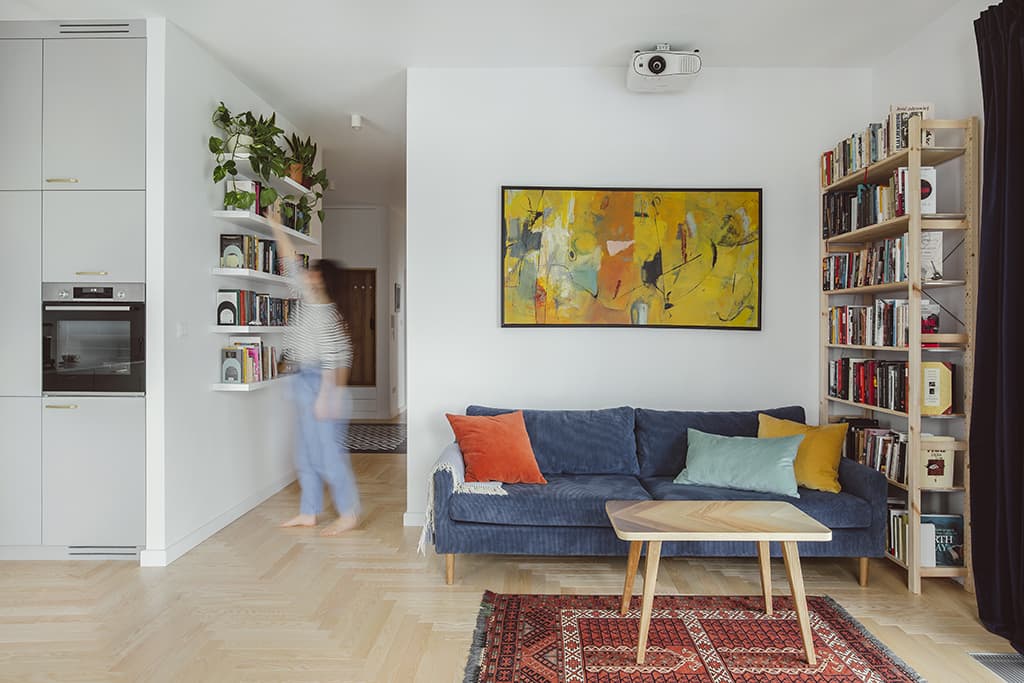
Ghost pictures
An interesting effect in interior photography is the use of the so-called ‘ghost’, that is a silhouette of a person captured in motion. A person clearly visible in the photo will always focus the viewer’s attention and therefore distract them from the interior design.
However, sometimes it’s good to capture someone in the picture to show functionality of the space. If you photograph a model with a long exposure time it will appear in the photo as a blurry figure. That is how you can emphasise the presence of a human in a more discreet way and not distract the viewer’s eye.
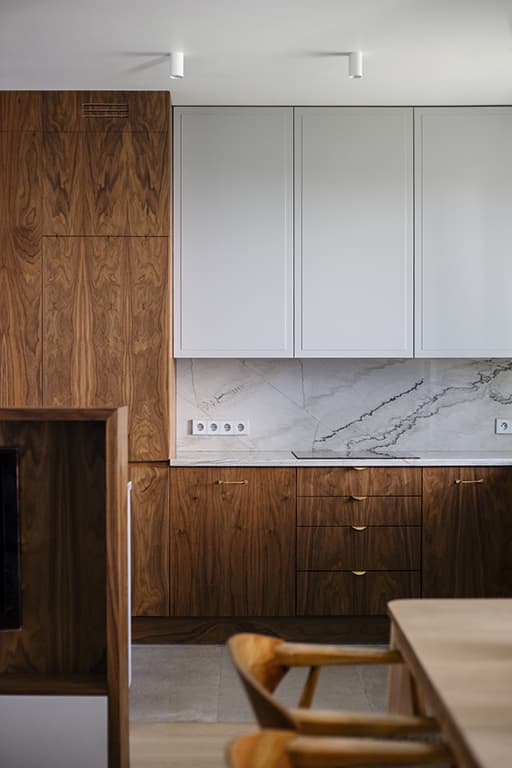
Details
Wide frames are considered to be the basis of interior photography but it is also the detail shots that build the atmosphere of the entire photoshoot. It is worth showing close-ups of finishing materials, textures and characteristic elements of the interior arrangement to attract the attention of the viewer.
When taking these shots work with wide aperture values (eg f/2.8, f/3.2) so that the depth of field is as shallow as possible.
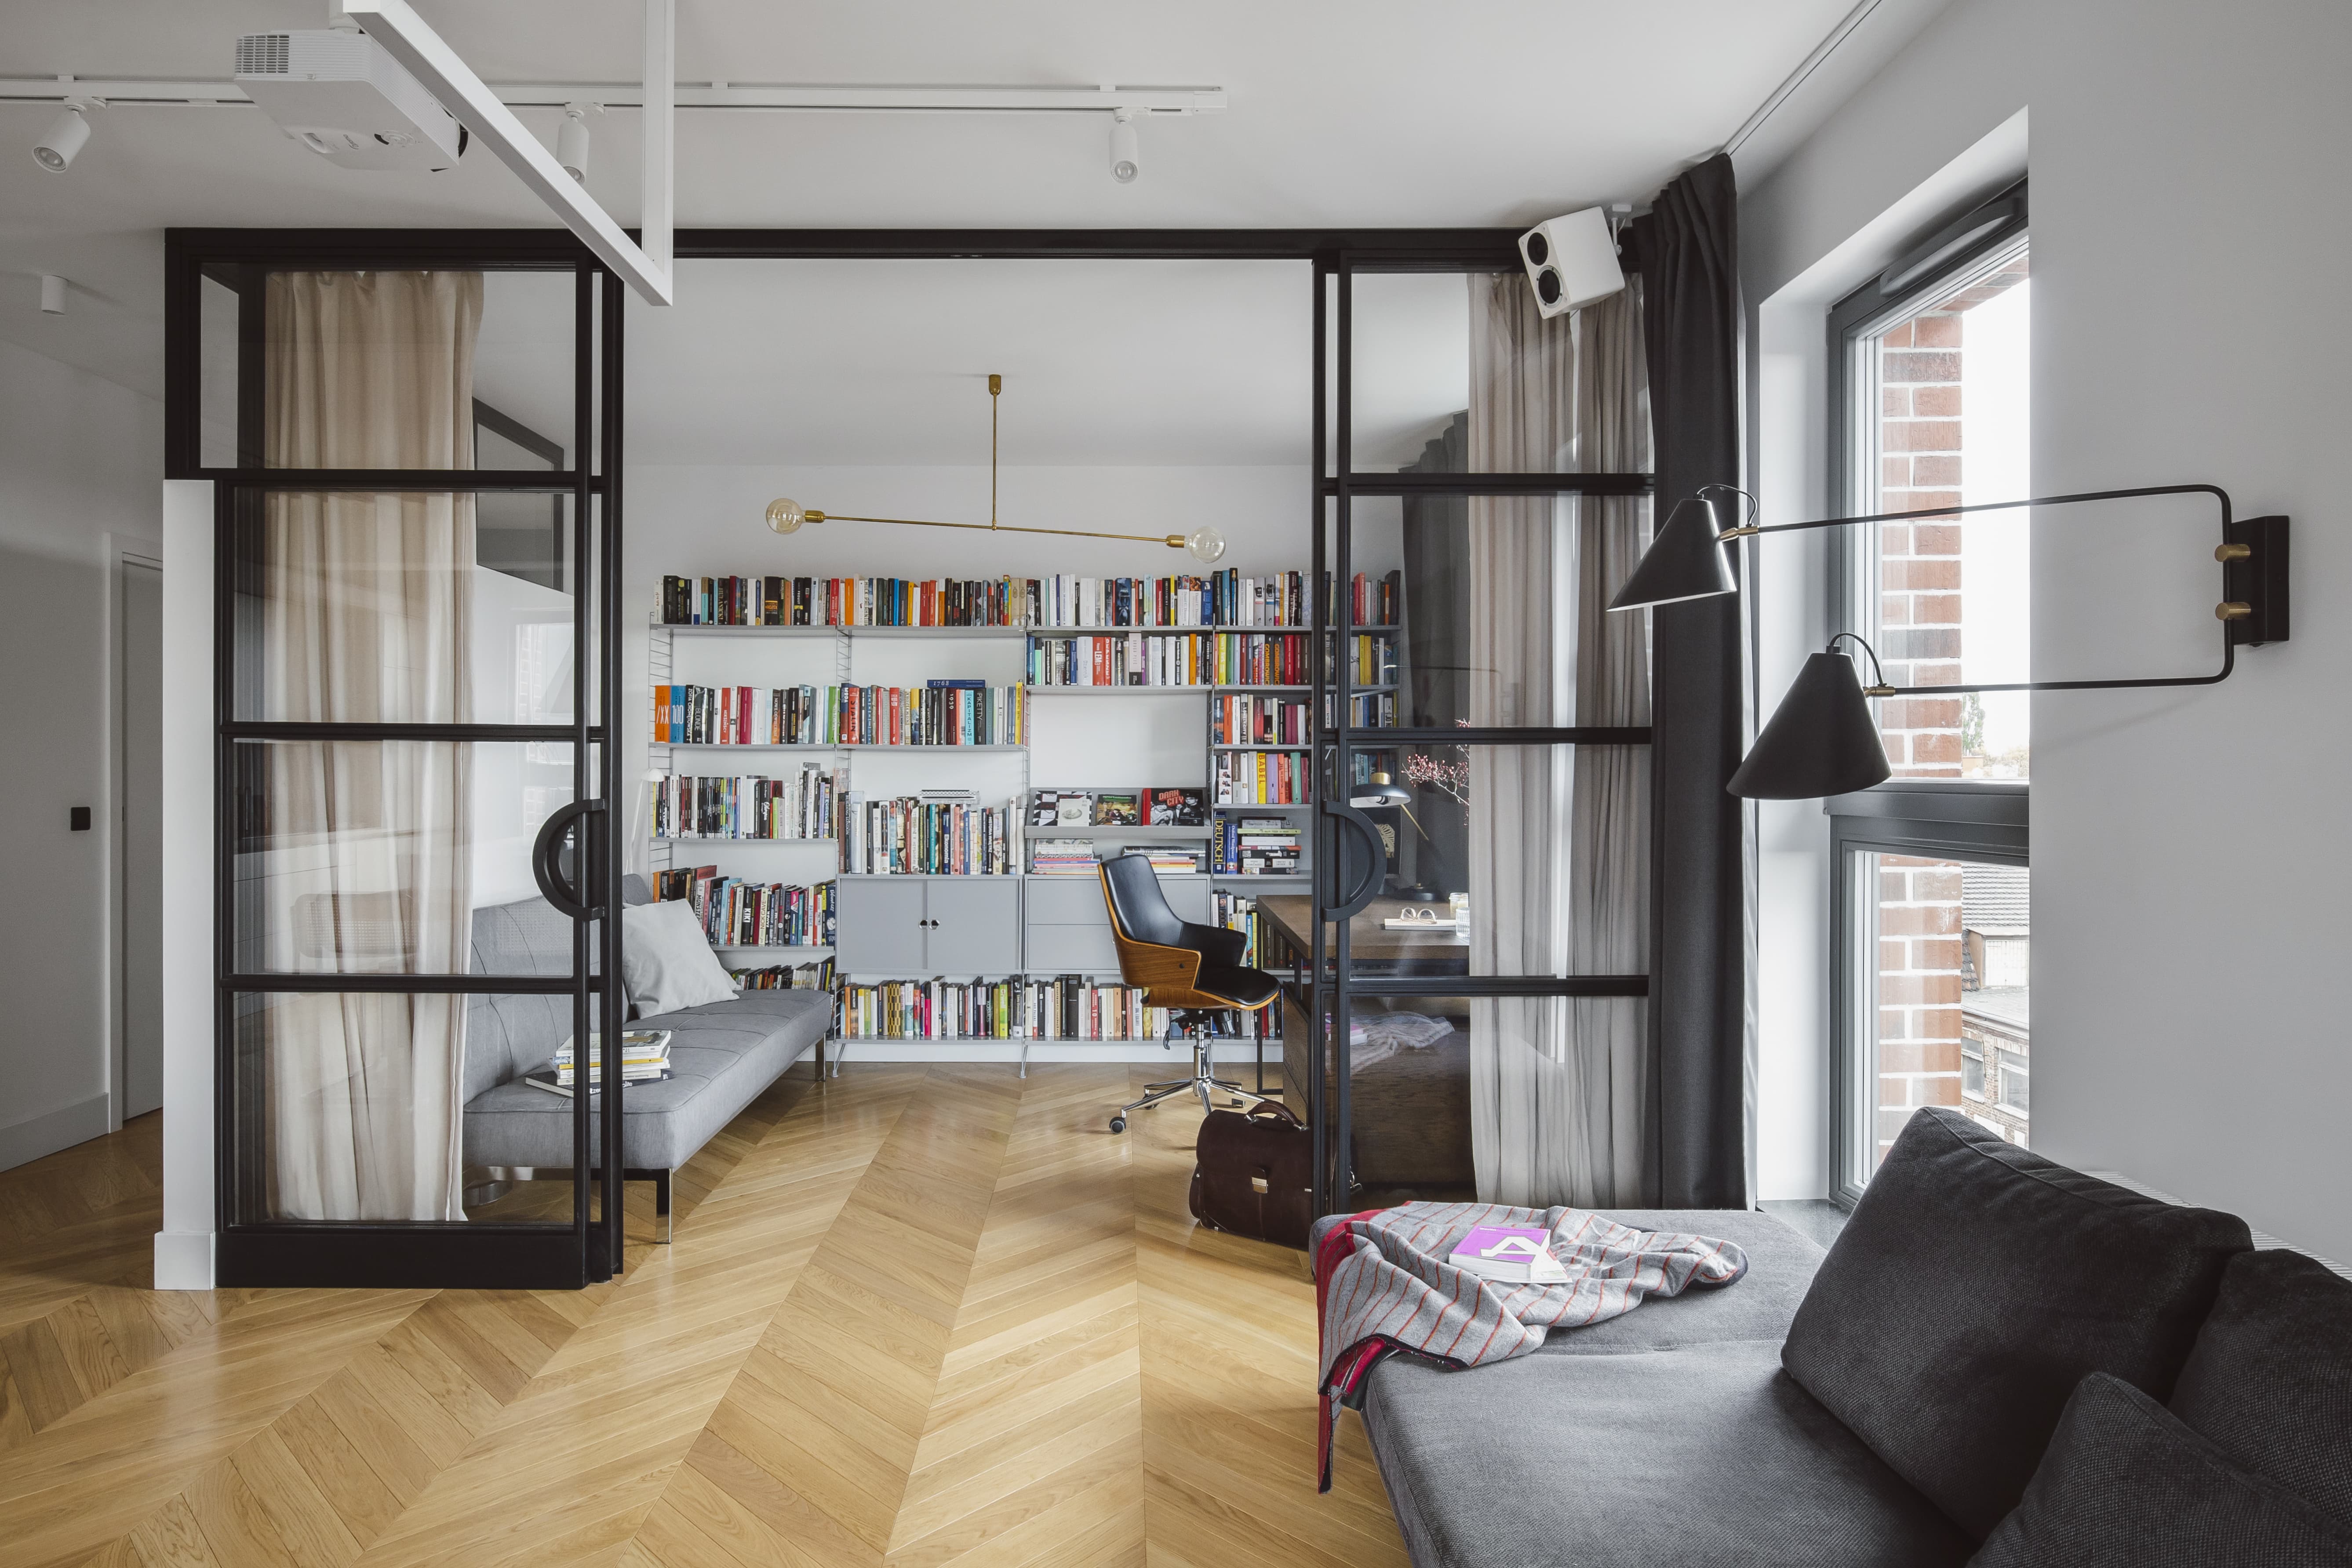
Natural light
I believe that natural light creates the best conditions for interior photography and for the most part there is no need to enhance the space with artificial lighting. Any good architect, whilst creating and designing a project, will have taken into account how natural light illuminates a space.
Focus on emphasising how these features are lit and not falsely tweaking them. In this case, flash or studio lamps can easily spoil this and flatten the whole interior design. Therefore, instead of investing in professional lighting, I recommend a simple photographic reflector and use the existing natural and ambient light during your photoshoot.
Keeping the lines straight
Just as you would in exterior architectural photography, in the case of interiors it is also necessary to keep the lines straight. It is crucial to use a tripod and I personally feel if you want to take quality images you should invest in a professional tripod system instead of using cheaper ones.
When you are taking your shots straight on you need to remember the lines and levels. This is where an auxiliary grid through the viewfinder or LCD screen comes in handy, and some also have a built-in levelling option, which can be useful.
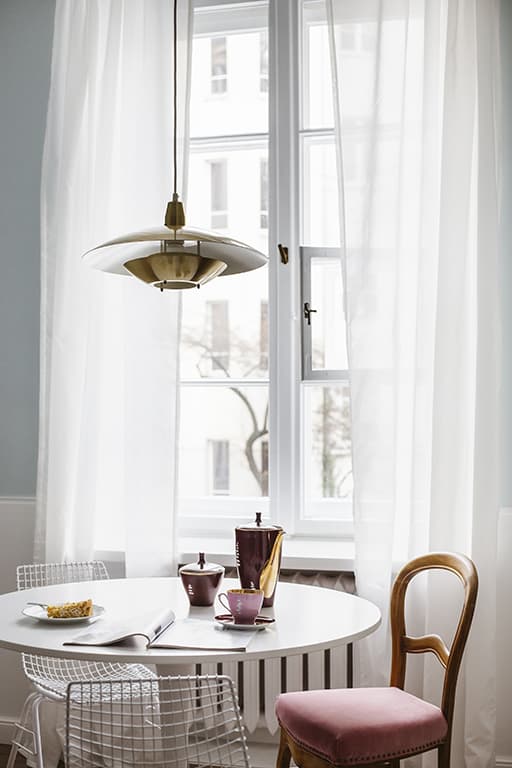
Elements of life
The role of an interior photographer is not only to present a spatial design and its features but also, if not primarily, to reflect the spirit of a place and thus also its hidden story. After all, interiors are created for people – they are homes, places of work or leisure.
Given this, it is worth showing in your images traces of someone living, working or resting within the space. For example, it could be a coffee mug on the kitchen counter, a book lying wide open on a nightstand or a table set ready for a meal. However this is only one side of the styling process, as you also have to hide less- desirable elements, such as cables, clothes or excess decorations. The key is to get a natural effect without overloading the frame with unnecessary distractions.
Using Wi-Fi
Some of the more recent technical innovations can significantly improve the quality of your photos. In the case of interiors, the absolute blockbuster is the Wi-Fi connection option which allows you to control the camera from a tablet or smartphone.
After setting the camera on a tripod and selecting the frame, you have a live view in front of you and can freely move around the entire set, constantly controlling the arrangement of furniture and objects visible in the photo. This way you are able to precisely compose the perfect shot!
Best kit
- Wide lens and standard – I use at least two different lenses – one wideangle lens to capture overall shots (e.g. 16-35mm) and one standard lens for close-ups (e.g. 50mm or 85mm).
- Tripod – This is needed to keep the lines straight and save yourself time fixing the photos in post-production.
- Tablet – This is useful for shooting remotely and using live view mode while composing the scene.
Further reading
Great women architecture photographers share their insights


