

Star trails are a rite of passage in night photography for many photographers. Discover the right way to capture them in all their celestial splendour, with a bit of light painting, following Duncan Wallace‘s easy to follow guide.
Choosing a location to shoot star trails
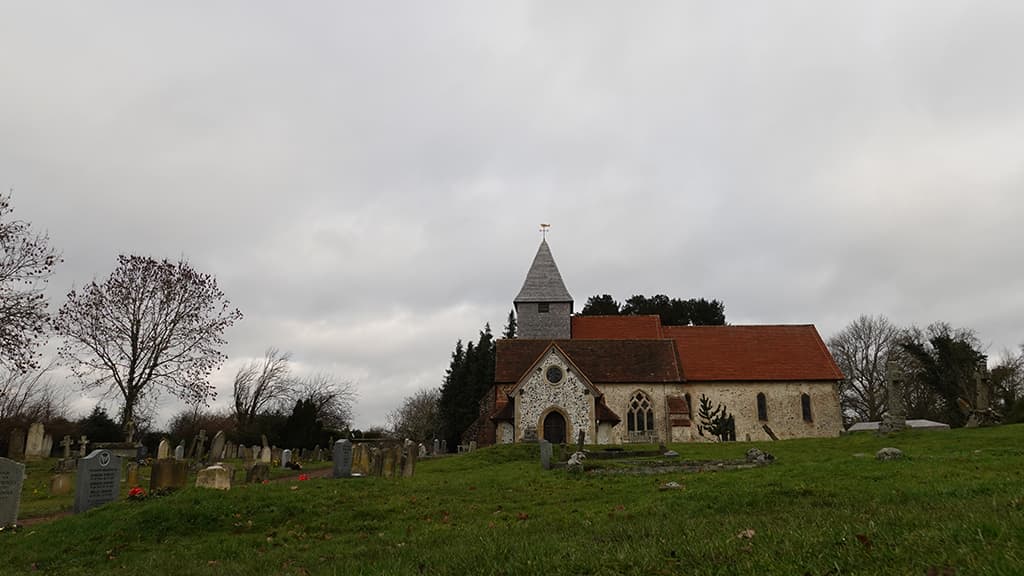
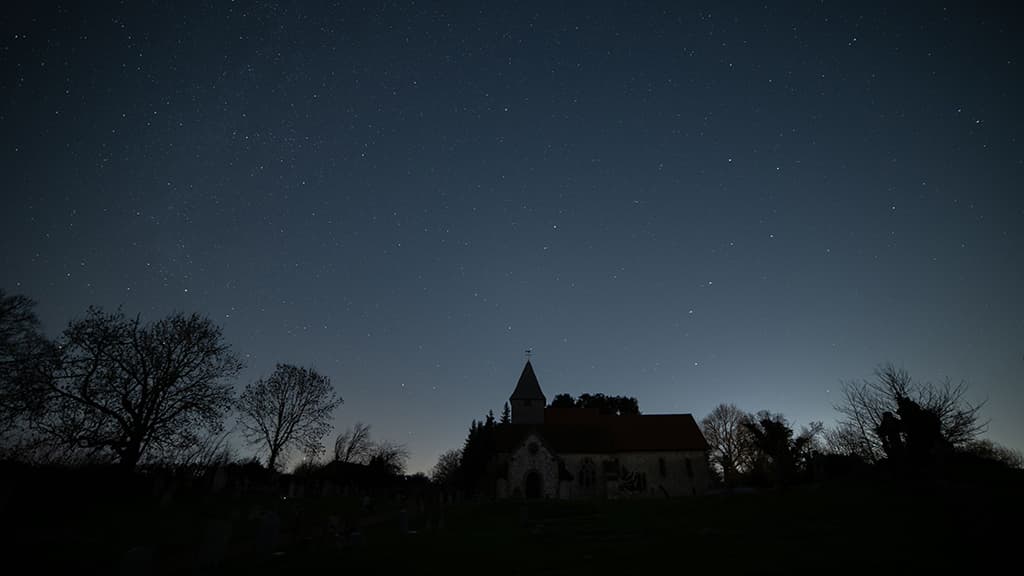
The first and most important thing I had to decide on was a location. At the time Christmas was coming up, the idea was to create an image of the church spire with Polaris aligned as close as possible to the spire and then capture the rotating star trails with as much colour as possible. I walk around Silchester nearly every day with my dog, Bob, and had walked through the churchyard many times.
As my main goal was the alignment of Polaris with the top of the church spire’s weathervane ‘golden fish’, the first thing I had to know was the location of Polaris. Luckily, these days you can find apps for your phone to help with almost anything. The one I use on my iPhone is called Night Sky. Using this app, you can enter a star name in the search bar, select it from the results and then select ‘Directions always above horizon’.
Then simply move the phone and follow the arrow on the screen until the app shows the location of the star in the sky, in my case Polaris. This will pretty much be the same position day or night at any time during the year. Once I knew the location of Polaris, I had to find a good spot to set up my camera, one that gave me both a good view of the church and the open sky.
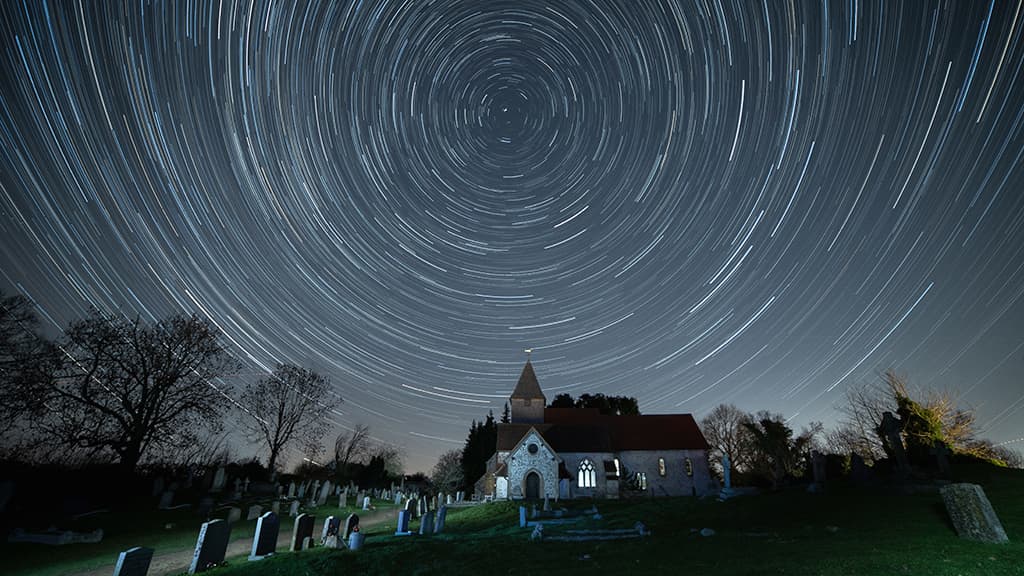
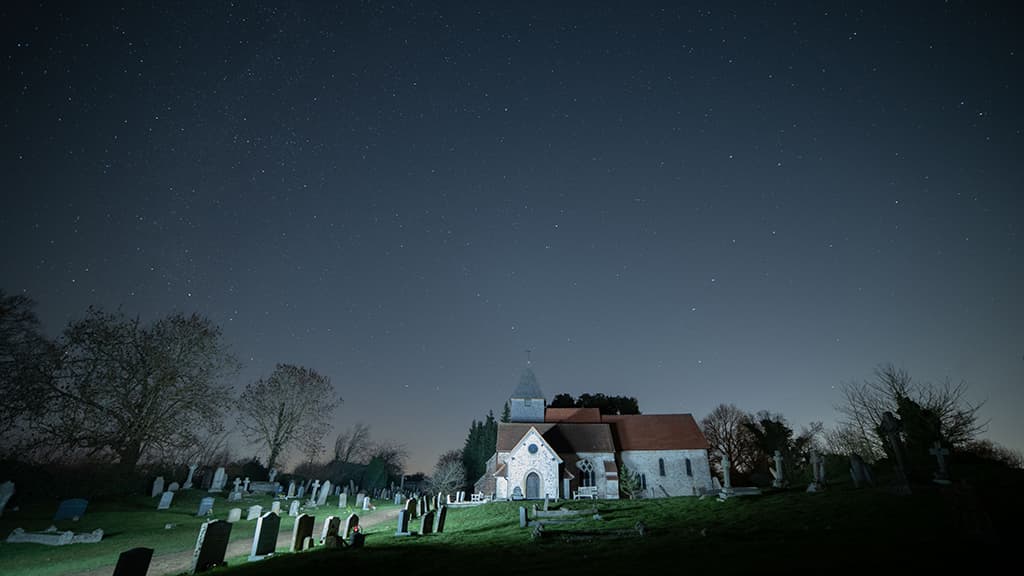
Star trails over Silchester Church, Silchester, Hampshire. Sony A7 III, 14mm, f/2.8, ISO 1600. Exposure time – 26 seconds/photo
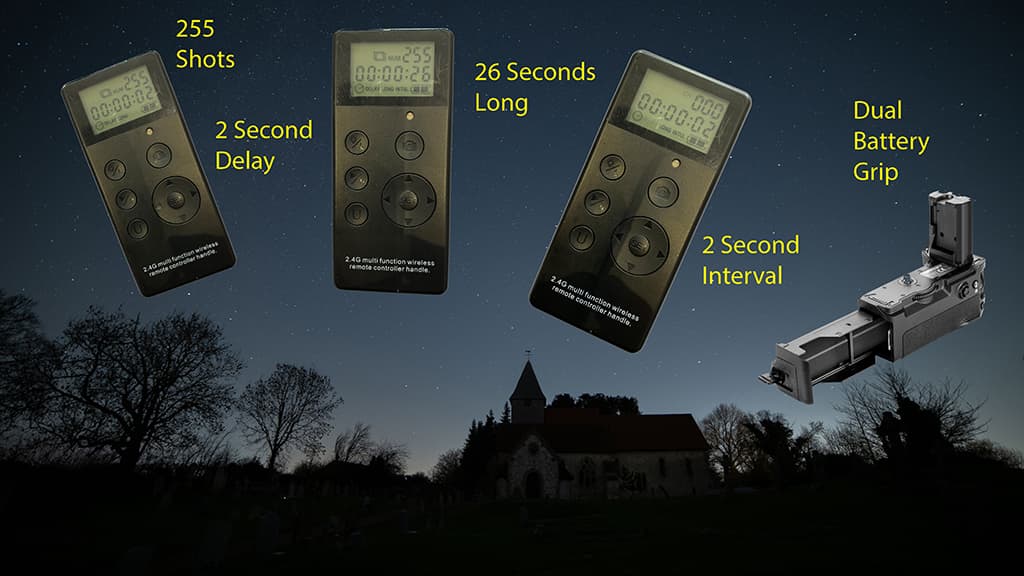
The interval between photos is 2 seconds. Number of photos – 162
I took a few test shots and from these, I got a rough idea of the best location. Waiting for the right conditions Deciding when to spend an evening out taking photos is probably the hardest piece of the process as weather conditions and moon visibility change every day.
Finding the right conditions can take days, weeks or even months. To help plan an evening window of opportunity, another app I used is Clear Outside. This helped me see in advance which nights and times the sky might be clear enough to venture out. Another thing I needed to know was how bright the moon might be.
The Silchester Star Trails photo (above) took a lot of planning and waiting for the perfect, clear, moon-free night as I needed at least two hours to take all 162 photos that make up the final image, some of which were light painted (paths and church windows) by using selective light painting. The photos were then stacked to create the final scene.

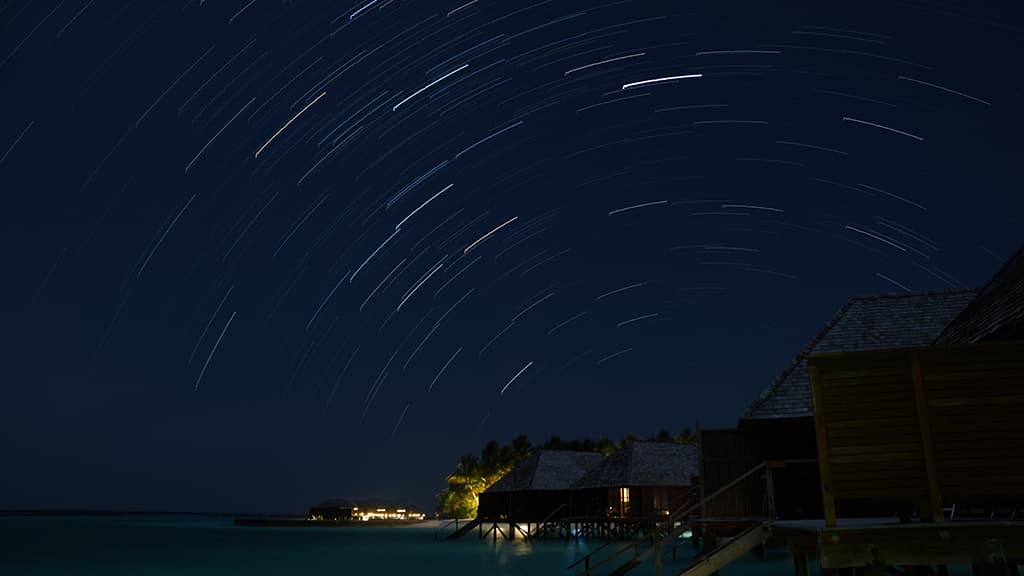
During lockdown, I practised this technique in my own back garden. This image was created by stacking 350 images taken at 30sec/photo, f/2.8, ISO 800
When is the right time to shoot star trails?
For star trails, the best time is when there is a new moon because you need to avoid a full or bright moon. For this, I use the Photopills app, one of the best free apps I’ve found for astrophotography. It also includes a virtual reality view for any given date, which is especially useful if you ever want to do Milky Way, Astro, Moon or Sun photography.
The Photopills YouTube channel is very helpful too, it has great video tutorials and documents free to download for all types of astrophotography photo shoots. Subscribers receive regular invites to PhotoPills masterclasses covering techniques, and how to plan for upcoming astronomical events.
I also checked Clear Outside for the weeks leading up to help find the next best clear night. Once I saw what looked to be a good night, I then checked moon conditions using Photopills. I had my camera bag packed and ready with all the equipment I needed as I knew I might only get one attempt.
One of my first attempts at star trails while on holiday. One of the things I learned here was to ensure I captured enough images to create the complete star trails
What settings do you need to shoot star trails?
On the night with the camera mounted, aligned, and framed I checked all the settings to make sure they were set correctly. I did a couple of test shots using different ISO settings but generally found ISO1600 worked well. Keeping the ISO setting low captures more colour in the star trail images.
I have used ISO 800 in my garden during the lockdown and with local light pollution had great success seeing much more colour than using higher ISOs. I could have taken all 162 photos like this but, after stacking, I would have just ended up with a dark outline of the church and the star trails above. To show more detail in the final photo I light-painted key features and paths without overexposing or lighting unnecessarily.
Kit list for star trails photography
- A full-frame camera like the Sony A7 III, is a good choice – see our guide to the best cameras for astrophotography.
- An ultra-wide-angle prime lens, like the Samyang 14mm f/2.8 is a great start – see our guide to the best lenses for astrophotography.
- Benro Travel Angel 2 Four Section Aluminium Twist Lock Tripod, Lume Cube 2.0
- Neewer Vertical Battery Grip for Sony A7 III with 2.4 G Wireless Remote Control Head Torch with white and red light modes
- Small LED Torch, Kiwifotos Dew Heater Strip with USB power bank (ready if needed), Vallerret Markhof Pro 2.0 Winter Photography Gloves, hat and warm clothing
How to capture star trails step by step
Spend time scouting for a location and the ideal composition for your star trails image.
1. Pick a location
Decide on a location and think about the composition. It’s a good idea to visit in the daytime and determine what you want to show in the final image. Take a few test shots to help work out where to position your tripod as it won’t be as easy in the dark.
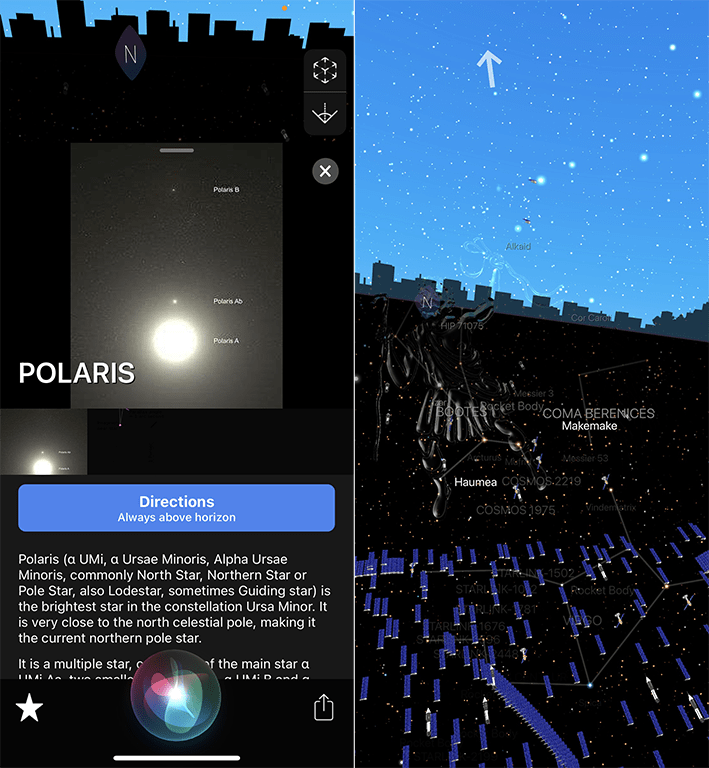
Apps like Night Sky will help you locate the stars that you intend to shoot.
2. Locate Polaris
When you visit, open Nightsky on your IOS device and locate Polaris using Sky view. Sky view presents you with a real-time simulation of the sky as currently seen from your own location or another location of your choice. It is a 360° view and you can move it around by moving your device.
Compose and expose the image in a way that maintains focus and detail of the night sky.
3. Setting up you tripod and camera
Set up your tripod in your chosen spot and mount the camera securely. Use an LED torch beam to help frame the image. Take the first photo using ISO-1600 as this generally creates a photo with enough light without losing the stars or church detail.
A remote and battery extension are must-haves for a successful night of star trails photography.
4. Wireless remote control
I use a multi-function battery grip with a shutter release button, and a 2.4G wireless remote control, which provides more battery capacity – effectively extending shooting time. The remote allows for setting delay time, exposure time, time interval and a number of shots. Set the camera to shoot in Bulb mode.
Light painting can enhance your image.
5. Light painting the churchyard
Once the camera is shooting, you can start light painting. I walked up the path with my Lume Cube slightly dimmed and was careful not to shine the light directly at the camera. This process was repeated several times to give light to different areas. Excess light can be removed in the post processing.
Use window lights as part of your lighting process to enhance the overall image.
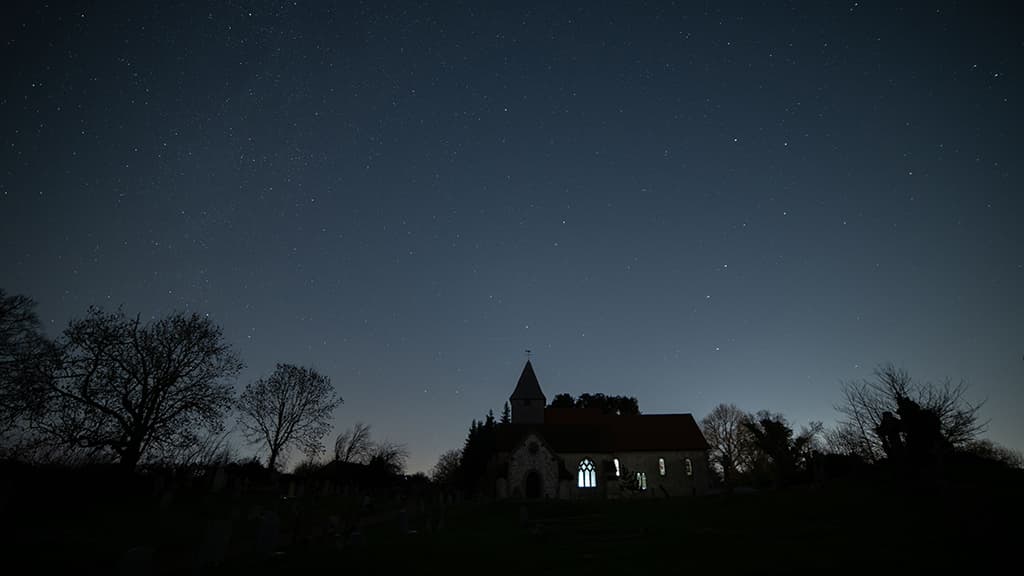
6. Light painting the windows
One advantage of using the Lume Cube over an LED torch is the ability to increase or decrease the brightness of the light. The church windows were lit by holding the Lume Cube on maximum light for 5-10 seconds at various windows on the opposite side of the church.
Duncan’s post-processing workflow
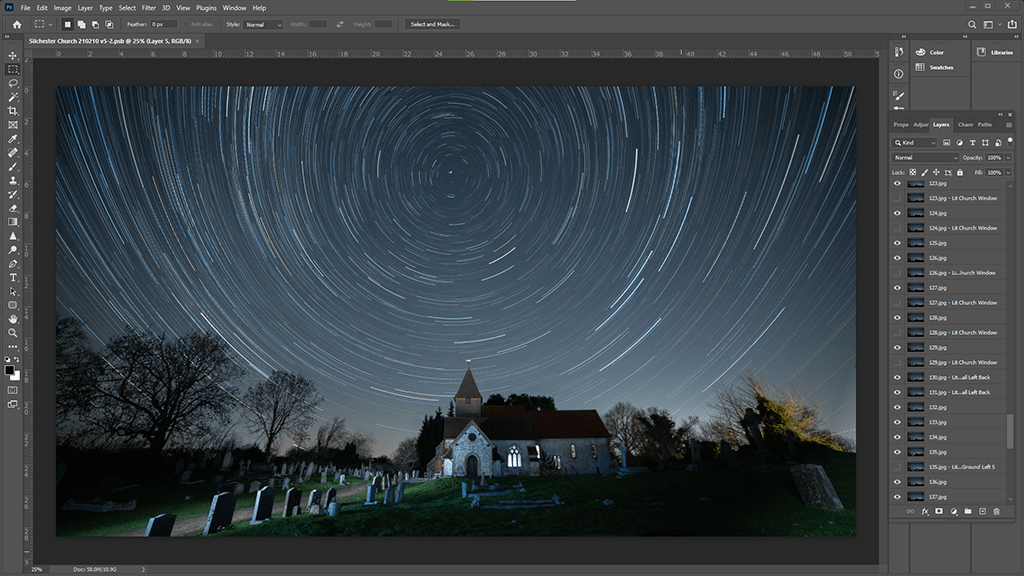
Post-processing is where we combine the images and remove any objects or lights we don’t want in the final image as we often get satellites, plane trails, car lights, and other people’s torches. There is an excellent tutorial on YouTube called Star Trails – Photoshop Tutorial by Peter Zelinka.
For my final image, I hid all the layers in Photoshop and then went through them one at a time. If the layer had any kind of light, I gave it an appropriate title, e.g. Church Path Lit 1. This made it much easier to identify and hide or reveal all the different layers one at a time, or in combinations, to see how they looked when they were or were not visible with the star trail layers.
Once I settled on a combination of layers to use, I hid all the layers. For the unused layers with light, I went through them one at a time and masked any areas of light painting I didn’t want in the final image. I needed to make sure the layer could still be made visible, because the stars need to remain in the scene, since without them I would have little gaps between the star trails.
To finish the post-processing, I made all the layers visible and saved the final image.

Your guide: Duncan Wallace
Duncan works in the IT industry and has always been a keen amateur photographer since he received his first camera on his 21st birthday a good few years ago. He finds photography fits with the lifestyle he enjoys – walking, travelling and nature. See more at Photoliser.com. Duncan has dedicated this feature to his dad, Gordon Wallace, who sadly passed away last year. It was Gordon who encouraged and developed Duncan’s interest in photography.
Related articles:
Night photography: how to photograph the night sky, moon and stars
How to photograph stars and the Milky Way
Best Camera for Astrophotography in 2023
Follow AP on Facebook, Twitter, Instagram, and YouTube.


