
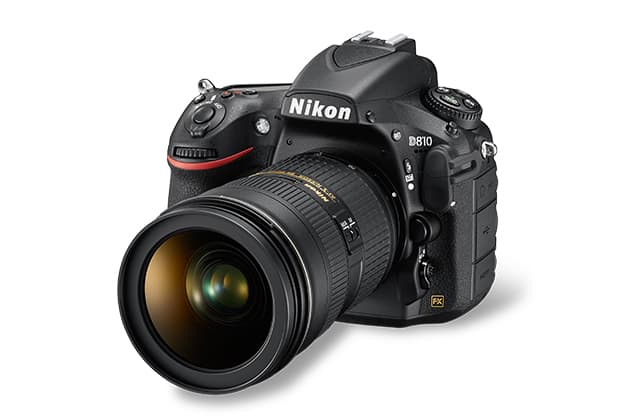
There is no getting away from the fact that since the release of Nikon’s powerful and stunning D810 last July, obtaining the best possible image quality has been taken to a whole new level. With its 36MP sensor and the new Expeed IV processor capable of producing files of 103MB, the world is your oyster in terms of print size or flexibility in cropping an image. The image quality that is possible is staggering.
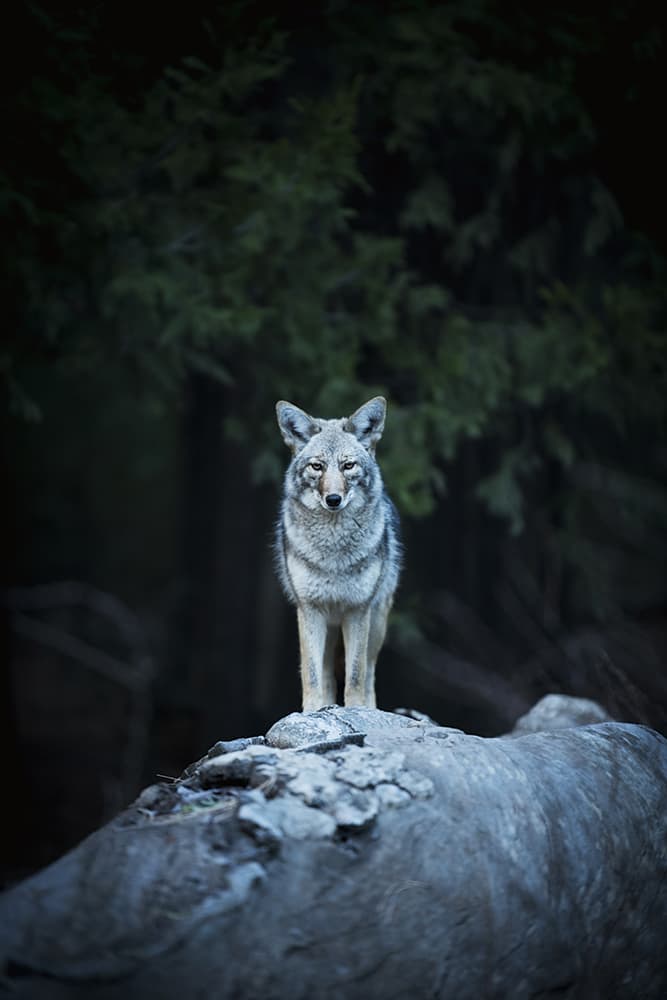
© Jeremy Walker
In any given photographic situation, there will be ways in which you can maximise the potential of your image. However, with the Nikon D810 there are a few things you should consider doing just to optimise your image quality, before you even venture out on location.
Electronic front-curtain shutter
This is possibly one of the most important developments in shutter technology for a long time. The D810 has a much quieter shutter than the D800/800E anyway, but the electronic front-curtain shutter significantly reduces vibration caused by the opening and firing of the shutter mechanism. Vibration because of the mirror going up and shutter opening will have an adverse effect especially with slower shutter speeds, macro work or with long telephoto lenses where the slightest bit of movement will be detrimental to image quality.
So what exactly is the electronic front-curtain shutter? A standard focal plane shutter has two curtains: one that opens and exposes the chip, and a second one that follows it and closes to end the exposure. The movement of these curtains can cause vibration, which reduces image quality. With Nikon’s new feature, the electronic front-curtain shutter, you fire the camera and the first curtain opens as normal; however, no exposure is made although the chip is uncovered. At the second press of the shutter release, an exposure is started electronically and finishes when the second curtain closes. It
is this opening of the mechanical shutter before an exposure actually starts that reduces vibration and blur significantly.
After the first press of the shutter release and having raised the mirror up, wait a few seconds before exposing the image. Again, this will help reduce any loss in image quality. You have to go into the camera’s menu to set this option, but it is well worth doing. On the Nikon menu display, you need to go to ‘Pencil’ d 5, Enable.

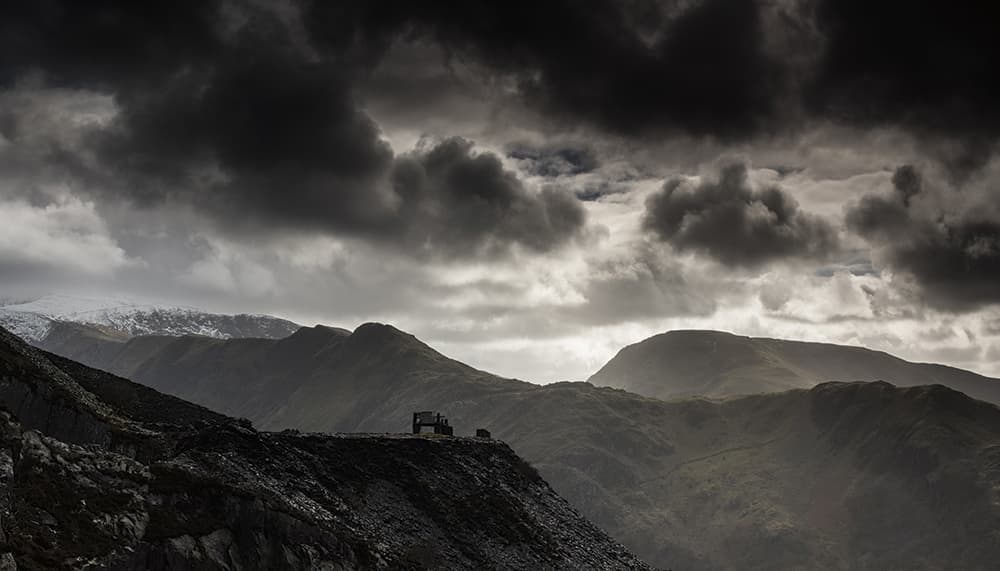
© Jeremy Walker
Mirror-up
The electronic front-curtain shutter has to be used with the mirror-up function. I use the mirror lock-up all the time anyway, as this does help to reduce blur and vibration caused by the mirror ‘slapping’ up – especially at slower shutter speeds or with long lenses. The mirror-up function is easily set without going into a menu as it sits on the camera’s top-plate on a rotating wheel, marked ‘Mup’.
There is no point whatsoever in using the electronic front-curtain shutter or mirror-up function if you are not using an electronic cable release or remote control. Any touching of the camera will potentially lead to vibration, blur or camera shake, and so firing the shutter release with your finger should be avoided.
Lenses
Your final image will only be as good as the optics allow, and because of the extreme high resolution and detail the Nikon D810 is capable of, you will need to use the very best lenses you can afford. My lenses of choice are the Nikon f/2.8 zooms from 14-24mm through to the 70-200mm and the 200-400mm f/4 as well as the 105mm micro and the 45mm tilt-shift. The results from all these lenses are very sharp, clean and crisp, and feature bags of detail. There is no point buying a D810 body and then putting cheap, inferior glass in front of it.
However, even if you are using the finest lenses possible to achieve the highest image quality, you have to use the lenses at their optimum settings. Setting a lens to its widest possible aperutre will not achieve the sharpest image, nor will stopping down past f/11, due to the effects of diffraction. All lenses have a sweet spot, and if your images are to be as good as they can be, you must find the best aperture setting. It is usually in the range of f/5.6 to f/11. It differs for each lens, so a bit of testing and research will be necessary.
As a landscape photographer, I use a tripod 99 times out of a hundred. It is a must for anyone working outdoors in this way. Yes, it slows you down, but it also gives you time to think about your compositions. Critically, it will also help to prevent camera shake. While most modern lenses have a vibration-reduction system of some kind, there is nothing better than securing your camera to a tripod and knowing that it’s not going anywhere. Not only is this important for landscape work, but it’s also crucial for macro, close-ups and when using long lenses. Fixing your camera to a tripod in these situations will help to maintain the superior image quality you can get with the D810.
The Nikon D810 produces exceptional images at high ISOs and in low light, but for the optimal image quality, I recommend users set the camera to ISO 64. This, of course, is assuming there is enough light about to maintain a reasonably fast shutter speed – one that will prevent camera shake and image blur due to the camera being disturbed in the wind. If there is a slight breeze, try to protect the camera, using your body as a wind shield.
© Jeremy Walker
Shoot Raw
For optimum image quality you should use the D810 in its Raw mode, 14-bit uncompressed (Menu> ‘camera’ NEF (RAW) recording). The JPEGs are very impressive, but for that overall control and the ability to fine-tune your images you will want to shoot Raw.
The Nikon D810 is an awesome camera offering the potential for super-sharp images rich in detail. However, you should treat the camera with the respect it deserves if you want to achieve the ultimate rewards. This camera is a precision tool and should be used as such. Take the time to set the camera up and learn how to make the most of its incredible capabilities and you will not be disappointed.
Setting up your Nikon D810 for the highest quality landscape images
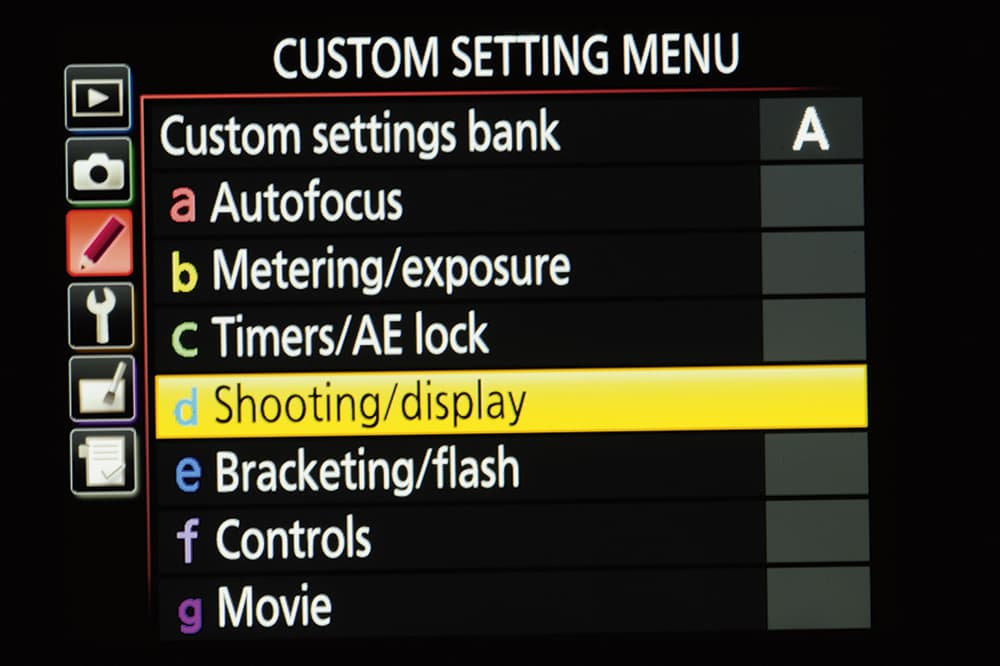
Step 1
Press the menu button on the back of the camera and go to the Custom Setting Menu or ‘pencil’ icon. Scroll down to ‘d’ Shooting/Display and then toggle right.
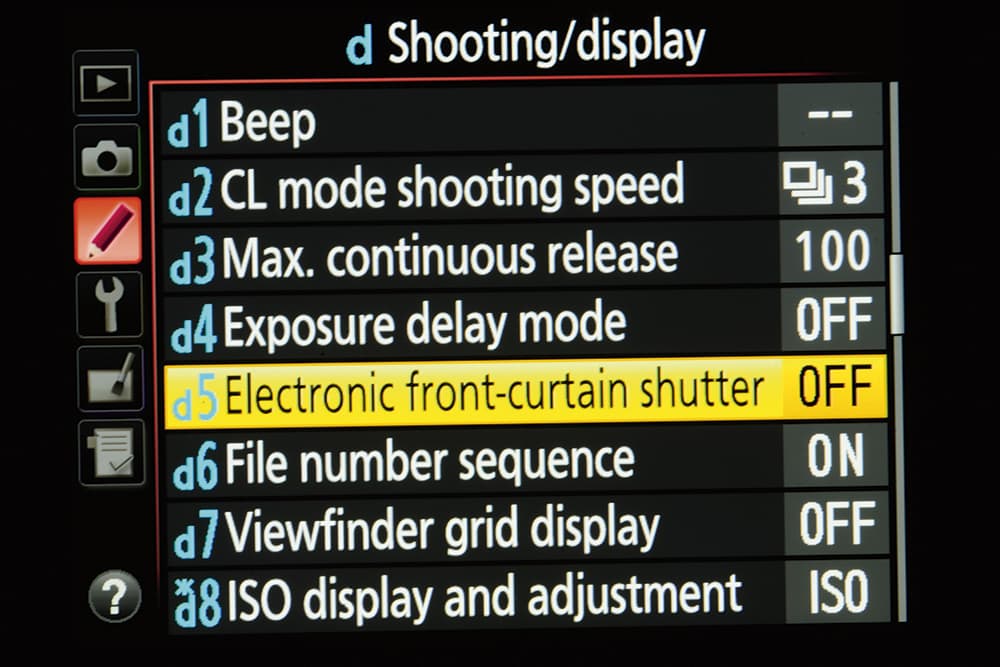
Step 2
On the ‘Shooting/Display’ menu, scroll down to ‘d 5’, Electronic front-curtain shutter and on the right of the menu screen it will say OFF. Toggle right.
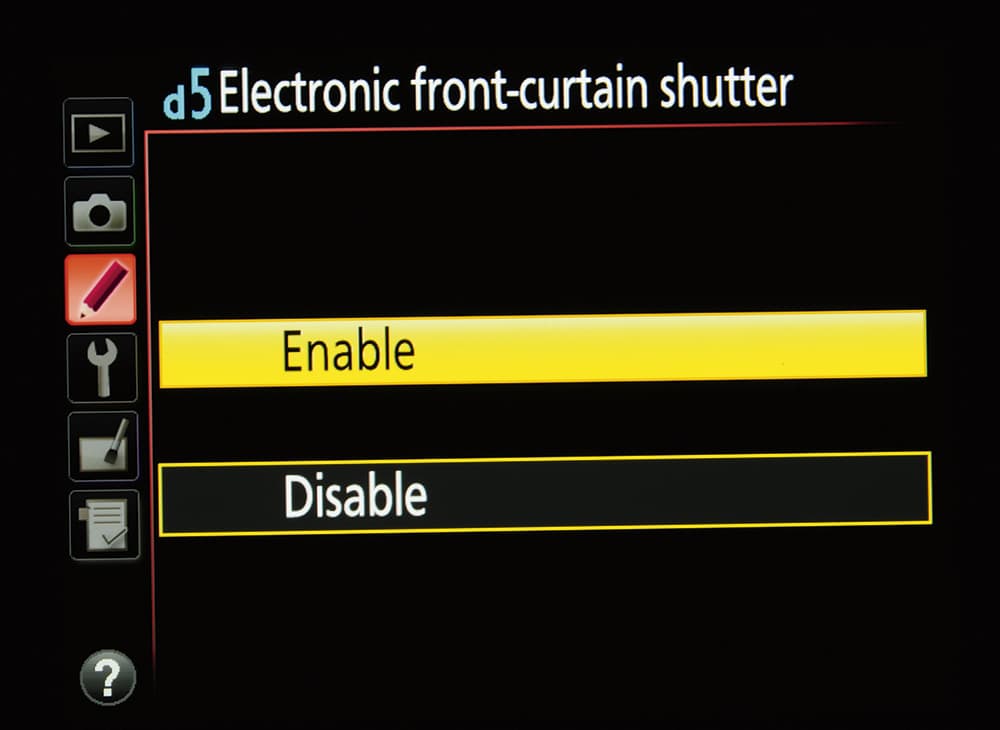
Step 3
You will now have a screen titled ‘d5 Electronic front-curtain shutter’ with the words Enable and Disable. Toggle up and highlight ‘Enable’, and press the OK button. The electronic front-curtain shutter is now set until you choose to disable it in the menu.
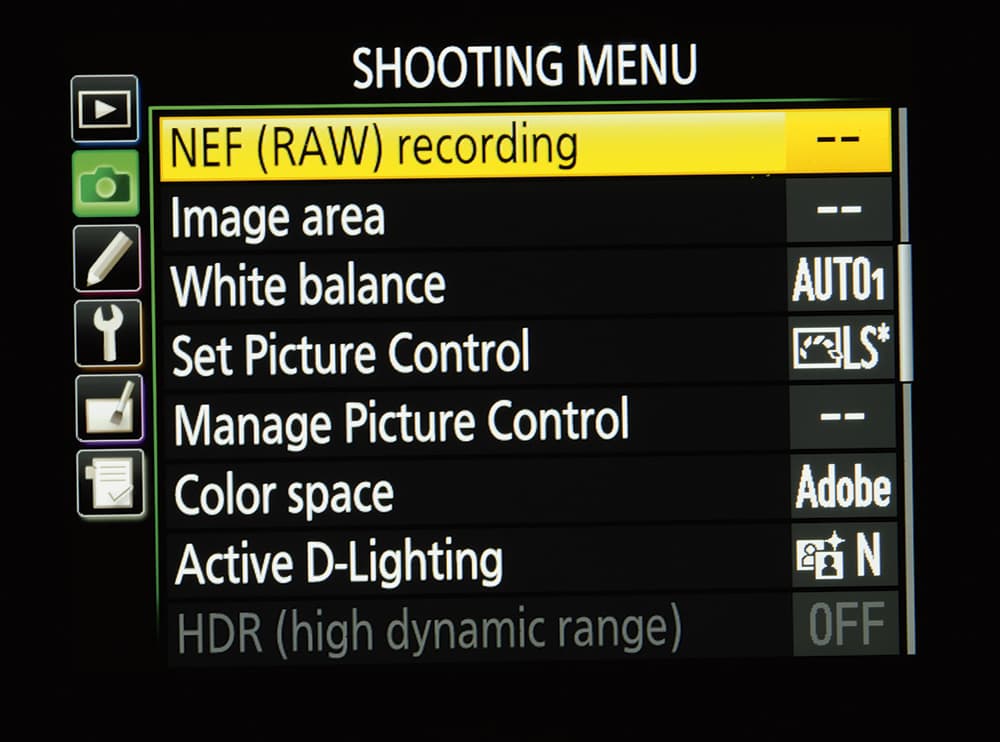
Step 4
Return to the ‘pencil’ icon and scroll up to the ‘camera’ icon. The menu will be titled Shooting Menu. Toggle right to highlight NEF (RAW) recording.
Step 5
Toggle right again to bring up a menu NEF (RAW) recording and then highlight ‘Image size’ and scroll right. You have a choice of size for your Raw files: RAW L and RAW S. Select RAW L for the largest possible Raw file size and hit OK. You will be returned to the NEF (RAW) recording menu. Highlight NEF (RAW) bit depth and scroll right.
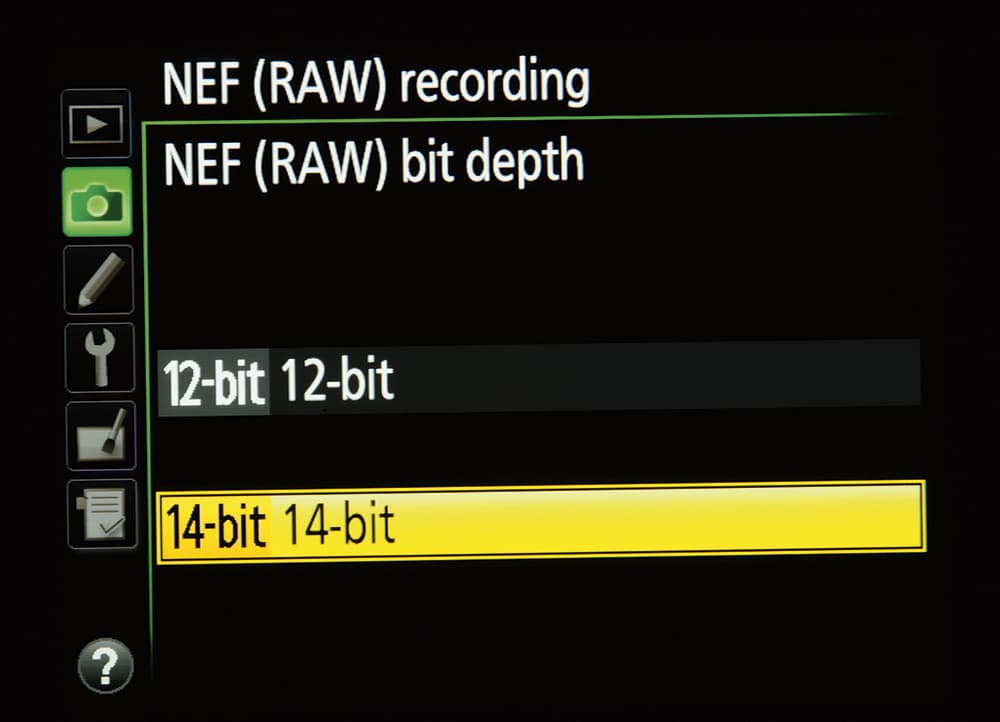
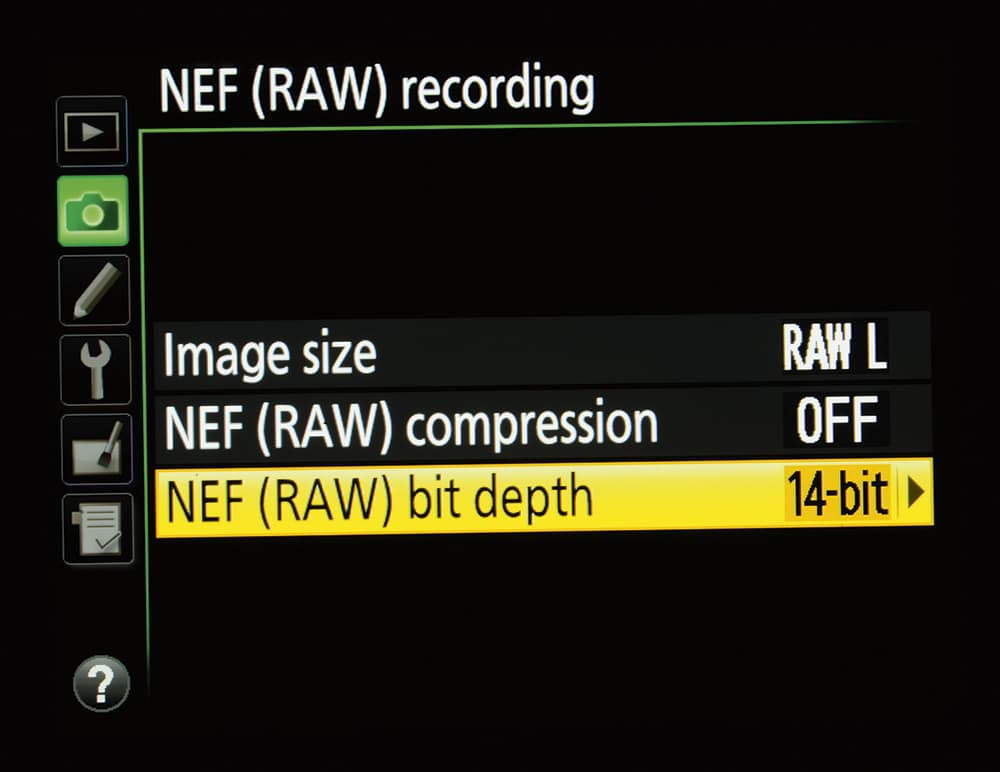
Step 6
The menu will give you a choice of 12-bit depth or 14-bit depth. Highlight 14-bit depth for the highest quality.
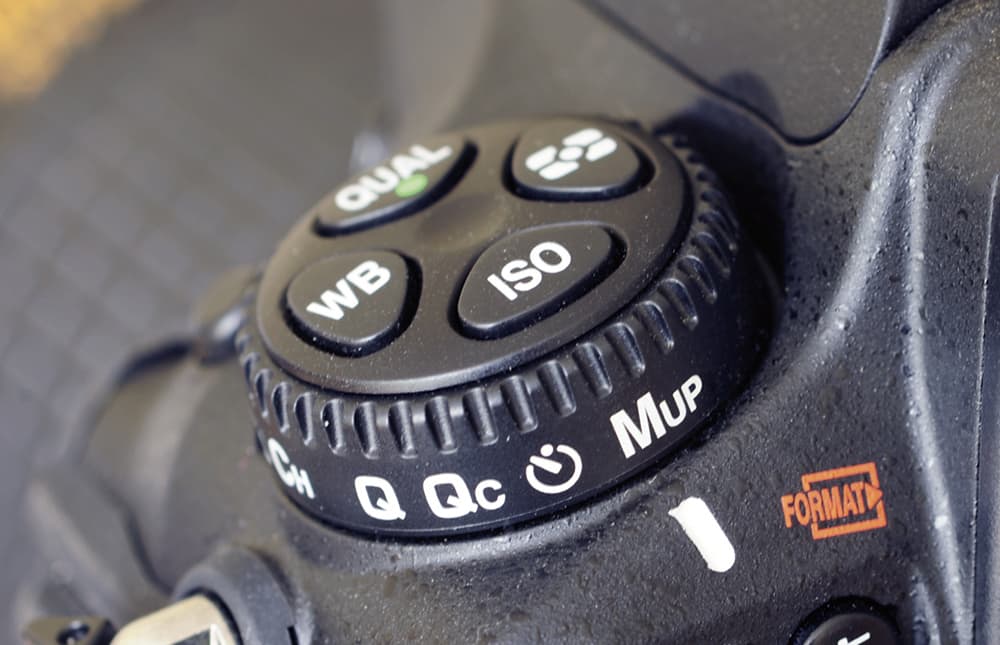
Step 7
In conjunction with the electronic front-curtain shutter you must use the mirror-up lock. This is located on the top left of the camera on a rotating wheel. Depress the small button at the front of the wheel and rotate the wheel until the ‘Mup’ symbol is in line with the white mark. Mirror lock-up will now be activated.


