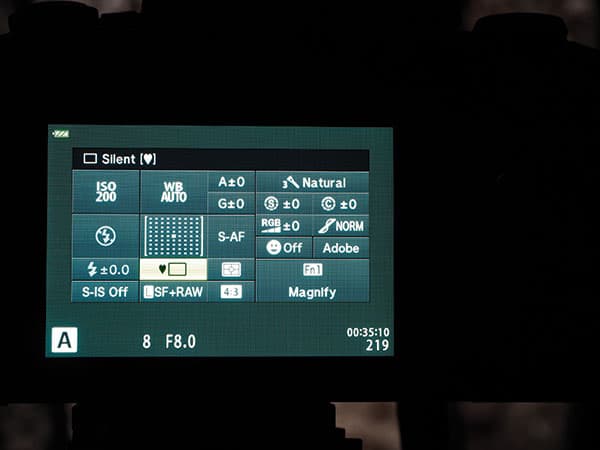
Not that long ago, cameras were relatively simple affairs – two rings around the lens for aperture selection and focusing, a dial for setting shutter speeds, another for adjusting the ISO, and a shutter release. But design and technical sophistication have come a long way since then.
Now, cameras are really computers for taking pictures, crammed full of the latest technology. In recent years, autofocus has become commonplace (with a multitude of focus points available to the user at the touch of a control), shooting speeds of 5fps or more are standard fare and the ability to shoot at high ISOs is taken for granted. As photographers, we have become spoilt, but our appetite for technological innovation never seems to be satisfied. And camera manufacturers are only too happy to oblige – adding more and more features at every camera release or firmware upgrade.
Do we need these features to make us better photographers? No, of course not. It was and is possible to get great shots with very simple equipment. But (and it is a big but) many of the features built into 21st-century cameras make life a lot easier, almost guaranteeing a successful result in terms of technical achievement. For example, multi-pattern metering systems have become so sophisticated and so effective that 99.9% of the time, left to their own devices, they will produce an acceptable exposure.
Importantly, by reducing the amount of time and effort the photographer has to invest in achieving technical perfection allows more energy to be devoted to the creative process.
Based on my experience of running workshops for Olympus, I know that when photographers are shown some of the OM-D’s features, they are impressed and enthusiastic about the potential impact on their photography. But many users are not aware of all the facilities available to them before coming on the course. This is the potential downside of technological sophistication – some useful features are buried away in the menu system, discovered only by the avid reader of camera manuals.
With this in mind I want to mention three features of Olympus cameras that users might not be aware of or have not tried out. Please note that the camera needs to be operating with the latest firmware for these features to be accessible and functioning as described.
Hidden Olympus Features: Keystone Compensation

Without keystone correction
This feature offers in-camera correction for converging verticals – useful for architectural shots to avoid photos with buildings looking as if they are leaning over or for keeping elements in the landscape (e.g. trees) appearing upright in the final image. In the past this could only be achieved by using the tilt/shift and rise/fall features of a large-format camera or by buying an expensive and purpose-built tilt/shift lens for a DSLR.

With keystone correction: Converging verticals are a common problem in architectural photography. Using the Keystone Compensation function allows you to correct this in camera
With the OM-Ds, this can now be carried out in camera using software corrections by employing two methods, either 1) while shooting using the controls on the camera or 2) using the RAW/JPEG edit function while viewing images in playback mode. See Step by Step 1 (left) to find out how to use the first method.
To use method 2, press the play back button and select the image you want to adjust. Press the OK button and select either Raw file or JPEG edit, then press OK again. Navigate to Custom 2 and enable Keystone Compensation. Press the info button and make the changes to the image using the control dials; once you’re happy, press the OK button twice and the changes will be applied.
This feature is available on the Olympus E-M1, E-M5 II, E-M10 II and PEN-F cameras.
Step by step: Keystone Compensation while shooting
1. Turn Keystone Compensation on in Shooting Menu 2.
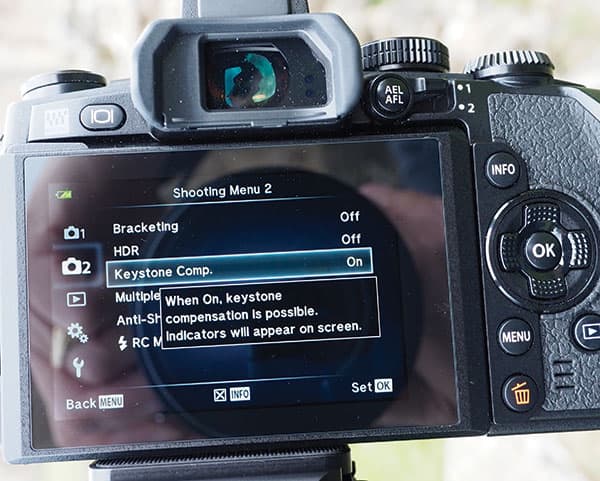
2a. Frame the shot and adjust the effect in the display using the front and rear dial. Select the area to be recorded using the directions buttons (located around the OK button).
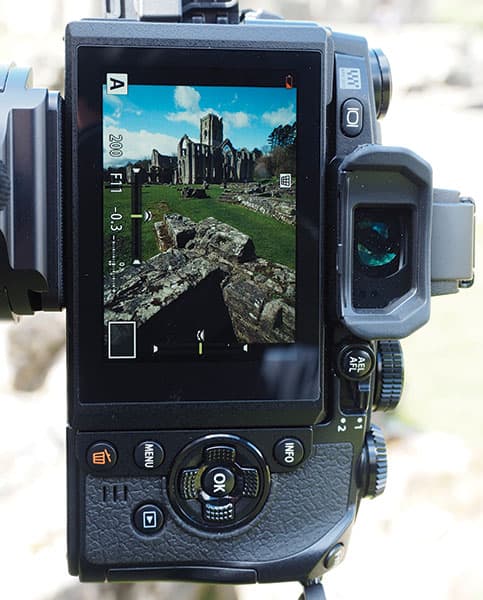
2b. To adjust aperture, shutter speed, and other shooting options while keystone compensation is in effect, press the INFO button to view a display other than keystone compensation adjustment. To resume keystone compensation, press the INFO button until keystone compensation adjustment is displayed.
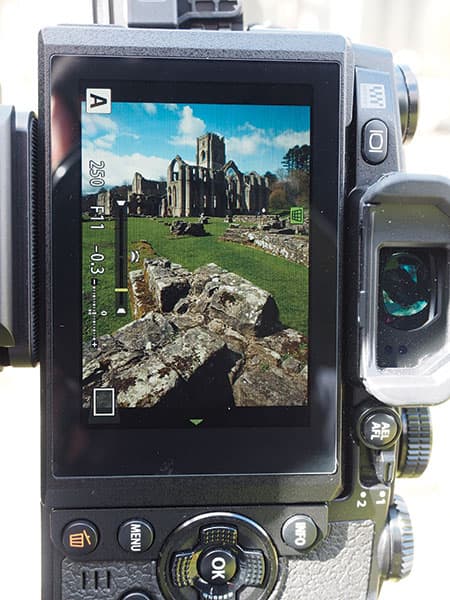
3. Take the shot. Remember to turn off Keystone Compensation in Shooting Menu 2.

Hidden Olympus Features: High Resolution Composite Mode

High Resolution Composite mode produces very high-quality, detailed images
Introduced with the E-M5 II model, this mode employs the in-body image stabilisation system to move the sensor by half a pixel for a maximum of eight sequential exposures and then blends those in camera to produce a 40MP JPEG file or 64MP Raw files. Three file types are produced: a Raw file, a JPEG and an ORI file (the latter is one of the eight Raw files used to compose the final blended image).
This mode produces very high-quality detailed images and is ideal for still-life studio shots, macro photography or landscape images where there are no moving elements in the frame.
The camera does need to be mounted on a stable tripod and nothing can move between each of the eight exposures (if they do then they can’t be blended successfully and artefacts become apparent in the final image). So, for example, it’s not suitable for landscapes where clouds, water or windblown foliage appear in the shot.
There are other limitations, too. A maximum of ISO 1600 is required, shutter speeds cannot exceed eight seconds and an aperture smaller than f/8 cannot be used.
However, within these limitations, this is a very useful innovation that produces higher resolution files with more detail and the added benefits of eliminating moiré and reducing noise at ISO 1600.
The only OM-D that has this feature at the current time is the E-M5 II (although the recently released PEN-F can also shoot in High Res, producing 50MP JPEG and 80MP Raw files as well as adding the ability to use this mode with flash).
Step by step: High Resolution Composite Mode
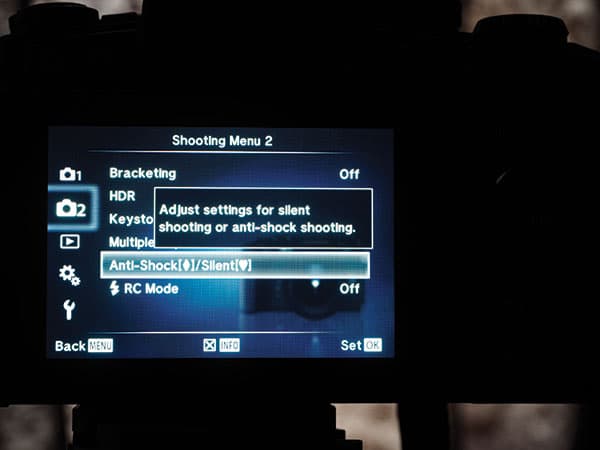
1. Mount the camera on a tripod and go to Shooting Menu 2; select High Res Shot and then choose the delay period (ideally use a cable release but if not select a 2 second delay to avoid vibration).
2. Ensure that the High Res Shooting mode is selected in the Super Control Panel (found in the ‘Sequential Shooting/Self timer’ option).
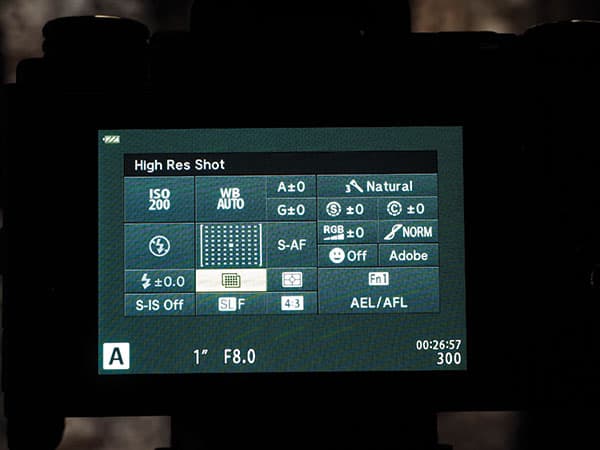
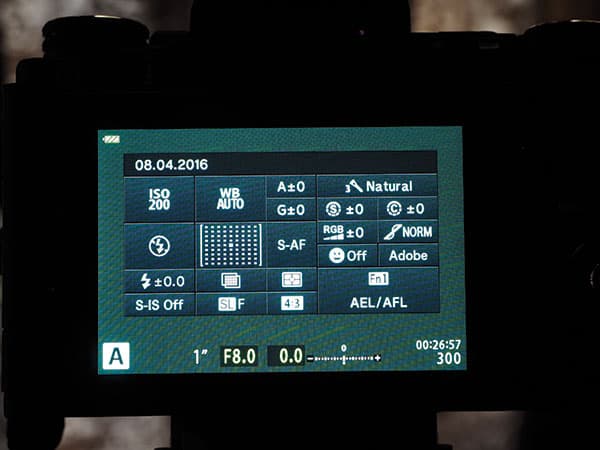
3. Ensure the ISO doesn’t exceed 1600, the aperture f/8 and the shutter speed 8 seconds; take the shot!
Hidden Olympus Features: Silent Shooting Mode

Shot using silent mode
Another feature introduced with the OM-D E-M5 II is the silent shooting mode – once turned on, the camera becomes virtually inaudible (it also turns off AF sounds). Fantastic for wildlife, wedding, performance or candid street photography where any noise could be either disruptive to proceedings or alert the subject to the fact that a photograph is being taken and therefore spoil the moment.
When using the silent shutter, sequential shooting of 11fps becomes available and shutter speeds from 1/8sec to 1/16000sec can be utilised. The latter also enables a fast lens to be used wide open in bright sunlight without employing an ND filter.
However there are a couple of disadvantages – firstly, with fast moving subjects you may see rolling shutter artefacts and smearing in the final photograph; secondly, using the silent shutter under fluorescent or LED lighting can cause stripes to appear in the image. Neither of these, however, detract from the value of the mode used in the right circumstances.
Cameras with this feature are the Olympus E-M1, the E-M5 II, the E-M10 II and the PEN-F.
Step by step: Silent Shooting Mode
1. Select ‘Anti-Shock/Silent’ in Shooting Menu 2; press OK and select ‘Silent’ and then choose the interval between the shutter button being pressed and the shutter firing.

2. Select ‘Sequential Shooting/Self timer’ via the Super Control Panel and select one of the items marked ♠ using the front control dial; press OK.
