 Most DSLRs offer a variety of ways in which to view the pictures you have just taken.
By pressing the four-way control pad, or in some cases going into the menu, you can toggle between a straight view of your image only, with no distractions, or one of several other viewing modes.
Image Playback Menu – Features
EXIF
You can display the shooting data for each picture, such as shutter speed, aperture and ISO, with or without the image.
Histogram
You can view the image with its histogram, so you can check the exposure, or even with the histogram broken down into RGB colour channels.
Shadow/Highlight
This causes areas of shadow and highlight that contain no detail to show as patches of blinking colour, such as red and blue. If these areas are an important part of the image, you can choose to adjust the exposure slightly to record some detail in these areas.
Auto Rotate
You can choose in the menu how you want the camera to display pictures that you shot in the portrait (vertical) format.
If you leave them as shot you’ll have to turn the camera 90° to view pictures you shot in this way.If you’ve shot a mix of orientations you can easily find yourself turning the camera back and forth.
If you select ‘Auto Rotate’ in the menu it will turn all pictures so you can view them the right way up without having to turn the camera. The downside is that portrait format images will be much smaller, as the height of the LCD screen is much shorter than its width.
Image Playback Menu – Image magnification
 Thumbnails
You can choose to display one image at a time or use the zoom button to display multiple images as thumbnails – either four, nine or 72 at a time, depending on how far out you zoom.
This is useful for finding an image you may have taken a few shots before, and saves on scrolling time. When you see the image you may want, select it to view it full screen.
Zooming in
With the image displayed full screen, pressing the zoom button enables you to magnify the image so you can check the sharpness, depth of field and fine detail.
Keep pressing to keep zooming, and use the four-way control pad to scroll around the image to get to the bit you want to see.
Image Playback Menu – Editing
Deleting
The process of selecting which of your pictures to keep and which to delete is best done later on your PC when you have a bigger monitor on which to base your decisions, but sometimes you just know when you’ve shot a dud and if space on your memory card is at a premium you may want to weed out the obvious failures on the spot. You can delete single frames or the whole card.
Protecting
To prevent accidental deletion of your best shots, press the DPOF button (marked with a key icon) when your image is displayed. This locks the image so it can’t be deleted until you go and unlock it.
Viewing externally

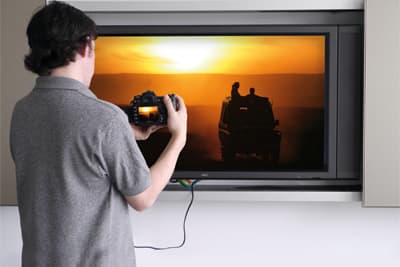
You can use the USB port on the camera to connect to a PC or the A/V output to connect directly to a TV, which will enable you to see the pictures much bigger.
If you set the camera to slideshow mode it will automatically scroll through your images. Bear in mind, though, that the image quality of pictures displayed on a TV may not always be great, due to compatibility issues.


