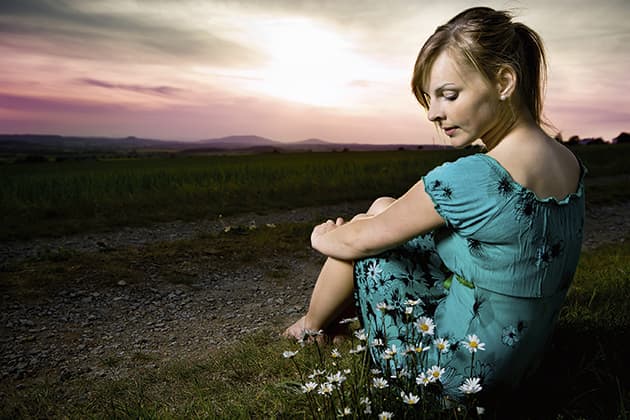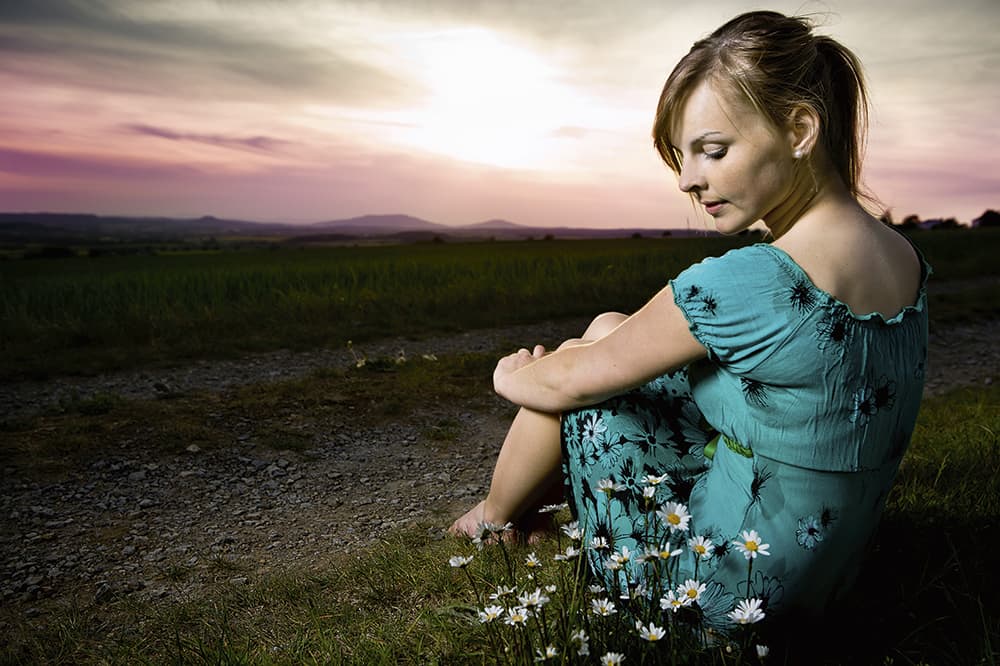
Slow sync flash is useful at dusk – it keeps the shutter open slightly longer, brightening dimly-lit backgrounds behind the subject
The word ‘photography’ is actually an amalgamation of two ancient Greek words: photos, which translates as ‘light’, and graphos, which translates as ‘writing’. The literal meaning of ‘photography’ then, can be taken as ‘writing with light’. Despite advances in technology and the transition from film to digital, this same basic concept applies just as much as it always has. To be a successful photographer and make great images one of the most important things you need to master is control over the light.
In a perfect photographer’s world the ambient light would always behave exactly as you want, switching from hard and contrasty to soft and diffused at the flick of an imaginary switch. Of course in the real world this isn’t even remotely possible and to become a skilled photographer you need to be able to operate in a range of conditions, including when the ambient light is too bright (i.e. in the midday sun) or in too short supply (i.e. when shooting at night, or in dimly lit interiors). In both of these cases being able to create your own light and shape it to your own particular requirements using flash often makes the difference between an average image and a great one. This is especially true when photographing people, but applies equally to inanimate subjects too.
Flash is often – and rightly – considered something of a minefield, and certainly it takes a lot of time, experimentation and practice to get things right. However, once things click into place you’ll discover that flash is one of the most flexible, creative and fun photographic techniques you can call upon. Eventually, once you’ve mastered the art you’ll be able to instinctively see how you can turn potentially good images into great ones by painting your own light into the scene. And before anyone accuses us of getting carried away remember that flash doesn’t have to be overpowering or in-your-face either; indeed the best flash photographers are those who’ve learned how to seamlessly and subtly blend the ambient light with man-made light to create something truly unique.
We will take a closer look at the types of flashgun that are available to buy, and highlight some of the key features and flash technologies to be aware of.
Types of flash
Broadly speaking, there are three different types of flash: the tiny pop-up units that are built into most cameras; independent hotshoe flashguns (sometimes also called speedlights) that attach directly to your camera via its hotshoe or accessory plate; and the larger flash heads that require mains power or their own bespoke battery packs, and which are generally designed for use in a studio environment, or by professionals shooting on location. In this guide we’ll focus primarily on the first two types as these are what the vast majority of photographers use on a daily basis. While flash heads and studio kits provide much more power than pop-up units or flashguns, they are also large and quite cumbersome. In any case a decent hotshoe flashgun will generally prove more than ample in most situations.
While built-in and pop-up flash units are fine for taking snapshots and candids with, if you want to get creative with flash then you’ll need to invest in a hotshoe-mounted flashgun. Not only will a dedicated flashgun unit provide more power than your camera’s pop-up flash, you will also find it to be far more flexible, allowing you to control, direct and shape the light it emits to your own specific requirements.
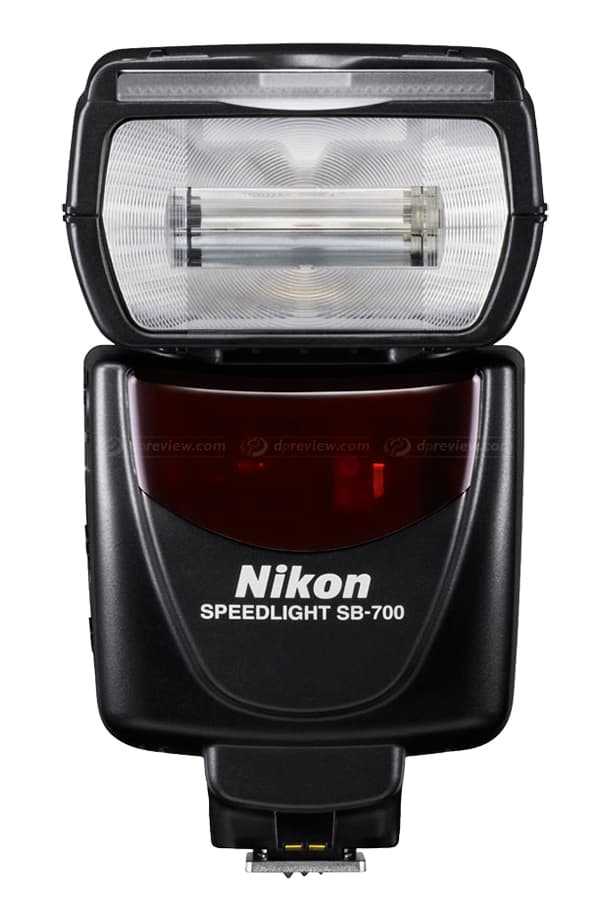
Nikon SB-700
Basic flashguns can be bought from as little as £70 if you shop around, while at the other end of the scale prices for more advanced and flagship models extend up to £500 and beyond. If you’re just starting out you really don’t need to spend that much though. If you can set your budget to around £150-300, then you’ll have no trouble finding a powerful, feature-rich flashgun that’ll offer enough power and flexibility for you to develop your skills with. You’ll need to ensure that it’s compatible with your camera, of course, otherwise you run a risk of damaging the electronics inside the flash unit or your camera.
All of the major manufacturers offer their own flashgun ranges, in addition to which a number of reputable third-party specialists such as Metz, Nissin and Sunpak manufacture devices that are individually tailored to work with all the main camera brands.
Simple things to look out for when comparing models include overall build quality and resistance to dust and moisture. Can the head be tilted or swivelled so that you can bounce the light it emits off walls and ceilings for softer, more diffused light? Also, check to see if it comes equipped with a motorised zoom head as this enables the flash element to move forward or backwards so that it can match the focal length of your lens for more accurate results. Most mid-range flashguns tend to provide a zoom range of 24-105mm, although a few models extend a bit further. Since just about all flashguns rely on four AA batteries for their power it’s worth investing in a set of rechargeable batteries and a charger, as this will save you a lot of money in the long run. Nickel-metal Hydride (NiMH) batteries tend to be the preferred choice, with Panasonic’s Eneloop brand a popular option.
Once attached to your camera all flashguns employ some form of TTL (Through The Lens) metering in order to calculate the correct amount of light that needs to be supplied. The naming conventions used to describe this technology vary between manufacturers (Nikon calls it i-TTL whereas Canon calls it E-TTL), but ultimately all forms of TTL flash metering are fully automatic and rely on your flashgun communicating with your camera to determine the correct power settings. If, for any reason, the TTL metering is fooled into supplying too much or too little power, then all but the most basic flashguns usually offer some form of flash compensation that allows you to dial the power up or down accordingly. Be aware that using a flash off-camera in TTL mode can often be problematic, especially if the two devices are placed at different distances from the subject. For this reason most off-camera enthusiasts prefer to use their flashguns in manual mode, as this provides more consistency. If you want to go down the off-camera road then be sure to buy a flash that offers a manual power mode.
Sync speed
One important thing to grasp about the use of flash is native sync speed. This refers to the fastest shutter speed that can be used in combination with the flash. For basic compacts this is often limited to around 1/60sec, however for advanced compacts, CSCs and DSLRs it’s usually around 1/200sec or 1/250sec. If you’re shooting in shutter-priority or program mode and try to raise the shutter speed above the camera’s maximum sync speed then the camera will automatically override you and lower it back down to the maximum sync speed.
There is a way around this, however, which is to use what’s called High-Speed Sync (HSS). This feature is generally only found on more advanced cameras that employ a mechanical shutter with dual curtains. The basic premise behind it is that rather than emit a single pulse of light when both curtains are fully open, the flash instead emits a stream of high-speed pulses while the sliver of open space between the front curtain and rear curtain travels across the sensor. The main benefit of HSS is that it allows you to shoot with flash at much wider apertures in brighter conditions than would otherwise be possible. The main drawback is that higher shutter speeds reduce the amount of ambient light that reaches the sensor, which can result in darkened backgrounds in some situations.
Flash modifiers
Once you’re up and running with a portable flashgun, your next step will be to learn how to shape and control the light that is emitted from it. This is achieved with the aid of dedicated flash modifiers such as diffusers, softboxes and umbrellas. While each individual type offers its own particular strengths and weaknesses, the main thing to remember is that virtually all of them serve the same basic purpose: to diffuse and soften the light in order to reduce harsh shadows. Different shapes and designs will also alter the direction in which the light travels, generally either focusing it into a narrow beam (e.g snoots) or spreading it as wide as possible (e.g shoot-through umbrellas). Softboxes are considered by many to be a good halfway house between the two as they diffuse and soften the light from your flashgun, while spreading it in a more controllable way than an umbrella. This makes it easier to illuminate specific areas of your frame without too much light spilling out into other areas.
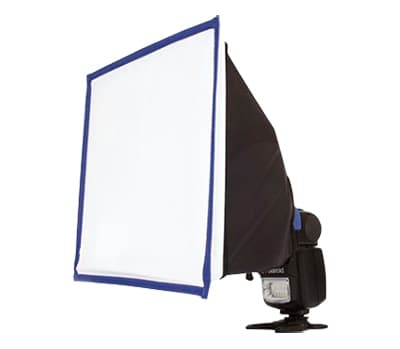
Lastolite Ezybox Speed-lite 2 softbox
Specialist flashguns
While traditional flashguns are ideal for general purpose photography, many macro and portrait specialists prefer to use either ringflash or dedicated macro flash devices instead. These work in exactly the same way as traditional flashguns, but look markedly different. A ringflash is designed so that it sits on the front-end of a lens with the flash elements encircling the whole lens. This has the effect of removing shadows from small subjects that are being photographed close up, hence their appeal to macro specialists. Some professional portrait photographers also like using ringflash devices because of the distinctive circular catchlights they produce in the model’s eyes.
Flash modes
While it’s worth investing in a decent flashgun to develop and refine your flash skills with, it’s also worth getting to grips with the individual modes offered by your camera’s pop-up flash unit. The number of flash modes offered does vary between cameras, however, at the very least you can expect to find a fully Automatic mode whereby the camera automatically calculates how much flash power is required. While it’s useful for shooting off-the-cuff candids with, it’s by no means foolproof and there will be occasions when your camera gets things wrong. Thankfully, most cameras offer a range of alternative settings you can employ in order to get the shot you want.
While shooting in the midday sun guarantees plenty of ambient light, it often results in darkened eyes and unflattering shadows across the face when shooting portraits. Shooting into the sun, meanwhile, will result in an image where the subject is at least partially if not wholly silhouetted. One way to alleviate these problems is to use Forced Flash mode. This is commonly referred to as Fill Flash and is used to eliminate unsightly shadows to produce a much cleaner and flattering image of your subject.
If you’re shooting at dusk and want to retain some of the ambient light in the background then slow-sync mode is a useful feature that keeps the shutter open slightly longer. This has the effect of brightening dimly-lit backgrounds behind your subject. It can also be used to good artistic effect when your main subject is moving and you want to want to capture some of that movement.
At some point we’ve all taken flash-powered portraits where the subject’s eyes take on a demonic red glow. This is due to the light from the flash bouncing off their retina, and is most common when the subject is positioned close to your camera. It’s relatively easy to fix in post production, however if you want to try to avoid it altogether most cameras offer some kind of Red Eye Reduction mode. This works by shining a pre-flash light into the subject’s eyes a split-second before the main flash fires. This has the effect of narrowing the subject’s pupils, which reduces the chance of redeye. If you’re using a hotshoe-mounted flash, another way to avoid it is to bounce the flash off a wall or ceiling.
If you’re shooting a moving subject and want to capture a sense of that movement then Front Curtain Sync and Rear Curtain Sync are two handy flash modes to call on. The former fires the flash as soon as the first curtain opens, while the latter fires it just before the rear curtain closes. In terms of results the former creates a blur in front of the moving subject, while the latter creates a blur behind it. Using a slower shutter speed increases the effect.
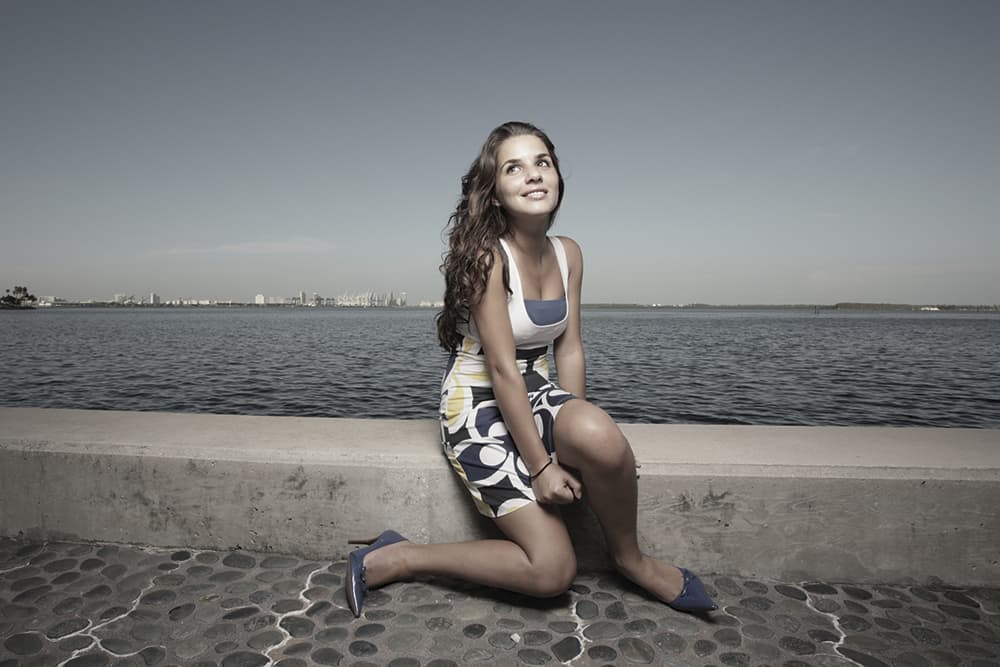
Fill in flash is useful on bright days with the sun behind the subject, as it avoids the subject being left in shadow
Guide numbers
Generally speaking the more expensive a flashgun is, the bigger and more powerful it will be. To help compare the power output of individual devices, all manufacturers supply what’s called a Guide Number for all of their models, which is usually abbreviated to GN. In the simplest possible terms, the higher the GN figure the more powerful the flash will be. The GN is calculated by multiplying the distance between the flash and the subject it’s illuminating by the f-stop used to produce an optimally exposed image of that subject. This can be simplified to: GN = distance x f-stop. Most manufacturers calculate their GN figures using a standard test set-up of ISO 100 with the flashgun’s internal zoom set to 105m, the notable exception being Nikon, which supplies figures using the 35mm flash head setting.
Off-camera flash
As well as being mounted on the hotshoe to provide direct, forward-facing light, flashguns can also be used off-camera and placed virtually anywhere. This gives you total control over the direction of the light, so you can light your subjects in much more interesting ways. You’ll want to trigger your flash so that it fires as you press the shutter button, and the most common way is to use wireless flash triggers. These generally come in two parts: a commander unit that attaches to your hotshoe, and a receiver unit that attaches to the flash. Some cameras – for example those within Nikon’s Creative Lighting System and Canon’s Wireless Flash System – can even trigger a flashgun mounted off-camera via infrared using the camera’s pop-up flash unit. Unlike radio-based triggers these require a clear light of sight. The Strobist website (www.strobist.com) is a great resource on using off-camera flash.

