


Shallow depth of field can help to draw the viewer’s eye to a precise part of the frame
Minimising depth of field in your photography has many benefits: it can help you to play down a messy or otherwise distracting background; direct the viewer’s attention to a precise area of the frame; suggest distance between elements; or transform background elements into an abstract wash of colour. But, more importantly, images with a shallow depth of field are also pleasing to look at, and it’s easy to see why.
If you hold your thumb out in front of you and focus on the tip, you will quickly notice how much of the surrounding area is out of focus. Our eyes are accustomed to a shallow depth of field, and this familiarity implies that we don’t have to work too hard to ‘read’ a picture with vast areas that are out of focus. By contrast, when we see a shot with an unusually deep depth of field, our eyes can sometimes dart around looking for a place to rest, which can be unsettling.
In order to minimise depth of field, we first need to understand what is meant by the term ‘depth of field’. In short, only the exact point we have chosen to focus on – and anything that falls within the same focal plane – will be completely sharp; moreover, an area in front of and behind this point will also appear to be acceptably sharp. It’s important to note that the transition between sharp and unsharp areas is gradual rather than abrupt.
This zone of acceptable sharpness is known as depth of field, and there are three primary ways to control it: we can adjust the size of the aperture; change the focal length of the lens; or alter the camera-to-subject distance. We can also use two or more of these methods in combination.
Method 1. Adjust aperture size
Going back to basics for a moment, we know that the easiest way to alter depth of field is to change the lens aperture. In short, wide apertures (represented by low f-numbers) result in shallow depth of field, and narrow apertures (represented by high f-numbers) result in deep depth of field. But how do we determine precisely how this change in aperture will affect the end result without taking a picture first?
When you compose a picture via your DSLR’s optical viewfinder, your camera uses the maximum aperture of the lens to allow you to see the brightest, clearest view of the scene in front of you. The aperture you have dialled in does not come into play until the shutter-release button is pressed. But if you compose a picture using an electronic viewfinder or the LCD screen on the back of your camera, you will see the effects of changing the aperture in real time.
In order to do this, you need to activate the depth of field preview button, which is typically located just below the lens mount (although not all DSLRs have one). When you press this button, the aperture stops down to the setting you have dialled in, allowing you to see which areas will be in focus and which will be blurred. If you are using a lens with a depth of field scale on the barrel, you can also pre-visualise the extent of the depth of field by referring to the markings.
Method 2. Change the focal length

You can turn the background into a wash of colour by throwing it out of focus
Another common way of controlling depth of field is to change the focal length of the lens. In general, the longer the focal length, the shallower the depth of field, and the shorter the focal length, the greater the depth of field.
So a 200mm lens focused at 15ft (4.5m) will appear to produce less depth of field than a 20mm lens focused at 15ft (with both lenses set to the same aperture). But the difference isn’t quite as dramatic as you might think. In reality, if your subject occupies exactly the same proportion of the frame in both cases, the difference in depth of field will be quite marginal.
You can test this yourself by using two lenses with different focal lengths and shooting the same subject at the same distance and using the same aperture. Crop the image taken with the shorter focal length so the subject occupies the same proportion of the frame as it does in the image taken with the longer focal length. Now magnify the image and examine the extent of the depth of field. There is a difference, of course, but it’s not as dramatic as you might think, and much of this has to do with the way longer lenses magnify background blur.
Method 3. Alter the camera-to-subject distance

Using a shallow depth of field can help you to play down a distracting background
Depth of field is also affected by the camera-to-subject distance. The closer you focus the lens, the shallower the depth of field, and the further away you focus the lens, the greater the depth of field you can achieve.
For example, if you attach a 50mm lens to your camera, set the aperture to f/8 and focus on an object 2m (6.5ft) away, the acceptable zone of sharpness will be shallower than that if you use the same lens at f/8 and focus on an object 10m (32ft) away. This method of controlling depth of field is particularly relevant to macro photographers, who are sometimes centimetres away from their subjects. Even at small apertures, such as f/22, the zone of acceptable sharpness can often be measured in millimetres.
Just to confuse matters, this ‘rule’ is slightly bent when you train your lens on a subject that is a long way from the camera, such as a distant mountain range. In this instance, depth of field can also be shallow. The reasoning is that when you focus on a distant object you often use a telephoto lens and, as we have seen, lenses with longer focal lengths tend to give the appearance of slightly shallower depth of field.
Method 4. Sensor size matters
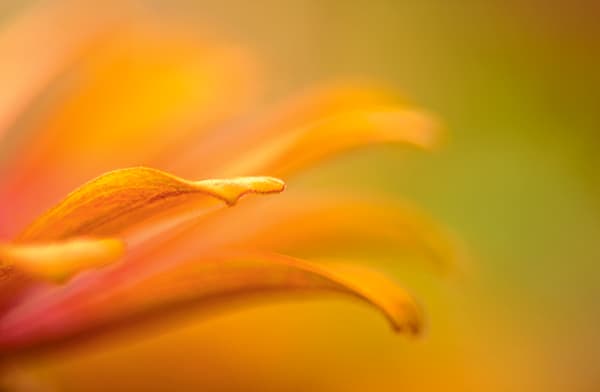
When the camera-to-subject distance is short, the zone of acceptable focus is minimal
As a basic rule, as sensor size increases, the depth of field decreases at any given aperture. You will need progressively narrower aperture sizes to keep the same depth of field on larger sensors. A shallower depth of field may be more desirable for portraits because it improves subject isolation and background blur. Conversely, a larger depth of field is widely used for landscape photography, as it leads in the eye into the scene and gives a greater sense of distance. When using an APS-C sensor, which involves a 1.5x crop factor compared to full frame, the focal length is effectively increased, as is the depth of field. This is not to say that full-frame sensors are better for portraits and APS-C sensors are better for landscapes; it’s just something to remember when deciding how to set your depth of field and choice of lens.
Remember…
In a picture, the zone of acceptable sharpness falls where the viewer will look first, so getting it right is important. Take your time and experiment.


