
One of the most interesting and ingenious photography-related 3D printing projects we’ve found is not actually a 3D-printed camera, but a digital conversion of an old film camera that uses 3D-printed parts.
Ollie Baker, an 18-year-old physics student, decided to use the money he was awarded from a scholarship fund to convert a Konica Auto S3 rangefinder camera into a digital camera.
The Auto S3 was introduced in 1973, priced £82.90, and is regarded by many as one of the best compact rangefinder cameras of the 1970s. Ollie chose a rangefinder camera for his conversion project because of its smaller dimensions compared to an SLR.
He was also concerned that the mirror mechanism of an SLR could get in the way of the digital-image sensor and its protruding anti-aliasing (AA) filter. The Konica was specifically chosen for its excellent 38mm f/1.8 six-element lens, the internal leaf shutter and the clear viewfinder that can be adjusted for a different focal plane – an absolute necessity for the conversion.
When selecting the ‘donor camera’ for the digital components, a compromise between image quality on one hand, and cost and size on the other, had to be found. A camera with a full-frame sensor would have offered the same field of view as the Konica, but would have been too large and expensive. Therefore Ollie settled on a Sony NEX-5, one of the smallest mirrorless system cameras available with an APS-C sensor.
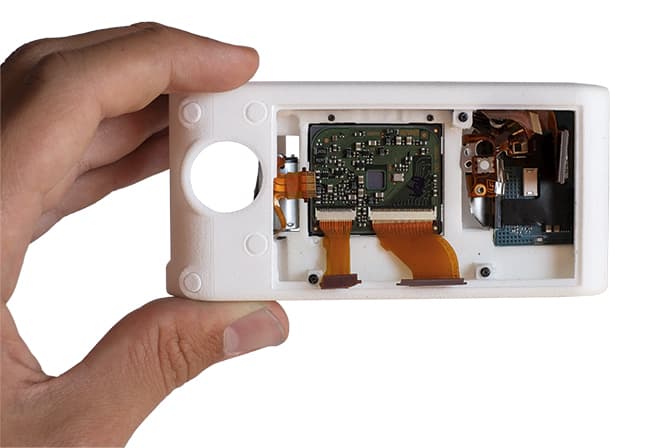
A 3D-printed back was used to house the sensor, circuitry and SD-card slot
Ollie removed the circuit board, image sensor, SD card slot, battery connector and screen from the NEX-5 for installation into the Konica.
The converted camera would use the S3’s original leaf shutter so the Sony’s shutter was not needed. Unfortunately, it still had to be transferred to the new design as the camera module would show an error message without it.
The project’s biggest challenge was mating the Sony’s digital component with the Konica’s body and lens, and this is where 3D printing came into play.
The camera’s original back was replaced with a 3D-printed version that was made from two parts and designed to hold the Sony digital components. The new back fitted perfectly into the original body, with hinges at one end and a clasp that used the Konica’s original locking mechanism at the other. The inner portion of the 3D-printed back held the SD card slot, the image sensor, motor, cogs and battery. The outer part held the screen and buttons. The Sony camera’s main circuit board was placed in between.
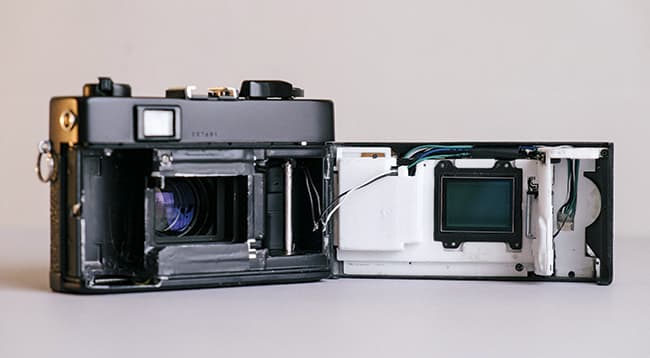
This view shows the NEX-5’s 14-million-pixel APS-C sensor fitted to the Konica Auto S3
The Konica’s original back piece was measured using a pair of vernier callipers and the measurements then used to design the replacement back using SolidWorks CAD software.
A first prototype was printed on a 3D printer at Ollie’s school, but the print quality wasn’t good enough for the detailed design of the camera back. So a second version was made by a 3D printing business in London that used the much more precise Selective Laser Sintering (SLS) printing method.
The resultant part was very strong and accurately printed from a nylon material. After some minor design changes forced a reprint, the new back was painted black and detailed with leatherette to blend it in with the Konica’s original parts.
In addition to designing the completely new back, Ollie converted the Konica’s film rewind wheel into the digitised camera’s power button and replaced the original shutter button with a 3D-printed version that can house a miniature electronic switch. This switch activates the digital image sensor on the NEX-5 sensor that is set to operate in bulb mode.
As on the original Konica camera, shutter speed is selected on the lens and the camera then automatically sets the correct aperture using its built-in light meter. ISO is selected on the Sony screen and then has to be adjusted accordingly on the Konica’s ISO dial to ensure the metering system works correctly.

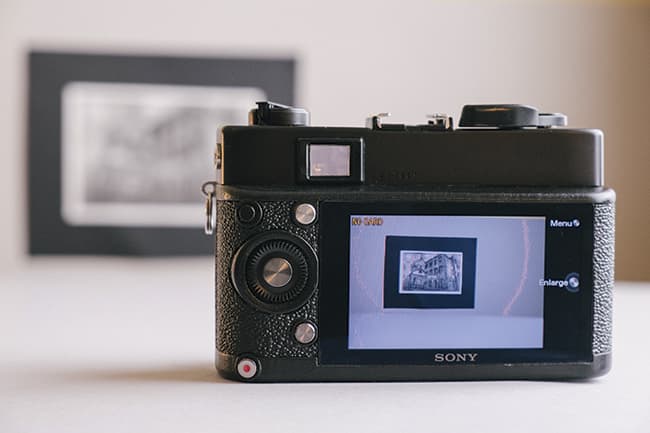
This shot was taken with the finished FankenCamera
Overall, the digitised Konica S3 works in exactly the same way as the original version would have done – the digital image sensor has simply replaced the film. There is no doubt the FrankenCamera is an amazing do-it-yourself project, even more so considering the engineer’s young age.
Getting the Sony’s digital components to work with the Konica’s film parts is an impressive feat and by no means an easy task, but arguably the project was only made possible through 3D printing. Without this method, manufacturing a customised camera back would simply have proved too difficult and expensive.
Since finishing the FrankenCamera, Ollie has not been resting on his laurels. He has started a crowdfunding project that will allow him to fund the digitisation of arguably the most famous rangefinder camera of all time, the Leica M3. He is planning to use the digital components of a Sony NEX-5 or, if possible, those of a full-frame Sony Alpha 7 camera to combine an even better sensor with the high-quality Leica optics. See Ollie’s website for more details.
Of course, 3D printing will be used to make the digital parts and the project has already reached its funding goal. The completion of the digital Leica M3 is expected in August this year. We can’t wait to see it.


