Shooting in low light often involves using higher ISOs, which can result in noisy images. Angela Nicholson looks at some of the best software for noise reduction
At this time of year in the Northern Hemisphere, the window of photographic opportunity can seem pretty narrow and unless it’s one of those rare clear-sky days, we have to embrace shooting in low light or even at night. Consequently, we often find ourselves having to push up the camera’s sensitivity (ISO) setting to enable us to shoot at the shutter speed and aperture combination that we want – especially when handholding the camera. Consequently, you may see a bit more noise creeping into your images than you do at the height of summer.
Most cameras offer a small collection of noise reduction settings for JPEGs but they can be rather crude and apply a blanket treatment so that while the sky in an image might look great, the detail of the foreground is smudged. Meanwhile, using a low setting can mean there’s more detail visible in the foreground but there’s coloured speckling visible in the sky and shadows.
The solution is to take control over how much noise reduction is applied to each image so that you can strike the right balance between concealing the noise and retaining the detail. It’s also best to do this while looking at the image either at 100% on a computer screen or at the size that you intend to use it at.
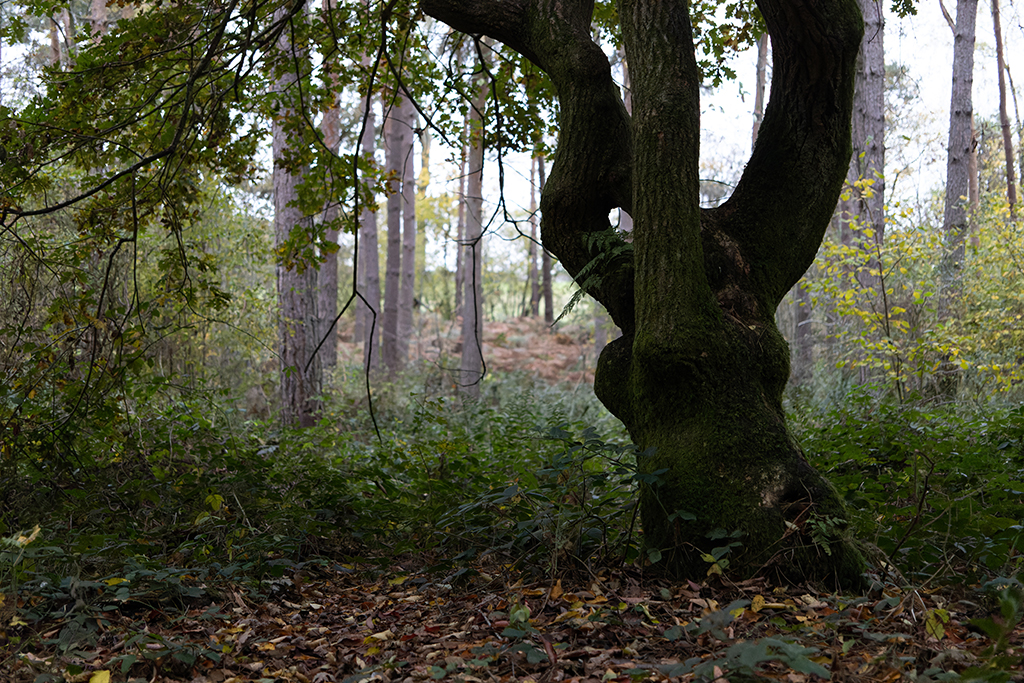
Gloomy woodland conditions may need ISO 6400 or higher, but noise-reduction software can help maintain image quality. © Angela Nicholson
In some cases you can even go the extra mile by applying different levels of noise reduction to different parts of the image. Most image-editing software offers some form of noise-reduction control but there are a few packages that are specifically designed for the task. While some software allows you to apply noise reduction to JPEGs, it’s best to work with raw files as these have the maximum amount of data and the least in-camera tinkering.
So let’s take a look at the noise-reduction controls in some of the most popular imaging software currently available.
Affinity Photo
£47.99
Affinity Photo is a very attractive alternative to Photoshop for anyone who doesn’t like the Adobe subscription model. It’s especially enticing as the £47.99 fee is a one-off and you don’t have to pay for updates. Like Photoshop, Affinity Photo allows you to work with layers and create masks which means that you can apply noise reduction and other adjustments selectively.
Affinity Photo’s noise-reduction controls are found in the Details section in the control panel on the right of the screen when an image is open. As with most other software, Affinity Photo has controls for adjusting the degree of chroma (colour) and luminance noise reduction. Because chroma noise is more objectionable in an image, it’s best to start by working on this first – the controls are below the Luminance controls in the panel.
Moving the Colours sliding control to the right increases the intensity of chroma noise reduction and it should be moved until the coloured speckling just disappears. The treatment can then be refined by using the Colours Contribution slider, moving it left from its maximum value until the point just before the coloured specking starts to appear again.
Then it’s time to turn your attention to the Luminance slider which governs the intensity of the luminance noise removal. This needs to be used with care as it can soften the image dramatically. Drag it to the right to increase the intensity of the reduction, stopping when you’re happy that enough noise has been removed.
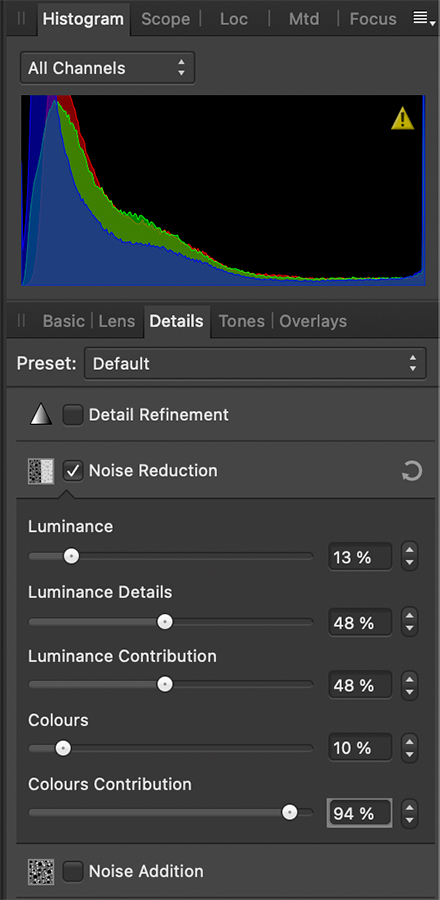
Next, adjust the Luminance Details to set the detail edge smoothing threshold. Higher values make more fine detail visible while lower values smooth the fine detail and hide more noise.
Lastly, use the Luminance Contribution slider to control how much of the overall luminance noise reduction is added to the image. It’s a back-and-forth process with all of the sliders until you get a result that you’re happy with.
Requirements
- Windows or Mac
- 2GB RAM minimum
- 1280×768 or better display
Adobe Lightroom Classic
£9.98 as part of the monthly Adobe Photography Plan
Adobe Lightroom Classic is the go-to image organiser and editor for many photographers. While it facilitates importing, keywording and cataloguing of images as well as global and local adjustment, it doesn’t support layers.
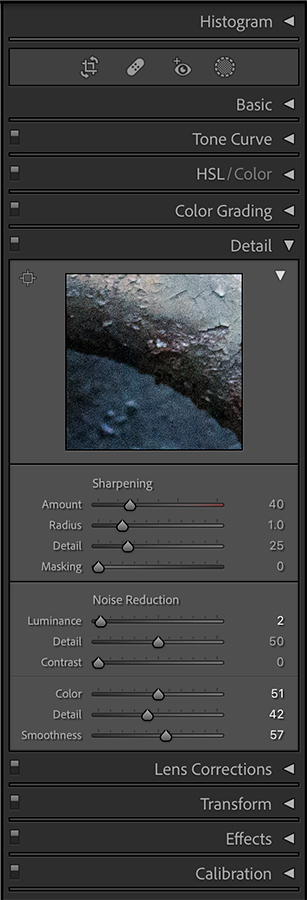
Lightroom Classic’s noise reduction tools are found in the Detail section of the Develop control panel, under the Sharpening controls. There are three controls for the two types of noise and as in Affinity Photo, the luminance noise controls sit above the chroma noise controls, but it’s best to tackle the chroma noise first.
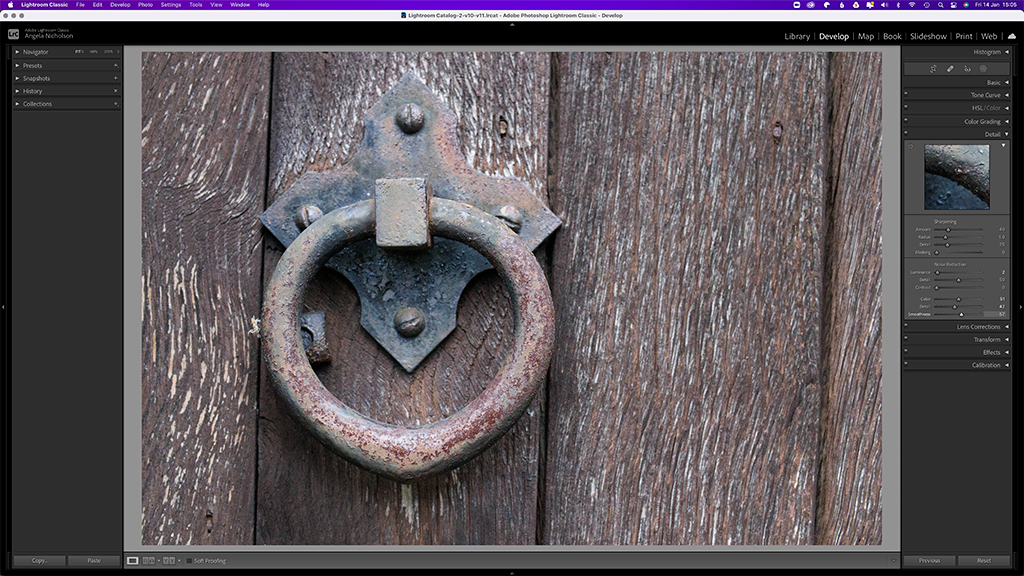
If you have the main preview filling the centre part of the screen, you can use the small window above the sharpening controls to see a magnified view of a small section at 100%. Alternatively you can enlarge the main image.
By default the Color slider in the Noise Reduction section is set to 25. Dragging the control left reduces the degree of noise reduction so that more coloured speckling appears. To find the best setting, move the Color control all the way to 0 and then slowly move it to the right until the colour noise just disappears.
Next, use the ‘Detail and Smoothness’ controls to refine the colour noise reduction. Increasing the Detail value enhances the detail but can bring back some of the noise, while increasing the Smoothness helps to reduce the visibility of some coloured speckling.
When you’re happy with the chroma noise, use the Luminance slider to take out some of the remaining noise. Be careful not to push this too far to the right as you’ll lose image detail. However, you may be able to bring some back with the Detail slider. Finally, if you’ve lost some contrast, use the Contrast control to give it a boost.
It can take a while to find settings that you’re happy with and you may find yourself adjusting backwards and forwards, not always seeing a great deal of difference in the impact of some of the controls.
Requirements
- Windows or Mac
- 8GB RAM (16GB recommended)
- 1024×768 or better display
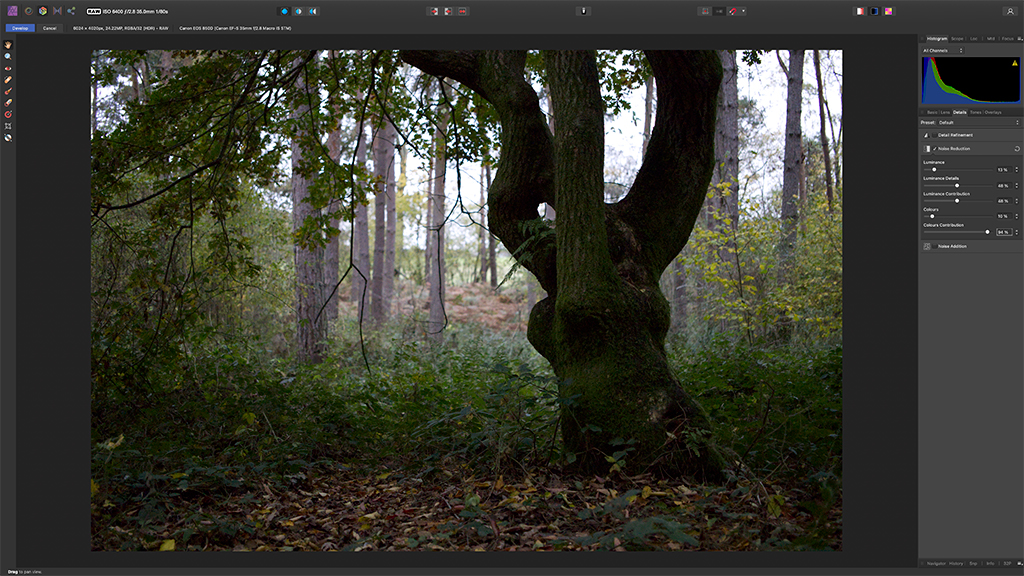
DxO PureRaw
£115
While DxO’s PhotoLab 5 image-editing software is excellent, the company recognised that there are lot of people who use software such as Adobe Lightroom and Capture One who would like a little help with noise reduction. The company’s solution is DxO PureRaw which uses the same DeepPRIME noise-reduction algorithm as PhotoLab and benefits from the company’s background in analysing lenses and cameras so as to enable it to correct their flaws with software.
It’s designed to fit into your workflow whatever image organisation and editing package you prefer to use, and it’s compatible with raw files from a huge range of cameras.
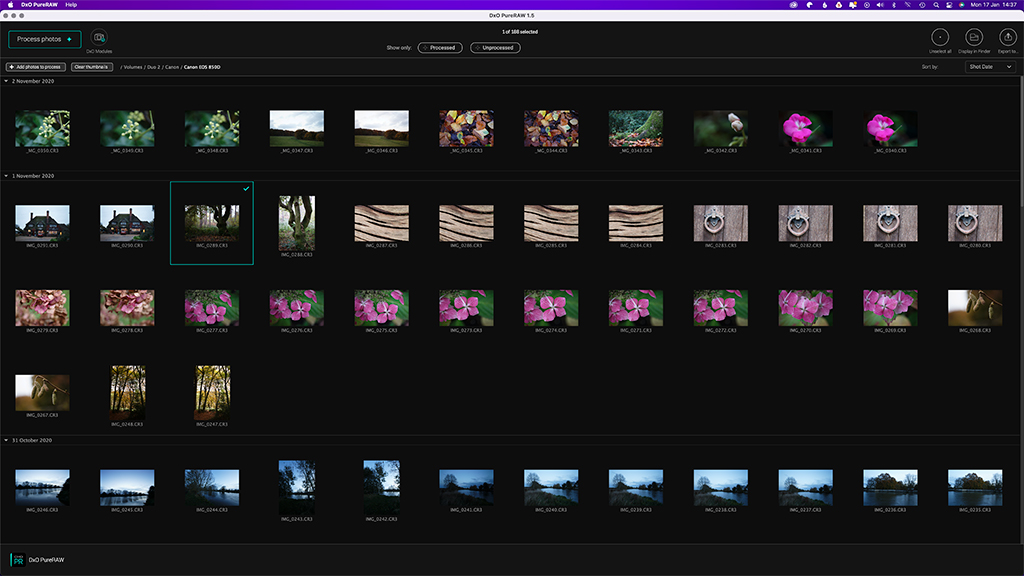
The first step in using DxO PureRAW is to import a folder of images or drag and drop the files into the PureRAW screen. If it’s the first time that you’ve used the software with images from a particular camera and lens combination, it will then prompt you to download the necessary correction module – if you’ve got a decent internet connection it only takes a couple of seconds.
Once the module is installed, you just need to ensure that the images you want to work on are selected and click on ‘Process photos’. This will bring up a dialogue box that allows you select whether you want the images to be output as JPG or DNG files, where they should be stored and which method of noise reduction you want to use, HQ, PRIME or DeepPRIME. DeepPRIME produces the best results and takes the longest time but it’s the one we recommend as it does a superb job. You can also opt to apply DxO’s Optical corrections, which is usually a good idea.
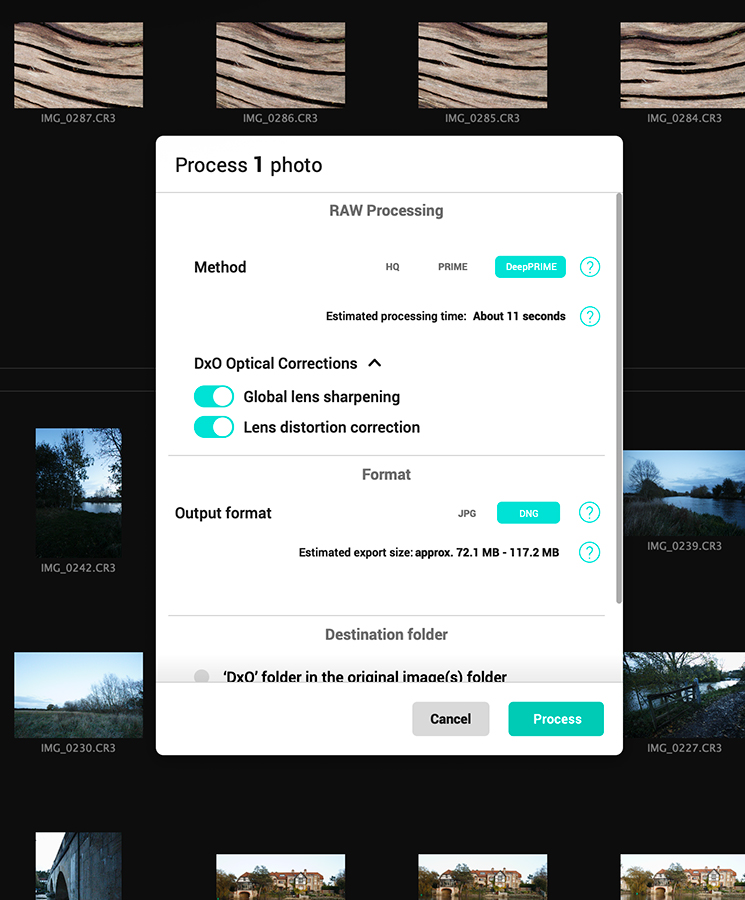
Once the images are processed, you’re given the option to see the results or export them to your preferred software for further editing. DxO PureRaw is very easy to use and one of the most effective solutions for removing noise from high-ISO raw files while still enabling further processing in your preferred software. Its only shortcoming is the lack of selective adjustment or masking.
Requirements
- Windows or Mac
- 4GB RAM (8GB recommended)
- 4GB or more of available hard disk space
Nik Collection 4 by DxO
£135
Nik Collection 4 by DxO is a suite of eight plug-ins for Adobe Photoshop, Lightroom Classic, and DxO PhotoLab. The most widely recognised of the eight is Silver Efex Pro which is popular for making black & white conversions; however, there’s also Dfine 2, which is specifically designed for noise reduction.
It can be used as a standalone package for working on JPEGs or as a plug-in to work on raw files via Photoshop or Lightroom. Although Dfine 2 is part of DxO’s portfolio, it doesn’t use the superb DeepPRIME system that’s employed by DxO PureRAW and PhotoLab 5. It also seems a little unstable with the latest Mac operating system and Adobe software, but it’s nevertheless very powerful.
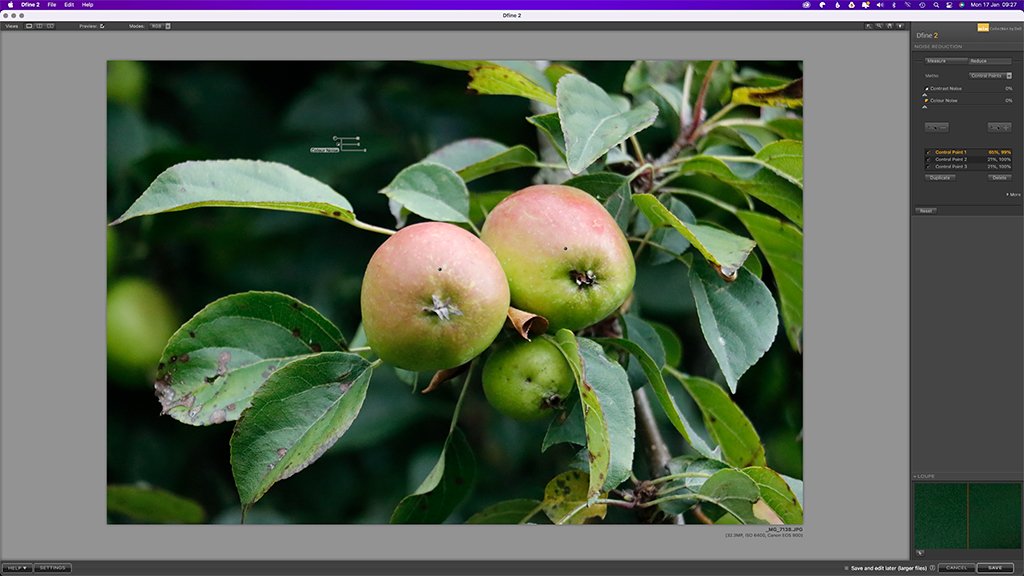
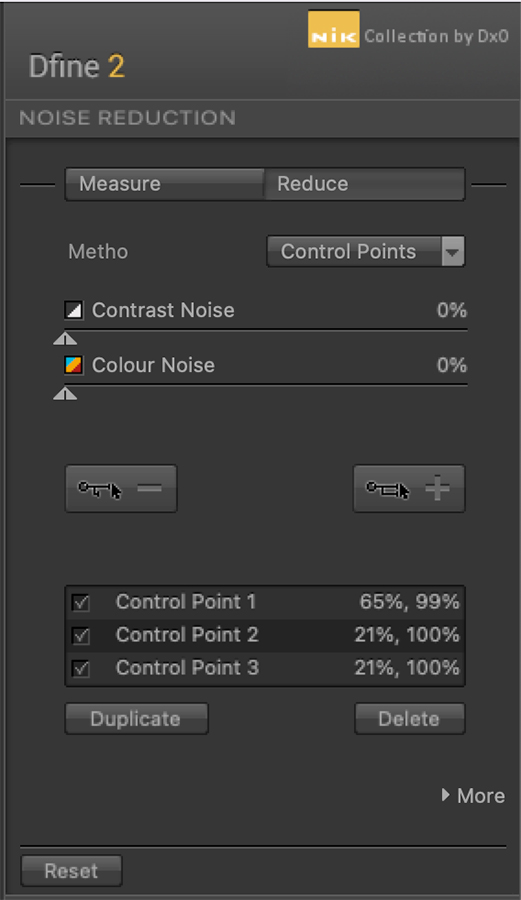
Once an image is open in Dfine, you have the choice of working in Automatic or Manual mode. In Manual mode you can position the measurement squares that appear in the preview over key areas of the image, adding more as you need. Dfine analyses these areas and applies appropriate noise reduction, however you can tweak these settings by clicking on the Reduce button to access the Contrast Noise and Colour Noise sliding controls.
It’s also possible to target the noise reduction to specific areas by adding Control Points or by selecting specific colour ranges. When you’re happy with the noise reduction, clicking on ‘OK’ applies it to match the preview that you see. Alternatively, if you started out in Photoshop, you can click on ‘Brush’ and the software will automatically create a mask as the image opens back in the host software.
The image will be shown without any noise reduction and you can paint it in exactly where you want it. You can even adjust the opacity of the brush to make the noise reduction subtler in some areas if necessary.
Requirements
- Windows or Mac
- 8GB RAM (16GB recommended)
- 4GB or more of available hard disk space
Read our DxO PhotoLab vs Adobe Lightroom comparison here: DxO PhotoLab 4 vs Adobe Lightroom: which is best for noise reduction?
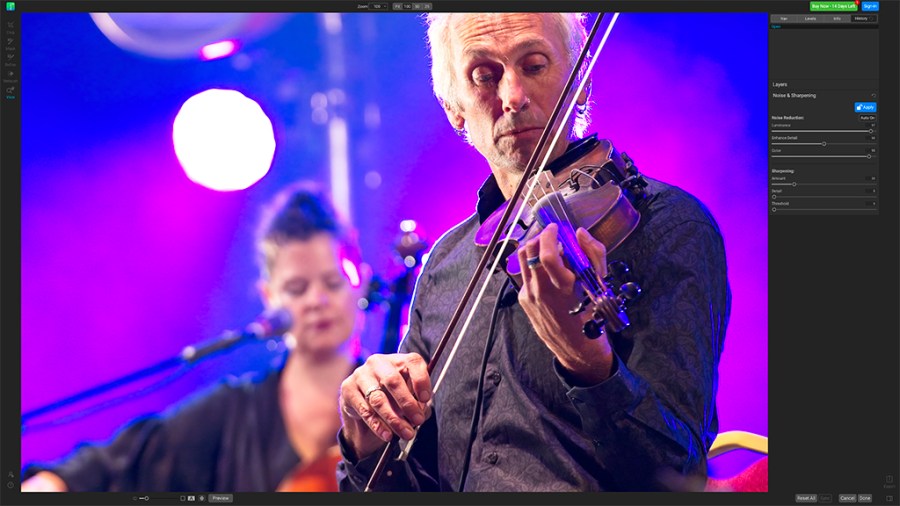
ON1 NoNoise AI
£63.56
NoNoise AI works as a standalone package or as a plug-in for Adobe Photoshop, Lightroom Classic, Photoshop Elements, Affinity Photo, Capture One, Apple Photos and Corel Printshop Pro as well as ON1 Photo Raw.
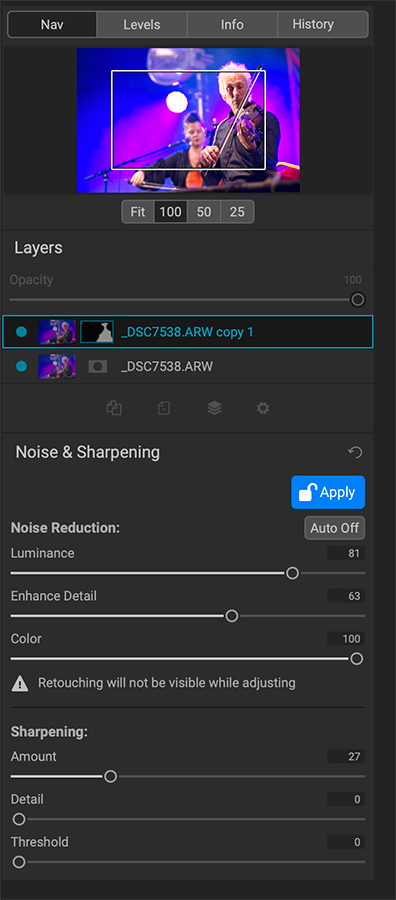
Like DxO PureRAW and Topaz Labs DeNoise AI, NoNoise AI uses artificial intelligence to tailor the noise reduction that it applies to suit the image. It also operates at the demosaicing stage of raw files and its default settings produce very good results. However, there are Luminance, Enhance, Detail, Color, and Sharpening controls available if you want to adjust the result.

There are also masking tools available to apply the noise reduction selectively, however you first need to lock in the ‘Noise & Sharpening’ settings by clicking on the blue Apply button and then create a duplicate layer with alternative noise and sharpening settings. Once the new layer is created, you have to unlock it by clicking on the red Adjust button before you can adjust the noise reduction and sharpening.
Then you have to hit the Apply button again to access the masking tools so that you can paint in your original treatment, hiding the new treatment. There are a few different brushes available to help you paint the edits in or out and you can adjust the size of the brush as well as the opacity, feathering and flow.
Once you’ve finished making the noise-reduction edits, you can use the crop tool and object remove tool to finish your image before clicking on File > Export to select the file type that you want to save your image as. DNG format is available if you want to make further edits to your shot. You can also specify the storage location and size of your image, and even add a watermark on Export.
It all adds up to make ON1 NoNoise AI an excellent choice for anyone wishing to get really serious about noise reduction.
Requirements
- Windows or Mac
- 8GB RAM (16GB recommended)
- 1024×768 or better display
Topaz Labs DeNoise AI
$79.99
Topaz Labs DeNoise AI can be used as a standalone package or as a plug-in for Adobe Lightroom Classic and Photoshop. It can also be used on JPEG or raw files (from supported cameras) and can be used on individual images or batches of images.
DeNoise AI doesn’t just apply a blanket noise-reduction treatment, it applies it selectively to specific areas to give the right level of noise reduction and detail enhancement, drawing on Topaz Labs’s deep learning that comes from the analysis of millions of images.
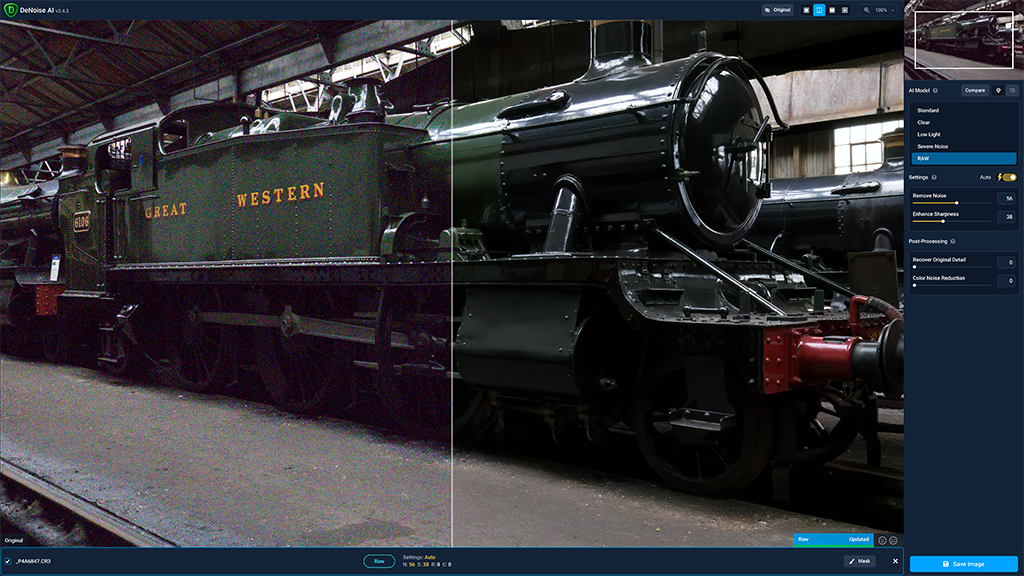
By default, once an image is open in DeNoise AI, the software will suggest settings, but you can select from five models of noise reduction (Standard, Clear, Low Light, Severe Noise or RAW) to use and adjust the settings. However, if you’re working on a raw file from a supported camera, the RAW model is recommended and this is only available in the standalone version of DeNoise AI.
Fortunately, the software gives the option to save denoised images as a DNG file so you can use your normal raw processing software to make any further adjustments. DeNoise AI takes a couple of seconds to render the preview with the noise-reduction settings after the model is selected and after any settings changes or if you move the magnified preview window.
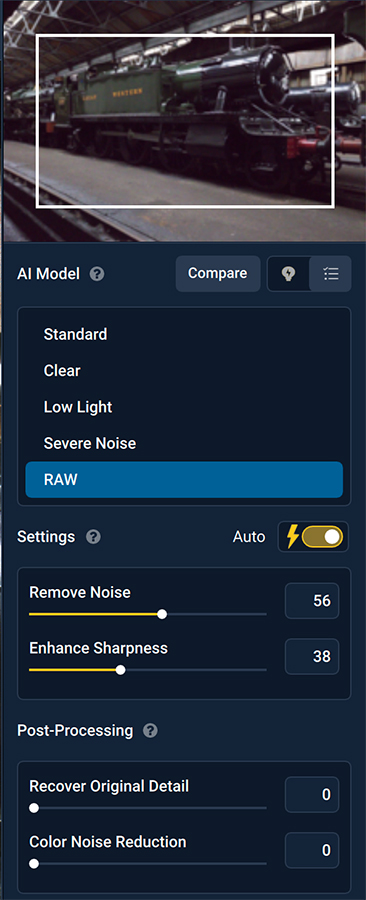
This can make tweaking the suggested settings tedious, but thankfully it generally works well in the default settings, striking a good balance between noise reduction, detail preservation and sharpening with raw files.
Like ON1 NoNoise AI, DeNoise AI includes a masking option that could prove useful. It allows you to paint in the treatment where you want it, adjusting the opacity of the brush as you go if necessary so you can create a bespoke treatment for any image, but it doesn’t have NoNoise AI’s layer support to enable different treatments to be applied to different areas.
Requirements
- Windows or Mac
- 8GB RAM (16GB+ for Mac)
- 1.5GB or more of available hard disk space
Related Articles:
Best cameras for low-light photography
Get rid of noise in your photos: noise-reduction software compared
Quick tips: Working with ISO and noise